

Halo StarLight 3000, Pocket Power StarLight 3000 Operating Instructions Manual
StarLight 3000
OPERATING INSTRUCTIONS
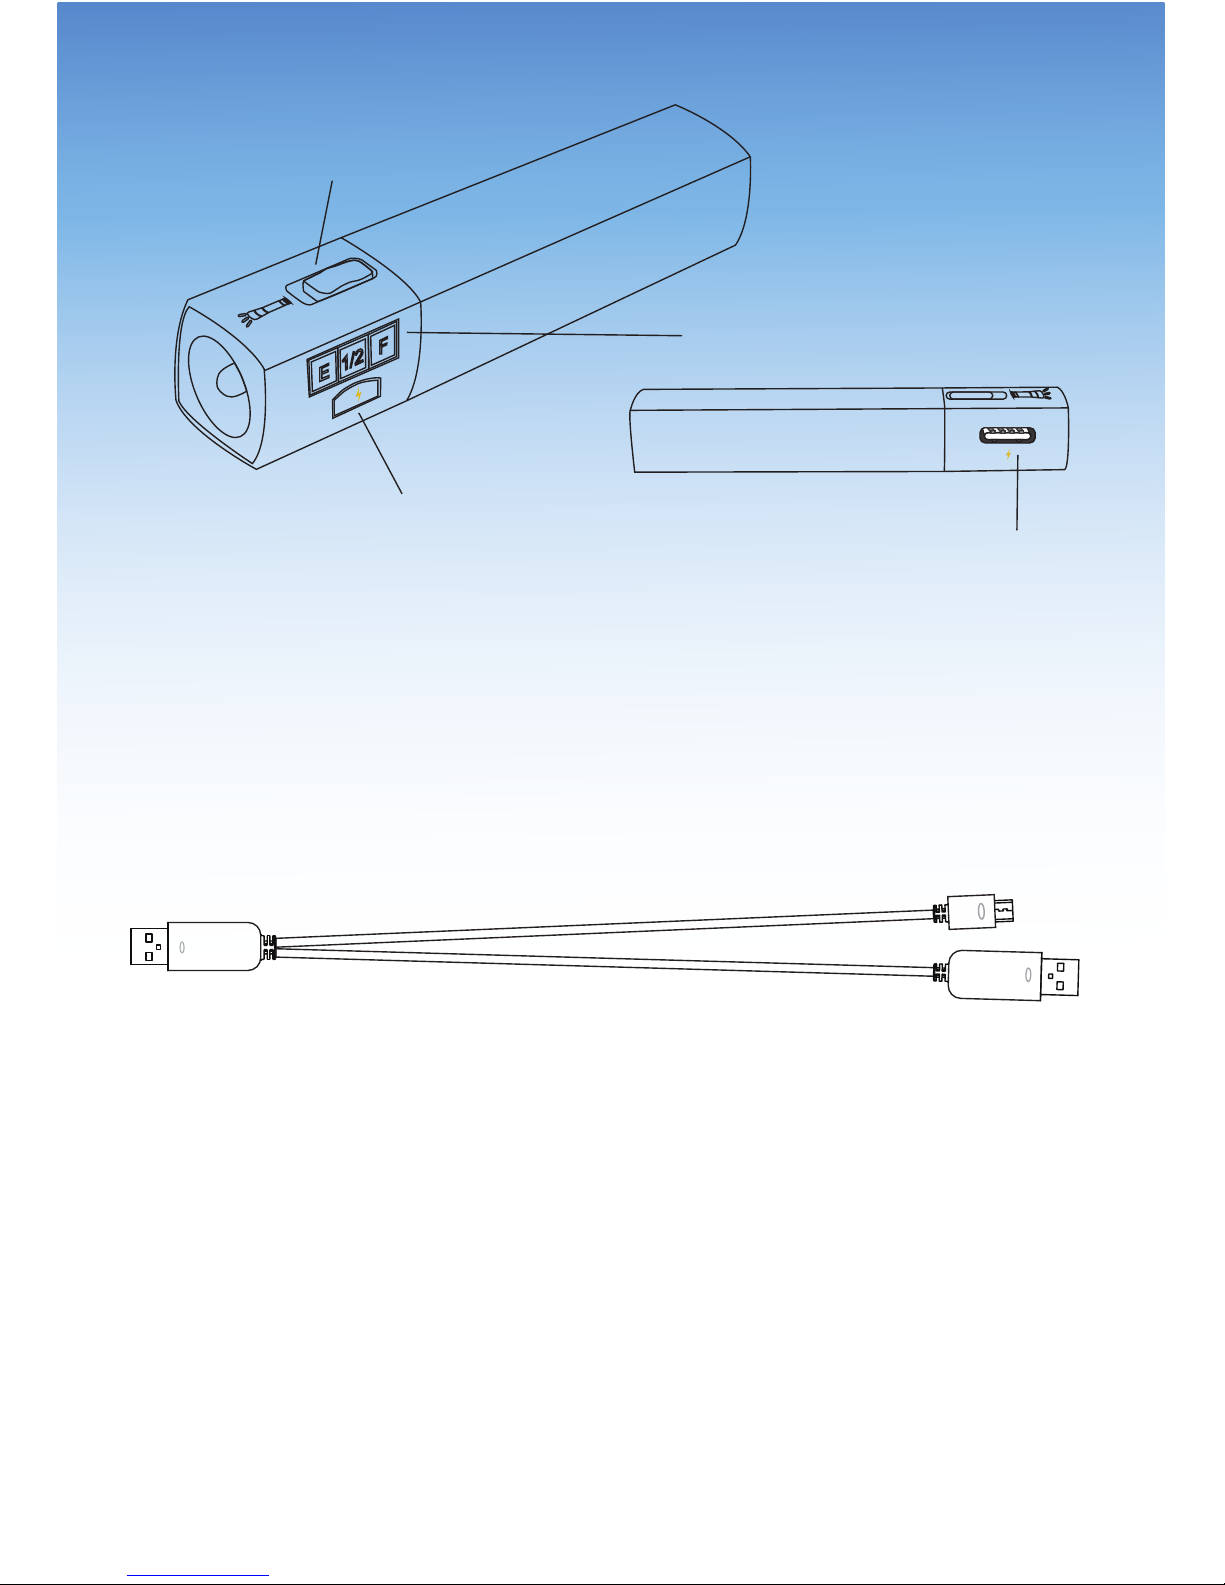
1. Quick Start Power Button
2. SOS/Flashlight Power Switch
3. USB Out/In
4. Fuel Gauge (Battery Status Indicator)
1
4
3
2
Included items:
- 1 HALO Pocket Power StarLight 3000
- 1 split cable (standard USB split on one end and
standard USB and micro USB on the other ends)
- 1 AC wall charger
- 1 30-pin connector tip
- 1 carrying pouch
- Operating Instructions/Warranty
h
h
h
Figure 1
A
B

Getting Started
Charge the HALO Pocket Power StarLight 3000 until the
LED displays a solid green light (no lights should be
ashing). This will take up to six hours and will uctuate
depending on the charging power source.
IMPORTANT: Charge your HALO charger for a full
six hours before regular use. Subsequent charging
will take ve - six hours.
Charging the HALO Pocket Power StarLight 3000
Using the supplied HALO Charge It Charge Me cable,
plug one USB connector into the HALO charger and
plug the other USB connector into a computer or an
AC power source with a USB 5V input.
While charging the HALO charger, the LED will ash
one of the following colors, indicating the charge level.
Red (1%-33%), orange (34%-66%), and green
(67%-99%). When the HALO charger is 100% fully
charged the green LED will become illuminated and
no longer ash. When the charger is not in use, slide
the power switch to the OFF (lower) position to
conserve the battery.
The charging cable works in either direction (see
Figure 1 for reference). Connect A to the power source

and B to the HALO charger, or connect B to the power
source and A to the HALO charger.
Charging Your Personal Electronic Device
Using the supplied split cable, plug one USB
connector into the HALO charger and insert the
provided appropriate tip into your device. The HALO
charger will automatically begin charging. You may
also use your own USB cable that was supplied with
your personal electronic device. While charging your
device the LED color (red, orange or green) on the fuel
gauge of the HALO charger will change over time,
indicating the remaining capacity of the HALO
chargers battery. The red LED will start ashing when
the HALO charger is out of power before shutting
down.
Using the supplied split cable, you can charge both
the HALO charger and your electronic device at the
same time. To do this you must rst plug either the
USB connector into a computer (or another 5V input
USB charging source), and then connect the HALO
charger and your electronic device.
After removing your device from the supplied 30-pin
connector tip, the HALO charger will remain on for 30
seconds before powering o. If you wish to charge
 Loading...