

Page 1
Order toll-free in the U.S. 800-959-6439
FREE technical support, Call 714-641-6607 or fax 714-641-6698
Mail order: Hall Research, 1163 Warner Ave. Tustin, CA 92780
Web site: www.hallresearch.com E-mail: info@hallresearch.com
CUSTOMER
SUPPORT
INFORMATION
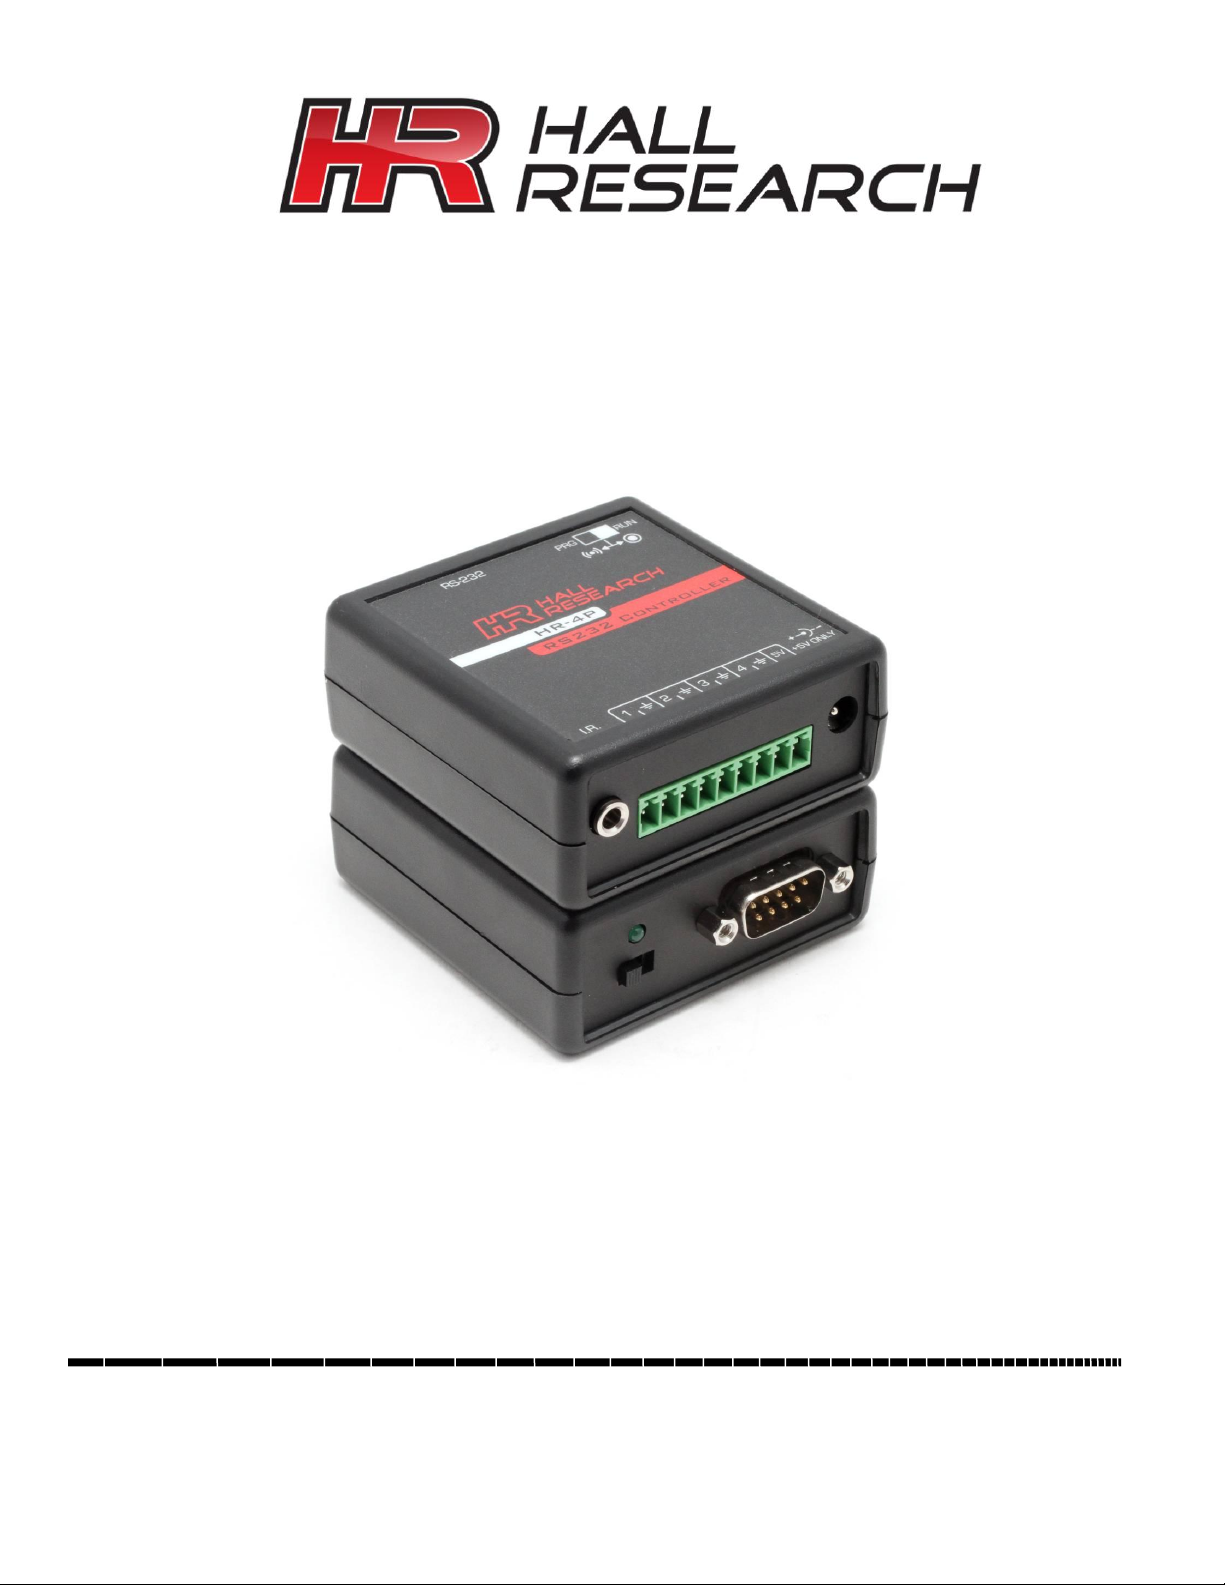
HR-4P
Projector Controller
Programmable I/O Serial Device
HR-4P Programmer Software Version 2.0
Help File
Page 2

Model HR-4P Programmer
2
Note Microsoft™ .NET Framework 2.0 or later is required prior to installing the HR-4P Programmer.
Most new PCs come with Microsoft™ .NET Framework 2.0 or later already installed.. If .NET
Framework 2.0 or later is not installed on your PC, it can be found on the Microsoft™ website.
Table of Contents
OVERVIEW ...................................................................................................................................................................................................................... 2
GETTING STARTED ........................................................................................................................................................................................................ 2
SOFTWARE GUI INSTALLATION .................................................................................................................................................................................. 2
USING THE SOFTWARE ................................................................................................................................................................................................. 3
BUTTON SELECTION ..................................................................................................................................................................................................... 3
CONNECT/DISCONNECT ............................................................................................................................................................................................... 3
CONFIGURATION ...................................................................................................................................................................................................... 6
I/O CONTROL .......................................................................................................................................................................................................... 10
IR .............................................................................................................................................................................................................................. 11
COMMUNICATIONS ................................................................................................................................................................................................. 13
MENU SYSTEM ............................................................................................................................................................................................................. 13
FILE ............................................................................................................................................................................................................................ 13
TOOLS ...................................................................................................................................................................................................................... 13
HELP ......................................................................................................................................................................................................................... 14
RS232 COMMAND SUMMARY ..................................................................................................................................................................................... 14
TROUBLESHOOTING ................................................................................................................................................................................................... 15
PRG VS RUN MODE DEMYSTIFIED ........................................................................................................................................................................... 15
Overview
The HR-4P Programmer is a Windows™ Software GUI used to:
Configure the function of individual I/O lines as input or output
Build Action Strings (actions are triggered by state changes on the input lines)
Upload and download configuration strings
Learn or playback Infra-Red Remote Control codes
Download, Upload, Edit and Save configuration information
Getting Started
The HR-4P Programmer is recommended to run on a compatible PC with Windows™ XP or later operating system.
Software GUI Installation
If the software has been previously installed, you must UNINSTALL the program from the Add/Remove Programs
selection of the control panel.
The software is installed by running the SETUP.EXE program on the installation source.
The typical user should be able accept all the default settings.
Once the HR-4P Programmer Software installation has completed, a desktop icon will appear as well as on
the start menu under:
Start->Programs->Hall Research->HR-4P Programmer
Page 3
Programmable Serial Controller
3
Note Most PCs and notebooks do not have a serial port. So to program the HR-4P you may need a USB
to RS-232 Serial converter. These are available from Hall Research P/N USB-RS232-1
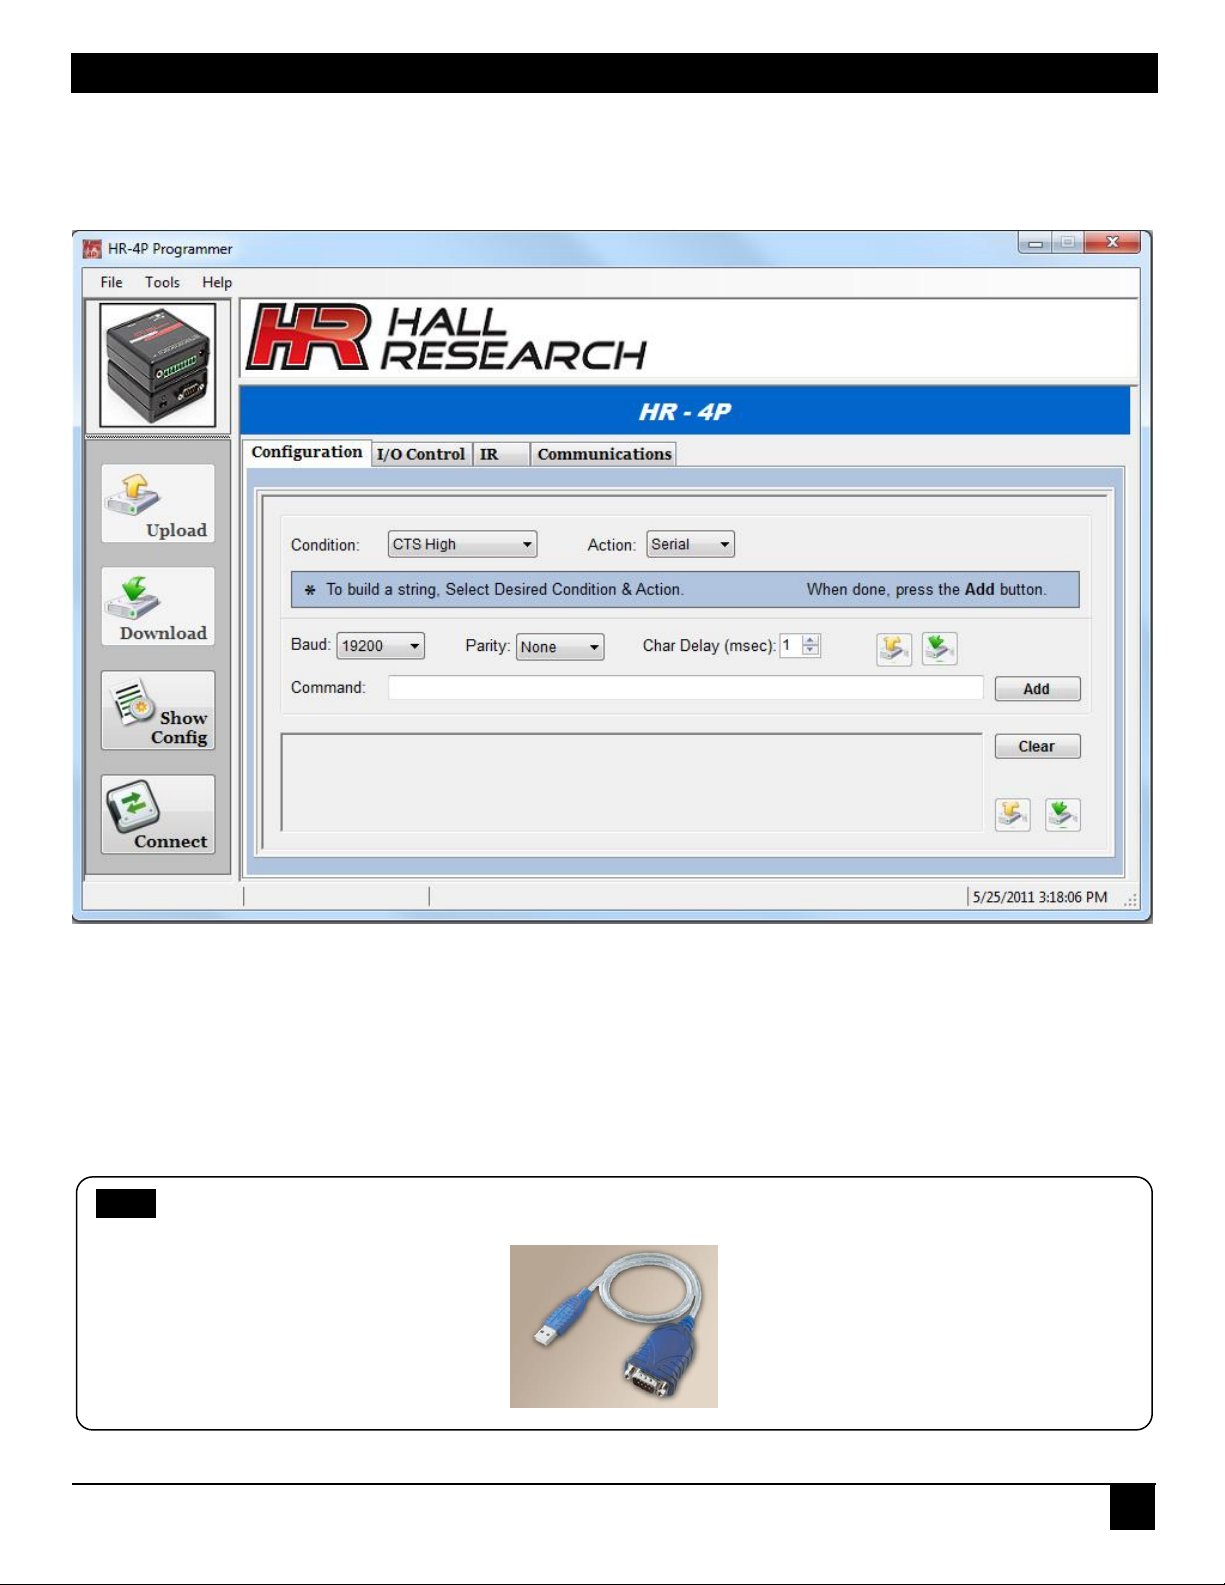
Using the Software
Double click the desktop icon or its program menu selection and the main screen will be displayed as shown below
in Figure1.
Figure 1 – Main
Button Selection
The main screen has four buttons along the left side shown in Figure 1, These are the most commonly used functions.
Connect/Disconnect
In order for the software to communicate with the HR-4P unit, it must be connected to serial port on the computer.
Page 4
Model HR-4P Programmer
4
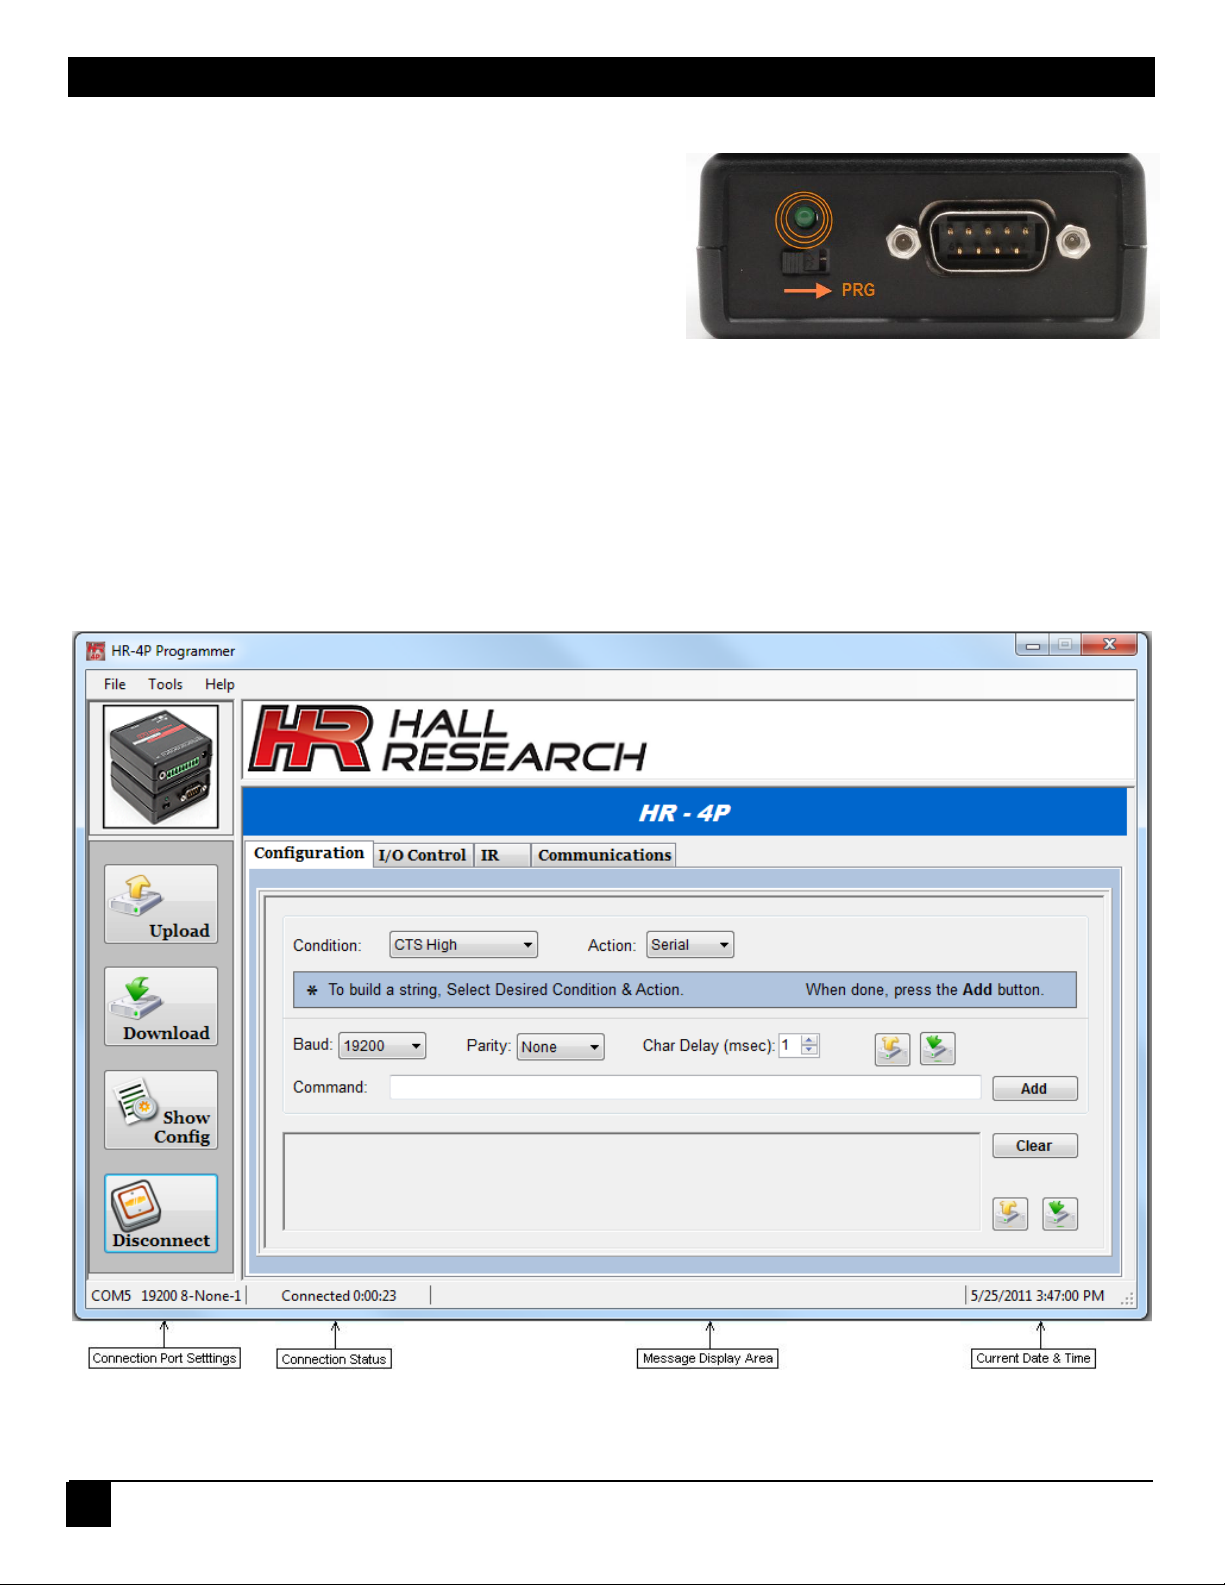
Connect the HR-4P to the RS-232 port using a F/F Cross-Over DB9 cable (included in the package). For the unit to use its
RS-232 in programming and/or command input mode, you need to
slide the switch next to the serial connector to PRG mode. The LED
over the switch will start blinking.
Click the Communications tab to verify or change the
COM port selection. This setting will be remembered for
future use. The baud-rate in PRG mode (for use with GUI)
is fixed.
To open a serial connection to the unit, click the Connect button on the left side of the screen to attempt a
connection to the HR-4P. The button will automatically change and say Disconnect. There are also Connect and
Disconnect buttons on the Communications tab that perform the same functions.
o If a connection was established between the software and the unit, the GUI main screen will update as
shown in Figure 2. Note that the bottom lower left of the screen will always show the current connection
status.
To close the serial connection, click the Disconnect button on the left side of the screen, or click the Disconnect
button in the Communications tab.
Figure 2 – Main
Page 5
Programmable Serial Controller
5
Note You will see smaller Download button icons peppered throughout the pages of the GUI. The big
download button along the left column downloads EVERYTHING from the target unit. If you just
want to download a specific command or configuration, then you use the small download
buttons. The buttons have tooltips, so if you hover your mouse pointer over them, you will see a
pop-up text that explains exactly what it will do.
Download
Click the Download button on the left of the Main screen to retrieve the current configuration strings
stored in a HR-4P unit and into the GUI software.
As the configuration screens are downloaded, the GUI interface will update with the retrieved
settings.
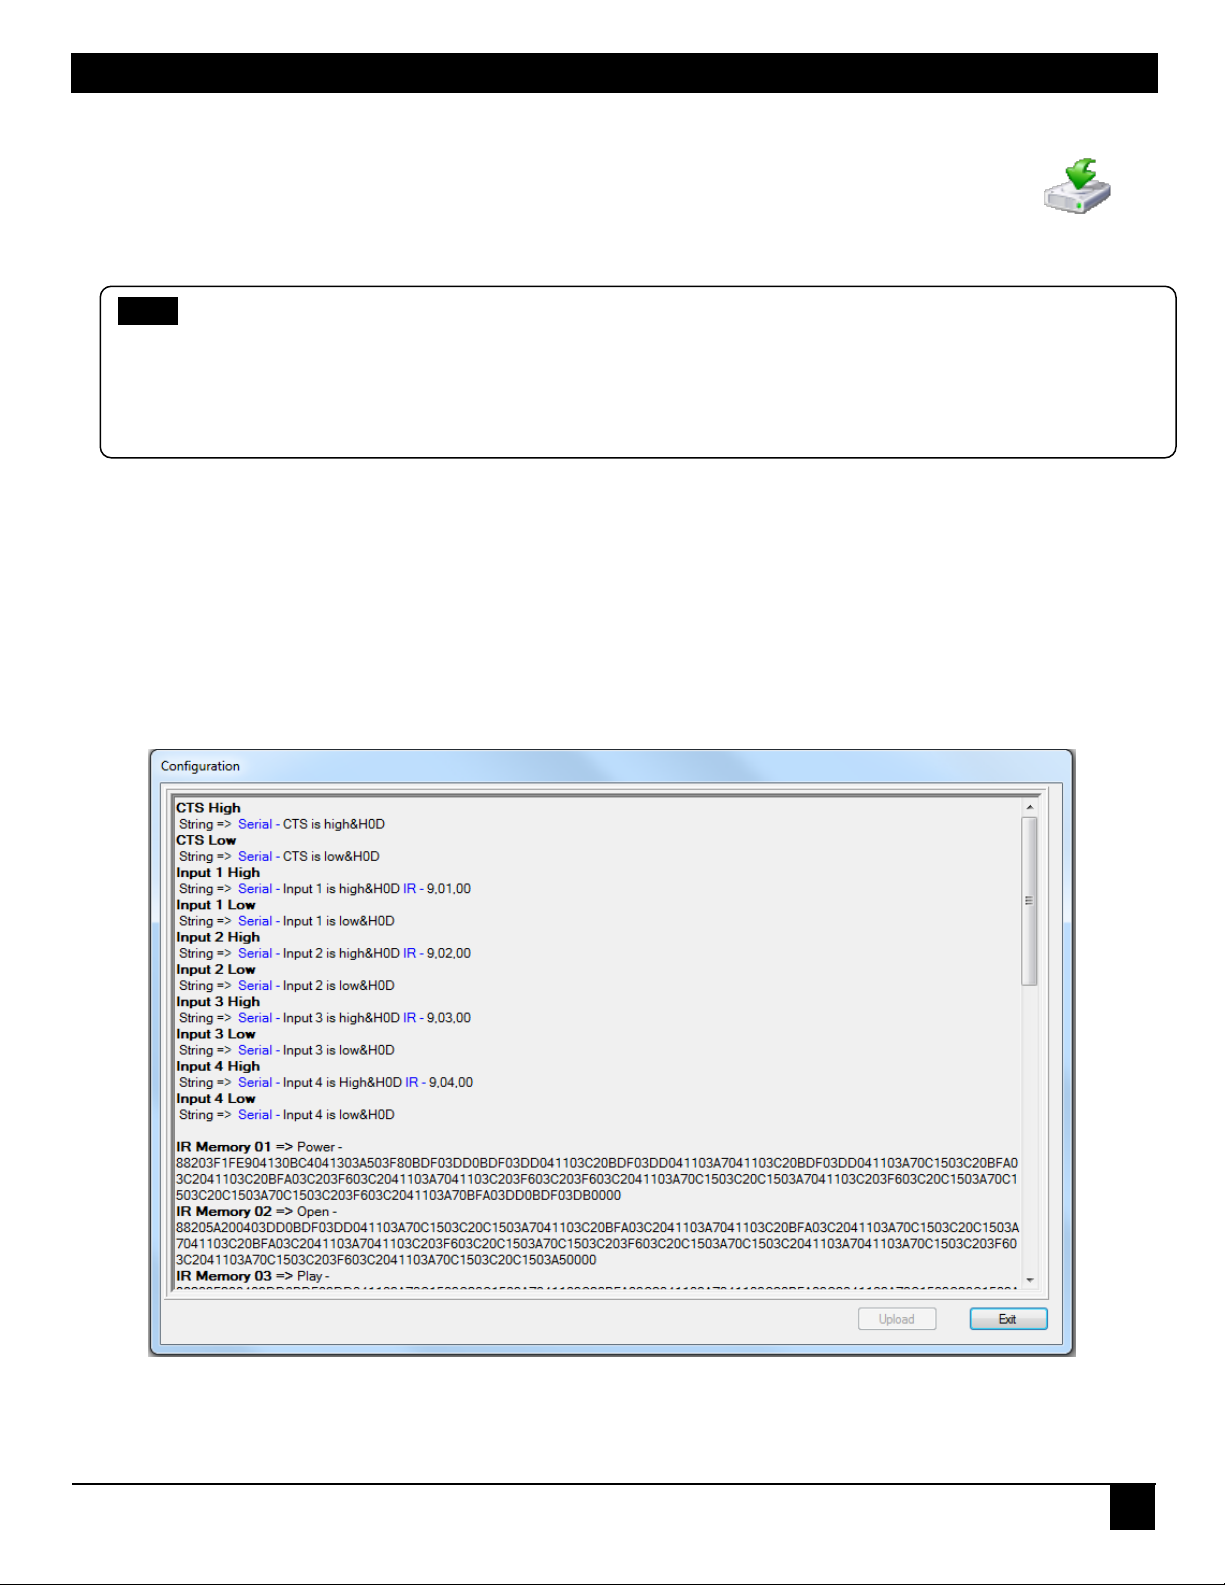
Show Config
Click the Show Config button to display the current configuration present in the GUI. Figure 3 below shows an
example of a unit‟s configuration. All INPUT Strings and IR Codes are available
Configuration settings can be saved and loaded from disk by using the “FILE” menu at the top of the main screen.
Configuration settings can be uploaded into the HR-4P unit by clicking the Upload button displayed on the left of
the main screen.
Configuration settings can be downloaded in the GUI by clicking the Download button displayed on the left of the
main screen.
Figure 3 – Sample Configuration Display
Page 6

Model HR-4P Programmer
6
Note You will see smaller Upload button icons peppered throughout the pages of the GUI. The big
Upload button along the left column Uploads EVERYTHING to the target unit. If you just want to
Upload a specific command or configuration, then you use the small Upload buttons. The buttons
have tooltips, so if you hover your mouse pointer over them, you will see a pop-up text that
explains exactly what it will do.
Upload
Click the Upload button on the left of the Main screen to store the current configuration strings in a HR-4P unit from
the GUI software. All information stored in the HR-4P will be overwritten.
Main Screen Tabs
The HR-4P Programmer consists of four different pages in a tabular format. Each Tab has a specific function
Configuration
The Configuration tab page as seen in Figure 4 is the default tab shown at software startup. This tab allows the user to
build configuration strings (also known as Action Strings). A configuration string can be created to perform one or more
specific actions based on a particular condition.
Figure 4 – Configuration Tab
Page 7

Programmable Serial Controller
7
A configuration string can be up to 250 bytes long, and it can be any combination of: serial, time delays, IR codes, outputs,
and pulses actions. The action strings you are building use bytes for identifying the desired action. For example, a Serial
Commands uses XX+2 bytes where XX is the number of bytes the user defines. For example “Hello” uses 4 bytes + 2 bytes
for the serial command. You are limited to 250 bytes for any particular action string.
Condition – Here you are specifying what real-world event to look for on the I/O
ports configured as input (or the CTS line pin 8 which is always an input), you can
also specify the direction of a change as high-to-LOW, or low-to-HIGH. So, for
example you can issue a command when a contact closes and a different command
when a contact opens. If you just want to issue a single command (when your input
is a momentary switch), all you have to do is define the action for either Low, or High
going pulse. If defined for High, then when the external momentary switch opens, the
action is triggered.
Action
This is what you want to do when the above condition is detected. Action strings can be complex and have any combination
of the following (the only limitation is the maximum bytes your defined action can have):
Serial is used to send specific serial characters to a device (such as turning a Projector ON or OFF)
IR is used to send an IR code to an IR enabled device
Delay is used to add a time delay
Output is used to toggle a specific output on and off
Pulse is used to send timed on/off/on or off/on/off to a output
Serial Commands
A serial command can send data to any standard serial device with selectable baud rate and parity. When sending
serial commands, you can also specify a delay between characters to meet varying requirements.
Serial commands can be mixed with other actions for the same input. For example, you may have a projector
configuration string like “PWR_ON” followed by a DELAY followed by an OUTPUT. There is no limit to the number
of actions that can be added as long as the 250 character limit is observed.
Hexadecimal characters may be entered by using &H in front of the 2 digit Hexadecimal character.
Select the desired Condition and change Action to Serial. Commands are entered in the Command text box.
When done, the user clicks the Add button to append the command as shown in Figure 5.
Figure 5 – Serial Commands
Page 8

Model HR-4P Programmer
8
IR Codes
IR code‟s can be part of the configuration string. Supported IR formats are available for sending known IR Addresses and
Commands. Ensure that the IR Protocol, Address and Commands have been tested to ensure proper response from the
controlled devices. A compatible IR Emitter is required to send IR Codes.
CIR-EMT
IR Emitter Cable
Select the desired Condition and change Action to IR. When done, the user clicks the Add button to append the
command as shown in Figure 6.
Figure 6 – IR Code
If you know the IR Protocol and the command for the device you want to control, then all you have to do is to select
the protocol (like RC5, NEC, JVC, etc) from the dropdown list and enter the address and command (for example
Hall Research uses NEC protocol for most of its Scaler products and we publish the IR codes!).
If you don‟t know the IR protocol or command for your device, or if the protocol is not supported, you can “Learn”
the desired IR codes and program them into the HR-4P. The “Learning” process is described later and required an
IR Detector/Receiver cable
CIR-DET-D2
IR Receiver Cable (Type 2)
Page 9

Programmable Serial Controller
9
Up to 32 IR Codes that have been „learned‟ can be transmitted from the unit.
Select the desired Condition, change Action to IR, change IR Protocol to Memory Recall and select the desired
location that the IR code was saved into.
When done, click the Add button to append the command as shown in Figure 7.
Figure 7 – IR Memory Recall
Time Delay
Time delay‟s can be added to configuration strings as needed. Delay‟s can from milliseconds to 255 minutes.
Multiple delays can be entered if longer times are required.
When done, click the Add button to append the command as shown in Figure 8.
Figure 8 – Time Delay
Output
If any of the units I/O is configured as an output, you can control that output based on a specific input condition.
Select the Output from the Action drop-down menu and pick a desired output channel state, either ON or OFF.
When done, the user clicks the Add button to append the command as shown in Figure 9.
Page 10

Model HR-4P Programmer
10
Figure 9 – Output
Pulse
If any of the units I/O is configured as an output, you can pulse that output one or more times based on a specific
input condition. The Pulse Width and Delay between Pulses is selectable in milliseconds. The delay is only
required when more than one pulse is being sent.
Select the Pulse from the Action drop-down menu and pick a desired output channel, the Number of Pulses and
the Pulse Width.
When done, the user clicks the Add button to append the command as shown in Figure 10.
Figure 10 – Pulse
I/O Control
The I/O Control tab allows the user to configure any or all four discrete I/O‟s as inputs or outputs.
An input can be defined as Input-Contact or Input-Voltage. When an input is defined as “contact” you can just use
a contact closure or switch to ground with no additional circuitry, or use a digital signal that swings anywhere from 0
to 24v. In this mode the input of HR-4P is high impedance (>50 KOhm). When an input is defined as “voltage” then
the HR-4P will terminate the input with a 1K ohm resistor to ground. In this mode it will not be able to sense a
contact to ground (since the pull-down resistor is already keeping the pin at ground potential), but it is useful for
sensing DC supplies that can be a DC voltage from 3 to 24 vDC.
A good example is if you want to detect 110 VAC. In that case you can simply use a small 6v DC power adapter
and plug it into the AC line, and tie the 6v DC to the HR-4P. When configured as Voltage input, the 1K resistor will
bleed off and decay the DC signal from the external supply when the AC voltage is disconnected.
Page 11

Programmable Serial Controller
11
Any I/O configured as inputs may have the current status read by clicking the I/O Status button.
Any I/O configured as outputs may have the output state set by selecting the appropriate control button.
RTS is an OUTPUT, CTS is an INPUT. Action based configuration strings can be created for the CTS Input only.
The HR-4P unit is assigned a common address value of 01 by factory default, and it is just part of the unit‟s info for
your convenience and serves no other purpose (you can tag your units with a number between 1 and 255 for future
reference).
After using the Connect button and establishing communication with a HR-4P unit, this tab will show the units
Firmware Version Number as well as its programmed Address.
Figure 11 – I/O Control
IR
The IR tab is used to configure the IR capabilities of the HR-4P unit. A compatible IR Detector and Emitter are
required to fully utilize the IR features.
When the IR is configured as an Input, the HR-4P unit can learn any supported IR codes from the user‟s remote
control. These IR codes can be stored into 1 of 32 IR Memory locations in the unit.
IR codes stored in memory can have an 8 character name associated with it, making it easier to be identified later.
o Check the IR Enabled box
o To LEARN IR Codes
Select the Input radio button and click Upload
Install IR Detector on HR-4P Unit
Click the LEARN button
Press IR Remote Control button while pointing at IR Detector
Store code learned into IR Memory Location with name if desired
o To SEND IR Codes
Page 12

Model HR-4P Programmer
12
Select the Output radio button and click Upload
Install IR Emitter
Recall IR memory location (or test IR code by entering IR address & command)
Click the SEND button to play the remote code from the HR-4P unit
Note
Storing and Recalling IR codes from memory locations are ONLY allowed when the HR-4P unit is in the
program mode.
Figure 12 – IR Learn
Figure 13 – IR Send
The learned IR codes can be played back from the GUI as described above in PRG mode, or after programming is done
and the Mode Switch is in RUN position, input high/lo conditions can be used to trigger I/O commands.
A typical use for HR-4P would be to use it to issue Learned IR commands based on RS-232 input. Then you need to keep
the unit in PRG mode all the time and communicate with it at 19,200 baud and issue the following command:
IRS9,Location<cr> where location is 1 through 32 (that of memorized location)
Page 13

Programmable Serial Controller
13
Communications
The Communications tab page can be used to select a COM port of your PC to talk to the HR-4P unit. Once, the
preferred COM port is selected, pressing the Connect button either in this tab page or on the left of the Main screen
to make a serial connection.
Since GUI communicates with the HR-4P‟s serial port at a fix baud rate of 19200, no parity, 1 stop bit, and 8 data
bits, those selections are fixed. The COM port is the only selection that needs to be set as shown in Figure 14.
Figure 14 – Communications
Menu System
The HR-4P Programmer consists of three menus which allow you to easily perform more specific tasks.
File
The File menu consists of the following menu items as shown in Figure 15.
New – Clear all user configuration strings and IR codes currently
stored in the HR-4P Programmer.
Open – Open a text file to load user configuration strings, I/O
configuration, and IR codes into the HR-4P Programmer.
Save – Save user configuration strings, I/O configuration, and IR
codes from the HR-4P Programmer into a text file. Figure 15 – File Menu
Exit – Exit the HR-4P Programmer.
Tools
The Tools menu consists of the following menu items as shown in Figure 16.
Reset Unit – Reset your HR-4P unit after a new I/O configuration or IR
configuration.
Factory Defaults – Clear all user configuration strings and IR code stored in
HR-4P unit, re-initialize I/O and IR configurations.
Refresh – Refresh the tab page. Figure 16 – File Menu
Page 14

Model HR-4P Programmer
14
Command
Function
Response
VER?<cr>
Read Firmware version
Version x.y<cr><lf> where X.Y is the firmware version
CLnm<cr>
Configure I/O line n to m
n = 1 to 4
m = 1 : 2 : 3 : ? = contact input : voltage input : output : status
Nothing except Status Reads return:
CLX1 = I/O line X configured as contact type input<cr><lf>
CLX2 = I/O line X configured as voltage type input<cr><lf>
CLX3 = I/O line X configured as output<cr><lf>
IOnm<cr>
Set or Read State of I/O line n to m
n = 1 to 4 = output
m = 0 : 1 : ? = low : high : status
Input X = 1 or 0<cr><lf>
Output X = 1 or 0<cr><lf>
TOGn<cr>
Toggle the state of I/O line n
n = 1 to 4
Input X = 1 or 0<cr><lf>
Output X = 1 or 0<cr><lf>
IRCn<cr>
Set or inquire IR
n = 0 : 1 : ? = input : output : status
IRC0 = IR configured as Rxd<cr><lf>
IRC1 = IR configured as Txd<cr><lf>
IRSn,m<cr>
Send IR code stored in 1 of 32 IR memory locations
n = 9 (Learned IR)
m = 1 – 32 (Memory Location)
Nothing
IRSn,m,k<cr>
Send IR code with a specified IR protocol, IR address, and IR command
n = 0 - 6 (NEC, JVC, Sharp, RCA, RC5, Sony-sirc, and Extended NEC)
m = 0 - 255 (or 0 - 65535 for Extended NEC) = IR address in DECIMAL
k = 0 - 255 = IR command in DECIMAL
Nothing
IRPn<cr>
Set or Read Current IR protocol State
n = 0 - 5 (NEC, JVC, Sharp, RCA, RC5, and Sony-sirc)
n = ? = status
IRP0 = Current IR protocol = NEC<cr><lf>
IRP1 = Current IR protocol = JVC<cr><lf>
IRP2 = … and so on
RTSn<cr>
Set or Read State of RTS line
n = 0 : 1 : T: ? = low : high : toggle : status
Nothing except Status Reads return:
RTS? = RTS0<cr><lf> or RTS1<cr><lf>
CTSn<cr>
Read State of CTS line
n = ? = status
CTS? = CTS0<cr><lf> or CTS1<cr><lf>
FDFT<cr>
Factory default
Are you sure (Y,N)?
User must send CAPITOL “Y” before 8 Second Timeout
RST<cr>
Unit Reset/Restart
MODE<cr>
Return current mode status
00 = Run mode
01 = Program mode
00 or 01<cr><lf>
RE<cr> or re<cr>
Reserved – Active only in PROGRAM MODE
Factory use only
WE<cr> or we<cr>
Reserved – Active only in PROGRAM MODE
Factory use only
RDIO<cr>
Reserved – Active only in PROGRAM MODE
Factory use Only
RDIN<cr>
Reserved – Active only in PROGRAM MODE
Factory use Only
Help
The Help menu consists of the following menu items as shown in Figure 17.
Contents – Display the help file contents. A PDF reader will be required in order to view the
document.
About… – Display the Version and Support information for the software.
Figure 17 – Help Menu
RS232 Command Summary
The HR-4P uses a simple command protocol that can be used by other software in order to control and/or configure the
unit.
The unit uses a baud rate of 19200, 8 Data bits, 1 Stop bit and No Parity and it must be in PRG MODE (Power Led
is blinking)
The HR-4P supports a command format as shown in the following table.
<cr><lf> in the table below denote the CARRIAGE RETURN (0x0D) and LINEFEED (0x0A) Characters
Each command is terminated by a single CARRIAGE RETURN <cr>
Page 15

Programmable Serial Controller
15
UNIT SEEMS DEAD
Comments
Check that the unit is powered with the supplied power
supply and operating normally.
With SWITCH in RUN Position the LED should
be on SOLID
With SWITCH in PRG Position the LED should
be BLINKING
GUI WON’T RUN
Verify that program installs without errors
Verify that the .NET Framework 2.0 minimum has
been installed
COMMUNICATIONS PROBLEMS WITH GUI
Set switch to PRG position when using the GUI
The LED should be BLINKING
Ensure RS232 cable used is compatible with the PC
being used
This is normally a NULL-MODEM cable with
pins 2 & 3 crossed.
Only Pins 2, 3 and 5 are used for serial
communication
Ensure PC COM port is set correctly on the
COMMUNICATIONS TAB
UNIT DOESN’T CONTROL SERIAL DEVICE
Verify unit and Serial Device have proper serial
interconnect cabling
Straight Cable or Null-Modem
Verify via PC and Hyperterminal that unit outputs
proper characters at proper baud rate when the
appropriate event occurs.
Verify serial device can be controlled via
HyperTerminal or similar program
Set switch to RUN position when unit is put into service
The LED should be on solid
Troubleshooting
If you are having trouble configuring or communicating with the HR-4P unit, check:
PRG vs RUN mode Demystified
In Run mode the unit does not pay attention to any RS-232 data coming from external device. Hence, the RS-232 port is used only to
send out data (as defined in Action Strings). This is done because the unit has its own command set that it understands (described in
last section), and if it were paying attention to the incoming data, upon getting wrong commands it will output “Err”.
So if, for example, if you have connected the serial port to a projector and your defined Actions are sending commands to the projector,
the returned data from the projector need to be ignored, lest they be interpreted as commands!
In PRG mode the unit pays attention to incoming RS-232 data. However, if Actions are trigged by input state changes, all aspects of
the Actions are executed except serial output part. This is done because if you were connected to the PC and running the GUI, and if
inadvertently you trigger an Action String with serial output, that data it would crash the GUI!
In PRG mode the unit does, however, execute other portions of your defined Action such as blasting IR outputs, or changing I/O output
state (high, low, or pulse).
 Loading...