

Page 1
®
Adjustable Boom Stand
Assembly Instructions
Thank you for purchasing the HAKKO 999-224B Boom Stand
Please be sure to review these instructions before you start.
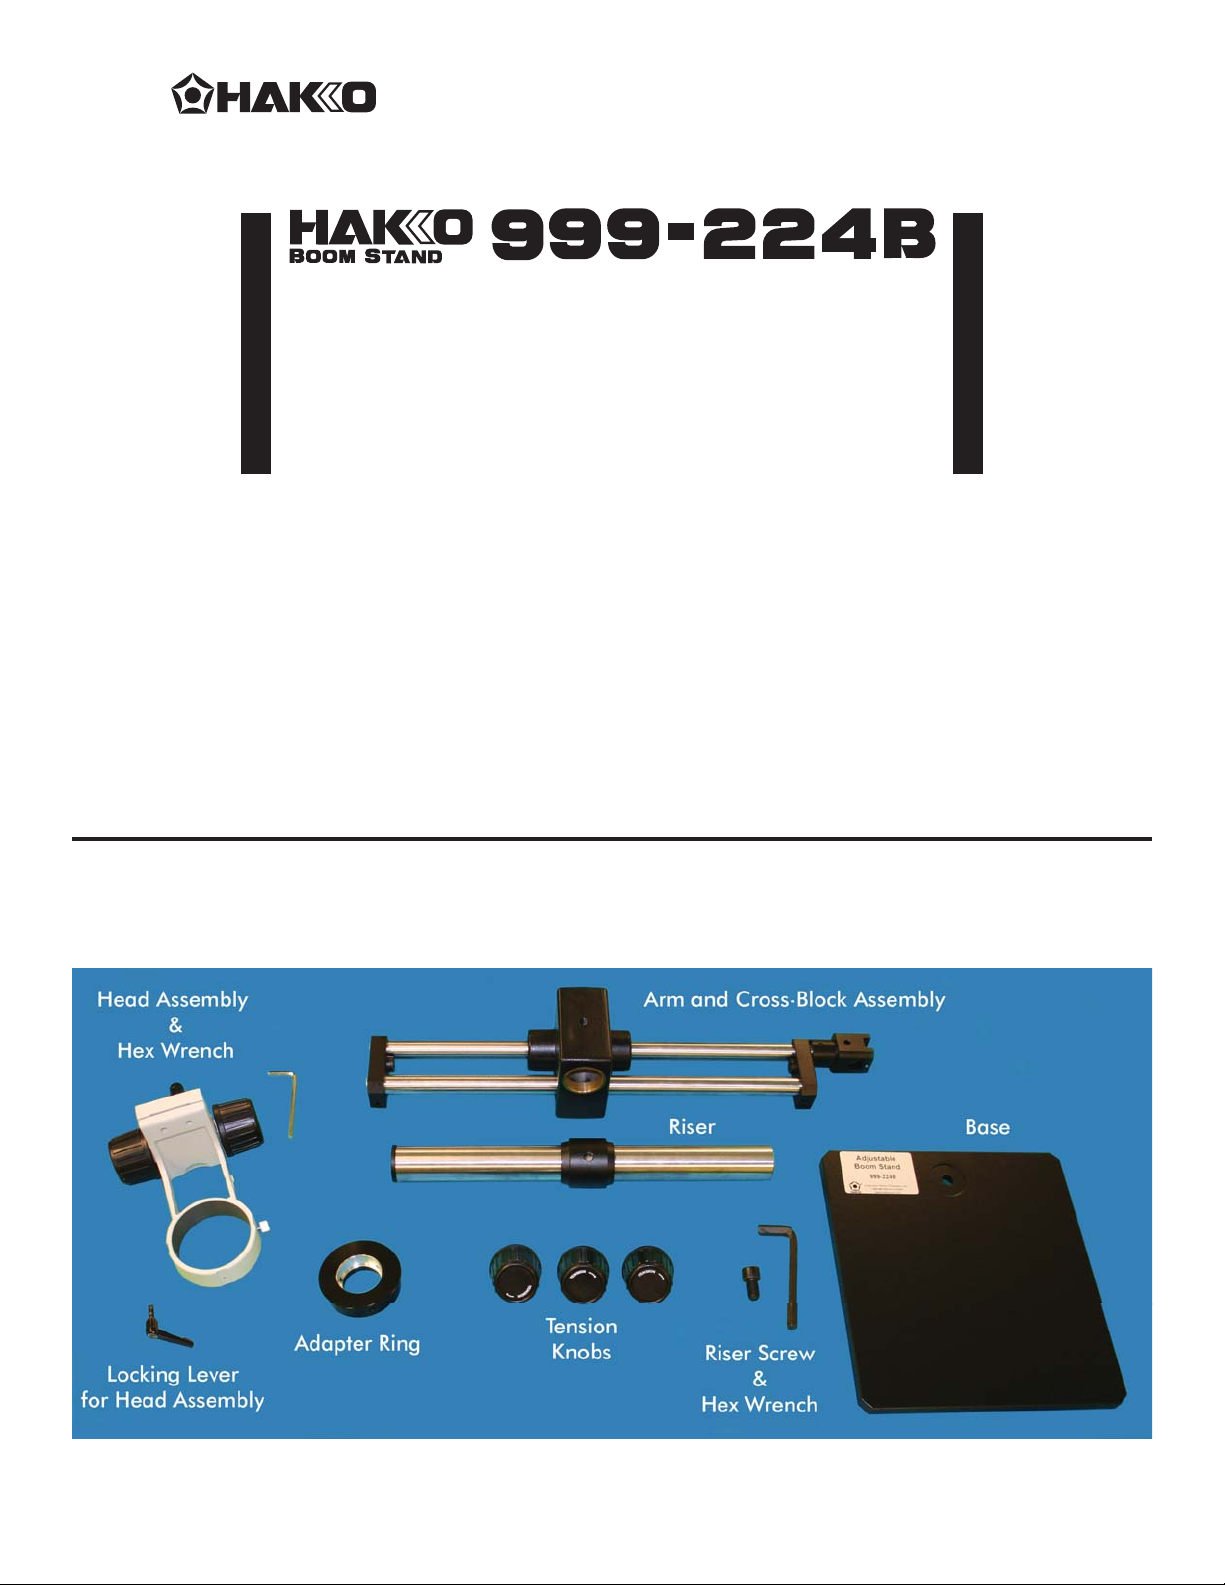
PACKING LIST AND PART NAMES
1 - Head Assembly
1 - Head Assembly Hex Wrench
1 - Locking Lever for Head Assembly
1 - Adapter Ring
1 - Riser with Ring
1 - Base
1 - Riser Screw
1 - Riser Screw Hex Wrench
1 - Arm and Cross-Block Assembly
3 - Tension Knobs
Page 2
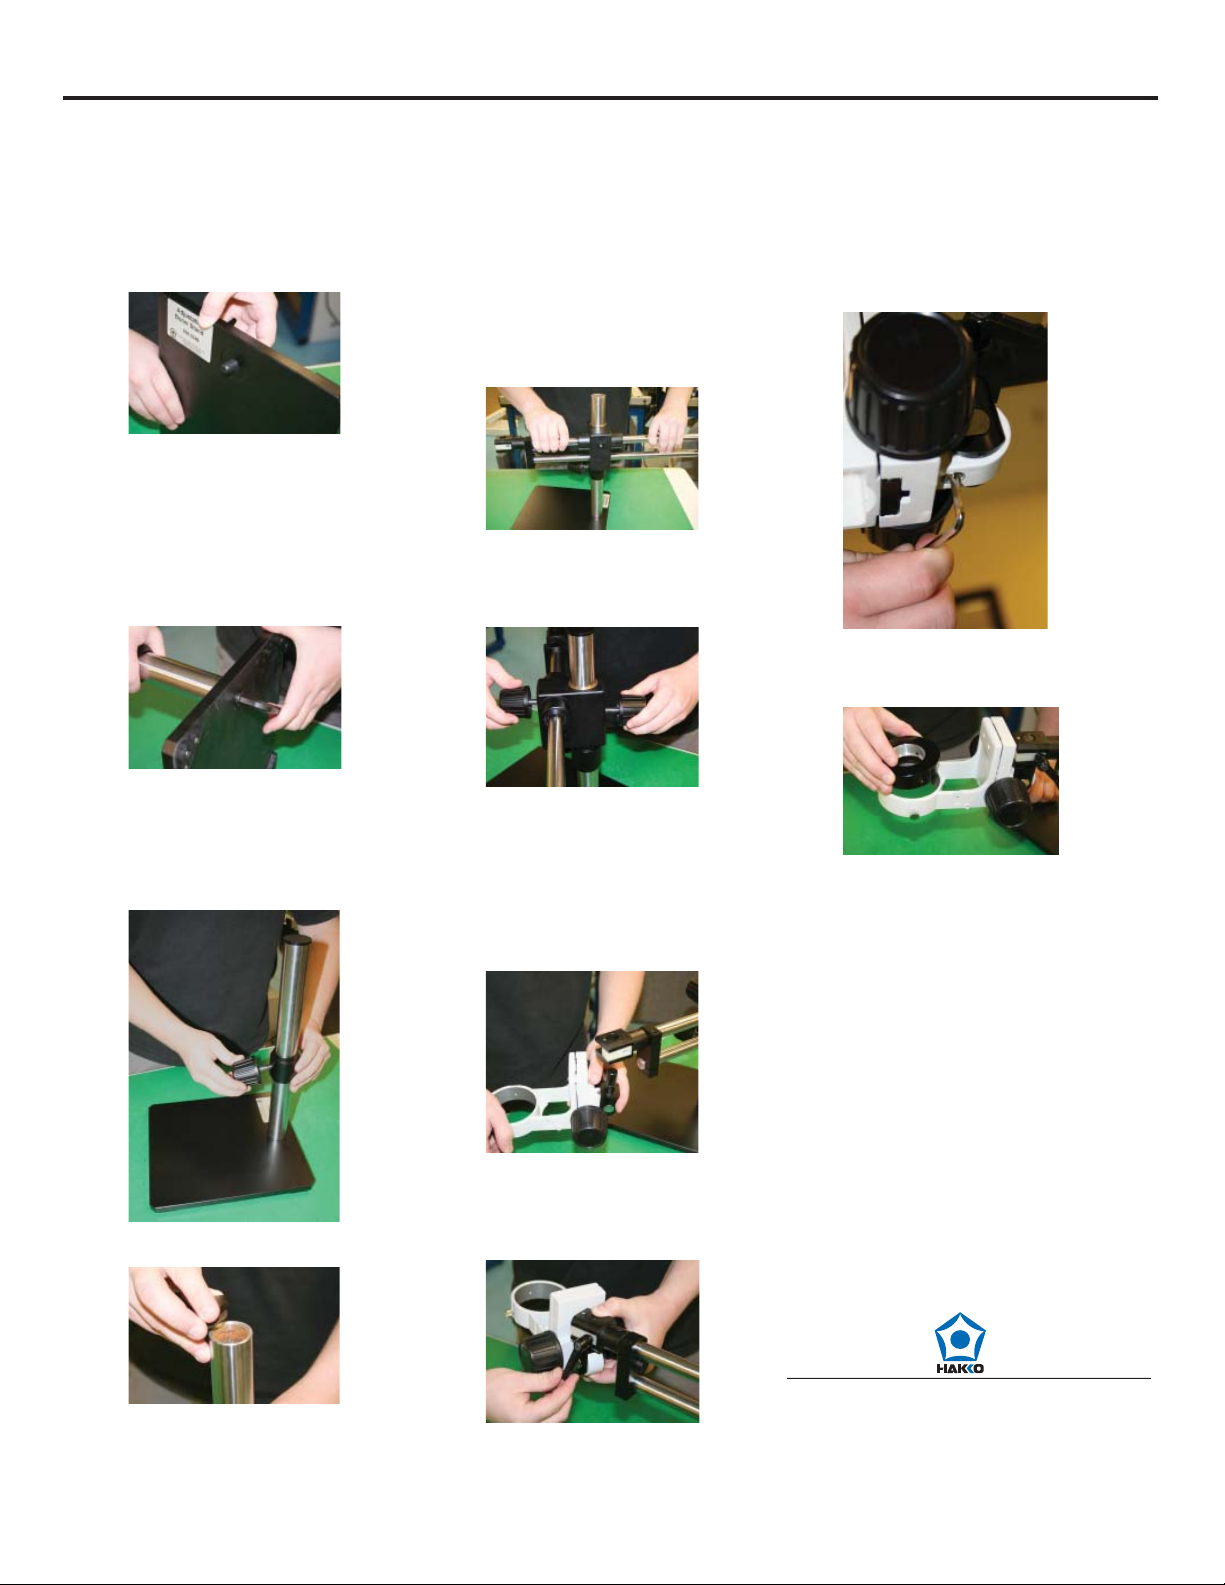
ASSEMBLY
Before you begin, remove the contents from all packing materials and layout all the items to ensure the product is complete prior to assembly.
1. Place the base upright on its front
edge and insert the riser screw
through the hole from the bottom
side of the base.
2. While holding the base and riser
screw with one hand, attach the
riser using your other hand, threading it onto the riser screw.
3. Use the supplied hex wrench to
tighten the riser screw.
6. Carefully slide the arm and crossblock assembly down over the riser
until it rests on the riser ring.
NOTE: Be sure the attachment
point for the head assembly is on
top as pictured.
7. Secure the arm and cross-block
assembly with the remaining two
tension knobs
11. Using the supplied hex wrench,
tighten the adjustment screw on
the bottom of the head assembly to
secure it in a position that is approximately parallel to the work surface.
12. Insert the adapter ring with the larger
opening facing up.
4. Place the base fl at on its support
feet and secure the riser ring approximately half way up the riser
using one of the three supplied
tension knobs.
5. Remove the cap from the riser.
8. Replace the cap on top of the riser
that was removed in step 5.
9. Insert the pin for the head assembly into the attachement point from
the bottom.
10. Secure the head assembly by
threading the locking lever into the
attachment point until it is snug.
HOW TO USE
1. Insert your Hakko Hot Air SMD
Rework Station handpiece into the
adapter ring
2. Secure the handpiece by tightening
the three socket head set screws with
the appropriate size hex wrench
3. Place the handpiece with adapter ring
into the head assembly and secure
by tightening the small thumb screw
on the right-hand side of the head
assembly.
®
American Hakko Products, Inc.
28920 Avenue Williams
Valencia, CA 91355 USA
1-800-88-HAKKO (42556)
www.HakkoUSA.com
999224Be200811
 Loading...