

Page 1
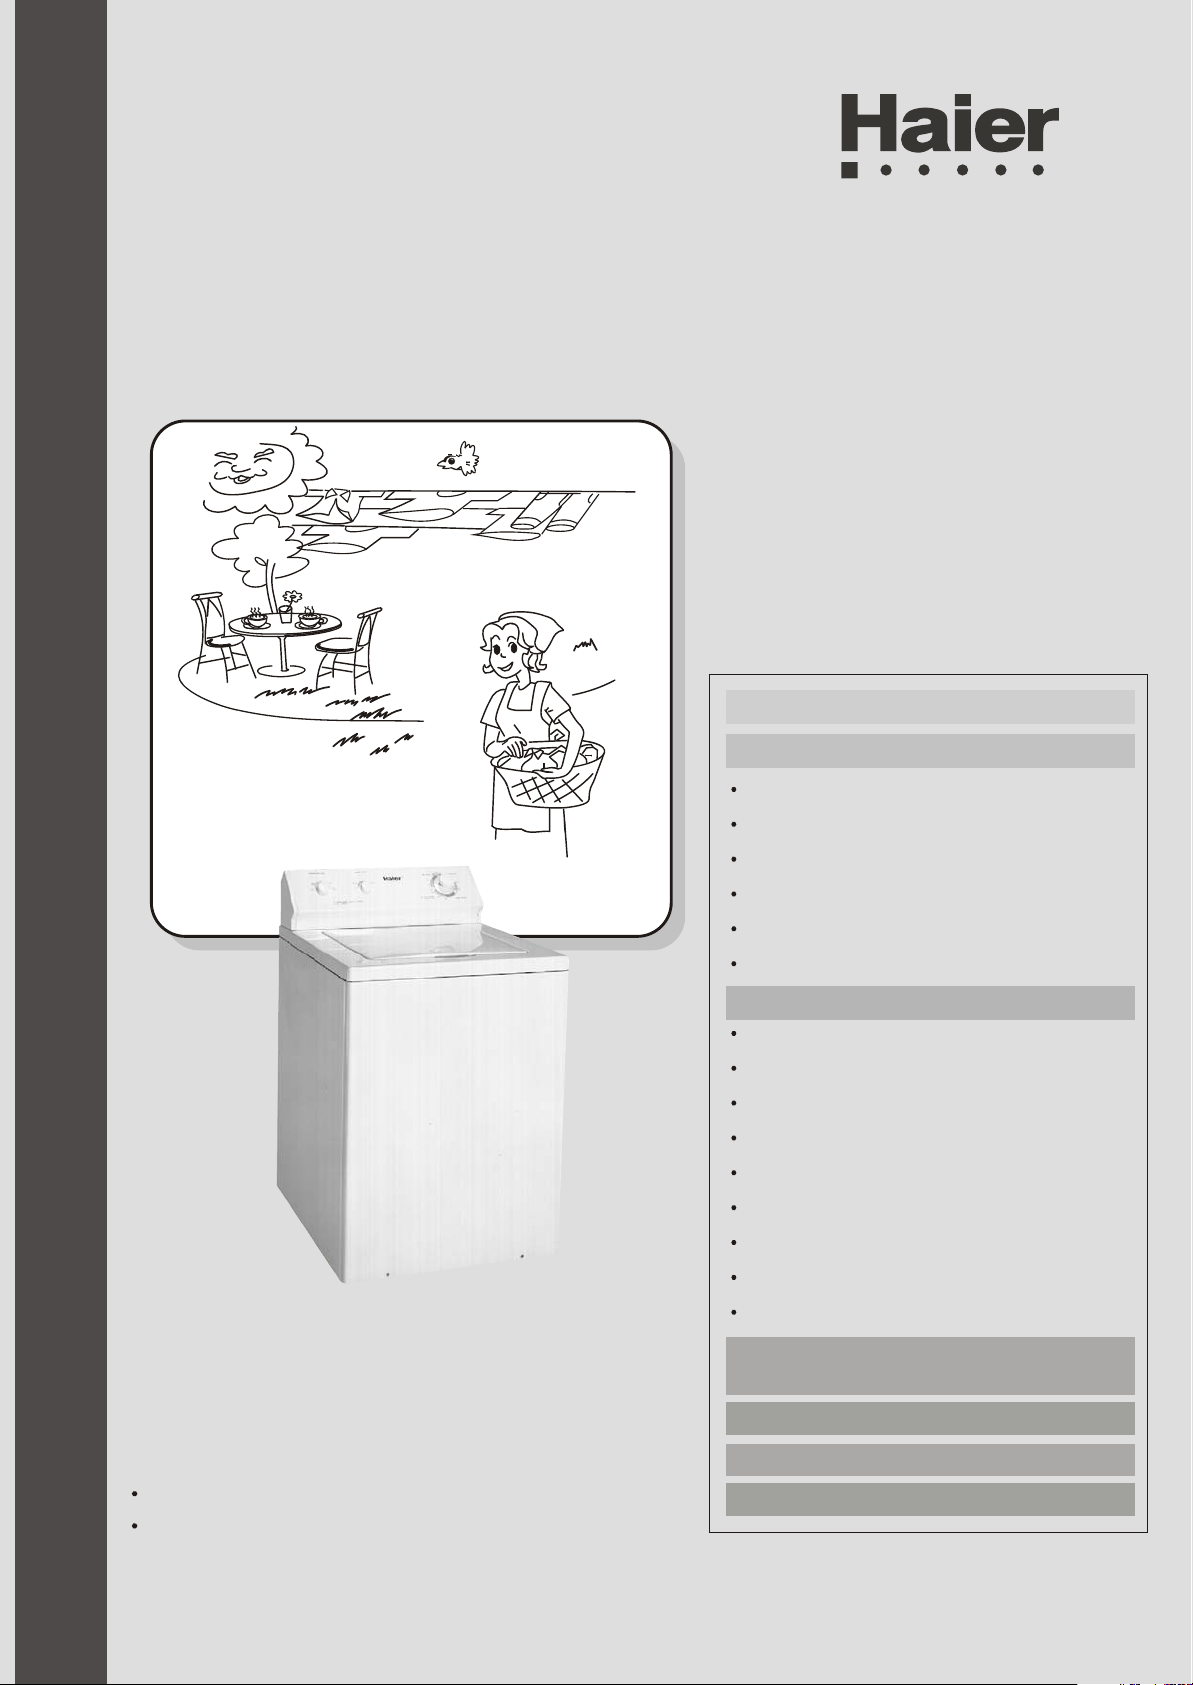
User's manual
XQJ100-96
Automatic Washing Machine
Contents
Before using
Names of the parts...........the 2nd cover
Safety precautions .............................1
Installation and adjustment ................3
Installation the water inlet hose..........4
Temperature & hardness of water ......5
Wash cycle and sound........................6
Using process
Preparation before washing ..............7
Put in the laundries ............................8
Put in the detergent ............................9
Close the top lid .................................9
Select water level..............................10
Select temperature............................10
Select program..................................10
Finish washing ..................................11
Please read this manual carefully before using.
Please retain it attentively for future reference.
Disposal after washing ......................11
Trouble shooting
*Answer to question....................12
Packing list ..................................13
After-sales service
Specification.............the back cover
.......................13
Page 2
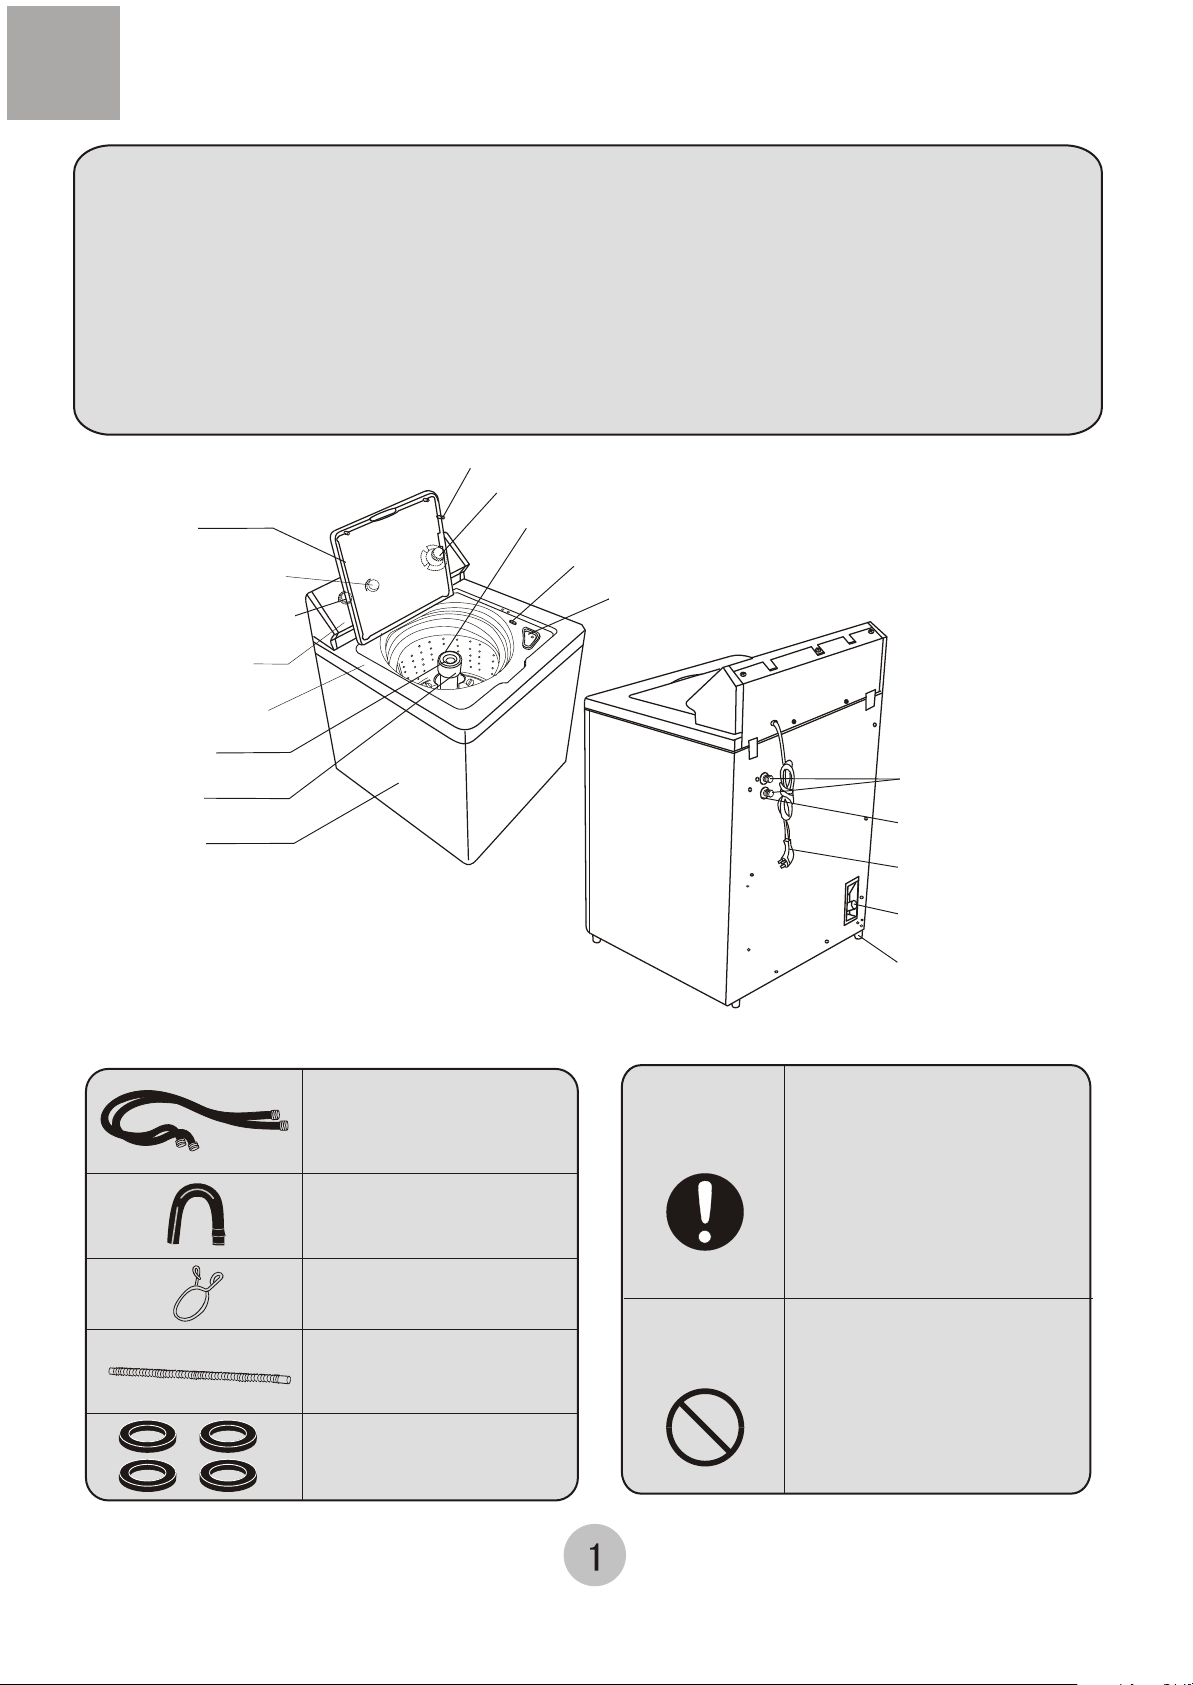
Names of the parts
Honorable users,
Thanks for your choosing Haier products.
Haier products integrate high-tech, precision frontier science and possess the best quality
among similar products. To facilitate your operation, please read the manual carefully and
operate this machine according to it.
Haier's star-level service is always accompanying you. No matter what problems you meet
in use please do not hesitate to contact us by the telephone number and address on the
certificate of warranty. We are at your service all the time.
Thanks again for your choosing and introducing Haier products.
Haier-sincere forever!
Control foot of door switch
Program selector
Top lid
Water level knob
Temperature knob
Control panel
Control panel seat
Inner tub
Agitator
Cabinet
Accessories
Softener injection inlet
Door switch
Water inlet hose
(two)
Drain hose hook
(one)
Drain hose clamp
(one)
Outer drain hose component
(one)
Flat water inlet hose
washers
(four)
Bleach injection inlet
Water inlet valve
Water absorption
cushion
Power line
Drain hose joint
Adjustable foot
(four pieces)
Meaning and description of the symbols
Contents marked with that symbol
Warning sign
Forbidding sign
are related to the safety of the
product and the personal safety
of the users. Please operate in
strict conformity to the contents,
otherwise it may cause damage
of the machine or injure the
personal safety of the user.
Contents marked with that symbol
are actions forbidden to perform.
Performing of those actions may
result in damage of the machine
or injure the personal safety of
the user.
Page 3
Safety precautions
Read all instructions in the manual before using the washer.
The washer must be grounded. In the event of a malfunction or breakdown, grounding will
reduce the risk of electrical shock by providing a path of least resistance for electric current.
The plug must be plugged into an appropriate outlet that is properly installed and grounded
in accordance with all local codes and ordinances.
WARNING:
1. Improper connection of the equipment-grounding conductor can result in a risk of electric
shock. Check with a qualified electrician or serviceman if you are in doubt as to whether
the appliance is propel grounded.
2. Do not modify the plug provided with the appliance if it will not fit the outlet, have a proper
outlet installed by a qualified electrician.
3. Do not repair or replace any part of the washer or attempt any serving unless specifically
recommended in this use and care guide or in published user-repair instructions that you
understand and have the skills to carry out .
4. Be sure to pull the plug off when the machine is idle or
when cleaning the machine.
5. Do not use an extension cord.
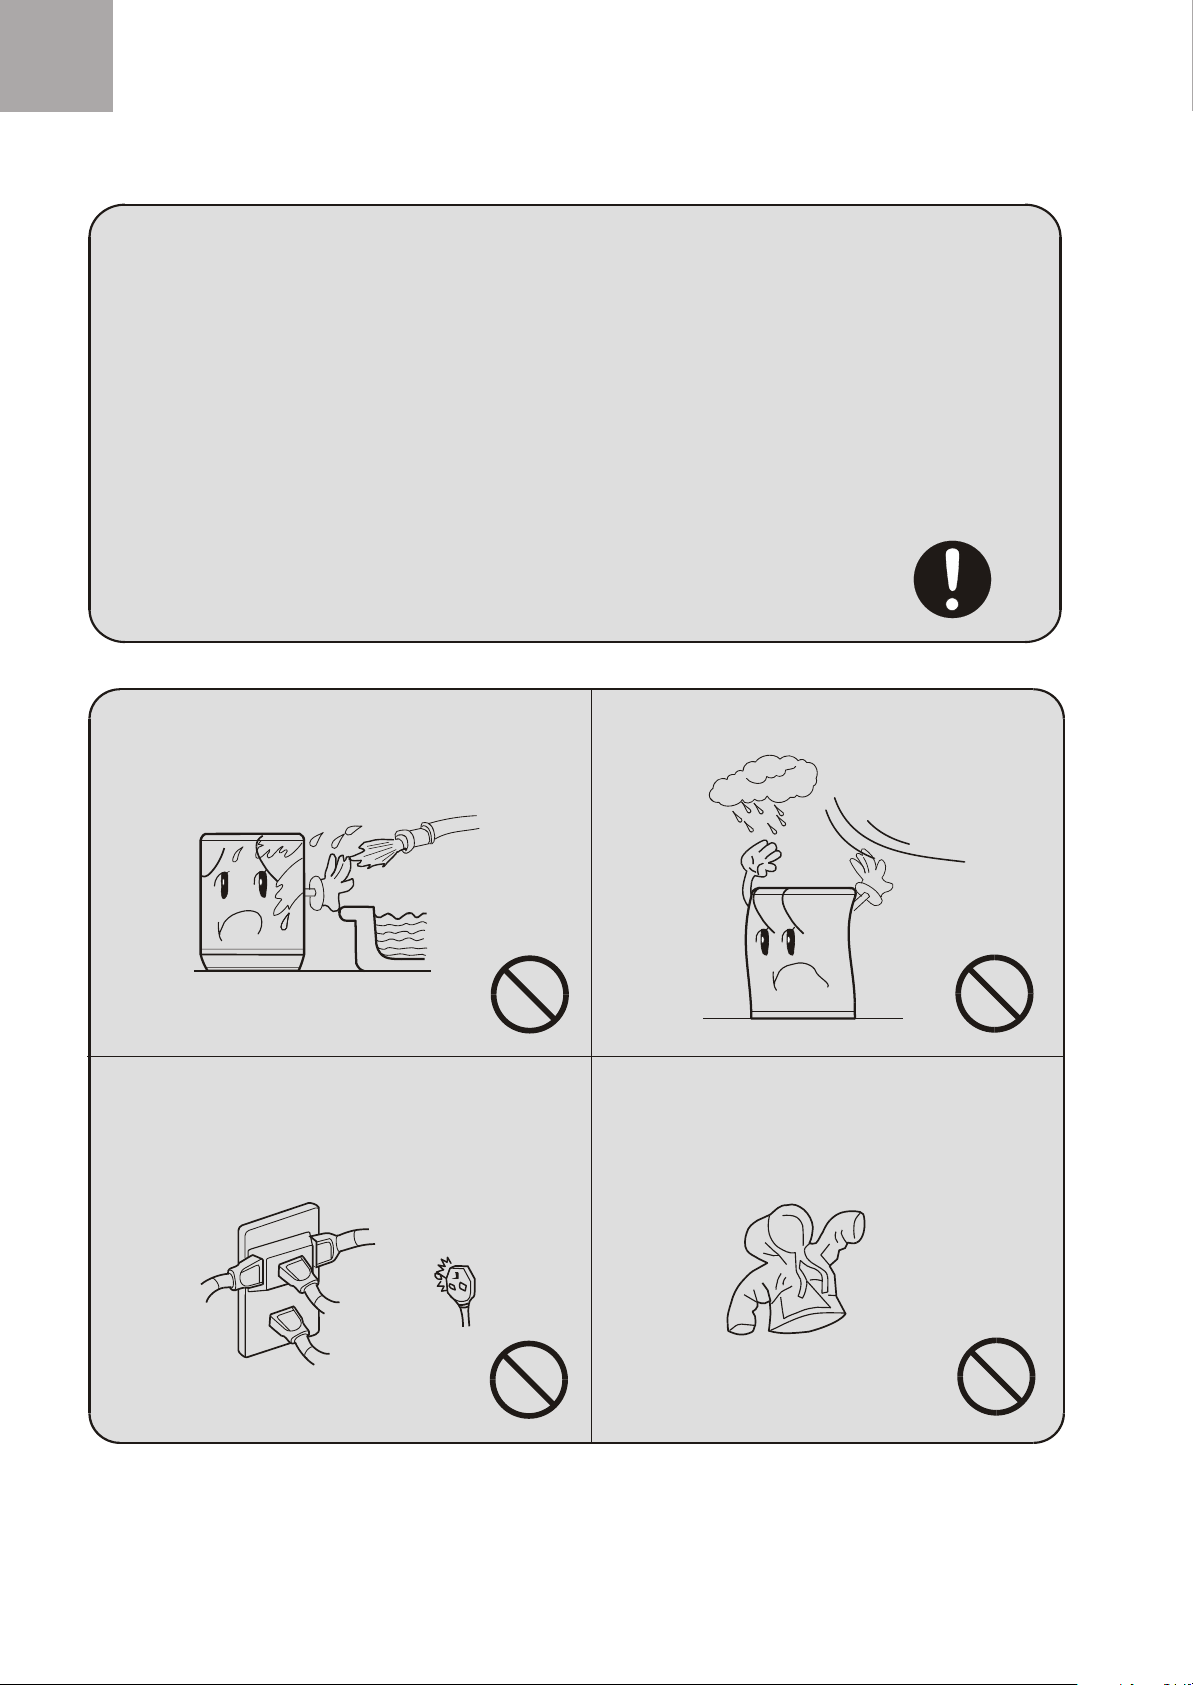
Do not put the machine at damp place like
the bathroom. Never wash it with water.
Do not let the machine share one receptacle
with other electric appliances. If the power
plug is damaged, or the plugging into the
receptacle is loose, do not use the plug any
more.
Do not install or store the washer where
it will be exposed to the weather.
Do not wash water-proof laundries like
the raincoat, bike covers etc. to avoid
abnormal vibrations in spinning.
Page 4

Safety precautions
IMPORTANT SAFETY INSTRUCTIONS
WARNING -To reduce the risk of fire, electric shock, or injury to persons when using your appliance,
follow basic precautions, including the following:
1) Read all instructions before using the appliance.
2) Do not wash articles that have been previously cleaned in, washed in, soaked in, or spotted with
gasoline, dry-cleaning solvents, other flammable, or explosive substances as they give off vapors that
could ignite or explode.
3) Do not add gasoline, dry-cleaning solvents, or other flammable, or explosive substances to the wash
water. These substances give off vapors that could ignite or explode.
4) Under certain conditions, hydrogen gas may be produced in a hot water system that has not been
used for 2 weeks or more. HYDROGEN GAS IS EXPLOSIVE. If the hot water has not been used for
such a period, before using the washing machine, turn on all hot faucets and let the water flow from
each for several minutes. This will release any accumulated hydrogen gas. As the gas is flammable,
do not smoke or use an open flame during this time.
5) Do not allow children to play on or in the appliance. Close supervision of children is necessary when
the appliance is used near children.
6) Before the appliance is removed from service or discarded, remove the door.
7) Do not reach into the appliance if the tub or agitator is moving.
8) Do not install or store the washer where it will be exposed to the weather.
9) Do not tamper with controls.
10) Do not repair or replace any part of the washer or attempt any serving unless specifically
recommended in this use and care guide or in published user-repair instructions that you understand
and have the skills to carry out .
SAVE THESE INSTRUCTIONS
GROUNDING INSTRUCTIONS
For a grounded, cord-connected appliance:
The washer must be grounded. In the event of a malfunction or breakdown, grounding will reduce
the risk of electrical shock by providing a path of least resistance for electric current. The plug must
be plugged into an appropriate outlet that is properly installed and grounded in accordance with all
local codes and ordinances.
WARNING: Improper connection of the equipment-grounding conductor can result in a risk of
electric shock. Check with a qualified electrician or serviceman if you are in doubt as to whether
the appliance is propel grounded.
Do not modify the plug provided with the appliance if it will not fit the outlet, have a proper outlet
installed by a qualified electrician.
Page 5
Before Using
Safety precautions
Before Using
Read all instructions in the manual before using the washer.
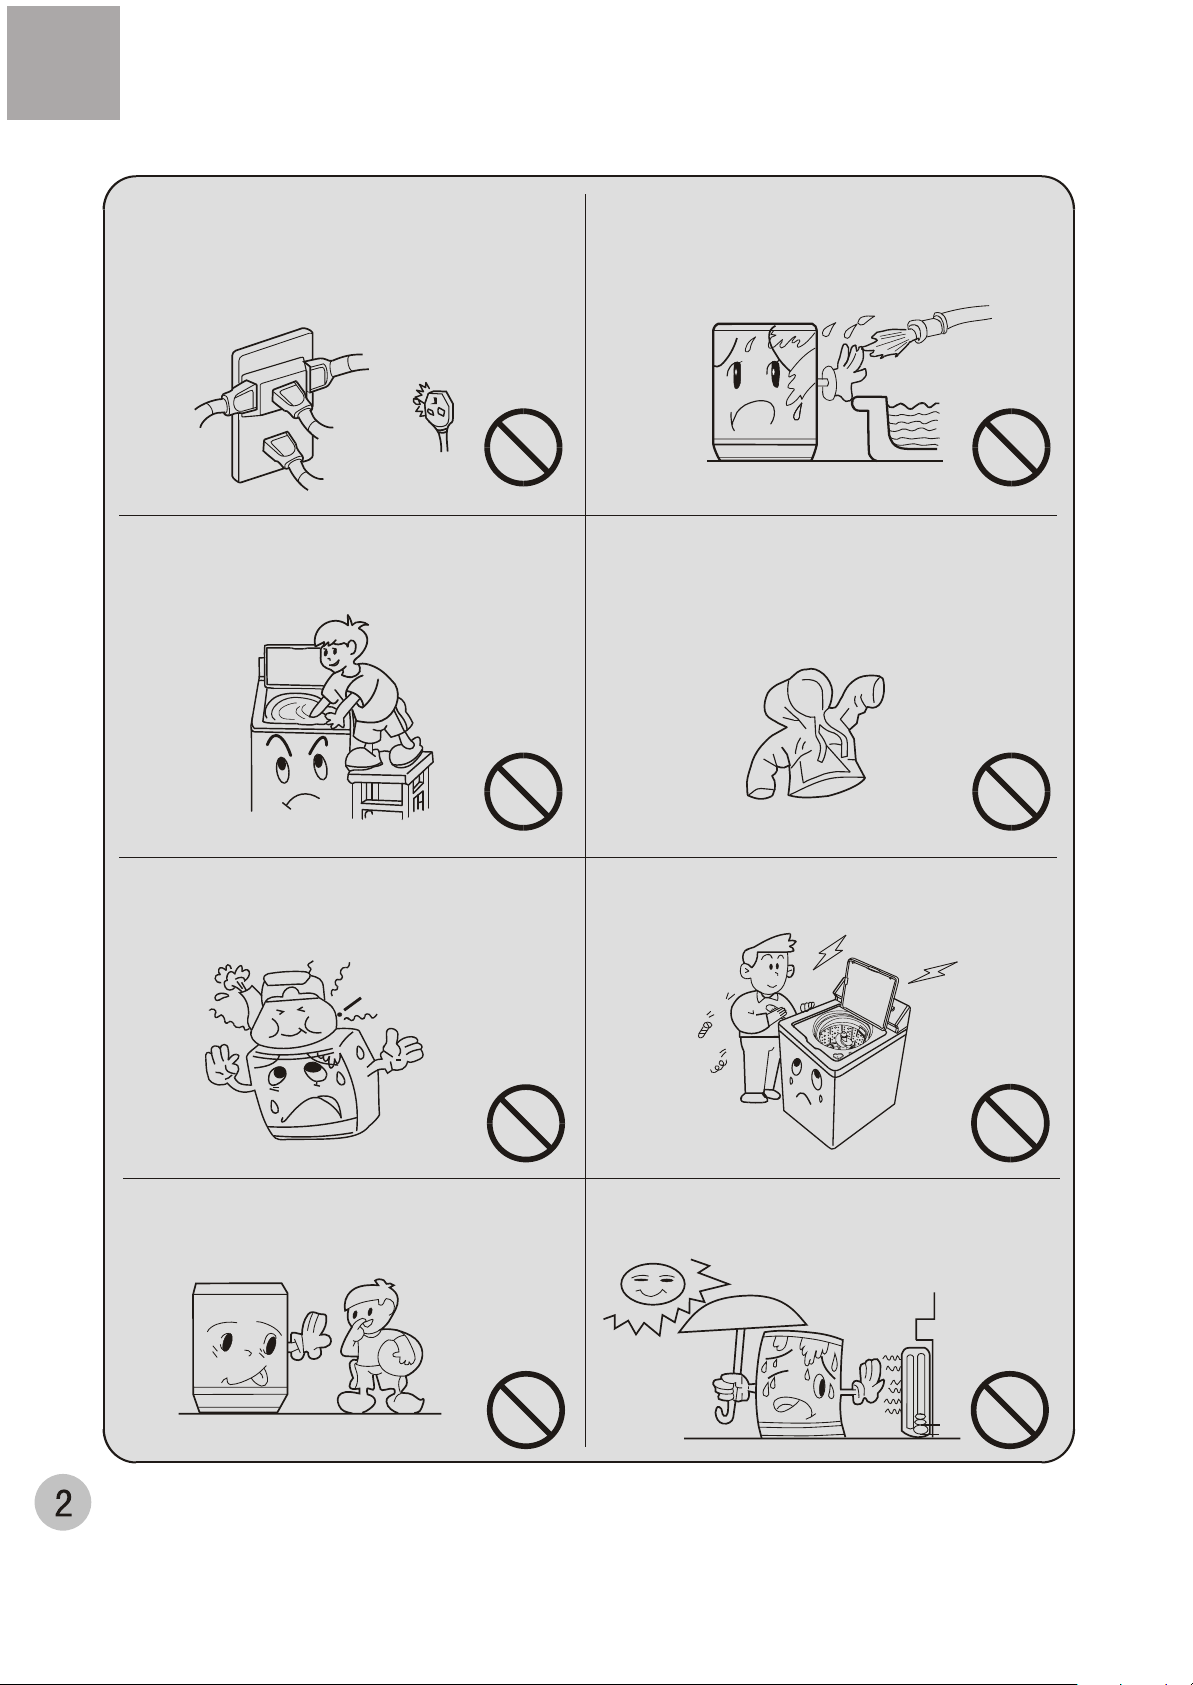
Do not let the machine share one receptacle
with other electric appliances. If the power
plug is damaged, or the plugging into the
receptacle is loose, do not use the plug any
more.
Do not stretch hands into the working
machine. It is dangerous even if the
rotation is slow. Take special care of
the children.
Do not put the machine at damp place like
the bathroom. Never wash it with water.
Do not wash water-proof laundries like
the raincoat, bike covers etc. to avoid
abnormal vibrations in spinning.
Do not put any hot or heavy items (such
as the kettle with hot water ) on the
washing machine.
The handicapped or children without
care shall not use the machine.
Do not decompose, repair or alter the
machine by yourself.
Keep the machine away from direct
sunlight and heat source like the heater.
Page 6

Installation and adjustment
Please install and adjust the machine according to the requirement of the manual. It is
very important to your security and correct operating the machine.
Adjust the installation position
The largest allowed slope of the base of the machine is 2 . The slanting or rough
ground will result in unstable running or stoppage of the machine. Please adjust
it with following methods:
Confirm it's horizontal:
Hang the lead line to confirm
if it is horizontal.
Adjust the adjustable foot:
1.To twist the adjustable foot, please first lift up
the side of the foot slightly, and twist the foot.
2.Fasten the nut after adjustment.
Install the drain hose
First install the drain hose hook on the parts of
outer drain hose component.
Put the drain hose clamp on the outer drain hose,
insert the outer drain hose into the joint for it, and
then clutch tightly with drain hose clamp.
High
Outer drain hose
component
Adjustable foot
Low
Drain hose hook
Drain hose clamp
Usage of the drain hose
Hang the outer drain hose on the proper place
before washing( do not use it toppled down
on the ground).
Attend that the outlet of drain hose shall be higher
than the water level in washtub to avoid siphon
phenomenon.
Drain hose joint
Page 7

Install the water inlet hose
Connect the Water Inlet Hoses
1. Insert a new flat washer into each end of the inlet hoses. Firmly seat the washers
in the coupling. ( As figure 1)
Figure 1
2. ttach the water inlet hoses to the hot water faucet and the cold water
Respectively a
faucet. Using pliers, tighten the coupling . ( As figure 2)
NOTE: Do not overtighten. Damage to the valves can result.
Figure 2
3. Run water through both faucets and inlet hoses, into a bucket or laundry tub, to get
rid of particles in the water lines that might clog the inlet valves screens.
4. Attach the hose connected with hot water faucet to the HOT water inlet valve(sign
with "H') . Attach the hose connected with cold water faucet to the COLD water
valve(sign with "C"). ( As figure 3)
NOTE: Do not overtighten. Damage to the valves can result.
Figure 3
5. Check for leaks
(1). Swing the water inlet hose gently to confirm if it's suitable.
(2). Turn on the water faucets and check for leaks. A small amount of water might
enter the washers. You will drain this later.
Page 8

Temperature & hardness of water
How to select water temperature
Wash water
temperature
HOT
111 F 44
or above
WARM
90-110 F
32-43
COLD
70-90 F
21-32
In water temperature options, the cold water is commonly used to rinse. Warm water wash and
warm water rinsing may also be adopted. Comparing cold water rinse, a better rinse effect may
be got and the laundries will dry more quickly if use warm rinse, but the warm water rinse may
make the laundries wrinkle easily. In the cold winter, the warm water rinse will provide you a
more comfortable temperature when dispose the washed laundries.
Suggested fabrics
Work clothes
Solid white s
/uneasy fading
elegant fabrics
Deep color/easy fading
articles
Often change clothing
Nylon,silk and woolen
articles
Knitting /delicate
articles
Articles
sensitive color
Easy fading
A hand washing
rticles with
fabric
and quietly
articles
with very
articles
Effect
May get the best wash effect for
heavily-soiled articles
remove grease, perspiration or
May
mechanical oil
May stop losing luster or yellowing
Mostly applicable for washing general
-soiled or light-soiled articles
May not damage the most fibre-made
Slight fading and lightly mutual
educe the degree of wrinkling
May r
Mostly applicable for light-soiled
Economize hot water
The optimum rinsing temperature
dyeing
articles
articles
Check the temperature of hot water
The temperature of hot water shall be 111 F(44 ) or above. I
the temperature of hot water is up, i
temperature of water heater. How to detect the temperature of hot water?
1.To get a full bowl of hottest water from injection inlet of hot water used by the washing
machine.
Note: If there is no injection inlet on your washing machine, then get hot water from the
nearest place away from washing machine.
2.To put a thermometer into the water to detect the temperature.
Note:The temperature of wash water lower than 70 F(21
and this will make it difficult to clean the soil, some fabrics will wrinkling arks and small
fluffing increase.
t will be easy to detect. Maybe you need increase the
f you do not know what degree
)will affect the solution of detergent,
Hardness of water quality
The reason for not washing the laundry clean may be that the water quality is too hard. You
may detect the hardness of water quality according to the following methods:
Tap water -- please consult the local tap water company.
Well water -- please consult the local residents institutions.
The content of mineral substances in water shall be calculated as galling/gallon or ?/10000.
If the content of mineral substance in water exceeds 8 galling/gallon, or higher than
132/10000, you shall: add softener
put more detergent
not use soap any more
Page 9

Wash Cycle and sound
How to choose washing cycle and washing time
Follows will help you to choose the right washing cycle for the fabrics you are washing.
Every cycle is set according to the type and soil degree of the fabrics.
There is pause step in every cycle, it is normal if it happens during washing
Saturated soak(20 minutes): use this option for the heavy-soiled fabrics, for every 3
minutes interval, the fabrics will be agitated 1 minute. In order to improve the cleaning,
please use 2 times the amount of recommended detergent(Soak time can be selected
according to your need).
REGULAR cycle
REGULAR cycle is used for normal soiled fabrics, this cycle combine the high-speed washing
and short high-speed spin. This cycle is mainly used for cottons and linens, you can choose
the washing time according to the soil degree of the fabrics, 6 minutes for light-soiled fabric,
12 minutes for heavy-soiled fabrics.
PERM PRESS cycle
This cycle is one kind of the delicate cycle, which rinse 2 times, the cold water wash can be
used to prevent the fabrics from wrinkling. This cycle is for heavy-duty fabrics or synthetics.
You can choose washing time according to the soil degree of the fabrics.
DELICATES cycle
This cycle can use low speed wash action to remove the soil, the low speed spin can prevent
the fabrics from wrinkling. For light soiled delicate fabrics, use this cycle.
HAND WASHABLE cycle
This cycle, low speed wash 20s in every internal of about 20s, this cycle is suitable for the
fabrics needed special care. The low speed spin can prevent the fabrics from wrinkling.
Rinse and spin
In all above cycles, PERM PRESS cycle rinses 2 times , and other cycle rinses 1 times. It is
necessary of additional rinsing when washing heavy-soiled fabrics with superfluous
detergent or special care fabrics.
When the cycle is completed, If you want to rinse once more, push in the button and turn
the knob in clock wise direction to "rinse " in "NORMAL" cycle(drain-spin-fill-rinse-drain-spin).
Spin
If you need separate drain and spin, you can operate as follows:
Push in the button and turn the knob to the "spin " in "NORMAL" cycle.
Pull out the knob, the washing machine start to drain then spin.
.
Sounds during operation of washing machine
The following sounds shall be the normal sounds of washing machine in operation:
Wash cycle
If the low water level is selected for washing a small amount of laundry, you may hear "kada"
sound from agitator due to the lower water level in washtub, this is normal washing sound.
Draining stage
The draining speed of washing machine is dependent on the installation of it. When the water
is quickly drained out from the washing machine, you hear the sound of drawing of the air to
the drain pump. This phenomenon may appear in the final draining stage.
After draining and before spinning
When the wash cycle turns from draining to spinning, the sound of gear meshing and puller
opening may be heard.
Page 10

1Preparation before washing
Preparation before washing
1.Connect the water inlet hose. Open the water
faucet.
2.Confirm that the washing machine is earthed
reliably. Then insert the power plug into the
receptacle. The earth terminal shall not link to
gas pipeline and faucet water pipeline.
3.Put the drain hose up to suitable position.
Pay attention to followings before washing the laundries
Note: "H" is the height of
the hanged drain hose.
Confirm if there has special requirement for the laundries.
The quantity of the laundries shall not exceed the rated value. The big laundries like jeans
shall be put in loosely.
Close zippers, snaps, and hooks to avoid snagging other items. Remove pins, buckles,
and other hard objects to avoid scratching the washer interior. Remove non-washable
trim and ornaments
Empty pockets and turn them inside out.
Turn down cuffs, brush away lint and dirt.
Tie strings and sashes so they will not tangle.
Mend tears, loose herms, and seams.
Treat spots and stains.
Stained or wet garments should be washed promptly for best results.
Separate heavily soiled items from lightly soiled ones, even if they would normally be
washed together.
Separate lint givers(towels, chenille) from lint takers(corduroy, synthetics, permanent
press). When possible, turn lint givers inside out.
Separate dark colors from light colors, colorfast items from non-colorfast items.
Sort by fabric and construction(sturdy cottons, knits, delicate items).
Page 11

2 Put in the laundries
How to place the laundry into the
washing machine in a right way
Place the laundry into the washing machine loosely till
the upper of the washtub is full of the laundries(up to
the hightest holes located). Do not twist the laundry
round the agitator, the laundry should be easily lifted
from water to obtain the best washing effect and anti
-crease effect. The laundry should go downward first,
after some time go up again.
Correctly load the laundry and choose the right water
level. Overload or stack or too low water level will lead
to: ---wash not clean
---winkling of the fabrics
---fluffing
---rapid wears of the fabrics (because of fluffing)
Loading should depend on the place the laundry
occupied, instead of the weight of the laundry itself.
Every time when you wash, mix the larger item and
smaller item and evenly place them into the washing
machine to keep the machine in balance. Unbalance
Place a load of sorted clothes
into the washer
will lead to vibration and noise when spin cycle starts.
For heavy-duty fabrics and some synthetics, in order
to prevent them from wrinkling, the allowed washing
laundry should be larger than the actual laundry size,
when washing, these laundry need largest space to
move than the bulky item like blankets and jeans.
The washing time should be reduced when you wash
fewer laundry. The less the laundry placed in, the
shorter the washing time needed.
Loading suggestions(maximum size loads)
Please set water level to "high" for the following maximum size loads
Heavy Work Clothes
3 trousers
3 shirts
4 jeans
1 coat
1 overcoat
Knitting
3 t
rouser
3 boy's suits
6 shirts
4 caps
4 formal dress
Towels
10 bath towels
10 hand towels
14 wash clothes
1 bath blanket
Delicate fabrics
3 woman's underwear
1 coat
4 slippers
4 underwear
2 corset
1 babywear
Mixed load
3 double bedsheets
4 pillowcases
8 T-shirts
6 cotta
2 shirts
2 boy's suits
8 handkerchiefs
Page 12

3 Add the detergent
Softener injection inlet
Bleach
injection inlet
How to use the bleacher
Fill water to decided level. Dilute the
bleacher with container. Pour it slowly
into the washing tub.
Avoid using bleacher on laundries with
color or pattern as they are prone to
lose color.
The bleacher shall not touch the
laundries directly.
Refer to the user's manual for the
usage and quantity of the bleacher.
For powder bleacher, please dissolve
it before use.
The b
only for liquid bleacher.
leach injection inlet is suitable
If the content of mineral substances in water
exceeds the standard limits, please add
softener, and softener shall be added from
softener injection inlet.
How to use the washing powder
Direct dissolved in the machine
1.Fill water to "Low" water level.
2.Add the power. Run for 30 seconds to
dissolve it completely.
3.Put in the laundries. Select suitable
water level.
The instant dissolving of the washing
powder:
1. Prepare warm water of 30 and a
container.
2. Add the powder while stirring to fully
dissolve it.
The powder is more prone to pollute the
laundries than the detergent. Therefore
please use it with proper quantity.
It is suggested not to use high sudsing
detergent.
Different washing powders have different
dosage. Please refer to the usage manual
of the washing powder for the details.
Standard dosage of the detergent and water quantity(suggest)
Water
level
High
Medium
Low
Water
quantity
About88L
About60L
About38L
Common powder,
Add 40g in each 30L water
Concentrated powder,
Add 25g in each 30L water
4 Close the top lid
If you open the top lid,
the machine will stop working.
Page 13

5 Select water level
LOAD SIZE KNOB
Three water levels available according to the laundries quantity:
MEDIUM
LOAD SIZE
LARGE
RESET
Large; Medium; Small.
Page 8
After the water inlet as per the preset water level, in case
additional water quantity is required, please first set the button
to the "RESET", and perform automatic water inlet. When it
SMALL
reaches the suitable water level, you can turn it to the preset
water level.
After the water inlet under set water level, if higher water level is
needed, please first turn the knob to " Reset ", then turn back to
needed water level. The washing machine will fill water to the
new water level automaticly.
6 Set of temperature of wash and rinse water
According to the different washing laundries,5 kinds of different
wash/rinse temperature may be selected.
Note:
For the marked temperature, the upper is wash temperature,
and the lower is rinse temperature.
TEMPERATURE
WARM
COOL
HOT
COOL
COOL
COOL
WASH
RINSE
WARM
WARM
HOT
WARM
7 Cycle program select
First push on the cycle selection button.
Rotate this button in clock wise direction. You may select the following cycles singly:
REGULAR cycle, DELICATES cycle, HAND WASHABLE and PERM PRESS cycle.
The wash time may be set for each cycle according to the requirements.
After finishing the selection of cycle, pull out the button and the washing machine may
begin to work.
If want to stop the washing machine at any time, push in the cycle control button.
If restart the washing machine, close the cover
first, then pull out the cycle control button.
Note:
There is pause step in each washing cycle, this is
normal in operation of washing machine. In the
operation of washing machine, sounds appeared
in P may be heard, and most of these sounds are
normal.
PULL TO START
PULL TO STOP
PERM PRESS
Rinse
Light 6
Regular 9
OFF
Spin
Rinse
Spin
Regular 6
OFF
OFF
Soak
Spin
REGULAR
Heavy 15
OFF
Regular 6
Light 3
Rinse
DELICATESHAND WASHABLE
Regular 6
Rinse
Spin
Page 14

Attention
The pulsator will not rotate unless the water is filled to selected water level.
Do not use the SOAK program for the woolen laundries.
8 The washing is finished
The power will be switched off automatically
after the finishing of the washing.
9 Disposal after washing
It beeps to indicate
the finishing of
washing
After using, please clean the lint and foreign materials of the lint filter etc. in time. Otherwise
it may influence your using the machine.
Please first pull off the power plug from the receptacle before cleaning.
The filter screen of the water inlet valve is
likely to be blocked by foreign materials
and influence the water inlet. Please clean
it with brush every two months.
1.After washing, close the water faucet. ( If needed, you can dismantle the water inlet hose).
2.Do not store water in the washing machine for a long period. Drain the water completely
after each using.
3.Be sure to pull off the power plug before maintenance.
4.Hang up the power cord and drain hose.
5.Wipe off the water drops on the surface of the machine and inside the tub. Open the top lid
for some time (about 1 hour), then close the top lid.
If the cabinet is dirty, wipe it with wet cloth
Do not flush it directly with water.
Wipe it with neutral detergent.
Do not wipe it with thinner, petrol,
alcohol etc.
Petrol
Thinner
Alcohol
Page 15

Trouble-shooting Answer to question
(If there's breakdown, please pull off the power plug before checking) The following phenomena
are not breakdowns sometimes. Please confirm again before sending it to repair. If there are real
breakdowns, please come to the special maintenance department or after-sale service department
of our company. Do not repair it by yourself.
Phenomenan The reason How to settle
In washing,rinsing,spinning,
the machine stops running.
No water filling or
filling slowly
The machine does not act.
There's abnormal sound
inside the machine.
The water faucet leaks.
During draining, the washer
continues draining when push
in programme selector knob.
The top lid is not closed.
Is the drain hose put down?
Is the drain hose blocked
by foreign material?
Is the water pressure lower?
Is there power failure?
Is the power plug loose?
Is the machine slanting?
Are the laundries slanting
in spinning?
Is the jointer screw of the
water inlet hose is loose
or twisted awry?
It is special phenomena for
washer with pump.
Close the top lid.
Put down the drain hose.
Open and close the top lid once.
Clean the foreign material.
Open and close the top lid once.
Wait for the normal water
pressure before use.
Use it when the power is on.
Insert the power plug tightly.
Level the machine properly.
Re-order the laundries.
Fasten the jointer screw
properly.
If do not need continue
draining, you can raise
the entrance of drain hose
and let water flow back
inner tub. .
Common phenomena
Phenomena Explanation
Rotate the "Process selector" knob to
select "Spin", but it doesn't work.
There may be some water flowing out of
the drain hose in the first use of the machine.
The program is setting the drain time. Some
time is needed before it starts spinning.
It is the water remained in the factory
inspection of performance.
Page 16

Specification
Model XQJ100-96
Rated voltage frequency 240V ~ 50Hz
Rated washing / spinning capacity 10.0kg (weight of standard dry cloth)
Water level/Water quantity (about) High/95L, Medium/72L, Low/51L
Max water consumption
Injection pressure 0.03Mpa-0.78Mpa
Rated washing power 680W
Rated spinning power 680W
Weight( bout) 68kg
Dimension L 686 mm W 686 mm H 1115mm
About 190L(High water level; Normal program)
 Loading...