

Page 1

Haier
AUTOMATIC DRUM
WASHING MACHINE
WNA500T WNA600T
INSTRUCTIONS FOR
INSTALLATION AND
OPERATION
Page 2

Dear customers, congratulations. You have once again made a wise and
sensible purchase. By choosing our Washing machine you not only found
the best in advanced technology, but above all you have found a faithful,
untiring and reliable friend.
Your machine is strong, reliable and long lasting. All those qualities which
have made the our trademark famous the world over.
From today, these qualities are at your disposal to help you resolve your
daily household problems.
Your machine is easy to use. Read this owner's manual carefully since
contains all the instructions for safe installation, use and maintenance.
Remember to keep your owner's manual in a safe place so that you can
refer to it whenever you need to.
1
Page 3

FUNCTION INTRODUCTION.....................................................3-5
INSTALLATION...........................................................................6-8
CLOSE UP................................................................................9-11
USING INSTRUCTIONS..........................................................12-16
MAINTENANCE...........................................................................17
SOLUTION TO PROBLEMS................................................18-19
ATTACHED CHART:
GUIDE FOR SELECTION GPROGROMME...........................20-21
WARNING....................................................................................22
2
Page 4
FUNCTION INTRODUCTION
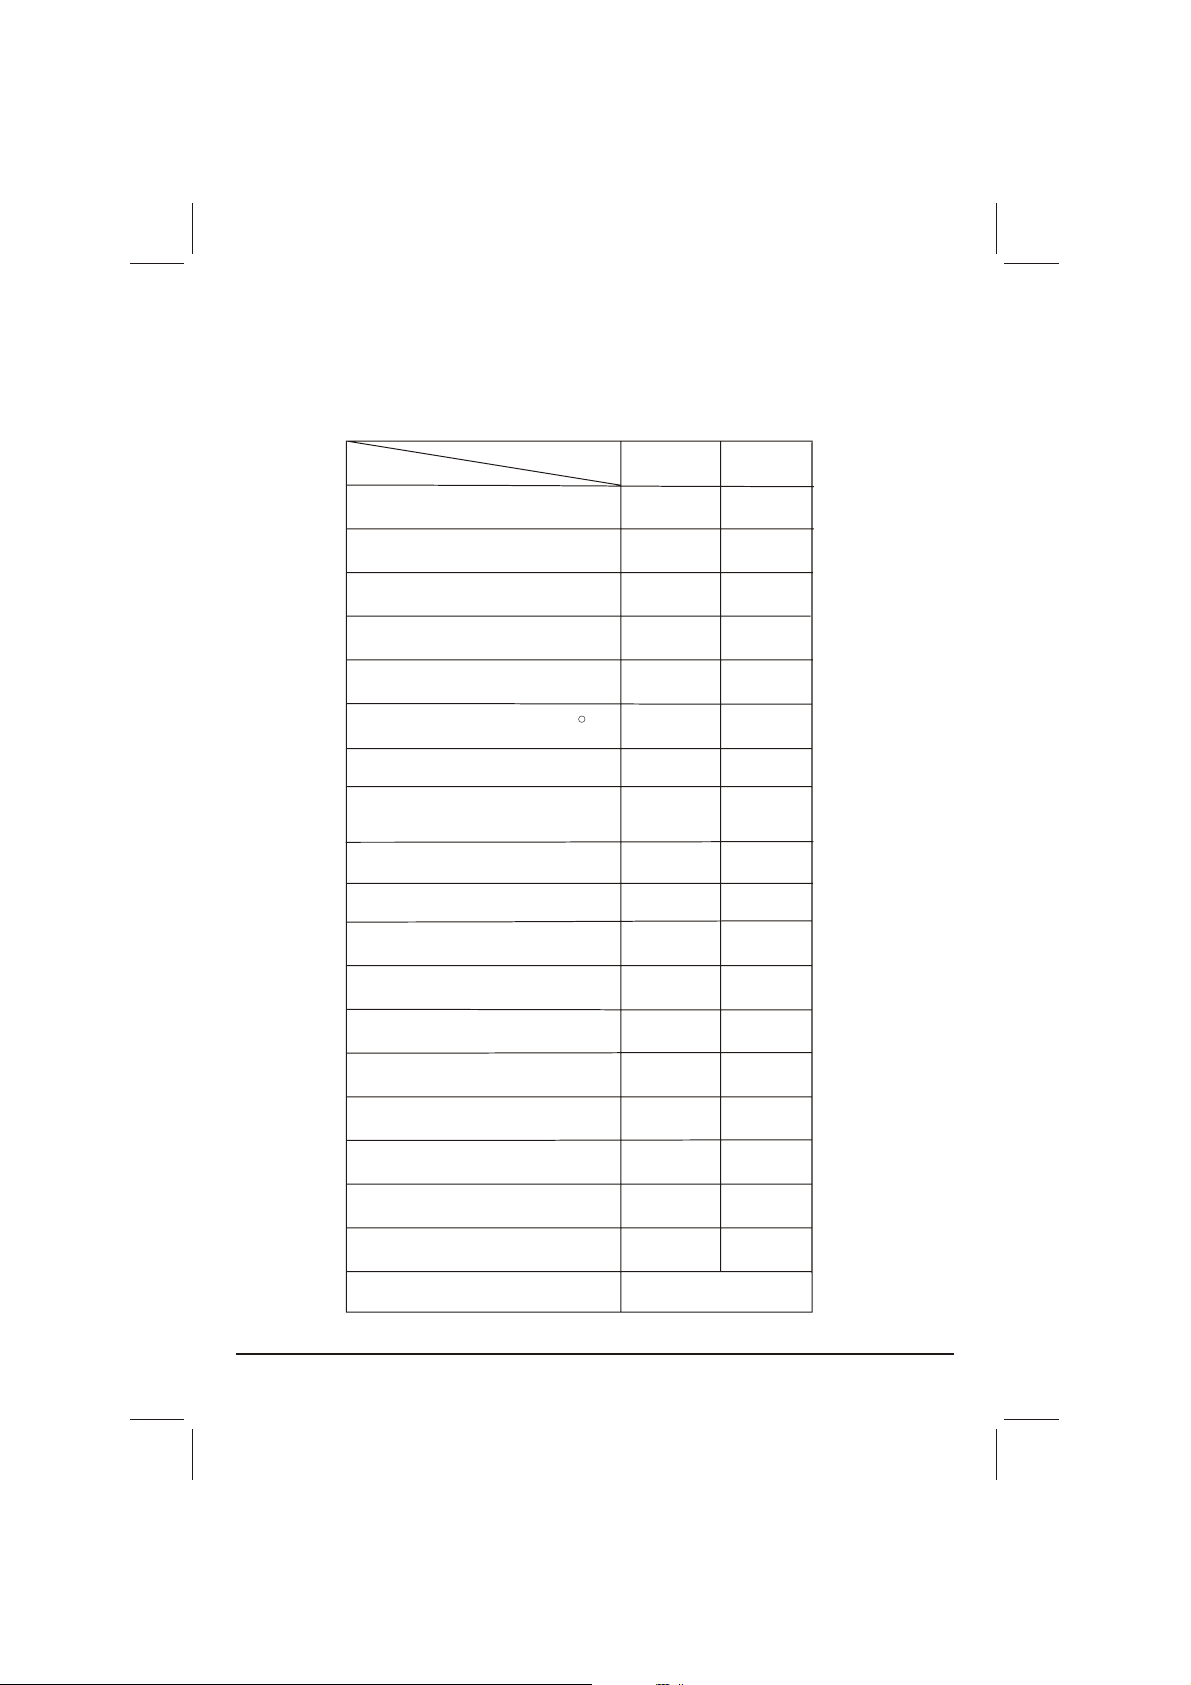
FUNCTION COMPARING TABLE
FUNCTION
MODE
Washing capacity
Programmes
Cotton
Synthetic
Wool
Thermostat ajustable(0-90 C)
Cold wash button
Economic wash button
No soak
Spin speed
Power switch
ON/OFF
Rinse
WNA500T
5
16
600r/min
WNA600T
5
16
500r/min
Plustic tub
Door-locking device
Power
Power(Wash)
Power(Spin)
Weignt
H.W.D
330W
650W
67Kg
850X520X595
330W
650W
67Kg
3
Page 5
FUNCTION INTRODUCTION
Characteristics of WNA600T WNA500T
European and Asia Aesthetic design, elegant and beautiful.
Three types of wash: rinse, beat and rain effect.
Changeable washing function: cold wash and hot wash,No soak
Three types of laundry: cotton, synthetic and wool, with 16 cycles.
A large washing capacity: 5 kg.
Stainless steel drum; painted cabinet with three layers of
cataphresis, phosphorus and paint.
Rinse with anti-crease system, care for clothes.
Super anti-shock design.
Self-lock device for the door.
4
Page 6
Installation
Unpacking
levelling and
positioning
Remove the package and check that the machine is
undamaged.
If you have any doubts, do not use the machine and call on a
qualified technician. Keep all packing parts (plastic bag,
foam rubber, screws etc.) out of the reach of children since
they could be dangerous.
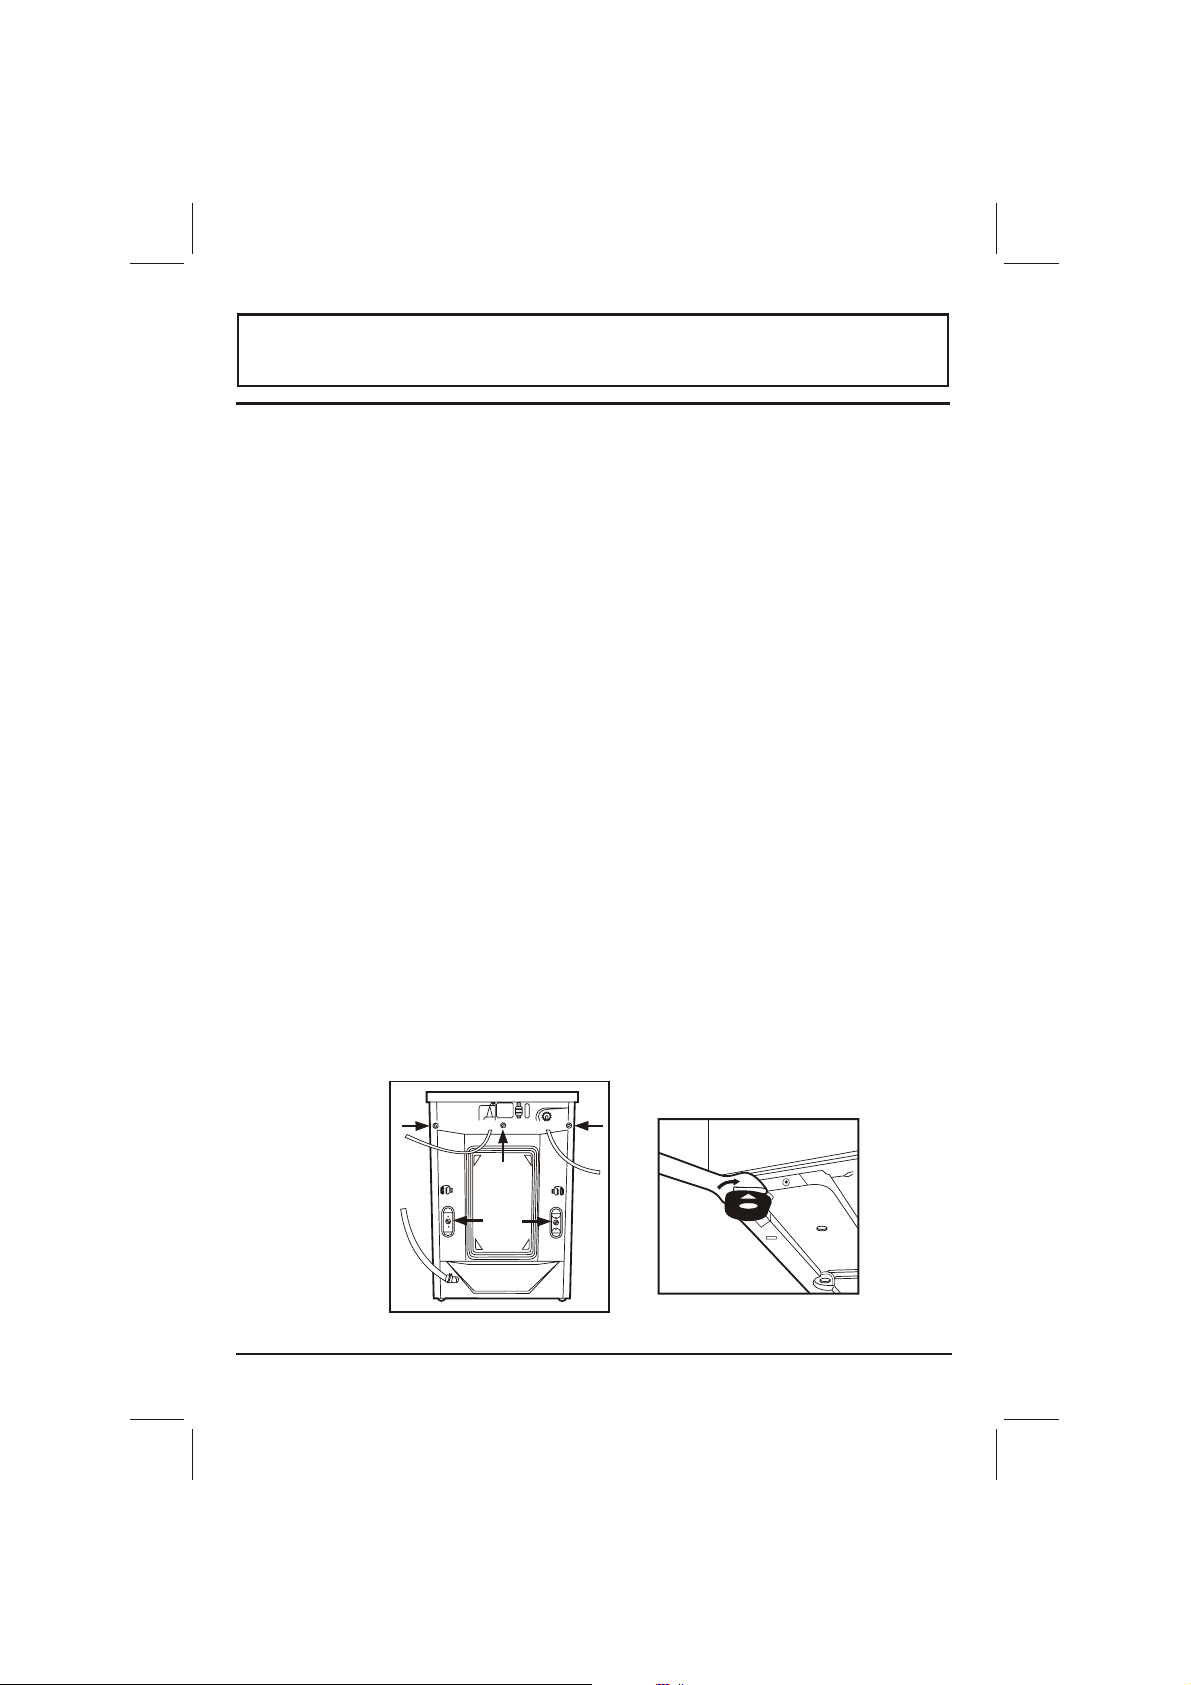
Important: The inside of the washing machine which
consists of a floating unit, is fixed with screws at the back of
the cabinet (Fig.1) during transport. Before starting the
machine remember to release the floating unit by removing
the above screws . To prevent water spray from entering the
machine, remember to close the holes left open by the
screws with the plastic caps provided in the packet
containing the owner's manual. And rescrew the holes
where the iron piece is taken down with the former two
screws.Attention:keep the packing screws and plastic caps
in a safe place for later use. It is important for the machine to
be perfectly level (the angle of inclination on the work surface
must not be more than 2 degrees). For this reason the
machine is fitted with adjustable feet used for levelling the
machine before use (Fig.2). In the case of flooring with
carpeting, remember to check that the ventilation in the
support area is not plugged.
Fig.1
6
Fig.2
Page 7
Installation
Electric
connection
Connection
of tap and
Loading
Hose
Connect the plug to a socket provided with efficient earthing.
Or use the spare earthing wire supplied together with the
machine and the earthing terminal located on the left-upper
corner of the back of your machine (Warning: this appliance
must be earthed as a safety measure according to the law).
Make sure that the voltage and frequency available
correspond with the values stated on the data plate located at
the back of the machine (power range:187-242V) and that the
electric system is dimensioned to withstand the maximum
current shown on the data plate. If the socket the machine is
connected to does not correspond with the plug, replace the
plug with a suitable one and avoid using adaptors or shunts
since they could cause overheating and burn out.The spare
eathing wire is absolutely not allowed to be connected to
water pipe,heating pipe or other kinds of pipes.
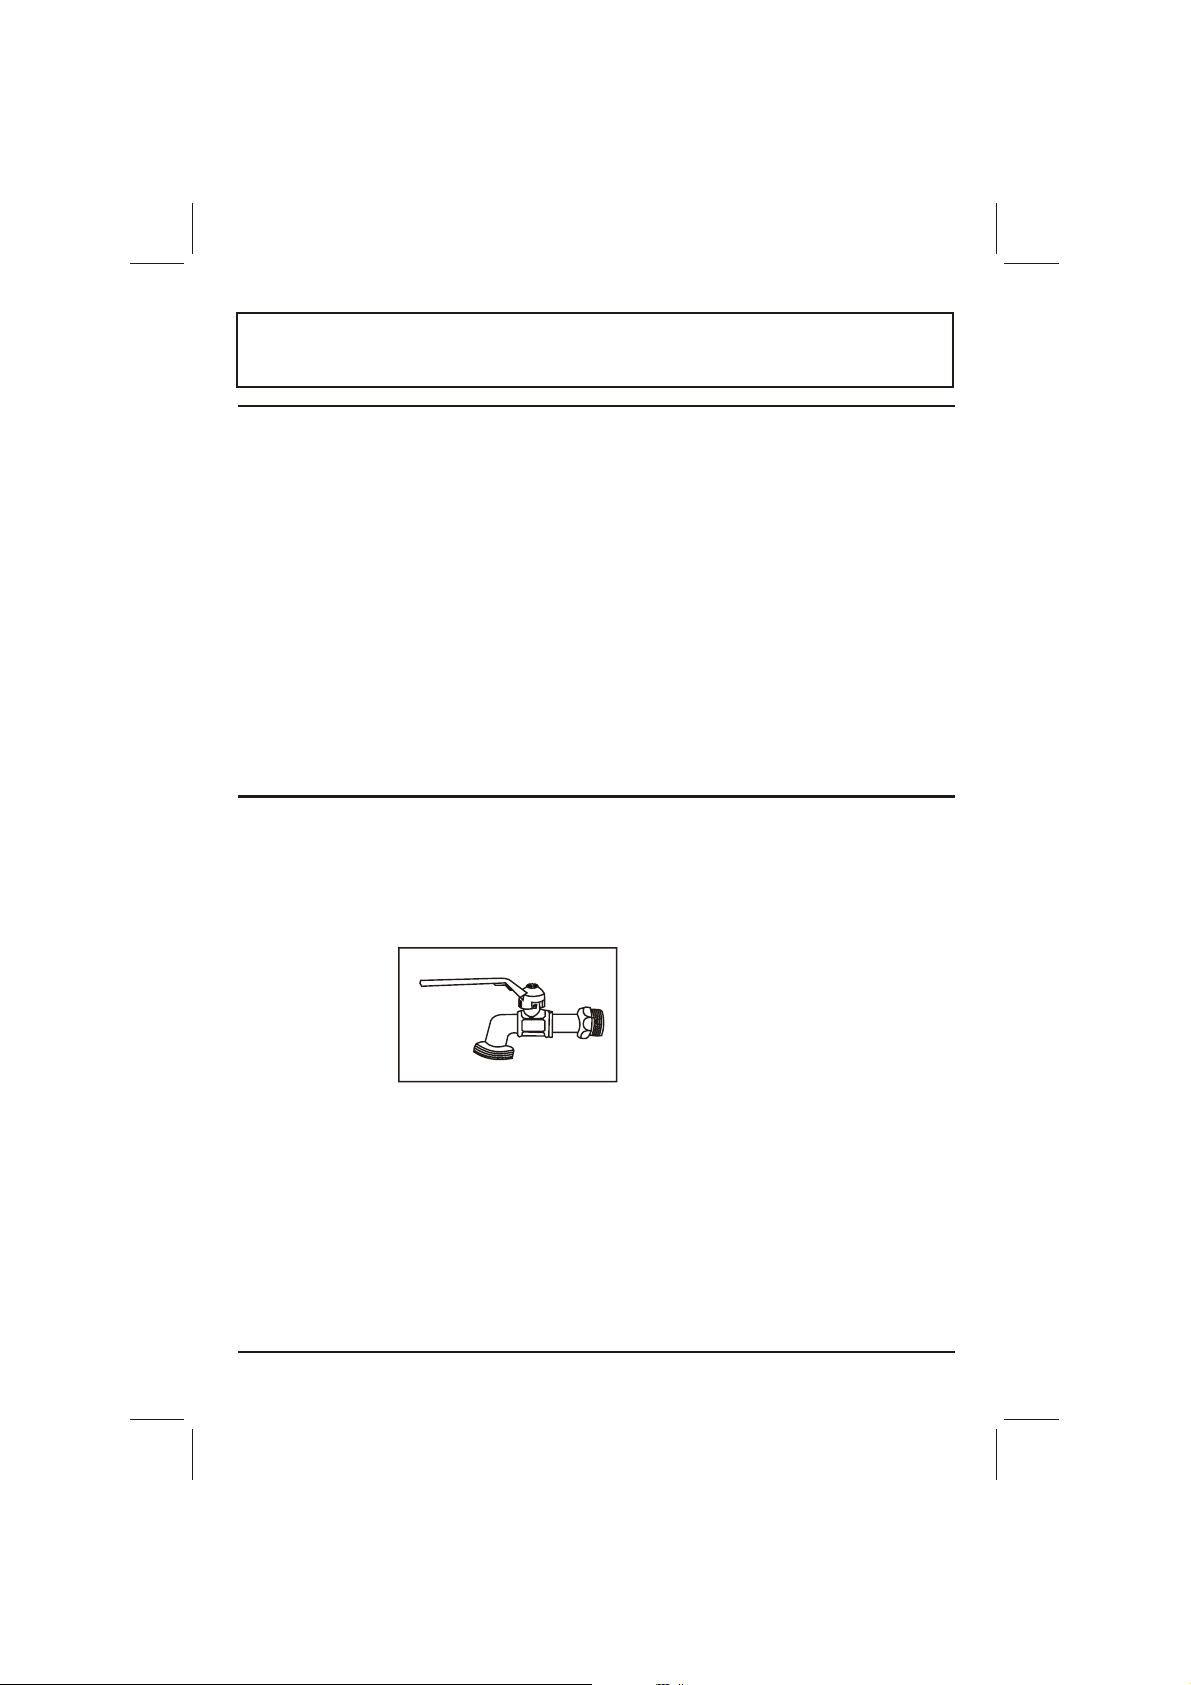
Connect the inlet hose to a cold water tap with a 3/4 gas
threaded opening, and fit the filter and the rubber gasket
supplied with the washing machine. Check that it is tightly
screwed to the tap (Fig. 3).
Fig. 3
If the water piping is new or has not been used for a long time,
before making the connection, let the water run until it is clear
and free from impurities.
This step is necessary to ensure that the incoming water
does not clog and possibly damage the machine.
7
Page 8

Installation
Connection of
the Drain Hose
Fig.4
Connecting
WaterSupply
Connect the drain hose to a drain duct (with internal
diameter of at least 4 cm.) or place it for drainage into
a sink or a tub, ensuring that there are no kinks or
bends. The free end must be at a height of between
80 and 100 cm. Should it be necessary to fix the end
of the hose at a height of less than 80 cm from the
floor, the hose must be fixed in the appropriate hook
on the upper part of the back panel (Fig.4) or use the
supplied support to fix the drain hose.(Fig.5)
Fig.5
Insert stainless steel screen washers into end of each
supply hose and attach that end of supply hose to
your 3/4" water tap spigot.Be sure that you match up
cold water to "C" .Note:Home Centers also have"Y"
connectors and "Couplings" which enable you to
connect the machine to your sinks faucet.
8
Page 9

Close up
G
D
E
F
B
C
A
Page 10

Close up
MAX
80
60
70
40
50
30
70
A Programme selector Knob.
By turning this dial (clockwise only) you can
select from sixteen wash programmes the one
most suited for your washing.
1~7 cotton cycle
8~12 synthetic cycle
13~16 wool cycle
B Programme selector Knob.
With this dial you can set the wash temperature
that you desire.For synthetic and wool, the
thermostat works below 60¡æand 40¡æ
respectively.
When the dial is located at " ", a cold wash is
available
C Power Light
This light indicates whether the electricity is on or
off. The light comes on when button D is pressed
and goes off when button D is not pressed.
D ON/OFF Button
ON/OFF button. Supplies electrical power to the
machine.
E Economic Wash Button.
It reduces water and power consumption when
rinsing if the machine does not have a full load.
(Less than 3kg)
10
Page 11

Close up
1
2
C
A
I No Soak Button
For the synthetics cycle and the wool cycle, push the
button down, the anticrease funtion will be skiped and
automatically enter into the next step;Release the
button, the anti-crease funtion will work again.
G Detergent Dispenser.
The detergent dispenser is divided into 4 compartments marked 1,2,A,C:(See Fig.8)
1 Pre-wash detergent
2 Wash detergent
A Softeners, conditioners, perfumes
C Bleach
11
Fig.8
Page 12

Using instructions:Your machine
offers the best results when...
The weight
is right
Laundry has
been loaded
correctly
In order to get the excellent results that you would expect
from your washing machine, it is important to load the washer
correctly. You should therefore choose the quantity of each
type of fabric that you want to wash. This table will help:
Colour fast fabrics maximum load 5kgs/11lbs
Delicate fabrics maximum load 2kgs/2.5 lbs
Woollens maximum load 1kg/2.2 lbs
Mixed fabrics maximum load 2.5kgs/5.5 lbs
Divide the laundry by fabric and degree of soiling loaded
making the loads as uniform as possible.
Pull the handle out to open the door.
Place the laundry in the machine remembering to arrange
uniformly.
12
Page 13

Using instructions:Your machine
offers the best results when...
The correct
programme has
been chosen
Anti-crease
A perfect wash depends above all on choosing the most
suitable programme. We would therefore advise you to
divide up your washing into separate loads of more or
less the same types of fabric. This will make it easier to
select the best programme.
Hints on choosing the programme are shown in the table
on pages of this manual.
Once you have selected a programme, just turn dial
A clockwise until the chosen programme lines up with
the indicator line on the facia panel.
When your machine is washing synthetic fabrics or
woollens, the wash cycle stops before the last spin cycle,
with the laundry soaked in water in order to prevent the
formation of creases due to spinning. Complete the
wash cycle with a spin cycle or simply drain the water
from the washing machine without spinning.
For the spin cycle, turn the selector knob A clockwise by
one step.
To drain, set the selector knob A on drain programme in
both cases, before turning the knob A remember to
switch OFF the ON/OFF button D.
13
Page 14

1
2
C
A
Using instructions:Your machine
offers the best results when...
The detergent
has been put
in properly
The 4 compartments marked 1, 2, A and C (Fig.9) should
be used as follows:
1 Pre-wash detergent
2 Wash detergent
A Conditioner,starch, scents
C Bleach
Fig.9
Remember that it is important to use the right amount of
soap powder or liquid for the type of laundry you are washing;
the amount of detergent you use depends on a number of
factors:
14
Water hardness; if the water in your area has a
high calcium content, we recommend using a
anti-limestone additive.
degree of dirtiness; increase the amount of
soap powder used in the case of heavily soiled
laundry.
laundry load; the smaller the load the less soap
powder you will need to use.
Page 15

Using instructions:Your machine
offers the best results when...
The following table will guide you:
Laundry
Normally
soiled
Compart.1
prewash
1/2 measuring
cup
Compart.2
wash
1 and 1/2
measuring
cups
Compart.A Compart.C
Softeners
(see note 'A')
Bleach
(see note 'C')
When using concentrated detergents, remember to keep to the
manufacturer's instructions using only the measuring cups
supplied with the packet.
Use more detergent in the case of very hard water ( more than
21.F), but remember to maintain the proportion between the
prewash and wash cycles.
Liquid detergent
The liquid detergents currently available on the market may be
used with the washing machine. Use compartment 2 for very
dense liquid detergents. Follow the manufacturer's
instructions when using liquid detergents sold with the ball
detergent dispenser. Place the ball dispenser in the tub of
washing machine together with the laundry.
The prewash cycle may not be used with liquid detergents.
Note "A"
For soft and fluffy laundry always a softener in the final rinsing
cycle.
Note "C"
Bleach is ideal for removing stains (e.g.tea, coffee, fruit, red
wine ) on resistant fabrics like cotton, hemp and linen provided
the wash care label indicates that the garment may be
bleached.
Place the bleach in compartment C before you start the
machine without exceeding the maximum level. your machine
will load the bleach automatically when necessary .when
necessary.
Never place bleach in the other compartments.
15
Page 16

Using instructions:Your machine
offers the best results when...
The cycle is
started
The wash is
finished
You can now start washing. We would advise you, especially
the first few times, to check that the programme that you
have set is really the one you want and that the fabric
selection is correct.
If you want to start the cycle immediately, press the ON/OFF
button D.
At the end of the chosen cycie, the machine will stop
automatically.
Press the ON/OFF button D to switch off the power (light C
will turn off).
16
Page 17

Maintenance: five simple
precautions for this machine
Your machine is designed to last without complicated
maintenance.
All the same, we would ask you to take care of a few small
matters. If you follow these four simple rules, we are sure that
the washing machine will stay as your faithful friend and
helper for a long, long time.
1. Ensure that your machine was installed according to the
installation manual that comes with this booklet.
2. Avoid at all costs using solvents either to clean the
machine, or to do the wash. when clean the machine, cut
off the power.
3. Clean the detergent dispenser every so often. This is very
simple and should be done with water. Your machine has
an extractable dispenser to make it even easier. Just pull it
upwards and out.
4. If it is long time no use, you'd better cut off the power,
switch off the tap, and open the door to avoid unpleasant
smell.
5. Your washer is equipped with a self-cleaning pump. It is
therefore not necessary to carry out cleaning and
maintenance operations.
Open the cover of the filter, loosen the knob in counter-
clockwise rotation, then take out the filter and clean it with
water, every month.(see Fig.8)
Fig.8
Note: Reassembly the filter carefully after cleaning,
ensuring it is fit perfectly and no water can come out.
17
Page 18

Solution to Problems
Even though your washing machine has been carefully
designed and constructed, something could still go a miss
with your machine. Before rushing to phone one of our
service centres, however, please check that the operations
listed below have been carried out. In many cases you will
save time, money and bother. Our statistics show that many
of the calls received by our service centres could have been
avoided with just a little more attention.
The washing
machine
won't start
The washing
machine won't
fill with water
The machine
fills and drains
continuously
The machine
will not drain
drain the water
There is too
much foam in
the tub
Check that:
the plug is pushed right into the mains socket;
the door is closed tightly:
the "ON/OFF" button has been pressed.
Check that:
the tap is open and properly connected to the inlet
pipe;
the inlet pipe is not bent.
Check that:
the drain pipe is placed at least 80 cm/32 inches
above ground level.
Check that:
the drain pipe is not blocked;
the drain pipe is not connected at a height more than
1 metre/40 inches above ground level.
Check that:
the detergent being used is meant for automatic
machines and not for washing by hand;
that the amount used is that shown in this manual
and not more.
18
Page 19

Solution to Problems
The machine
vibrates too
much when
spinning
The machine
stops operating
before finishing
Check that:
the transit bolts have been removed (see
installation manual);
the machine is level;
the washing load is according to the instructions
given in thisbooklet.
Check that:
there is a sudden power failure or water stop.
the machine is in the normal state of rinse.
19
Page 20

Guide for selecting programme
Synthetic
Drain water
16
Washing machine stops,
clothes are soaking in water
Rinses
Softeners
15
14
cycle
Wool
Woollens
13
Spin cycle
12
clothes are soaking in water
Washing machine stops,
cycle
Rinses
Softeners
10
11
colours
Synthetic fabrics with fast
9
fabrics with fast colours
Heavily soiled synthetic
8
Spin cycle
7
Rinses
Softeners
5
6
F
abrics with d
elicate colours
4
cotton
cycle
fabrics with fast colours
Mixed cotton+synthetic
Normal white and fast colours
3
3
White and fast colours
2
and fast colours
Heavily soiled white laundry
1
Heavily soiled white laundry
1
dirtiness
Type of fabric & degree of
knob
Program
in
compart 1
in
compart 2
in
compart A
Position
Detergent
Detergent
Softeners
Draining (the drum does not rotate)
the machine will continue to work
Bleach
in
compart C
Wash cycle at 40 C-rinses-anti-crease soak
softener-anti-crease soak
softener-rinse-anti-crease soak
Rinses with automatic introduction of
Rinses with automatic introduction of
manually turn timer knob to the symbol" ",
Push down the no soak button or
softener-anti-crease soak
the machine will continue to work
manually turn timer knob to the symbol" ",
Push down the no soak button or
Draining-spin
softener-anti-crease soak
Rinses with automatic introduction of
Rinses with automatic introduction of
Wash cycle at 40 C-rinses-anti-crease
(Fabric is soaked in water)
softener-spin
Draining and spin
Rinses with automatic introduction of
Wash cycle at 60 C-rinses-anti-crease
softener-spin
Rinses with automatic introduction of
Wash cycle at 40 C-rinses-spin
Wash cycle at 50 C-rinses-spin
Wash cycle at 60 C-rinses-spin
Wash cycle at 60 C-rinses-spin
rinses-spin
rinses-spin
Prewash at 40 C-wash cycle 60 C-
Prewash at 40 C-wash cycle 90 C-
a cold wash is available)
(Press cold-wash button, then
Description of wash cycle
21
Page 21

Warning:
1. If the supply card is damaged, it must be replaced by a special
card or assembly available from the manufacturer or it is service
agent.
2. It a stationray appliance is provided with a supply card and a plug,
the instructions shall state that the appliance must be positioned
so that the plug is accessible.
Note: this requirement dose not apply if the appliance incorporates
other means for disconnection from the supply.
3. For washing machines with ventilation openings in the base, that a
carpet must not obstruct the openings.
4. The instructions shall state that the appliance is to be connected
to the water mains using new hose-sets and that old hose-sets
should not be reused.
Note: this instructions is not required if the hoses are permanentiy
attached to the appliance.
22
Page 22

WIRING CIRCUIT (WNA500T WNA600T)
I1=ON/OFF
L Line
N Neutrol
SL Line LED
SO Door lock
MR Thermol lock
EVF Cold water electrovolve
P1 1- level pressure switch
I2=ECONOMIC WASH
I3=NO SOAK
P2 2- level pressure switch
MT Timer motor
RR Heating element
PS Drain pump
TH40 40 C thermostat
 Loading...