

Page 1

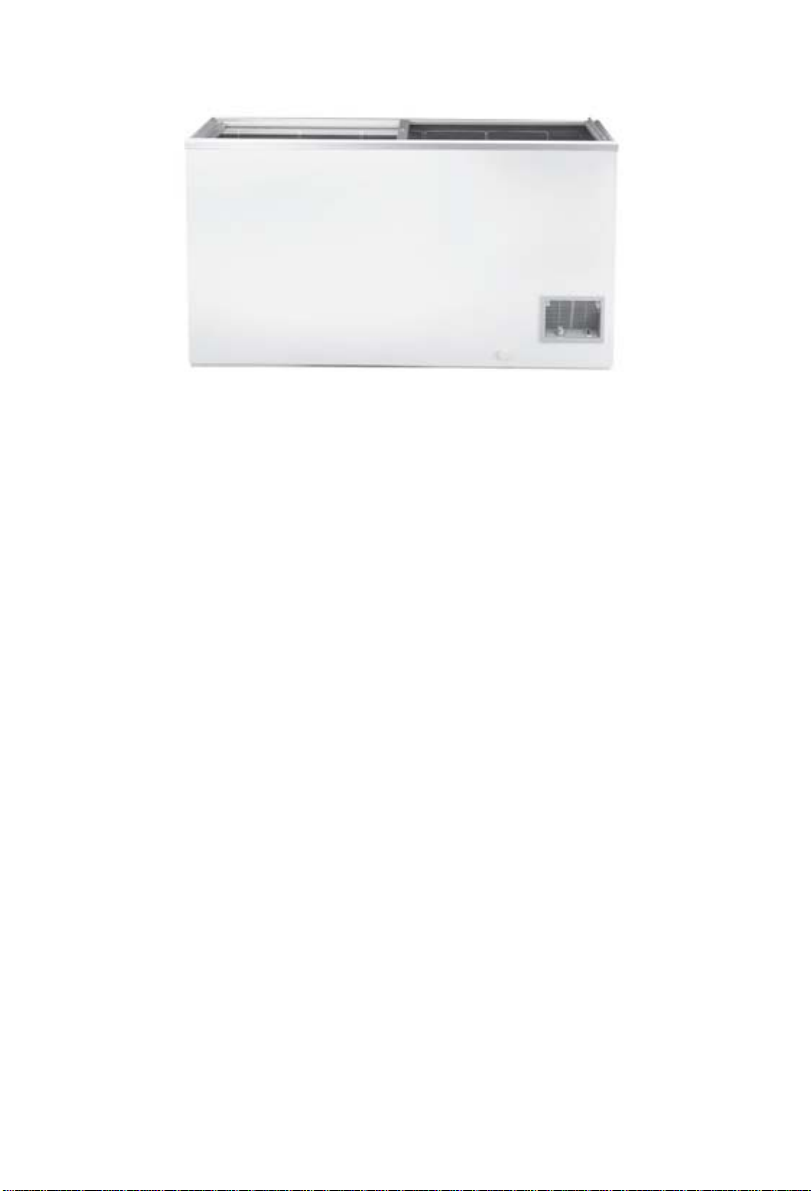
CHEST FREEZER
USER MANUAL
Models: SD-309G
Nationwide
«
We Know Cool
«
We Know Cool
Sales and Service Network
12 Month Warranty
IMPORTANT
Please read this Owner’s Manual carefully before using
your freezer. Keep in a safe place for future reference.
Thank you for choosing
Page 2
Yes
Yes
Yes
Yes
Yes
Yes
(1)
thermostat
(2)Green lamp Yes
(3)Food Basket Yes
(4)Drainage Plug Yes
(5)Ventilation grill for compressor Yes
(6)Lock
(6)Lock Yes
Yes
Page 3
Page 4

DANGER
AVOID THE RISK OF CHILD ENTRAPMENT.
BEFORE THROWING AWAY AN OLD REFRIGERATOR OR FREEZER, TAKE
OFF THE DOORS/LIDS AND REMOVE THE SHELVES SO THAT CHILDREN
CANNOT GET TRAPPED INSIDE.
Important Safeguards
Read all instructions before using this appliance.
When using this appliance, always exercise basic safety precautions, including
the following:
1) Use this appliance only for its intended purpose as described in this guide.
2) Remove all packaging before commencing freezer operation.
3) This freezer must be installed properly in accordance with the installation
instructions before it is plugged in and used. See grounding instructions in
the installation section.
4) This freezer is designed for freestanding installation only and it should not be
recessed or built in.
5) At least 7.5cm air space on top, sides and back of the freezer should be
given. This allows air to circulate freely and helps to prevent condensation
on the cabinet.
6) It is recommended that the freezer is cleaned before use as per the ‘Care
and Cleaning Instructions’ in this manual.
7) Never unplug your freezer by pulling on the power cord. Always grip the plug
firmly and pull it straight from the outlet.
8) Replace or repair immediately all electric service cords which may have
become frayed or otherwise damaged. Do not use cord that shows cracks or
abrasion damage along its length or at either the plug or connector end.
9) If your old freezer is still around the house but not in use, be sure to remove
the doors to reduce the possibility of danger to children.
10) Unplug your freezer before cleaning or before making any repairs. NOTE
We strongly recommend that any servicing or repairs be undertaken by a
suitably qualified technician.
11) Do not refreeze any foods which have been thawed.
:
Page 5

12) Do not use any electrical devices or sharp instruments to defrost the freezer.
13) Food should only be placed inside the freezer 8 hours after the freezer has
been turned on to avoid wasting power and over working the compressor.
14) Ensure that hot food is allowed to cool completely before freezing.
15) Do not overfill the freezer. Where possible, large blocks of meat should be
cut and wrapped in smaller pieces. Space should be left between packages
of food to enable air to circulate at all times.
16) Never place combustible, explosive or volatile liquid, gas or other materials in
the freezer.
17) Do not install the freezer in the same vicinity of any combustible, explosive or
volatile liquids/gases.
18) Do not leave beverages such as beer, soft drinks or other liquids packaged
in glass containers in the freezer. Such liquids will expand upon freezing and
can cause the glass to break.
19) Do not put water directly in to the tank of the freezer.
Page 6
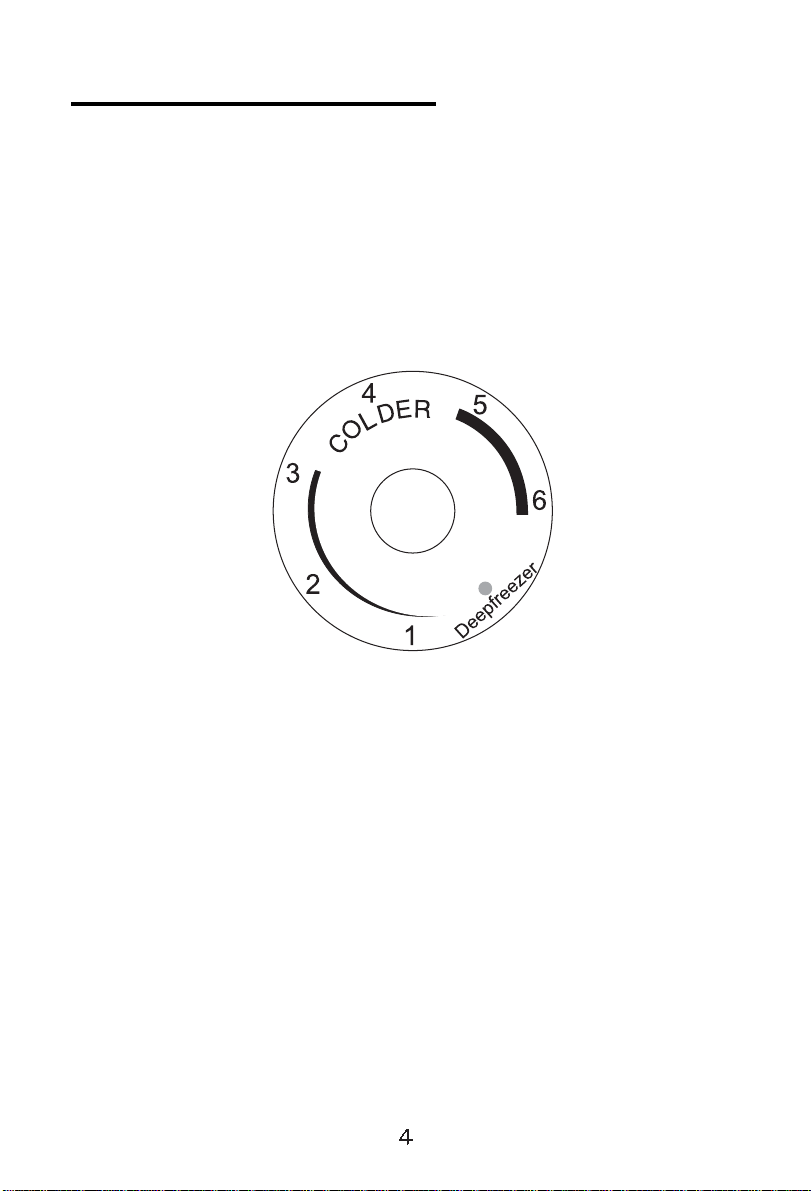
Electric Control Panel
The main functions of the electric control panel are:
1) The thermostat is numbered “1”-“6”. This refers to the temperature on
the inside of the freezer. The temperature is lowered by turning the
dial in a clockwise direction.
2) If position Deepfreezer is selected,temperature will be holding in
prestissimo .
Page 7

Freezer Installation
1) The freezer is designed for free-standing installation only.
2) The freezer should not be recessed or built in.
3) Install the freezer on a base strong enough to support it when fully loaded.
Ensure the freezer is on a stable surface to minimise noise and vibration.
4) When moving the freezer, never tilt at an angle more than 45
damage the compressor and freezer system. If the freezer is tilted over 45
has been stored on its side, allow the freezer to stand upright for at least 24
hours prior to plugging it back in. This will allow the refrigerant to settle.
5) Install the freezer in a well-ventilated area away from any heat source or direct
sunlight. Air must be allowed to circulate freely around the freezer. Allow at
least 3inches (7.5cm) of clearance space for the top, back and sides.
6) Install the freezer in a dry place to prevent rust from forming on the compartment
body and to avoid the risk of damaging the electric insulation.
Electrical Connection and Precautions
1) IMPORTANT – For personal safety, this appliance must be properly
earthed.
2) The voltage range for this appliance is 187v – 242v. In the event that your
regional power supplier cannot meet this requirement, please use a safe and reliable
automatic voltage regulator with a minimum output of 500W to avoid damaging the
compressor.
earthed.
o
as this could
o
, or
3) A 13 Amp, 3 pin plug and 5 Amp fuse only must be used for this freezer to avoid
serious damage.
It is safest to consult a qualified electrician at all times
4) In the event of an electrical short circuit, grounding reduces the risk of electric
shock by providing an escape wire for the electrical current. This appliance is
fitted with a cord having a grounding wire with a grounding plug. This plug must
be plugged in to an outlet that has been properly installed and grounded.
5) Consult a qualified electrician or service centre if the grounding instructions are
not completely understood, or if any doubt exists as to whether the appliance is
properly grounded.
Page 8

Energy Saving Tips
Do not place your freezer next to a heating vent, cooker, in direct sunlight or
•
in the vicinity of any other heat-producing source.
Keep the door closed as much as possible, especially in hot and humid
•
weather
Defrost the freezer every few months or when the frost becomes 6mm (¼”)
•
thick or more.
Cover foods securely to reduce moisture build up inside the freezer.
•
Operating Your Freezer
Voltage Supply
To start your freezer it must be connected to a 220 volt, 50Hz A.C. power supply.
Failure to do so may invalidate the guarantee.
Temperature/Cold Control
The temperature control dial has settings from “1” to “6”, where “6”is the coldest
temperature setting. Turn the control knob to higher numbers for colder
temperatures.
During extremely hot weather and frequent lid openings, it is advisable to select a
higher setting to ensure that food remains frozen.
Initially, set the temperature control knob to the “3” setting by turning the knob in a
clockwise direction. After 30 minutes, e myouColo niducan obvious decreawis(in tha )Tj0 -1.1527 TD0.0003 Tc0.0002 Twiranri foe temperatury oe the freezer. Leost the freezey tounrs foa fureathe12ly uberbes feot plrnint your foop insi, tiaowrninr
Page 9

The freezer is equipped with a removable food basket for storing items at a higher
level. Where food is dripping, place it into a tray before you start freezing, to prevent
contaminating other food already in the freezer.
Lock and Key
Those freezers which have locks , allow you to secure the freezer contents from
theft or to simply keep children out of the freezer.
To lock the lid, close the lid securely, insert the key into the lock and turn clockwise
until the lid is latched and locked.
To unlock, turn the key in the opposite direction and remove key.
Page 10

Care and Cleaning
IMPORTANT
Before Cleaning always switch the freezer off and remove the plug from
the power supply.
Part How to Clean
Exterior
Interior
Lid Liner / Gasket
/ Food Basket
Wash using warm water and a mild detergent e.g. soap or
•
dishwashing liquid.
Rinse thoroughly, wipe clean and dry.
•
DO NOT USE HARSH CLEANERS OR ABRASIVES.
•
Waxing is recommended if humidity is high to prolong the
•
life of your freezer. Use a good quality car wax or
appliance wax. DO NOT USE WAX ON PLASTIC
PARTS.
DO NOT USE BLEACH OR PETROL BASED
•
PRODUCTS TO CLEAN YOUR FREEZER.
DO NOT PLACE HOT OR HEAVY OBJECTS ON THE
•
SURFACE OF THE FREEZER TO AVOID DAMAGING
THE SURFACE OR DEFORMING THE GASKET.
Wash with a warm water solution containing either a mild
•
detergent or baking soda (2 tablespoons/30g baking soda
to 1 litre warm water).
Wipe clean and dry.
•
If fridge and freezer are left empty and disconnected from
•
mains for more than a few days then help prevent odours
by leaving an open box of baking soda in the freezer,
changing it every 3 months.
DO NOT WASH ANY PLASTIC PARTS FROM THE
•
FREEZER IN A DISHWASHER.
Wash using only warm water and a mild detergent.
•
Rinse and dry.
•
Liquids such as oil and juice stick easily to the gasket – to
•
clean, wipe with lukewarm water to extend the life of the
plastic.
Page 11

Defrosting
If the frost on the freezer walls reaches a thickness of 6mm or greater, the freezer
requires defrosting. It should not be necessary to defrost the freezer more than
once every few months and the defrosting process is best carried out when the stock
of food is at a low level.
Defrosting
Before defrosting, turn the thermostat to the lowest temperature setting “6” for about
four hours. This will enable you to remove any remaining food from the freezer at its
lowest temperature. Food removed from the freezer should then be wrapped in
several layers of newspaper and placed in a cold refrigerator. Remember that any
rise in temperature will shorten the life of the frozen food considerably.
food should not be re-frozen.
Once all food has been removed from the freezer, disconnect the power by
removing the plug from the power source/socket.
To help remove the frost, use the plastic defrosting scraper provided. DO NOT USE
SHARP OR METALLIC INSTRUMENTS TO REMOVE THE ICE. Defrosting usually
takes a few hours. To defrost faster, keep the door open and place a bowl of warm
water inside the freezer.
Draining the Freezer
Turn the inner plug in the bottom of the freezer compartment. Place a tray or other
water receptacle beneath the outer drain dial/plug (front lower left of the freezer).
Thawed
Pull the drain dial out and rotate it until the triangle points downwards. When done,
return the triangle to the up position, push the dial back in, and replace the plug
inside the freezer compartment.
Cleaning and Temperature Setting
Wipe the interior of the freezer and drain hole with a cloth or clean as described in
the ‘Care and Cleaning’ section of this manual. Reinsert drain plug and plug the
power cord back into the power source/socket.
Turn the temperature control to the desired setting.
Page 12

Useful Hints
If your freezer is to be out of service for any length of time, ensure that the
•
interior is carefully cleaned and dried as per the ‘Care and Cleaning’ instructions
given in the manual. Leave the lid open and disconnect the plug from the power
supply.
Hot Foods should be allowed to cool before being placed inside the freezer.
•
Don’t try to freeze too much fresh produce at any one time.
•
Carry out regular cleaning of the exterior as per the ‘Care and Cleaning’
•
instructions given in the manual. This is important if the freezer is subjected to
high humidity and heavy condensation.
Safety Notes
When disposing of an old freezer, ALWAYS remove the lid as a safeguard
•
against small children getting trapped inside.
DO NOT store flammable or explosive substances in the freezer cabinet.
•
DO NOT store any fizzy drinks in the freezer.
•
DO NOT store any liquids contained in glass in the freezer.
•
Troubleshooting
The table below provides some guidance to solving any apparent minor operating
problems that might occur occasionally.
It is important to recognize that the following three situations are a part of the normal
operation and use of the freezer:
1) There is a sound of liquid flowing in the system when the freezer is switched on.
THIS IS NORMAL AND IS THE SOUND OF THE REFRIGERANT FLOWING
THROUGH THE SYSTEM.
2) The exterior of the freezer is warm and the compressor is extremely hot and
burns on touching. THIS IS NORMAL.
3) There is condensation on the surface. THIS IS ESPECIALLY COMMON IN
CLIMATES WITH HIGH HUMIDITY AND IS NOT A DEFECT.
CLEAN THE CONDENSATION WITH A DRY CLOTH.
Page 13

Page 14

Guide to Home Freezing
Recommended maximum duration of storage for various foods. For best results it is recommended
that Freezer Bags are used for storing foods.
Meat and Poultry
Meat can be frozen in various ways. Do not Freeze
Large packets or pieces, as this will ruin meat quality.
Beef raw, joint 6-8 months Orange Squeezed 12 months
Beef roasted 10-12 months Grapefruit Squeezed 12 months
Beef Steak raw, joint, steak 10-12 months Apricot Washed, sliced 12 months
Beef Fillet raw, joint, steak 6 months Grape Bunch 12 months
Lamb raw 6-12 months Apple peeled, pips out
Chicken raw, cleaned 6 months cut in half, diced 12 months
Pork cutlets raw 3 months Rhubarb 12 months
Veal cutlets raw 10-12 months Plum stone removed and
Venison cutlets raw 12 months cut into halves 12 months
Fish and Seafood Vegetables, Mushrooms and Spices
Fish can be frozen in various ways Most vegetables can be frozen
Trout raw, cleaned Aubergine 12 months
Whole or fillet 4-6 months Cauliflower 10-12mths
Smoked 1 month Broccoli 10-12mths
Lobster Beans 12 months
& Prawns boiled 3 months Dill 10-12mths Salmon
raw, cleaned Kale 12 months
Whole or fillet 3 months Corncob 12 months
Smoked 3 months Peppers 12 months
Cod raw, cleaned Horseradish 12 months
Whole or fillet 8-12 months Parsley 12 months
Barracuda, Beetroot 12 months
Mackerel & Celery 12 months
other fish raw, cleaned 3 months Spinach 12 months
Smoked 1 month Peas 12 months
Mushroom 10-12mths
Ready Prepared Food
It is both practical and economical to freeze
Remember that the duration of storage depends on the fat
Contained in the food
Bouillon 6 months Bread can be frozen both whole and sliced.
Fish, boiled 10-12 months Remember that the duration of storage depends on Fish
dish or soup 4-5 months the fat contained in the bread and pastry.
Vegetable dish 3-6 months
Hamburger 3-6 months Rye bread 6 months
Stew 6 months Wheat bread 3-6 months
Pizza 3-4 months Pastry 3 months
Biscuits 3 months
Fruits and berries
Bread and Pastry
Food which should not be frozen
Avocado Marmalade
Egg Tomatoes
Lettuce Banana
Mango Papaya
Omelette
Page 15

Page 16

Page 17

Warranty Information
The 12-MONTH WARRANTY gives you piece of mind and
assured satisfaction from the moment of purchase. Under normal use, the
12-MONTH WARRANTY covers free parts replacement under warranty and
free repairs under warranty. Damage caused by misuse is not covered by the
warranty.
Extensive NATIONWIDE SALES AND SERVICE
NETWORK offers you fast and reliable service and replacement parts which
will normally be available for many years.
HPZ
Sales and Service Depots are available in:
Lagos (Isolo Sales Depot,) Ibadan, Akure, Oshogbo, Ilorin, Benin, Warri, Port
Harcourt, Aba, Onitsha, Enugu, Abuja, Minna, Kaduna, Jos, Zaria, Kano,
Maiduguri, Gombe, Yola and Sokoto.
Contact
as part of a continuous improvement programme. “ ” is a
registered trademark.
HPZ
Ltd or your local distributor for information.
reserves the right to amend specifications without notice
HPZ
45/47, Town Planning Way, llupeju Industrial Estate,
45/47 Town Planning Way, Ilupeju Industrial Estate,
’s Copy
Haier THERMOCOOL Sales Office
P.M.B 21132,Ikeja,Lagos, Nigeria.
Tel: 01-4973474, 01-5554768, 01-5553288-90,
P.M.B. 21132 Ikeja
Lagos, Nigeria
Fax: 01-5553289, 01-4962076,
Tel: +234 (0) 1 497 3460-8
E-mail: sales@hpz.com.ng
Fax: +234 (0) 1 496 2076
WWW.htcool.com
Email: sales@hpz.com.ng
Limited
Limited
Page 18

 Loading...