How it Works
Log In / Sign Up
Buy Points
How it Works
FAQ
Contact Us
Questions and Suggestions
Users
Haier
Loading...
R
RF-8888-174
RF-8888-193
RF-8888-221
RF-8888-39
RFF5050
RFF5050FF
Rg-51a
RGBTV-21TA
RGBTV-25F99
RMGS28PNPRO
ROHS-L20AV6-A0
Room Air Conditioner
Room Air Conditioners
RR140-1
RR140-2
RRCS25
2
RRCS25 Series
RRCS25TD
RRDE350AW
RRTG
2
RRTG18PAAW
RRTG18PAB
RRTG18PABB
2
RRTG18PABB - 18.2 Cu Ft Frost Free Refrigerator
RRTG18PABW
RRTG18 Series
RRTG21PABB
RRTS18 Series
RRTW
2
RRTW18 Series
RRTW18VAB
RRTW18VABW
RRTW Series
RS35
RT-1424
RT-146A
RTC1700EBSS
RTC1700SS
RTO1400SS
RTR1200
RTXS G382TM/1-07
RTXS G584TMH-07
RTXS G584TMHR-07
RW-DT800F3
RW-S1000F3
RW-S800F3
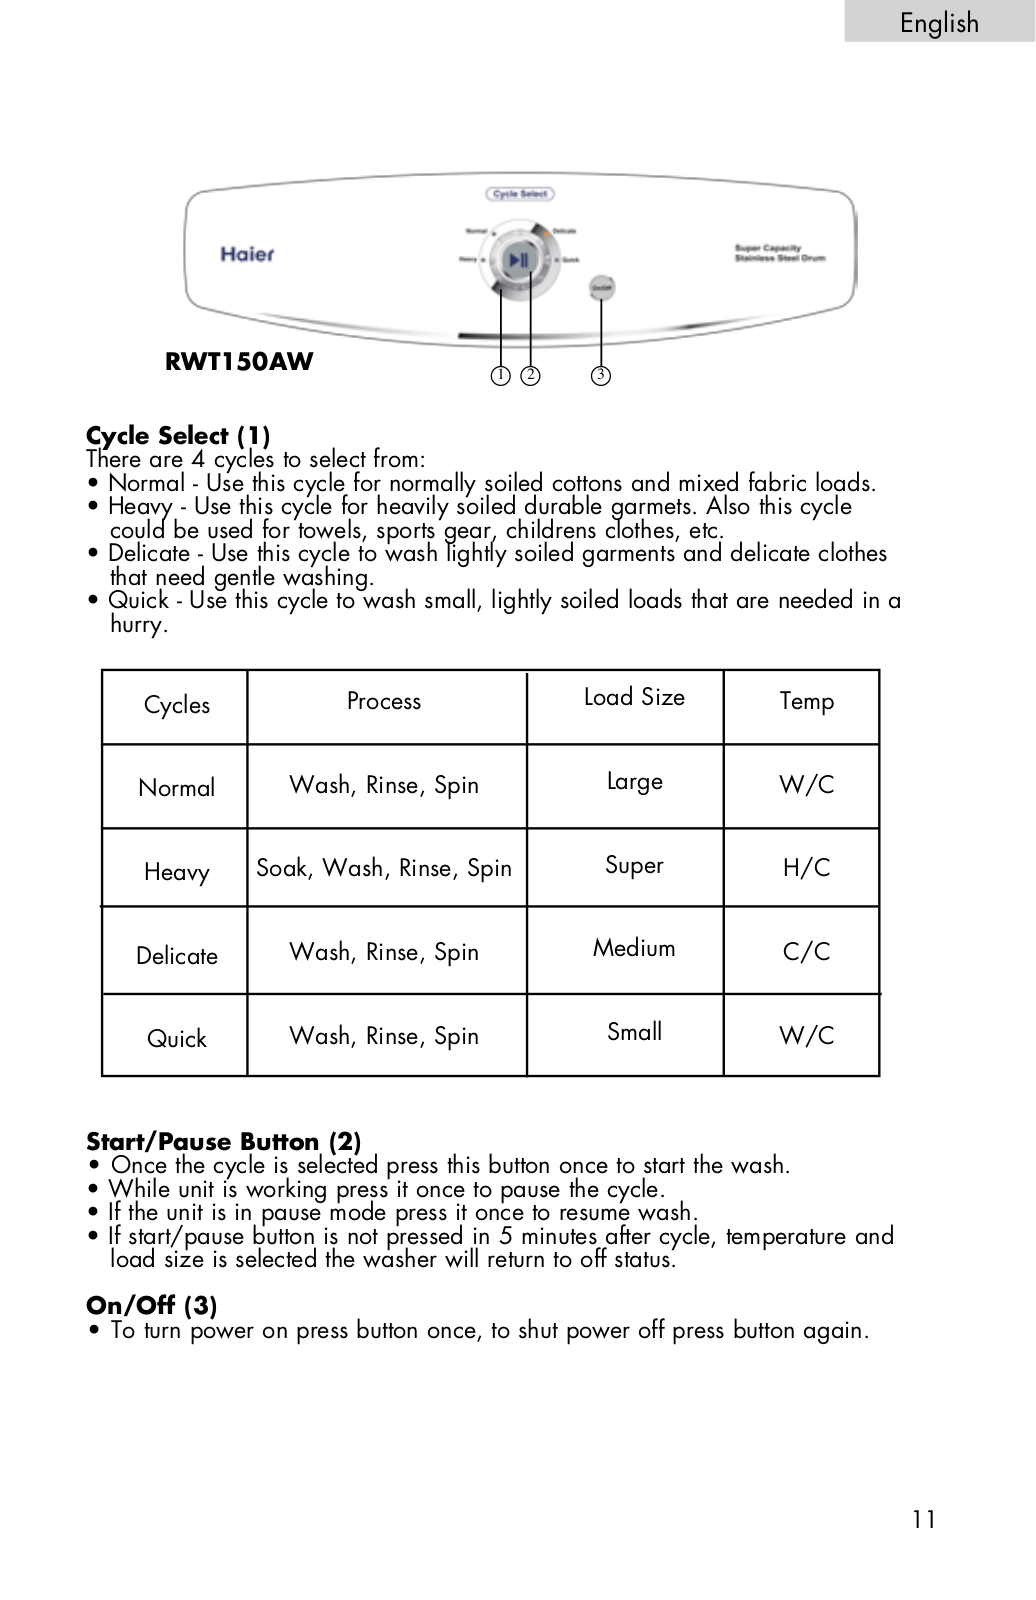
RWT150AW
2
RWT150AW - Agitator Encore Washer
RWT200AW
RWT300AW
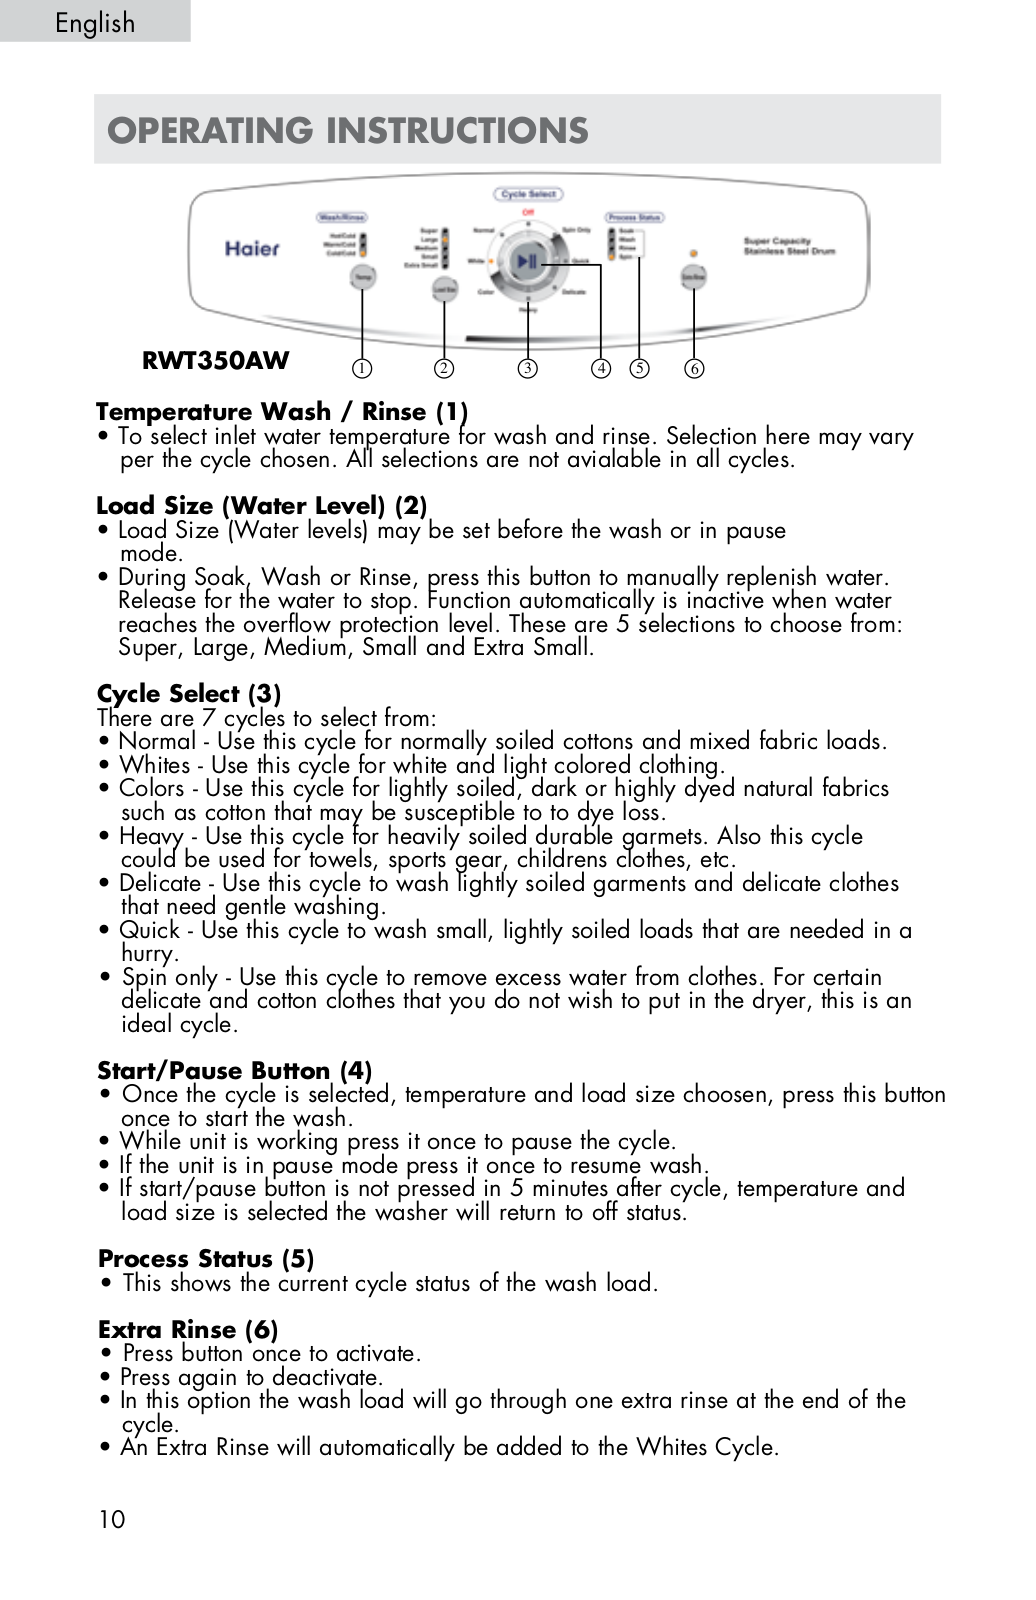
RWT350AW
2
RWT350AW - Agitator Encore Washer
RWT360BW
4
RWT400AW
S
S102 R1A 2
S110EHF
S110EHL
S110ENF
S110ENL
S125EHF
S125EHL
S125ENF
S125ENL
S150EHF
S150EHL
S150ENF
S150ENL
S314G
S315XF13 V0
S378G
S424
S428
S701 R2A 1
S75EHF
S75EHL
S75ENF
S75ENL
S802 R1A 2
S85EHF
S85EHL
S85ENF
S85ENL
SA21XT
SAP-K18AM
SAP-KRV12AV
SAP-KRV18AV
SAP-KRV22AV
SAP-KRV9AV
SB-BT21
SBC20
SBEV40-3D
SBEV40-SLIM
SBFS21EDAW
SBM600T
SBX-10
SC-180
SC-210GA
SC-230
2
SC-240GA
S HLP140E
Loading...
Loading...
Nothing found
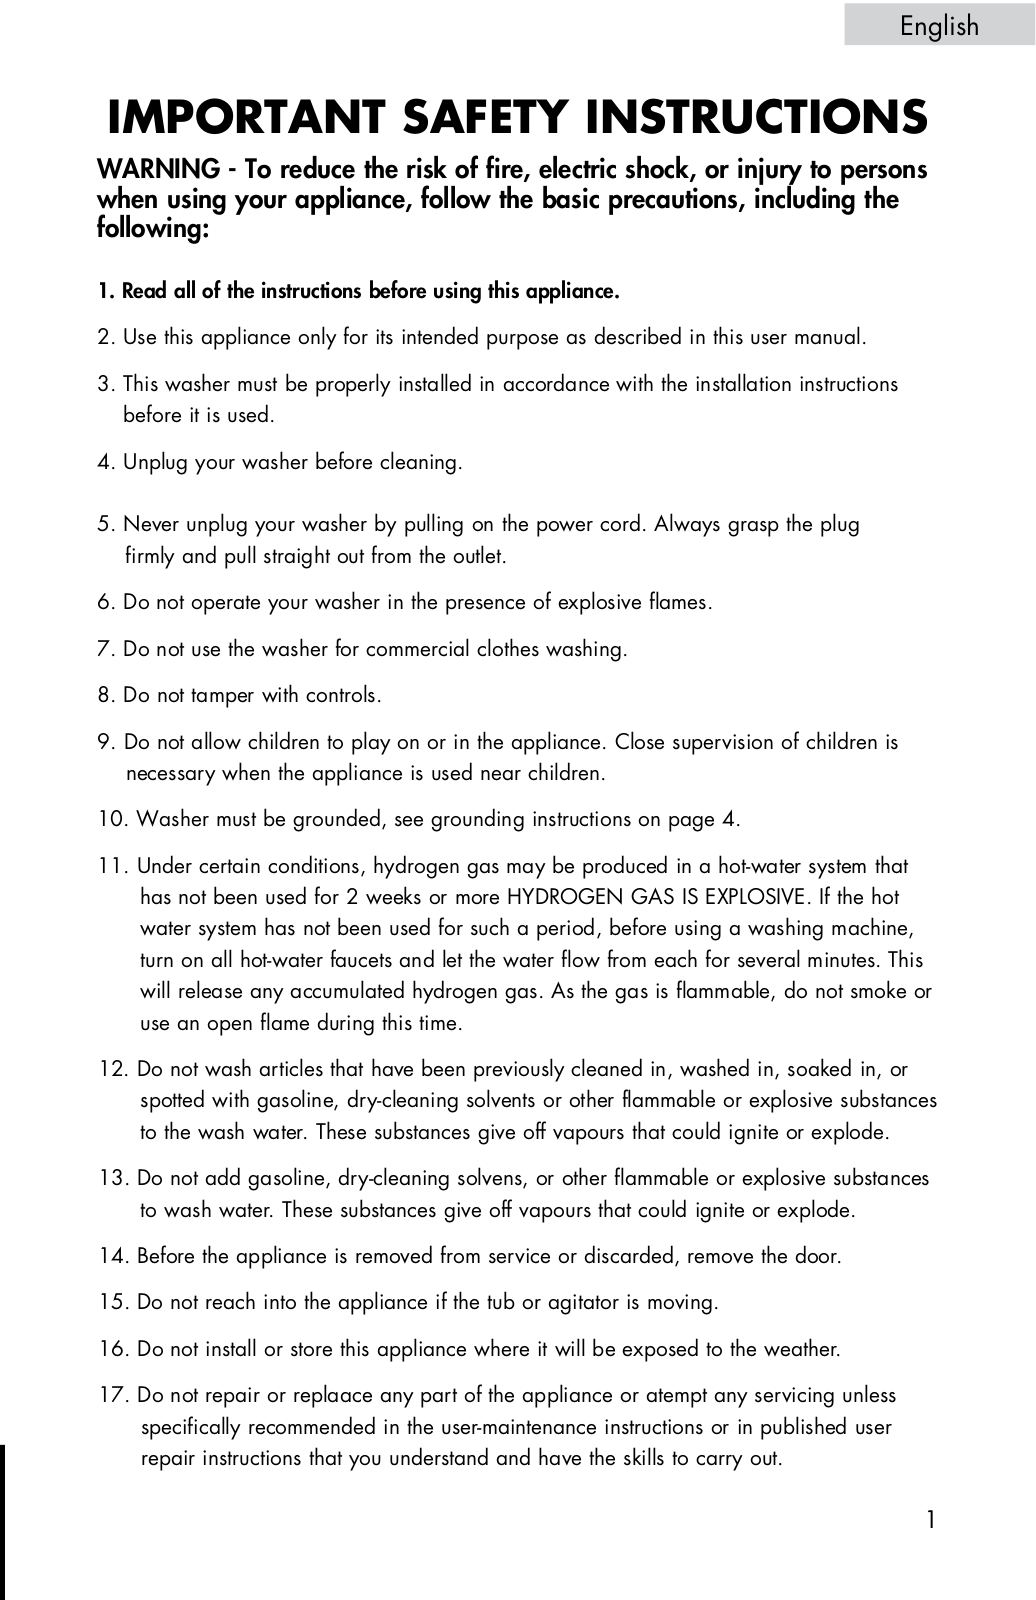
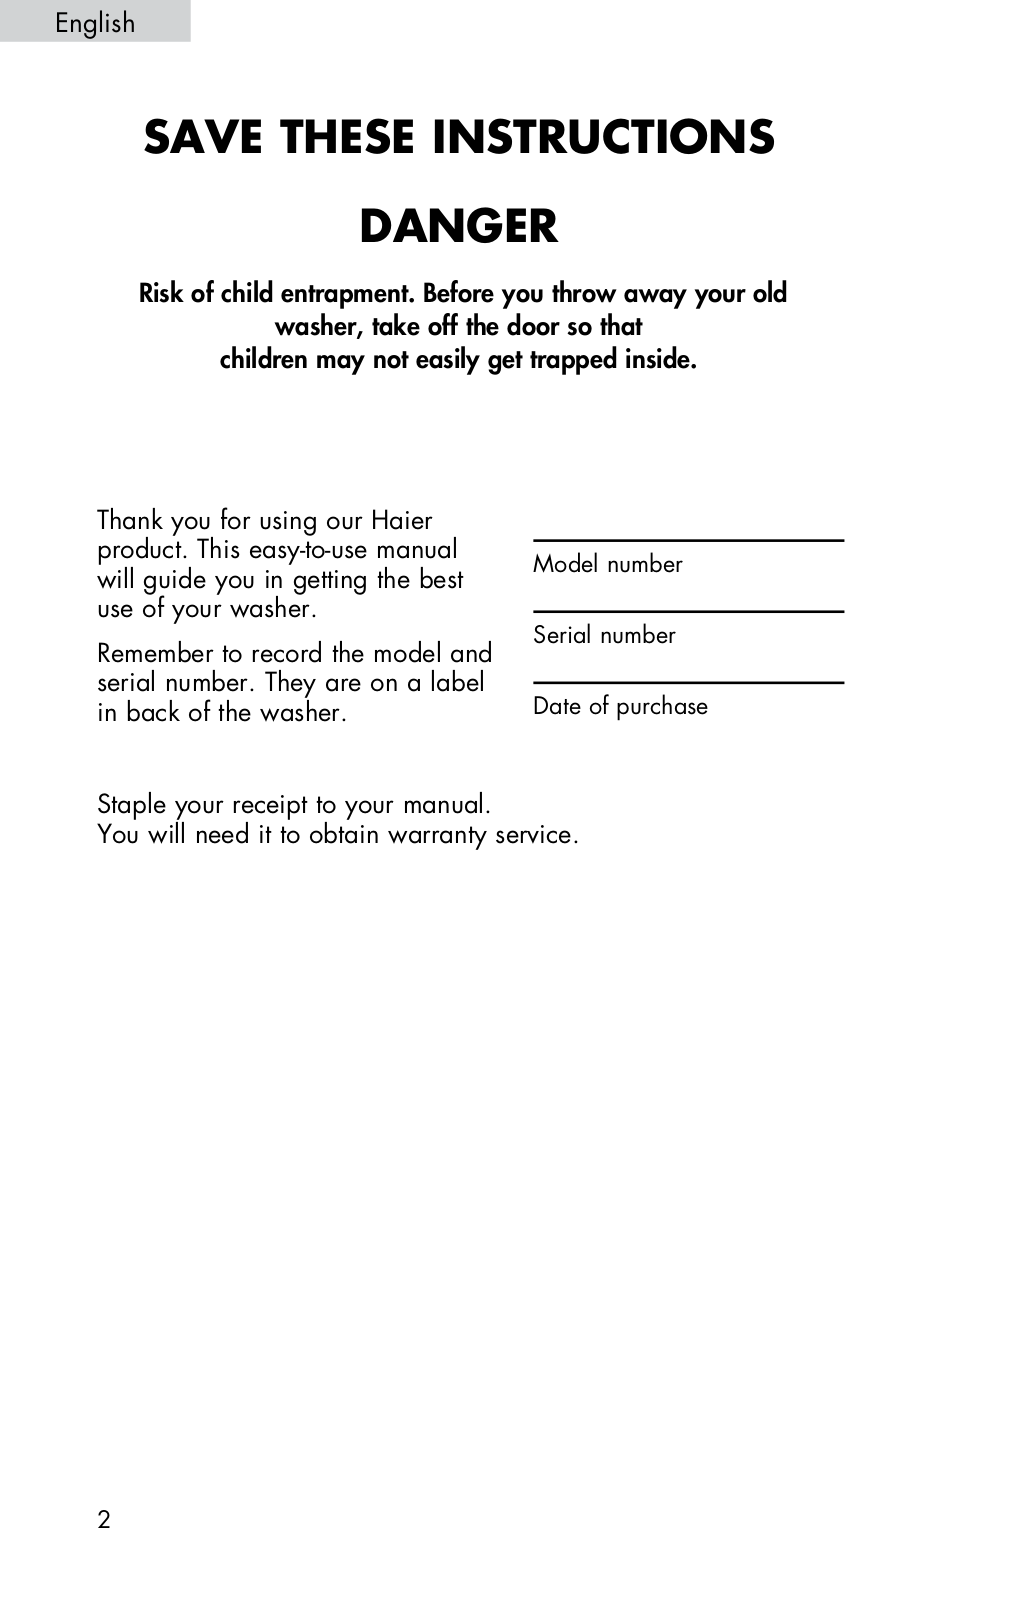
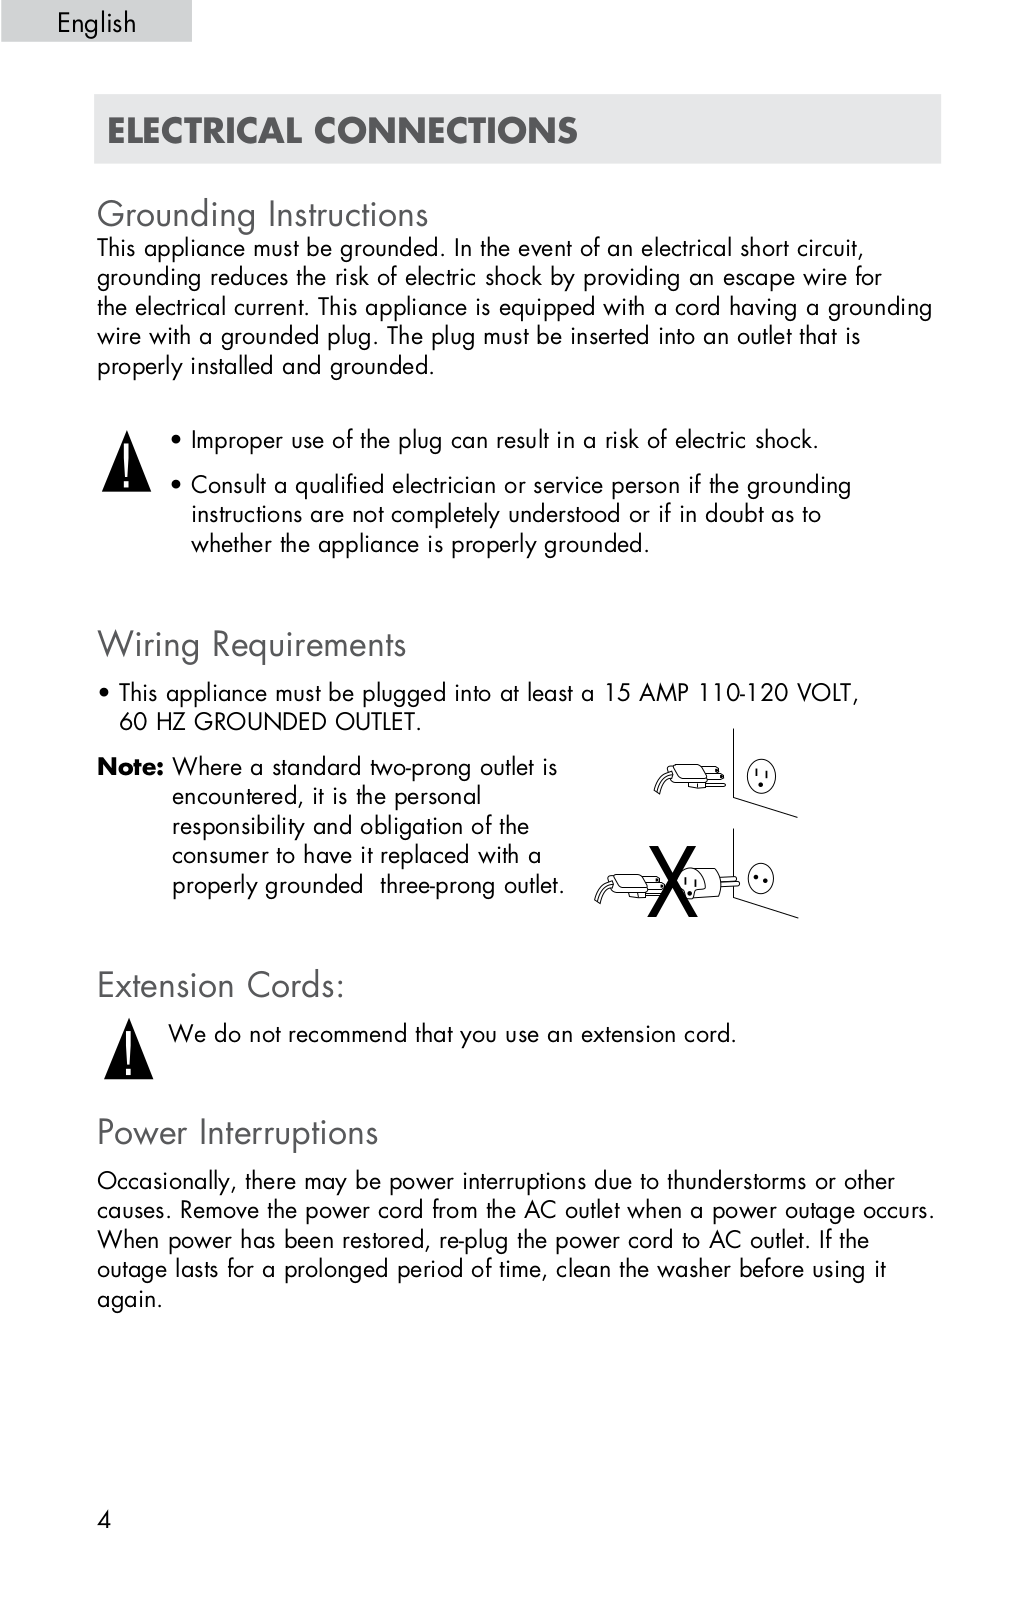
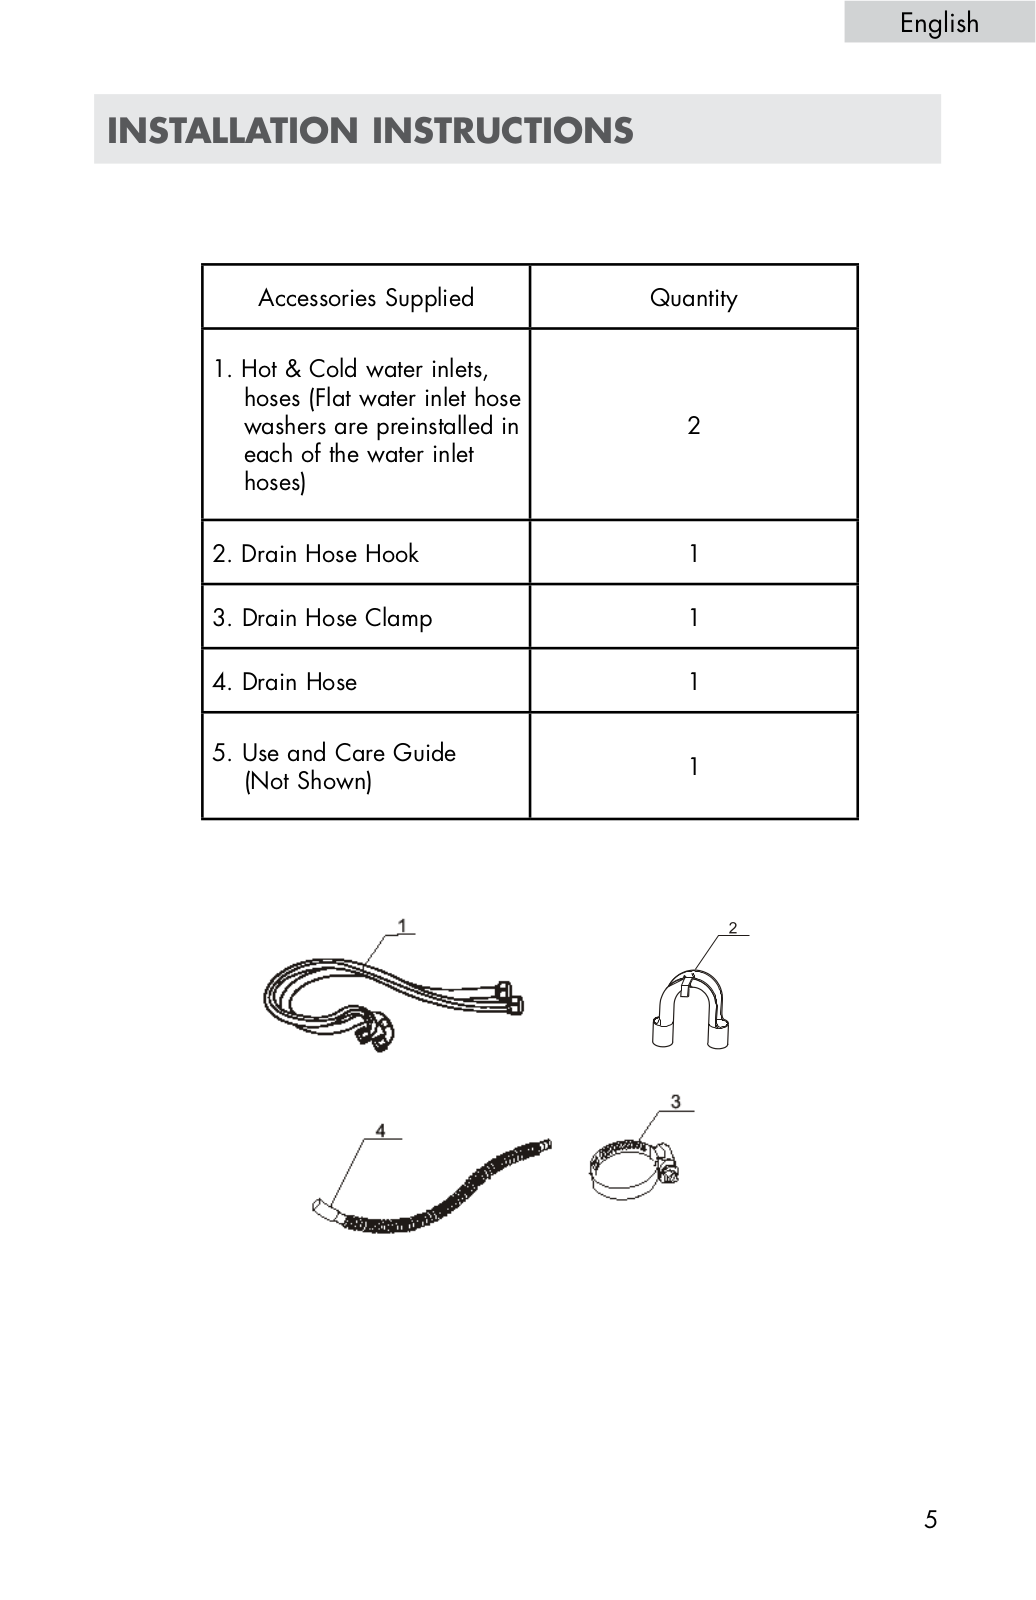
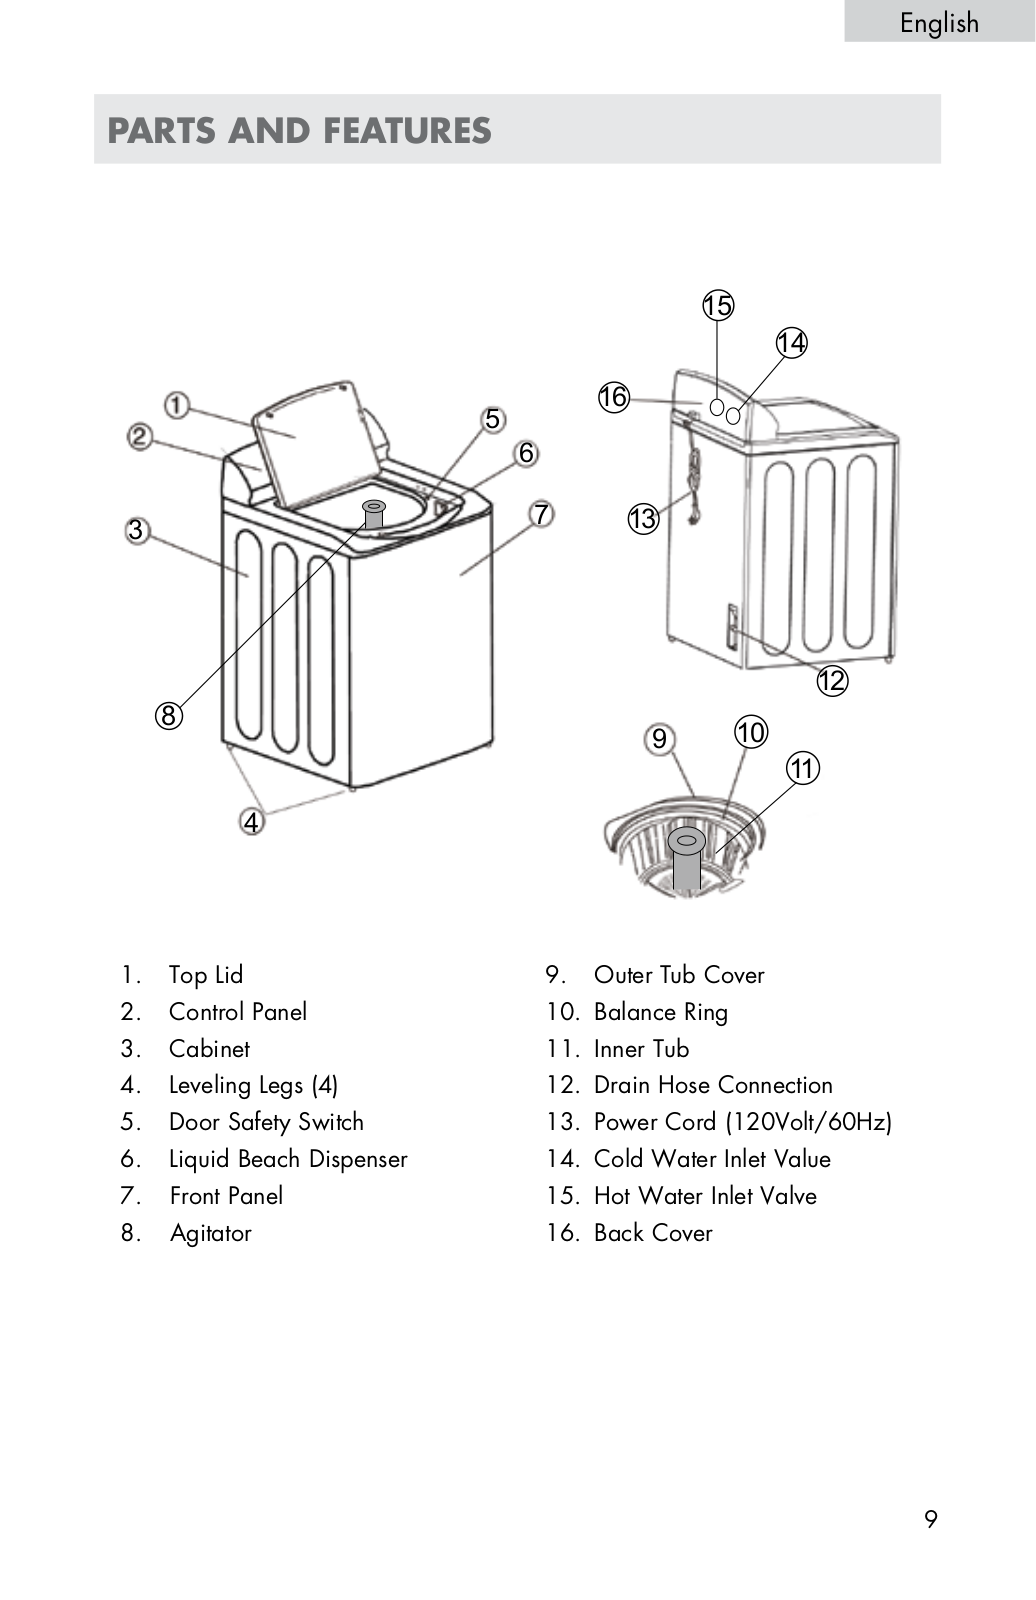
RWT350AW
Owner’s Manual
56 pgs
1.5 Mb
0
Service Manual
17 pgs
752.62 Kb
0
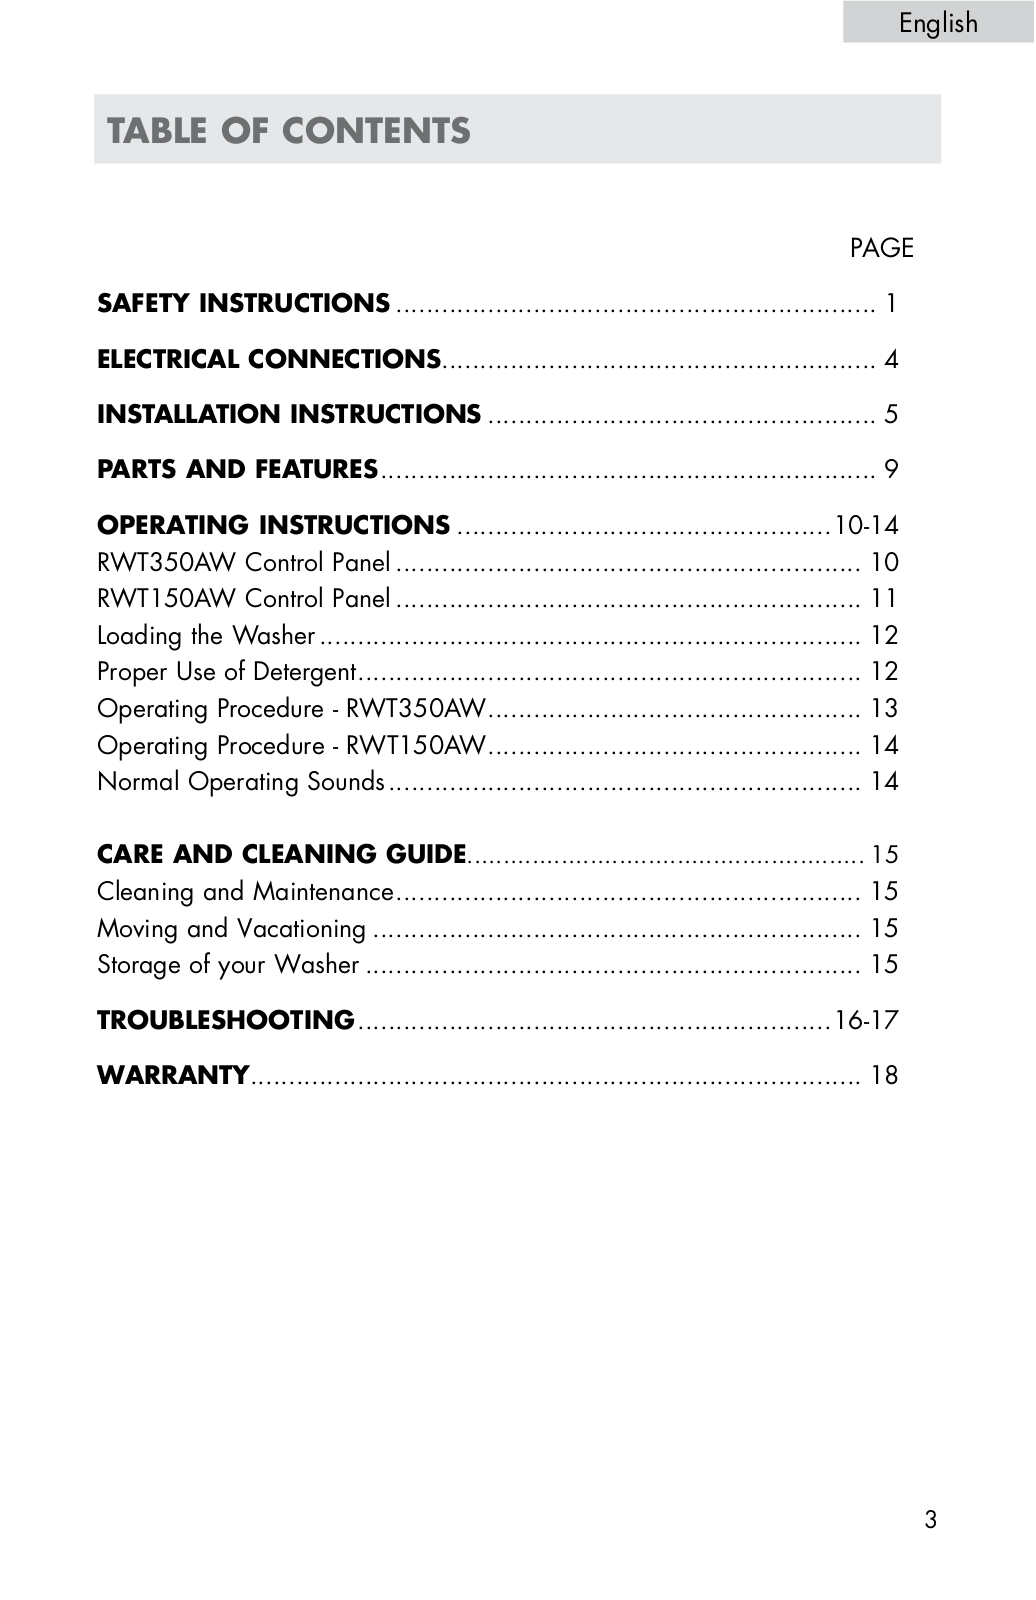
Table of contents
Loading...
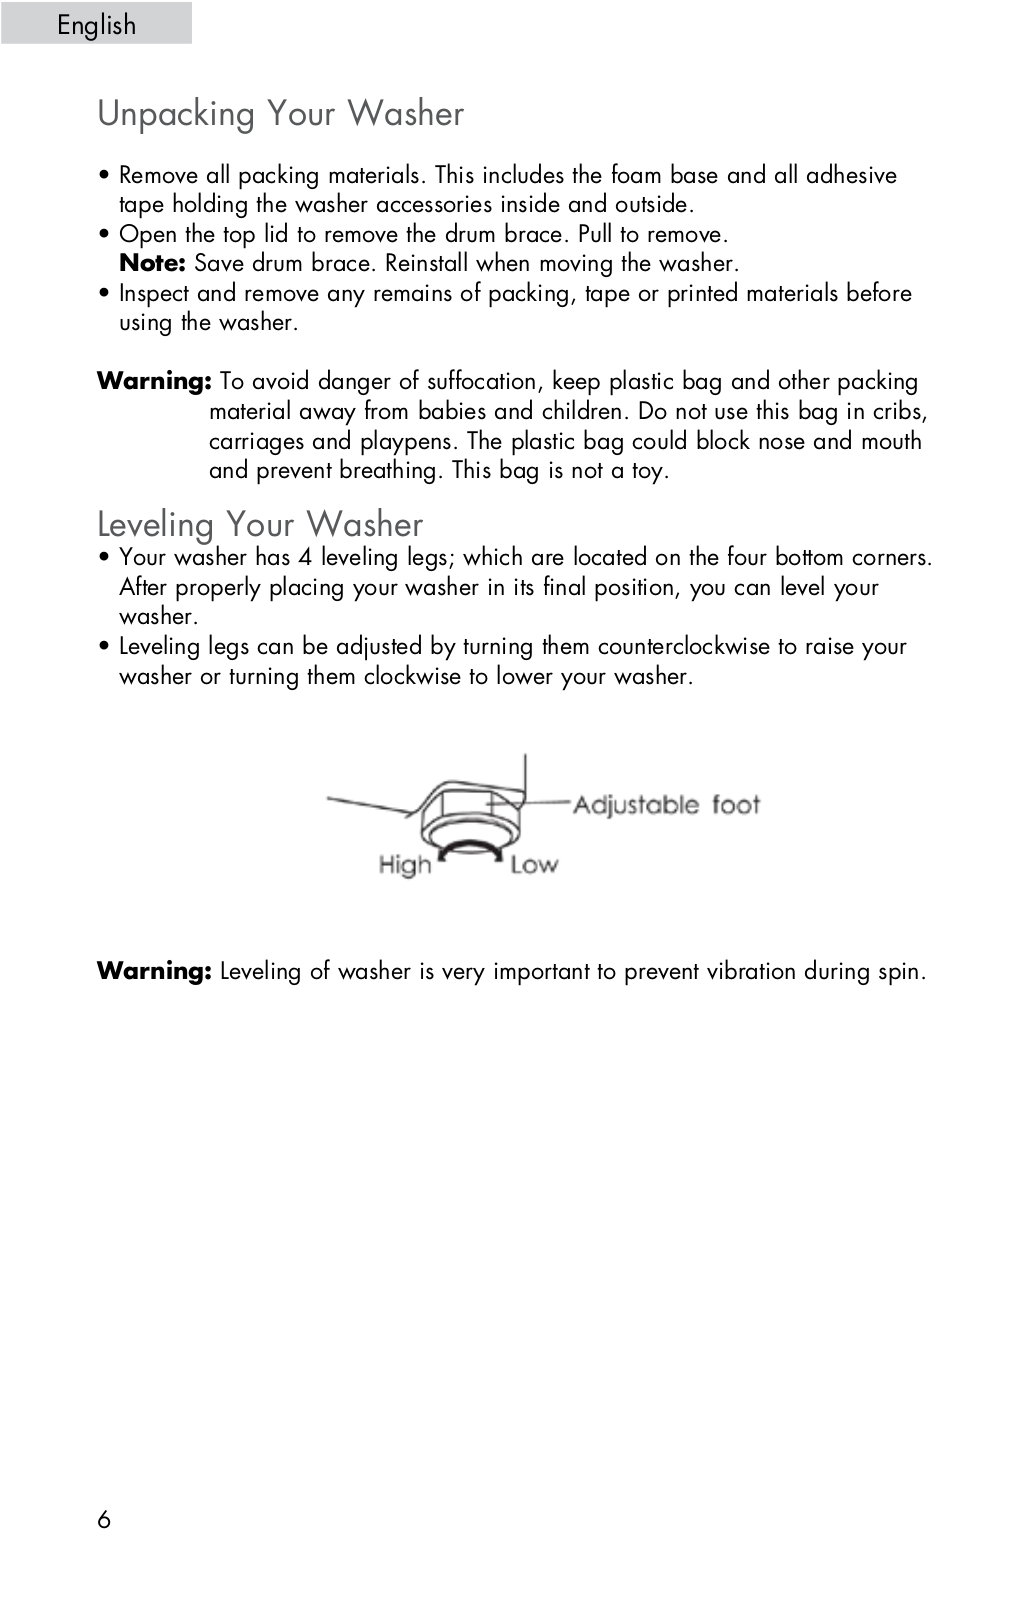
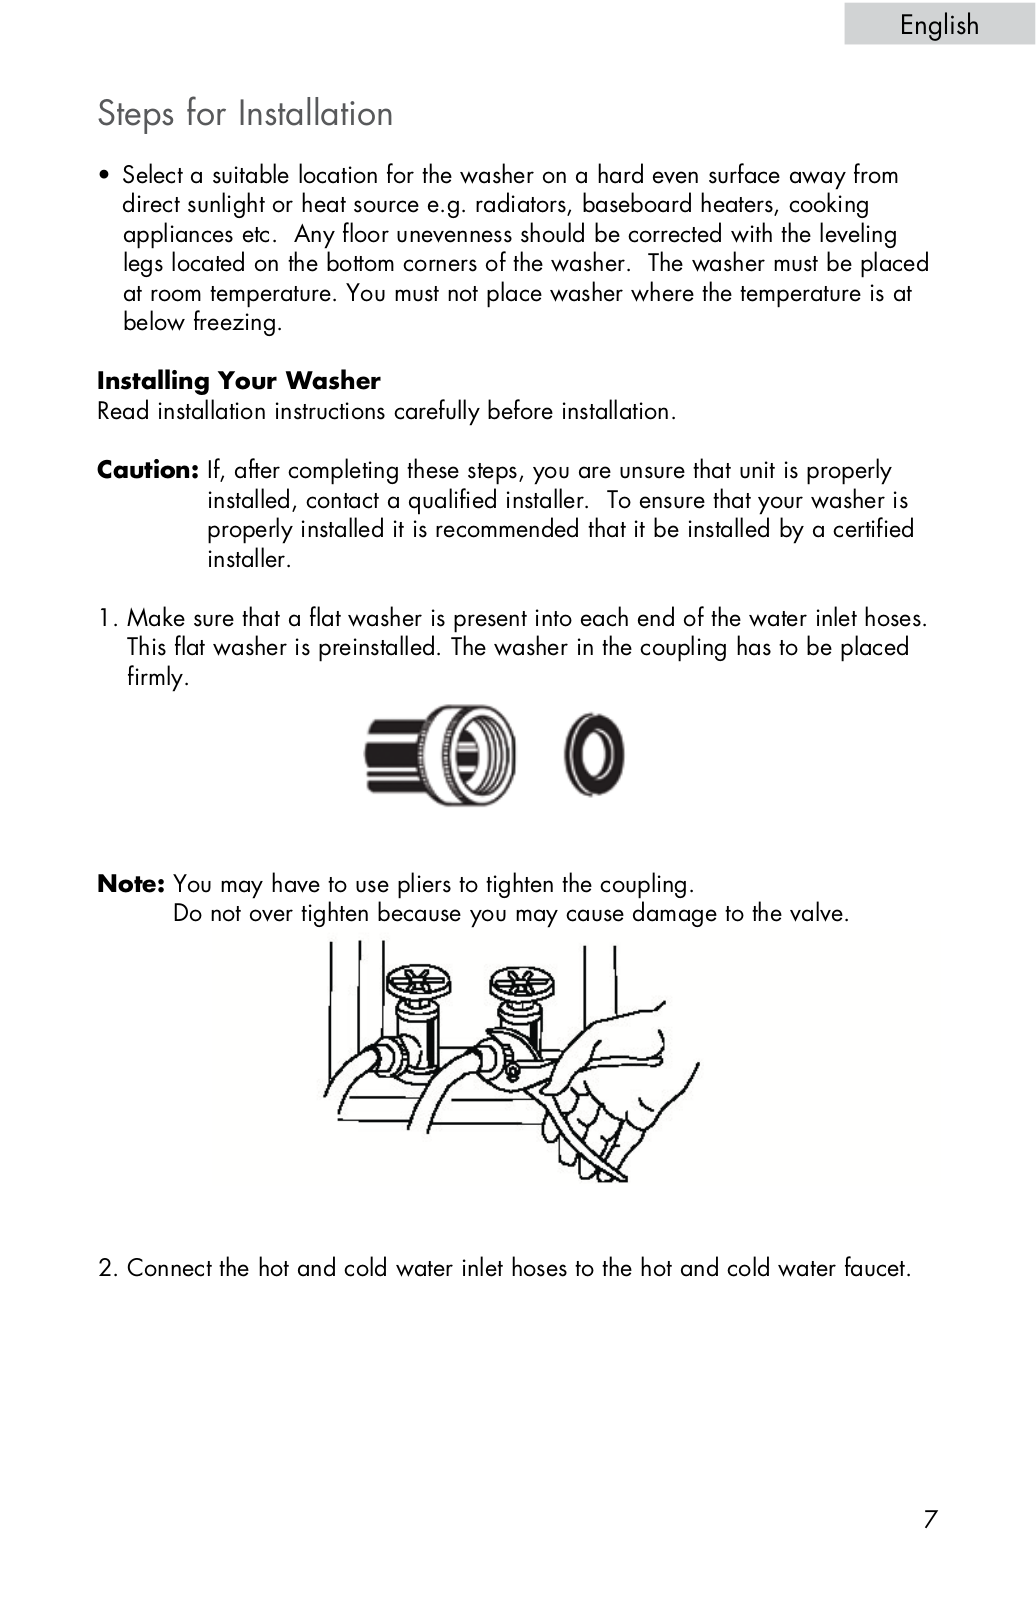
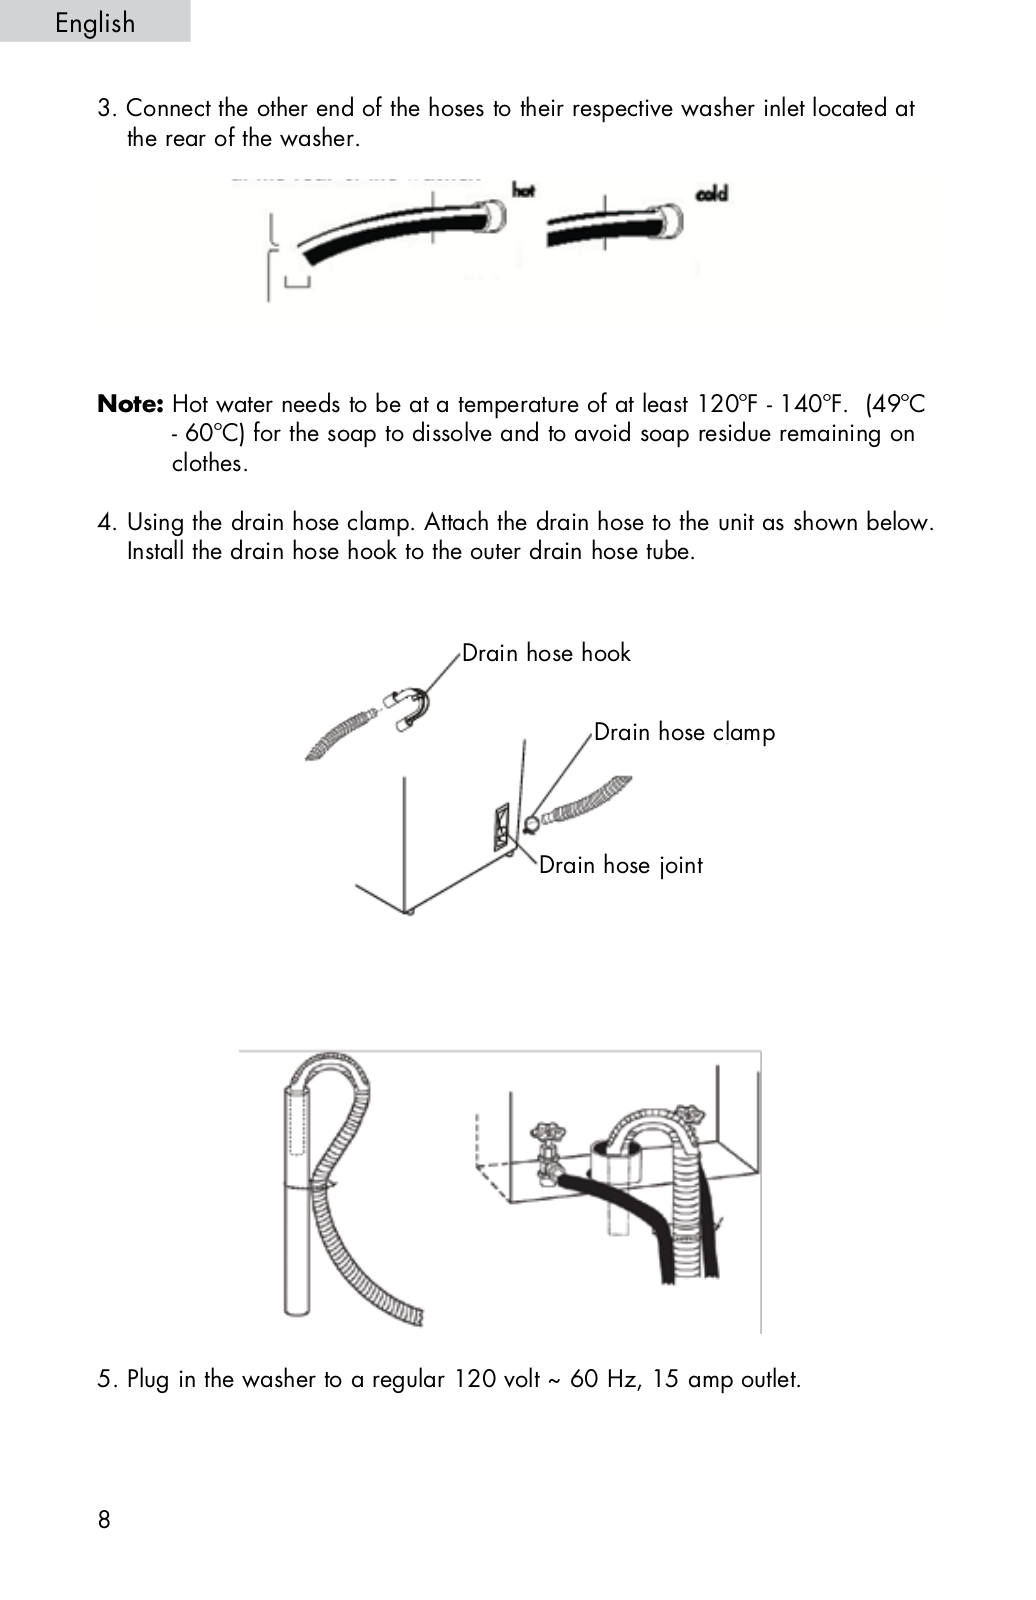
Haier RWT350AW, RWT150AW Owner’s Manual
...
Haier Owner’s Manual
Download
Specifications and Main Features
Frequently Asked Questions
User Manual
Download
Loading...
+
39
hidden pages
Unhide
You need points to download manuals.
1 point = 1 manual.
You can buy points or you can get point for every manual you upload.
Buy points
Upload your manuals
 Loading...