

Page 1
0.6 CU. FT. / 600 WATT MICROWAVE OVEN
HORNO MICROONDAS DE 0.6 PIES CUBICOS
Y 600 VATIOS
User Manual
Model # MWM6600RW
Manual del Usuario
Para Modelo de # MWM6600RW
Quality ß Innovation ß Style
Page 2

English
WARNING
PRECAUTIONS TO AVOID POSSIBLE EXPOSURE
TO EXCESSIVE MICROWAVE ENERGY
(a) Do not attempt to operate this oven with the door open since open-door
operation can result in harmful exposure to microwave energy. It is important
not to defeat or tamper with the safety interlocks.
(b) Do not place any object between the oven front face and the door or allow
soil or cleaner residue to accumulate on sealing surfaces.
(c) Do not operate the oven if it is damaged. It is particularly important that the
oven door close properly and that there is no damage to the :
1. Door (bent)
2. Hinges and latches (broken or loosened)
3. Door seals and sealing surfaces
(d) The oven should not be adjusted or repaired by anyone except properly
qualified service personnel.
Addendum
• If the apparatus is not maintained in a good state of cleanliness, its surface
could be degraded and affect the lifespan of the apparatus, leading to a
dangerous situation.
Before you call for service
If the oven fails to operate:
a) Ensure that the oven is plugged in securely. If it is not, remove the plug from
the outlet, wait 10 seconds and plug it in again securely.
b) Check for a blown circuit fuse or a tripped main circuit breaker. If these seem
to be operating properly, test the outlet with another appliance.
c) Ensure that the control panel is programmed correctly and the timer is set.
d) Ensure that the door is securely closed, engaging the door safety lock system.
Otherwise, the microwave energy will not flow into the oven.
IF NONE OF THE ABOVE RECTIFIES THE SITUATION, THEN CONTACT
A QUALIFIED TECHNICIAN. DO NOT TRY TO ADJUST OR REPAIR THE
MICROWAVE OVEN YOURSELF.
1
Page 3

Specifications
English
Power Consumption:
Microwave Output: 600W
Frequency: 2450MHz
Outside Dimensions (HxWxD): 10-3/16 x 17 x 12-3/8 inches
Oven Capacity: 0.6 cu.ft.
Cooking Uniformity: Turntable System (9-5/8” )
Net Weight: Approx. 26.9 lbs.
120V~60Hz, 950W
MICROWAVE TABLE OF CONTENTS
PAGE
PRECAUTIONS TO AVOID POSSIBLE EXPOSURE .................................1
BEFORE YOU CALL FOR SERVICE ..........................................................1
SPECIFICATIONS ....................................................................................2
IMPORTANT SAFETY INSTRUCTIONS ....................................................3
GROUNDING INSTRUCTION .................................................................5
UTENSILS ................................................................................................6
COOKING TECHNIQUES ........................................................................7
PARTS & ACCESSORIES .........................................................................8
INSTALLATION .......................................................................................8
OPERATION ...........................................................................................9
CONTROL PANEL ...................................................................................9
CLEANING AND CARE .........................................................................11
TROUBLESHOOTING ............................................................................12
LIMITED WARRANTY ...........................................................................13
2
Page 4

English
IMPORTANT SAFETY INSTRUCTIONS
When using electrical appliances, basic safety precautions should be
followed, including the following:
WARNING! - To reduce the risk of burns, electric shock, fire, and injury to
persons or exposure to excessive microwave energy:
1. Read all instructions before using the appliance.
2. Read and follow the specific “PRECAUTIONS TO AVOID POSSIBLE
EXPOSURE TO EXCESSIVE MICROWAVE ENERGY” on page 4.
3. This appliance must be grounded. Connect only to properly grounded
outlet. See “GROUNDING INSTRUCTION” on page 8.
4. Install or locate this appliance only in accordance with the provided
installation instructions on page 11.
5. Some products such as whole eggs and sealed containers -for example,
closed glass jars- are able to explode and should not be heated in this
oven.
6. Use this appliance only for its intended use as described in this manual.
Do not use corrosive chemicals or vapors in this appliance. This type of
oven is specifically designed to heat, cook, or dry food. It is not designed
for industrial or laboratory use.
7. As with any appliance, close supervision is necessary when used
by children.
8. To reduce the risk of fire in the oven cavity:
• Do not overcook food. Carefully attend appliance when paper, plastic,
or other combustible materials are placed inside the oven to facilitate
cooking.
• Remove wire twist-ties from paper or plastic bags before placing bag in
oven.
• If materials inside the oven should ignite, keep oven door closed, turn
oven off, and disconnect the power cord or shut off power at the fuse
or circuit breaker panel.
• Do not use the cavity for storage purposes. Do not leave paper
products, cooking utensils or food in the cavity when not in use.
9. Liquids, such as water, coffee, or tea can be overheated beyond the
boiling point without appearing to be boiling due to surface tension of
the liquid. Visible bubbling or boiling when the container is removed
from the microwave oven is not always present. THIS COULD RESULT IN
VERY HOT LIQUIDS SUDDENLY BOILING OVER WHEN A SPOON OR
OTHER UTENSIL IS INSERTED INTO THE LIQUID. To reduce the risk of
injury to person:
3
Page 5

English
• Do not overheat the liquid.
• Stir the liquid both before and halfway through heating it.
• Do not use straight-sided containers with narrow necks.
• After heating, allow the container to stand in the microwave oven for a
short time before removing the container.
• Use extreme care when inserting a spoon or other utensil into
the container.
10. Do not heat oil or fat for deep-frying. It is difficult to control the
temperature of oil in microwave oven.
11. Pierce foods with heavy skins such as potatoes, whole squash, apples
and chestnuts before cooking.
12. The contents of feeding bottles and baby jars should be stirred or shaken
and the temperature should be checked before serving in order to avoid
burns.
13. Cooking utensils may become hot because of heat transferred from the
heated food. Potholders may be needed to handle the utensil.
14. Do not cover or block any openings on the appliance.
15. Do not store or use this appliance outdoors. Do not use this product near
water, for example, near a kitchen sink, in a wet basement, near a
swimming pool, or similar locations.
16. Do not operate this appliance if it has a damaged cord or a plug, if it is
not working properly or if it has been damaged or dropped.
17. Do not immerse cord or plug in water. Keep cord away from heated
surface. Do not let cord hang over edge of table or counter.
18. Use only thermometers, which are specifically designed for use in
microwave ovens.
19. Be certain the glass tray and roller rings are in place when you operate
the oven.
20. When cleaning surfaces of door and oven that comes together on
closing the door, use only mild, nonabrasive soaps, or detergents
applied with a sponge or soft cloth.
21. This appliance should be serviced only by qualified service personnel
contact nearest authorized service facility for examination, repair, or
adjustment.
SAVE THESE INSTRUCTIONS
HOUSEHOLD USE ONLY
4
Page 6

WARNING
English
GROUNDING INSTRUCTION
This appliance must be grounded. In the event of an electrical short circuit,
grounding reduces risk of electric shock by providing an escape wire for the
electric current. The appliance is equipped with a cord having a grounding wire
with a grounding plug. The plug must be plugged into an outlet that is properly
installed and grounded.
WARNING! Improper use of the grounding plug can result in a
risk of electric shock.
Electrical Requirements:
• The electrical requirements are a 120 volt 60 Hz, AC only, 15 amp. It is
recommended that a separate circuit serving only the oven be provided. The
oven is equipped with a 3-prong grounding plug. It must be plugged into a
wall receptacle that is properly installed and grounded.
Power Supply Cord
1.
A short power supply cord is provided to reduce the risks resulting from
becoming entangled in or tripping over a longer cord.
2.
Extension cords are available and may be used
if care is exercised in their use.
a) If it is necessary to use an extension cord,
use only a 3-wire extension cord that has a
3-blade grounding plug, and a 3-slot
receptacle that will accept the plug on the
appliance. The marked rating of the
extension cord shall be equal to or greater
than the electrical rating of the appliance.
The extension cord must be arranged so that
b)
it will not drape over the
counter top or table top where it can be
pulled on by children or tripped over uninten
tionally.
NOTE: 1. Consult a qualified electrician or serviceman if the grounding
instructions are not completely understood, or if doubt exists as to
whether the appliance is properly grounded.
Neither Haier nor the dealer can accept any liability for damage to
2.
the oven or personal injury resulting from failure to observe the
electrical connection procedures.
Radio or TV Interference
Should there be any interference caused by the microwave oven to your radio
or TV, check that the microwave oven is on a different circuit, relocated the radio
or TV as far away from the oven as feasible or check position and signal of
receiving antenna.
WARNING
electric shock.
cord or an adapter plug. Do not remove
any prong from the power cord.
Grounding type
wall receptacle
-
Avoid fire hazard or
Do not use an extension
Power supply
cord with 3-prong
grounding plug
5
Page 7

WARNING
English
UTENSILS
This section lists which utensils can be used in the microwave, which ones have
limited use for short periods, and which ones should not be used in the
microwave.
Recommended
• Microwave browning dish - Use to brown the exterior of small items such as
steaks, chops, or pancakes. Follow the directions provided with your
browning dish.
• Microwaveable plastic wrap - Use to retain steam. Leave a small opening for
some steam to escape and avoid placing it directly on the food.
• Paper towels and napkins - Use for short-term heating and covering; These
absorb excess moisture and prevent spattering. Do not use recycled paper
towels, which may contain metal and could ignite.
• Glass and glass-ceramic bowls and dishes - Use for heating or cooking.
• Paper plates and cups - Use for short-term heating at low temperatures. Do not
use recycled paper, which may contain metal and could ignite.
• Wax paper - Use as a cover to prevent spattering.
• Thermometers - Use only those labeled “Microwave Safe” and follow all
directions. Check the food in several places. Conventional thermometers may
be used on microwave food once the food has been removed from the oven.
Limited Use
• Aluminum foil – Use narrow strips of foil to prevent overcooking of exposed
areas. Using too much foil can damage your oven, so be careful.
• Ceramic, porcelain, and stoneware – Use these if they are labeled “Microwave
Safe”. If they are not labeled, test them to make sure they can be used safely.
• Plastic – Use only if labeled “Microwave Safe”. Other plastics can melt.
• Straw, wicker, and wood – Use only for short-term heating, such as warming
dinner rolls for a few seconds; baskets and bowls may be flammable.
Not Recommended
• Glass jars and bottles – Regular glass is too thin to be used in a microwave.
It can shatter and cause damage and injury.
• Paper bags – These are a fire hazard, except for popcorn bags that are
designed for microwave use.
• Styrofoam plates and cups – These can melt and leave an unhealthy
residue on food.
• Plastic storage and food containers – Containers such as margarine tubs
can melt in the microwave.
• Metal utensils - These can damage your oven. Remove all metal
before cooking.
NOTE: Should you wish to check if a dish is safe for microwaving, place the
empty dish in the oven and microwave on HIGH for 30 seconds.
A dish which becomes very hot should not be used.
6
Page 8

English
COOKING TECHNIQUES
Your microwave makes cooking easier than conventional cooking, provided you
keep these considerations in mind:
Stirring
Stir foods such as casseroles and vegetables while cooking to distribute heat
evenly. Food at the outside of the dish absorbs more energy and heats more
quickly, so stir from the outside to the center. The oven will turn off when you
open the door to stir your food.
Arrangement
Arrange unevenly shaped foods, such as chicken pieces or chops, with the
thicker, meatier parts toward the outside of the turntable where they receive more
microwave energy. To prevent overcooking, place delicate areas, such as
asparagus tips, toward the center of the turntable.
Shielding
Shield food with narrow strips of aluminum foil to prevent overcooking. Areas
that need shielding include poultry wing-tips, the ends of poultry legs, and
corners of square baking dishes. Use only small amounts of aluminum foil.
Larger amounts can damage your oven.
Turning
Turn foods over midway through cooking to expose all parts to microwave
energy. This is especially important with large foods such as roasts.
Standing
Foods cooked in the microwave build up internal heat and continue to cook for a
few minutes after heating stops. Let foods stand to complete cooking, especially
foods such as cakes and whole vegetables. Roasts need this time to complete
cooking in the center without overcooking the outer areas. All liquids, such as
soup or hot chocolate, should be shaken or stirred when cooking is complete.
Let liquids stand a moment before serving. When heating baby food, stir well at
removal and test the temperature before serving.
Adding moisture
Microwave energy is attracted to water molecules. Food that is uneven in
moisture content should be covered or allowed to stand so that the heat disperses
evenly. Add a small amount of water to dry food to help it cook.
7
Page 9

SETTING UP YOUR OVEN
English
Parts and Accessories
Remove the oven and all materials from the carton and oven cavity.
Your oven comes with the following accessories:
Glass tray ............................1
Turntable ring assembly
A.
Control panel
Turntable shaft
B.
.........
1
F
C. Turntable ring assembly
D.
Glass tray
G
E. Observation window
F.
Door assembly
Safety interlock system
G.
Turntable Installation
a.
Never place the glass tray upside down.
The glass tray should never be restricted.
b. Both glass tray and turntable ring assembly
must always be used during cooking.
c. All food and containers of food are always
placed on the glass tray for cooking.
d. If glass tray or turntable ring assembly
Turntable shaft
cracks or breaks, contact your nearest authorized service center.
ABCDE
Hub (underside)Glass tray
Turntable ring
assembly
Countertop Installation
Remove all packing material and accessories. Examine the oven for any
damagesuch as dents or broken door. Do not install if oven is damaged.
Cabinet: Remove any protective film found on the microwave oven cabinet
surfaceDo not remove the light brown Mica cover that is attached to
the oven cavity to protect themagnetron.
Installation
1. Select a level surface that provide enough open space for the intake and/or
outlet vents.A minimum clearance of 3.0 inches (7.5cm) is required between
the oven and any adjacent walls. One side must be open.
(1) Leave a minimum clearance of 12 inches (30cm) above the oven.
(2) Do not remove the legs from the bottom of the oven.
(3) Blocking the intake and/or outlet openings can damage the oven.
(4) Place the oven as far away from radios and TV as possible. Operation of
microwave oven may cause interference to your radio or TV reception.
8
Page 10

English
2. Plug your oven into a standard household outlet. Be sure thevoltage and the
frequency is the same as the voltage and thefrequency on the rating label.
WARNING: Do not install oven over a range cooktop or otherheat-producing
appliance. If installed near or overa heat source, the oven could be
damaged and the warranty would be void.
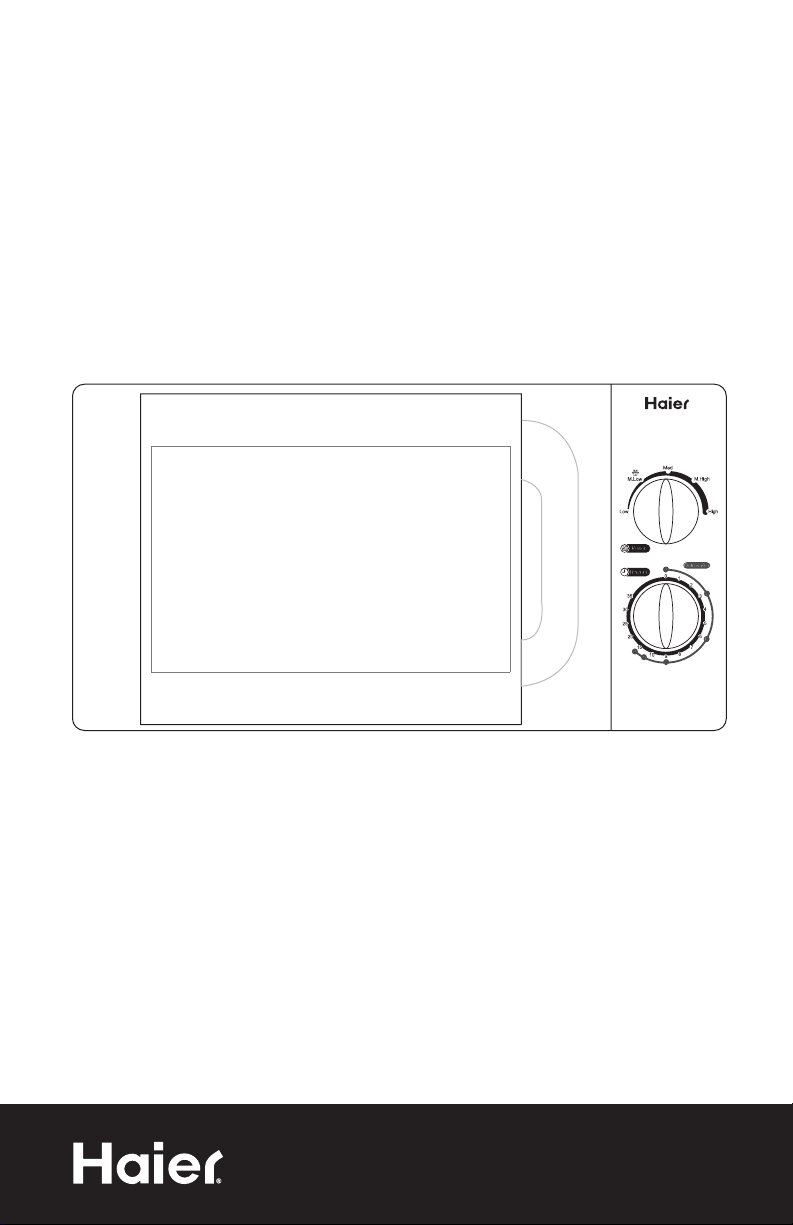
OPERATION
CONTROL
The control panel consists of two function operators. One is a timer knob, and
another a power knob.
Power/Action Selector
You use this operator knob to choose a cooking power level. It is the first step to
start a cooking session.
Timer Knob
Offers visual timing settings at an easy turn of the thumb to
select a desired cooking time, up to 35 minutes per
cooking session.
Microwave Cooking
For pure microwave cooking, there are five power levels from
which to choose as best fit to do the job at hand. Power level
increases as the knob turns clockwise. The power levels can
be classified as the following:
PANEL
1 100% HIGH
2 77% M. HIGH
3 55% MED
4 33% M. LOW
5 33% DEFROST
6 17% LOW
AND
FEATURES
Power output Description
9
Page 11

WARNING
English
Operating Instructions
For settings always follow recommendation from the package and use cooking
guide table for guidance only.
To start cooking:
1. Place Container with food in the oven on the turntable.
2. Set the desired cooking Power Level.
3. Set Timer to desired setting. This will turn on microwave oven to Start Cooking.
NOTE: When setting Timer for less than 2 minutes, turn knob pass 2 minutes
and then return to correct time.
4. When time has elapsed and cooking is complete, a bell will ring and unit will
turn off. Interior light will go off too.Note: If door is opened while cooking,
microwave oven will stop. To restart, simply close the door.
Defrosting the Food
Defrost – Med. Low setting enables thawing frozen foods. Microwave energy
heats up outside surface of the food and this heat moves slowly into center. This
thaws the food evenly throughout.
In addition to defrosting, this setting also used for slower and gentler cooking,
such as soups stews or sauces. Food with high-milk, cheese or egg content may
also be cooked on this setting to prevent curdling or toughness.
To start defrosting:
1. Place food in microwave oven on turntable and close the door.
2. Set Power level at Med. Low – Defrost position.
3. Set Timer for the time suggested in the cooking guide or as desired. This will
turn on microwave oven to star defrosting.
4. A bell will ring, when cycle is completed.
CAUTION: ALWAYS RETURN TIMER BACK TO ZERO, if food is
removed from the oven before cooking time is
completed or when oven is not in use.
10
Page 12

English
CLEANING AND CARE
1. When cleaning surfaces of door and oven that comes together on closing the
door, use only mild, nonabrasive soups, or detergents applied with a sponge
or soft cloth.
2. Turn off the oven and remove the power plug from the wall socket
before cleaning.
3. Keep the inside of the oven clean. When food splatters or spilled liquids
adhere to oven walls, wipe with a damp cloth. Mild detergent may be used
if the oven gets very dirty. Avoid the use of spray and other harsh cleaners
as they may stain, streak or dull the door surface.
4. The outside surfaces should be cleaned with a damp cloth. To prevent
damage to the operating parts inside the oven, water should not be allowed
to seep into the ventilation openings.
5. Wipe the window on both sides with a damp cloth to remove any spills or
spatters.
6. Do not allow the control panel to become wet. Clean with a soft, damp
cloth. When cleaning the control panel, leave oven door open to prevent
oven from accidentally turning on.
7. If steam accumulates inside or around the outside of the oven door, wipe
with a soft cloth. This may occur when the microwave oven is operated
under high humidity conditions, this is normal.
8. It is occasionally necessary to remove the glass tray for cleaning. Wash the
tray in warm sudsy water or in a dishwasher.
9. The roller ring and oven floor should be cleaned regularly to avoid excessive
noise. Simply wipe the bottom surface of the oven with mild detergent. The
roller ring may be washed in mild sudsy water or dishwasher. When
removing the roller ring from cavity floor for cleaning, be sure to replace in
the proper position.
10. Remove odors from your oven by combining a cup of water with the juice
and skin of one lemon in a deep bowl, microwave for 5 minutes. Wipe
thoroughly and dry with a soft cloth.
11. When it becomes necessary to replace the oven light, please consult a
dealer to have it replaced.
11
Page 13

TROUBLESHOOTING
Check your problem by using the chart below and try the solutions for each
problem. If the microwave oven still does not work properly, contact Haier
customer service center or the nearest authorized service center.
TROUBLE POSSIBLE CAUSE
Oven will not
start
Arcing or
sparkling
Unevenly cooked
foods
Overcooked
foods
Undercooked
foods
a. Electrical cord for oven is not
plugged in.
b. Door is open.
c. Wrong operation is set.
a. Materials to be avoided
in microwave oven were
used.
b. The oven is operated when
empty.
c. Spilled food remains in the
cavity.
a. Materials to be avoided
in microwave oven were
used.
b. Food is not defrosted
completely.
c. Cooking time, power level is
not suitable.
d. Food is not turned or stirred.
Cooking time, power level is not
suitable. Use correct
cooking time, power level.
a. Materials to be avoided
in microwave oven were
used.
b. Food is not defrosted
completely.
c. Oven ventilation ports are
restricted.
d. Cooking time, power level is
not suitable.
POSSIBLE REMEDY
a. Plug into the outlet.
b. Close the door and try again.
c. Check instructions.
a. Use microwave-safe
cookware only.
b. Do not operate with oven
empty.
c. Clean cavity with wet towel.
a. Use microwave-safe
cookware only.
b. Completely defrost food.
c. Use correct cooking
time,power level.
d. Turn or stir food.
Use correct cooking time and
power level.
a. Use microwave-safe
cookware only.
b. Completely defrost food.
c. Check to see that oven
ventilation ports are not
restricted.
d. Use correct cooking time and
power level.
English
Improper
defrosting
a. Materials to be avoided
in microwave oven were
used.
b. Cooking time, power level is
not suitable.
c. Food is not turned or stirred.
a. Use microwave-safe
cookware only.
b. Use correct cooking time and
power level.
c. Turn or stir food.
12
Page 14

English
LIMITED WARRANTY
What is covered and for how long?
This warranty covers all defects in work-
manship or materials for a period of:
12 months for labor
12 months for parts
(Functional Parts Only)
2 years Magnetron Tube for
Microwave (part only)
The warranty commences on the date of
item purchase. Customer shall provide
Haier with proof of the date of purchase
and the original receipt along with; brand,
model and serial number for verification
prior to any warranty service being
provided.
Carry-In Service is available for selected
products at the discretion of Haier
America.
EXCEPTIONS: Commercial or Rental Use
warranty
90 days for labor 90 days for parts
No other warranty applies.
What is covered.
1. The mechanical and electrical parts of
the appliance which serve the
functional purpose of this appliance are
covered for a period of 12 months or
as stated above. This includes all parts
except finish, trim and glass.
2. The limited warranty does not cover
any credit or refund for any loss or
injury caused by the product or defects
to the product including but not limited
to incidental or consequential damages.
3. If the magnetron tube fails (for
Microwave) due to poor workmanship
or material, the part will be replaced.
What will be done?
1. Any mechanical or electrical part that
proves to be defective in normal usage
during the specified warranty period
will be repaired or replaced at Haier’s
discretion.
ALL WARRANTY SERVICE MUST BE
PROVIDED BY ONLY OUR FACTORY
SERVICE CENTERS, OR BY AN
AUTHORIZED HAIER CUSTOMER
TECHNICIAN.
If it is determined that repair is not
appropriate or replacement parts
are unavailable for repair, Haier will
exchange the product with a refurbished
or new product the same or similar to the
original at its discretion.
2. There will be no charge to the
purchaser for functional replacement
parts and labor on any covered items
during the initial12- month period or as
stated above.
3. THIS WARRANTY COVERS
APPLIANCES WITHIN THE
CONTINENTAL UNITED STATES,
PUERTO RICO AND CANADA. IT
DOES NOT COVER THE FOLLOWING:
Damages from improper installation.
Damages incurred during shipping.
Defects other than manufacturing. Damage
from misuse, abuse, accident, alteration,
lack of proper care and maintenance
or incorrect current or voltage or acts of
God. Damage from other than household
use. Damage from service by other than
an authorized dealer or service center.
Decorative trims, glass or replaceable
light bulbs. Transportation and shipping
costs. Labor (after the initial 12 months).
Credit or Refund for products over 30
days past date of purchase Food loss for
food spoiled as a direct result of mechanical failure of the product or of any delay
in providing service, repair, replacement.
This limited warranty doesn’t apply to
refurbished product or unit purchased
as/like new or second-hand. THIS LIMITED
WARRANTY IS GIVEN IN LIEU OF ALL
OTHER WARRANTIES, EXPRESSED OR
INCLUDING THE WARRANTIES OF
MERCHANTABILITY AND FITNESS FOR A
PARTICULAR PURPOSE. The remedy provided in this warranty is exclusive and is
granted in lieu of all other remedies. This
warranty does not cover incidental or
consequential damages, so the above
limitations may not apply to you. Some
states do not allow limitations on how long
an implied warranty lasts, so the above
limitations may not apply to you. This
warranty gives you specific legal rights,
and you may have other rights, which
vary from state to state.
Haier America,
New York, NY 10018
To have your product serviced, please contact Haier America Customer
13
Service Hot Line 24 hours a day, 7 days a week. In the U.S.A.,
call 1-877-337-3639.
Page 15

PRODUCT REGISTRATION
Keep for your records to obtain Warranty Service
Thank you for using our Haier product. This easy-to-use manual will guide
you in getting the best use of your microwave.
Remember to record the model and serial number. They are on a label in
back of the microwave.
Model number: ______________________________________________________
Microwave Serial number: ____________________________________________
Date of purchase: ____________________________________________________
English
Staple your receipt to your manual. You will need it to obtain warranty service.
Please register online at www.prodregister.com/Haier
14
Page 16

IMPORTANT
Do Not Return This Product To The Store
If you have a problem with this product, please contact
the “Haier Customer Satisfaction Center” at 877.337.3639.
DATED PROOF OF PURCHASE REQUIRED FOR WARRANTY SERVICE
IMPORTANTE
No regrese este producto a la tienda
Si tiene algún problema con este producto, por favor contacte
el “Centro de Servicio al Consumidor de Haier” al
NECESITA UNA PRUEBA DE COMPRA FECHADA PARA EL SERVICIO DE LA GARANTIA
1-877-337-3639 (Válido solo en E.U.A).
New York, NY 10018
Part # MW-9999-29
MWW6600RW
©2007 Haier America Trading, LLC. All Rights Reserved. 0607
Made in China
Hecho en China
Haier America
Printed in China
 Loading...