

Page 1
0010551960
HWF06XC5, HWR06XC5,
ESAM055, ESA3055
(ESAM055/ESA3055 Only)
Page 2

Page 3
Page 4
Page 5
6-7
8-13
8-13
14-18
15
15
16-18
1
1
2
4
4
5
5
8
19-20
20-21
22
Page 6

Important:
Test power plug before each use:
1. Press ìreset ìbutton.
2 . Press ìtest ìbutton, unit should trip.
3. Press ìresetî button again for use .
Do not use if above test fail.
In the event this device trips , the cause of the malfunction is to
be corrected before further use of the device .
Page 7
5
Page 8

MODEL: HWR06XC5, ESA3055
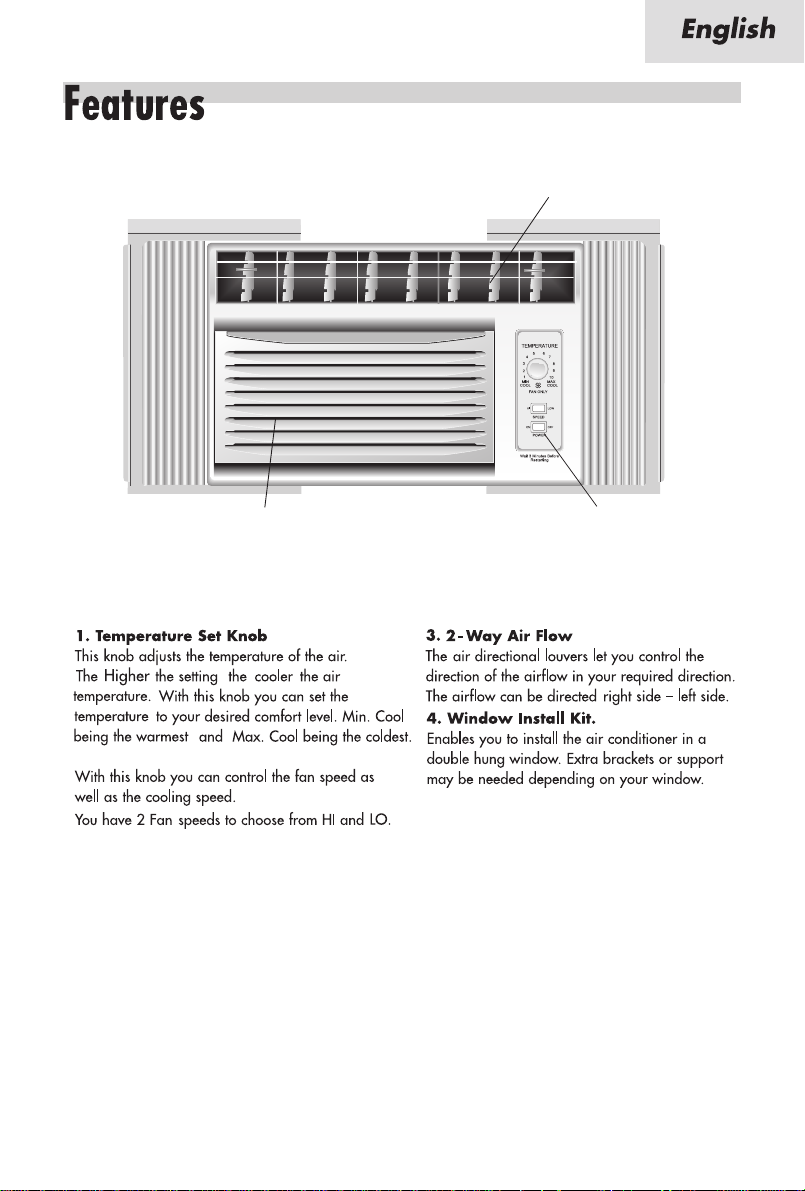
2-way airflow
control paneleasy access filters
1. Thermostat
This allows you to adjust the temperature of the air.
The lower the setting the cooler the air temperature
With this you can set the temperature to your
desired comfort level You can set the temperature
between 61oF and 86oF.
2. fan Speed
You have 2 levels of Fan speed to set at your
desired comfort level.
3. Function.
Your air conditioner has 2 F unctions.
a) COOL
Here the air conditioner will operate the compressor
and the desired fan speed set to give you chilled
cold air for your comfort.
b) Fan
You can run the fan only on not so hot days. The
fan can be set to run at 2 speeds as desired by you.
4. Timer
Your air conditioner can be set to go on or off at
your desire. This can be done up to 24 hours in
advance.
5. 2 Way Air Flow
These air directional louvers let you control the direction
of the airflow in your required direction.
The airflow can be directed right side -- left side.
6. Window Install Kit
Enables you to install the air conditioner in a double
hung window. Extra brackets or support may be needed
depending on your window.
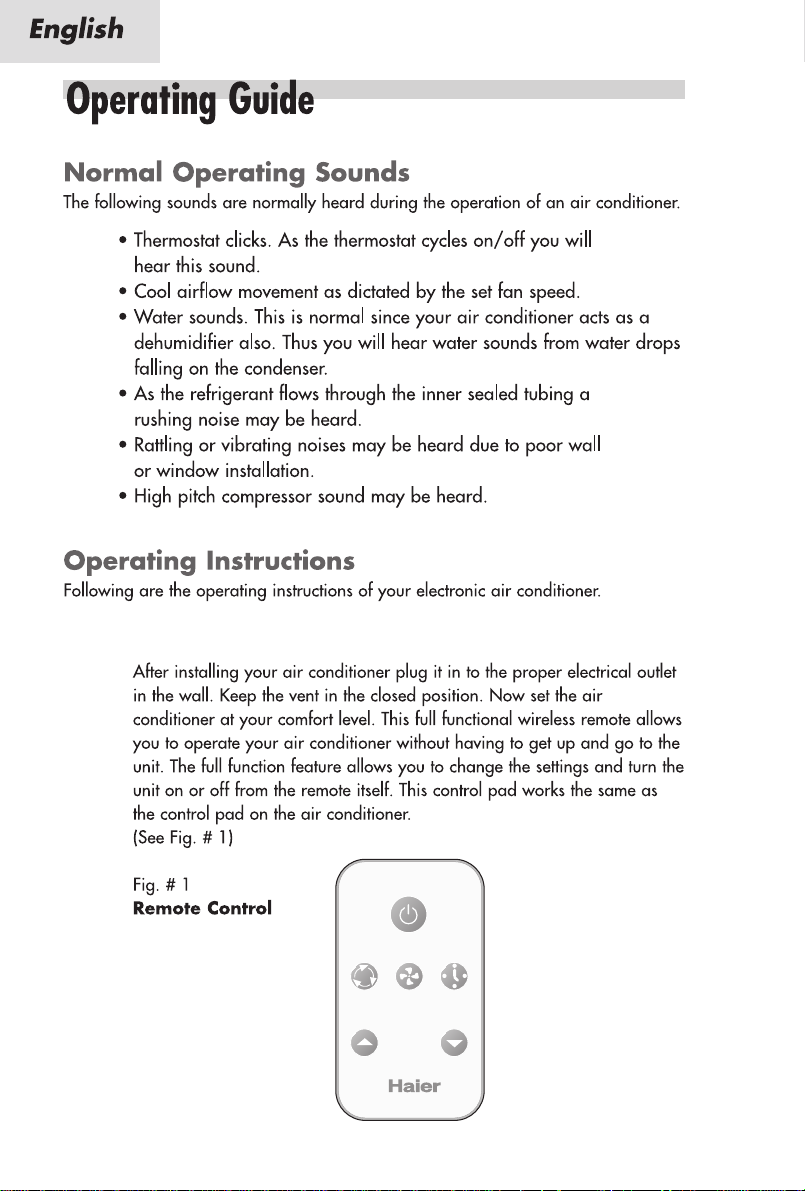
7. Remote Control
This full functional wireless remote allows you to
operate your air conditioner from a distance. You
need not have to get up to change the settings, the
functions or to turn the unit on or off.
8. LED Display Electronic Control Panel
The 4 function LED displays Room Temperature,
Temperature Setting, Timer Setting and Time
Remaining to Stop / Start the unit. Electronic
Control Panel lets you set the temperature to the
Exact T emperature you desire.
9. Electrostatic Filter (not all models)
Being constructed of high efficiency purifying
substance, active carbon fabric, electrostatic fabric,
electrostatic active carbon net and other materials
it purifies the air effectively. Its wavy structure
increases the capability to filter dust and smoke
effectively. Due to the retention of the active carbon
it has a high purifying speed capable of
strong airflow.
Page 9
2. MODE Set Switch
2-way
airflow
control paneleasy access filters
MODEL: HWF06XC5, ESAM055
7
Page 10
MODEL: HWR06XC5, ESA3055
Remote control and control panel operations
ON/OFF
MODE SPEED TIMER
TEMP/TIME
8
Page 11

Having set the temperature you will set the function of the air conditioner.
ON/OFF
MODE SPEED TIMER
TEMP/TIME
Every time you press the MODE button, it will change between FAN, COOL .
fig.# 3)
(See
9
Page 12

ON/OFF
MODE SPEED TIMER
TEMP/TIME
Once the function mode is decided you will have to set the fan speed.(See fig. #4)
Every time you press the SPEED button, fan speed will change between LOW, HIGH.
1) If you choose the COOL mode you can run the fan in one of the 2 speeds HIGH,
LOW.
10
2) For cool days you may want to run the "FAN" function. Here the fan runs at one
of 2 speeds, HIGH or LOW.
Page 13

ON/OFF
MODE SPEED TIMER
TEMP/TIME
Timer on or Timer off mode is used to pre-start or shut off your unit in
advance. You can program this up to 24 hours in advance. You can use the Timer in functions
i.e. COOL, FAN .
Timer on (See Fig. # 5)
Unit must be on to set the timer. Unit will shut down automatically after it accepts the settings in
5 seconds. Use this mode to pre-set the start time of the unit 24 hours in advance.
a) Press TIMER ON, LED display will show "XX" (time set last time) when power is connected first
time, LED display will show "01".
b) Set desired number of hours by pressing the ( ) pad of the Temp/Time buttons, one for each
hour. If you passed the desired time use the ( ) pad key to lower the selection.
c) After set TIMER ON, LED display will show the time. This time displayed:
unit will starts after X hours.
Timer off (See Fig. # 5)
Unit must be running to set the timer off. Use this to preset the time you would like the unit to
shut off.
a) Press TIMER OFF, LED display will show "XX" (time set last time) when power is connected first
time, LED display will show "01".
b) Set desired number by pressing the ( ) pad of the T emp/Time buttons.
One for each hour. If you passed the desired time, use the ( ) pad key to lower the selection.
c) After set TIMER OFF, LED display will show the room temperature about 5 seconds later.
When using the timer the unit will use/revert to the last COOL and fan settings when activated.
The timer must be reset every time you choose to use it.
11
Page 14

Fig. # 5
ON/OFF
MODE SPEED TIMER
TEMP/TIME
MODEL: HWF06XC5
ESAM055
Fig. # 1
TEMPERA TURE
4
3
2
1
MIN
COOL
65
FAN ONLY
7
10
MAX
COOL
8
9
12
LOWHI
SPEED
OFFON
POWER
Page 15

POWER Turns air conditioner off.
SPEED "LOW" Low speed fan operation with cooling or not.
SPEED "HI" High speed fan operation with cooling or not.
This automatically controls the temperature of indoor air . Turn the knob
so that arrow points to the cooler marks for more moderate cooling.
Normal Fan
1. T urn the SPEED mode switch to the "HI" or the "L OW" setting.
2. Set the thermostat control to the temperature mark "FAN ONL Y".
Normal cooling
1. T urn the SPEED mode switch to the "HI" or the "L OW" setting.
2. Set the thermostat control to the desire temperature (the mid-point
is a good starting position).
If the room temperature is not satisfactory after a reasonable time, adjust
the control to a warmer setting, as appropriate.
Maximum cooling
1. Turn the SPEED mode switch to the "HI" setting
2. Set the thermostat control to the MAX COOL temperature mark.
Quieter operation
1. Turn the SPEED mode switch to the "LOW" setting.
2. Set the thermostat control as needed.
CAUTION:
1
2
Also when you shut off the air conditioner wait for 3 minutes
before turning it on again.
3
13
Page 16

14
Page 17

wood screws 31/32"
window seal gasket
top rail
short screws 13/32"
short screws 13/32"
wood screws 31/32"
window seal gasket
Model:HWF06XC5, ESAM055
ON/OFF
MODE SPEED TIMER
TEMP/TIME
Remote
control
Model:HWR06XC5, ESA3055
top rail
ìCR2025ì battery
15
Page 18

ASSEMBLE
CURTAINS/TOP RAIL
Install top rail with 3 short
screws13/32".
Insert the side curtains into the
top and bottom rails of the air
conditioner. Fasten the curtains
to the unit with 8 short screws
13/32".
HWF06XC5, HWR06XC5, ESA3055, ESAM055
3
5
25
3
12
5
2
13
5
1
33
5
1
22
2
7
12
16
9
18
16
3
13
8
16
Page 19
2
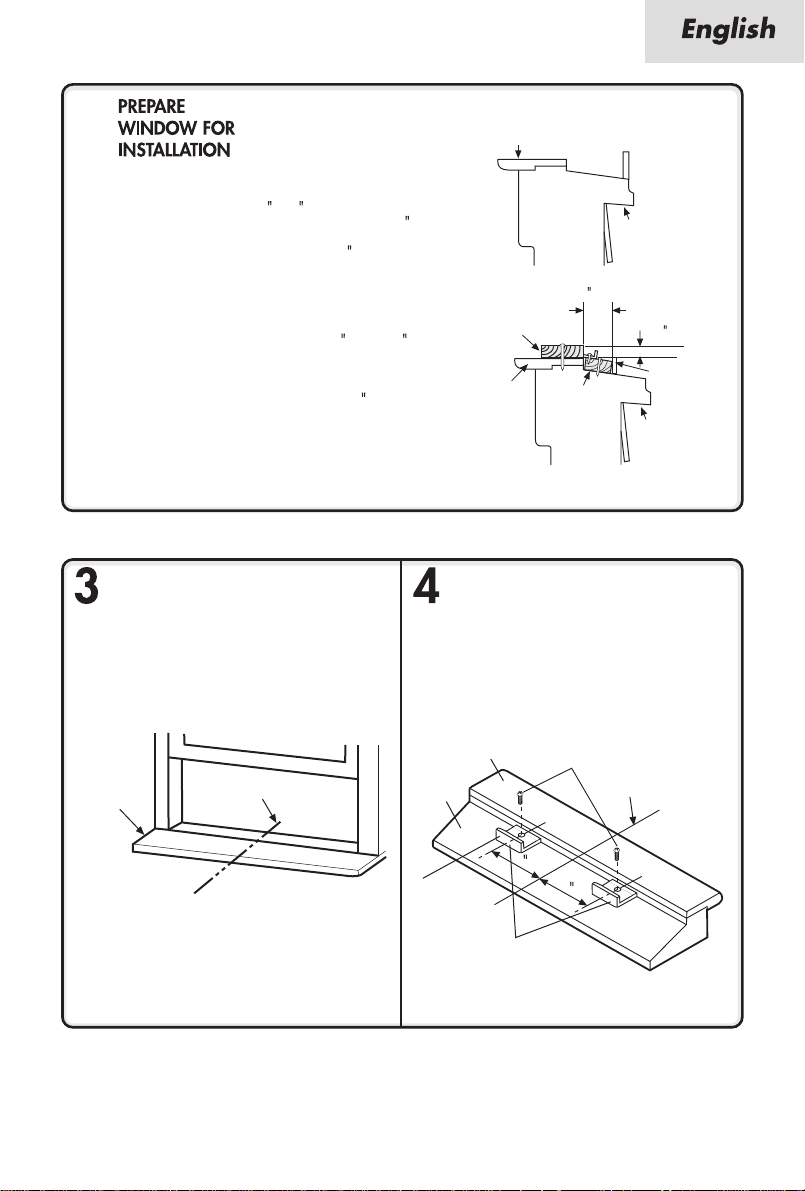
1. This unit is designed for installation in standard double hung windows
with actual opening widths of 22
must open sufficiently to allow a clear vertical opening of 14
bottom of the sash to the window stool.
2. If storm window presents interference, fasten a 2
included) (OUTER SILL) to the inner window sill across the full width of
the sill. The wood strip should be thick enough to raise the height of
the window sill so that the unit can be installed without interference by
the storm window frame (STORM WINDOW FRAME) or wood strip
(OUTDOORS) to help condensation to drain properly to the outside.
3. Install a second wood strip (approximately 6
same thickness as first strip) in the center of the outer sill flush against
the back off the inner sill. This will raise basepan angle .
4. If the distance between STORM WINDOW FRAME and WOOD STRIP
MOUNTED ON TOP OF INNER SILL is more than 1
strip are not necessary.
to 36 . The upper and lower sash
wide wood strip(not
long by 3/2 wide and
, two of wood
INNER
SILL
I
N
D
O
O
from the
R
S
WOOD STRIP
MOUNTED ON
TOP OF INNER SILL
INNER
SILL
I
N
D
O
O
R
S
WOOD STRIP
FOR BASEPAN
ANGLE
1 MAX.
O
U
T
D
O
O
OUTER
R
SILL
S
3/4 CLEARANCE
STORM
WINDOW FRAME
O
U
T
OUTER
D
SILL
O
O
R
S
LOCATING UNIT IN
WINDOW
Open the window and mark center line on the
center of the inner sill.
INNER SILL
INDOOR SIDE
CENTER LINE
ATTACH BASEPAN
ANGLE
Install the basepan angle behind the inner window sill, with
the short side of basepan angle as shown. Use the 2 short
screws13/32" provided.
The basepan angle helps to hold unit securely in place.
Be sure to place basepan angle edge flush against back
of inner sill.
INNER SILL
OUTER SILL
SHORT SIDE
OUTSIDE
BASEPAN ANGLE
SHORT SCREW13/32"
CENTER LINE
INSIDE
8
8
17
Page 20

INSTALL THE AIR CONDITIONER
IN THE WINDOW
Carefully lift the air conditioner and slide it into the open
window. Make sure the bottom guide of the air conditioner
drops into the notches of the basepan angle.
While steadying the air conditioner ,carefully bring the
window sash down behind the upper guide of the air
conditioner.
WINDOW FRAME
UPPER GUIDE
ABOUT 1/4
INSTALL THE SEAL GASKET
AND SASH LOCK
Extend the side curtains to fill the
window opening using 4 wood screws
31/32" to secure them.
Cut the seal gasket to the window
width. Stuff the sash seal between the
glass and the window to prevent air
and insects from getting into the room.
Fasten the basepan angle, using a
short screw13/32".
SHORT SCREW13/32"
WOOD SCREW31/32"
BASEPAN ANGLE
BOTTOM GUIDE
BASEPAN ANGLE
WINDOW SEAL GASKET
18
Page 21

TEMPERATURE
6
5
7
4
8
3
9
2
10
1
MAX
MIN
COOL
COOL
FAN ONLY
LOW
PEED
OFF
POWER
Always unplug your air conditioner before cleaning.
The air filter behind the front grille should be checked and
cleaned at least once every 2 weeks or more often if necessary.
To remove:
1. Open the inlet grille downward by pulling out the top of the inlet grille.
2. Remove the air filter from the front grille assembly by pulling the air filter
up slightly.
3. Clean the filter with warm, soapy water below 40oC(104oF).
4. Rinse and gently shake the water from the filter and let it dry before replacing
it.
DO NOT use your air conditioner without the air filter in place.
To clean the front panels or the cabinet DO NOT use harsh
chemicals, abrasives, ammonia, chlorine, bleach, concentrated
detergents, solvents or metal scouring pads.
Always use a soft cloth dampened with water or mild soap
and water solution to wipe the front of the cabinet.
19
Page 22
20
Page 23
(see page 8)
(see page 18)
21
Page 24
 Loading...