

Page 1
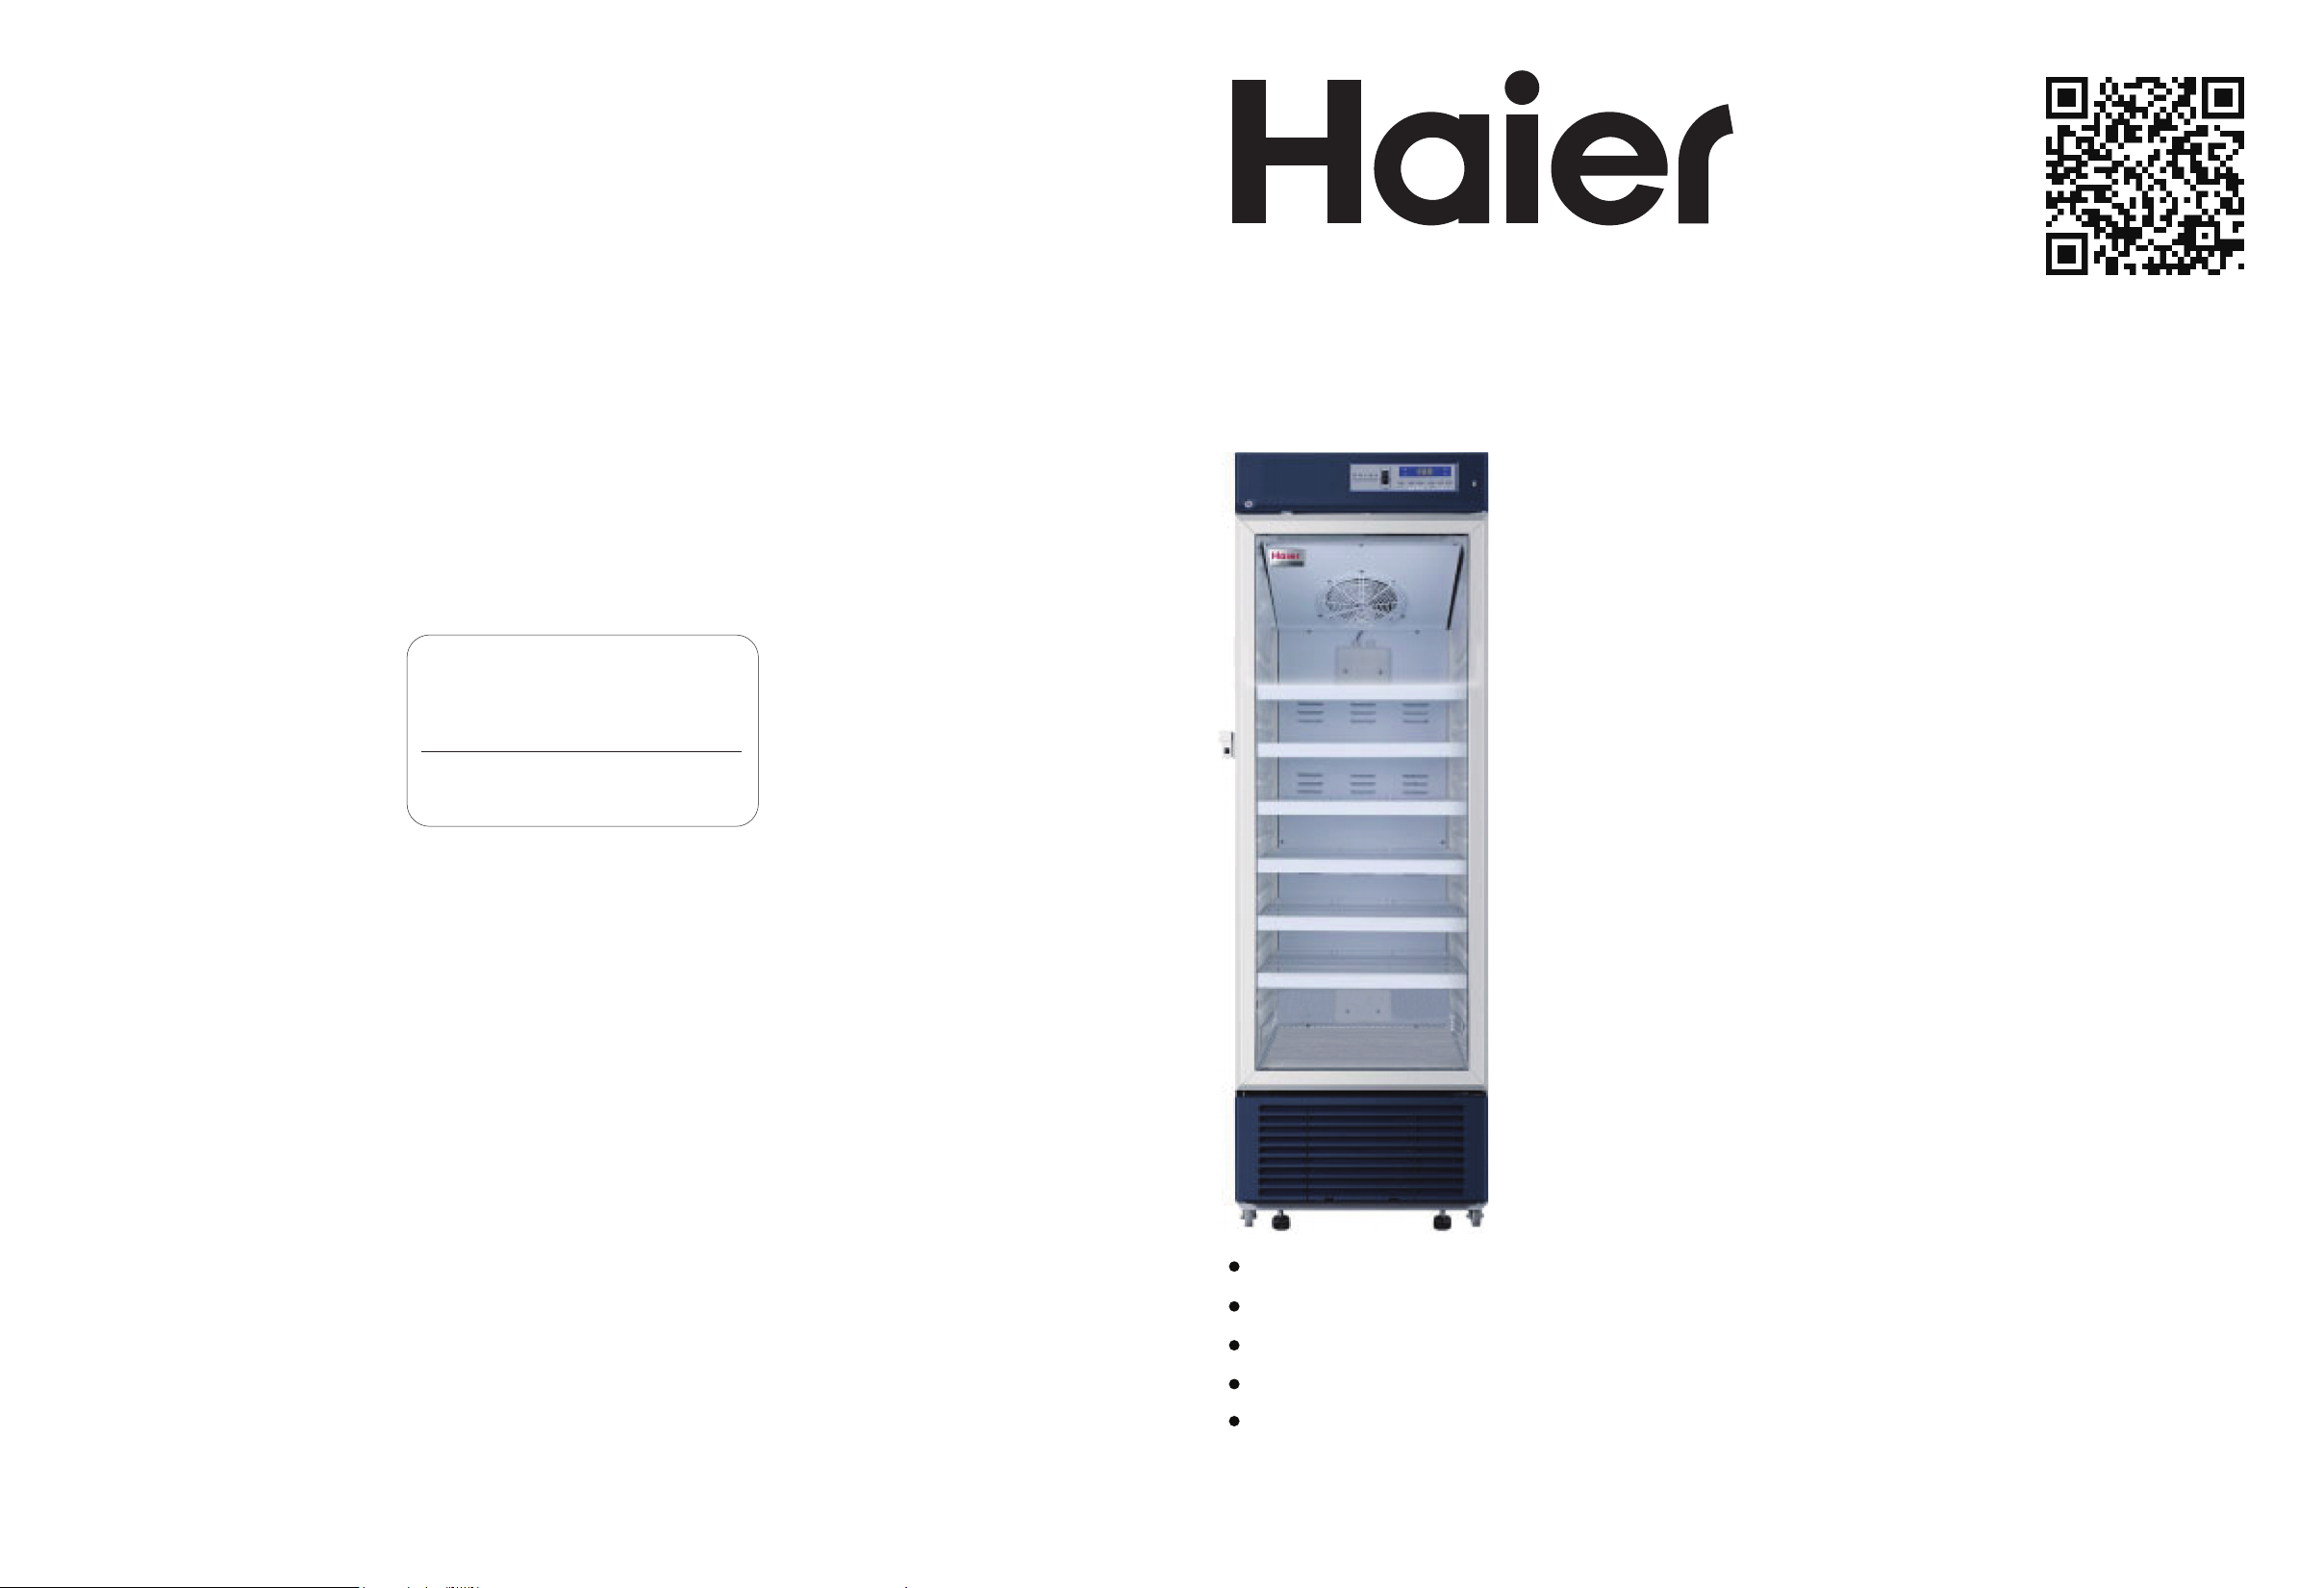
Pharmaceutical Refrigerator
Operation Manual
Model:
HYC-260
HYC-360
HYC-290
HYC-390
Certificate of Quality
Checker:
Haier Medical and Laboratory Products Co., Ltd.
Address: Haier Industrial Park, Economic Technology Development
Zone. Qingdao 266510.P.R.China
Web:www.haiermedical.com
Version:1st,2017
Dedicated code:0270501031
V13026
HYC-390F
HYC-610
HYC-890
HYC-940
HYC-940F
Read the Operation Manual carefully before using your appliance.
Keep the Operation Manual in a safe place.
Appearance , color and layout of the door may vary.
Translation of the original instruction.
This product is only applicable for storage of pharmaceutical products or drugs. Not
applicable for storage of blood or blood products including biological products, for
example biological vaccine, agents for in vitro diagnosis and etc.
Page 2

Packing List
EC Declaration of Conformity
according to the Machinery Directive 2006/42/EC
For the following equipment :
Product : Pharmaceutical Refrigerator
Type Designation/Trademark:
HYC-260
HYC-360
Model
Operation Manual
Plastic bag
Key
Shelves
Label strip
Drain hole cap
Fixed card
Brackets
(for rear wall distance)
Pad lock /
Handle Kits
Power cord Kits
HYC-260
1
1
2
4
4
1
16
2
/
/
HYC-360
1
1
2
5
5
1
20
2
/
/
HYC-290
1
1
2
5
5
1
/
2
1/0
1
HYC-390
1
1
2
7
7
1
/
2
1/0
1
HYC-390F
1
1
2
7
7
1
/
2
1/1
1
HYC-290
HYC-390
HYC-390F
Haier
HYC-610
HYC-890
HYC-940
HYC-940F
Manufactures Name : Haier Medical and Laboratory Products Co.,Ltd.
Manufactures Address : Haier Industrial Park, Economic Technology
Development Zone. Qingdao 266510.P.R.China
Refer to in this declaration confirms with the following directive(s)/standards:
2006/42/EC, EN60335-1, EN60335-2-89 EN62233
Model
Operation Manual
Plastic bag
Key
Shelves
Label strip
Drain hole cap
Fixed card
Brackets
(for rear wall distance)
Pad lock /
Handle Kits
Power cord Kits
HYC-610
1
1
2
6
/
1
24
/
0/1 /
/
HYC-890
1
1
4
12
12
/
48
/
/
HYC-940
1
1
4
12
12
/
48
/
/
/
HYC-940F
1
1
4
12
12
/
48
/
/
45
Page 3
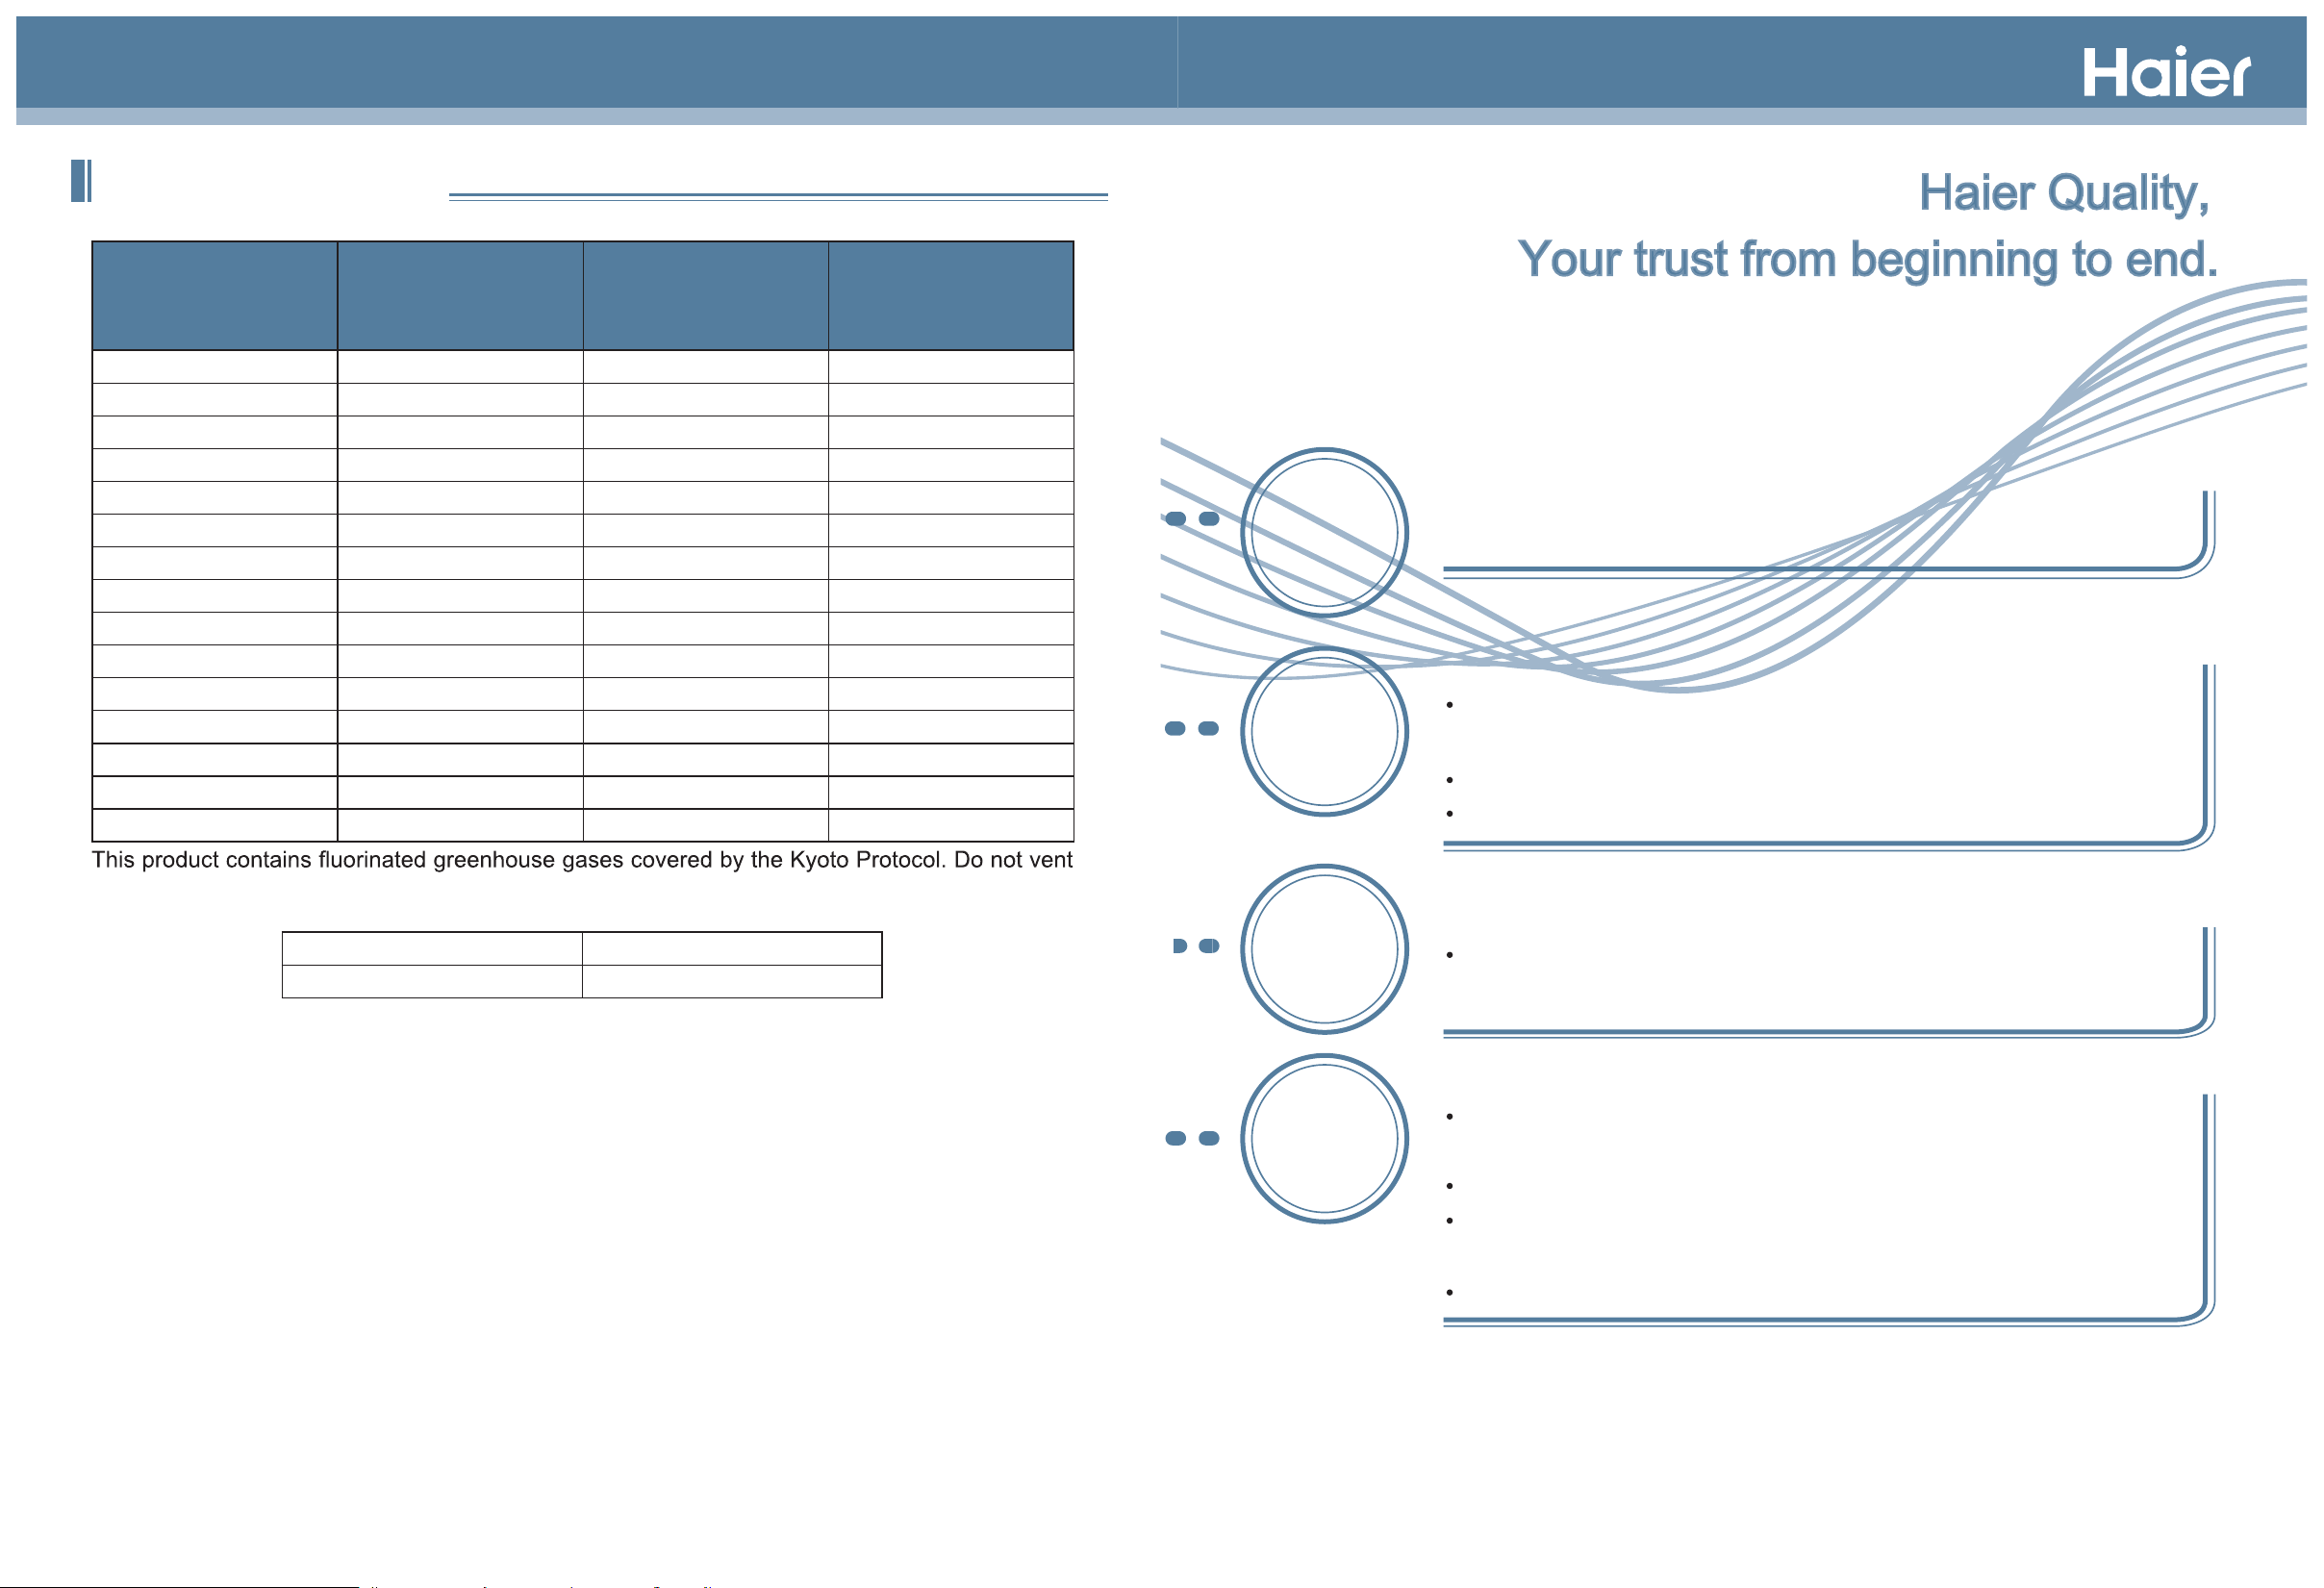
Global Warming Potential
Rated voltage
Rated frequency
CO
Model
(
HYC-260 220~240 50/60 0.186
HYC-360 220~240 50/60 0.215
HYC-360 115 60 1.177
HYC-290 220~240 50/60 0.429
HYC-290 115 60 0.358
HYC-390 220~240 50/60 0.436
HYC-390 115 60 0.429
HYC-390F 220~240 50/60 0.436
HYC-610 220~240 50/60 0.601
HYC-610 115 60 0.501
HYC-890 220~240 50 0.358
HYC-940 220~240 50 0.472
HYC-940 220~240 60 0.615
HYC-940 115 60 0.458
HYC-940F 220~240 50 0.472
VAC
)
(Hz)
equivalent
2
(Tonnes)
The product is applicable to pharmacies, pharmaceutical factories, quarantine stations, health
centers and hospitals, used to store pharmaceuticals, medicine and other related products
which need a storage environment of 2~8℃.
Temperature
Control
Safety
System
The unit is equipped with a computer control, digital display of
temperature of 0.1℃ accuracy and a temperature range of 2℃ to 8℃.
Multi-fault alarm (high and low temperature alarm, low battery alarm,
power failure alarm, sensor error alarm and door ajar alarm)
Two alarm methods(Audible buzzer alarm and flashing indicator alarm)
All independent components are safely grounded
into the atmosphere.
GWP=global warming potential
Refrigerant type GWP
R134a 1430
Refrigeration
System
User-friendly
Design
Refrigeration system is optimized with high quality hermetically sealed
compressors and other components for a high efficiency performance.
User-friendly design, computer control, smart and carefree, adjustment
not required.
High performance thermal insulation.
Electric heated glass door with multiple anti-condensation
technologies(except HYC-260/360).
Automatic removal of condensate water.
Note: Technical information might be somewhat different on your refrigerator than
published due to continuous improvement.
44
1
Page 4

Specification
Content:
Product Feature........................................................
Content.....................................................................
Safety Precautions...................................................
Application guidelines..............................................
Product Installation ...................................................
Component Names Control Panel...........................
Application method ...................................................
1
2
3
6
7
13
21
Name
Model
Exterior Dimensions
(W×D×H)
(mm)
Interior Dimensions
(W×D×H)
(mm)
Effective Volume
Door
Insulation
Compressor
Shelves
Load
Refrigerating Method
Exterior / Interior
Condenser/Evaporater
Pharmaceutical Refrigerator
HYC-940 HYC-940F
1130×755×1980
1030×590×1425
890L
Glass door with electric heat
CFC-Free foamed-in-place urethane
High Quality Hermetically sealed compressor
12 Polyester coated wire shelves
≤20kg per shelf
Force-air cooling circulation
Cold-rolled steel with power coated/Cold-rolled steel with power coated
Fin tube type / Fin tube type
Solid door
Alarm........................................................................
Cleaning and Maintenance.......................................
FAQ..........................................................................
Circuit Diagram.........................................................
Specification&Packing List.......................................
29
31
33
34
39
Temperature Control
Interior light
Net Weight
Temperature Range of
sensor in glycerin bottle
Voltage
Rated Power/Current
Refrigerant
Noise Level(Lp)
Foaming Agent
Climate Type
Anti-shock Safety Classification
Power connection type
Alarm system
Battery duration for alarm system
Rechargeable Battery
Microprocessor controlled
LED 9W
227kg 207kg
2℃~8℃
220-240V~/50Hz 220-240V~/60Hz
850W/4.5A
R134a 330g
High & low temperature alarm, sensor error alarm, power failure alarm,
770W/4.5A
R134a 430g R134a 320g
45dB(A)
CP/IP
low battery power alarm, door ajar alarm
48 h (when the battery is fully charged)
DC 12V rechargeable battery
115V~/60Hz
4
I
Y
850W/11A
220-240V~/50Hz
600W/3A
R134a 330g
2
Note: Climate Type 4 means the temperature is +30℃,the relative humidity is 55%.Technical information may vary from
the appliance that you have just purchased due to technical improvements.
43
Page 5

Safety Precautions
Specification
Name
Model
Exterior Dimensions
(W×D×H)
(mm)
Interior Dimensions
(W×D×H)
(mm)
Effective Volume
Door
Insulation
Compressor
Shelves
Load
Refrigerating Method
Exterior / Interior
Condenser/Evaporater
Temperature Control
Pharmaceutical Refrigerator
HYC-890
1130×755×1980
1030×590×1425
890L
Glass door with electric heat
CFC-Free foamed-in-place urethane
High Quality Hermetically sealed compressor
12 Polyester coated wire shelves
≤20kg per shelf
Force-air cooling circulation
Cold-rolled steel with power coated/Cold-rolled steel with power coated
Fin tube type / Fin tube type
Microprocessor controlled
Dear users:
Thanks for your choice of Haier pharmaceutical refrigerator, please make sure you have carefully
read and observed the contents with following signs in the manual, for better understanding of this
manual and better use of this product, so as to prevent personal injuries and refrigerator damage.
Ignoring this warning may result in
death or serious injury
Ignoring this warning may result in
death or serious injury,and/or damage
Actions or operations
which are prohibited
Actions or operations
which must be followed
to the refrigerator and property
When there is a leak of flammable gas, shutoff the feed valve of the gas. Open windows
for ventilation and exhaust. Do not plug in your refrigerator or unplug your refrigerator as
spark in these processes can cause an explosion or fire.
We recommend the unit be installed by a professional to avoid any electrical hazard.
Place the refrigerator on solid and flat ground to avoid tipping the unit over to cause
personal injury.
Only connect the refrigerator unit with a dedicated power outlet specified by the nameplate
of the unit. This is to avoid fire or electric shock.
Interior light
Net Weight
Temperature Range of
sensor in glycerin bottle
Voltage
Rated Power/Current
Refrigerant
Noise Level(Lp)
Foaming Agent
Climate Type
Anti-shock Safety Classification
Power connection type
Alarm system
Battery duration for alarm system
Rechargeable Battery
Note: Climate Type 4 means the temperature is +30℃,the relative humidity is 55%.Technical information may vary from
the appliance that you have just purchased due to technical improvements.
High & low temperature alarm, sensor error alarm, power failure alarm,
low battery power alarm, door ajar alarm
48 h (when the battery is fully charged)
DC 12V rechargeable battery
LED 6W
227kg
2℃~8℃
220-240V~/50Hz
800W/4A
R134a 250g
45dB(A)
CP/IP
4
I
Y
If the supply voltage is lower than 198 V or higher than 242 V, an automatic voltage
regulator of at least 4,000 W should be installed with the refrigerator.
If the power cord needs to be lengthen, the cross section area of the extension line’s
conductor should be at least 2 mm² and the length of the extension cord should be limited
to 3 m. This is to prevent electric fire or shock.
The power cord of the unit is equipped with a 16 A three-prone power plug. Do not remove
the ground pin of the power plug under any circumstances. Make sure the plug is securely
plugged into the power outlet to prevent fire.
The power socket must be equipped with a ground wire to prevent electric shock. If the
socket fails to be grounded, the ground wire must be installed before the refrigerator is
plugged in.
The refrigerator shall not conduct outdoor service. Electrical leakage or shock may be
caused if wet by rainwater.
Do not place the refrigerator in humid places or places where the unit may get splashed
on by water. This is to avoid electric shock due to deterioration of insulation.
In case the fire, do not pour water onto the refrigerator unit as a means to prevent electric
shock or short circuit.
42
3
Page 6

Do not place containers of water or heavy objects on the refrigerator. Falling objects may
cause personal injury and overflown water may damage the insulation to cause electric
shock and fire.
Do not ground the refrigerator through gas pipes, water supply pipes, telephone lines or
lighting conductors. These types of connections can cause electric shock.
Do not touch electric parts such as power plugs or switches with wet hands to prevent
electric shock.
When pulling the plug out of the power socket, hold the power plug instead of power cable.
Pulling the cable can cause a damage and personal injury.
Unplug the refrigerator unit if it malfunctions to avoid fire or personal injury.
Specification
Name
Model
Exterior Dimensions
(W×D×H)
(mm)
Interior Dimensions
(W×D×H)
(mm)
Pharmaceutical Refrigerator
HYC-610
780×840×1945
680×640×1400
Dismantling, repairing and retrofitting a unit should only be performed by a professional to
avoid personal injury.
Disconnect the refrigerator when repairs or maintenance are performed on the
refrigerator to prevent electric shock or personal injuries.
Do not inhale airborne particles inside and near the refrigerator during routine
maintenance. This is to avoid health hazard.
To avoid any potential danger to human health or environment, the refrigerator should be
used in safe regions to store toxic, harmful or radioactive particles.
If the refrigerator is to be decommissioned, unplug the power cord to avoid electric shock,
current leakage, or fire caused by aged power lines.
If the refrigerator is left unused in area where supervision is unavailable for a long time,
make sure children are not near the unit and the door cannot be completely closed and
locked.
End of life disposal of a unit should only be performed by a professional. Remove the
door to avoid accidents such as suffocation.
Do not store flammable, explosive or volatile articles inside the refrigerator and do not use
flammable sprays nearby. This is to avoid an explosion or a fire.
Do not store corrosive articles such acid or alkali in the refrigerator. These chemicals can
damage internal components or electrical parts.
Do not place packaging plastic bags within the reach of children to prevent suffocation
accidents.
Do not climb to the top of the refrigerator or place plastic bags on top of the refrigerator.
This is to prevent tip over of the refrigerator, which can cause personal injury.
Do not use any metal objects such as iron nails or wires into holes, gaps or vents for
internal air circulation. This is to prevent personal injury due to contact of articles behind
the holes.
Effective Volume
Door
Insulation
Compressor
Shelves
Load
Refrigerating Method
Exterior / Interior
Condenser/Evaporater
Temperature Control
Noise Level(Lp)
Interior light
Net Weight
Temperature Range of
sensor in glycerin bottle
Voltage
Rated Power/Current
Refrigerant
Foaming Agent
Climate Type
Anti-shock Safety Classification
Power connection type
Alarm system
Battery duration for alarm system
610L
Glass door with electric heat
CFC-Free foamed-in-place urethane
High Quality Hermetically sealed compressor
6 Polyester coated wire shelves
≤30kg per shelf
Force-air cooling circulation
Powder coated cold rolled steel/Stainless steel
Fin tube type / Fin tube type
Microprocessor controlled
43dB(A)
LED 3W
204kg
2℃~8℃
220-240V~/50Hz/60Hz
550W/3.5A
R134a 420g R134a 350g
CP/IP
4
I
Y
High & low temperature alarm, sensor erroe alarm, power failure alarm,
low battery power alarm, door ajar alarm
48 h (when the battery is fully charged)
560W/7.5A
4
Rechargeable Battery
Note: Climate Type 4 means the temperature is +30℃,the relative humidity is 55%.Technical information may vary from
the appliance that you have just purchased due to technical improvements.
DC 12V rechargeable battery
41
Page 7

Specification
Name
Model
Exterior Dimensions
(W×D×H) (mm)
Interior Dimensions
(W×D×H) (mm)
Effective Volume
Door
Insulation
Compressor
Shelves
Load
Refrigerating Method
Exterior / Interior
Condenser/Evaporater
Temperature Control
HYC-290
665×710×1665
530×555×1080
290L
Glass door with electric heat
High Quality Hermetically sealed compressor
5
≤26kg per shelf
Cold-rolled steel sheet with powder coated /HIPS plate
Pharmaceutical Refrigerator
HYC-390
665×710×1965
530×555×1380
390L
CFC-Free foamed-in-place urethane
7
≤26kg per shelf
Force-air cooling circulation
Fin tube type / Plate type
Microprocessor controlled
HYC-390F
665×710×1965
530×555×1380
390L
Solid Door
7
≤26kg per shelf
Always check the settings in the controller after restarting a unit from a power outage or
shut off. Change of settings may cause damage to the products stored.
If the power is shut off, let the unit sit for 5 minutes before it is powered up again to avoid
damaging the compressor or the system.
Wear gloves when performing maintenance to prevent personal injury as a result of sharp
edges or corners.
Hold the knob when closing the door to prevent finger pinching.
The angle of inclination shall not be greater than 45°when handling the refrigerator.
Be aware of the danger of tripping when working with the refrigerator to avoid managing
the unit or personal injury.
Do not use the door knob to prevent refrigerator damage or personal injury.
Do not damage the refrigeration line.
Do not use electrical appliances inside the food storage compartments of the appliance,
unless they are of the type recommended by the manufacturer.
Position the refrigerator to make sure the power plug is accessible.
Interior light
Net Weight
Temperature Range of
sensor in glycerin bottle
Voltage
Rated Power/Current
Refrigerant
Noise Level(Lp)
Foaming Agent
Climate Type
Anti-shock Safety
Classification
Power connection type
Alarm system
Battery duration
for alarm system
Rechargeable Battery
LED 3W
105kg
2℃~8℃
220-240V~/50/60Hz
340W/2.2A
R134a 300g
43dB(A)
CP/IP
4
I
Y
High & low temperature alarm, sensor error alarm, power failure alarm,
LED 3W
116kg
2℃~8℃
115V~/60Hz 115V~/60Hz
460W/5.0A
R404a 250g
47dB(A)
low battery power alarm, door ajar alarm
220-240V~/50/60Hz
380W/2.4A
R134a 305g
43dB(A)
CP/IP
48 h (when the battery is fully charged)
DC 12V rechargeable battery
500W/5.5A
R404a 300g
47dB(A)
4
I
Y
LED 3W
106kg
2℃~8℃
220-240V~/50/60Hz
300W/2.4A
R134a 305g
43dB(A)
CP/IP
4
I
Y
The appliance must be placed on a solid and flat surface, or excessive vibration and
noise may be produced when the appliance in operation.
The appliance can be used by children aged from 8 years and above and persons with
reduced physical, sensory or mental capacibilities or lack of experience and knowledge
if they have been given supervision or instruction concerning use of the appliance in a
safe way and understand the hazards involved. Children shall not play with the appliance.
Cleaning and user maintenance shall not be made by children without supervision.
If the power supply cord is damaged, it should be replaced by a qualified technician to
avoid a hazard condition.
Keep ventilation openings, in the appliance enclosure or in the built-in structure, clear of
obstruction.
If your cabinet is to be discard, you must remove the door and leave the shelves in
place. This will reduce the posibility of danger to children. And the flammable foaming
needs to be disposed by professional persons.
CP/IP foaming materials are flammable, need professional processing.
Note: Climate Type 4 means the temperature is +30℃,the relative humidity is 55%.Technical information may vary from
the appliance that you have just purchased due to technical improvements.
40
5
Page 8

Application guidelines
The battery in the refrigerator may be low after the refrigerator has been in storage for a long time.
Turn on the battery charge switch when the unit is powered up to allow the battery to be recharged.
Specification&Packing List
Specification
The battery will be in full capacity after about a week’s charging.
Before loading the refrigerators, make sure the unit is at set temperature. Do not load in more than
1/3 of the storage volume to avoid thermally overloading the unit.
The display on the panel shows the sensor temperature located in the refrigerator. It is not
necessary the same as the temperature in the center of the refrigerator. The cabinet temperature
will gradually reach an equilibrium state.
Only clean the unit with light soapy water. Never use brushes, acids, gasoline, soap powders,
polishing powders or hot water to clean refrigerators as these materials may damage the interior
painting and surface, parts and components. Never wide plastic parts with volatile solvents such
as gasoline.
If the unit is to be stored for a long period of time, turn off the power switch and the battery
charging switch.
To reduce the possibility of temperature fluctuation in the refrigerator, please attempt to cut down
the time to open to the door to remove and load products.
If the door is opened, the temperature of the refrigerator will warm up somewhat. That is normal.
Name
Model
Exterior Dimensions
(W×D×H) (mm)
Interior Dimensions
(W×D×H) (mm)
Effective Volume
Door
Insulation
Compressor
Shelves
Load
Refrigerating Method
Exterior / Interior
Condenser/Evaporater
Pharmaceutical Refrigerator
HYC-260
620×655×1720
550×460×1065
260L
Glass door
CFC-Free foamed-in-place urethane
High Quality Hermetically sealed compressor
4 Polyester coated wire shelves
≤20kg per shelf
Force-air cooling circulation
Scratch resistant painted steel / HIPS
Wire tube type / Fin tube type
HYC-360
620×655×1995
550×460×1340
360L
Glass door
5 Polyester coated wire shelves
≤20kg per shelf
Force-air cooling circulation
Scratch resistant painted steel / HIPS
Wire tube type / Fin tube type
The temperature will recover to a stable condition in a short time.
The refrigerator is designed to operate at a condition of 16 ℃ to 32 ℃ and humidity less than
85%RH (for HYC-260/360,the humidity should be less than 70%RH). Small amount of condensation
can occur on the surface of the unit if the actual condition is outside of this range. The storage
temperature of the unit, however, is not impacted. To reduce the condensation, please improve the
ventilation and drop the ambient temperature if possible.
Only professional people should perform maintenance work.
Meaning of crossed –out wheeled dustbin:
Do not dispose of electrical appliances as unsorted municipal waste, use separate collection
facilities.Contact you local government for information regarding the collection systems available.
If electrical appliances are disposed of in landfills or dumps, hazardous substances can leak into
the groundwater and get into the food chain, damaging your health and well-being.When replacing
old appliances with new ones, the retailer is legally obligated to take back your old appliance for
disposals at least free of charge.
Temperature Control
Interior light
Net Weight
Temperature Range of
sensor in glycerin bottle
Voltage
Rated Power/Current
Refrigerant
Noise Level(Lp) 43dB(A) 43dB(A)
Foaming Agent
Climate Type
Anti-shock Safety Classification
Power connection type
Alarm system
Battery duration for alarm system
Rechargeable Battery
Microprocessor controlled
Fluorescent lamp 15W
88kg
2
℃~8℃
220-240V~/50Hz/60Hz
300W/2.1A
R134a 130g
CP/IP
4
I
Y
High & low temperature alarm, sensor error alarm, power failure alarm,
low battery power alarm, door ajar alarm
48 h (when the battery is fully charged)
DC 12V rechargeable battery
220-240V~/50Hz/60Hz
Microprocessor controlled
Fluorescent lamp 15W
99kg
℃~8℃
2
315W/2.2A
R134a 150g
CP/IP
4
I
Y
115V~/60Hz
340W/4.5A
R404a 300g
47dB(A)
6
Note: Climate Type 4 means the temperature is +30℃,the relative humidity is 55%.Technical information may vary from
the appliance that you have just purchased due to technical improvements.
39
Page 9

Product Installation
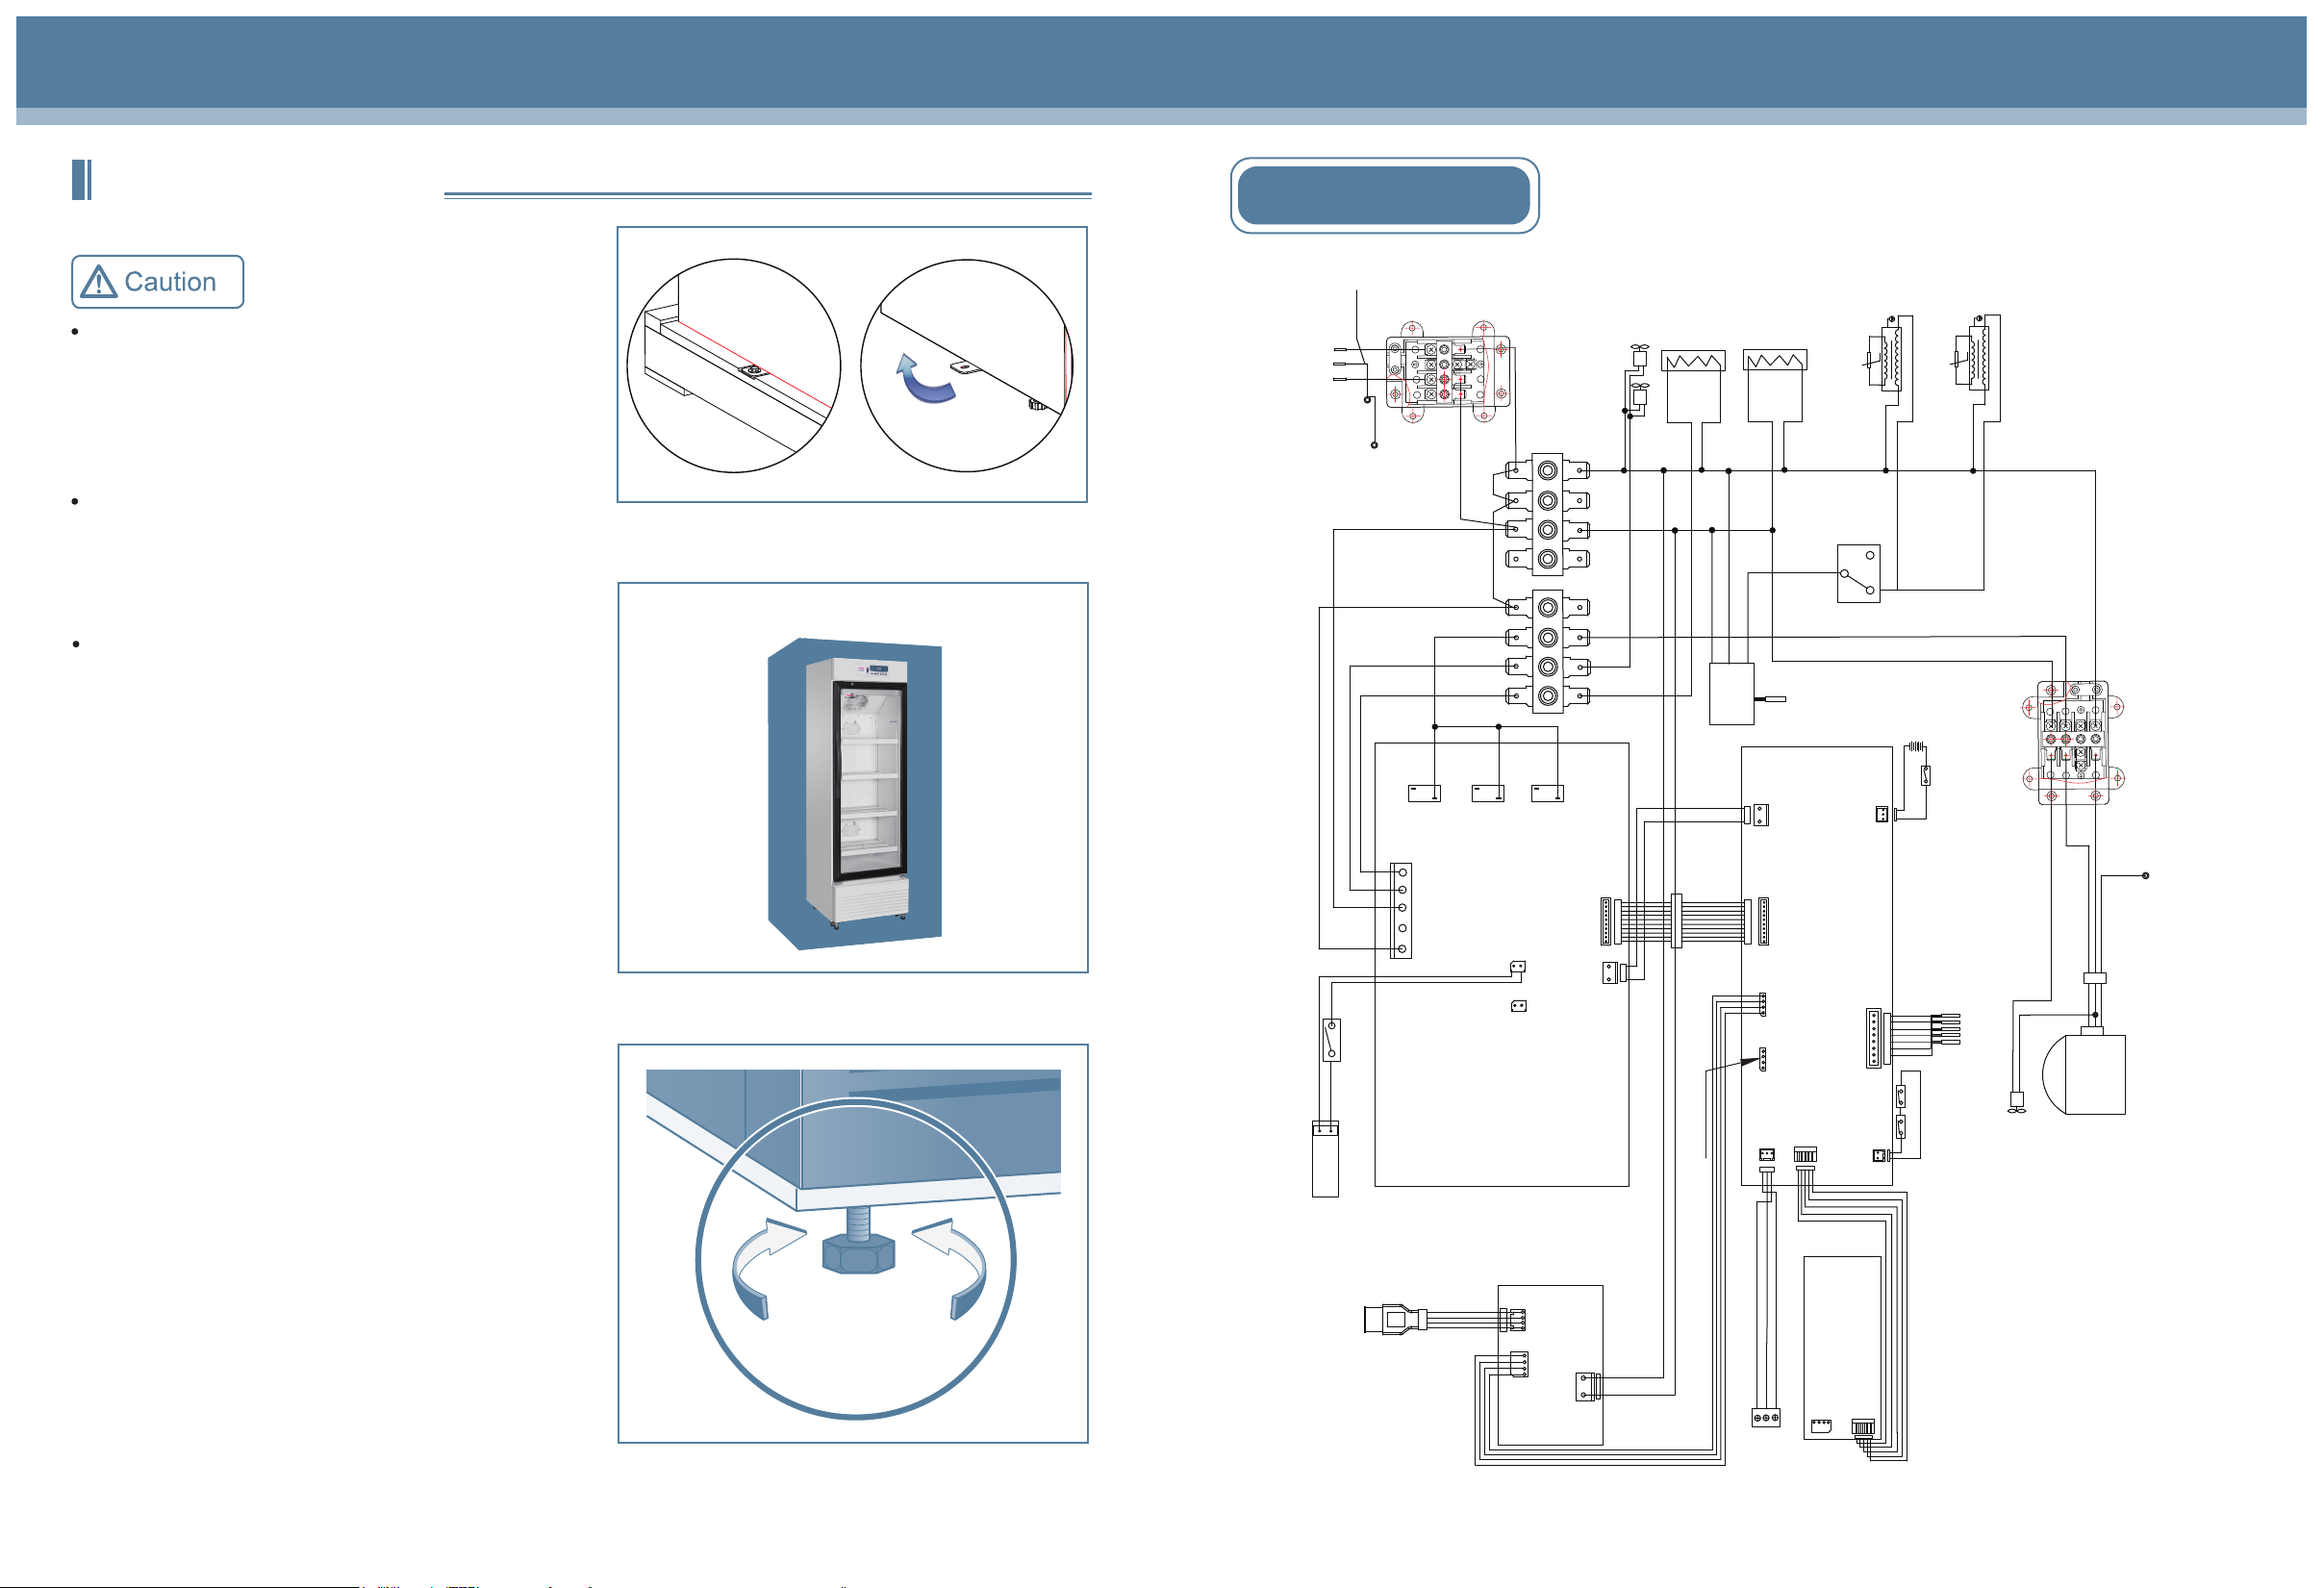
Circuit diagram(HYC-940/940F)
Junction
Power wire
N
E
L
to the roof of cabinet
Terminal connected
Terminal connected
box
N
L
1
to the compressor
bottom board
NC
K3
NO
CN2
HTR
FAN
L
N
N
L
2
NC
NC
K7
NO
Power panel
GND
+12V
CN4
CN5
Lamp switch
LED lamp set
LED lamp set
Installation environment
Ambient temperature: 16 ℃ to 32 ℃, the range of 18 ℃ to 25 ℃ is optimal. Air conditioning
system is required as necessary.
Ambient humidity: below 85%RH(for HYC-260/360,the humidity should be less than 70%RH).
Internal fan
t
Door heating strip
t
Door heating strip
Door heating transformer
Door heating transformer
Avoid excessive dust.
Avoid mechanical vibration.
outlet
at the cabinet
Heating strip
strip
heating
Defrosting
The refrigerator shall operate at an altitude lower than 2000m.
Input voltage: no greater than ±10% of rated voltage.
Performance of the refrigerator is degraded if the operational conditions are
beyond the specifications mentioned above.
thermostat
prevention
High temperature
L
C
H
applicable for products with the foaming door.
Note: The content in the frame with dotted lines are not
The unit should be installed indoors. Electric leakage or shock is possible if the
unit gets wet by rainwater.
Installation site
N
L
1
The installation site shall meet following requirements for normal operation and best performance of
N
2
L
K4
NO
CN1
GND
16V
CN3
CN11
GND
16V
CN2
CN1
USB
Main control panel
CN4
PRINT
NC
NO
COM
Printer communication interface
CN5
CN6
BAT-
BAT+
Sensor
door
BT1
Battery switch
Terminal connected to the
compressor bottom board
CN3
Alarm
Defrosting
Control
Lower temperature
Upper temperature
VCC
GND
Door switch
CN7
Cooling fan
Compressor
Cooling fan
Display panel
CN2
Remote alarm port
NO
COM
CN1
NC
refrigerator:
Do not install the refrigerator in a narrow and confined space as heat may be trapped to increase
ambient temperature. Additionally, the unit should not be installed in a space where the entry door
way is low to prevent an easy maneuver of the unit for maintenance and operation.
The floor for the installation site should be solid and flat. It should also be well ventilated and free
from direct sunshine.
The power outlet for the refrigerator must be a dedicated power outlet. The power plug must be
plugged in to the outlet securely.
Do not twist or jam the power cord.
If the power cord needs to be extended, the cross section area of the conductor in the extended
line should be no less than 2 squared millimeters and no longer than 3 meter.
Inspect the operating voltage range before operation. If the voltage supply is unstable, install a
voltage stabilizer of 4000 W or greater to ensure the supply voltage is within 10% of the rated
voltage supply.
The refrigerator must be grounded reliably.
Check the integrity of the socket ground before power up. If it is not grounded appropriately,
repair the wiring before installing the unit.
Do not ground the refrigerator through gas lines, water lines, telephone lines, or lighting rods as
these devices may cause electric shock and danger.
The power plug and outlet should be located in a place where they can be
accessed easily and immediately in case of an emergency. Air vents must be
free of obstruction.
The power plug can be accessed after installation to ensure the power line can
be pulled out in a timely manner in emergency cases. The air vent shall free from
barriers.
38
7
Page 10
Preparation before usage
1. Remove all packaging materials.
For safety reason, the equipment of
HYC-890/940/940F is situated on a wooden
pallet and secured by metal brackets. Please
remove the screws and place the metal
brackets under the unit.(Pic.1).
Forklift or specialty lifting equipment should be
used to remove the unit off the pallet. Forklift
should reach the bottom of the wood pallet for
lifting.
The unit should not be tilted at an angle of
more than 45 degree.
2. Inspect standard accessories shipped with the unit
Inspect the accessories against packing list. Should
there be any discrepancy, contact the after-sale
department.
3. Installation
Leave a minimum space of 10 cm around the
refrigerator for ventilation and heat dissipation.
(Pic.2).
4. Adjust the leveling leg
Rotate the leveling legs with a wrench in clockwise
to extend them out and secure them onto the ground.
This is to make sure the refrigerator does not move
during operation.(Pic.3).
> 10cm from
the back
> 10cm from
the left
Pic.1
> 30cm from the top
Pic.2
> 10cm from
the right
Circuit diagram(HYC-890)
Junction
Power wire
N
E
L
to the roof of cabinet
Terminal connected
Lamp switch
LED lamp set
Terminal connected
box
N
L
1
to the compressor
bottom board
NC
K3
NO
CN2
HTR
FAN
L
N
N
L
2
NC
NO
Power panel
K7
GND
+12V
CN4
CN5
Internal fan
NC
K4
NO
CN1
GND
16V
CN3
strip
heating
Defrosting
L
Printer communication interface
C
N
controller
Electronic
CN6
Heating strip
at the front vertical beam
CN11
GND
16V
CN2
CN1
USB
CN4
PRINT
NC
NO
COM
t
Door heating strip
prevention
High temperature
C
Sensor
Main control panel
Sensor
CN5
thermostat
L
H
BT1
BAT-
BAT+
CN3
CN7
door
Door heating transformer
Battery switch
Alarm
Defrosting
Control
Lower temperature
Upper temperature
VCC
GND
Door switch
t
Door heating strip
Door heating transformer
L
1
2
L
Compressor
Cooling fan
N
N
Terminal connected to the
compressor bottom board
8
Downward
Leveling legs
Pic.3
upward
USB port
CN2
J5
N
L
USB panel
CN1
Remote alarm port
NC
NO
COM
Display panel
CN2
CN1
37
Page 11

Circuit diagram(HYC-610)
prevention
thermostat
Low temperature
L
C
LED lamp bank
Lamp switch
H
High
prevention
temperature
L
C
H
thermostat
Defrosting heating strip
thermostat are exchangeable.
L of the low temperature prevention
Note: Cables at terminal C and terminal
Switch
Heating strip at the cabinet outlet
t
Door heating strip
Door heating transformer
Null wire
Earth wire
Live wire
Filter
Grounding
Double-throw switch
Grounding
Wiring terminal
Power line
5. Standing
Do not immediately power up the refrigerator after it is installed. Let the unit stand still for 24 hours
and then power it up to ensure the unit works properly.
6. Installation of Shelves and Label strip
HYC-260/360/610/890/940/940F
Take out the shelf, label strip and rack fastener from the
refrigerator. Fix the shelf fasteners on the liner plate at the
appropriate distance and height. After mounting the shelf
and label strip, place them on the shelf fastener and ensure
the shelf is placed firmly.See Pic. 1 (see Pic. 2 for HYC-610、
Pic.1
HYC-890);
HYC-290/390/390F
After mounting the shelf and label strip, place them on the
liner plate slot at the appropriate distance.
Pic.2
NC
NC
K3
NO
CN2
HTR
FAN
L
N
CN2
NC
K7
NO
CN4
CN5
K4
NO
GND
16V
GND
+12V
CN4 and CN5 are both LED power supply interfaces.
Power panel
CN1
CN3
CN11
GND
16V
CN2
CN1
USB
CN4
NO
CN6
Printer communication interface
Main control panel
PRINT
NC
COM
CN5
BAT-
BAT+
CN3
Sensor
door
BT1
CN7
Battery switch
Alarm
Defrosting
Control
Lower temperature
Upper temperature
VCC
GND
Door switch
7. Install handle (HYC-390F/HYC-610/HYC-940F)
1
a.Place the end
of handle with a
hole facedown.
3
c.Raise the handle
after securing the
handle and holder.
2
b.Align the handle with
the holder on the door.
4
d.Use screws to fasten
the handle at the bottom.
36
N
L
J5
USB drive board
CN1
Internal fan
NC
NO
Remote alarm port
COM
Display panel
CN2
CN1
Temperature recorder (optional)
Cooling fan
Compressor
9
Page 12

8.Back Bracket(HYC-260/360/290/390/390F)
HYC-260/360
Install the support bolts into the mounting holes on the back of the
refrigerator. (See Pic.3)
Circuit diagram(HYC-290/390/390F)
t
HYC-290/390/390F
Remove four M5 bolts from the back of cabinet,then fix the back
bracket for rear wall distance with the removed bolts.(See Pic.4)
9. Power line bracket installation (HYC-290/390/390F)
Use two M3.5 screws to fix the power line brackets to the refrigerator.
(See Pic.5)
For the power supply cable with loose prevention hook it is not
configured clamp stand.
Pic.3
Pic.4
Pic.5
LED lamp bank
LED lamp bank
Lamp switch
NC
CN2
C
K3
NO
HTR
FAN
L
N
Condensate fan
Compressor
terminal C and
terminal H of the
thermostat can be
exchanged.
mechanical
Note: Cables at
L
H
NC
NO
NC
K7
CN4
CN5
GND
K4
NO
+12V
CN4 and CN5 are both LED
power supply interfaces.
Power panel
GND
16V
CN1
CN3
Internal fan
Printer
Door heating strip
Door heating transformer
NO
CN6
CN11
CN2
CN1
CN4
COM
GND
16V
USB
PRINT
NC
CN5
BATBAT+
Main control panel
Sensor
door
Note: HYC-390F has no Door heating strip,
Door heating transformer and mechanical
thermostat.
BT1
CN3
CN7
Battery switch
Alarm
Defrosting
Control
Lower temperature
Upper temperature
VCC
GND
Door switch
L
N
2
applicable for products with the printer.
Note: The content in the frame with dotted lines are
Grounding
10
CN2
L N
J5
USB drive plate
CN1
CN2
CN1
USB transfer plate
Display panel
CN2
Remote alarm port
NC
NO
COM
CN1
1
L
N
Terminal box of power line
LNE
Power line
35
Page 13

Circuit Diagram
Circuit diagram(HYC-260/360)
NC
NO
K3
NC
NO
K7
NC
K4
NO
Compressor
Internal fan
Condensate fan
CN11
GND
16V
Initial Power-on
Follow the flow chart below to start the refrigerator.
While the refrigerator is empty, connect the power line to the appropriate dedicated socket and
make sure the power supply in the socket matches the required voltage and frequency.
After the power is switched on, turn on the battery charging switch. The audible alarm is usually
triggered. Press the buzzer to stop the alarm. The audible alarm continues to operate until the
temperature of the sensor reaches 5℃±3℃.
Lamp
BT1
BATBAT+
Battery switch
Starter
Ballast
The refrigerator has been preset to operate at 2~8℃ in the factory and it is not required to set
temperature
CN2
HTR
FAN
Power panel
L
N
CN1
GND
16V
CN3
CN4 and CN5 are both LED power supply interfaces.
CN4
CN5
GND
+12V
CN6
CN2
Lamp switch
CN1
Main control panel
CN3
Sensor
CN7
door
Alarm
Defrosting
Control
Lower temperature
Upper temperature
VCC
GND
Door switch
Grounding
L
N
N
2
1
L
USB
CN4
NC
NO
COM
CN5
Terminal box of power line
It usually takes several hours for the refrigerator temperature to reach a stable condition. When
the temperature becomes stable, inspect the actual temperature to make sure it matches the set
point.
Turn on the light switch and ensure the light inside the freezer operates properly.
When the refrigerator passes all the functional inspections, load in products in batches.
Display panel
CN2
CN1
N
E
L
34
Power line
11
Page 14

FAQ
This unit should be managed a dedicated professional person. Operating conditions
should be checked and recorded using appropriate methods. When the refrigerator
temperature is out of specification, take proper actions to protect the stored samples.
No products should be stored in the unit unless the unit operates without issues.
The refrigerator is a pharmaceutical refrigerator designed to operate within 2℃ to 8 ℃.
Make sur to store only products that fit this temperature range.
Due to the refrigeration effect, the displayed temperature may be somewhat different
from actual temperature and humidity. This is a normal process.
Do not place any article in the space between liner bottom and underbed shelf of the
refrigerator to avoid blocking of air duct which may affect homogeneity of temperature
inside.
Warm products should only be loaded into the units in batches to reduce the load to
the cooling system. Overloading the system can cause the refrigerator temperature
to rise and the compressor to work under undesirable stress, which can shorten the
life of the system.
Do not damage the refrigeration lines.
Do not use an electrical apparatus in the refrigerator without proper approval.
If you have any questions about the operation of the refrigerator, please refer
to the table frequent asked questions as follows. Call Haier technical support
if you still have questions. Do not attempt to maintain or dismantle the unit by
yourselves.
Fault
The refrigerator does not work
The refrigeration effect is
weak and temperature
exceeds upper limit.
Troubleshooting
Inspect the power supply to make sure it meets the requirement.
Inspect the connection between the power plug and the socket.
Check the power cord for any obvious damage.
Whether the voltage is too low
The unit is loaded with too much warm sample and product.
There is a lack of space between stored samples.
There might be a direct sunlight or other heat radiation energy on the refrigerator.
The door is opened too frequently.
Operation after Power Outage
The control parameters are stored in the control system in the refrigerator even there is a power
outage. When the power recovers after the outage, the refrigerator continues to operate in
accordance to the set parameters before the power outage.
If the unit is shut off, allow a 5 minutes hiatus before powering it up again.
If the unit is to be shut down for a long time, be sure to turn off the power
switch, and the battery switch. Unplug the unit from the power outlet. This is
to a hazardous condition due to aging power lines.
If the refrigerator is decommissioned and left unattended, make sure children
cannot get close to the refrigerator and the door cannot be closed completely.
Unit seems to emit
too much noise.
Alarm light flashes
and alarm buzzer sounds
Ambient temperature is too high.
Air duct is blocked.
Check the installation of the unit to make sure the unit does sit on a solid floor
without vibration.
Part of the refrigerator leans against a wall.
As a reference, the published sound data is obtained at specific laboratory condition.
It is normal that the actual sound level in the field differs due to subtle installation and
operation conditions.
Warm products have been placed into the unit recently and the refrigerator has not
stabilized yet at 2℃to 6 ℃. The alarm condition will be automatically corrected once
the temperature reaches the set value.
The door is not closed properly.
The unit lost power recently and it is in the process of cooling down.
Ambient temperature might exceed the designed range.
12
33
Page 15

Component Names Control Panel
Purchasing backup battery for temperature recorder
You can purchase a high quality battery from a store for the same size and voltage(9V). You may
also call Haier to purchase a high quality replacement battery. The lead time to deliver the battery is
15 days after receiving the payment. Please call Haier for details.
Battery maintenance
When the refrigerator works continuously, please test battery charge level every 15 days (please
refer to “Alarm Test” on Page 27 for test method). In case of low battery charge level, make sure
that battery switch is on and battery is charged. When the battery has been charged for consecutive
7 days, please retest battery charge level. In normal conditions, battery charge should be full. If low
battery charge level remains, it is recommended to replace the rechargeable battery.The battery of
power failure alarm is a consumable item with 3-year service life. If it has been used for more than 3
years, power failure alarm may not act when alarm conditions occur. It is recommended to replace
the battery earlier. Please contact a Haier after-sales service technician for battery replacement.
Rechargeable battery recycling
Component Names
HYC-260/360
Light switch
Control panel
Door ajar alarm switch
Door lock
Handle
The refrigerator has a built-in rechargeable battery. The battery is recyclable; when its service life
expires, please ask a local relevant battery recycling organization for check or discard it properly.
a.Battery location
The built-in battery of the refrigerator-freezer is used for power failure alarm and located in the
electrical compartment.et.
There are high-voltage electrical components in the electrical compartment.
To avoid electric shock, the cover of the electrical cabinet must be opened by a
qualified technician.
b.Battery removal
1) Unplug the unit from the power outlet.
2) Remove the screws on the cover with a screw driver.
3) Unplug the battery’s connecting plugs.
4) Remove the battery’s holding clip and remove the battery.
5) Recycle or dispose of the used battery as required.
Prohibition
Shelf
Glass door
Glycerin bottle for
temperature sensor
When replacing the battery, make sure that brown wire is connected to the battery's positive pole
and blue wire to the battery's negative pole. Do not misconnect; otherwise the charging circuit of
computer board would be burned out easily and thus the battery cannot be charged.
32
Leveling leg
13
Page 16

Cleaning and Maintenance
HYC-290/390
Door lock
Interior light
Battery
switch
Handle
Door ajar
alarm switch
Light switch
Control panel
USB port(Optional)
Component Cleaning
To avoid electric shock or personnel injuries, make sure to power off the
refrigerator before any repair work or maintenance is performed.
Make sure no drug or aerosol around the refrigerator is inhaled during
maintenance, otherwise your health will be threatened.
Refrigerator cleaning
The refrigerator should be cleaned once a month to keep the appearance new and reduce the
chance for gem formation.
Use a damp cloth to clean off dust on the refrigerator. If necessary, use light detergent water to
wipe off the unit if necessary. Then use a dry cloth to wipe it again.
Do not dump water directly onto the interior of the unit to avoid damage to electrical systems.
Compressor and other mechanical parts are hermetically sealed. They don’t need lubrication.
Lamp replacement
Glass door
Shelf
(1) HYC-260/360 is equipped with a fluorescent lamp on the upper front part of the refrigerator.
When you change the tube, please pay attention:
Unplug the power cord.
Remove the lamp cover.
Remove the tube.
Replace the original florescent lamp with a new lamp.
Switch on the power.
Replacement lamp must have the same specification as the original one.
If the starter is defective, remove the old starter and install a new starter.
(2)HYC-290/390/390F/610/890/940/940F is equipped with a LED lamp. To replace the lamp,
please contact the service department.
Purchasing chart paper for temperature chart recorder
The chart recorder papers are imported chart papers designed for the recorder. The papers that are
supplied with the unit usually last about half of a year. When you are running short of the chart paper,
please contact Haier to purchase more. The lead time to deliver the charts is 15 days after receiving
the payment . Please call Haier for details.
Caster Leveling leg
14 31
Page 17

Automatic Alarm Recovery
HYC-390F
This series of refrigerator is has an automatic alarm recovery feature.
When the system is in the alarm mode, you can press the “Silence” on the display panel to
cancel the alarm. (The remote alarm will not be stopped.)
If the alarm condition still exists, the buzzer will return to the alarm mode again
automatically 20 minutes later.
HYC-260/360 series does not have the remote alarm function.
Remote Alarm Terminals
HYC-290/390/390F/610/890/940/940F has remote alarm terminals:
Remote alarm terminals are installed on the
refrigerator and the alarm signal behind the
compartment is output by the terminals. The
bearing capacity of the terminals is DC 30V, 2A.
Terminal output:
Remote alarm terminals include NO, NC and COM.
COM
NO
NC
Handle
Pad lock
Door
lock
Door ajar
alarm switch
Light switch
Battery
switch
Control panel
USB port
The user can choose “NO” or “NC” if needed.
Solid door
Caster Leveling leg
30
15
Page 18

Alarm
HYC-610
Glycerin bottle for
temperature sensor
Light switch
Control panel
Interior light
Alarm or Safety
High
temperature
Low
temperature
Outage
Door ajar
Phenomenon
If upper temperature sensor or lower
temperature sensor perceives
temperature of the refrigerator ≥8℃
If upper temperature sensor or lower
temperature sensor perceives
temperature of the refrigerator < 2℃
Outage of the refrigerator
Outer door ajar or open
Open circuit or short circuit of
the upper temperature sensor
Alarm Indication
Alarm light flashes
Alarm light flashes
Temperature Display area
displays inside temperature
for 60s and stop displaying
for 60s, then repeat
Alarm light flashes
after 10 min delay
Alarm light flashes,
temperature display
area displays E1
Buzzing Alarm
Impulsive sound alarm
Impulsive sound alarm
Impulsive sound alarm
within 48h outage
Give impulsive sound
alarm after 10 min delay
Impulsive sound alarm
Handle
Door lock
Caster
Shelf
Door ajar alarm switch
USB port(Optional)
Temperature
recorder
Sensor
abnormities
Open circuit or short circuit of
the lower temperature sensor
Open circuit or short circuit of
the control sensor
Open circuit or short circuit of
the defrosting sensor
Alarm light flashes,
temperature display
area displays E2
Alarm light flashes,
temperature display
area displays E3
Alarm light flashes,
temperature display
area displays E4
Impulsive sound alarm
Impulsive sound alarm
Impulsive sound alarm
If alarm condition is not corrected within 20 minutes, buzzer and remote control
contact will restart.
IF there is a power outage, a fully charged emergency battery can keep the
alarm function in working condition for 48 hours.
Once the unit starts up and restarts after a long time in storage, charge the
battery for to keep the alarm function for 48 hours.. Even if the battery
discharges, remote alarm contact shall keep in working condition.
Press "Alarm Test " key. For each press, the buzzer goes off thrice with frequency
as 1Hz continuously. Meanwhile, the alarm indicator light flashes thrice and the
remote alarm relay is disconnected after pull-in thrice, which means the alarm
system functions normally.
16
Leveling leg
29
Page 19

1. If control buttons are not touched in 60 seconds, all changes of parameters will not
HYC-890
become effective. The previous settings are restored.
2. If the unit is powered off before the parameters are saved, the control parameters in
the RAM will be lost. The unit will retain the previous set up once the power recovers.
3. Humidity measuring range: 20 ~ 90% RH; humidity measurement accuracy: ± 5% RH
(40% RH ~ 80% RH); ± 8% RH (Others)
Door lock
Light switch
USB port
Control panel
Handle
Glass door
Caster
Shelf
Leveling leg
28
17
Page 20

HYC-940
Door lock
Light switch
Control panel
shows“1P” once again. Users can set 1P-5P again. After the setting, press the “Cal ” for 5s, and all s
ettings will be automatically saved. And then the display area of inner temperature shows the inner
temperature normally.
Note: during the said 1P-5P setting process, parameters can be specifically regulated via the
“Sensor ” (increase) or “Cal Cancel” (decrease) keys. For example,in the case that current display
area of inner temperature shows 1P (year), and the year (1P)and month (2P) need not regulation,
Handle
press the “Cal Cancel” to choose the date (3P) so as to reset the date directly. Then press the “Cal ”
and the display area of inner temperature blinks the date. Press the “Sensor ”(decrease) or
“Cal Cancel” (increase) to regulate the current date. And then press the “Cal ” to save it. After that,
the display area of inner temperature shows the hour (4P). If hour setting is necessary, press the
“Cal ” to regulate. Otherwise press “Cal Cancel” (increase) to enter the minute (5P) setting.Upon the
finish of setting, press the “Cal ” for 5s to save it and exit. Then the display area of inner temperature
shows the inner temperature normally. During the said 1P-5P setting process, after setting any
parameter, if other parameters do not need to set, press the“Cal ” for 5s to save it and exit.
Please checking the time before use, if the time is not right, follow the upper
method to adjust the time 。
Anti-condensation controller(HYC-890)
Anti-condensation controller intelligently operates the heating on the door and cabinet parameter to
prevent condensate from forming, using the environment temperature and the humidity as input
parameters. Therefore, in environment with high humidity, the heater in the door glass and
18
Glass door
Caster
Leveling leg
Shelf
parameter of the frame will be powered up.
Display description
The left panel window displays the temperature and humidity, and keypad is on the right side.
Display description is as follows:
It is 2-1/2 digital display, as shown in the right picture:
① Alarm symbol: displayed when alarming;
② Heating symbol: displayed during heating operation;
③ Defrost symbol: (not used);
①
②
③
④ Humidity symbol: displayed when checking humidity;
Humidity display range: 20 ~ 90% RH;
④
Modify control humidity
Three buttons “SET” ,“▲”,“▼” on the instrument are used for controller operation.
Press button “SET” for 1 second, display shows the current set operating point;
Use “▲” or “▼” to increase or decrease the set humidity value, until it reaches the desired value;
Press button “SET” for 5 seconds to confirm and exit setup.
27
Page 21

USB Function
Functions of USB interface
The computer has a USB function. Test data can be exported via the USB port. The computer can
automatically collect and store the test data within the recent 10 years. It collects data every other 6
minutes and stores them automatically. The latest data will automatically replace the earliest data
when the data storage is full.With a USB port plugged in, the computer will automatically identify it
and start to export data to the USB port.In the data exporting process, if you press “ Cal ” , the
screen will blink “ USb” , which indicates the data are now exporting and not finished yet. After
blinking 5s, it exits and displays the actual temperature in the case.If the displays “ ALL” stably, the
HYC-940F
Control panelLight switch
Door lock
data export is finished. It exits 5s later can displays the actual temperature in the case.The USB port
can be removed at this point. The exported data are in the following formats:
序号/No.
0
1
2
...
Time setting of USB interface data recording (time system current setting):
Press the “Cal” for 10s and the display area of inner temperature shows “1P” stably. Press the “Cal ”,
and the display area of inner temperature blinks the year. Press the “Sensor ” (decrease) or
“Cal Cancel” (increase) to choose the year. It displays 10 to 99 recurrently. For example, to set 2013,
choose 13 and press the “Cal ” to save it. And then the display area of inner temperature shows "2P"
stably. Press the “Cal”, and the display area of inner temperature blinks the month . Press the
“Sensor ” (decrease) or “Cal Cancel” (increase) to choose the month. It displays 01 to 12 recurrently.
When the current month comes out, press the “Cal ” to save it. And then the display area of inner
时间/Time
20130425
20130425
20130425
...
设定温度/Setting Temp.
5
5
5
...
箱内温度/Inner Temp.
5.6
5
4.9
...
Door ajar alarm switch
Handle
temperature shows “3P” stably. Press the “Cal ”, and the display area of inner temperature blinks
the date . Press the“Sensor ” (decrease) or “Cal Cancel” (increase) to choose the date. It displays
01 to 31 recurrently. When the current local date comes out, press the “Cal ” to save it. After that,
the display area of inner temperature shows “4P” stably. Press the “Cal ”, and the display area of
inner temperature blinks the hour.Press the “Sensor ” (decrease) or “Cal Cancel” (increase) to
choose the hour. It displays 00 to 23 recurrently. When the current local hour comes out, press the
“ Cal ” to save it. After that, the display area of inner temperature shows “5P” stably. Press the
“ Cal ”, and the display area of inner temperature blinks the minute. Press the “Sensor ”(decrease)
or “Cal Cancel” (increase) to choose the minute. It displays 00 to 59 recurrently. When the current
local minute comes out, press the “Cal ” to save it. After that, the display area of inner temperature
26
Caster
Leveling leg
19
Page 22

Control Panel
Calibration of Recorder
The temperature recorder has been accurately adjusted before leaving the factory even if the power
supply is interrupted. If there is a need to be adjusted, perform the following procedures.
HYC-260/360/290/390/390F/890/940/940F
HYC-610
1. Let the unit run for at least 2 additional hours after it reaches stable condition,
2. Place a standard thermocouple in the temperature solution bottle filled with 100 ml 10%
glycerol solution. Place the sensor of the temperature recorder into the sensor bottle as well.
3. Place the sensor bottle in the refrigerator for at least 4 hours. Compare the thermocouple
reading and the recorder reading. If there is a discrepancy, press the adjustment button on the
left (1#) or on the right (2#) of the panel to adjust the temperature value of the recorder so that
recorder reading matches the reading of the thermocouple.
Note: The recorder pen will start moving 5 seconds after the button is left out.
The recorder has been calibrated before leaving the factory. Do not make adjustment except in
special circumstances.
The recorder is optional for HYC-610 only, not available for others.
20
25
Page 23

Maintenance and replacement of the recorder's standby battery
When the recorder’s LED light blinks green, check the recorder performance as follows.
1) Remove the standby battery. If the LED light is off and the recorder stops working, the
main power supply of the recorder fails. Check the main power supply for connection and
any other issues. When the main power is available and the recorder starts working
Application method
Temperature display
This refrigerator has been set capable of reaching appropriate temperature (2~8℃) automatically
before delivery.
properly, Install the standby power supply. If the LED light stops blinking, it means the
standby battery is in good condition. If the LED light continues to blink, it indicates the
standby battery is low in power and it should be replaced. The green LED light will stay on
and the does not blink any more.
2) Remove standby power. If the LED light continues blinking and the recorder works
properly, it means the main power supply is in good condition and the standby battery is low
and should be replaced.
Replace recorder paper
Please follow the steps below for the replacement of recording paper:
1. Find the pressing button (3#) at the top left corner in the front of the recorder panel;
2. Press and hold the button (3#) for about 1 second till the recording pen begins to move toward the
left of the paper;
3. After the recording pen completely moves outside the recording paper, loosen the central bolt and
remove the old recording paper. When replacing a new recording paper, carefully align the timeline
on the paper to the time slot on the panel (there is a small indentation at the left of the panel);
4. Retighten the central bolt, press and hold the button 3# for about 1 second to make the recording
Display Temperature
Operation
1
2
3
4
Plug in, switch on power
Press Display
Temperature key
Press Display
Temperature key
Press Display
Temperature key
Key
Operation
Display
Average temperature
of monitoring bottle
up
Temperature of
upper monitoring bottle
up
Temperature of
lower monitoring bottle
up
Average temperature
of monitoring bottle
up
low
low
low
low
Light on
Display Mode
Average temperature
Temperature of upper
monitoring bottle
Temperature of lower
monitoring bottle
Average temperature
Light off
pen reset and start to record temperature;
5. Examine whether the recording pen is easy to use on the paper; if it is not easy to use, adjust the
crossbeam of the recording pen to make the nib contact with the recording paper. (Note: Do not
damage the nib and crossbeam. If it is difficult to be adjusted, use a screwdriver to dismount the
crossbeam. After bending the crossbeam with a little strength, install back the crossbeam and repeat
the above operations);
6. Ensure the accuracy of the recorder. Calibrate the preciseness of the recording pen after each
replacement of paper. Methods are set as follows: Press and hold the button (3#) till the recording
pen leaves the recording paper; then repress and hold the button (3#) till the pen get back to the
recording paper. At the moment, the pen will pause at the outermost temperature scale of the
recording paper (such a scale may not be marked with temperature value, but it is the outermost
scale). If the pen does not pause at the above location, you may utilize arrow key of 1# or 2# to
adjust the location of the pen within 5 seconds to make the nib aligning to the outermost scale.
Repeat step 6 if you do not complete the adjustment of the location of pen within 5 seconds.
5
The displayed temperatures indicate upper and lower temperatures of the refrigerator perceived by
the sensor in glycerin bottle. It is not always of 5℃. Temperature sensor indicates average temperature
inside the refrigerator.
Repeat operation from 2
24
21
Page 24

TEMP. SET
Temperature Recorder (optional)
If you want to reset the temperature, for example, 5℃ is set originally and you want to change the
temperature to 5.5℃, please operate according to the following steps:
TEMP. SET
Key Operation
1
The temperature in the refrigerator displays.
Display
The original temperature set value 5℃
Press both “Sensor” and
2
“Cal Cancel” for 5s at
the same time.
appears and flickers.(Please follow the
following steps in 5s since the value
flickers. Otherwise, the display panel will
return to the temperature in the refrigerator)
Click “Cal Cancel”
3
(0.1℃ higher/time) or “Sensor”
(0.1℃ lower /time)
The original temperature set value 5℃
changes accordingly, until the temperature
displayed on the display panel is 5.5℃.
The temperature value 5.5℃ stops
Chamber temperature recorder with 6 inch standard panel is optional for HYC-610 to record
chamber temperature change.
Installation and operation
To operate and use the recorder correctly, please follow the steps below:
1. Open the recorder door to see the recorder;
2. Switch on the 9V DC battery on top right corner of the recorder, the battery is standby power;
3. Check the recording paper. If it is necessary to replace the paper, please follow the operation
steps in P24;
4. Take down plastic cap of recording pen and close the recorder door.
The recorder will not work until the chamber temperature reaches record range of
the recorder.
9 volt battery
Chart Adjustment Buttons
Imprinting Stylus
flickering after being displayed and
After the demanded temperature 5.5℃
4
is set, stop the operation.
flickering for 5s and then is saved in the
system. After successful setting, the
display panel will display the temperature
in the refrigerator again.
Defrost Cycle
The refrigerator has two automatic defrost cycles.
1) Cycle defrost
To maintain a constant temperature inside the refrigerator, the refrigeration system cycles on and off
according to the temperature demand. When the refrigeration compressor cycles off, a small electric
heater is energized to thaw the frost off the evaporator surface. The function does not have an
obvious impact to the chamber temperature.
2) Forced defrost cycle(HYC-260/360/290/390/390F only have this funtion)
When the environmental humidity is too high or the products loaded into the refrigerator emit much
moisure, cycle defrost will not be sufficient to remove all frost and ice accumulated on the evaporator
Date Reference Mark
Chart Adjustment Buttons
Center Nut and Chain
Chart Paper
Power supply
When the storage box operates, the recorder normally use AC supply. If the AC power supply fails,
LED indicator light on the recorder will blink and give alarm to indicate abnormal power supply. The
recorder continues to record chamber temperature through standby battery supply. Each standby
battery supply can sustain power for nearly 30h (Note: The battery shall be replaced timely when the
battery is low to avoid corrosion of battery button caused by delayed replacement. To save battery,
please disconnect battery button when the storage box is not used. During normal use, please install
standby battery to ensure normal recording in case of power failure). LED indicator light of the
recorder blinks continuously until main power supply (AC) is switched on and its stand-by power
battery is replaced. When the standby battery is low, LED indicator light of the recorder blinks to
indicate that the battery shall be replaced.
surface. The equipment will start the forced defrost cycle. Once the frost is thawed, the refrigerator
will resume normal operation.
22
23
 Loading...