

Haier HWT10AN1, HWT09AN1, HWT08AN1 User Manual for HWT09AN1
TOP LOAD FULL-AUTOMATIC
WASHING MACHINE
USER’S MANUAL
MODEL
HWT07AN1
HWT08AN1
HWT09AN1
HWT10AN1
Please read this manual carefully before
operating your washing machine and retain
it for future reference.
0030517190

CONTENTS
Product overview
Safety precautions
Description of symbols
Safety
Safety warnings
Installation & adjustment
Installing the bottom plate
Balancing the washing machine
Installation of the drain hose
Installation of water inlet hoses
Before washing
Check the following before washing
Operation
Loading your laundry
Loading detergent
Explanation of the display
Operation and Wash Cycles
Cleaning and Maintenance
Trouble-shooting
Packing list
1
2
2
2
2
4
4
5
5
6
7
7
8
8
8
9
13
15
16
17
Specification
18
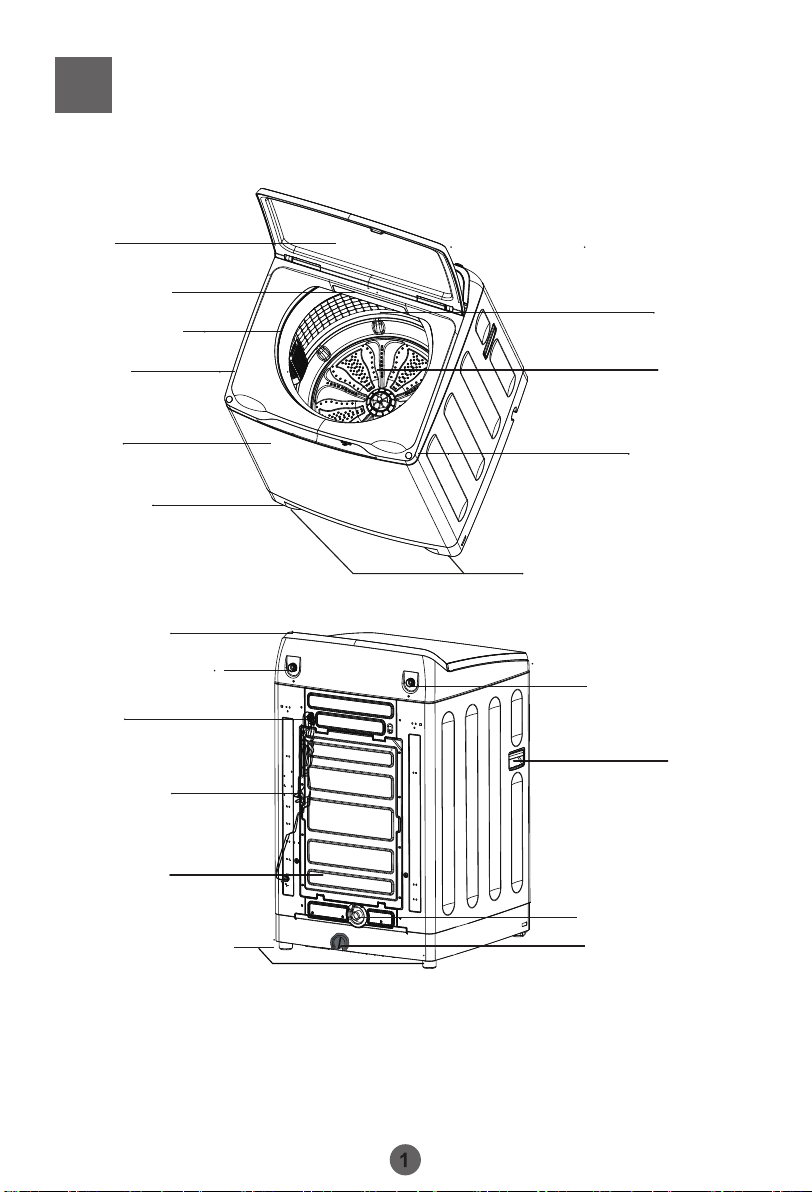
Product overview
Top lid
Detergent tray
Outer tub cover
Inner tub
Top deck
Cabinet
Base frame
Control panel
Cold water inlet valve
Hook
Power cord
Back cover
Fixed
feet (2 pieces)
Adjustable feet (2 pieces)
Drain hose connector
Drain pump filter cap
(Not to be removed by
the customer)
Screw cover
Hot water inlet valve
Please understand the shapes of the washing machine and accessories may be
different from the sketch figures in this manual due to product improvement.
Pulsator
Handle
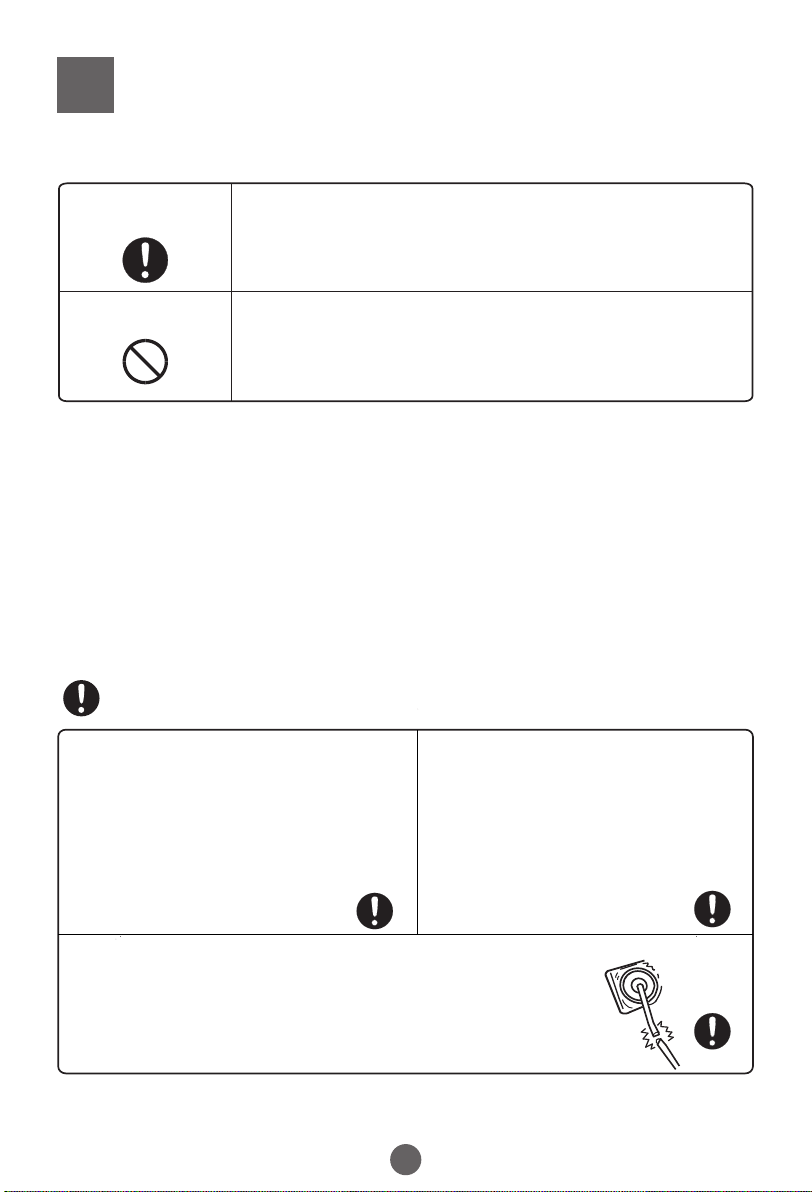
Safety precautions
Description of symbols
Warning sign
Forbidden sign
Contents marked with this symbol are related to the safe use of
the product and the personal safety of the user.
Please operate in accordance with the contents of this manual
to avoid harm to the user or damage to the machine.
Contents marked with this symbol indicate operations or
actions that should not be undertaken by the user.
Performing of such actions may result in an injury to the user or
damage to machine and void the warranty.
Safety
This appliance is intended to be used in household and similar applications such as:
... staff kitchen areas in shops, offices and other working environments;
... farm houses;
... by clients in hotels, motels and other residential type environments;
... bed and breakfast type environments;
... areas for communal use in blocks of flats or in launderettes;
... max. capacity 7 kg (HWT07AN1), max. capacity 8 kg (HWT08AN1), max. capacity 9 kg
(HWT09AN1), max. capacity 10 kg (HWT10AN1), water pressure 0.03-1MPa.
Warning
A separate, earthed power socket is
required for the power supply.
Hold the plug, not the electric cable, when
unplugging the washing machine.
Do not insert or remove the power plug with
wet hands.
The power plug should be accessible after
machine installation.
Ensure the plug is removed and the taps
are turned off in the following cases.
Power failure, cleaning, moving,
installation of the machine and when not
in use.
If the Power cord is damaged, it must be replaced by the manufacturer, its service
agent or similarly qualified people in order to avoid a hazard.
CAUTION: If this appliance is supplied from a cord extension set or
electrical portable outlet device, the cord extension set or electrical
portable outlet device must be positioned so that it is not subject to
splashing or ingress of moisture.
2
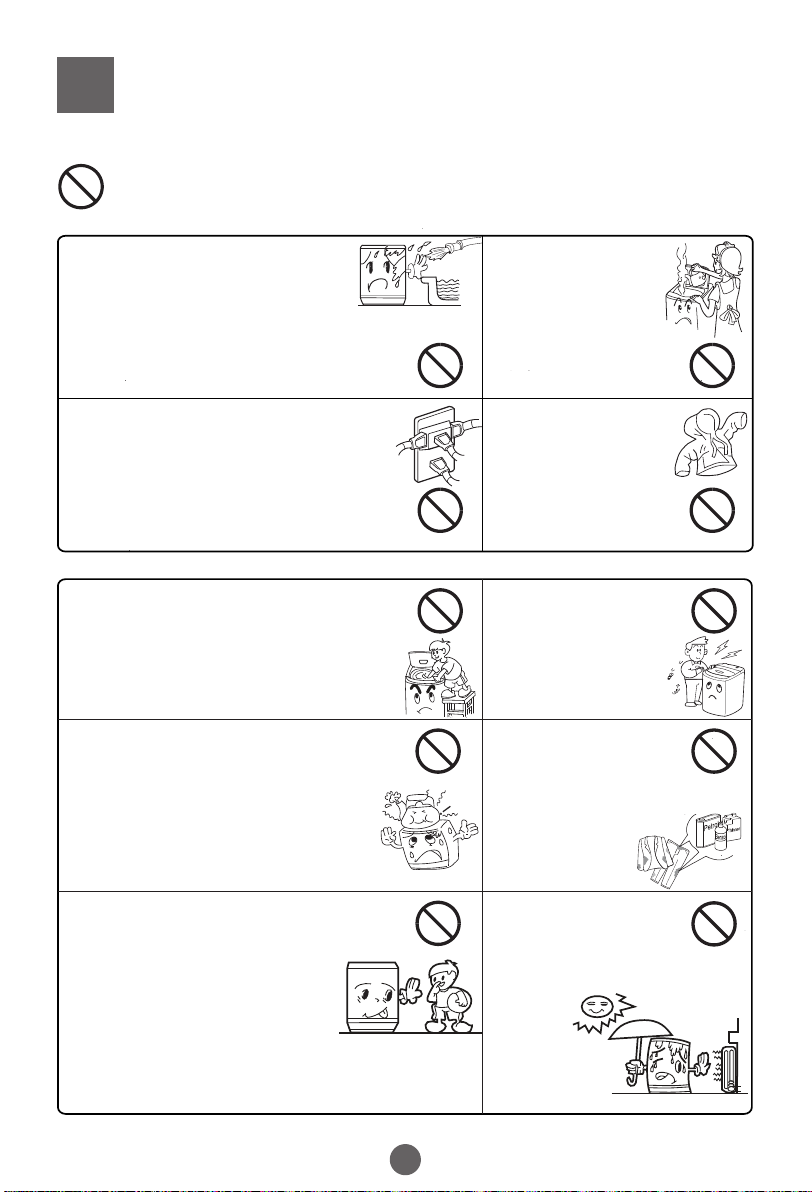
Safety precautions
Forbidden
Do not install this appliance in a
damp or wet environment. Do not
leave wet laundry on the Control
Panel or spray water directly onto
this appliance as this may cause the
washer to malfunction or cause an
electrical fault.
If you are using an extension cord or
a portable electrical outlet device
(not recommended), ensure that it
is positioned so that it does not come
into contact with water or moisture.
Do not attempt to remove washing or place
hands inside the washing machine while in
operation. Please ensure children are
supervised around the machine to avoid
harm.
Do not leave hot or heavy items on the lid
or control panel as this may cause
damage to the washer or make the
washer unsafe to operate.
Do not connect to hot
water higer than
60°C temperature.
Do not wash
water-proof clothing
as this may affect load
balance during
spin cycle(s).
Do not take apart,
repair or alter the
machine by
yourself.
Do not wash laundry
with chemicals or other
volatile materials(such as
petrol, solvents or thinners)
as this may cause
damage to the
machine.
60
This appliance is not intended for use by
persons (including children) with reduced
physical, sensory or mental
capabilities, or lack of experience
and knowledge, unless they have
been given supervision or
instruction by a person responsible
for their safety. Children should be supervised to
ensure that they do not play with the appliance.
3
Keep washer away
from heat sources
such as heater,
stoves or direct sunlight.
Safety precautions
If power cord or other parts of this machine become damaged or faulty, please
contact a technician to have it repaired.. Do not attempt repairs by yourself as this
may cause personal harm or void warranty.
The new hose-sets supplied with the appliance are to be used and the old hose-sets
should not be reused.
Please do not to remove the pump filter cap situated at the
bottom rear of the product in any situation as water remaining
in the product will flow directly out of the product.
In the event of a blockage or a failure to drain, please contact
the customer care centre for assistance.
The pump filter cap is only to be removed by a trained service
technician.
Pump filter cap
Installation & Adjustment
Please install and adjust the machine according to the directions contained in this
manual. It is very important to follow these directions for the safe operation of the
machine, and to ensure your machine operates correctly.
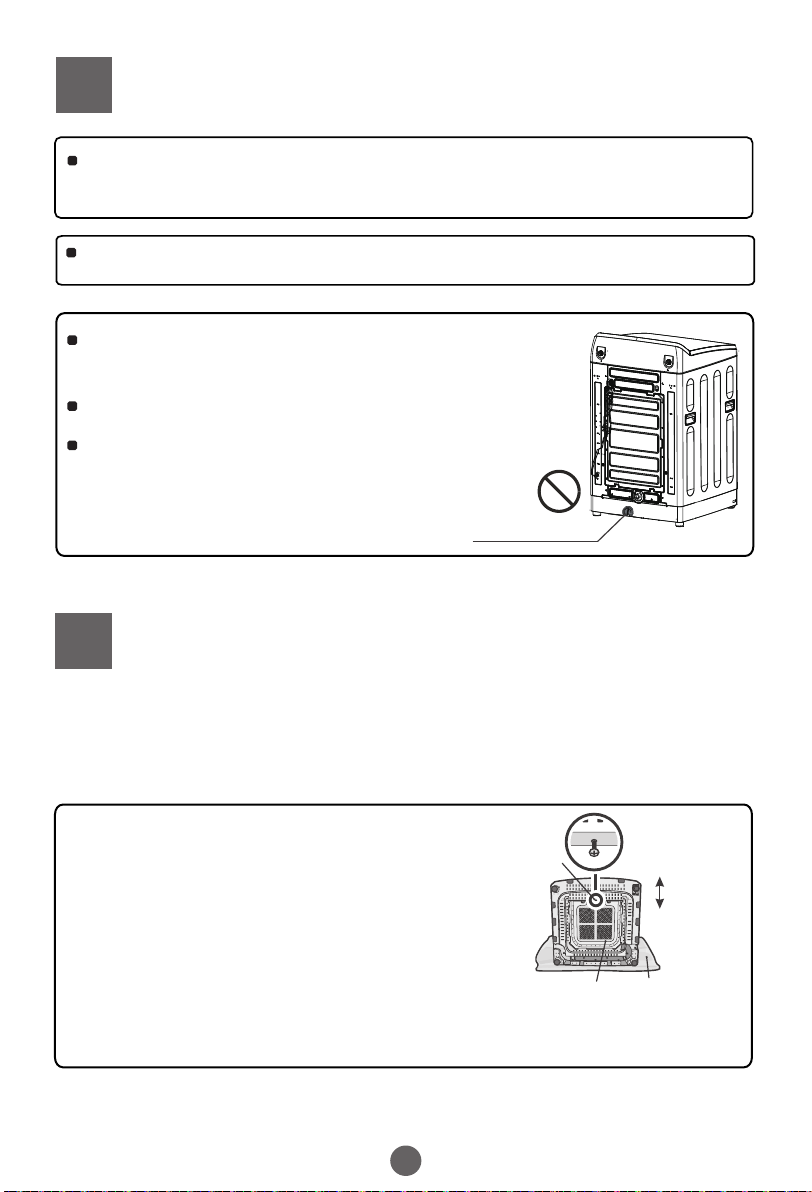
Installing the bottom plate
The purpose of the bottom plate is to su ppress noise
from the washing machine during operation.
Steps:
1. Tilt the machine backwards against a wall. (ensure that the
machine is well supported)
2. Place the plate onto the bottom of the machine.
3. Use a screwdriver to tighten the screw ( in accessory
bag) securing the panel to the bottom of the washer.
4. Once the screw is tight and the panel is secure, return
the washer to its standing position.
Note: The washing machine has ventilation openings in the base, the product must not be
placed on a carpeted surface.
4
Screw
Bottom plate Carpet
Front
Back
 Loading...