

Page 1

Automatic Washing Machine User manual
This manual is for
HWMP75-918
Please read this manual
carefully before using.
Retain for future reference.
Page 2
CONTENTS
Product Overview
Safety Precautions
Installation and Adjustment
Installation of drainage hose
Installation of water inlet hoses
Before washing
Loading your laundry
Detergent usage guide
Operation & Wash Cycles
Maintenance
Trouble shooting
Packing list
Specifications
2-3
7
7
8-13
14
15
17
18
1
4
4
5
6
Page 3

Product Overview
Top lid
Detergent box
Bleach Inlet
Balance
ring
Inner tub
Lint filter
Control panel
Cold water inlet valve
Hot water inlet valve
Power cord
Hook
Pulsater
Lid Lock
Drain connector
Cabinet
Base frame
Adjustable leg
(2pieces)
Back cover
Fixed leg
(2 pieces)
Handle
1
Page 4
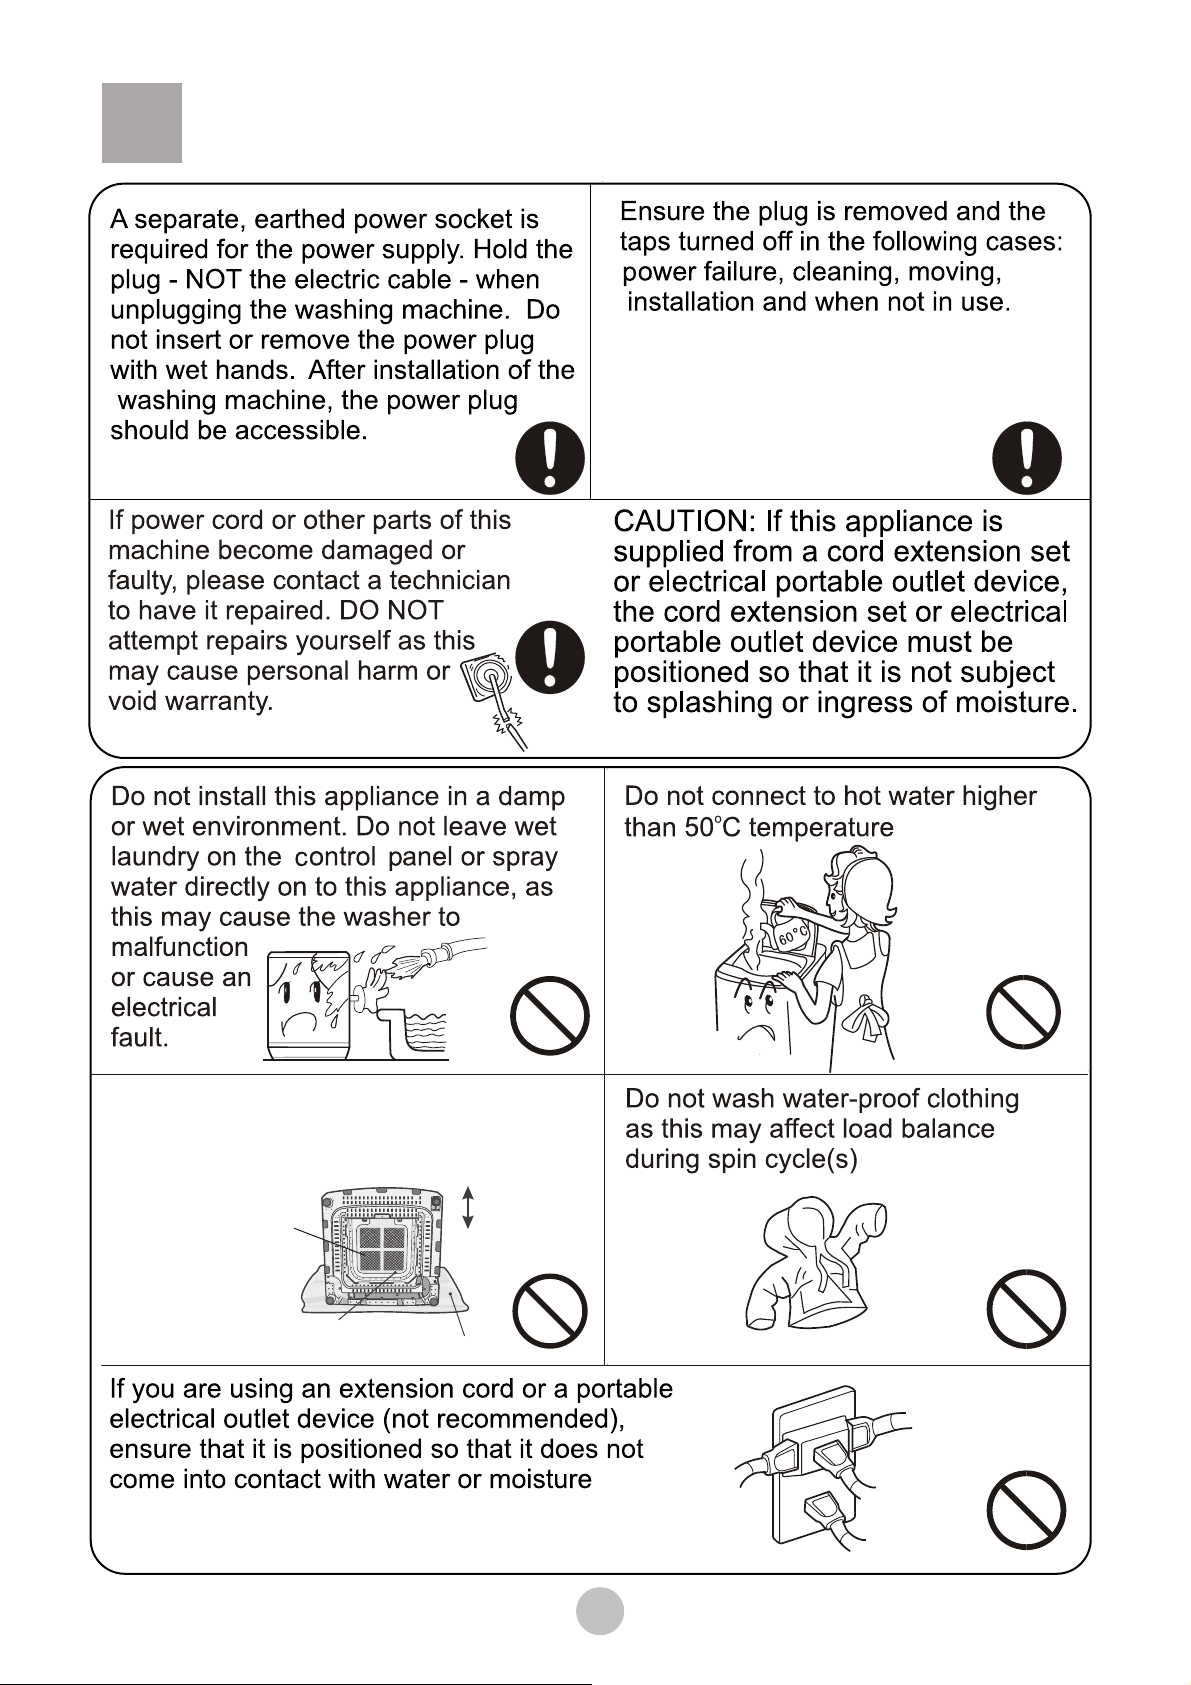
Safety Precautions
Do not block the ventilation holes with
carpet. Ensure carpet does not
obstruct the opening under the base
of the cabinet.
Front
The ventilation
holes at the bottom
Bottom plate
Back
Soft object
.
.
.
2
Page 5
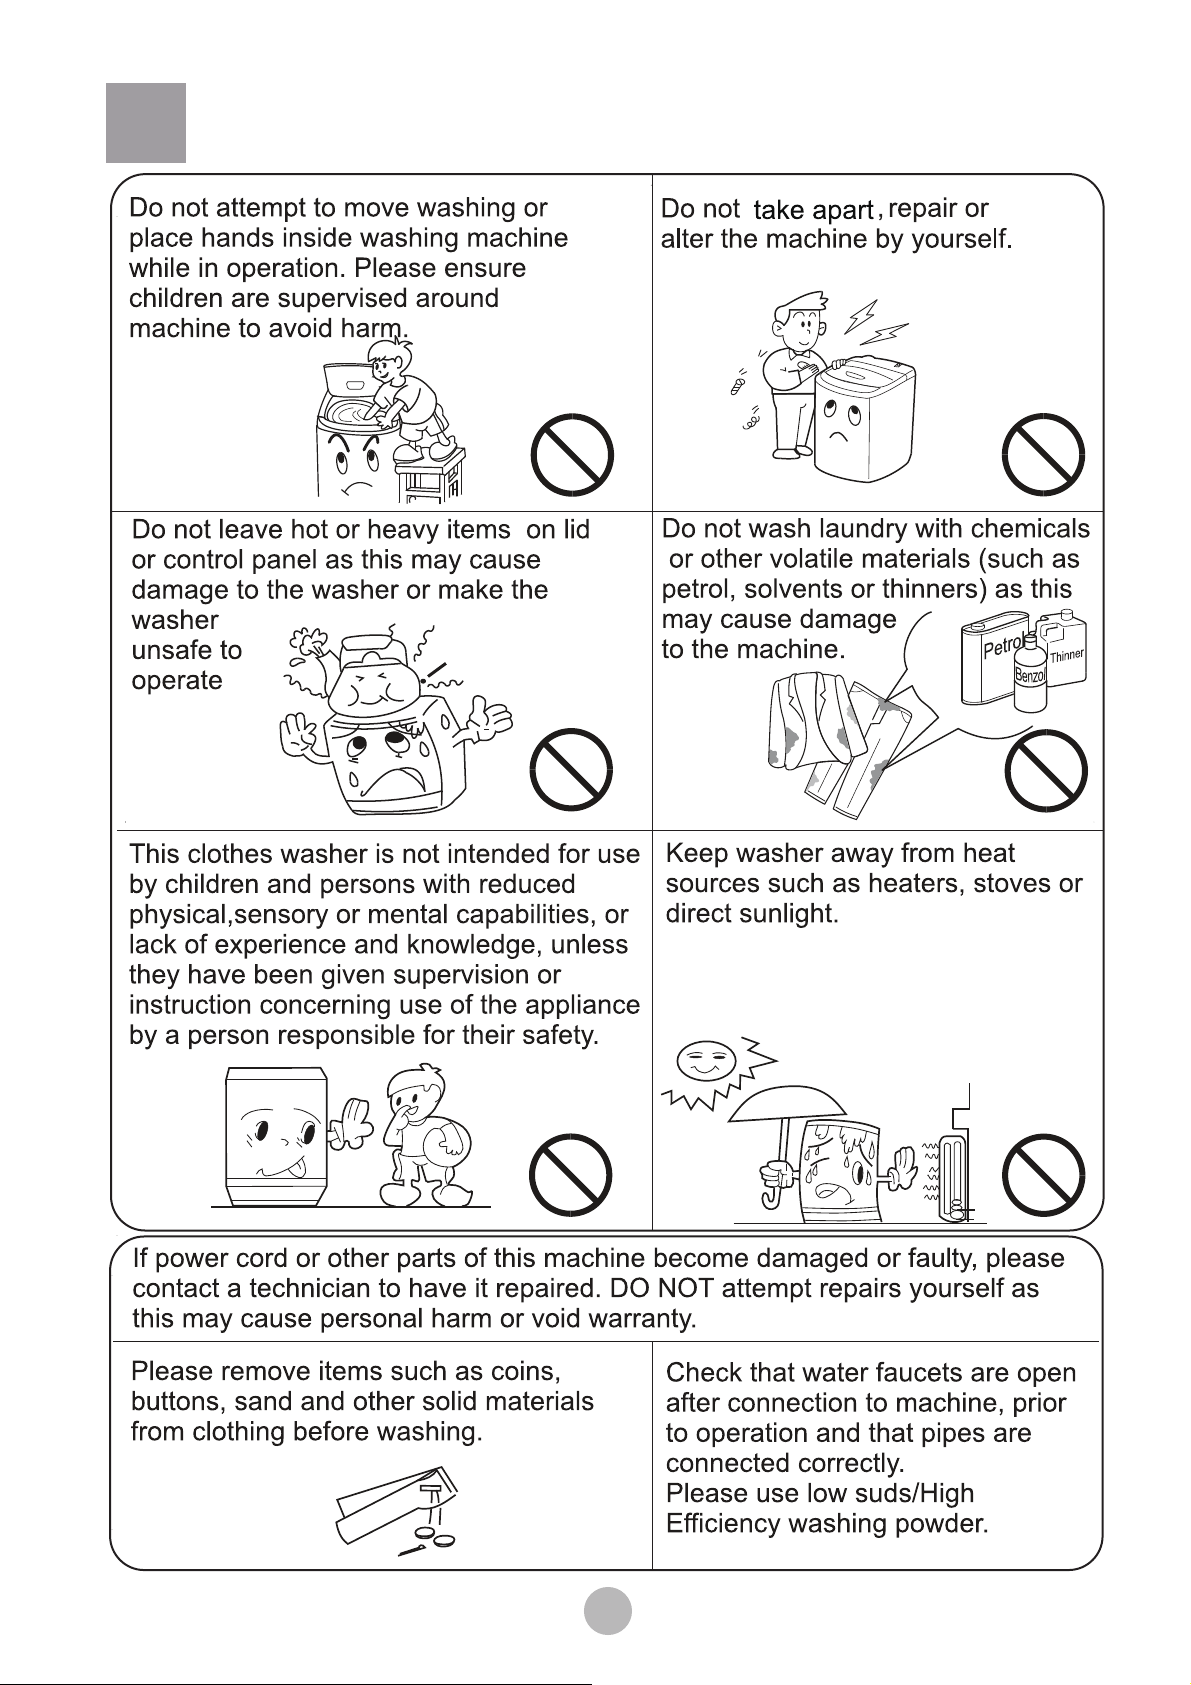
Safety Precautions
.
3
Page 6

High
Low
Installation and Adjustment
Please install and adjust the machine according to the directions contained
in this manual. It is very important to follow these directions for the safe
operation of the machine, and to ensure your machine operates correctly.
Install the bottom plate
The purpose of the bottom plate is to suppress noise
from the washing machine during operation.
Steps:
1. Lay the washer on its back, on a non-abrasive surface.
2. Place the plate on to the bottom of the machine.
3. Use a screwdriver to tighten the screw ( in accessory
bag) securing the panel to bottom of the washer.
4. Once the screw is tight and the panel is secure, return
the washer to its standing position.
Balance washing machine
Do not install this machine on an incline greater than 2° . Installing machine on an
angle or on rough ground will result in unstable running or stoppage of the
machine. Please adjust it by the following method:
1.Confirm it is level;
2.Lift up the side of the leg slightly and twist the adjustable leg.
Screw
Bottom plate Carpet
Front
Back
Note:The distance between the washing machine
and wall:at least 20 mm.
20mm
Installation of drainage hose
Install drainage hose
First connect the drainage hose to the connection point on the lower
right side of the cabinet, and fasten with drain hose clamp (provided).
Connect drain hose guide on to the outside of drainage hose. To guide
the drain hose over the tub or standpipe the hose guide MUST be fitted
to the drain hose.
Placement of Drainage Hose
Drain hose joint
20mm
Drain hose neck guide
Drain hose
clamp
The height of the standpipe or tub should be between 850 - 1200 mm.
To avoid syphoning, the drain hose should not extend more than 20 mm
from the end of the guide.
Ensure drainage hose is held in place to avoid leaks or spills.
4
0.8m h
1.2m
Page 7

Installation of water inlet hoses
5
Page 8

Before washing
Check if the
laundry has
any special
washing
instructions.
Clear the pockets
,and take out
loose items such
as coins,sand,
hairpins etc.
Tie any long
Straps or
strings,fasten
buttons and
close zippers.
The weight of the
laundry shall not
exceed the rated
capacity of your
machine Loosen
the laundry before
placing it evenly
in the tub.
When the machine is
running, buttons may
cause noise. To
reduce the noise, turn
clothes inside out or
place them in a laundry
bag.
6
Page 9

Loading your laundry
Detergent usage guide
Adding washing power
It is suggested to dissolve detergent before adding to
the tub, see as below:
1. Prepare warm water (<35 C) in a container.
2. Add washing powder, stirring to dissolve it completely.
How to use
Bleach/whitener
Close the lid
During a washing program, the top lid will be activated.
If you want to open the top lid, please press key “START/PAUSE” button, and the washing
program will pause. The top lid will be unlocked and you can access your laundry.
7
Page 10

Operation & Wash Cycles
Hot/Cold
Warm/Cold
Cold/Cold
Temp
Soak
30
Min
20
Min
10
Min
Min
5
A B C D E F
Wash
Long
Medium
Rapid
Express
Rinse
3
2
1
Rinses
Rinses
Rinse
Spin
9
Min
7
Min
5
Min
3
Min
Lid
Lock
Minutes Remaining
Delay(Hours)
Delay
7 8
5 6
3 4
1 2
Child
Lock
Memory
Synthetic
Wool
Tub dry
Water
Level
G H
Normal
Heavy
Delicate
Quick
Cycle
START
PAUSE
I
J
Indicator display
Lid lock function
During the washing program, the lid lock will continue to function even with the power off,
and power plug removed from the wall socket.
When the washing program is over please wait for the light of lid lock to go out before
removing the power plug from the wall socket.
If you want to cancel from lid lock function, press “START/PAUSE” button during the
washing program.
NOTE:
In order to protect the washing machine, please don't try to open the top lid while the lid
lock light is on.
Child lock function
The function is intended for children safety and preventing the washing program from
accidental changes by children.
Hold the Spin button and Delay button,then press the Power botton,the child lock light on,
set desired washing procedures,After setting,press the Start/Pause button,the child lock is
activatde,all of the buttons are locked and can not make selection.
Release the child lock function:
Press the Spin button and Delay button at the same time
for more than 2 seconds.After three beep sound,the child lock function is released.
Minutes Remaining
Delay(Hours)
Remaining time display
8
Page 11

Operation & Wash Cycles
A
B “Soak”button
“Memory/Synthetic/Heavy/Normal”
The button is unavilable in the “Quick”and“Tub dry”cycles.
For the “Wool” programs,press the Soak botton, choose or cancel soak process, but can't
change the soak time.
C/D/E
F
press
Soak
G
2,4,6 or 8.
8
2
9
Page 12

H
Operation & Wash Cycles
than
This cycle setting remembers the last soak,wash, rinse and spin
settings(Water level will not be remembered as it is determined by
fuzzy logic function).
I
J
10
Page 13

Operation & Wash Cycles
Button Operation and Descriptions
1
2
Soak
11
Page 14

Operation & Wash Cycles
The wash will finish in about 18 hours.
12
Page 15

Operation & Wash Cycles
Cycle completed
When the machine has completed the
selected/current wash cycle an audible
alarm will sound and the machine will switch off
automatically.
Note:
The energy test program was performed using the "Normal"
cycle default setting of:
Soak:"20"Min
Wash: "Long"
Rinse:1 Rinse
Spin:7 Min
Water level:8.
Please use low suds/high efficiency detergent.
13
Page 16

Maintenance
Remove the power plug before carrying out any cleaning or maintenance.
Clean the lint filter(s) and detergent box after each wash.
Remove and clean the detergent
box, replace after cleaning.
Dismantle
The filter screen of the water inlet valve
may become to be blocked by foreign
materials and influence the water inlet.
Please clean it with brush every two
months.
Install
The lint filter must be used during washing.
It must be cleaned after each use
Lint filter:
1. Slide upwards to remove.
2. Gently push it down to install;
ensuring it is in place before
next wash.
If the cabinet is dirty, wipe it with a damp cloth.
Do not wash directly with water.
Wipe with a neutral detergent (please check
directions on detergent bottle first).
Do not wipe machine with thinners, petrol,
alcohol or other harsh solvents.
1. After washing cycle has finshed, turn off the water faucet. (If needed, you can
remove the water inlet hose).
2. Do not store water in the washing machine for a long period without completing
a wash cycle. Drain the water completely after each wash.
3. Hang up the power cord and drain hose.
4. Wipe up any drops of water on the surface of the machine and inside the tub.
Leave the lid open for about 1 hour after each wash to evaporate any residual
water.
14
Page 17

Trouble shooting
If there is a fault or the machine does not operate correctly, remove the power plug before checking the
machine. Using diagnostic list below, please check the machine requires repair. If a repair is required,
please contact our Customer Care Team, do not try to fix it yourself.
Problem Possible causes What to do
The machine does not
drain or drains slowly.
The display shows E1.
The machine stops running.
The display shows E2.
The machine does not
spin. The display shows
E3.
The display will show E4
within 30 minutes.
The display shows E6. The water level sensor
The display shows E8.
Is the drain hose blocked? Remove the blockage.
The top lid is not closed. Close the top lid.
Has the laundry been
place unevenly in the
machine?
Is the machine level?
Is the water tap opened, or
has the water supply been
interupted?
Is the water inlet valve
blocked?
Is the water pressure too
low?
has failed.
Lid lock fails to lock?
Open and close the top
lid once.
Redistribute the load
evenly,close the top lid.
Level the machine. The
machine will start 10
seconds after being leveled
correctly.
Open the water tap. Push
the Start/Pause button once.
Clean the water inlet valve
then push the Start/Pause
button once.
Push the Start/Pause
button once.
Please contact the after-sales
service department.
Switch off the power,
switch on again.
Will not
wash
The machine
does not
work.
Will not
spin
There are abnormal
sounds inside the
machine
The water tap leaks Is the water inlet hose
Is there a power failure?
Is the power plug inserted
tightly?
Has the water level
reached preset position?
Is the power plug inserted
tightly?
Is the top lid closed ?
Is the laundry distributed
unevenly in the machine?
Is the machine level?
Has the laundry been place
unevenly in the machine?
Are there any foreign
objects inside the bowl?
loose?
Wait for the power supply
to be restored.
Insert the power plug
tightly.
Wait for water to fill to the
preset level.
Insert the power plug
tightly.
Close the top lid.
Redistribute the laundry.
Redistribute the load
evenly. Close the top lid.
Level the machine.
Remove the foreign object.
Fasten the inlet hose.
15
Page 18

Common occurrences
Situation
The spinning is intermittent
when it starts.
The wash procedure pauses.
Select spin program,
but it does not work.
There maybe water in the
drain hose in when first used.
Cause
Redistribute the load evenly.
Close the top lid.
The cloth sensor is detecting, it will add
water after about 48 seconds.
A period of time is needed before
the spin program starts.
It is the water remaining after the
performance inspection by the factory.
.
16
Page 19

Packing list
Name
Automatic washing
machine
Bottom plate
User manual
Warranty card
Tapping screw
Components of the
water inlet hose
Connect to the
washing machine
Quantity
One
One
One
One
One
Two
Storage position
Between the upper cushion of the
washing machine package and the
upper seal of the package carton
Inside the document bag
Inside the document bag
Inside the accessory bag
Inside the accessory bag
Connect
to the tap
Drain hose
Drain hose guide
Drain hose clamp
One
One
One
Inside the accessory bag
Inside the accessory bag
Inside the accessory bag
17
Page 20

Specifications
HWMP75-918
400W
360W
46
54
L 610 W 620 H 995
1/24L 2/34L 3/44L 4/52L
5/60L 6/68L 7/76L 8/85L
Note Default settings when you choose this program after power on
Item
Cycle
Normal
Heavy
Delicate
Quick
Memory
Synthetic
Wool
Tub dry
WashSoak
20min
/
/
/
This cycle setting remembers the last soak,wash,rinse and spin settings.
/
/
/
Long
Medium
Rapid
Express
Medium
Express
/
Rinse
1 Rinse
2 Rinses
2 Rinses
1 Rinse
1 Rinse
2 Rinse
/ /
Spin
7 Min
7 Min
5 Min
5 Min
5 Min
5 Min
Water
level
8
6
6
2
6
6
/
Temp
Warm/Cold
Warm/Cold
Warm/Cold
Warm/Cold
Warm/Cold
Cold/Cold
/
Time
106Min
57Min
46Min
10 Min
/
34Min
54Min
18
Part No.0030810251
 Loading...