

Haier HWM80-187S Owner's Manual
Owner's manual
HWM80-187S
Please read this manual carefuuly before using.
Twin-tub Washing Machine
0030508674A
Contents
Names of the parts ..............................1
Safety precautions . ............................. 2
Installation and adjustment ................... 4
Preparation before washing.................. 6
The musts in washing ............................7
Usage of the detergent ........................ 7
Washing sequence................................ 8
Disposal after washing......................... 12
Trouble-Shooting *Answer to question..15
Packing list ...........................................17
Specification .........................................18
1
Meaning and description of the symbols
Warning sign
Forbidding sign
Contents marked with that symbol are related
to the safety of the product and the personal
safety of the users. Please operate in strict
conformity to the contents, otherwise it may
cause damage of the machine or injure the
personal safety of the user.
Contents marked with that symbol are actions
forbidden to perform. Performing of those
actions may result in damage of the machine
or injure the personal safety of the user.
Please check if the power receptacle has good earthing condition
before using to guarantee your safety.
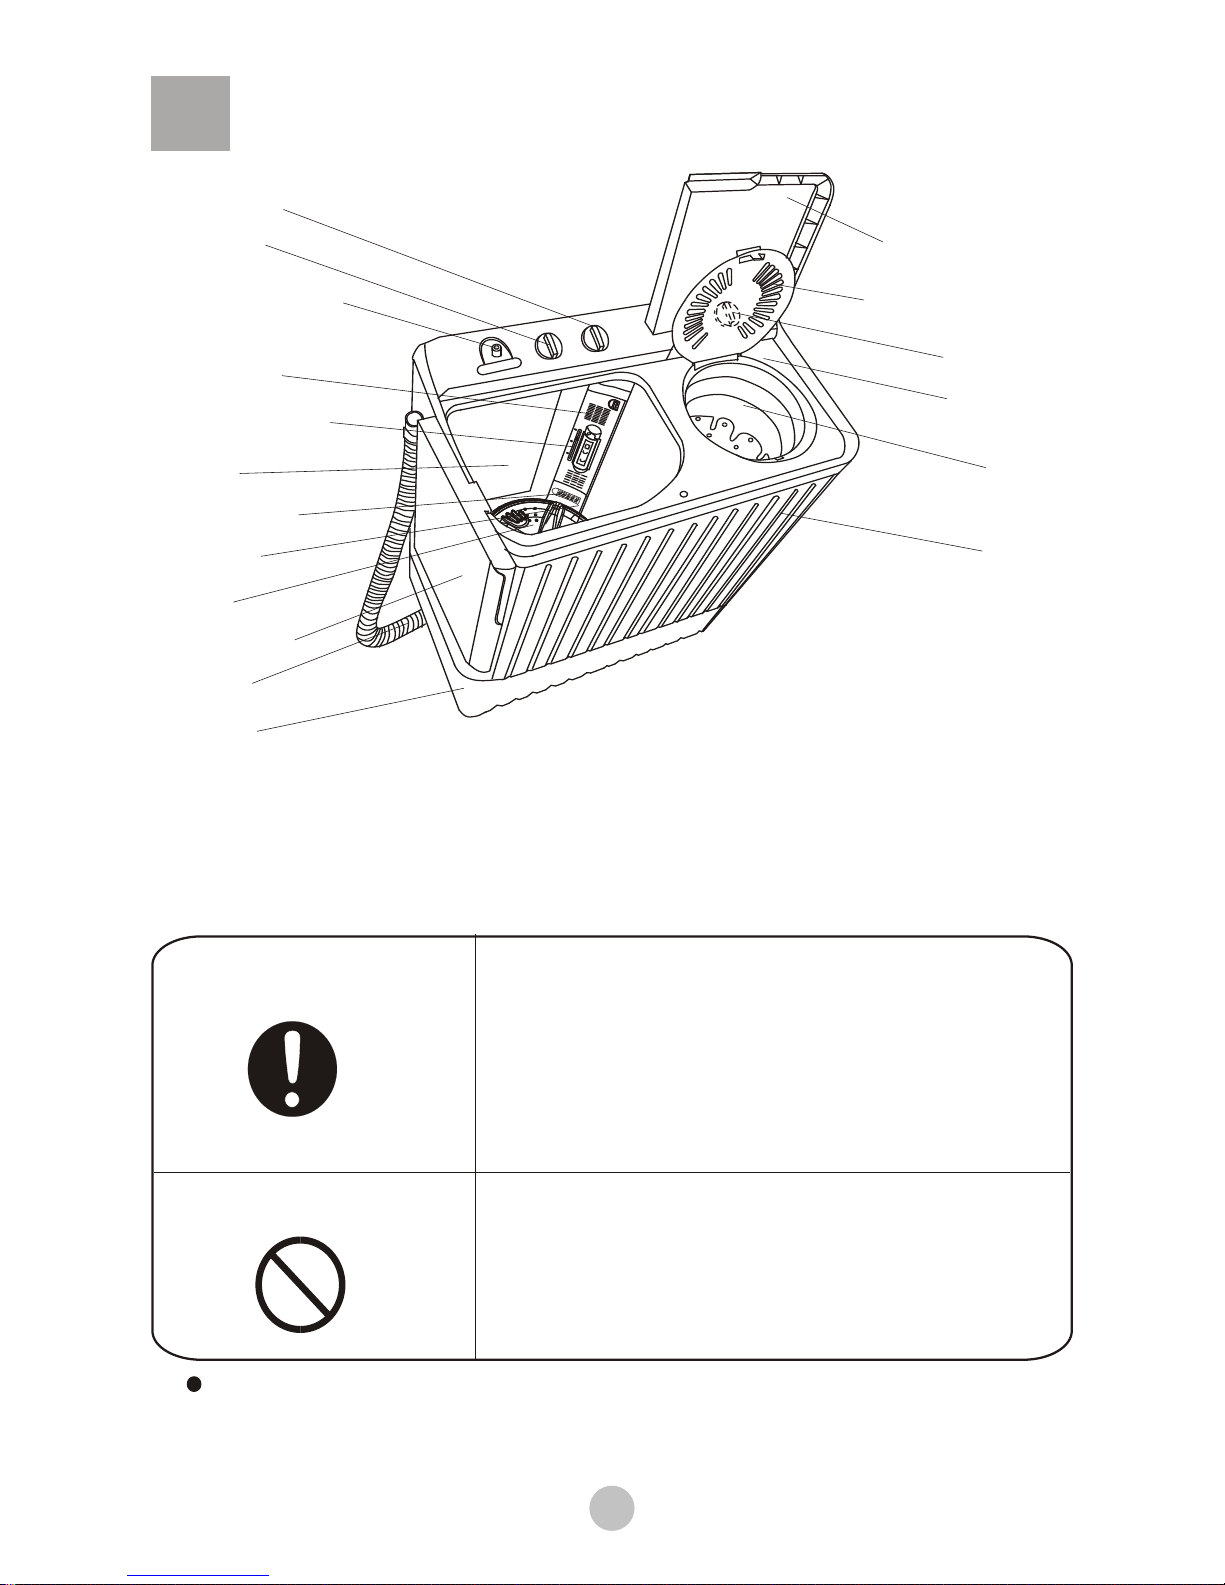
Names of the parts
Major frame
Base frame
Water-filling entrance
Wash selector
Wash timer
Water level adjusting
lever
Pulsator
Wash tub
Wash tub cover
Drain hose
Overflow filter
Valve cover
Protecting cover
Outer cover of the spin tub
Inner cover of the spin tub
Spin tub
Cabinet
Notes: All illustrations in this manual are given for reference only. Your products and
accessories may show differences from these illustrations due to our
continuous improvement.
Spin timer
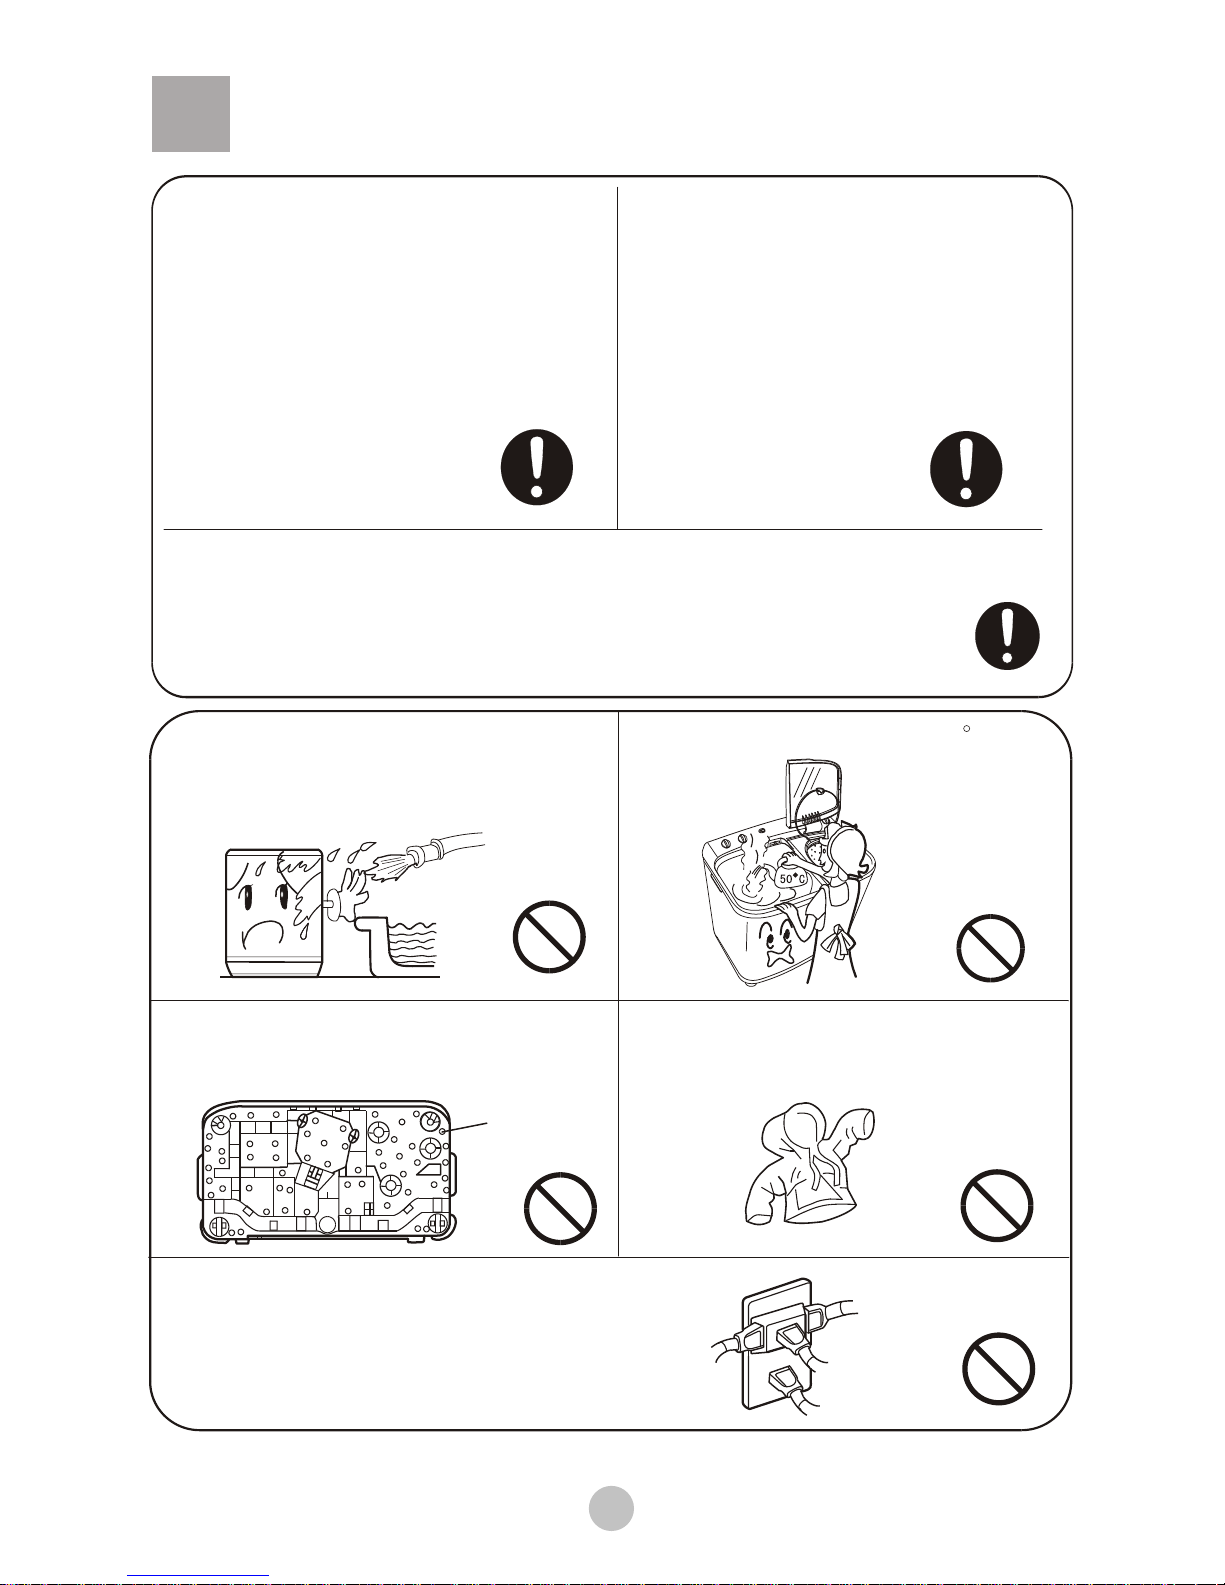
Safety precautions
Please insert the power cord into
special receptacle with rated voltage. Be sure to use single-phase
three pins receptacle. The earthing
terminal of the receptacle must be
earthed reliably. If possible, please
adopt electric leakage protector.
When the machine is normally
using, please put the power plug
at the location easily to be inserted and extracted by hand. Be sure
to pull the plug off when there's
power failure, or the machine is
being moved, cleaned or when it
is idle.
If the power cord is bad, to avoid risk it is required to replace it by the
technicians of our special shop or the after-sale service department.
Keep the pin of the power plug clean.
Do not put the machine at damp
place like the bathroom . Never
wash it with water. Do not place
wet laundries on the control panel.
Do not use water hotter than 50 C .
In case the washing machine is installed
on ground with carpet , do not block the
ventilation hole with carpet.
Ventilation hole at
the bottom of the
washing machine
Do not wash water-proof laundries like
the raincoat, bike covers etc. to avoid
abnormal vibrations in spinning.
Do not let the machine share one receptacle
with other electric appliances. If the power
plug is damaged, or the plugging into the
receptacle is loose, do not use the plug any
more.
2
Please don t use the washer in the environment below 0 C. If the washer is
below 0 C, the washer s water inlet system and draining system will be
frozen ,then result in the damaged of the whole machine. If the washer has
below 0 C, please be sure to ensure the washer is placed under the room
temperature for 2~4 hours and then use .
It is suggested to use foamless washing powder.
Please put down the drain hose before washing and
connect the water inlet pipe properly.
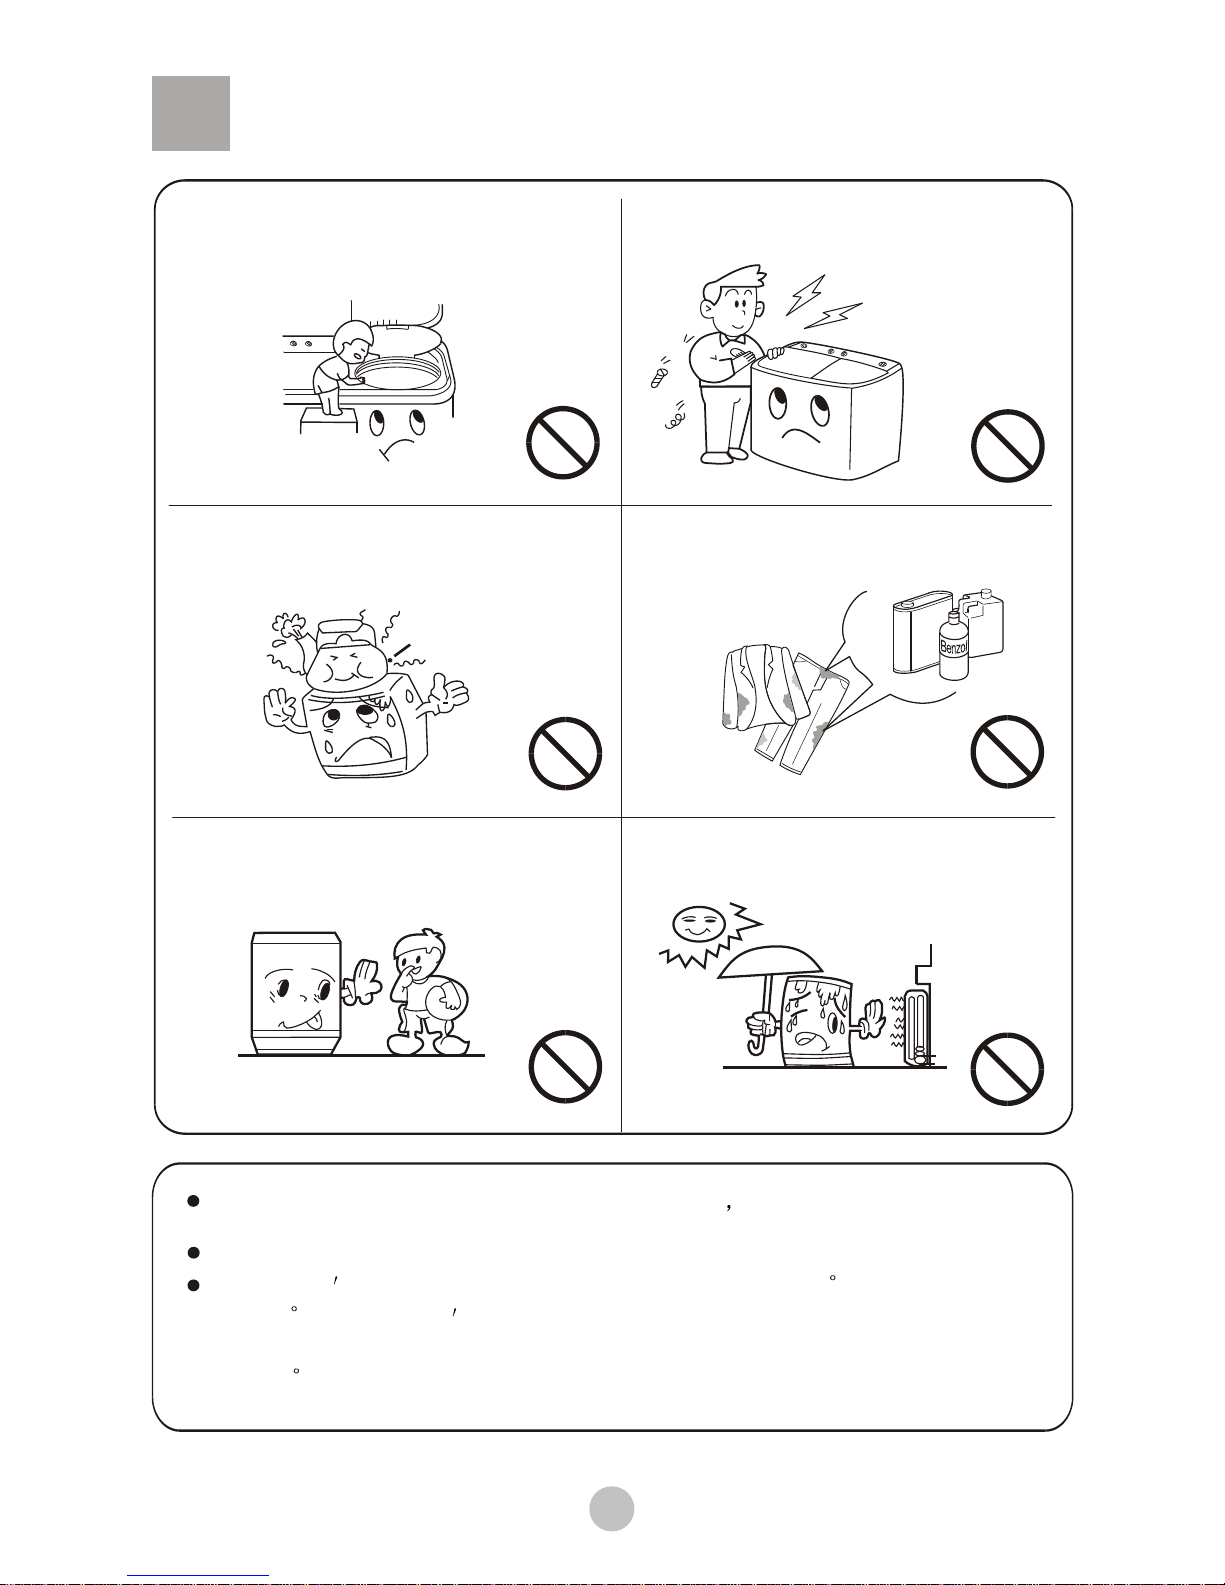
Do not stretch hands into the working
machine. It is dangerous even if the
rotation is slow. Take special care of
the children.
Safety precautions
Do not put any hot or heavy items
( such as the kettle with hot water )
on the washing machine.
Do not decompose, repair or alter the
machine by yourself.
Handicapped or children without care
shall not use the machine.
Keep the machine away from direct
sunlight and heat source like the
heater.
Do not wash laundries with volatile
materials (such as thinner, petrol etc.).
P
etro
l
Th
inner
3
Installation and adjustment
Please install and adjust the machine according to the requirement of
the manual. It is very important to your security and correct operating
the machine.
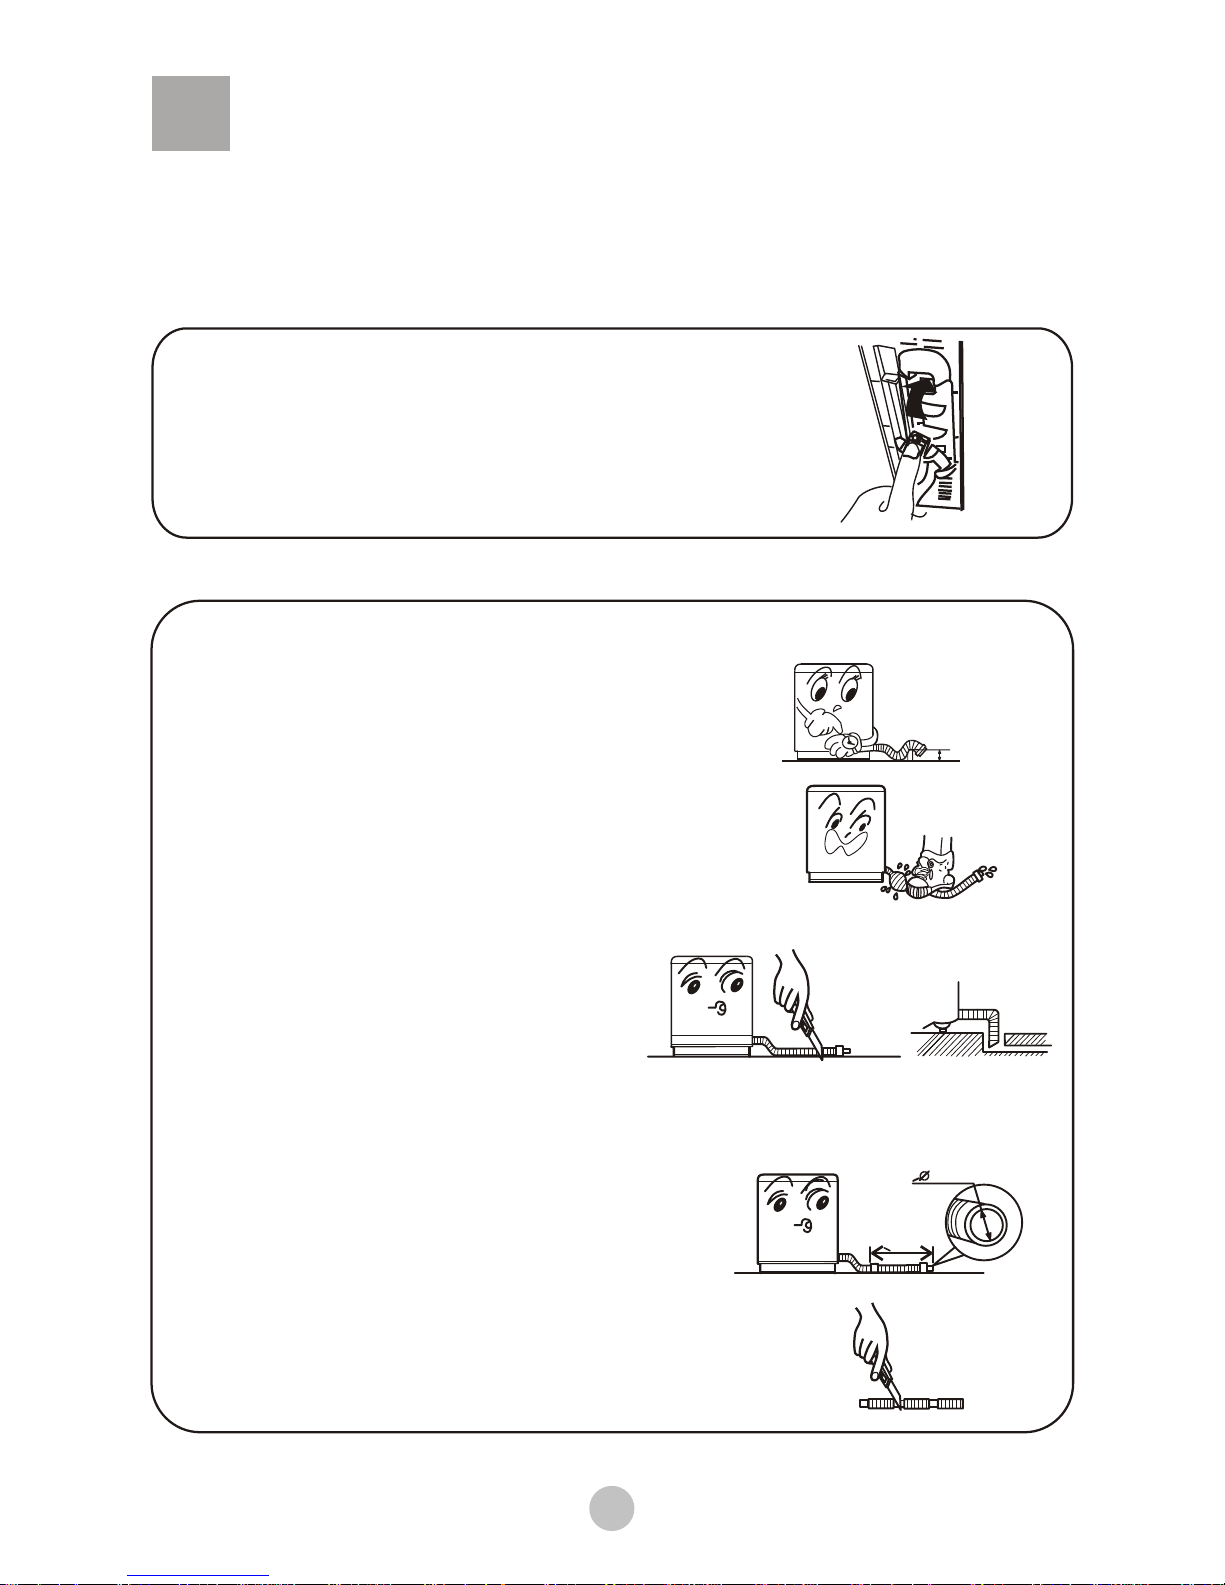
Install the lint filter
After opening the package, please take out the lint
filter from the document bag, install it to the overflow
filter of the wash tub. See to the figure.
4
Usage of the drain hose
If the extra hose is too long, cut it either
at point A or B.
BA
> 30mm
<1.5m
The drainage shall be smooth with the drain hose.
1.The height of the drain hose shall be
less than 10cm , or the drainage will
not be smooth enough and cause
incomplete drainage.
2.Do not tramp or press the drain hose.
3.If the drain hose is too long, cut it at mid point.
To make smooth drainage, cut the front end of
the hose slantingly.
4.If extra drain hose is needed , please make
separate purchase. The inner diameter of the
extra hose shall not less than 30mm, and the
length shall not exceed 1.5m.
<10cm
5
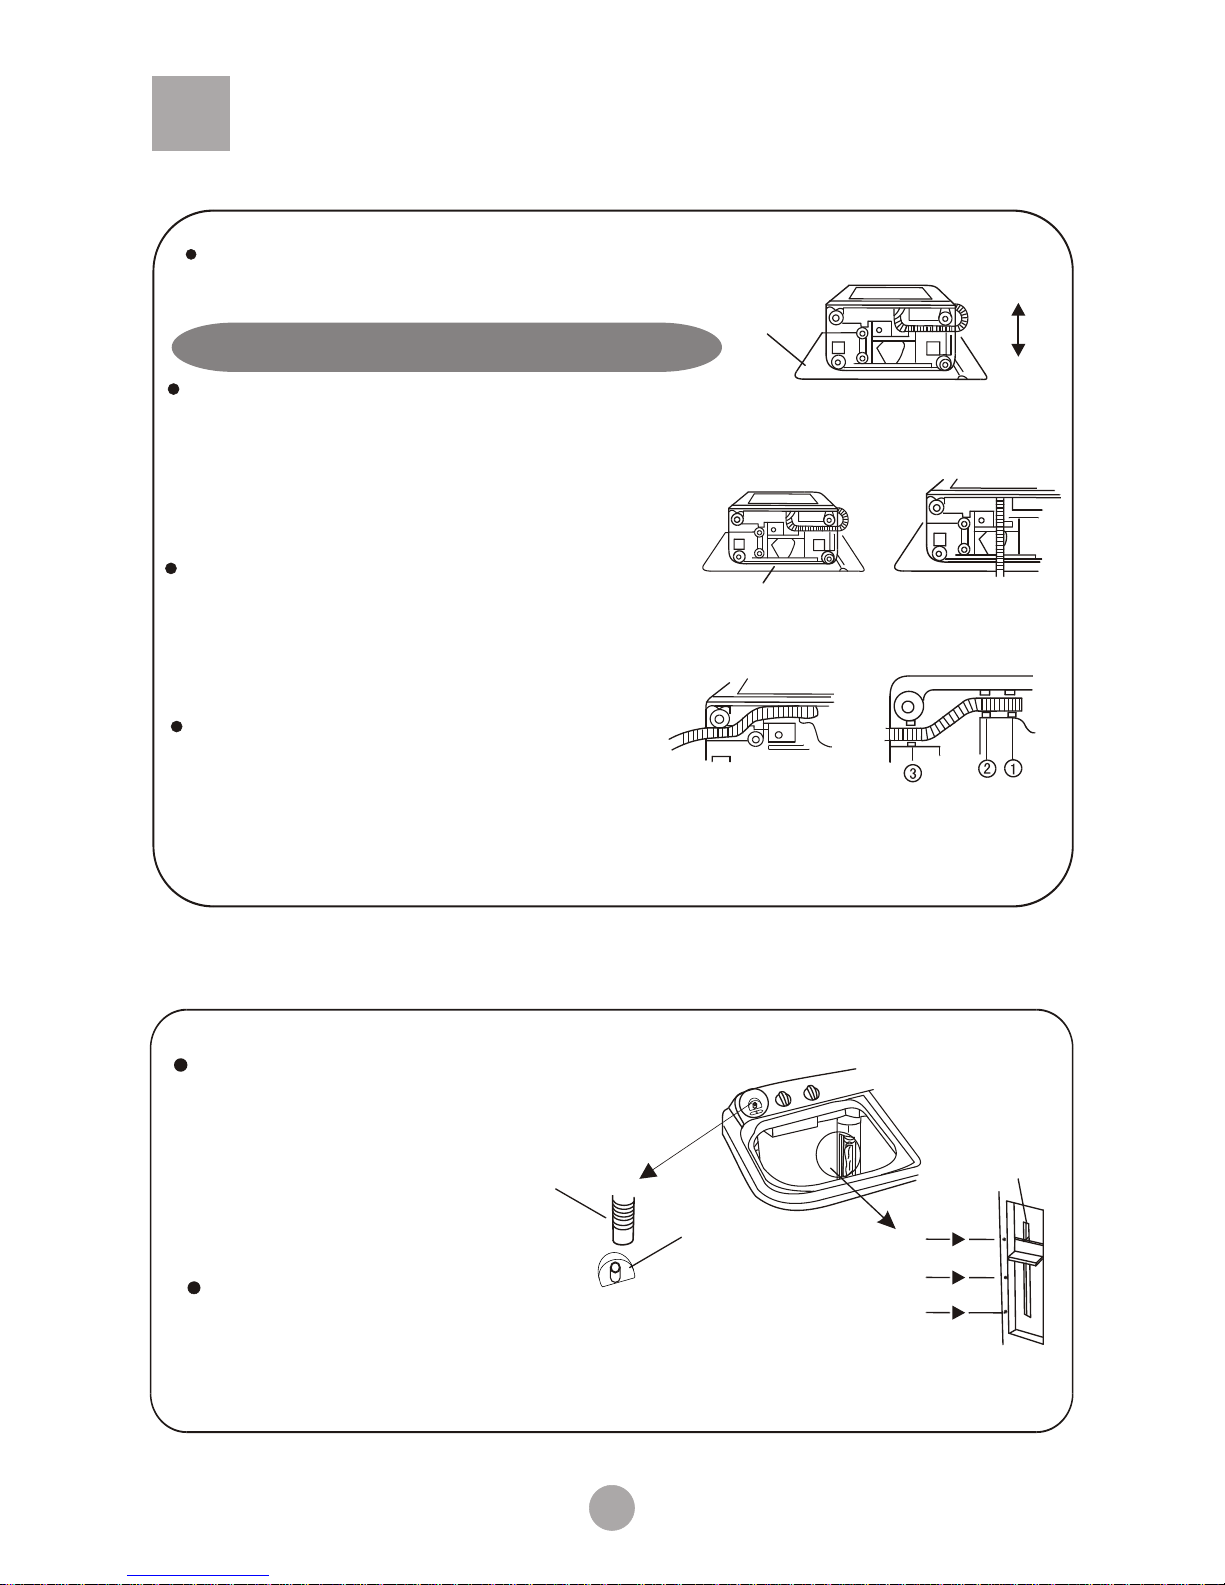
How to change the direction of the drain hoses
Install the water inlet hose; Select the water level
Insert the water inlet hose into the water-filling
entrance on the control pane directly.(pull it
out to dismantle it)
Select water level according to the
quantity of the laundries.
Set the water level adjusting lever
to needed line.
Water inlet hose
Water inlet
Maximum
Max
Minimum
Min
Medium
Med
Water level
indicator
Figure 1 indicates the ex factory installation
position of the drain hose.
Put soft items on the ground. Lean the machine
down gently with the front surface facing the
ground. Take off the drain hose from the cabinet.
Take the hose out of the fixing groove.
(See to Figure 2).
Embed the drain hose into the groove along the
side of the spin tub in the order of (1)~(3), heading
for the side of the spin tub. (See to Figure 3).
Embed the drain hose into the groove with
hands. Take care not to damage the drain
hose in fastening the fixing clamp.
Figure 1
Extend the drain hose from the side of spin tub
Figure 2
Soft item
Figure 3
Embed into the
groove in turn
Extend to the
spin tub side
Soft item
Back
Front
 Loading...