

Page 1
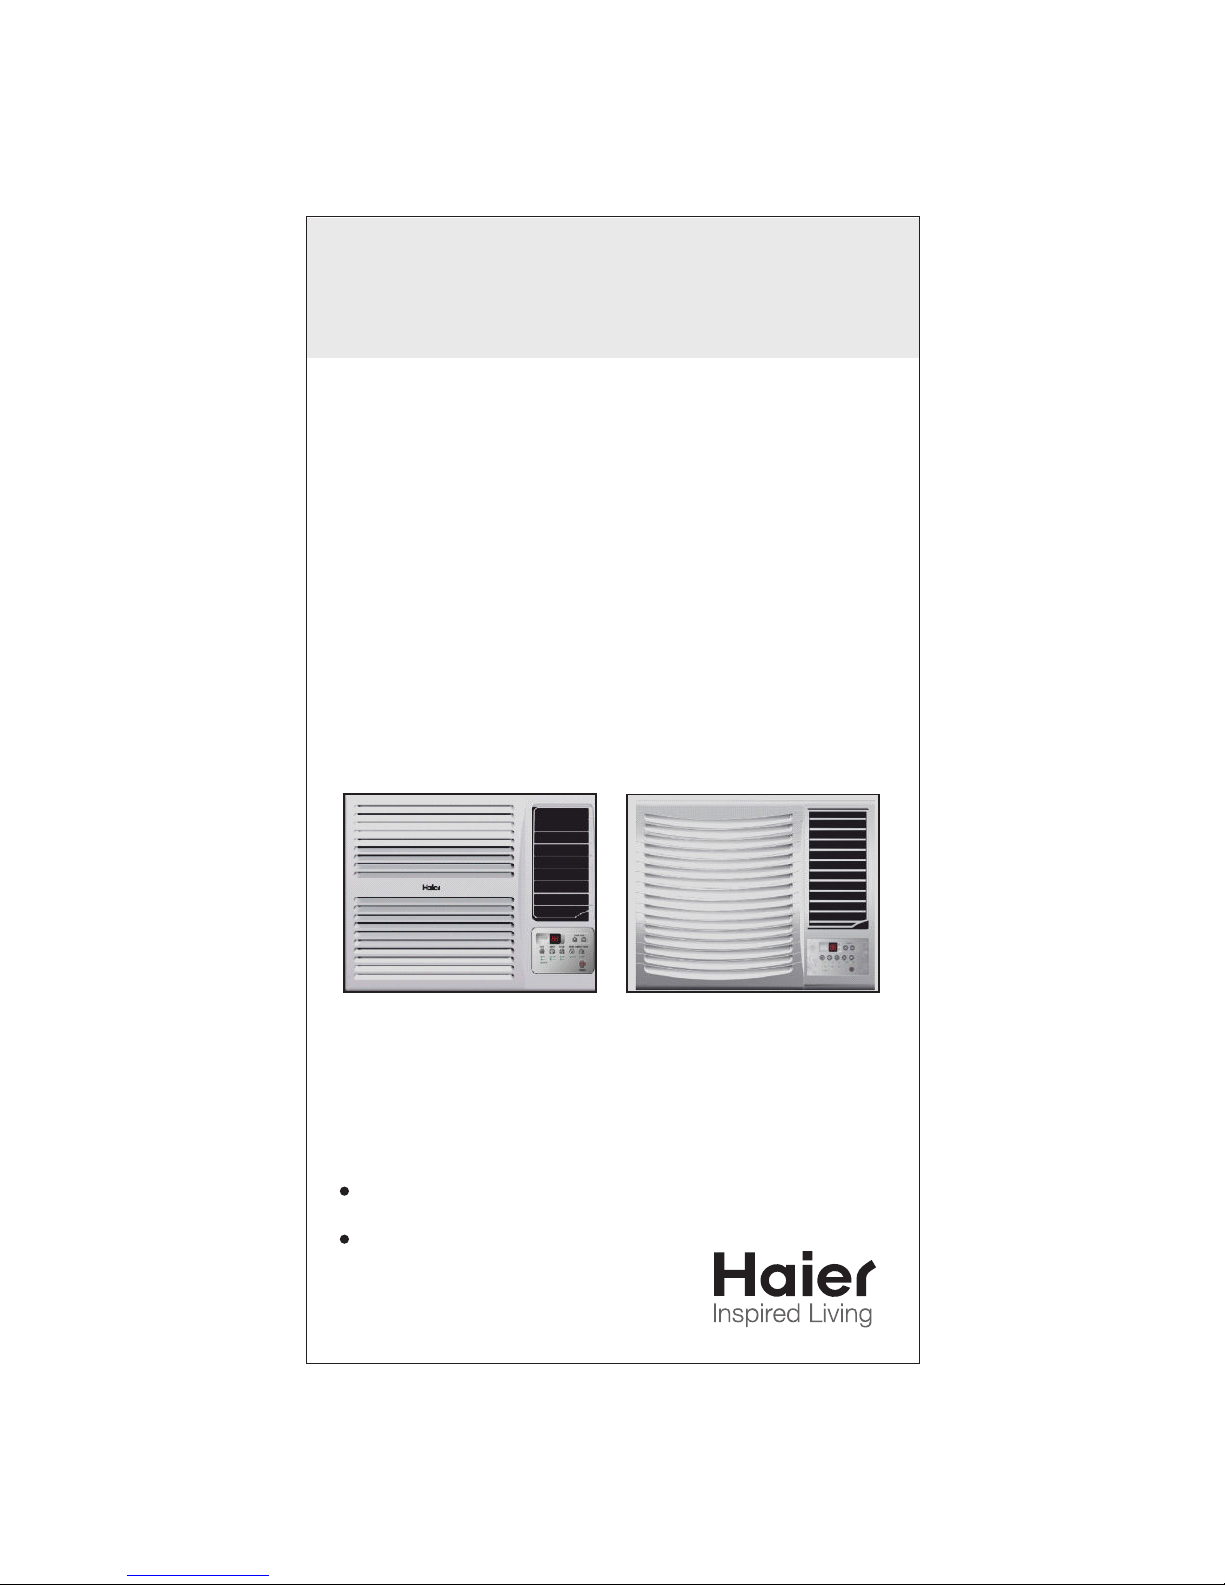
HW-18CH3CNA
HW-18CT3CNA
USER MANUAL
P/No. HA 0500025
Please read this operation manual
before using the air conditioner.
Please keep it attentively.
WINDOW TYPE ROOM AIR CONDITIONER
HW-18CH2N
HW-18CH3N
HW-18CH2CNA
HW-18CT3N
Page 2

2
Dear Friend,
At the outset, we at Haier thank you for your interest in our range of products. A
unique and international range of appliances designed solely with the purpose of
making modern life simpler. But how! The entire Haier range of appliances,
ranging from refrigerators, televisions, washing machines, airconditioners,
microwave ovens, dishwashers and wine-coolers, combines the best of
technology, features, performance and styling. All, a result of our perfect
understanding of your lifestyle and your needs.
But what is a great product without great service? Leaving no stone unturned in
giving you the best of service, we have also established an extensive network of
authorised dealers and authorised service centres, so that you get a lifetime of
great and timely service for your Haier appliance.
It has been an honour and a pleasure bringing these hi-tech products to you and
we hope that you get as much happiness using them as we have got, creating
them for you.
Happy Inspired Living!
Thanking you,
Page 3

......................................................................................................................4
Parts Names
Parts & Functions ..............................................................................................................5
Operation Guide .............................................................................................................6-9
....................................................................................................................10
Usage Musts
.............................................................................................................. 11-12
Maintenance
..........................................................................................................................13
Cautions
.............................................................................................................14
Trouble Shooting
....................................................................................................15
Installation Instructions
.............................................................................................................16
Installation Guide
Contents
3
Page 4
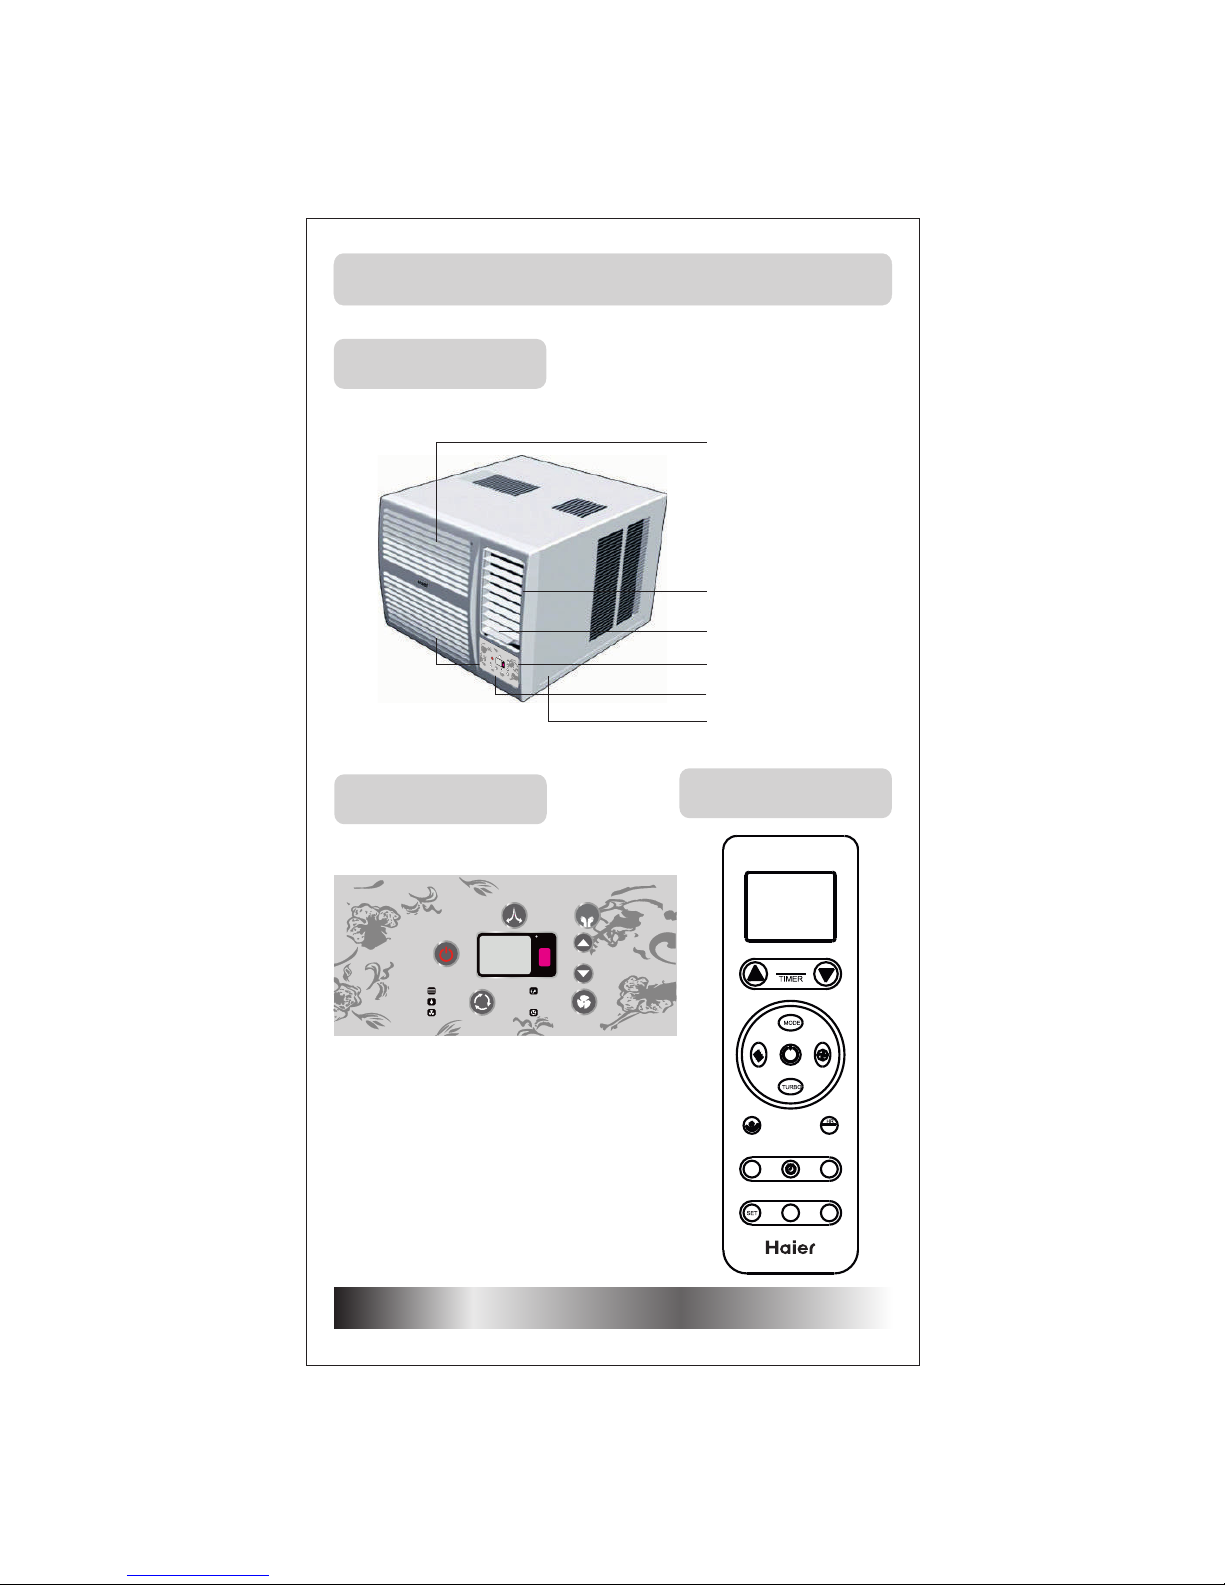
Machine body
Operation Panel
Remote Controller
Parts Names
Front panel
Air inlet (indoor side)
Air outlet (indoor side)
Air inlet (outdoor side)
Operation panel
Cabinet
4
POWER
C
hr
SLEEP
TIMER
COOL
DRY
FAN
$
SWING
ENERGY
SAVER
SPEED
TEMP.
MODE
POWER
C
hr
SLEEP
TIMER
COOL
DRY
FAN
$
SWING
ENERGY
SAVER
SPEED
TEMP
.
MODE
TEMP
T.ON
T.OFF
MIN
LCD
Page 5
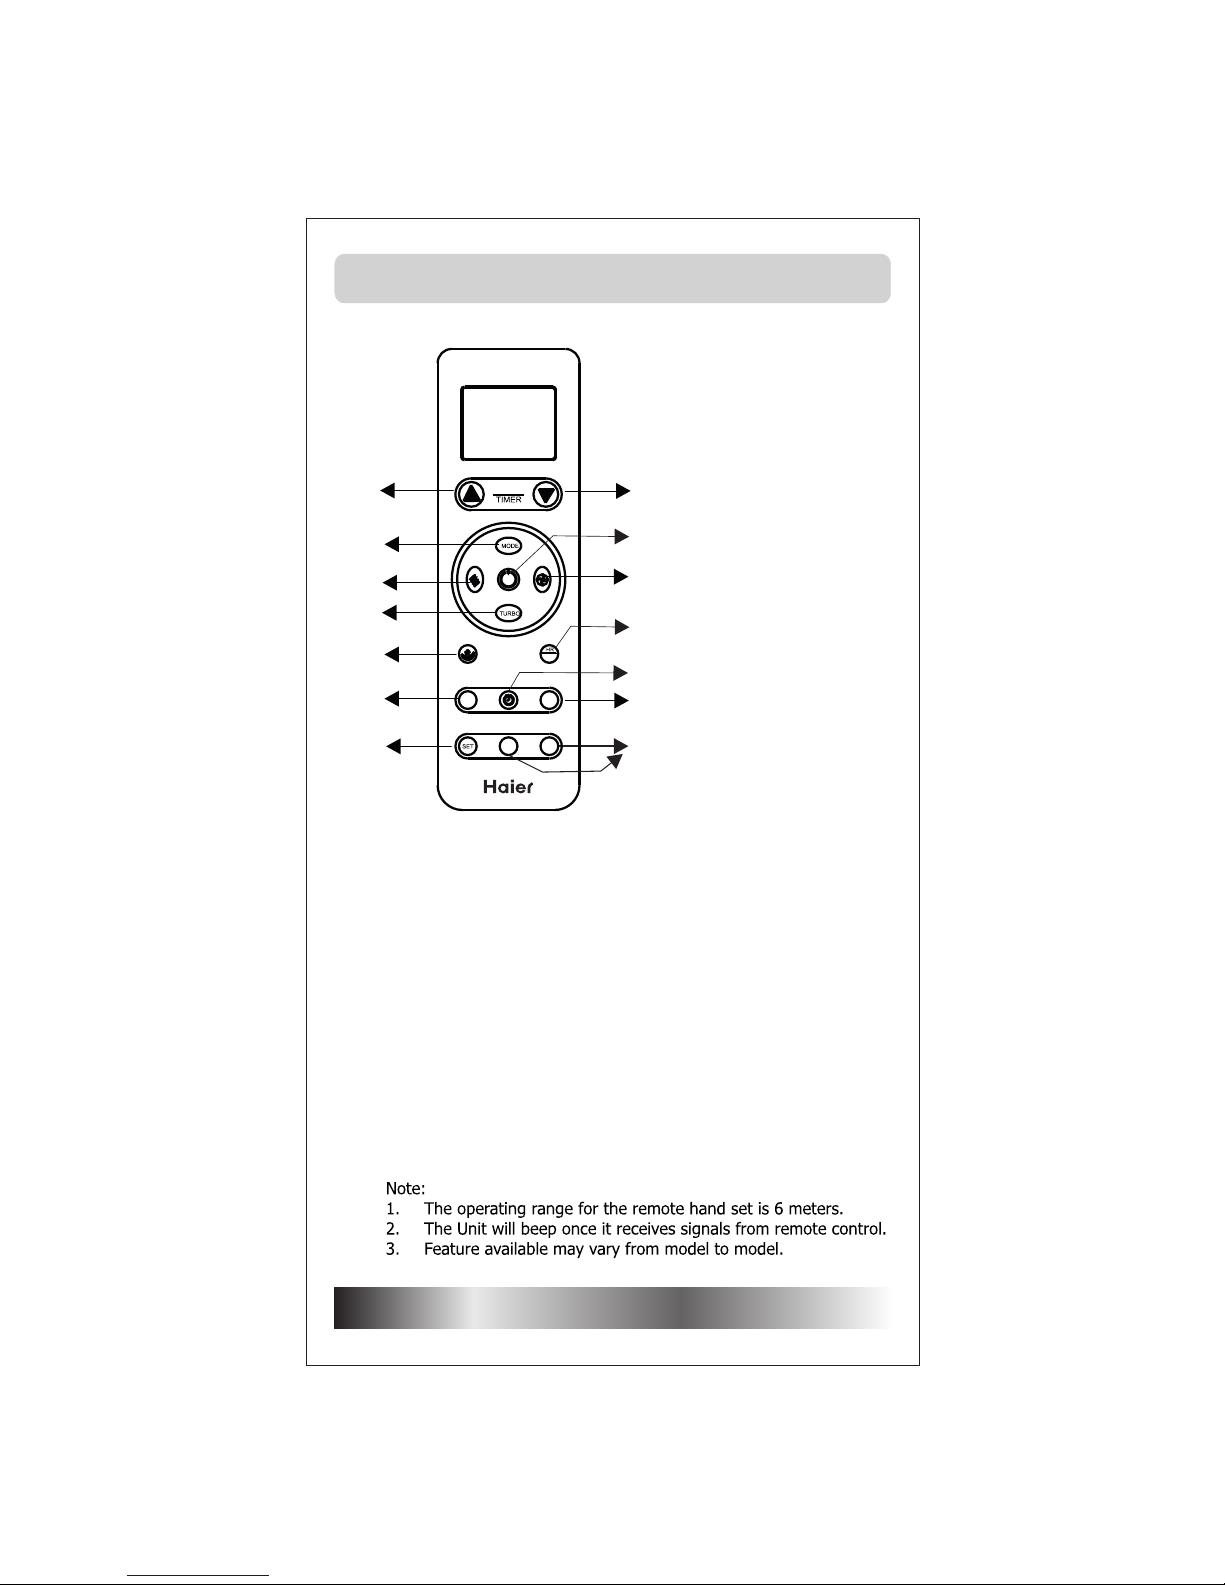
Parts and Functions
5
6
8
4
3
12
1
10
9
7
2
11
5
NA
TEMP
T.ON
T.OFF
MIN
13
LCD
1. Down(-)
2. Up(+)
3. Power
4. Fan Speed
5. Turbo
6. Mode
7. Swing
8. Hr/Min
9. Sleep
10. Timer On
11. Timer Off
12. Set
13. Clock Button
Page 6
Operation Guide
POWER
Press the ON/OFF key on the Control Panel or Remote Control to turn the unit
On/Off. The A/C starts with the previous setting.
MODE
The unit can be operated in any one of the following modes :
1) Cool : The temperature setting is adjustable between 16°C and 30°C.
The temperature setting can be changed using Up and Down keys
on your remote control or control panel.
2) Dry : This mode removes excess humidity from the room. The Fan
speed is automatically set to Low speed to allow condensation of
moisture.
3) Fan : Compressor will be OFF in this mode and only Fan will operate.
Fan speed can be changed by using “Fan” key on the remote control.
FAN SPEED
Pressing the Fan key will change Fan speed with the sequence below
· Low-Medium-High-Auto
· Auto Speed is only activated in Cool Mode
SWEEP / SWING
Press the SWEEP / SWING key on remote control or Control Panel to activate
automatic swing of the vertical louvers. The louvers will oscillate left and right
automatically. Pressing the sweep key again will stop the louver swing.
SLEEP
This feature ensures your sound sleep at night. Pressing this key changes set
temperature automatically by 1°C per hour for 2 hours..
Pressing this key will activate preset setting for the A/C which will operate the unit on
Energy Efficient setting. “ES” will be displayed on the Control panel. This function is
active only in cool mode. (THIS FEATURES IS AVAILABLE IN SELECTED MODEL)
TEMP.& UP/DOWN KEY
Press Temp. key to set the desired temp. in Room and UP/Down Key used to
increase and decrease temp.
6
Page 7

Operation Guide
7
Page 8

Operation Guide
8
(THIS FEATURES IS AVAILABLE IN SELECTED MODEL)
Page 9

Operation Guide
9
Page 10

Usage musts
Suitable indoor temperature. Cleaning of the air filter.
Close the doors and windows during
running.
Use the timer reasonably.
Do remember the following:
No obstructions allowed at the air inlet
Do not use it in other fields:storage of
foods,feeding animals,plantings,etc.
Do not spray water on the machine.
and outlet.
Do not pull the power line with hands.
10
Page 11

Removal of air filter
1. Loosen the air inlet by opening Inlet Grill at
both edges as shown.
2. Open the air inlet.
3. Hold the handle at lower part of the air filter
and draw outward to remove the air filter.
Air filter cleaning
1. Gently tap the dirt off the air filter.
2. Carefully wash the air filter in warm water (below 40°C)
To obtain better cleaning effect, soapy water or neutral
detergent may be used.
3. Flush the air filter carefully with clean water after
removing the dirt. Let it dry completely.
Installation of filter
(1) Put the air filter on.
(2) Close the Inlet Grill again.
Maintenance
Air filter cleaning: Please clean the air filter every two weeks
When dirt accumulates in the air filter, air circulation will be blocked, and causes poor cooling.
It is advisable to clean the air filter every two weeks for efficient operation.
Washing
air filter
CAUTION
*
*
Power cord: Only to use an exclusive power cord.
Changing installation site: If the air conditioner needs to be changed to another
location, please contact the dealer that sold you the unit.
11
Air inlet
Opening of
Inlet Grill
Drain tray
Extra pipe
Disposal of condensate
1. The drain hole on the bottom of the air conditioner will be clogged by a rubber stopper to make the
condensate in the bottom tray be spattered onto the condensator to raise efficiency of heat
exchange.If the spattering sound disturbs you,you can adopt the method illustrated below.
2. Remove the rubber seal from hole on the bottom in order to make the condensate run out.
Page 12

12
Before cleaning please pull off the
power plug.
Do not clean the machine with
following material in order to
decrease pollution: petrol,
detergent.
Do not pour water on the machine to
prevent electric shock or mechanical
trouble.
Hot water above 40°C may cause
discoloration of the shell or
deformation.
*
Cleaning of the shell and remote
Wipe the shell with soft cloth. If it is very dirty,
please use water with diluted neutral detergent.In
wiping, first twist out the water in the cloth.
Wipe out the detergent on the machine shell
completely.
*
Maintenance
Page 13

Avoid opening doors and windows
as much as possible.
Use curtain or blinds.
Direct sunlight may reduce cooling
effect, so always use window curtain.
Keep heat sources away from the
air conditioner.
Do not hang clothes in the vicinity of the
air inlet. This will decrease the cooling
effect and cause abnormal operation.
Before operating the mode selection
switch, check whether the air inlet
or outlet has been blocked.
Go away!
No entrance
Keep away from me
Cautions
For longer and trouble-free operation of the unit, pay special attention to the following:
*
*
*
*
*
Install the air conditioner at a location strong enough to support the unit.
Leave enough space around the air inlet and outlet for better circulation.
Avoid sites where flammable gas leaks.
Problems may occur if the unit is installed in the following areas:
Place where oil exists in the air including engine oil, seaside with
salt breeze, and hot springs area with air-borne sulfurous gas.
13
Page 14

Trouble Shooting
Condition Check Item Corrective Action
Doesn't
operate
Is plug firmly inserted?
Is fuse burned out?
Is there power failure?
Restore power or replace
fuse.
No cool air of
poor cooling
Is thermostat switch
incorrectly adjusted?
Is there direct sunlight
into the room?
Is mode selection switch
set to fan mode?
Are doors or windows left
open?
Is there any obstacle
blocking air inlet or outlet?
Is the fresh air window
shifted to the open?
Is there a strong heat
source in the room?
Is air filter clogged?
Adjust the themostate.
Use curtain or blinds.
Select cool mode.
Shut doors and windows.
Remove the obstacle.
Close the fresh air
window.
Remove or turn off the
heat source.
Remove and clean.
If problems cannot be solved, please pull out power plug and contact your dealer.
14
Page 15

Installation Instructions
Selection of the installation position
1. Select position where the structure is firm.
2. Select position where the air inlet and outlet are not blocked by obstacles.
3. Select position where the cooled air can be blown to every corner of the
room.
4. Select position where there's no direct sunlight. If sunlight cannot be
avoided, some means of sun shade is required.
5. Select position where the outdoor airflow will not bother neighbors.
6. Select position where condensation drainage is not impeded.
7. Select position where there's no dangerous gas or oil vapor nearby.
8. An extension cord is not recommended.
Installation diagram
The unit must be installed so that the back (outdoor side) is lower to allow
drained water to flow out smoothly.
Width of wall should be
less than 295mm
5 ~ 10mm
400mm
400mm
400mm
700mm
Minimum distance
15
Requirements for electricity:
0
1. Applicable ambient temperature range is 21C ~ 46°C.
2. If the power supply cord is damaged, it must be replaced by the manufacturer,
the service, agent or a similar qualified supplier. An extension cord is not
recommended.
3. The wiring method should comply with local wiring standards.
4. After installation, the power plug should be easy to access.
5. The breaker of the air conditioner should be an all-pole switch (25A) and the
distance between its two contacts should be no less than 3mm.
6. The appliance must be connected to a socket outlet with the appropriate rating.
7. The appliance is not intended for use by young children or infirm persons without
supervision.
8. Young children should be supervised to ensure that they do not play with the `
appliance.
Page 16

2. Attach a metal support (not provided by manufacturer) in a
firm location with expanding screws or
bolts.
3. Remove the air conditioner from its packing
carton.
4. Place the air conditioner on the metal support.
5. Stuff gaps in the wall or window with soft
sponge material or rubber gaskets to block
outside noise and keep cool air from escaping.
6. Let the rear of the air conditioner raiseslightly, the
drain hole on the bottom canbe seen. Clog it by a
black rubber stopper attached to the air conditioner In factory
(see Fig.2)
7. The condensate need to be led to the
designated place, buy a soft plastic pipe with
internal diameter of 16mm to connect the drain
connecting pipe and tied it tightly. (See Fig. 3)
Supplied accessory parts.
Note: After finishing the installation of the air conditioner, fix the panel board onto
the casing withone front attachment screw and two side attachment screws.
Fig.2
condenser
rubber lid
Fig.3
Name
Appearance
Quantity
Manual
1
M4 x 10
Screw
4 4
Drain tray
1
1
Rubber lid
1 2
Remote controller Battery
Installation Guide
8
Fig.1
Thickness of wall
Metal support
A
B
Installation of air conditioner (only for reference)
1. Make a wooden frame. (Fig.1)
16
Model BA
1.5Tr/2.0Tr WAC
670mm440mm
N8 x 32
Screw
Page 17

HAIER WARRANTY
HAIER Appliances (India) P.Ltd (hereinafter referred to as “the company”) hereby
offers the following warranty to the original domestic purchaser commencing from
the date of the purchase.
TERMS AND CONDITIONS
1) The company will, free of charge repair or replace any defective part or parts which
prove to be defective in workmanship and / or materials and not due to abnormal or
improper usage, at its sole discretion.
2) This warranty will automatically terminate on the expiry of the applicable warranty
period from the date invoice.
3) While the company will make every effort to carry out the repairs as soon as
possible, however the Company is not liable for any delay in servicing due to
reasons beyond the control of the company or any of its authorized service center.
4) It is entirely left to Company's discretion to repair/replace parts at the site of
installation or at the authorized service centers of the Company.
5) This warranty shall be strictly limited to the repairs or replacement of defective parts
specified in the warranty.
6) The parts shall be replaced by funcitionally operation equivalent material only and
not will brand new ones and are likely to be different from the one originally fitted.
The parts thus removed shall be taken back by the company.
7) This warranty will continue to be in force for the term herein specified, irrespective of
what replacements may be provided under it, and such replacement shall not attract
any fresh warranty.
8) The Company reserves the right to reatian any part or component replaced at its
sole discreting during the warranty period.
9) This warranty shall not in any case extend towards payment of any monetray
consideration whatsoever or replacement or return of the Product.
10) In no event the Company or its authorized service center be liable for any
consequential damages or resulting liability, damage or loss arising directly or
indirectly out of any defect in the Appliance.
Product Warranty
Period Parts not covered
Dvd Player
Home Theatre
6 Months
6 Months
Dishwasher
Cloth Dryer
12 Months
24 Months
Colour TV
Refrigerator
12 Months Remote, Cabinet
Comprehensive: 12 Months
Compressor: 60 Months
Plastic Parts, Glassware,
Light bulb
Washing
Machine
Comprehensive: 24 Months
Motor: 60 months
Top lid, Outer steel Cassing
Air-Conditioner
Comprehensive: 12 Months
Compressor: 60 Months
Air filter, Front grill Remote
Microwave
12 Months
Glass plate, Light bulb
Plastic parts
Plastic parts
Remote, Plastic parts
Remote, Plastic parts
Period Parts not coverd
Page 18

11) During the period of additional / non comprehensive warranty, visit charges as
applicable will be payable in additional to and fro charges.
12) In case of DVD player, the customer will have to bring it to the nearest authorized
Haier Service Center other wise visit charges will be applicable.
13) Demo for Direct Cool Refrigeration, Semi Automatic Washing Machine, CTV below
74cm and DVD will be on chargeable basis by the company, however the call center
can provide support over telephone.
14) Any change of location or change in the ownership during the warranty period must
be intimated in writing to the company.
15) The company's employees or its authorized representatives or dealer / service
franchisee have no authority to vary the terms of this warranty.
16) The company is not liable to provide service support beyond 5 years after the end of
manufacturing of the particular model of the product except in cases where the
product is covered under warranty.
17) This warranty is effected in New Delhi and claims, if any, shall be a made only
before the courst having jurisdiction in New Delhi and no claim shall be made
against the company outside New Delhi not with satading that the appliance may
have been sold or delivered else where.
18) This warranty is not valid in case of the following events:
a) If the Product has been installed/Service/Repaired/Opened or tampered by any
unathorised personnel.
b) If original serial number is removed or obliterated from the product.
c) If defects arise/caused by improper electrical circuit, major fluctuations in voltage,
alteration,misuse, neglect, substitution of original components with spurious/nongenuine components, attacked by household pest/rodents, fire, flood, earthquake,
lightning and/or other accident or act of God/natural calamities.
d) The product is shifted outside India.
Customer Name....................................... Address .................................................
Serial No. ........................................... Date of Purchase ........................................
Model ...........................................Dealer Seal ........................................................
HAIER APPLIANCES (INDIA) P. LTD.
BULDING No-1, OKHLA INDUSTRIAL AREA,
.
NEW
DELHI-110020.
For Complaints/Queries, Please Call us at : -
------------------------------------------------------------------------------------------------------------------------------------------------------------------------------------------------------------------
Warranty void if Invoice does not carry Product Sr. No.
1800-200-9999 / 1800-102-9999
(Toll Free-24x7)
SMS : Haier to 56677
email : customercare@haierindia.com
Page 19

Page 20

New Delhi-110020
Building No-1, Okhla Industrial Area, ,Phase-3
Email: info@haierindia.com Website: www.haierindia.com
Do not dispose this product as unsorted municipal
waste, Collection of such waste separately for special
treatment is necessary.
 Loading...