

Haier HRF-663DTB2WW, HRF-663DSA2WW, HRF-663DSB2WW, HRF-663DTB2HS, HRF-663DSA2HS User Manual
...
Inspired living
Refrigerator/Freezer Combi
User's Guide
Thank you very much for choosing to purchase a Haier-brand refrigerator.
This User's Guide will help you properly install and operate your newly acquired
appliance.
For future reference, please write down the model and serial number in the spaces
provided below.
You can retrieve that information from the product label attached to the inside of
the refrigerator.
Model number:
Serial number:
Date of purchase:
*=blank WW HS SS S2
HRF-660S
HRF-663DTA2*
HRF-663DTB2*
HRF-663DSA2*
HRF-663DSB2*
HRF-660SAA

Before operation
Notes on the refrigerator compartment
Notes on the freezer compartment
Defrosting Cleaning Inoperation
Troubleshooting & Customer Service
Components ....................................................................................1
Precautions...................................................................................2-4
Preparations..................................................................................5-6
Door removal................................................................................7-8
Setting up the Refrigerator/Freezer Combi .....................................9
Start-up..........................................................................................10
Digital display operation ..........................................................11-13
Refrigerator compartment........................................................14-16
Notes on refrigeration ...................................................................17
Tips on refrigeration ......................................................................18
Freezer compartment.....................................................................19
Notes on freezing ..........................................................................20
Defrosting......................................................................................21
Cleaning ........................................................................................21
Inoperation ...............................................................................22-23
Troubleshooting .......................................................................24-25
Customer service ......................................................................26-27
Contents
Before start-up, be sure to read the User's Guide.
Keep the User's Guide in a safe place.
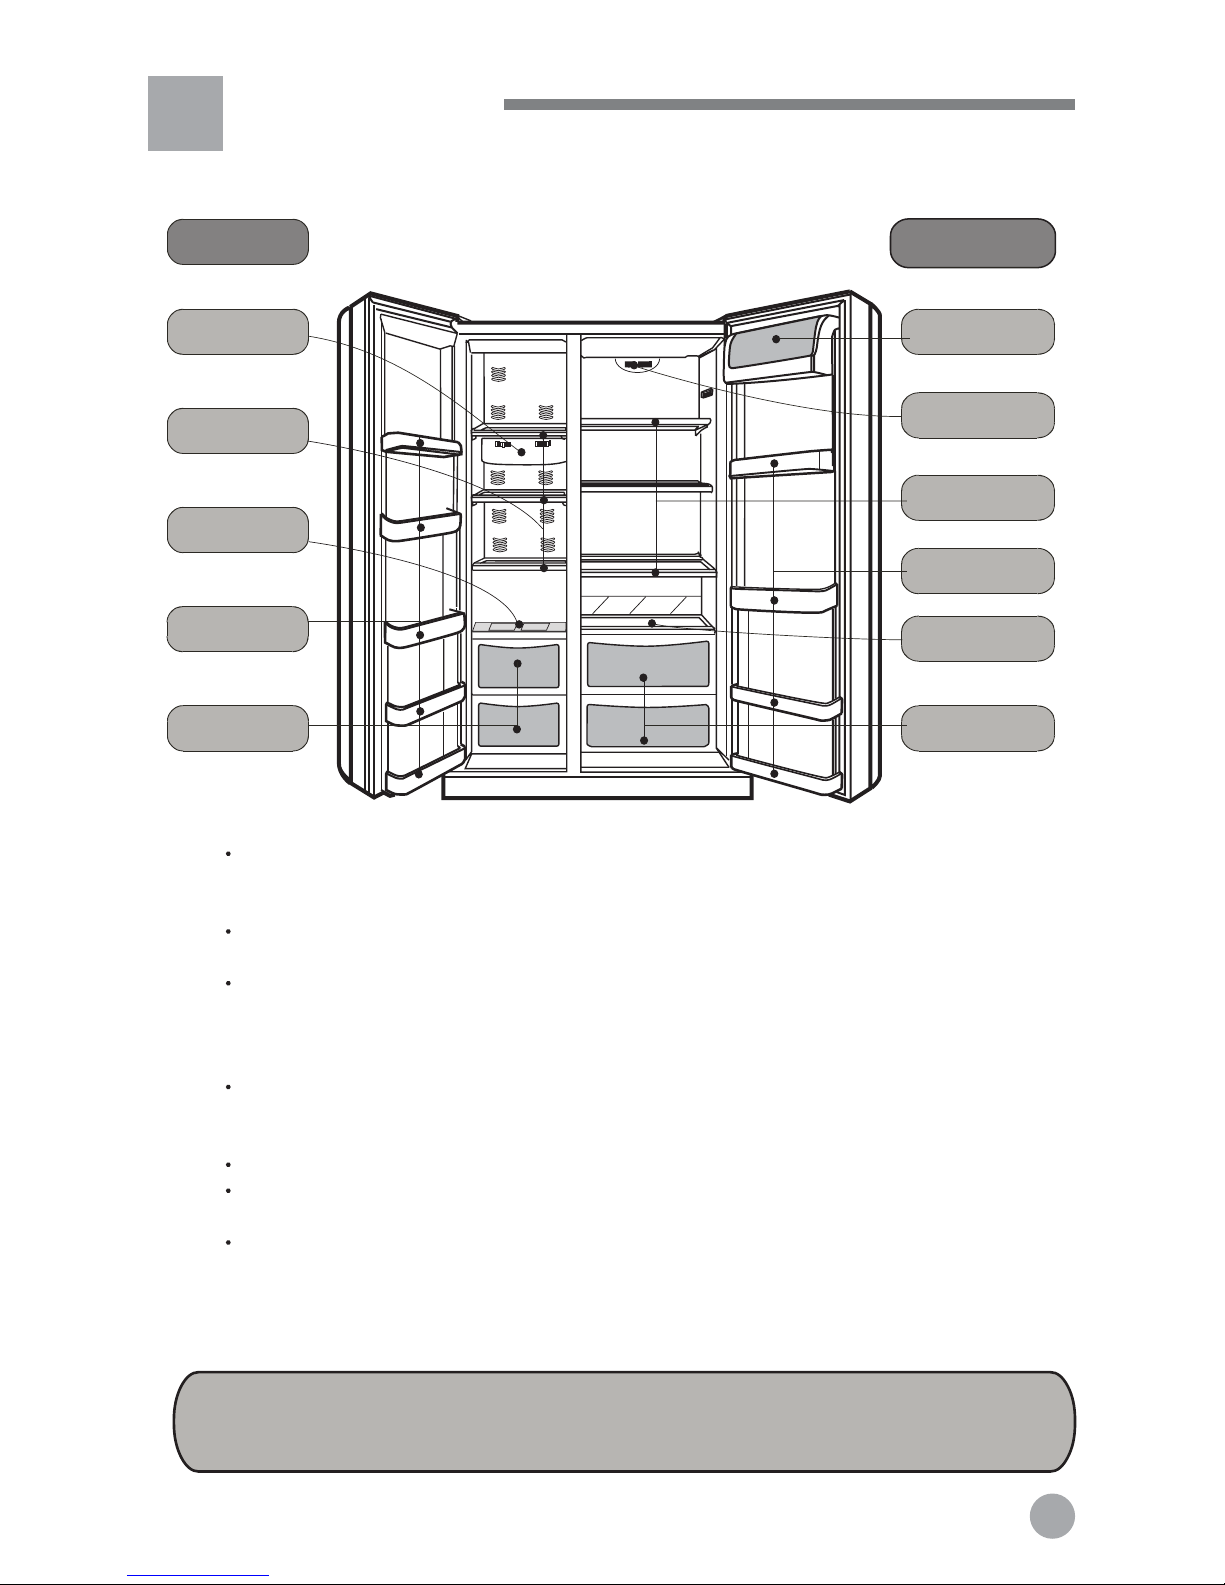
Components
Freezer
Light
Shelves
Bottle rack
Freezer drawers
Refrigerator
compartment
Veggie drawer cover
Note
The power plug must remain accessible after setting up the appliance.
If damaged, the power cord of this appliance must be replaced by the maker, their customer
service or an equally qualified person so as to prevent any hazards.
Should the refrigerant circuit have been damaged, keep away all sources of fire or sparks and
thoroughly air the room.
Children frequently do not recognise the hazards related to handling household appliances.
Therefore, children and people with impairments should only be allowed to use the refrigerator
under the supervision of a qualified person. Do not let children play with the appliance.
Do not use any mechanical or artificial devices or any tools other than those recommended by the
maker in order to accelerate the defrosting process.
Check the appliance for damages sustained during transportation. Do not connect the appliance if
it is damaged. In case of damage, contact your supplier.
Make sure that no part of the refrigerant circuit is damaged when transporting and setting up the
appliance.
To prevent damage to the appliance, its ventilation openings must not be covered or blocked.
Do not operate any electrical devices inside the food storage area, unless instructed to do so by
the maker.
Our company continually thrives towards improving all models and versions. For that
reason, we hope that you can accept our right to change their appearance, equipment or
operation.
Shelves
Bottle cover
Light
Bottle rack
Veggie drawer
1
Ice tray

Precautions
This appliance requires a 220-240V/50Hz power
supply.
If the voltage is outside of the 187-242V range,
malfunctions and damages of the controls,
thermostat or compressor may result, unless a
regulator of at least 750W was installed.
A dedicated grounded outlet is required. The
appliance is equipped with a standard
shockproof plug, whose grounding should not be
disabled. The power plug of the appliance
should always be accessible.
Do not damage the power cord.
*Never pull the plug out by the cord; always
grab and pull the plug
*Do not place the power cord under the
appliance or walk on it.
*Be sure not to damage the power cord when
moving the appliance away from the wall.
If the power cord is damaged or the plug cracked
or worn, the power cord must be replaced with a
matching one, available from the maker or their
customer service. The power cord may only be
replaced by the maker, their customer service or
an equally qualified person.
In the case of a gas or other flammable leak:
*Close the valve.
*Open the doors and windows.
*Do not pull out or insert the power cord of the
appliance.
Pull out the power plug:
*Before cleaning or repair
*When replacing a burned-out bulb
2
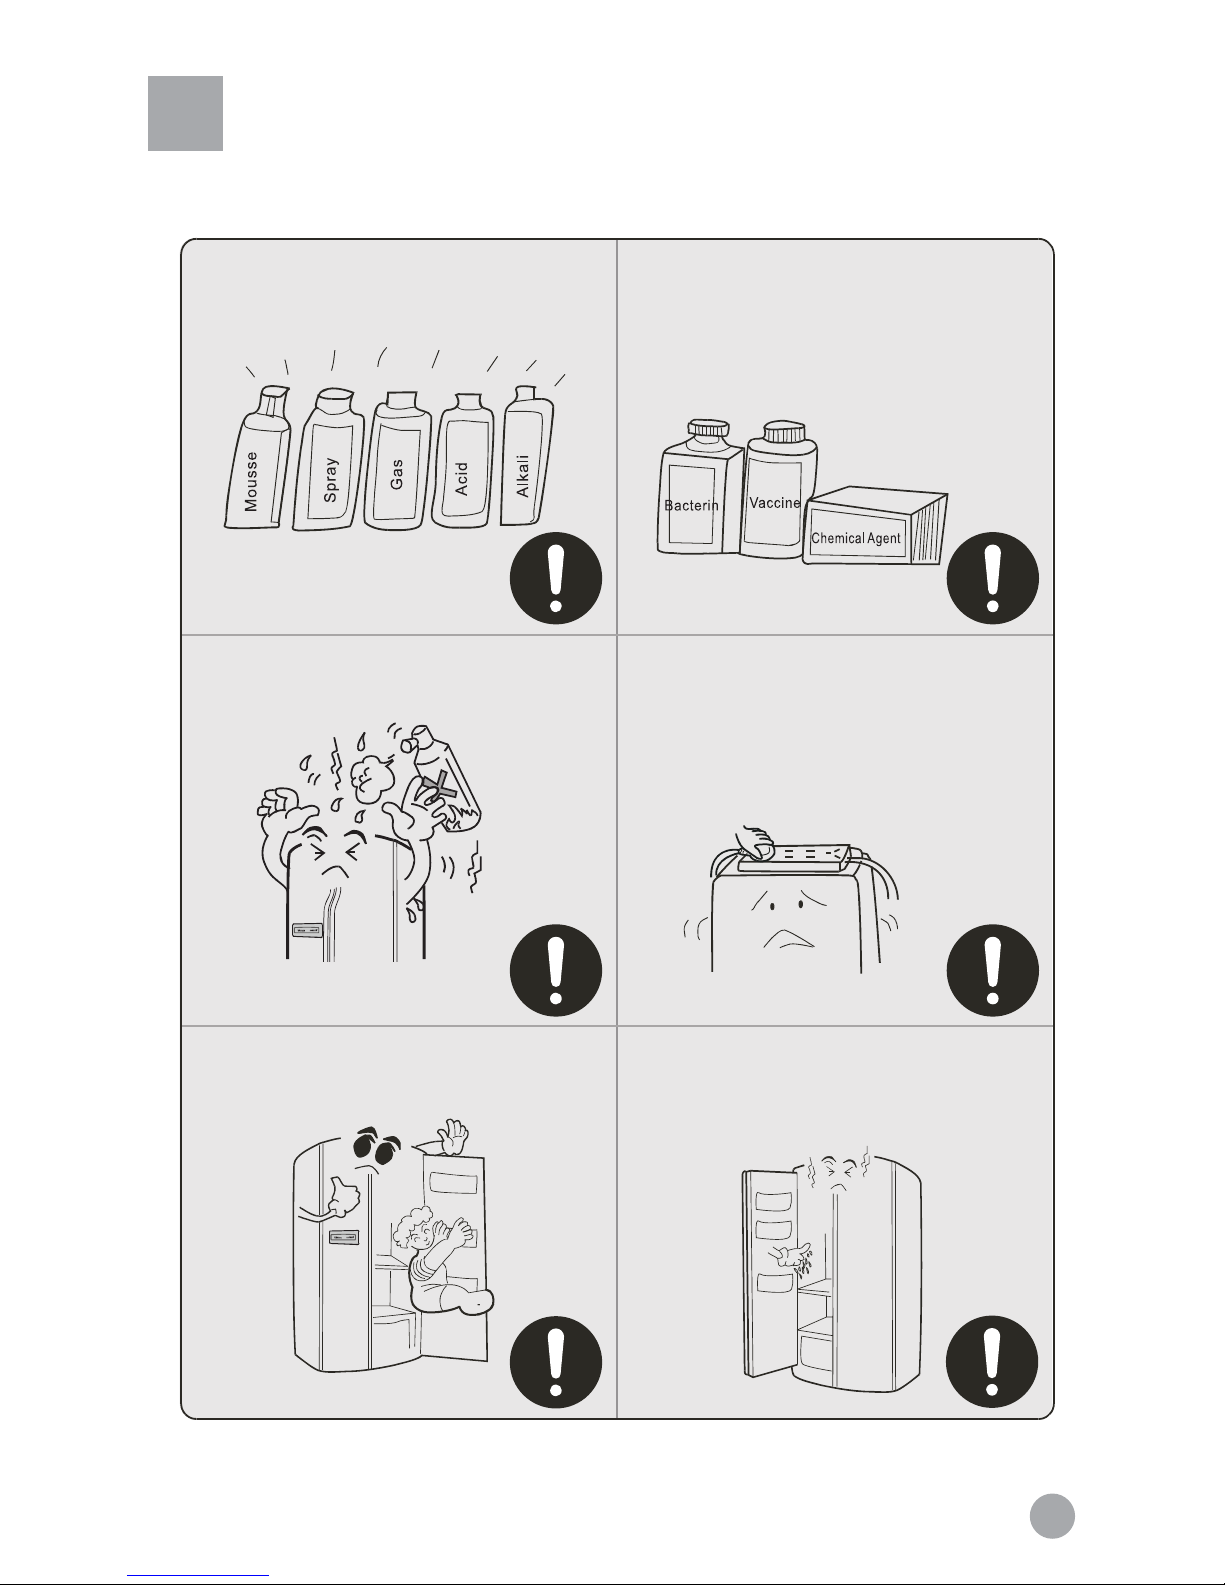
Precautions
Never place flammable, explosive or corrosive
materials in the refrigerator.
This appliance is intended strictly for storing
and freezing foods. It is not suitable for storing
such things as vaccines, bacteria or chemical
samples, which have demanding temperature
requirements.
Do not store fuel and other flammable products
near this appliance.
Do not put microwave ovens, voltage
regulators or power strips on this appliance. Do
not operate electrical devices and such inside
the refrigerator (except if instructed to do so by
the maker).
To avoid injuries, do not let children climb on
or hang from the appliance door.
Once the appliance has been started up, do not
touch the inside of the freezer compartment
with wet hands, otherwise they may get stuck
on the surface.
3

Precautions
To avoid injury, keep fingers away from the
door crack when opening or closing the doors.
Keep children away from the appliance doors
being opened and closed.
Do not pour water onto the appliance or set it up
in wet areas.
Refrigerators may only be repaired or altered by
professionals. Improper repair may cause
considerable damage. Please contact your dealer
or our customer service should your appliance
require repair or modification.
Keep bottles and tins out of the freezer. They
could burst when the content freezes.
Pull out the power plug in the case of a power
outage, repair or cleaning.
When disposing of the appliance, remove the
door or door seal and shelves to prevent playing
children from locking themselves in and putting
their lives at risk.
4

Preparations
Unpacking
Remove the entire packing material,
including the foam underlay and pieces of
tape used to hold accessories in place.
Separating and counting the
included accessories.
Check the items in the box against the
packing list.
In case of a mismatch, please contact
your supplier.
Setting up the appliance in a suitable
area.
(Details under “Setting up”.)
Attaching the toe moulding
Open the refrigerator and freezer
doors, remove the moulding from
the refrigerator compartment, and
then affix it as shown in the
illustration.
5
Preparations
Cleaning interior
It is recommended to clean the interior before
starting up the appliance. (Details under
“Cleaning”.)
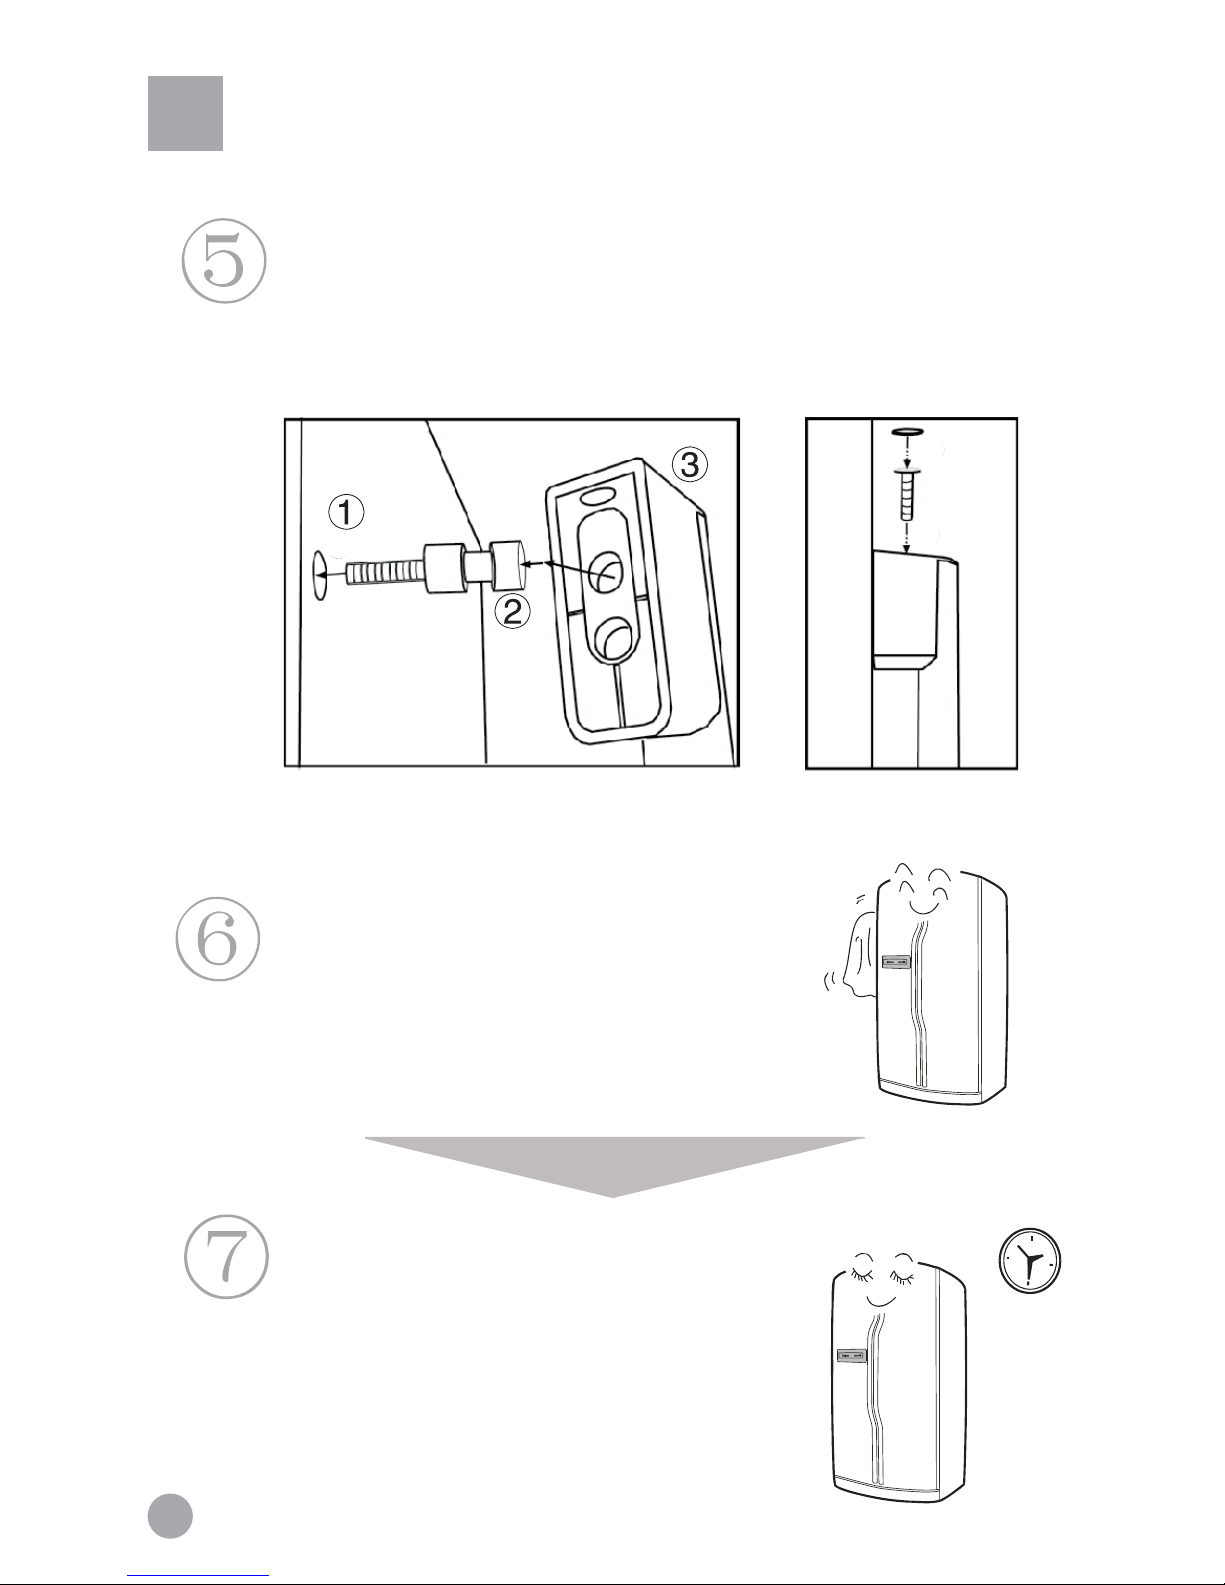
Standing still
After cleaning, let the appliance stand still for at
least six hours before turning it on to start it up.
Installing the door handle
First, screw part 2 into the threaded hole in the door (part 1); there are two
screws per door. Next, press part 3 with its larger opening onto part 2.
Finally, pull part 3 down in order to attach it firmly to the door.
6
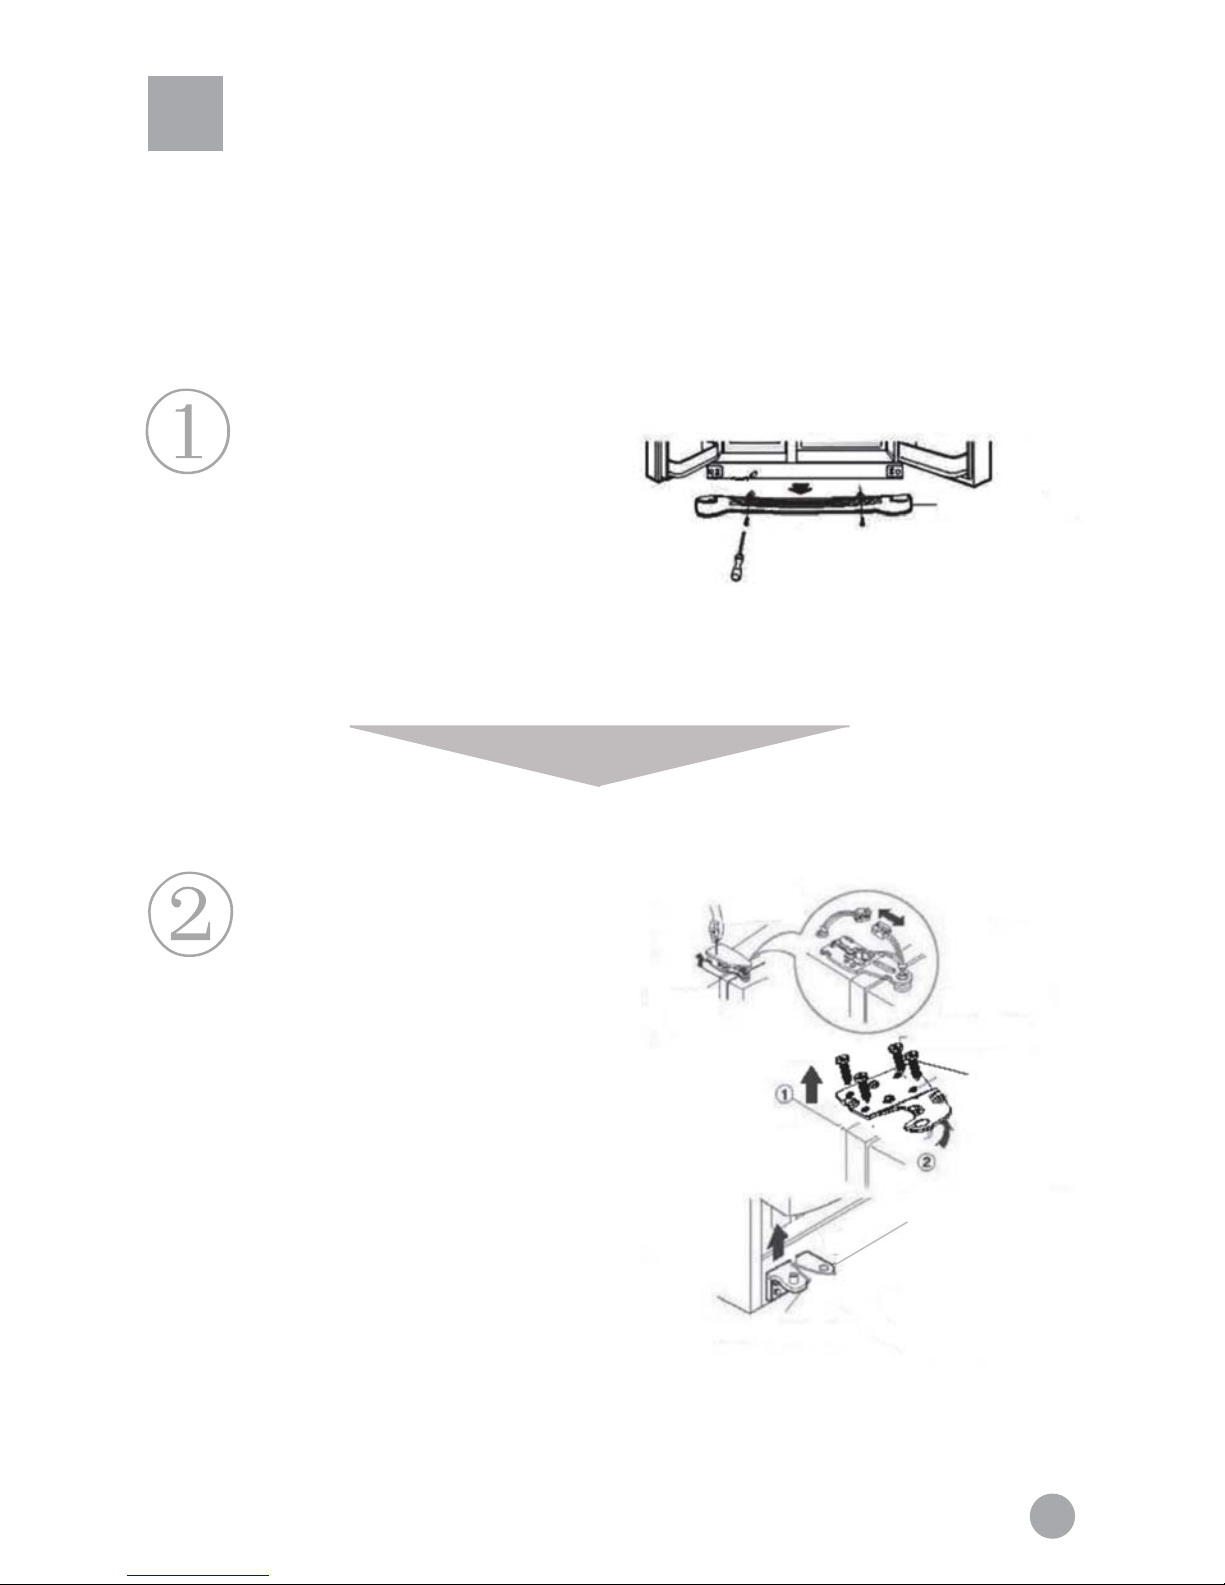
Door removal
Removing the door
If your house door is too narrow, remove the refrigerator door and carry the
refrigerator in narrow side first.
Remove the toe moulding.
Toe moulding
Remove the freezer compartment door.
1) Unscrew the hinge covers. Disconnect
all wires except for the grounding wire.
2) Remove the screws from the upper
hinge following the direction as indicated
by Arrow (1). Then remove the upper
hinge following the direction as indicated
by Arrow (2).
3) Lift the freezer compartment door to
remove it.
Hinge cover
Wire s
Upper
(hinge)
Grounding wire
Upper hinge
Screw
Lower
hinge
7
 Loading...