

Page 1
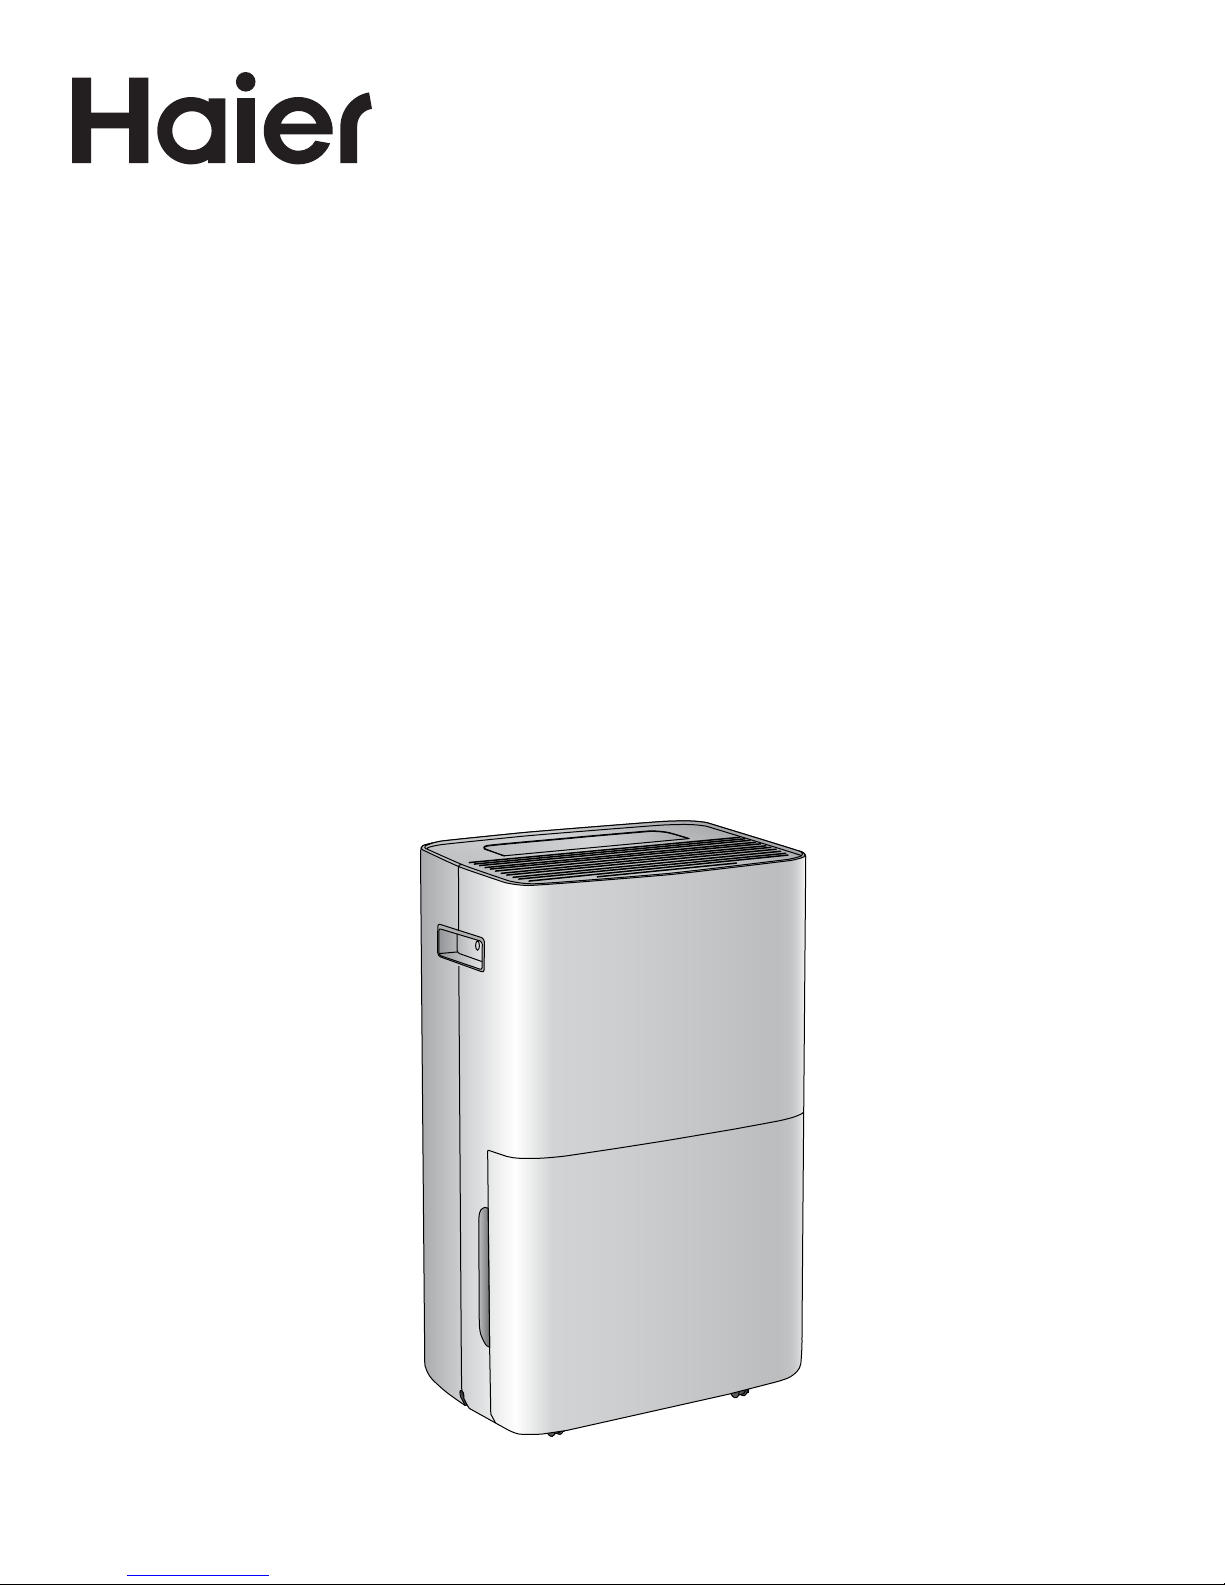
Dehumidier
Déshumidicateur
Deshumidicador
Installation and User Manual
Installation et guide de l’utilisateur
Manual de instalación y del usuario
HEN70ETFP
Part # 0060522959 REV A
Page 2

Page 3

TABLE OF CONTENTS
DEHUMIDIFIER SAFETY ............................................................................................................................................. 2
PARTS AND FEATURES .............................................................................................................................................. 3
INSTALLATION REQUIREMENTS ................................................................................................................................ 3
Location Requirements ...................................................................................................................................... 3
Electrical Requirements ...................................................................................................................................... 3
INSTALLATION INSTRUCTIONS ................................................................................................................................. 4
Step 1 - Unpack
Step 2 - Install Direct Drain .................................................................................................................................. 4
Step 3 - Install Drain Tube to Drain Pump ............................................................................................................... 5
Step 4 - Complete Installation ............................................................................................................................. 5
CONTROL PANEL ...................................................................................................................................................... 6
Display ............................................................................................................................................................. 6
Buttons and Indicators ........................................................................................................................................ 6
DEHUMIDIFIER USE ................................................................................................................................................... 7
Defrost Mode .................................................................................................................................................... 7
DEHUMIDIFIER CARE ................................................................................................................................................ 7
Cleaning ........................................................................................................................................................... 7
Air Filters .......................................................................................................................................................... 7
Water Collection Bucket ..................................................................................................................................... 8
Storage ............................................................................................................................................................. 8
Dehumidier .............................................................................................................................. 4
ENGLISH
TROUBLESHOOTING ................................................................................................................................................ 8
LIMITED WARRANTY ................................................................................................................................................. 9
RECORD KEEPING ................................................................................................................................................... 10
1
Page 4

Your safety and the safety of others are very important.
We have provided many important safety messages in this manual and on your appliance. Always read and obey all
safety messages.
DANGER
WARNING
CAUTION
This is the safety alert symbol.
This symbol alerts you to potential hazards that can kill or hurt you and others. All safety messages will
follow the safety alert symbol and either the word “DANGER,” “WARNING” or “CAUTION.”
These words mean:
An imminently hazardous situation. You could be killed or seriously injured if you don’t
immediately follow instructions.
A potentially hazardous situation which, if not avoided, could result in death or serious
bodily injury.
A potentially hazardous situation which, if not avoided, may result in moderate or minor
injury.
All safety messages will tell you what the potential hazard is, tell you how to reduce the chance of injury, and tell you what
can happen if the instructions are not followed.
State of California Proposition 65 Warnings:
WARNING: This product contains one or more chemicals known to the State of California to cause cancer.
WARNING: This product contains one or more chemicals known to the State of California to cause birth defects or other
reproductive harm.
ENGLISH
DEHUMIDIFIER SAFETY
IMPORTANT SAFETY INSTRUCTIONS
WARNING: To reduce the risk of re, electrical shock, injury to persons, or damage when using the dehumidier, follow
basic precautions, including the following:
Read all instructions before using this dehumidier.
•
Plug into a grounded 3 prong outlet.
•
Do not remove ground prong.
•
Do not use an adapter.
•
Do not use an extension cord.
•
Do not operate the
•
or plug, if it is not working properly, or if it has been
damaged or dropped.
The dehumidier should be serviced only by qualied
•
service personnel. Call an authorized service company
for examination, repair, or adjustment.
Disconnect power before servicing.
•
Disconnect power before cleaning.
•
NOTE: Turning
button does NOT disconnect the appliance from the
power supply.
dehumidier if it has a damaged cord
o power by pressing the Power
READ AND SAVE THESE INSTRUCTIONS
Do not install or use the dehumidier in any area where
•
the atmosphere contains combustible gases or where
the atmosphere is contaminated. Avoid any chemicals
coming in contact with your dehumidier.
Do not store anything directly on top of the dehumidier.
•
Use two or more people to move and install dehumidier.
•
Never operate the
•
place.
Do not use the dehumidier near a bathtub, shower or
•
wash basin or other wet area.
Do not drink water collected in the water collection
•
bucket.
dehumidier without the lters in
2
Page 5
PARTS AND FEATURES
a
f
g
c
d
b
e
i
h
20"
(51 cm)
20"
(51 cm)
20"
(51 cm)
20" (51 cm)
WARNING
Electrical Shock Hazard
Plug into a grounded 3 prong outlet.
Do not remove the ground prong from the power
cord plug.
Do not use an adapter.
Do not use an extension cord.
Failure to do so can result in death, fire or
electrical shock.
Control Panel
A
Dehumidied Dry
B
Air Vent
Handle
C
Water Collection
D
Bucket
Casters
E
Humid Air Intake
F
Air Filter
G
Direct Drain
H
Outlet
Drain Pump
I
Connector
ENGLISH
INSTALLATION REQUIREMENTS
LOCATION REQUIREMENTS
Place the dehumidier on a at, level, surface to avoid
•
shaking, vibration and water spilling.
The surface must be strong enough to support the
•
dehumidier when the collection bucket is full of water.
Maintain a minimum 8" (20 cm) clearance around the
•
dehumidier to dissipate the heat properly.
Keep the dehumidier free of any obstructions such as
•
•
drapes, curtains, blinds, etc.
Keep all windows and doors to the outside closed when
operating the dehumidier. Humid air will increase the
dehumidier’s workload.
Do not place the dehumidier in an area where the
•
temperature will fall below 38°F (3°C). Lower
temperatures may cause a layer of frost to accumulate
which will decrease performance.
Do not place the dehumidier in direct sunlight or near a
•
heat source such as baseboard heaters, stoves, etc.
ELECTRICAL REQUIREMENTS
3
Page 6

POWER SUPPLY CORD
WARNING
Excessive Weight Hazard
Use two or more people to move and install
dehumidifier.
Failure to do so can result in back or other injury.
b
a
a
ENGLISH
Wiring Requirements
115 Volt, 60Hz, 15-amp fused grounded 3 prong outlet
•
The use of a time-delay fuse or time-delay circuit breaker
•
is recommended.
Use a dedicated circuit only.
•
NOTE: Do not operate any other electrical
appliances on this circuit or you may trip the circuit
breaker/fuse.
REQUIRED GROUNDING METHOD
This dehumidier must be grounded. The dehumidier is
equipped with a power supply cord that has a 3 prong
grounding plug. The power supply cord must be plugged into
a mating, grounded 3 prong outlet, and grounded in
accordance with all local codes and ordinances.
INSTALLATION INSTRUCTIONS
STEP 1 - UNPACK DEHUMIDIFIER
115V
15 Amp
Remove packaging materials. Save the carton and the
•
foam packaging for storing the dehumidier when not in
use.
NOTE: There are no packing materials inside the
dehumidier to remove. Do Not open the cabinet.
Properly dispose of/recycle all packing material.
•
Handle the dehumidier gently.
•
Keep the dehumidier upright and level. Do not set the
•
dehumidier on its side, front, back or upside down.
STEP 2 - INSTALL DIRECT DRAIN
(Optional)
If you plan to operate your
you are placing it near a oor drain, such as in a basement,
you may decide to install a direct drain to avoid having to
empty the water collection bucket.
1. Unscrew and remove the drain cover on the back of the
dehumidier.
2. Remove the soft, rubber stopper. Place the drain cover
and stopper into the water bucket for safe keeping.
dehumidier continuously, and
Rubber
A
Stopper
Drain Cover
B
3. Connect a drain hose (not provided) to the garden-hose
style drain connection.
Drain Hose
A
4. Lower the drain hose horizontally into a drain.
4
Page 7

STEP 3 - INSTALL DRAIN TUBE TO
a
b
a b
a
a
WARNING
Electrical Shock Hazard
Plug into a grounded 3 prong outlet.
Do not remove the ground prong from the power
cord plug.
Do not use an adapter.
Do not use an extension cord.
Failure to do so can result in death, fire or
electrical shock.
DRAIN PUMP
(Optional)
If you plan to operate your dehumidier continuously, and it
requires a longer hose to reach a
located above the dehumidier, connect the 16 ft (4.9 m)
drain tube with drain tube tting (provided) to the drain pump
connector on the back of the dehumidier. When the level of
the water inside the collection bucket reaches the specied
level, the drain pump will automatically pump the water to
the drain.
1. Remove the drain tube from the water collection
bucket.
Drain Tube Fitting
A
Drain Tube (16 ft [4.9 mm] long)
B
2. Insert the drain tube tting into the drain pump
connector located on the back of the dehumidier.
oor drain, or the drain is
4. Insert the opposite end of the drain tube into the drain.
5. To remove the drain tube, turn the knob of the drain
pump connector clockwise 45° while pulling out the
drain tube tting.
NOTE: The drain tube tting will pop away from the
drain pump connector.
Drain Pump Connector Knob
A
STEP 4 - COMPLETE INSTALLATION
ENGLISH
Drain Tube Fitting
A
Drain Pump Connector
B
3. Push the drain tube tting as far as possible into the
drain pump connector.
NOTE: Make sure that the drain tube tting has
securely snapped into position.
Drain Tube Fitting
A
1. Place the dehumidier on a rm, level surface in a
suitable location. See “Location Requirements.”
2. Make sure the water collection bucket is inserted
correctly into the dehumidier.
NOTE: If the Bucket Full indicator illuminates,
remove the water bucket and check that the
lever moves freely.
3. Plug the power cord into a grounded 3 prong outlet.
5
oat
Page 8

a b c d e
fgh
BUCKET
FULL
DEFROST
HIGH
LOW
ON
OFF
CHECK
FILTER
% RH
POWER SPEED TIMER HUMIDITY / TIME FILTER RESET
ENGLISH
CONTROL PANEL
DISPLAY
Displays the current room humidity as a percent, or the
hours remaining in a Time Delay. The corresponding indicator
light will illuminate.
BUTTONS AND INDICATORS
POWER BUTTON
A
Press the Power button to turn On/O the
•
dehumidier.
NOTE: Turning o power by pressing the Power
button does NOT disconnect the appliance from the
power supply.
FAN SPEED BUTTON
B
The fan speed can be adjusted from Low to High speed.
Press the Fan Speed button to toggle among the two
•
speeds. The corresponding fan speed indicator will
illuminate.
TIMER BUTTON
C
Auto Turn ON/Auto Turn OFF
Program a time from (1-hour to 24-hours) for the
dehumidier to turn O or On. When a Time Delay is
programmed, the Timer ON indicator light will
illuminate.
While the dehumidier is operating:
1. Press the Timer button.
2. Press the Up Arrow/Down Arrow buttons to select
the number of hours you want the dehumidier to
continue to operate before turning O.
NOTE: After displaying the time, the Display
will revert to showing the current humidity after
10 seconds have passed.
NOTE:
will revert to showing the current humidity after
10 seconds have passed.
To cancel the timer:
Press the Timer button once, the hours remaining
•
will ash, press the timer button again and the timer
will be cancelled.
HUMIDITY/TIME (Up and Down Arrow) BUTTONS
D
Adjusts the Humidity or Hours in Time Delay.
To Set the Humidity Level:
The humidity can be set between 30% Relative Humidity
(RH) and 90% RH. The humidity can be adjusted in
increments of 5% by each press of a button.
Press the Up Arrow/Down Arrow buttons to select
•
the desired Relative Humidity (RH).
NOTE: After setting the humidity level, the
display will revert to the current humidity after
10 seconds have passed.
FILTER RESET BUTTON
E
Press this button to reset the air lter timer and to
•
turn O the Check Filter indicator.
FILTER STATUS
F
After 250 hours of operation, the lter indicator light will
illuminate to remind you to clean the air lter. Clean the
air lter. See “Cleaning.”
BUCKET FULL
G
When the water collection bucket is full the indicator
illuminates to remind you to empty the bucket.
DEFROST
H
When the room temperature is low, the dehumidier
enters defrost mode and the indicator illuminates.
After displaying the time, the Display
While the dehumidier is o:
1. Press the Timer button.
2. Press the Up Arrow/Down Arrow buttons to select
the number of hours you want the dehumidier to
remain o before turning On.
6
Page 9

DEHUMIDIFIER USE
WARNING
Electrical Shock Hazard
Disconnect power before cleaning.
Failure to do so can result in death or electrical shock.
b
a
IMPORTANT: If the dehumidier has been tilted on its
side, wait 24 hours before turning on the dehumidier to
allow the oil to return to the compressor. This will
prevent the dehumidier from failing prematurely.
Allow 20" (51 cm) of space around the unit for proper air
•
circulation.
Do Not operate the dehumidier without an air lter in
•
place.
Do not spill liquid on the control panel; it may cause an
•
electrical short to the interior electronic parts that would
either disable them or cause them to function
improperly.
When the unit is operated in high humidity conditions,
•
you may need to empty the water bucket more
frequently.
When the water collection bucket is full, the dehumidier
•
will stop operating automatically. The Bucket Full
indicator illuminates to alert you of this condition. Empty
the water collection bucket. See “Cleaning.”
DEHUMIDIFIER CARE
When the empty water collection bucket is replaced
•
properly, the dehumidier will restart and operate
normally.
DEFROST MODE
If the dehumidier is operated at temperatures below
•
54°F (12°C), but above 41°F (5°C), the surface of the
evaporator may accumulate a layer of frost which would
reduce the eciency of the dehumidier. So, the
dehumidier will enter periodic defrost mode. The time
to defrost may vary. If the dehumidier freezes up, turn it
o at the power supply and restart.
NOTE: If the room temperature remains below 41°F
(5°C), the dehumidier should be turned OFF.
ENGLISH
CLEANING
1. Unplug dehumidier or disconnect power.
2. Use only a soft cloth dampened with water to clean the
cabinet.
NOTE:
Do not use a liquid or spray cleaner to clean the
•
dehumidier.
Do not wash with a hose or immerse in water.
•
DO NOT use chemicals, abrasives, ammonia,
•
chlorine bleach, concentrated detergents,
solvents or scouring pads. Some of these
chemicals/items may damage and/or discolor
dehumidier.
your
3. Wipe dry with a soft cloth.
4. Plug in or reconnect power.
AIR FILTERS
Your dehumidier features a removable air lter located at
the back of the unit behind the humid air intake grille.
IMPORTANT:
the air lter in place.
1. Unplug or disconnect power.
2. Pull on the tabs to slide out the lters from the back of
the dehumidier.
NOTE: The secondary lters are accessible once
the main lters are removed.
3. Wash or vacuum the dust from the air lters.
NOTE: If washed, gently shake the lter to remove
the excess water and dust particles trapped in the
lter.
4. Reinstall the lters.
5. Plug in or reconnect power.
7
DO NOT use your dehumidier without
Air Filter
A
Humid Air
B
Intake Grille
Page 10

WATER COLLECTION BUCKET
WARNING
Sickness Hazard
Do not drink water collected in water bucket.
Doing so can result in sickness.
a
ENGLISH
The Bucket Full indicator illuminates, when the water
collection bucket has lled with water.
To Empty the Water Collection Bucket:
1. Unplug the dehumidier or disconnect power.
2. Using two hands, slowly slide the water collection
bucket from the front of the dehumidier.
Water
A
Collection
Bucket
3. Empty the water collection bucket.
4. Replace the empty water collection bucket into the
dehumidier.
5. Plug in or reconnect power.
STORAGE
If the unit is not being used for a long period of time:
1. Unplug the
2. Drain the water from the water bucket. See
“Dehumidier Care.”
3. Use the original packaging to repack the unit to avoid a
buildup of dust or dirt.
4. Store the
dehumidier or disconnect power.
dehumidier in a cool, dry location.
TROUBLESHOOTING
First try the solutions suggested here to possibly avoid the cost of a service call.
PROBLEM POSSIBLE CAUSE SOLUTION
Unit does not start or
operate
Power supply cord is not plugged into an
outlet.
The Power button has not been pressed. Press the Power button on the Control Panel or
There is no power to the electrical outlet. Plug a working lamp into the outlet to check
A household fuse has blown or a circuit
breaker has tripped.
The control was programmed for a Time Delay. Cancel the Time Delay. See “Control Panel.”
The batteries in the remote control are dead. Replace the batteries.
The water bucket is full.
NOTE: The dehumidier automatically
turns o, and the Bucket Full indicator
illuminates to alert you of this condition.
Plug dehumidier into a grounded 3 prong
outlet.
Remote Control to turn ON the dehumidier.
for power.
Replace the fuse or reset the circuit breaker.
Empty the water bucket. See “Dehumidier
Care.”
8
Page 11

PROBLEM POSSIBLE CAUSE SOLUTION
Dehumidier is working
but the room is still
humid.
FOR MORE HELP, VISIT HAIERAMERICA.COM OR CALL THE CONSUMER HELP LINE AT 1-877-337-3639.
The room is humid.
NOTE: On extremely hot and humid days,
the dehumidier will take longer to
dehumidify the room.
Airow is restricted. Remove any obstacles to the airow and
RH Level set too high Lower the set humidity level.
Air lters are dirty or restricted. Clean the air lter. See “Dehumidier Care.“
Doors and windows are open. Close the doors and windows to the room
Allow time for the room to dehumidify when
you rst turn on the unit.
Make sure the dehumidier has an adequate
BTU rating for the size of the room being
cooled.
redirect airow for uniform cooling.
being cooled to prevent cooled air from
escaping.
LIMITED WARRANTY
ENGLISH
IN-HOME SERVICE
FULL ONE YEAR WARRANTY
12 Months on Parts, Labor and Sealed System
For 12 months from the date of original retail purchase, Haier
will replace any part free of charge that fails due to a defect in
materials or workmanship.
Haier may replace at their sole discretion any part, sub
system including the entire product.
LIMITED WARRANTY
NOTE: This warranty commences on the date the item
was purchased, and the original purchase receipt must
be presented to the authorized service representative.
Exceptions: Commercial Use Warranty
90 days parts from date of original purchase
No other warranty applies.
FOR WARRANTY SERVICE
All parts must be provided by a Haier authorized service
center. For the name and telephone number of the nearest
authorized service center, please call 1-877-337-3639.
Before calling please have available the following
information:
Model number and serial number of your appliance. The
name and address of the dealer you purchased the unit from
and the date of purchase.
A clear description of the problem.
A proof of purchase (sales receipt).
This warranty covers home appliance services within the
contiguous United States and Canada and where available
in Alaska, Hawaii and Puerto Rico.
What is not covered by this warranty:
Replacement or repair of household fuses, circuit breakers,
wiring or plumbing.
A product whose original serial number has been removed or
altered.
Any service charges not specically identied as normal such
as normal service area or hours.
Damage incurred in shipping.
Damage caused by improper installation or maintenance.
Damage from misuse, abuse, accident, re, ood, or acts of
nature.
Damage from service other than an authorized Haier dealer
or service center.
Damage from incorrect electrical current, voltage or supply.
Damage resulting from any product modication, alteration
or adjustment not authorized by Haier.
Adjustment of consumer operated controls as identied in
the owner’s manual.
Labor, service transportation, and shipping charges for the
removal and replacement of defective parts beyond the
initial 12-month period.
Damage from other than normal household use.
Any transportation and shipping charges.
THIS LIMITED WARRANTY IS GIVEN IN LIEU OF ALL
OTHER WARRANTIES, EXPRESSED OR IMPLIED,
INCLUDING BUT NOT LIMITED TO, THE WARRANTIES OF
MERCHANTABILITY AND FITNESS FOR A PARTICULAR
PURPOSE.
The remedy provided in this warranty is exclusive and is
granted in lieu of all other remedies.
9
Page 12

This warranty does not cover incidental or consequential
ENGLISH
damages, so the above limitations may not apply to you.
Some states do not allow limitations on how long an implied
warranty lasts, so the above limitations may not apply to you.
This warranty gives you specic legal rights, and you may
have other rights, which vary from state to state.
RECORD KEEPING
Haier America
Wayne, NJ 07470
Thank you for purchasing this Haier product. This user manual will
help you get the best performance from your new dehumidier.
For future reference, record the model and serial number located
on the label on the side of your dehumidier, and the date of
purchase.
Staple your proof of purchase to this manual to aid in obtaining
warranty service if needed.
_______________________________________
Model number
_______________________________________
Serial number
_______________________________________
Date of purchase
10
Page 13

TABLE DES MATIÈRES
SÉCURITÉ DU DÉSHUMIDIFICATEUR ........................................................................................................................ 12
PIÈCES ET CARACTÉRISTIQUES ............................................................................................................................. 13
EXIGENCES D'INSTALLATION ................................................................................................................................. 13
Exigences d’emplacement ................................................................................................................................ 13
Spécications électriques ................................................................................................................................. 14
INSTRUCTIONS D'INSTALLATION ............................................................................................................................ 14
Étape 1 - Déballage du déshumidicateur ........................................................................................................... 14
Étape 2 - Installation du système de vidange directe ............................................................................................ 14
Étape 3 - Raccordement du tuyau d'écoulement à la pompe de vidange .................................................................. 15
Étape 4 - Fin de l’installation .............................................................................................................................. 16
TABLEAU DE COMMANDE ....................................................................................................................................... 16
Achage ........................................................................................................................................................ 16
Boutons et témoins .......................................................................................................................................... 16
UTILISATION DU DÉSHUMIDIFICATEUR ................................................................................................................... 17
Mode de dégivrage ........................................................................................................................................... 17
ENTRETIEN DU DÉSHUMIDIFICATEUR ..................................................................................................................... 18
Nettoyage ....................................................................................................................................................... 18
Filtres à air ....................................................................................................................................................... 18
Bac de récupération d’eau ................................................................................................................................. 18
Rangement ..................................................................................................................................................... 19
DÉPANNAGE .......................................................................................................................................................... 19
GARANTIE LIMITÉE ................................................................................................................................................. 20
DOCUMENTS À CONSERVER ................................................................................................................................... 21
FRANÇAIS
11
Page 14

SÉCURITÉ DU DÉSHUMIDIFICATEUR
Votre sécurité et celle des autres est très importante.
DANGER
AVERTISSEMENT
ATTENTION
Voici le symbole d’alerte de sécurité.
Ce symbole d’alerte de sécurité vous signale les dangers potentiels de décès et de blessures graves à
vous et à d’autres. Tous les messages de sécurité suivront le symbole d’alerte de sécurité et le mot
“DANGER,” “AVERTISSEMENT” ou “ATTENTION.”
Ces mots signifient :
Une situation de danger imminent. Vous courez le risque d’un décès ou de
blessures graves si vous ne suivez pas immédiatement les instructions.
Une situation potentiellement dangereuse qui, si vous ne l’évitez pas, peut
provoquer la mort ou des blessures graves.
Une situation potentiellement dangereuse qui, si vous ne l’évitez pas, peut
entraîner des blessures légères à modérées.
Tous les messages de sécurité vous diront quel est le danger potentiel et vous disent comment réduire le risque de
blessure et ce qui peut se produire en cas de non-respect des instructions.
Nous donnons de nombreux messages de sécurité importants dans ce manuel et sur votre appareil ménager.
Assurez-vous de toujours lire tous les messages de sécurité et de vous y conformer.
FRANÇAIS
AVERTISSEMENT : An de réduire le risque d’incendie, de choc électrique, de blessures corporelles ou de dommage
lors de l’utilisation du déshumidicateur, il convient d’observer certaines précautions fondamentales, notamment :
Lire toutes les instructions avant d’utiliser ce
•
déshumidicateur.
Brancher sur une prise à 3 alvéoles reliée à la terre.
•
Ne pas enlever la prise de liaison à la terre.
•
Ne pas utiliser d’adaptateur.
•
Ne pas utiliser un câble de rallonge.
•
Ne pas faire fonctionner le déshumidicateur si la prise
•
ou le câble est endommagé(e), si l’appareil ne fonctionne
pas correctement, s’il est tombé par terre ou a été
endommagé.
Seul du personnel d’entretien
•
eectuer une intervention d’entretien sur le
déshumidicateur Contacter le centre de service agréé
le plus proche pour examen, réparation ou réglage.
Déconnecter la source de courant électrique avant
•
l’entretien.
Déconnecter la source de courant électrique avant le
•
nettoyage.
REMARQUE : Éteindre l’appareil en appuyant sur le
bouton Power (mise sous tension) ne débranche PAS
l’appareil de l’alimentation électrique.
IMPORTANTES INSTRUCTIONS DE SÉCURITÉ
Ne pas installer le déshumidicateur ou l’utiliser dans
•
une zone dont l’atmosphère contient des gaz
combustibles ou dont l’atmosphère est contaminée.
Éviter les contacts entre tout produit chimique et le
déshumidicateur.
Ne rien remiser directement au-dessus du
•
déshumidicateur.
Utiliser deux personnes ou plus pour déplacer et installer
•
déshumidicateur.
le
Ne jamais faire fonctionner le
•
qualié est habilité à
LIRE ET CONSERVER CES INSTRUCTIONS
ltres ne sont pas en place.
Ne pas faire fonctionner le
•
d’une baignoire, d’une douche, d’un lavabo ou de toute
zone humide.
Ne pas boire l’eau recueillie dans le bac de récupération.
•
déshumidicateur si les
déshumidicateur à proximité
12
Page 15

PIÈCES ET CARACTÉRISTIQUES
a
f
g
c
d
b
e
i
h
20"
(51 cm)
20"
(51 cm)
20"
(51 cm)
20" (51 cm)
Tableau de
A
commande
Évacuation de l’air
B
sec déshumidié
Poignée
C
Bac de
D
récupération
d’eau
Roulettes
E
Arrivée d’air
F
humide
Filtre à air
G
Orice de sortie
H
de vidange
directe
Connecteur de
I
pompe de
vidange
EXIGENCES D'INSTALLATION
EXIGENCES D’EMPLACEMENT
Placer le déshumidicateur sur une surface plane et
•
horizontale an d’éviter les tremblements, les vibrations
et les renversements d’eau.
La surface doit être susamment solide pour soutenir le
•
déshumidicateur lorsque le bac de récupération est
rempli d’eau.
Conserver un dégagement de 8" (20 cm) au minimum
•
autour du déshumidicateur pour permettre à la chaleur
de se dissiper correctement.
Ne pas installer le déshumidicateur dans un endroit où la
•
température pourrait descendre en-dessous de 38 °F
(3 °C). Des températures basses peuvent provoquer une
accumulation de givre qui aecte les résultats de
l’appareil.
Placer le déshumidicateur à l’abri de la lumière directe
•
du soleil ou d’une source de chaleur (plinthes
chauantes, cuisinières, etc).
FRANÇAIS
Ne pas obstruer le déshumidicateur de quelque manière
•
que ce soit (rideaux, stores, etc).
Maintenir fermées toutes les fenêtres et les portes
•
donnant vers l’extérieur lorsque le déshumidicateur est
en marche. L’air humide augmente la charge de travail du
déshumidicateur.
13
Page 16

SPÉCIFICATIONS ÉLECTRIQUES
Risque de choc électrique
Brancher sur une prise à 3 alvéoles reliée à la terre.
Ne pas enlever la broche de liaison à la terre du cordon
d'alimentation.
Ne pas utiliser un adaptateur.
Ne pas utiliser un câble de rallonge.
Le non-respect de cette instruction pourrait causer un
décès, un incendie ou un choc électrique.
AVERTISSEMENT
Risque du poids excessif
Utiliser deux ou plus de personnes pour déplacer et
installer le déshumidificateur.
Le non-respect de cette instruction peut causer une
blessure au dos ou d'autres blessures.
AVERTISSEMENT
b
a
CORDON D’ALIMENTATION ÉLECTRIQUE
Spécications du câblage
115 V, 60 Hz, 15 ampères, protégé par fusible et relié à la
•
terre.
On recommande l’emploi d’un disjoncteur ou fusible
•
temporisé.
Utiliser uniquement un circuit distinct.
•
REMARQUE : Ne faire fonctionner aucun autre
appareil électrique sur ce circuit, car cela pourrait
déclencher le disjoncteur ou griller les fusibles.
MÉTHODE DE LIAISON À LA TERRE
REQUISE
Ce déshumidicateur doit être relié à la terre. Le
déshumidicateur est équipé d’un cordon d’alimentation
électrique à trois broches pour la liaison à la terre. Le cordon
d’alimentation doit être branché sur une prise de courant de
conguration correspondante, à 3 alvéoles, reliée à la terre
et installée conformément à tous les codes et règlements
locaux.
115 V
15 Ampères
FRANÇAIS
INSTRUCTIONS D'INSTALLATION
ÉTAPE 1 - DÉBALLAGE DU
DÉSHUMIDIFICATEUR
Enlever les matériaux d’emballage. Conserver le carton
•
et le polystyrène d’emballage pour entreposer le
déshumidicateur lorsqu’il n’est pas utilisé.
REMARQUE : Il n’y a AUCUN matériau d’emballage à
retirer à l’intérieur du déshumidicateur. Ne pas
ouvrir la caisse.
Jeter/recycler tous les matériaux d’emballage de manière
•
adéquate.
Manipuler le déshumidicateur délicatement.
•
Garder le déshumidicateur debout et d’aplomb. Ne pas
•
placer le déshumidicateur sur le anc, sur l’avant, sur le
dos ou à l’envers.
ÉTAPE 2 - INSTALLATION DU
SYSTÈME DE VIDANGE DIRECTE
(Facultatif)
Si vous avez l’intention de faire fonctionner le
déshumidicateur en continu et que celui-ci est installé à
proximité d’un système de vidange au sol, vous avez la
possibilité d’installer un système de vidange directe pour
éviter d’avoir à vider le bac de récupération d’eau.
1. Dévisser et retirer le couvercle de vidange à l’arrière du
déshumidicateur.
2. Retirer la bonde molle en caoutchouc. Placer le
couvercle de vidange et la bonde à l’abri dans le bac à
eau.
Bonde en
A
caoutchouc
Couvercle de
B
vidange
3. Brancher un tuyau de vidange (non fourni) au
raccordement de vidange de type tuyau d’arrosage.
14
Page 17

a
Tuyau de
a
b
a b
a
a
A
vidange
4. Abaisser le tuyau de vidange à l’horizontale dans une
ouverture de vidange.
ÉTAPE 3 - RACCORDEMENT DU
TUYAU D'ÉCOULEMENT À LA
POMPE DE VIDANGE
(Facultatif)
Si l'on prévoit de faire fonctionner le déshumidicateur sans
interruption et qu'un tuyau d'écoulement plus long est
nécessaire pour atteindre le drain de plancher ou que
l'emplacement du drain se trouve au-dessus du
déshumidicateur, relier le tuyau d'écoulement de 16 pi
(4,9 m) avec raccord (fourni) au raccord de la pompe de
vidange à l'arrière du déshumidicateur. Lorsque le niveau
d'eau à l'intérieur du bac de récupération atteint le niveau
spécié, la pompe de vidange pompe automatiquement l'eau
vers le drain.
1. Retirer le tuyau d'écoulement du bac du
déshumidicateur.
Raccord du tuyau d'écoulement
A
Connecteur de la pompe de
B
vidange
3. Enfoncer le raccord du tuyau d'écoulement aussi loin
que possible dans le raccord de la pompe de vidange.
REMARQUE : Vérier que le raccord du tuyau
d'écoulement est bien emboîté.
Raccord du tuyau d'écoulement
A
4. Insérer l’extrémité opposée du tuyau d'écoulement
dans le drain.
5. Pour retirer le tuyau d'écoulement, tourner le bouton de
la pompe de vidange à 45 ° (dans le sens des aiguilles
d'une montre) tout en tirant sur le raccord du tuyau
d'écoulement.
REMARQUE : Le raccord du tuyau d'écoulement se
dégagera du raccord de la pompe de vidange.
FRANÇAIS
Raccord du tuyau d'écoulement
A
Tuyau d'écoulement (16 pi
B
[4,9 mm] de long)
2. Insérer l'adaptateur du tuyau d'écoulement dans le
raccord de la pompe de vidange situé à l'arrière du
déshumidicateur.
15
Bouton du connecteur de la
A
pompe de vidange
Page 18

ÉTAPE 4 - FIN DE L’INSTALLATION
Risque de choc électrique
Brancher sur une prise à 3 alvéoles reliée à la terre.
Ne pas enlever la broche de liaison à la terre du cordon
d'alimentation.
Ne pas utiliser un adaptateur.
Ne pas utiliser un câble de rallonge.
Le non-respect de cette instruction pourrait causer un
décès, un incendie ou un choc électrique.
AVERTISSEMENT
a b c d e
fgh
BUCKET
FULL
DEFROST
HIGH
LOW
ON
OFF
CHECK
FILTER
% RH
POWER SPEED TIMER HUMIDITY / TIME FILTER RESET
TABLEAU DE COMMANDE
1. Installer le déshumidicateur sur une surface plane et
horizontale dans un emplacement approprié. Voir
“Exigences d’emplacement”.
2. S’assurer que le bac de récupération d’eau est
correctement inséré dans le déshumidicateur.
REMARQUE : Si le témoin indicateur de bac rempli
s’allume, retirer le bac et vérier que le levier
otteur bouge librement.
3. Brancher le cordon d’alimentation dans une prise à
3 alvéoles reliée à la terre.
FRANÇAIS
AFFICHAGE
Indique l’humidité actuelle de la pièce sous forme de
pourcentage, ou le nombre d’heures restantes dans le cas
d’une programmation de fonction diérée. Le témoin
correspondant s’allume.
BOUTONS ET TÉMOINS
BOUTON DE MISE SOUS TENSION
A
Appuyer sur le bouton Power (mise sous tension)
•
pour allumer ou éteindre le déshumidicateur.
REMARQUE : Éteindre l’appareil en appuyant sur le
bouton Power (mise sous tension) ne débranche
PAS l’appareil de l’alimentation électrique.
BOUTON DE VITESSE DU VENTILATEUR
B
La vitesse du ventilateur peut être réglée sur Low
(basse), ou High (élevée).
16
Appuyer sur le bouton Fan Speed (vitesse du
•
ventilateur) pour alterner entre les deux vitesses. Le
témoin correspondant à la vitesse du ventilateur
s’allume.
BOUTON DE MINUTERIE
C
Mise SOUS ou HORS TENSION automatique
Programmer une durée de 1 heure à 24 heures pour
éteindre ou allumer le déshumidicateur. Lorsqu’une
fonction diérée est programmée, le témoin ON
(marche) s’allume.
Lorsque le déshumidicateur fonctionne :
1. Appuyer sur le bouton Timer (minuterie).
2. Appuyer sur les èches haut ou bas pour
sélectionner le nombre d’heures supplémentaires
de fonctionnement avant que l’appareil ne
s’éteigne.
REMARQUE : Après avoir aché la durée,
l’achage repasse sur le taux actuel d’humidité
au bout de 10 secondes.
Page 19

Lorsque le déshumidicateur ne fonctionne pas :
1. Appuyer sur le bouton Timer (minuterie).
2. Appuyer sur les èches haut ou bas pour
sélectionner la durée en heures au bout de laquelle
l’appareil se mettra en marche.
REMARQUE : Après avoir
l’achage repasse sur le taux actuel d’humidité
au bout de 10 secondes.
Annulation de la minuterie :
Appuyer une fois sur le bouton de minuterie, la durée
•
résiduelle en heure clignote, appuyer de nouveau sur
le bouton de minuterie pour annuler la minuterie.
BOUTONS HUMIDITY/TIME (humidité/durée) (èches
D
haut et bas)
Règlent le niveau d’humidité ou une fonction diérée en
heures.
Pour régler le niveau d’humidité :
Le niveau d’humidité peut être réglé entre une humidité
relative (RH) de 30 % à 90 %. Le niveau d’humidité peut
être réglé par tranches de 5 % pour chaque pression sur
un bouton.
aché la durée,
Appuyer sur les èches haut/bas pour sélectionner
•
le niveau d’humidité relative (RH) souhaité.
REMARQUE : Une fois le niveau d’humidité
réglé, l’achage repasse sur le taux actuel
d’humidité au bout de 10 secondes.
Bouton Filter Reset (réinitialisation du ltre)
E
Appuyer sur ce bouton pour réinitialiser l’indicateur
•
de durée du
(vérier le ltre).
Filter Status (état du ltre)
F
Après 250 heures de fonctionnement, le témoin
indicateur du ltre s’allume pour vous rappeler de
nettoyer le ltre à air. Nettoyer le ltre à air. Voir
“Nettoyage”.
Bucket Full (bac rempli)
G
Lorsque le bac de récupération d’eau est rempli, le
témoin s’allume pour vous rappeler de vider le bac.
Defrost (dégivrage)
H
Lorsque la température ambiante est basse, le
déshumidicateur entre en mode de dégivrage et le
témoin s’allume.
ltre et éteindre le témoin Check Filter
UTILISATION DU DÉSHUMIDIFICATEUR
IMPORTANT : Si le déshumidicateur a été incliné sur le
côté, patienter 24 heures avant de le remettre en
marche pour laisser le temps à l’huile de rejoindre le
compresseur. Cela évitera au déshumidicateur de
tomber en panne prématurément.
Laisser un dégagement de 20" (51 cm) autour de
•
l’appareil pour permettre à l’air de circuler correctement.
Ne pas faire fonctionner le déshumidicateur si les ltres
•
à air ne sont pas en place.
Ne pas renverser de liquide sur le tableau de commande;
•
cela pourrait provoquer un court-circuit électrique vers
les composants électroniques intérieurs et entraîner leur
désactivation ou leur dysfonctionnement.
Lorsque l’appareil fonctionne dans un environnement
•
très humide, il peut être nécessaire de vider le réservoir
d’eau régulièrement.
Lorsque le bac de récupération d’eau est rempli, le
•
déshumidicateur s’arrête de fonctionner
automatiquement. À ce moment-là, le témoin Bucket Full
(bac rempli) s’allume pour vous avertir. Vider le bac de
récupération d’eau. Voir “Nettoyage”.
Lorsque le bac de récupération d’eau vide est
•
correctement remis en place, le déshumidicateur
redémarre et fonctionne normalement.
MODE DE DÉGIVRAGE
Si le déshumidicateur fonctionne à une température
•
inférieure à 54 °F (12 °C) mais supérieure à 41 °F (5 °C),
une couche de givre peut s’accumuler sur la surface de
l’évaporateur, ce qui peut aecter l’ecacité du
déshumidicateur. Le déshumidicateur entre alors en
mode de dégivrage régulier. La durée de dégivrage peut
varier. Si le
met hors tension au niveau de l’alimentation et
redémarre.
REMARQUE : Si la température ambiante est
inférieure à 41 °F (5 °C), le déshumidicateur doit être
ÉTEINT.
FRANÇAIS
déshumidicateur est pris dans la glace, il se
17
Page 20

ENTRETIEN DU DÉSHUMIDIFICATEUR
Risque de choc électrique
Déconnecter la source de courant électrique avant le
nettoyage.
Le non-respect de cette instruction peut causer un
décès ou un choc électrique.
AVERTISSEMENT
b
a
Risque de maladie
Ne pas boire l’eau recueillie dans le bac.
Le non-respect de cette instruction peut occasionner
une maladie.
AVERTISSEMENT
a
Filtre à air
A
Grille
B
d’arrivée
d’air humide
FRANÇAIS
NETTOYAGE
1. Débrancher le déshumidicateur ou déconnecter la
source de courant électrique.
2. Nettoyer la caisse avec un chion doux humidié à l’eau
uniquement.
REMARQUE :
Ne pas utiliser de nettoyant liquide ou en aérosol
•
pour nettoyer le déshumidicateur.
Ne pas nettoyer au jet ni immerger dans l’eau.
•
NE PAS utiliser de produits chimiques, de
•
produits abrasifs, d’ammoniaque, d’agent de
blanchiment, de détergents concentrés, de
solvants ou de tampons à récurer. Certains de
ces produits chimiques/articles peuvent
endommager et/ou décolorer le
déshumidicateur.
3. Sécher parfaitement avec un linge doux.
4. Brancher l’appareil ou reconnecter la source de courant
électrique.
FILTRES À AIR
Le déshumidicateur est équipé d’un ltre à air amovible
situé à l’arrière de l’appareil, derrière la grille d’arrivée d’air
humide.
IMPORTANT : NE PAS utiliser le déshumidicateur si les
ltres à air ne sont pas en place.
1. Débrancher ou déconnecter la source de courant
électrique.
2. Tirer sur les pattes pour faire coulisser les ltres et les
dégager de l’arrière du déshumidicateur.
REMARQUE : Les ltres secondaires sont
accessibles une fois que les ltres principaux ont
été retirés.
3. Éliminer la poussière en lavant les ltres ou à l’aide d’un
aspirateur.
REMARQUE : Si les ltres sont lavés, les secouer
doucement pour éliminer le surplus d’eau et de
particules de poussière piégées dans le ltre.
4. Réinstaller les ltres.
5. Brancher l’appareil ou reconnecter la source de courant
électrique.
BAC DE RÉCUPÉRATION D’EAU
Le témoin Bucket Full (bac rempli) s’allume lorsque le bac de
récupération d’eau est rempli d’eau.
Pour vider le bac de récupération d’eau :
1. Débrancher le déshumidicateur ou déconnecter la
source de courant électrique.
2. Agripper le bac de récupération à deux mains et le faire
glisser lentement depuis l’avant du déshumidicateur.
Bac de
A
récupération
d’eau
3. Vider le bac de récupération d’eau.
18
Page 21

4. Remettre le bac de récupération d’eau vide en place
dans le déshumidicateur.
5. Brancher l’appareil ou reconnecter la source de courant
électrique.
RANGEMENT
Lors de longues périodes d’inutilisation de l’appareil :
1. Débrancher le déshumidicateur ou déconnecter la
source de courant électrique.
2. Vidanger l’eau du réservoir d’eau. Voir “Entretien du
déshumidicateur”.
3. Mettre l’appareil dans son emballage d’origine pour
éviter une accumulation de poussière ou de saleté.
4. Entreposer le déshumidicateur dans un endroit frais et
sec.
DÉPANNAGE
Essayez tout d’abord les solutions suggerees ici et evitez les couts pour le service de reparation.
PROBLÈME CAUSE(S) POSSIBLE(S) SOLUTION
L’appareil ne se met pas
en marche ou ne
fonctionne pas
Le cordon d’alimentation n’est pas raccordé à
une prise murale.
Le bouton de mise sous tension Power n’a pas
été enfoncé.
La prise électrique n’est pas alimentée. Brancher une lampe en état de marche sur la
Un fusible est grillé ou un disjoncteur s’est
déclenché.
La commande a été programmée pour une
mise en marche diérée.
Les piles de la télécommande sont épuisées. Remplacer les piles.
Le bac à eau est rempli.
REMARQUE : Le déshumidicateur
s’éteint automatiquement et le témoin
Bucket Full (bac rempli) s’allume pour vous
avertir.
Brancher le déshumidicateur sur une prise à
3 alvéoles reliée à la terre.
Appuyer sur le bouton de mise sous tension
sur le tableau de commande ou la
télécommande pour ALLUMER le
déshumidicateur.
prise pour vérier si celle-ci est alimentée.
Remplacer le fusible ou réenclencher le
disjoncteur.
Annuler la mise en marche diérée. Voir
“Tableau de commande”.
Vider le bac à eau. Voir “Entretien du
déshumidicateur”.
FRANÇAIS
Le déshumidicateur
fonctionne mais la pièce
est toujours humide.
POUR OBTENIR DE L’AIDE SUPPLÉMENTAIRE, VISITER HAIERAMERICA.COM OU CONTACTER LA LIGNE
D’ASSISTANCE À LA CLIENTÈLE AU 1-877-337-3639.
La pièce est humide.
REMARQUE : Durant les journées très
chaudes et humides, le déshumidicateur
met plus longtemps à déshumidier la
pièce.
Le débit d’air est obstrué. Dégager tout obstacle obstruant le débit d’air
Le réglage de l’humidité relative (HR) est trop
élevé
Les ltres à air sont sales ou obstrués. Nettoyer le ltre à air. Voir “Entretien du
Les portes et les fenêtres sont ouvertes. Fermer les portes et les fenêtres de la pièce à
Lors d’une première utilisation, la
déshumidication de la pièce prend plus de
temps.
S’assurer que le débit thermique du
déshumidicateur est approprié aux
dimensions de la pièce à refroidir.
et rediriger le débit d’air pour un
refroidissement homogène.
Régler l’humidité à un niveau moins élevé.
déshumidicateur ”.
refroidir pour éviter que l’air froid ne
s’échappe.
19
Page 22

GARANTIE LIMITÉE
SERVICE À DOMICILE
GARANTIE COMPLÈTE D’UN AN
12 mois sur les pièces, du travail et système scellé
Pendant 12 mois à compter de la date d’achat d’origine,
Haier remplacera gratuitement n’importe quelle pièce
comportant un défaut de matériau ou de fabrication.
Haier peut choisir à sa seule discrétion de remplacer des
pièces, des sous-systèmes ou le produit tout entier.
GARANTIE LIMITÉE
REMARQUE : Cette garantie prend eet à la date à
laquelle l’article a été acheté et le reçu de l’achat
d’origine doit être présenté au représentant de
dépannage.
Exceptions: Garantie à usage commercial
90 jours sur les pièces à compter de la date d’achat
d’origine
Aucune autre garantie ne s’applique.
SERVICE AU TITRE DE LA GARANTIE
Toutes les pièces doivent être fournies par un centre de
service agréé Haier. Pour le nom et le numéro de téléphone
du centre de dépannage autorisé le plus proche de votre
domicile, composer le 1-877-337-3639.
FRANÇAIS
Avant d’appeler le centre, veuillez garder à disposition les
renseignements suivants :
Numéros de plaque signalétique de l’appareil. Le nom et
l’adresse du revendeur auprès duquel vous avez acheté
l’appareil, ainsi que la date d’achat.
Une description claire du problème rencontré.
Une preuve d’achat (reçu de vente).
Cette garantie est valable pour le service des appareils
domestiques aux États-Unis contigus et au Canada et
lorsque le service est disponible, en Alaska, à Hawaï et Porto
Rico.
Cette garantie ne couvre pas :
Le remplacement ou la réparation des fusibles, disjoncteurs,
du câblage ou du circuit de plomberie du domicile.
Un produit dont le numéro de série d’origine a été enlevé ou
modié.
Tous frais de dépannage non identiés comme étant
normaux tel un dépannage dans une zone ou une tranche
horaire normale.
Les dommages liés à l’expédition.
Les dommages liés à une installation ou un entretien
inadapté.
Les dommages causés par l’un des éléments suivants :
Mauvaise utilisation, utilisation abusive, accident, incendie
ou catastrophe naturelle.
Les dommages résultant d’un dépannage fourni par une
entité autre qu’un revendeur ou centre de dépannage
autorisé Haier.
Les dommages causés par un courant, une tension ou une
alimentation électrique incorrects.
Les dommages résultant d’une quelconque
altération du produit ou d’un ajustement non autorisé par
Haier.
Un ajustement des commandes utilisées par le
consommateur tel qu’identié dans le manuel de l’utilisateur.
Les frais de main-d’œuvre, transport pour dépannage et
d’expédition pour le retrait et le remplacement de pièces
défectueuses au-delà de la période de 12 mois.
Les dommages liés à une utilisation autre qu’une utilisation
domestique normale.
Tout frais de transport et d’expédition.
CETTE GARANTIE LIMITÉE REMPLACE TOUTE AUTRE
GARANTIE EXPRESSE OU IMPLICITE, Y COMPRIS, MAIS
PAS SEULEMENT, LES GARANTIES IMPLICITES, Y
COMPRIS LES GARANTIES DE QUALITÉ MARCHANDE OU
D’APTITUDE À UN USAGE PARTICULIER.
Le recours
substitue à toute autre garantie.
Cette garantie ne couvre pas les dommages fortuits ou
indirects; aussi les limitations décrites ci-dessus peuvent ne
pas s’appliquer à votre cas. Certains États ne permettent pas
de limitation sur la durée d’une garantie implicite, aussi les
limitations décrites ci-dessus peuvent ne pas s’appliquer à
votre cas.
Cette garantie vous confère des droits juridiques
spéciques. Vous pouvez également jouir d’autres droits qui
peuvent varier d’un État à l’autre.
Haier America
Wayne, NJ 07470
oert dans cette garantie est exclusif et se
modication ou
20
Page 23

DOCUMENTS À CONSERVER
Merci d’avoir acheté ce produit Haier. Ce manuel d’utilisation vous
aidera à obtenir la meilleure performance possible de votre
déshumidicateur.
Pour référence ultérieure, inscrire le numéro de plaque
signalétique et la date d’achat. La plaque signalétique est située
sur une étiquette sur le côté de votre le déshumidicateur.
Pour faciliter l’obtention d’un service sous garantie, agrafer la
preuve de la date d’achat à ce manuel.
_______________________________________
Numéro de modèle
_______________________________________
Numéro de série
_______________________________________
Date d’achat
FRANÇAIS
21
Page 24

ÍNDICE
SEGURIDAD DEL DESHUMIDIFICADOR .................................................................................................................... 23
PIEZAS Y CARACTERÍSTICAS ................................................................................................................................. 24
REQUISITOS DE INSTALACIÓN ................................................................................................................................ 24
Requisitos de ubicación .................................................................................................................................... 24
Requisitos eléctricos ........................................................................................................................................ 25
INSTRUCCIONES DE INSTALACIÓN ......................................................................................................................... 25
Paso 1 - Desempaque el
Paso 2 - Instalación del desagüe directo .............................................................................................................. 25
Paso 3 - Instale el tubo de desagüe a la bomba de desagüe .................................................................................... 26
Paso 4 - Complete la instalación ........................................................................................................................ 27
PANEL DE CONTROL ............................................................................................................................................... 27
Pantalla ........................................................................................................................................................... 27
Botones y indicadoras ...................................................................................................................................... 27
USO DEL DESHUMIDIFICADOR ................................................................................................................................ 28
Modo Defrost (Descongelación) ........................................................................................................................ 28
CUIDADO DEL DESHUMIDIFICADOR ....................................................................................................................... 29
Limpieza ......................................................................................................................................................... 29
Filtros de aire ................................................................................................................................................... 29
Recipiente de recolección de agua ..................................................................................................................... 29
Almacenamiento ............................................................................................................................................. 30
deshumidicador .......................................................................................................... 25
SOLUCIÓN DE PROBLEMAS .................................................................................................................................... 30
GARANTÍA LIMITADA .............................................................................................................................................. 31
INFORMACIÓN A TENER EN CUENTA ....................................................................................................................... 32
ESPAÑOL
22
Page 25

SEGURIDAD DEL DESHUMIDIFICADOR
Su seguridad y la seguridad de los demás es muy importante.
PELIGRO
ADVERTENCIA
PRECAUCIÓN
Este es el símbolo de advertencia de seguridad.
Este símbolo le llama la atención sobre peligros potenciales que pueden ocasionar la muerte o una
lesión a usted y a los demás. Todos los mensajes de seguridad irán a continuación del símbolo de
advertencia de seguridad y de la palabra “PELIGRO”, “ADVERTENCIA” o “PRECAUCIÓN”.
Estas palabras significan:
Se trata de una situación de peligro inminente. Si no sigue las instrucciones
de inmediato, usted puede morir o sufrir una lesión grave.
Se trata de una situación posiblemente peligrosa que, de no evitarse, podría
causar la muerte o una lesión grave.
Se trata de una situación posiblemente peligrosa que, de no evitarse, podría
causar lesiones moderadas o leves.
Todos los mensajes de seguridad le dirán el peligro potencial, le dirán cómo reducir las posibilidades de sufrir una lesión y
lo que puede suceder si no se siguen las instrucciones.
Hemos incluido muchos mensajes importantes de seguridad en este manual y en su electrodoméstico. Lea y obedezca
siempre todos los mensajes de seguridad.
INSTRUCCIONES IMPORTANTES DE SEGURIDAD
ADVERTENCIA: Para reducir el riesgo de incendio, choque eléctrico, lesiones a personas o daños al utilizar el
deshumidicador, siga precauciones básicas, incluyendo las siguientes:
Lea todas las instrucciones antes de usar este
•
deshumidicador.
Conecte a un contacto de pared de conexión a tierra
•
de 3 terminales.
No quite el terminal de conexión a tierra.
•
No use un adaptador.
•
No use un cable eléctrico de extensión.
•
No ponga a funcionar el deshumidicador si tiene un
•
cable o enchufe dañado, si no funciona correctamente o
si se ha dañado o caído.
El
deshumidicador solo debe ser reparado por personal
•
de servicio competente. Llame a la compañía de servicio
técnico autorizada para su inspección, reparación o
ajuste.
Desconecte el suministro de energía antes de darle
•
servicio técnico.
Desconecte el suministro de energía antes de limpiarlo.
•
NOTA: Si apaga la unidad presionando el botón
Power (Encendido), esto NO desconecta el
electrodoméstico del suministro de energía.
LEA Y GUARDE ESTAS INSTRUCCIONES
No instale ni utilice el deshumidicador en áreas donde la
•
atmósfera contenga gases combustibles o donde la
atmósfera esté contaminada. Evite que cualquier
producto químico entre en contacto con el
deshumidicador.
No almacene nada directamente encima del
•
deshumidicador.
Con la ayuda de dos o más personas, mueva e instale
•
deshumidicador.
el
Nunca haga funcionar el
•
aire no están colocados en su lugar.
No utilice el acondicionado de aire cerca de una tina,
•
ducha o lavabo ni otra zona húmeda.
No beba el agua acumulada en el recipiente de
•
recolección de agua.
deshumidicador si los ltros de
23
ESPAÑOL
Page 26

PIEZAS Y CARACTERÍSTICAS
a
f
g
c
d
b
e
i
h
20"
(51 cm)
20"
(51 cm)
20"
(51 cm)
20" (51 cm)
Panel de control
A
Oricio de
B
ventilación de aire
seco
deshumidicado
Manija
C
Recipiente de
D
recolección de
agua
Ruedecillas
E
Toma de aire
F
húmedo
Filtro de aire
G
Salida de desagüe
H
directo
Accesorio del
I
tubo de desagüe
REQUISITOS DE INSTALACIÓN
REQUISITOS DE UBICACIÓN
Coloque el deshumidicador sobre una supercie plana y
•
nivelada para evitar agitación, vibración y derrame de
agua.
La supercie debe ser lo sucientemente resistente para
•
sostener al
recolección está lleno de agua.
Mantenga un espacio mínimo de 8” (20 cm) alrededor del
•
deshumidicador para disipar el calor de manera
correcta.
ESPAÑOL
Mantenga el deshumidicador libre de obstrucciones
•
como cortinas con pliegues, cortinas, persianas, etc.
Mantenga todas las puertas y ventanas hacia el exterior
•
cerradas cuando el deshumidicador esté en
funcionamiento. El aire húmedo aumentará la carga de
trabajo del deshumidicador.
deshumidicador cuando el recipiente de
No coloque el deshumidicador en un área donde la
•
temperatura puede ser inferior a 38 °F (3 °C). Las
temperaturas más bajas pueden generar la acumulación
de una capa de escarcha que reducirá el rendimiento.
No exponga el deshumidicador a la luz directa del sol o
•
cerca una fuente de calor como zócalos radiantes,
estufas, etc.
24
Page 27

REQUISITOS ELÉCTRICOS
ADVERTENCIA
Peligro de Choque Eléctrico
Conecte a un contacto de pared de conexión a tierra de
3 terminales.
No quite el terminal de conexión a tierra del cable de
alimentación.
No use un adaptador.
No use un cable eléctrico de extensión.
No seguir estas instrucciones puede ocasionar la
muerte, incendio o choque eléctrico.
Peligro de Peso Excesivo
Use dos o más personas para mover e instalar el
acondicionador de aire.
No seguir esta instrucción puede ocasionar una lesión
en la espalda u otro tipo de lesiones.
ADVERTENCIA
b
a
CABLE DE SUMINISTRO DE ENERGÍA
Requisitos de cableado
Tomacorriente de 3 terminales con conexión a tierra de
•
115 voltios, 60 Hz, con fusibles de 15 amperios
Se recomienda utilizar un fusible o un cortacircuitos
•
retardador.
Utilice solamente un circuito exclusivo.
•
NOTA: No utilice ningún otro electrodoméstico en
este circuito; de lo contrario, se puede disparar el
cortacircuitos/fusible.
MÉTODO DE CONEXIÓN A TIERRA
REQUERIDO
Este deshumidicador debe estar conectado a tierra. El
deshumidicador está equipado con un cable de suministro
de energía que tiene un enchufe de tres terminales con
conexión a tierra. El cable de suministro de energía deberá
enchufarse en un tomacorriente apropiado de 3 terminales,
conectado a tierra de acuerdo con todos los códigos y
ordenanzas locales.
115 Voltios
15 Amperios
INSTRUCCIONES DE INSTALACIÓN
PASO 1 - DESEMPAQUE EL
DESHUMIDIFICADOR
Quite los materiales de empaque. Guarde la caja y el
•
empaque de espuma para almacenar el deshumidicador
cuando no esté en uso.
NOTA: NO hay materiales de empaque internos
dentro del deshumidicador para quitar. No abra el
gabinete.
Deshágase adecuadamente de todos los materiales de
•
empaque o recíclelos.
Manipule el deshumidicador con cuidado.
•
•
Mantenga el deshumidicador en posición vertical y
nivelado. No coloque el deshumidicador de costado,
sobre su parte frontal, su parte posterior o al revés.
PASO 2 - INSTALACIÓN DEL
DESAGÜE DIRECTO
(Opcional)
Si planea utilizar el deshumidicador continuamente y lo
colocará cerca de un desagüe por el piso, como en un
sótano, puede instalar un desagüe directo para evitar vaciar
el recipiente de recolección de agua.
1. Desatornille y quite la cubierta del desagüe en la parte
trasera del deshumidicador.
2. Quite el tapón de goma blanda. Coloque la cubierta del
desagüe y el tapón en el recipiente de agua para
mantenerlo seguro.
Tapón de
A
goma
Cubierta del
B
desagüe
3. Conecte la manguera de desagüe (no incluida) a la
conexión de desagüe de tipo manguera de jardín.
25
ESPAÑOL
Page 28

a
Manguera de
a
b
a b
a
a
A
desagüe
4. Haga descender la manguera de desagüe de forma
horizontal hacia el desagüe.
PASO 3 - INSTALE EL TUBO DE
DESAGÜE A LA BOMBA DE
DESAGÜE
(Opcional)
Si desea que el deshumidicador funcione de manera
continua y este requiere una manguera más larga para llegar
al desagüe del piso, o el desagüe se encuentra arriba del
deshumidicador, conecte el tubo de desagüe de 16 pies
(4,9 m) que posee el accesorio del tubo de desagüe (se
incluye) con el conector de la bomba de desagüe en la parte
posterior del deshumidicador. Cuando el nivel de agua
dentro del recipiente de recolección alcance el nivel
especicado, la bomba de desagüe bombeará
automáticamente el agua hacia el desagüe.
1. Quite el tubo de desagüe del recipiente de recolección
de agua.
Conector de la bomba de
A
desagüe
Accesorio del tubo de desagüe
B
3. Empuje el accesorio del tubo de desagüe tanto como
sea posible dentro del conector de la bomba de
desagüe.
NOTA: Asegúrese de que el accesorio del tubo de
desagüe haya encajado con rmeza en su lugar.
Conector de la bomba de
A
desagüe
4. Inserte el extremo opuesto del tubo de desagüe en el
desagüe.
5. Para quitar el tubo de desagüe, gire la perilla del
conector de la bomba de desagüe 45° hacia la derecha
mientras jala hacia afuera el accesorio del tubo de
desagüe.
NOTA: El accesorio del tubo de desagüe se saldrá
del conector de la bomba de desagüe.
Conector de la bomba de
A
desagüe
Tubo de desagüe (16 pies
B
[4,9 m] de largo)
2. Inserte el accesorio del tubo de desagüe en el conector
ESPAÑOL
de la bomba de desagüe, ubicado en la parte posterior
del deshumidicador.
26
Perilla del conector de la bomba
A
de desagüe
Page 29

PASO 4 - COMPLETE LA
ADVERTENCIA
Peligro de Choque Eléctrico
Conecte a un contacto de pared de conexión a tierra de
3 terminales.
No quite el terminal de conexión a tierra del cable de
alimentación.
No use un adaptador.
No use un cable eléctrico de extensión.
No seguir estas instrucciones puede ocasionar la
muerte, incendio o choque eléctrico.
a b c d e
fgh
BUCKET
FULL
DEFROST
HIGH
LOW
ON
OFF
CHECK
FILTER
% RH
POWER SPEED TIMER HUMIDITY / TIME FILTER RESET
INSTALACIÓN
1. Coloque el deshumidicador sobre una supercie rme
y nivelada en una ubicación adecuada. Vea “Requisitos
de ubicación”.
2. Asegúrese de que el recipiente de recolección de agua
esté colocado correctamente en el deshumidicador.
NOTA: Si se ilumina el indicador Bucket Full
(Recipiente lleno), quítelo y verique que la barra del
otador se mueva libremente.
3. Conecte el cable eléctrico a un tomacorriente de
3 terminales con conexión a tierra.
PANEL DE CONTROL
PANTALLA
Muestra la humedad actual de la habitación como
porcentaje, o las horas restantes en la función Time Delay
(Tiempo diferido). La luz indicadora correspondiente se
encenderá.
BOTONES Y INDICADORAS
A
B
BOTÓN POWER (ENCENDIDO)
Presione el botón Power (Encendido/Apagado) para
•
encender o apagar el deshumidicador.
NOTA: Si apaga la unidad presionando el botón
Power (Encendido/Apagado), esto NO desconecta el
electrodoméstico del suministro de energía.
BOTÓN FAN SPEED (VELOCIDAD DEL VENTILADOR)
La velocidad del ventilador se puede ajustar de velocidad
Low (Baja) a High (Alta).
27
Presione el botón Fan Speed (Velocidad del
•
ventilador) para alternar entre las dos velocidades. El
indicador de velocidad del ventilador
correspondiente se iluminará.
BOTÓN TIMER (TEMPORIZADOR)
C
Encendido/Apagado automático
Programe un tiempo desde (1 hora a 24 horas) para que
el deshumidicador se apague o se encienda. Cuando se
programa una puesta en marcha diferida, la luz
indicadora de Timer ON (Temporizador encendido) se
iluminará.
Mientras el deshumidicador está en funcionamiento:
1. Presione el botón Timer (Temporizador).
2. Presione los botones con echa hacia arriba/echa
hacia abajo para seleccionar la cantidad de horas
que desea que el deshumidicador continúe
funcionando antes de apagarse.
ESPAÑOL
Page 30

NOTA: Después de mostrar el tiempo, la
pantalla volverá a mostrar la humedad actual
después de 10 segundos.
Mientras el deshumidicador está apagado:
1. Presione el botón Timer (Temporizador).
2. Presione los botones con echa hacia arriba/echa
hacia abajo para seleccionar la cantidad de horas
que desea que el deshumidicador continúe
apagado antes de encenderse.
NOTA: Después de mostrar el tiempo, la
pantalla volverá a mostrar la humedad actual
después de 10 segundos.
Para cancelar el temporizador:
Presione el botón Timer (Temporizador) una vez, las
•
horas restantes destellarán, presione el botón Timer
(Temporizador) de nuevo y el temporizador se
cancelará.
BOTONES Humidity/Time (Humedad/Tiempo) (Flecha
D
hacia arriba y echa hacia abajo)
Permite ajustar la humedad o las horas en tiempo
diferido.
Para ajustar el nivel de humedad:
La humedad se puede
relativa (HR) y el 90 % de HR. La humedad se puede
ajustar en incrementos del 5% cada vez que se presiona
un botón.
jar entre el 30 % de humedad
Presione los botones de echa hacia arriba y echa
•
hacia abajo para seleccionar la humedad relativa
(HR) deseada.
NOTA: Después de jar el nivel de humedad, la
pantalla volverá a mostrar la humedad actual
después de 10 segundos.
Botón Filter Reset (Volver a jar el ltro)
E
Presione este botón para volver a
•
temporizador del ltro de aire y apagar el indicador
Check Filter (Vericación del ltro).
Estado del ltro
F
Después de 250 horas de funcionamiento, se iluminará
la luz indicadora de ltro para recordarle limpiar el ltro
de aire. Limpie el ltro de aire. Vea “Limpieza”.
Bucket Full (Recipiente lleno)
G
Cuando el recipiente de recolección de agua está lleno,
se iluminará el indicador para recordarle que debe
vaciarlo.
Defrost (Descongelación)
H
Cuando la temperatura ambiente es baja, el
deshumidicador ingresa a modo de descongelación y
se ilumina el indicador.
jar el
USO DEL DESHUMIDIFICADOR
IMPORTANTE: Si el deshumidicador se ha inclinado
hacia un lado, espere 24 horas antes de encender el
deshumidicador a n de permitir que el aceite vuelva al
compresor. Esto evitará que el deshumidicador falle
antes de tiempo.
Deje 20" (51 cm) de espacio alrededor de la unidad para
•
permitir una circulación adecuada de aire.
No haga funcionar el deshumidicador si los ltros de aire
•
no están colocados en su lugar.
No derrame líquido en el panel de control; puede causar
•
un cortocircuito a las piezas electrónicas del interior que
lo desactivaría o haría que funcione incorrectamente.
Cuando la unidad funciona en condiciones de alta
•
humedad, es posible que usted tenga que vaciar
periódicamente el tanque de agua.
Cuando el recipiente de recolección de agua está lleno, el
•
deshumidicador se detendrá automáticamente. El
indicador Bucket Full (Recipiente lleno) se iluminará para
avisarle acerca de esta condición. Vacíe el recipiente de
recolección de agua. Vea “Limpieza”.
Después de colocar correctamente el recipiente de
•
recolección de agua vacío, el deshumidicador se volverá
a encender y funcionará con normalidad.
MODO DEFROST
(DESCONGELACIÓN)
deshumidicador funciona a temperaturas inferiores
Si el
•
a 54 °F (12 °C), pero superiores a 41 °F (5 °C), se podría
acumular una capa de escarcha sobre la supercie del
evaporador, que podría reducir la eciencia del
deshumidicador. Por eso, el deshumidicador ingresará
en modo de descongelación periódica. El tiempo de
descongelación podría variar. Si el
congela, apáguelo desde el suministro de energía y
vuelva a encenderlo.
NOTA: Si la temperatura ambiente se mantiene por
debajo de 41 °F (5 °C), se debe apagar el
deshumidicador.
deshumidicador se
ESPAÑOL
28
Page 31

CUIDADO DEL DESHUMIDIFICADOR
Peligro de choque eléctrico
Desconecte el suministro de energía antes de limpiarlo.
No seguir esta instrucción puede ocasionar la muerte o
choque eléctrico.
ADVERTENCIA
b
a
Peligro de enfermedad
No beba el agua acumulada en el recipiente de agua.
Si lo hace, podría derivar en una enfermedad.
ADVERTENCIA
a
LIMPIEZA
1. Desenchufe el deshumidicador o desconecte el
suministro de energía.
2. Utilice solamente un paño suave humedecido con agua
para limpiar el gabinete.
NOTA:
No utilice un limpiador líquido o con rociador
•
para limpiar el deshumidicador.
No lo lave con manguera ni lo sumerja en agua.
•
NO utilice productos químicos, abrasivos,
•
amoníaco, blanqueador con cloro, detergentes
concentrados, solventes o estropajos de metal.
Algunos de estos artículos/productos químicos
pueden dañar y/o decolorar su
deshumidicador.
3. Seque con un paño suave.
4. Enchufe o vuelva a conectar el suministro de energía.
3. Lave o aspire el polvo de los ltros de aire.
NOTA: Si se lavan, agite suavemente el ltro para
eliminar el exceso de agua y las partículas de polvo
atrapadas en el ltro.
4. Vuelva a instalar los ltros.
5. Enchufe o vuelva a conectar el suministro de energía.
RECIPIENTE DE RECOLECCIÓN DE
AGUA
Filtro de aire
A
Rejilla de
B
toma de aire
húmedo
FILTROS DE AIRE
El deshumidicador contiene un ltro de aire extraíble
ubicado en la parte trasera de la unidad detrás de la rejilla de
toma de aire húmedo.
IMPORTANTE: NO utilice el deshumidicador si los
ltros de aire no están colocados en su lugar.
1. Desenchufe o desconecte el suministro de energía.
2. Jale de las lengüetas para deslizar los ltros de la parte
posterior del deshumidicador.
NOTA: Los ltros secundarios son accesibles una
vez que se quitan los ltros principales.
El indicador Bucket Full (Recipiente lleno) se ilumina cuando
el recipiente de recolección de agua se llena de agua.
Para vaciar el recipiente de recolección de agua:
1. Desenchufe el
suministro de energía.
2. Con las dos manos, deslice lentamente el recipiente de
recolección de agua de la parte delantera del
deshumidicador.
3. Vacíe el recipiente de recolección de agua.
29
deshumidicador o desconecte el
Recipiente de
A
recolección de
agua
ESPAÑOL
Page 32

4. Vuelva a colocar el recipiente de recolección de agua en
el deshumidicador.
5. Enchufe o vuelva a conectar el suministro de energía.
ALMACENAMIENTO
Si la unidad no se utiliza durante un período prolongado de
tiempo:
1. Desenchufe el deshumidicador o desconecte el
suministro de energía.
2. Desagüe el agua del tanque de agua. Vea “Cuidado del
deshumidicador”.
3. Utilice el empaque original para volver a empacar la
unidad y evitar acumulación de polvo o suciedad.
4. Guarde el deshumidicador en un lugar fresco y seco.
SOLUCIÓN DE PROBLEMAS
Pruebe las soluciones sugeridas aquí y posiblemente se evite el gasto de una visita de servicio técnico.
PROBLEMA POSIBLE(S) CAUSA(S) SOLUCIÓN
La unidad no se pone en
marcha ni funciona
El cable de suministro de energía no está
enchufado en un tomacorriente.
El botón Power (Encendido) no se ha
presionado.
El tomacorriente eléctrico no recibe
suministro eléctrico.
Se ha fundido un fusible de la casa o se ha
disparado un cortacircuitos.
El control fue programado para un tiempo
diferido.
Las pilas del control remoto están agotadas. Reemplace las pilas.
El recipiente de agua está lleno.
NOTA: El deshumidicador se apaga
automáticamente y el indicador Bucket
Full (Recipiente lleno) se ilumina para
avisarle acerca de esta condición.
Conecte el deshumidicador en un
tomacorriente de 3 terminales con conexión a
tierra.
Presione el botón Power (Encendido) en el
panel de control o el control remoto para
ENCENDER el deshumidicador.
Enchufe una lámpara de trabajo en el
tomacorriente para vericar si hay energía.
Reemplace el fusible o reposicione el
cortacircuitos.
Cancele el tiempo diferido. Vea “Panel de
control”.
Vacíe el recipiente de agua. Vea “Cuidado del
deshumidicador”.
El deshumidicador
está en funcionamiento,
pero la habitación aún
está húmeda.
ESPAÑOL
SI NECESITA MÁS AYUDA, VISITE HAIERAMERICA.COM O COMUNÍQUESE CON LA LÍNEA DE AYUDA AL CONSUMIDOR
LLAMANDO AL 1-877-337-3639.
La habitación está húmeda.
NOTA: En días muy calurosos y húmedos,
el deshumidicador necesitará más
tiempo para deshumidicar la habitación.
El ujo de aire ha disminuido. Quite los obstáculos que bloquean el ujo de
El nivel de HR congurado es demasiado alto Baje el nivel de humedad jado.
Los ltros de aire están sucios u obstruidos. Limpie el ltro de aire. Vea “Cuidado del
Las puertas y las ventanas están abiertas. Cierre las puertas y las ventanas de la
Cuando enciende la unidad por primera vez,
dele tiempo para quitar la humedad de la
habitación.
Asegúrese de que el deshumidicador tenga
una categoría de BTU (Unidad Térmica
Británica) adecuada para el tamaño de la
habitación que desea enfriar.
aire y redirija el ujo de aire para lograr un
enfriamiento uniforme.
deshumidicador”.
habitación que desea enfriar para evitar que el
aire enfriado se escape.
30
Page 33

GARANTÍA LIMITADA
SERVICIO EN EL HOGAR
GARANTÍA COMPLETA POR UN AÑO
12 meses en partes, mano de obra y sistema sellado
Durante 12 meses a partir de la fecha de compra original en
la tienda, Haier reemplazará cualquier pieza del aparato sin
costo si la misma falla debido a defectos en los materiales o
en la mano de obra.
Haier puede reemplazar, a su sola discreción, cualquier pieza,
subsistema, incluso el producto entero.
GARANTÍA LIMITADA
NOTA: Esta garantía comienza en la fecha de compra de
este producto, y el recibo original deberá presentarse al
representante autorizado de servicio.
Excepciones: Garantía uso comercial
90 días en las piezas a partir de la fecha de compra original
No es aplicable ninguna otra garantía.
PARA OBTENER SERVICIO BAJO LA GARANTÍA
Todas las partes deben ser proporcionados por un centro de
servicio autorizado por Haier. Para obtener el nombre y el
número de teléfono del centro de servicio autorizado más
cercano, llame al 1-877-337-3639.
Antes de llamar, tenga a mano la siguiente información:
Número de modelo y de serie del aparato. El nombre y la
dirección del distribuidor en donde compró la unidad y la
fecha de compra.
Una descripción clara del problema.
Un comprobante de compra (recibo de compra).
Esta garantía cubre servicios para electrodomésticos dentro
de los Estados Unidos continental y Canadá y donde esté
disponible en Alaska, Hawaii y Puerto Rico.
Lo que no está cubierto bajo esta garantía:
Reemplazo o reparación de fusibles domésticos,
cortacircuitos, cableado o plomería.
Un producto cuyo número de serie original haya sido
removido o alterado.
Cualquier cargo por servicio que no haya sido
especícamente como servicio normal, como puede ser el
área o las horas de servicio.
identicado
Daños ocurridos durante el transporte.
Daños ocasionados por la instalación o el mantenimiento
inadecuados.
Daños por el uso incorrecto, abuso, accidente, incendio,
inundación o fenómenos de la naturaleza.
Daños debidos al servicio efectuado por un distribuidor o
centro de servicio que sea diferente del autorizado por Haier.
Daños ocasionados por la corriente, el voltaje o el suministro
eléctrico incorrectos.
Daños que resulten de cualquier modicación hecha en el
producto, alteración o ajustes no autorizados por Haier.
Ajuste de los controles manejados por el cliente según han
sido
identicados en el manual del propietario.
Cargos por mano de obra, transporte para el servicio y envío
para la remoción y el reemplazo de las piezas defectuosas
que se efectúen después del período inicial de 12 meses.
Daños ocasionados por un uso diferente al doméstico
normal.
Cualquier gasto de transporte y de envío.
ESTA GARANTÍA LIMITADA REEMPLAZA TODAS LAS
OTRAS GARANTÍAS, EXPRESAS O IMPLÍCITAS QUE
INCLUYAN, ENTRE OTRAS, LAS GARANTÍAS DE
COMERCIABILIDAD O DE CAPACIDAD PARA UN
PROPÓSITO EN PARTICULAR.
El recurso provisto en esta garantía es exclusivo y está
otorgado en lugar de cualquier otro recurso.
Esta garantía no cubre daños incidentales o consecuentes,
de modo que las limitaciones indicadas anteriormente
pueden no aplicarse en su caso. Algunos estados no
permiten las limitaciones acerca de cuánto tiempo dura una
garantía implícita, de modo que las limitaciones arriba
indicadas quizás no le correspondan.
Esta garantía le otorga derechos legales
posible que usted tenga otros derechos, los cuales varían de
un estado a otro.
Haier America
Wayne, NJ 07470
especícos, y es
ESPAÑOL
31
Page 34

INFORMACIÓN A TENER EN CUENTA
Le agradecemos la compra de este producto de marca Haier. Este
manual para el usuario le ayudará a obtener el mejor
funcionamiento de su nueva deshumidicador.
Para referencia futura, anote el modelo y número de serie en la
etiqueta en el lado de su deshumidicador, y la fecha de compra.
Engrape la prueba de compra a este manual para asistirle cuando
necesite obtener servicio bajo la garantía.
_______________________________________
Número de modelo
_______________________________________
Número de serie
_______________________________________
Fecha de compra
ESPAÑOL
32
Page 35

Page 36

IMPORTANT
Do Not Return This Product To The Store
If you have a problem with this product, please contact the
“Haier Customer Satisfaction Center” at
1-877-337-3639.
DATED PROOF OF PURCHASE, MODEL #, AND SERIAL #
REQUIRED FOR WARRANTY SERVICE
IMPORTANT
Ne pas Réexpédier ce Produit au Magasin
Pour tout problème concernant ce produit, veuillez contacter
le service des consommateurs “Haier Customer Satisfaction Center” au
1-877-337-3639.
UNE PREUVE D’ACHAT DATEE EST REQUISE POUR BENEFICIER DE LA GARANTIE.
IMPORTANTE
No regrese este producto a la tienda
Si tiene algún problema con este producto, por favor contacte el
“Centro de Servicio al Consumidor de Haier” al
1-877-337-3639 (Válido solo en E.U.A).
NECESITA UNA PRUEBA DE COMPRA FECHADA, NÚMERO DE MODELO
Y DE SERIE PARA EL SERVICIO DE LA GARANTÍA
Made in China
Fabriqué en Chine
Hecho en China
Haier America
Wayne, NJ 07470
Printed in China
HEN70ETFP
Issued: December2016 Part # 0060522959 REV A
 Loading...