

Page 1

Please read this operation manual
carefully before operation.
Keep it properly for future reference.
For Domestic Use Only
*
The manufacturer keeps on developing various types
of refrigerators, so he has the right to modify designs,
products and technical data without further notice.
CONTENT
OPERATING INSTRUCTIONS OF
REFRIGERATOR
MODEL: HBF130W
HBF130SS
Name of Each Part
Adjusting
Setting up
Operation Instruction
Left/Right - opened door
Reparing
1
2
3
4-6
7
9
8
Main Technical Data
Page 2
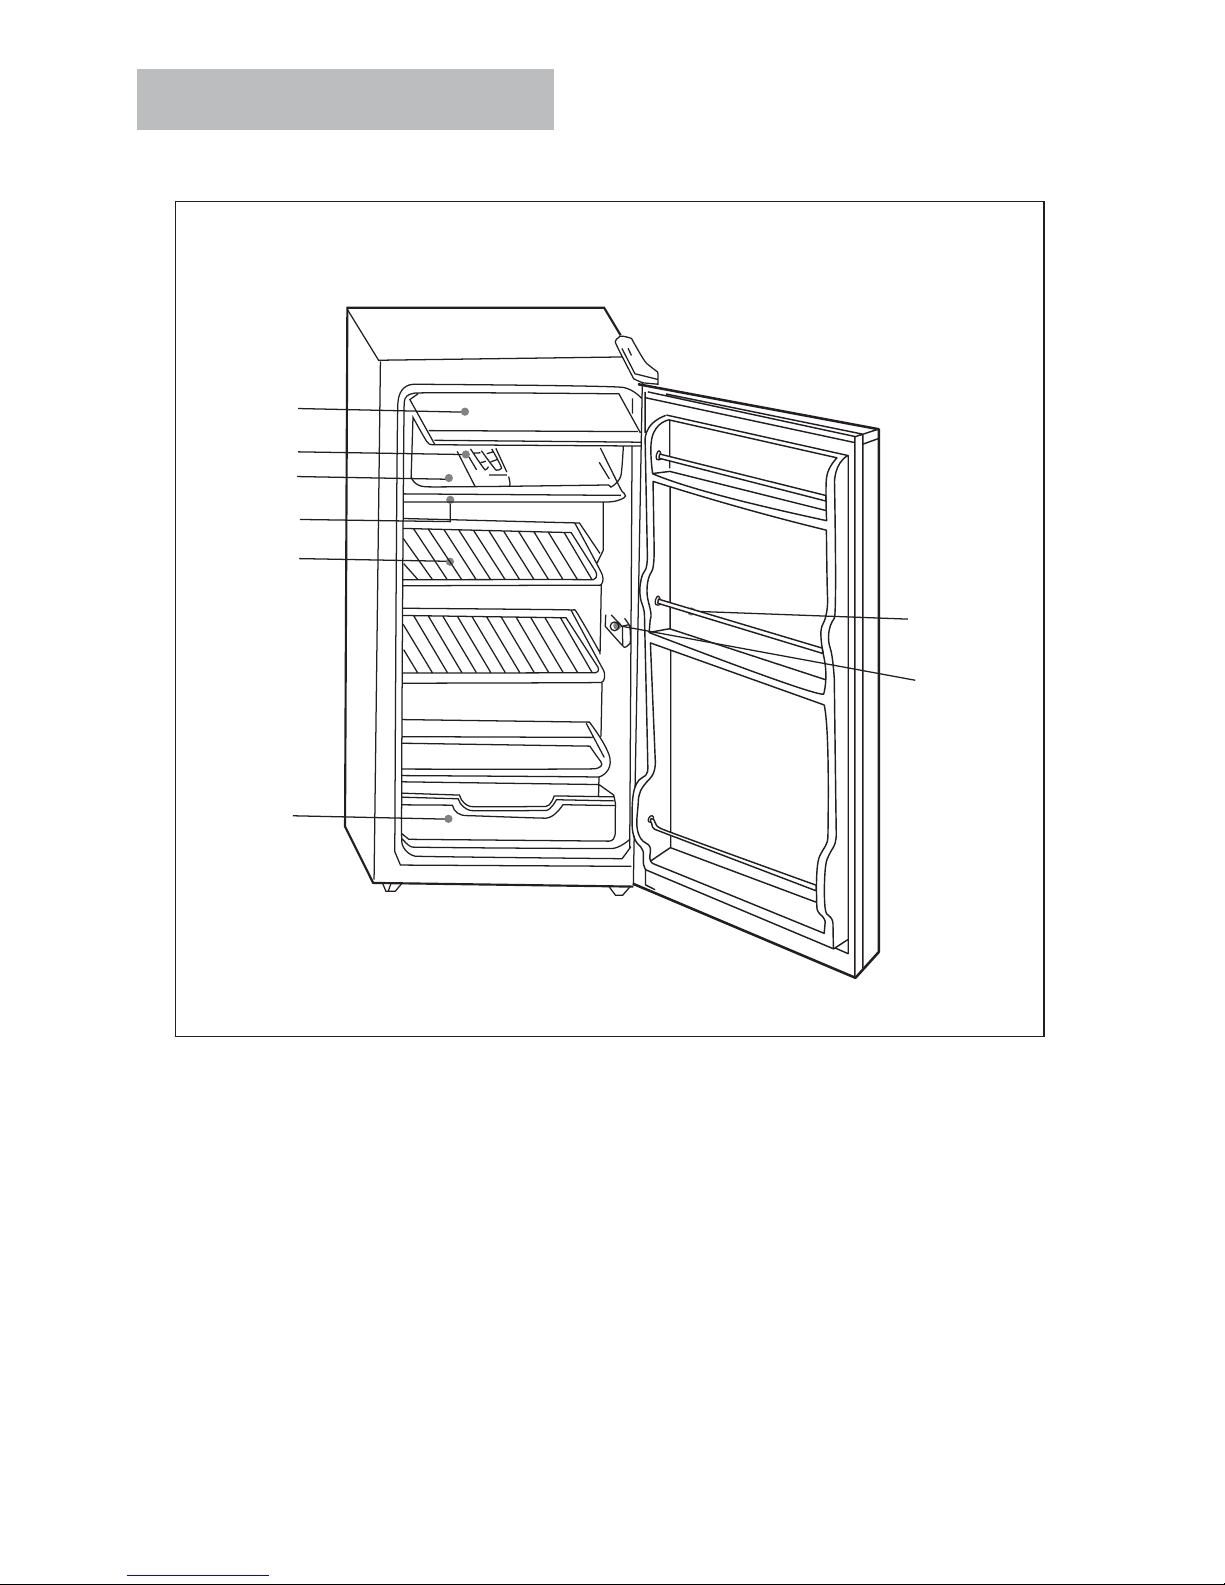
(1)=Evaporator door
(2)=Ice-tray
(3)=Evaporator
(4)=Drip tray
(5)=Shelf
(6)=Vegetable box
(7)=Bottle rack
(8) Knob of thermostat
Name of each part
.1.
(1)
(2)
(3)
(4)
(5)
(6)
(8)
(7)
Page 3
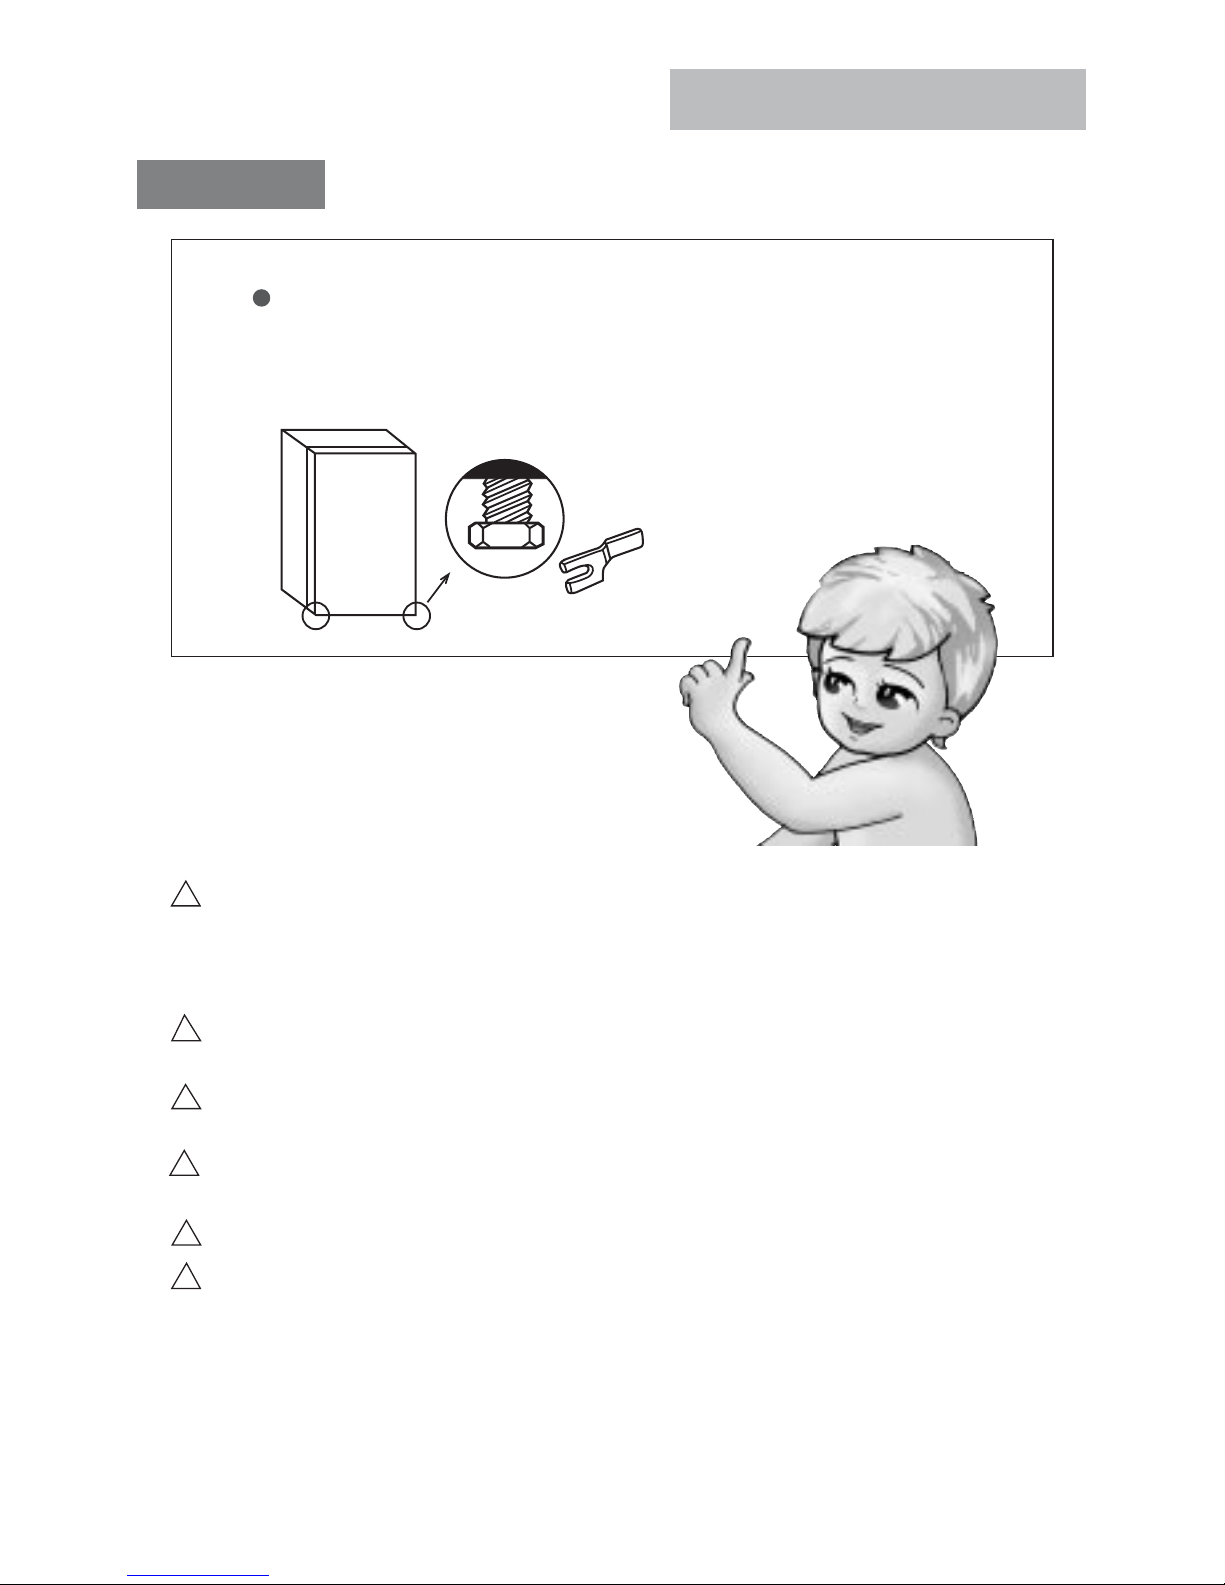
Adjusting
If the floor is uneven please adjust the adjustable screws at the
front of the refrigerator by using the spanner to level the
refrigerator. (the spanner is included in the bag).
.2.
Adjusting
WA R NING:
Ifthesupplycordisdamaged,itmustbereplacedbythe
manuf acturer, or
authorised service agent or similar qualified person in order
to avoid a hazard.
T he plug should be accessible after the appliance is positioned.
WA R NI NG :
Y oung chi l dren shoul d be superv ised to ensure that they do
not play with the
appliance.
!
!
!
WAR NING - K eep ventilation openings , in the a ppliance enclos ure o
r
in the
built-in structure, clear of obs truction.
W
AR NING - Do not use mechanical devices or other means to acceler
the defrosting process, other than those recommended b
the manufacture
r
.
WA
R NING - Do not damage the refrigerant circuit.
WA
R NING - Do not use electrical appliances inside the f
compa r tments of the a pplia nce , unle s s the
recommended
by the manufacturer.
T his a ppliance is not intended for us e by pers ons (including children
)
wi
th reduced physical, sensory or mental capabilities
an
d knowledge, unles s they have been given s upervis ion or instr
-c
e rning use of the appliance by a person res ponsible f
at
e
y
ood s torage
yareofthetype
,orlackofexperie
nc e
uction
con
or their safety.
!
!
!
Page 4
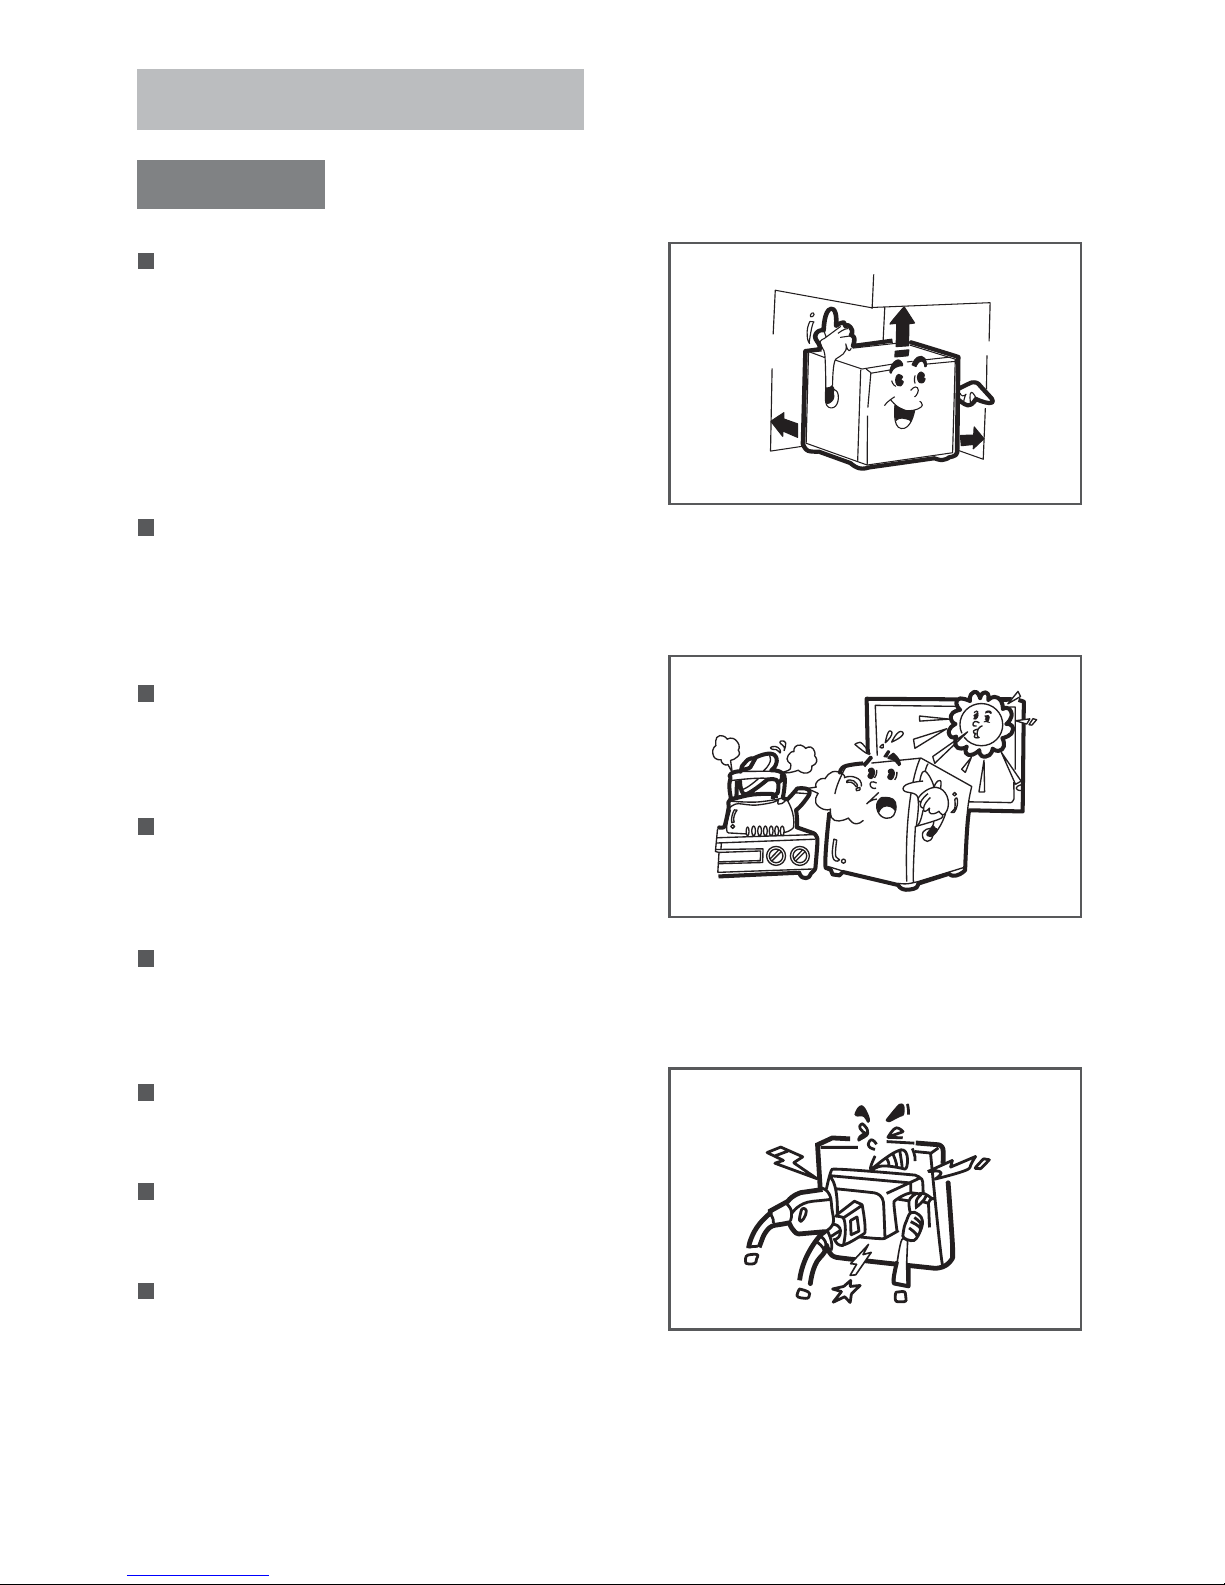
The appliance can’t be placed with its
rear panel directly against the wall.For
good air circulation, the vent grille at the
back of the worktop must not be blocked.
It should be placed on flat and firm
ground lest it gives off higher noise than
usual.
Poorly ventilated rooms are unsuitable.
A void positioning the appliance in direct
sunlight or exposing to similar sources
of heat.
Never store anything dangerous in the
appliance,such
as combustibles,
exposives, strong acid and alkali.etc.
The appliance is not intended for use by
young children or infirm persons without supervision.
Young children should be supervised to
ensure that they do not play with the
appliance.
The power supply for appliance is
220-240V~,50Hz single phase.
It is not recommended to use extention
cords.
Connect the appliance with a properly
earthed three-wire plug and socket.
Setting up
.3.
Setting up
>10cm
>10cm
>2cm
Page 5

.4.
Operating Instruction
Thermostat
The knob graduation 0, 1, 2, 3, 4, 5, 6, 7,
does not stand for concrete temperature.
The smaller the numbers, the higher the
temperature in the compartment and vice
versa. Usually, it’s better to put the thermostat in Pos. “1”, Pos. “4”, Pos. “0”
shows the power is cut off.
Storing food
The temperature varies within the refrigerator are different due to different refrigeration distribution. Thus when you
store food, select the best position to
meet your needs.
The coldest position is 1. Temperature
from low to high in order as 2,3,4,5,6,7.
Ice-making
When making ice, add water to the ice
tray until 4/5 full with the grid in it and
place it on the bottom of the ice chamber.
Twist the tray or place it briefly in warm
water to remove the ice cubes.
NOTE
Do not use a knife and the like when removing the ice tray.
1
2
3
4
5
6
7
Page 6

Operating Instructions
Notes on storage
Where necessary, food should be packed
in bags, to avoid giving off strong odours
or getting wet or dry.
Do not store food too full in the
appliance. Allow space among the packages of food for perfect refrigerating.
Hot food or liqiud must be cooled to
room temperature before placing in
refrigerator.
.5.
Cleaning
The appliance can only be cleaned when
the net-work plug is removed. Clean it
with luke-warm water containing a little
detergent. In any case do not use hot
water, corrosive scouring agent or anything rough.
NOTE
Do not use anything rough for cleaning.
Put the
plug out.
Page 7

Operating Instructions
.6.
When defrosting, switch off the
appliance. Remove food from the ice
chamber, it will be defrosted
automatically. When the defrosting process has been compeleted, the drip-tray
should be depleted. Replace the food and
switch on the appliance.
Defrosting
If the appliance remains out of use for
some time, pull out the plug to disconnect the appliance from the power
supply. Clean the interior as described
above to prevent odours from forming
inside.
The appliance door should be opened as
little and briefly as possible to reduce
energy consumption.
In the event of a power failure, try to keep
the appliance closed to maintain the refrigeration as long as possible.
Note
4~6mm
Page 8

Left/Right-opened door
.7.
This product is assembled according to the right-opened door
configuration. The right hinge together with its mount is fixed on the
right side of the door body. Take out the door handle from the accessory parts and fix it on the left side of the door body. The two holes on
the right side of the door body shall be stuffed with the handle hole
stoppers, as an item of accessory parts.
In case the left-opened door configuration is required, this can be
achieved by using accessory parts.
Remove the right hinge, hinge mount and the lower hinge from the
door body.
Put stoppers in the holes that occur.
Install the left hinge and hinge mount (two items of accessory parts)
onto the corresponding location at the left upper corner of the refrigerator body with screws removed from the right hinge.
Dismantle the shaft from the lower hinge, put it into the hole on the left
side and fasten it securely.
Install the door body with the refitted lower hinge and put the lower
hinge adjusting pad in place.
Install the door handle on the right side of the door body with screws
through two holes and fasten them securely.
Stuff the two holes on the left side of the door body with handle hole
stoppers.
1)
2)
3)
4)
5)
6)
7)
Page 9

.8.
Repairing
In the event of a fault occurring during operation, check
first if the fault is due to an operation error. You can
repair the following faults yourself.
The appliance does
not run.
The temperature inside the appliance is
not low enough.
Excessive noise from
the appliance.
1. It is not switched on properly, or the mains plug
is not properly inserted in the socket.
2. The thermostat knob is turned to position “0”.
3. Supply voltage is too low.
1. The appliance is too full of food.
2.
The appliance is located too close to a source of heat.
3. The door is not properly closed or is opened too
frequently.
4. The vent grille is covered over.
The appliance is not standing securely on the ground.
If it is none of these circumstances and you are not able to
repair the fault, please contact a authorised service agent.
Page 10

.9.
Main technical data
MODEL
I
600a 33 g
I
CAP ACITY
VOLT
REFRIGERANT
OVERALL DIMENSION(D
xWx
H)
ANTI-SHOCK SAFETY CLASSIFICA TION
HBF130W HBF130SS
1
13L
113L
220-240V~,50Hz
220-240V~,50Hz
R
R600a 33 g
550x500x865 mm
550x500x865 mm
RATED INPUT CURRENT 0.8A 0.8A
Page 11

 Loading...