

Page 1
SERVICE MANUAL
jury
Order No.: Ref1110S003V0
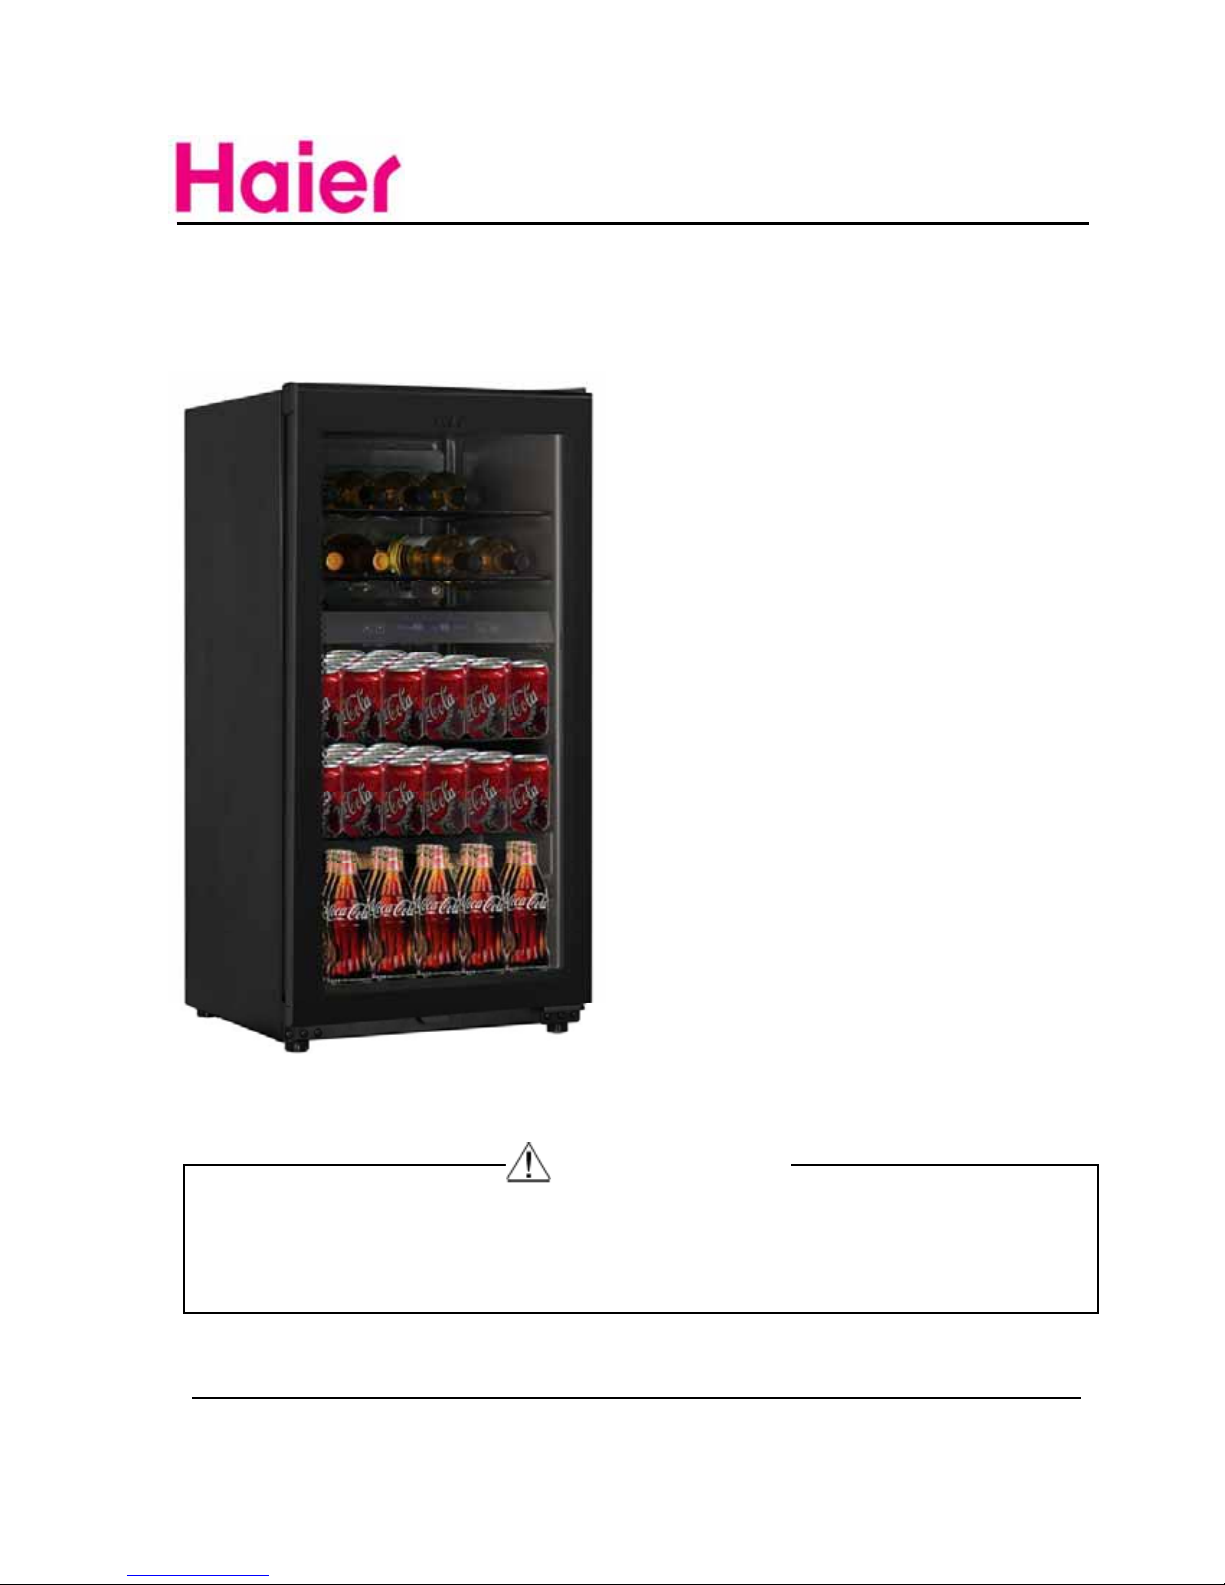
MODEL:
HBCW100ABB
HVFE040BBB
This service information is designed for experienced repair technicians only and is not designed for use by the general
public. It dose not contain warnings and cautions to advice non-technical individuals of potential dangers in attempting
to service a product. Product powered by electricity should by serviced or repaired only by experienced professional
technicians. Any attempt to service or repair the product or products dealt with in this service information by anyone
else could result in serious in
All right reserved. Unauthorized copying and distribution is a violation of law.
WARNING
or death.
Ƽ2011 (HAIER ELECTRICAL APPLIANCES COR. LTD)
Haier Group
Page 2
SERVICE MANUAL
Model: HBCW100ABB/HVFE040BBB
Contents
Issue 2011-10-21
Rev.
Ref1110S003V0
Table of Contents ·········································································································· 2
1. General Information ···································································································3
1-1. General guideline ································································································ 3
1-2. Insurance test ······································································································ 3
1-3. How to read this Service Manual ········································································ 4
2. Product Feature ········································································································· 5
2-1. Specifications ······································································································ 5
2-2. External views ····································································································· 7
Installation, adjustments and maintenance
3.
3-1. Installation ········································································································· 8
3-2. Maintenance ····································································································· 9
4. Disassembly ··············································································································· 10
4-1. Door ···················································································································· 10
4-2. Light and Display Panel ······················································································ 11
4-3. Main Control Panel ····························································································· 12
5. Control principle of electronic component ····························································· 13
······················································ 8
2
5-1. Control and Display Panel ··············································································· 13
5-2. Function Schedule ··························································································· 13
5-3. Function Adjustment and Control Principles ···················································· 13
5-4. Failure Code Display ······················································································· 14
6. System flow principle ································································································ 16
6-1. Refrigeration flow chart ···················································································· 16
6-2. Compressor’s Starting and Stopping Control ··················································· 16
7. Circuit diagram ·········································································································· 17
7-1. Circuit Diagram ································································································· 17
7-2. Connection Sketch Map ··················································································· 18
8. Trouble shooting ······································································································· 19
8-1. Normal Problems ······························································································ 19
8-2.Compressor parameter ····················································································· 20
8-3.Abnormal Problems ··························································································· 21
Page 3

SERVICE MANUAL
Model: HBCW100ABB/HVFE040BBB
Issue 2011-10-21
Rev.
Ref1110S003V0
Chapter 1 General Information
1-1. General Guidelines
When servicing, observe the original lead dress. If a short circuit is found, replace all parts which
have been overheated or damaged by the short circuit. After servicing, see to it that all the protective
devices such as insulation barriers, insulation papers shields are properly installed. After servicing,
make the following leakage current checks to prevent the customer from being exposed to shock
hazards.
1) Leakage Current Cold Check
2) Leakage Current Hot Check
3) Prevention of Electro Static Discharge (ESD) to Electrostatic Sensitive
1-2.Insurance Test
1. Check if there is any leak of current.
2. Cut out the power supply before the repair to avoid an electrical shock hazard.
3. In the case of a live-line test, insulating gloves should be worn to avoid potential electrical
shock.
4. Confirm the rated current, voltage and capacity before testing with any kinds of instruments.
5. Watch if the upper door is open when you check something at a lower position.
6. Take out every part in the cabinet before moving the machine, especially things like panels (e.g.
glass shelf).
7. Please wear intact cotton gloves when repair any parts of the evaporator, so that scratches by
the sharp fins can be avoided.
8. If there is a breakdown with the refrigeration system, please surrender the machine to the
service center, else the leaked refrigerant may pollute the atmosphere.
9. The refrigerator use AC of 115V with a frequency of 60Hz.
10. A big fluctuation of voltage may cause a start failure of the refrigerator, a burn-out of the control
panel and compressor, or an abnormal sound from the compressor in operation.
11. Take care not to damage the supply line. Don’t yank at the line; pull the plug out gently from the
receptacle. Don’t press the line under the cabinet or step on it. Take care not to roll on or
damage the supply line when moves the machine from the wall.
12. In the case of leakage of inflammable gases like carbon monoxide, open the door and windows.
Don’t pull out or insert the plugs of the appliance.
13. Don’t touch the refrigeration surface of the freezing compartment when the refrigerator is in
operation, especially when your hand is wet, else you may be glued to the surface.
14. Pull out the plug of power supply during clearance or power outage. Wait at least five minutes to
resume the power supply in order to prevent damage to the compressor caused by continuous
restart.
3
Page 4
SERVICE MANUAL
Model: HBCW100ABB/HVFE040BBB
Issue 2011-10-21
Rev.
Ref1110S003V0
. Photo used in this manual
The illustration and photos used in this Manual may not base on the final design of products, which
may differ from the products in some way.
1-3. How to read this Service Manual
The meaning of each icon is described in the table below:
Note:
A “note” provides information that is not indispensable, but may nevertheless be valuable to the
reader, such as tips and tricks.
Caution:
A “caution” is used when there is danger t, through incorrect manipulation, may damage equipment,
loose data, get an unexpected result or has to restart (part of) a procedure.
4
Warning:
A “warning” is used when there is danger of personal injury.
Reference:
A “reference” guides the reader to other places in this binder or in this manual
Page 5

SERVICE MANUAL
+%&:$%% +9)(%%%
Model: HBCW100ABB/HVFE040BBB
Chapter 2 Product Feature
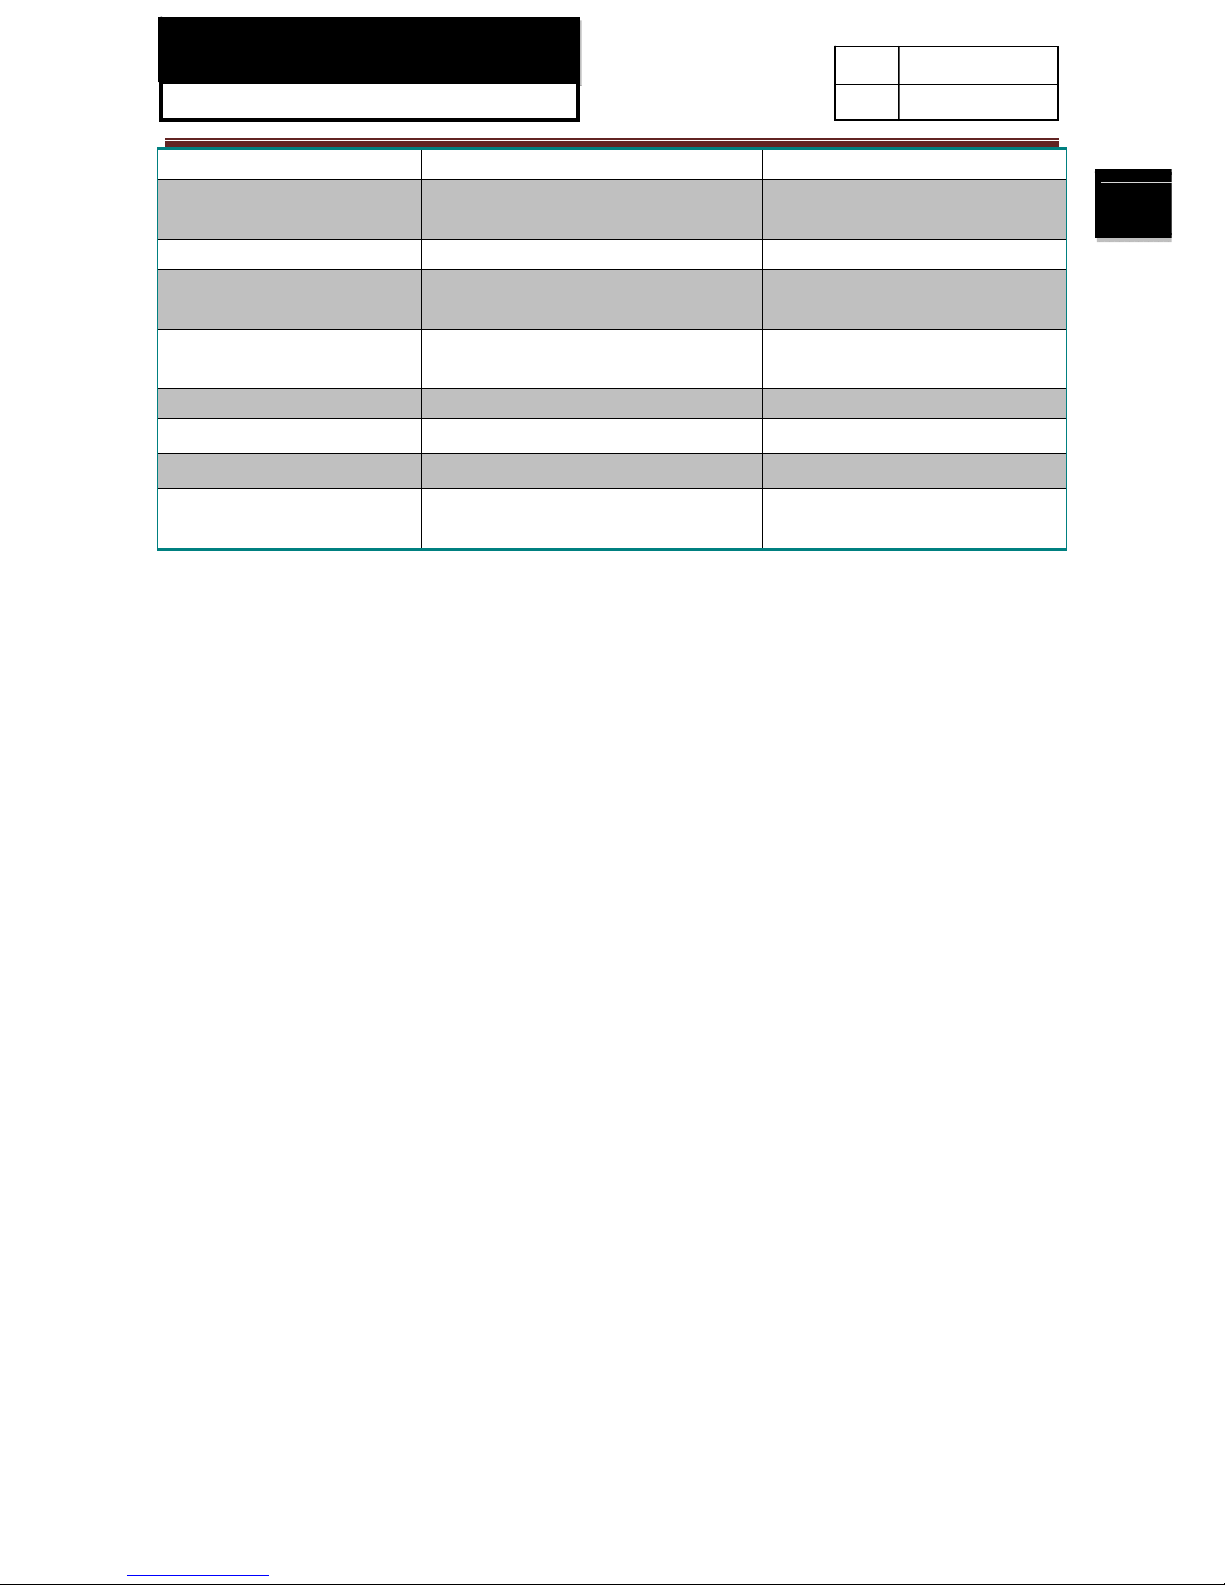
2-1. SPECIFICATIONS
Issue 2011-10-21
Rev.
Ref1110S003V0
5
Model
PHOTO
Features
Capacity (Bottles)
Capacity (cubic feet) 4.1 4.1
Temperature Control Type Dual Zone Electronic Electronic
Led Display
Temp Level Display Yes Yes
Interior light Manual Manual
Door Type
Automatic Door Stop Yes Yes
Storage Racks QTY 4 7
Cabinet color Black Black
Interior Liner Color Black Black
Installation Type Free Standing Free Standing
Leveling Legs Yes Yes
Storage Compartments Two Two
Performance Data
Electrical Requirements ( v/Hz)
Amps
Start Up Amps
Temperature Setting Range
Min/Max Ambient Temperature
Technical Details
Door Insulation
Type Of Refrigerant Used
Ventilation ( Rear/Side/Front)
Number Of Lights
Type Of Light Bulb
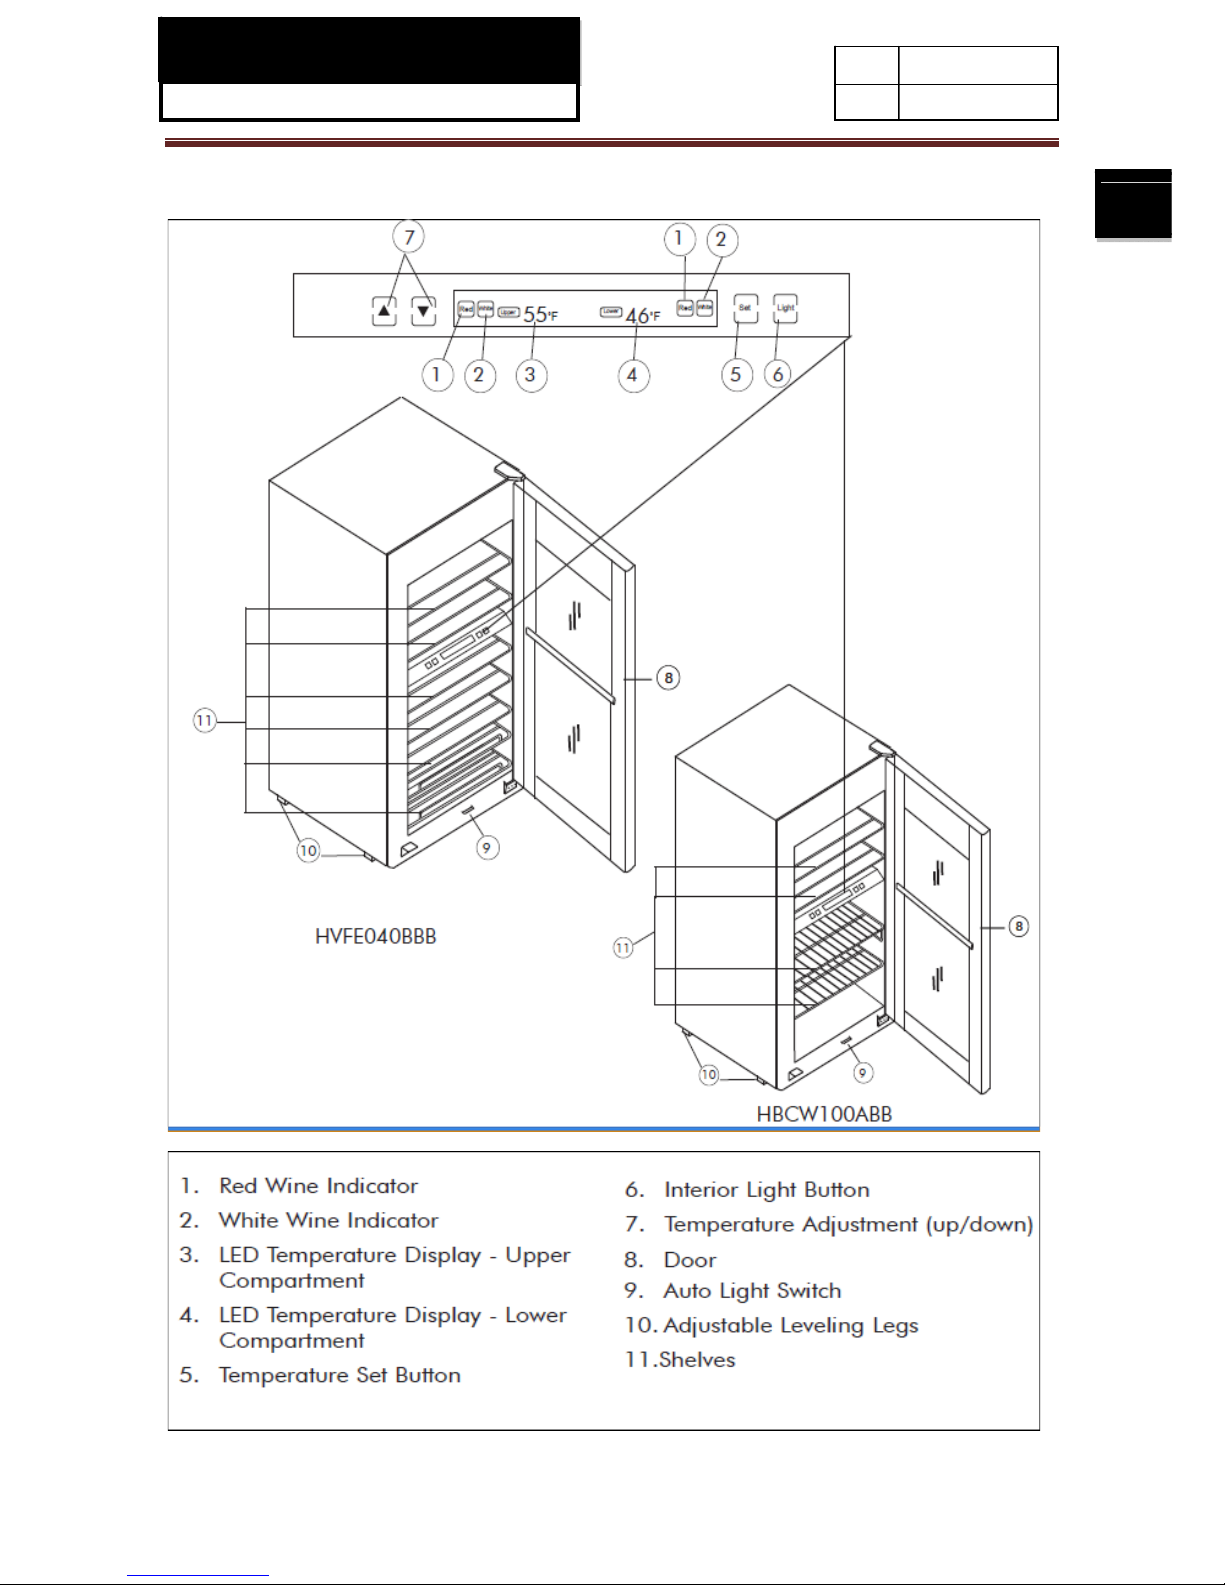
Upper zone˖16 Bottles
Bottom zone˖ 60 Coke cans & 15
Coke Bottles
Flat
Full View Glass
115V~/60Hz 115V~/60Hz
1.75A 1.5A
10.0 (max) 10.0 (max)
Full View Glass
40
1-18°C 6-18°C
Double Pane Tempered Glass Double Pane Tempered Glass
R134a R134a
Rear Rear
1 1
LED LED
Flat
Page 6
SERVICE MANUAL
Model: HBCW100ABB/HVFE040BBB
Issue 2011-10-21
Rev.
Ref1110S003V0
Dimensions
Unit dimensions
(H / W / D)mm
Net weight 45kg 45kg
Packing dimensions & load
ability
Packing dimensions (H /
W / D)mm
Gross weight 50kg 50kg
40 ' High cube container load 156pcs
Service
User instruction
(languages)
970/500/550 970/500/550
1040/568/640 1040/568/620
156pcs
English English
6
Page 7
SERVICE MANUAL
Model: HBCW100ABB/HVFE040BBB
2-2. External views
Issue 2011-10-21
Rev.
Ref1110S003V0
7
Page 8

SERVICE MANUAL
Model: HBCW100ABB/HVFE040BBB
Issue 2011-10-21
Rev.
Ref1110S003V0
Chapter 3 Installation, adjustments and maintenance
3-1. Installation
8
3-1-1.Unpacking the Unit:
Remove all packaging material. This includes the foam base and all adhesive tape holding the
Unit accessories inside and outside, compressor from shipping damage due to vibration and
shock.
Inspect and remove any remains of packing, tape or printed materials before powering on the
Unit.
3-1-2.Leveling the Unit:
The Unit has four leveling legs which are located in the front and rear corners of the Unit. After
properly placing the Unit in its final position, you can level the Unit.
Leveling cellar or by turning them clockwise to lower the unit, the unit door will close easier when
the leveling legs are extended.
Proper Air Circulation
1. To assure the unit works at the maximum efficiency it was designed for, you should install it in
a location where there is proper air circulation, plumbing and electrical connections.
2. The following are recommended clearances around the unit:
Sides…………..2” (50mm)
Top ……….……2” (50mm)
Back…………..2” (50mm)
3. Do not over fill the unit for proper internal air circulation.
3-1-3.Electrical Requirement
Make sure there is a suitable power outlet (115~V) with proper grounding to power the unit.
Avoid the use of three plug adapters or cutting off the third grounding in order to accommodate a
two plug outlet, this is a dangerous practice since it provides no effective grounding for the unit
and may result in shock hazard.
3-1-4.Install Limitations
Do not install the unit in any location not properly insulated or heated e.g. garage etc, the unit was
not designed to operate in temperature settings below 55 eFahrenheit.
Select a suitable location for the unit on a hard even surface away from direct sunlight or heat
source e.g. radiators, baseboard heaters, cooking appliances etc, any floor unevenness should
be corrected with the leveling legs located on the front and rear bottom corners of the unit.
The unit is designed for free-standing installation only; it is not designed for built-in application.
Page 9

SERVICE MANUAL
Model: HBCW100ABB/HVFE040BBB
3-1-5. Net Dimension
Issue 2011-10-21
Rev.
Ref1110S003V0
w
`
Model
Unit Dimension(W*D*H) 500*550*970
HBCW100ABB/ HVFE040BBB
D
9
H
3-2. Maintenance
To avoid electric shock always unplug the unit before cleaning, ignoring this warning
may result in death or injury.
General:
z Prepare a cleaning solution of 3-4 tablespoons of baking soda mixed with warm water, Use
sponge or soft cloth, dampened with the cleaning solution, to wipe down the unit.
z Rinse with clean warm water and dry with a soft cloth.
z Do not use harsh chemicals, abrasives, ammonia, chlorine bleach, concentrated detergent
solvents or metal scouting pads, some of these chemical may dissolve, damage and/or
discolor the unit.
Door Gaskets:
z Clean door gaskets every three months according to general instructions, Gaskets must be
kept clean and pliable to assure a proper seal,
Petroleum jelly applied lightly on the hinge side of gaskets will keep the gasket pliable and assure
a good seal
Page 10

SERVICE MANUAL
Model: HBCW100ABB/HVFE040BBB
Chapter 4 Disassembly
4-1. Door
1. Remove the top hinge cover with flat screwdriver
Issue 2011-10-21
Rev.
Ref1110S003V0
10
2. Remove the screws fixed the top hinge with screwdriver and then lift the door, the door will be
removed.
4-2. light and the display panel
The light and the display panel both are in the electronic box which is on the middle of the
wine cellar.
Page 11

SERVICE MANUAL
Model: HBCW100ABB/HVFE040BBB
1. The middle partition is fixed on the cabinet with two screws, so you should loosen the screws
and take off the middle partition from the unit.
2. Then make the up lid , foam , low lid separate from the middle partition
3. Dissemble the lampshade from the low lid, and loosen the screws fixed the LED light.
4. Loosen the screws which fixed on the display panel.
Issue 2011-10-21
Rev.
Ref1110S003V0
The middle part
11
Page 12

SERVICE MANUAL
Model: HBCW100ABB/HVFE040BBB
4-3. Main control panel
Issue 2011-10-21
Rev.
Ref1110S003V0
1. Remove the cover of the cabinet which is on the back of the unit
2. Remove the screws which fix the main control panel box.
3. The main control panel is fixed in the panel box by a screw, dismantle it ,the control panel will
be removed
12
Page 13

SERVICE MANUAL
Model: HBCW100ABB/HVFE040BBB
Chapter 5 Control and display system
5-1.Control and display panel
Issue 2011-10-21
Rev.
Ref1110S003V0
13
Once we plugged the unit, it needs to run for 30 minutes at least to acclimate itself before any
adjustments. During this time, depending on the internal temperature, the red or white wine
light will stay on for the upper compartment and red or white wine light will stay on for the
lower. The LED display will show the current internal temperature.
Page 14

SERVICE MANUAL
Model: HBCW100ABB/HVFE040BBB
5-2.Function Schedule
Button Function
Issue 2011-10-21
Rev.
Ref1110S003V0
14
Temperature adjustment up
Temperature adjustment down
Control the LED light
Temperature adjustment & enactment
5-3. Function adjustment and control principles
5-3-1 Temperature Adjustments:
1. Wine cellar (HVFE040BBB): It can be set to any temperature between 39and 65F in either of
the compartments to accommodate your wine storage requirements.
2. Wine/Beverage center(HBCW100ABB):The upper compartment can be set to any
temperature between 46and 65F;the lower compartment cab be set to any temperature
between 34and 62F
3. To set the temperature, hold the “ ” button for about 3 seconds. You will notice the
temperature display blink for the upper compartment. Press the” ” or “ “button to
increase or decrease the temperature setting, Once the desired temperature is attained,
press the “ ” button, Doing this, the electronic control panel will revert back to display
the inside temperature. It may take some time to reach the set temperature.
5-3-2 Light Adjustments
To complement the look of your wine collection, soft light has been built into the wine cooler.
Simply push the “ “button on the electronic controlled unit, and the light comes on,
push again for off. If you want to leave the light on always after closing the door, simply push
the “ “button, before closing the door leave light off when not viewing your collection.
Page 15

SERVICE MANUAL
Model: HBCW100ABB/HVFE040BBB
5-4. Failure code display
Issue 2011-10-21
Rev.
Ref1110S003V0
Some times the display works out of orders, reading the following contention may give you
some help.
Failure code display
Error
code
display
LL
HH
EE
Description and reason Solutions
“LL” blinks with buzzing; That means the
related compartment temperature is lower
than -5°C
“HH” blinks with buzzing; That means the
related compartment temperature is higher
than 50°C
“EE” is the abbreviation of “ERROR,
ERROR”; It is something wrong with the
sensors. Usually, the sensor circuit is
broken.
Stop the unit running until the
temperature rises up; Don’t use
the unit in lower temperature
environment if necessary.
Don’t use the unit in high
Check the sensor if connects
well with the main control panel
or find the location of the sensor
broken circuit and repair it.
environment
15
Buzzing sound we may hear when “LL” or “HH” or “EE” appears on the display panel, to
remove the buzzing sound ,we can press the ” ” button.
Page 16

SERVICE MANUAL
Model: HBCW100ABB/HVFE040BBB
Chapter 6 System flow principle
6-1. Refrigeration Flow System Chat
HYDSRUDWRUXS
HYDSRUDWRU
GRZQ
Issue 2011-10-21
Rev.
Ref1110S003V0
16
FRQGHQVDWRU
Explanation: The electromagnetism valve includes two single valves. When the two
compartment temperature does not reach the set temperature, the two valves are keeping open;
when one compartment temperature reaches the set temperature, the related valve is closed and
the other one is keeping open. Both the two compartments temperature reaches each set
temperature; the valves don’t close but the compressor stop working.
6-2.Compressor’s starting and stopping control
Form: The temperature display & the compressor’s and valves’ working status
Set
ć
Actual ć
Working 6 7 8 9 10 11 12 13 14 15 16 17 18 19 20
Not working 3 4 4 5 6 7 8 9 10 11 12 13 14 15 16
4 5 6 7 8 9 10 11 12 13 14 15 16 17 18
ILOWHU
HOHFWURPDJQHWLVP
YDOYH
Temperature
display
4 5 6 7 8 9 10 11 12 13 14 15 16 17 18
Page 17

SERVICE MANUAL
Model: HBCW100ABB/HVFE040BBB
Chapter 7 Circuit diagram
7-1.Circuit Diagram
Issue 2011-10-21
Rev.
Ref1110S003V0
17
Page 18

SERVICE MANUAL
Model: HBCW100ABB/HVFE040BBB
7-2.Connection Sketch Map
Issue 2011-10-21
Rev.
Ref1110S003V0
18
Page 19

SERVICE MANUAL
Model: HBCW100ABB/HVFE040BBB
Issue 2011-10-21
Rev.
Ref1110S003V0
Chapter 8 Trouble shooting
8-1. Normal Problems
8-1-1 Sounds of Unit
1. Boiling water, gurgling sounds or slight vibrations that are the result of the refrigerant
circulating through the cooling coils.
2. The thermostat control will click when it cycles on and off.
8-1-2Temperature of Unit
Too warm
1. Frequent door openings.
2. Allow time for recently added wine to reach desired temperature.
3. Check gaskets for proper seal.
4. Clean condenser coils.
5. Adjust temperature control to colder setting.
19
Too cold
1. If temperature control setting is too cold, adjust to a warmer setting.
8-1-3 Unit runs too frequently
1. This may be normal to maintain constant temperature during high temperature and humid days.
2. Doors may have been opened frequently or for an extended period of time.
3. Clean condenser coils,
4. Check gasket for proper seal.
5. Check to see if doors are completely closed.
8-1-4
1. This is normal during high humidity periods.
2. Prolonged or frequent door openings.
3. Check door gaskets for proper seal.
Moisture builds up on interior or exterior of the unit:
Page 20

SERVICE MANUAL
Model: HBCW100ABB/HVFE040BBB
8-2.Compressor parameter
Issue 2011-10-21
Rev.
Ref1110S003V0
Part Name Ambient temperature 25°C
Compressor
Starter(PTC)
Overload
protector
model Main Wiring Auxiliary Wiring
AS35U6
Model
Resistance 4.7f20%
Max working
voltage
Max running
current
Model
Operate
temperature
Revert
temperature
Normal 4.6 9.4
20
QP2-4.7G
180 V
12 A
B77-120
120f5ć
61f8 ć
Page 21

SERVICE MANUAL
Model: HBCW100ABB/HVFE040BBB
8-3.Abnormal Problems
Issue 2011-10-21
Rev.
Ref1110S003V0
8-2-1. Compressor doesn’t start
21
Page 22

SERVICE MANUAL
Model: HBCW100ABB/HVFE040BBB
8-2-2.Poor cooling
Issue 2011-10-21
Rev.
Ref1110S003V0
Poor cooling
Check the diaplay temperature
nomber whether it is setted at 18°C
Y
Whether the rear side and the top is
too close to the wall
Y
Whether the cellar is under
sunlight directly
Y
Whether the cellar is near thermal
source
Y
22
N
N
N
Change to lower
Avoid these
matters which
will affect heat
radiation of
condenser and
reduce
refrigeration
ability
Whether the room temperature is
too hoot or not
Y
Whether the condenser is blocked
by cloth pieces or paper or dirt or
not
Y
Whether the glass door has been
closed well
Y
Whether the glass door door seal
bar is too dirty or sealed well
Frequent opening and extended
opening of glass door will reduce
refrigeration ability
N
N
Remove dirt and put on a little
talcum power
Page 23

SERVICE MANUAL
Model: HBCW100ABB/HVFE040BBB
Sincere forever
Issue 2011-10-21
Rev.
Ref1110S003V0
23
Haier Group
Haier Industrial Park, No.1, Haier Road
266101, Qingdao, China
http://www.haier.com
 Loading...