

Page 1

Exhaust Type Tumble Dryer
GDZ3.5-1
User's Manual
Please read this manual
carefully before using.
Retain it for future reference.
Page 2
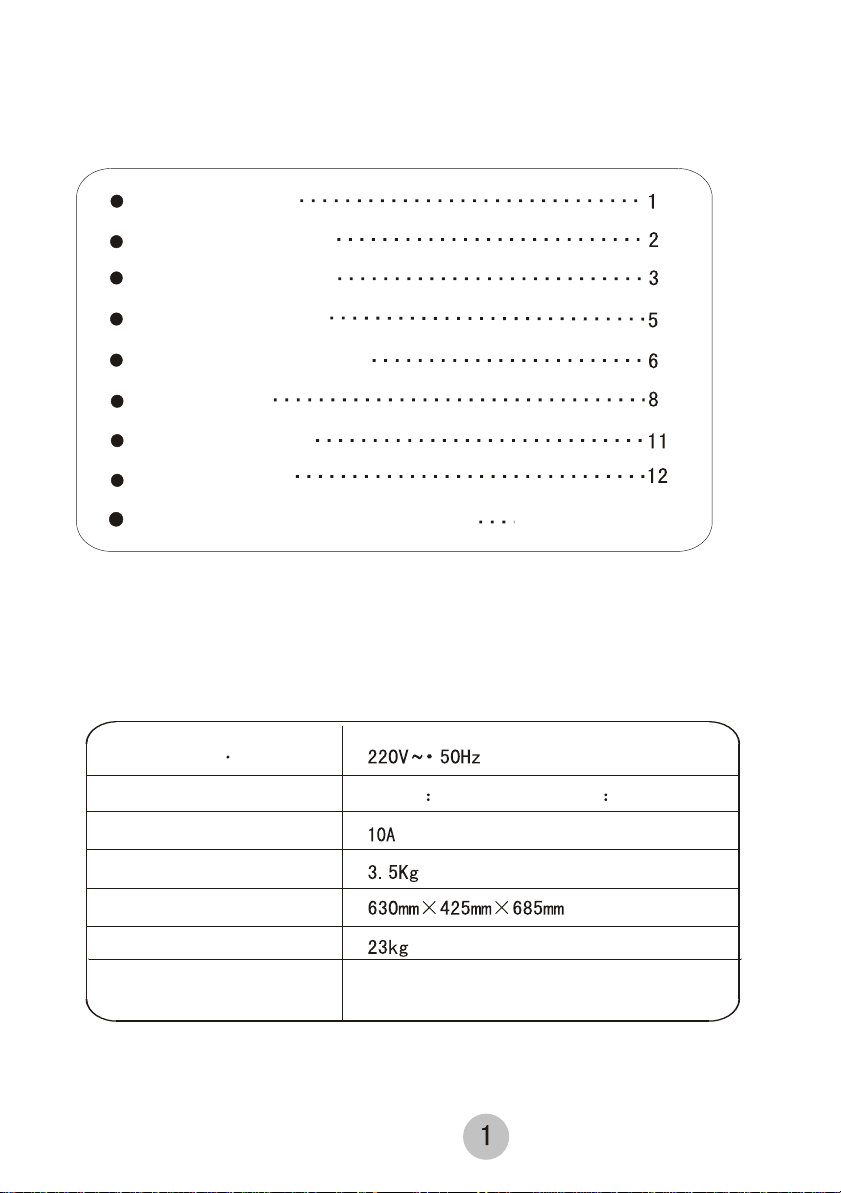
Contents
Specification
SPECIFICATION
Names of the parts
Safety Information
Operation Cautions
Installation Instructions
Using Method
Care and Cleaning
Troubleshooting
Packing And Electrical Safety Tips
Rated Voltage Frequency
Rated Input Power
Rated Fuse Current
Rated Max.Capacity
Overall Dimension
Net Weight
Timer Selector Knob
Strong 1020W Light 670W
Hot air:220min hot air (20min cooling included)
Cold air: 60min cold air
The back cover
Page 3
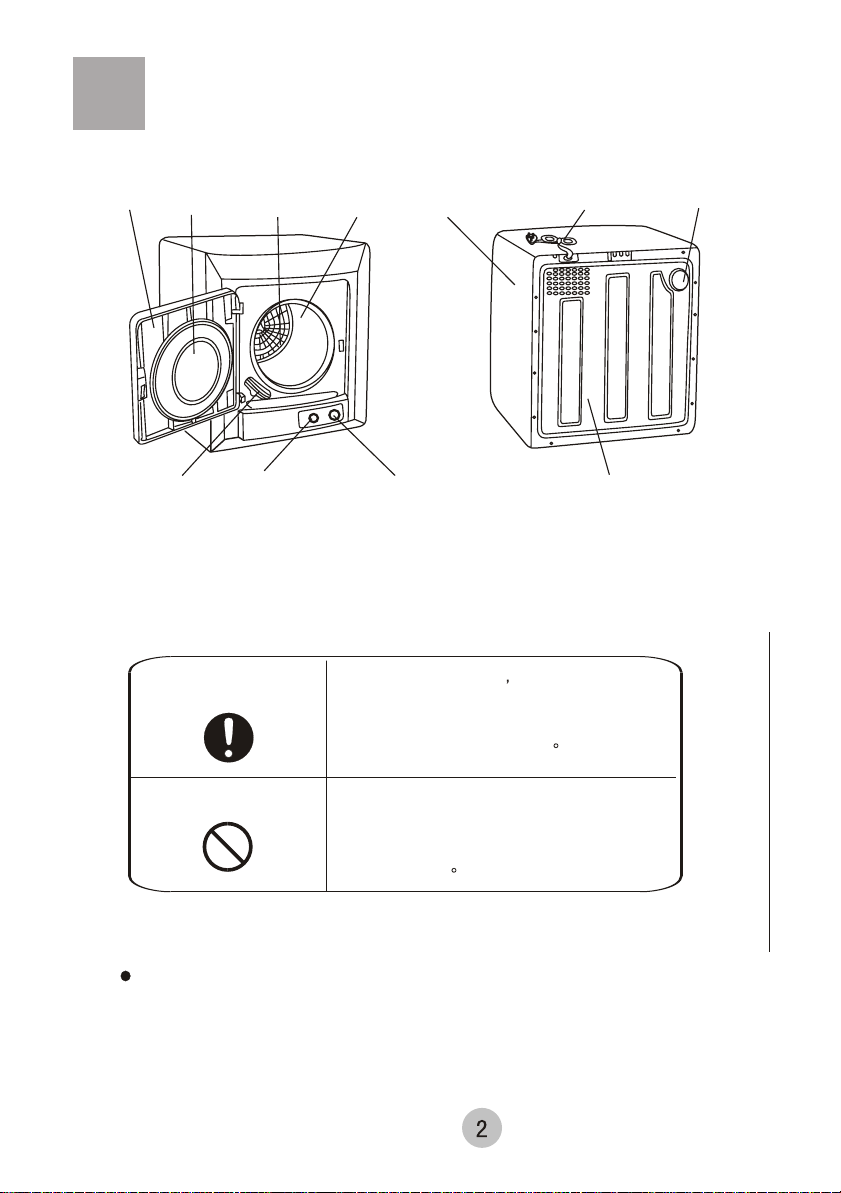
Part Description
Transparent
Door
window inside
Air Intake Shroud
Directions: All the figures in the directions are schematic drawings. We should understand that the products
you bought or the related elements may not match the figures in the directions because we have
new products everyday.
Exhaust Shroud
Heat Selector Knob
Drum
Casing
Timer Selector Knob
Power Cord
Back Cover
Exhaust Vent
Meaning and description of the symbols
Warning
For your and the product s safety, the information
related to this symbol must be followed to prevent
dryer damage and personal injury
Forbidden
Please check the power point and the ground connection carefully to secure the safety of you.
The information related to this symbol must be
definitely forbidden to prevent dryer damage and
personal injury
Page 4
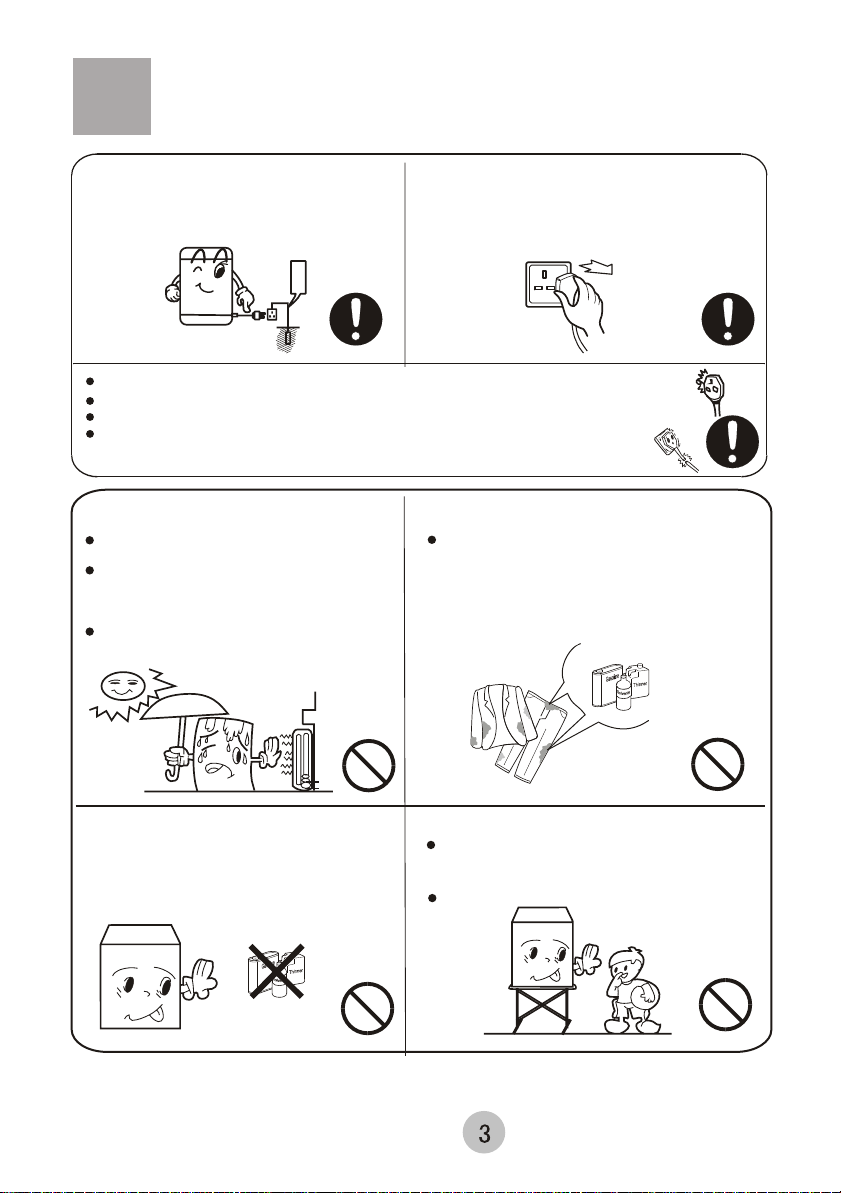
Safety Information
This dryer shall be connected to a three-wire,
single phase, 220V AC power receptacle more
than 10A, which must be reliably grounded.
A leakage protector shall be used, if possible.
und
Gro
Do not share a receptacle with other appliances. Do not use it when a plug loosely inserted into a receptacle.
Do not excessively bend, stretch, twist, bind power cord or put heavy stuff on it.
Keep the terminator of power cord clean. Carefully clean it with dry cloth if dusts accumulated.
If damaged, power cord or plug must be replaced by our service agent or qualified after-sale
service person to avoid the risk of danger.
Location of the Dryer
Do not use or place stove, gas device, water
heater, tinder or similars close to your dryer.
Do not locate your dryer in a place with heavy
moisture (like bathroom, water tap and a place
can be easily sprayed or without flashing) to
avoid failure or creepage.
Do not put it directly in sunlight to prevent fading.
When normally using, the power cord of dryer shall
be easily plugged or unplugged by hand. It must be
unplugged during power blackout, moving, not in
use or cleaning. Do not plug or unplug the power
cord with wet hands.
Clothes not allowed to load
Clothes containing dry-cleaning solvents, gasoline,
alcohol, machinery oil and cooking oil, be sure that
oil have been throughly cleaned up before put them
into your dryer (the residual oil sometimes will cause
spontaneous combustion during drying operation.
Be careful!)
Do not close to combustible
materials
Keep your dryer away from combustible
materials (such as gasoline) during
operation to prevent the risk of fire.
Do not allow children to climb
Do not allow children to climb on or look
into the drum to prevent injures due to kids
climbing into the dryer.
Do not put kids or any thing alive into your dryer.
Page 5
Safety Information
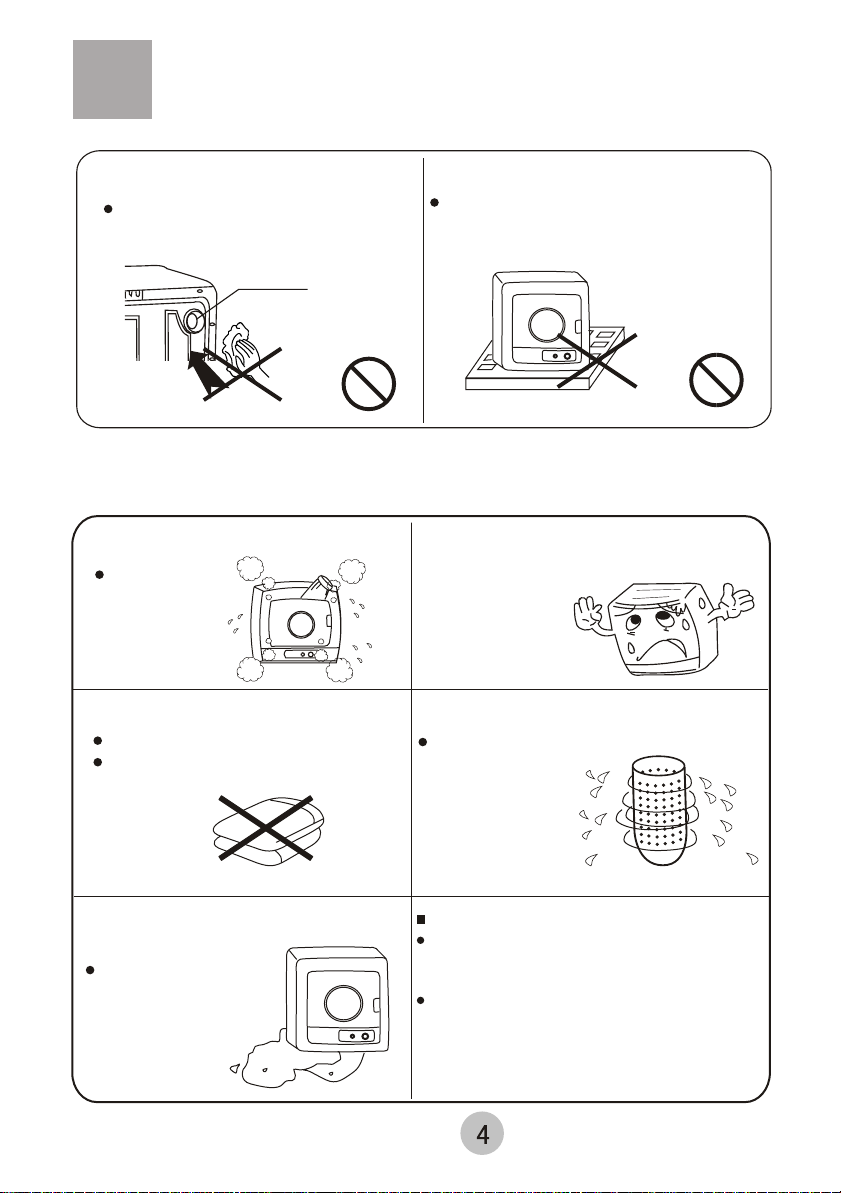
Do not block exhaust vent
Do not block the exhaust vent when dryer
operating to prevent it from overheating
or other dangers.
Exhaust Vent
Operation Cautions
Dry Capacity
Do not exceed
3.5kg (weight
after dried)
Do not dry wools in your dryer
Wool will be damaged.
Woolen clothes shrink in drying,
which should be avoided.
Woollen
Do not operate on packing foam.
Do not let your dryer operate on packing foam,
a kind of non-flame retardant material. Otherwise
it maybe cause fire since heat accumulation or
other external factors.
Do not place any hot or heavy
articles (such as hot kettle)
on your dryer
Sufficiently dehydrated
Only place sufficiently
dehydrated clothes
into your dryer for
drying ,wringing
out wet clothes by
hands should be
avoided to prevent
leakage and longer
drying time.
Do not let wet clothes in your
dryer too long.
Do not place washed
wet clothes in your
dryer for a long time
not drying them
(which may result
in water leakage).
Clen the scraps of thread in time
Each time you should clean the scraps of
thread promptly especially the scraps on the
filter of the air exit.
Please do not take the cover or the filter net
out of the air exit in case the ventilation will
be blocked up.
Page 6

Operation Cautions
Capacity reduced
Do not dry clearstarched clothes
in your dryer
Avoid to dry starched
clothes in your dryer to
prevent link filter from
clogging, which may
lead to bad exhaust
performance.
Solution
Starch
Clothes with ribbon or lace should
be dried in a nylon net
Put chemical fiber
and/or clothes with
ribbon or lace into
a nylon net before
drying.
Clothes with zipper
Dry this kind of
clothes with zipper
zipped or fastener
buckled and inside
out (to reduce the
impact noise between
metal and the drum)
Do not load your dryer when
it is running.
Loading the dryer
when it is running
shall be avoided to
prevent the clothes
overdried or
incompletely dried.
When bleacher used for wash
Rinse these clothes
throughly if them are
washed with bleacher
containing chlorin
before putting
them into your dryer.
Put rumpled clothes in order
Put all clothes
in order after
dehydrated
before
drying them.
Anti-wrinkle method for clothes
crumpled easily
Decrease capacity to get good anti-wrinkle
result (the capacity shall be 4/5 of that of
normal clothes).
Remove the clothes out of your dryer as early as
possible to reduce rumples.
.
Capacity reduced
Please flip clothes over manually from
time to time, if necessary, when drying
large ones.
It is not easy to flip
over large clothes
(such as overcoat)
in the drum,
uneven drying
therefore
happens sometimes.
If necessary, flip them over
manually from time to time to make them
dried completely.
Flip over clothes
Please hang the easily crumpled clothes
up with a hanger after dried
Page 7

Installation Instructions
10-15cm
For your safety and correct using your dryer, please observe all the instructions in this manual to
install and adjust your dryer.
Location of your dryer
Dryer should be located in a dry and well-vented place, not filled with moisture and vapors and
where rain cannot reach (like bathroom,open balcony and water faucet).Do not locate your dryer
in a place where sunlight directly shines.
Do not use stove, gas ans etc near your dryer to avoid dangers.
Locate your dryer on horizontal solid ground, floor or a special
bracket to prevent vibration and noise. Keep a distance of
10cm-15cm away from the rear wall when installing.
The dryer has air intake and exhaust cycles,which needs
good air-exhaust vent in the rear and well-vented room.
If used in a small space, air exchange fan or exhaust
duct can be installed at the vent to exhaust hot wet air outdoors.
The length of exhaust duct shall not exceed 2m.
Special bracket and exhaust duct are available at Haier after-sal service agent for purchsing.
10-15cm
Install and use the fixed legs of your dryer
If the dryer is not used with bracket, take fixed legs out
of the accessory bag and screw them into the assembly
hole of the dryer to ensure it be placed stable.
Fixed legs
Soft object
Page 8

Installation Instructions
Assembly of dryer and bracket
First assemble the bracket (detailed installation method
please refers to the instruction of bracket assembly).
Adjust to the proper height according to the washer type
you purchased (six height levels are available)
(Note: the bracket shall not be touched when the top cover
of washer is open to avoid inconvenient clothes loading
and unloading )
Carefully place your dryer onto the bracket with the control
panel in the bottom (as shown in the right figure).
Align assemble holes on the bracket with the installation
holes, screw and fasten them by the fixing screws and
washers attached.
After assembled, make sure that the distance between the
exhaust vent of the dryer and wall is more than 10-15cm.
Page 9

Using Method
Do not tumble dry
Hang to dry
Drip dry
Dry flat
Dry in the shade
Using
1. Plug the power cord
The appliance shall be supplied with 220V,50Hz,
connected to a special receptacle more than
10A (reliably grounded).
2. Place the dehydrated clothes in your dryer
Check the following items before putting clothes in.
They shall be loaded in such a way that 2-3 pieces
each time and not in a group to avoid tangling, which
is not easy to turn it over resulting in uneven drying
since the clothes were wrapped.
Please put the clothes into the cylinder of the machine
leaving nothing outside the edge of the machine in case
the clothes will be packed and tangled up or the sealing
washer will be pulled out. All the errors above will result
in failure in the drying.
Before drying your clothes
Make sure if clothes have any special requirements and suitable for drying.
Do not dry your clothes in your dryer if the materials of which cannot be dried
in a dryer or they bear the following labels:
Dry in the shade
Dry flat
Do not tumble dry
Carefully check the clothes to be dried and remove combustible
material such as lighter and match as well as sharp metal items
like coin, hair clip and safety pin maybe mixed with the clothes
and in pockets.
Clothes with zipper or fastener shall be put into your dryer inside
out with zipper zipped and fastener buckled.
Hang to dry
Page 10

Using Method
Strong Dry
Regular Dry
Anti-wrinkle
Air Fluff
Cooling
OFF
Air Fluff
Cooling
3. Control panel and its functions
Heat Selector Knob
Select drying level according to the material, quantity and drying
requirements of the clothes to be dried as shown in the figure
Select "Strong Dry" for clothes particularly thick and in large
quantities or in lower room temperature.
Select "Light Dry" for clothes not resistant to heat (like nylon,
chemical fibre and silk.
Drying Timer Knob
According to the selected dry time and heater working or not,five dry
combinations are available:cooling,ironing,regular dry,extra dry and air fluff
Light
Strong
Heat Selector Knob
For down,sweater,
mohair,cotton sweater
and cotton-padded
clothes needing
freshening,tumbles
without heat. Also can
be individually used for
clothes long time in
closet with the
same results.
Power off when the
timer knob in
"OFF" position.
The dryer starts
when turn the knob
clockwise.
40
20
OFF
220
200
180
For drying laundry in large quantity in
one time (more than 1/2 of the capacity
of drum) or particularyly thicker clothes.
Timer set more than 150 minutes with
"Heat selector knob" in "Strong dry"
position to dry the clothes throughly.
Motor keeps running after dryer time
heating finished while heater stops
working and cold air into the drum to
cool laundry. The whole cooling will be
finished once the timer knob gets to
"OFF " position. Its mainly used for
cooling the dried laundry to prevent
rumples.
160
OFF
140
120
20
40
60
80
100
RegularDry (min)
60
Set "Dry Timer" between 30
to 60 minutes based on
laundry quantity and set
"Heat selector knob" in "
Light" position. After the
timer stops (including
Cooling program),the
laundry will still contain
some moisture which can
be ironed with an
electrical iron. This
program is mainly used for
laundry needs to be ironed.
For normal laundry,timer set between 60 to
150 minutes and set "heat selector knob" in "
Strong" or "Light" postion as required. After
the dryer stops running, clothes normally
can be dried ,cooled and anti-wrinkle.
Page 11

Using Method
4. Set "heat selector knob" to select "Strong dry" or
"Light dry" level.
"Strong dry" level for large quantity and low room temperature.
"Light dry" for non heat-resistant clothes.
5. Dry time settings
Select dry program according to clothes materials and quantity,
turn the timer knob to relative position. The dryer starts running.
Please refer to page 9 "functions of control panel" .
6. Do not take the laundry out until drying process is done
The last 20 minutes of hot air drying is
cooling to reduce the temperature of
laundry inside the drum.
To take the laundry out during drying,
please run cooling operation first since
the temperature inside the drum must
be high.
Static electricity, due to friction, will be
generated on clothes made of chemical
fiber after dried. You can feel it when
taking them out, which is normal and
shall not to be worried about.
Light
Strong
Heat selector knob
7. Unplug the power cord
Please hold plug to unplug power cord
from a receptacle. Do not pull electrical
wire directly to prevent internal breakage
or bad connection.
8. Clean filters
Refer to the instructions on page 11.
Page 12

Care and Cleaning
Clean the buildup such as lints on filters in time after each use, otherwise it will affect
the performance of your dryer.
Please unplug the power cord first when cleaning it.
Cleaning of filters
The lint filter must be used for drying.
It must be cleaned in time after each use.
1. Remove the filters
Remove by pulling straight up with hands inserted
into the four holes around the exhaust vent shroud
in the sequence of "Exhaust vent shroud - Lint filter Exhaust filter", as shown in figure 1.
2. Clean the lints
Separate "exhaust vent shroud","lint filter" and "exhaust
filter" and clean the lints on the filter and exhaust filter
with a soft brush or vacuum cleaner.
Do not damage the filters (as shown in figure 2)
3. Install the filters
After cleaning, assemble in the sequence of "exhaust filter
-filter-exhaust vent shroud",align the recesses in the center
of filter with the projection in the center of drum and make
sure that it is firmly inserted (as shown in figure 3).
Exhaust
vent shroud
Lint Filter
Lint
filter
Lints
Exhaust
Filter
Exhaust Filter
Figure 1
Dust Cleaner
Figure 2
Note:The filter fixed in the bottom of the drum shall also
be cleaned with a soft brush.
Cleaning of the air intake filter
The filter shall be cleaned approximately every month.
Remove by pulling outwards with holding the upper and
lower ends of the air intake shroud. Remove the filter
inside the shroud and clean it with a soft brush or cleaner.
Reassemble and install it back as before.
Air Intake Shroud
Slightly push upwards
with your thumb until
latch hook disconnected
and take it out.
Air Intake Filter
Air Intake Filter
Figure 3
Cleaning of Housing
Clean the interior drum or dryer housing,
with wet soft cloth, if stained.
Do not wash directly with water.
Clean it with neutral detergent.
Do not use thinner,gasolene or alcohol.
Page 13

Troubleshooting
(If your dryer exhibits problems, please unplug the power cord before checking) The following maybe
unrelated to a malfunction of the dryer itself, please reconfirm before calling a serviceman. If it does
relate to a malfunction, please contact our service agent or after-sales service and do not repair it
by yourself.
Problem Possible Cause What to do
Timer knob does not turn
Drum does not turn
No hot air blown out
The laundry is not
throughly dried (some
of the clothes still wet
after dryer stops)
Dryer does not start
Is the power cord inserted firmly?
Is the door closed?
Is the power cord inserted?
Does the receptacle have power?
Is the timer incorrectly
set up in cold air?
Are the front and back filters
clogged?
Have the clothes
been fully dehydrated?
Is the laundry too much?
Have the dryer have been
added during operation?
Does the laundry twist?
Have any clothes dry easily and
hardly been dried together?
Is the dryer placed in a small
and badly-vented space?
Is power failure?
Is the power cord inserted firmly?
Is the door closed?
Is the timer in OFF position?
Insert the power cord firmly
Close the door.
Insert the power cord firmly.
Check the power cord receptacle.
Set to hot air
Clean the filter.
Dehydrate the laundry completely.
Reduce the laundry quantity.
Dry the undried laundry again.
Loose the twisted laundry and
dry again.
Dry the undried laundry again.
Place the dryer in a well-vented place.
Try again after power recovered
Insert the power cord firmly
Close the door
Set dry time
Page 14

Packing Notes
Electrical Safety Tips
Designation
Use Manual
Warranty certificate
Legs of the dryer
Drum-type dryer
Quantity
One
One
Four
One
Please be careful when using your dryer since this product is class appliance.
1.Reliably grounded power supply must be used with the earth wire buried
underground. Do not connect with public utilities such as water pipe.
Separate earth wire from zero line and do not connect them together.
2. An individual sepcial receptacle must be used, which shall be a product
have been qualified by national compulsive product certification.
For your and your family's safety, please improve as soon as possible
if any discrepancies with the above-mentioned requirements existed.
 Loading...