

Haier est08xcm, est10xcm, est12xcm, est10vcm, est12vcm Use & Care Manual
ROOM AIR CONDITIONER
Use & Care Guide
ACONDICIONADOR DE AIRE PARA HABITACIÓN
Manual de Uso y Cuidado
CLIMATISEUR DE PIÈCE
Guide d’utilisation et d’entretien
Model:
EST08XCM
EST10XCM EST10VCM
EST12XCM EST12VCM
0010536101
For questions about features, operation/performance, parts,
accessories or service call: 1-877-337-3639
Si tiene preguntas respecto a las características, funcionamiento,
rendimiento, partes, accesorios o servicio técnico,
llame al: 1-877-337-3639
Au Canada, pour assistance, installation ou service,
composez le : 1-877-337-3639
TEMP/TIME
CLEAN
POWER
FILTER
RESET
FILTER
FAN
DEHUM
ENERGY
SAVE
HIGH
MED
LOW
ON
OFF
MODE SPEED TIMER
°F/°C
Hr
ON/OFF
COOL


TABLE OF CONTENTS
ÍNDICE
TABLE DES MATIÈRES
AIR CONDITIONER SAFETY ........................................................3
INSTALLATION INSTRUCTIONS.................................................4
AIR CONDITIONER USE...............................................................6
Starting Your Air Conditioner .......................................................6
Using the Remote Control...........................................................9
Changing Air Direction ................................................................11
Normal Sounds............................................................................11
AIR CONDITIONER CARE ...........................................................11
Cleaning the Air Filter .................................................................12
Cleaning the Front Panel.............................................................12
Annual Maintenance....................................................................12
TROUBLESHOOTING ..................................................................12
ASSISTANCE OR SERVICE..........................................................14
In the U.S.A. ...............................................................................14
In Canada ...................................................................................14
WARRANTY ..................................................................................15
SEGURIDAD DEL ACONDICIONADOR DE AIRE......................17
INSTRUCCIONES DE INSTALACIÓN.........................................18
CÓMO USAR EL ACONDICIONADOR DE AIRE .......................18
Cómo poner en marcha su acondicionador de aire...................20
Cómo usar el control remoto .....................................................20
Cómo cambiar la dirección del aire ...........................................23
Sonidos normales.......................................................................23
CUIDADO DE SU ACONDICIONADOR DE AIRE.......................23
Limpieza del filtro de aire ...........................................................23
Limpieza del panel frontal ..........................................................23
Mantenimiento anual..................................................................23
SOLUCIÓN DE PROBLEMAS......................................................24
AYUDA O SER
VICIO TÉCNICO...................................................25
En los EE.UU. .............................................................................25
En los CANADÁ
. .........................................................................25
GARANTÍA.....................................................................................26
SÉCURITÉ DU CLIMATISEUR ...................................................28
INSTRUCTIONS D’INSTALLATION ............................................29
UTILISATION DU CLIMATISEUR................................................30
Mise en marche du climatiseur...................................................30
Utilisation de la télécommande...................................................33
Changement de direction de l’air.................................................34
Sons normaux ............................................................................34
ENTRETIEN DU CLIMATISEUR...................................................34
Nettoyage du filtre à air ..............................................................34
Nettoyage du panneau avant.....................................................34
Entretien annuel..........................................................................34
DÉPANNAGE.................................................................................35
ASSISTANCE OU SERVICE.........................................................36
Aux États-Unis............................................................................36
Au Canada..................................................................................36
GARANTIE.....................................................................................37
2
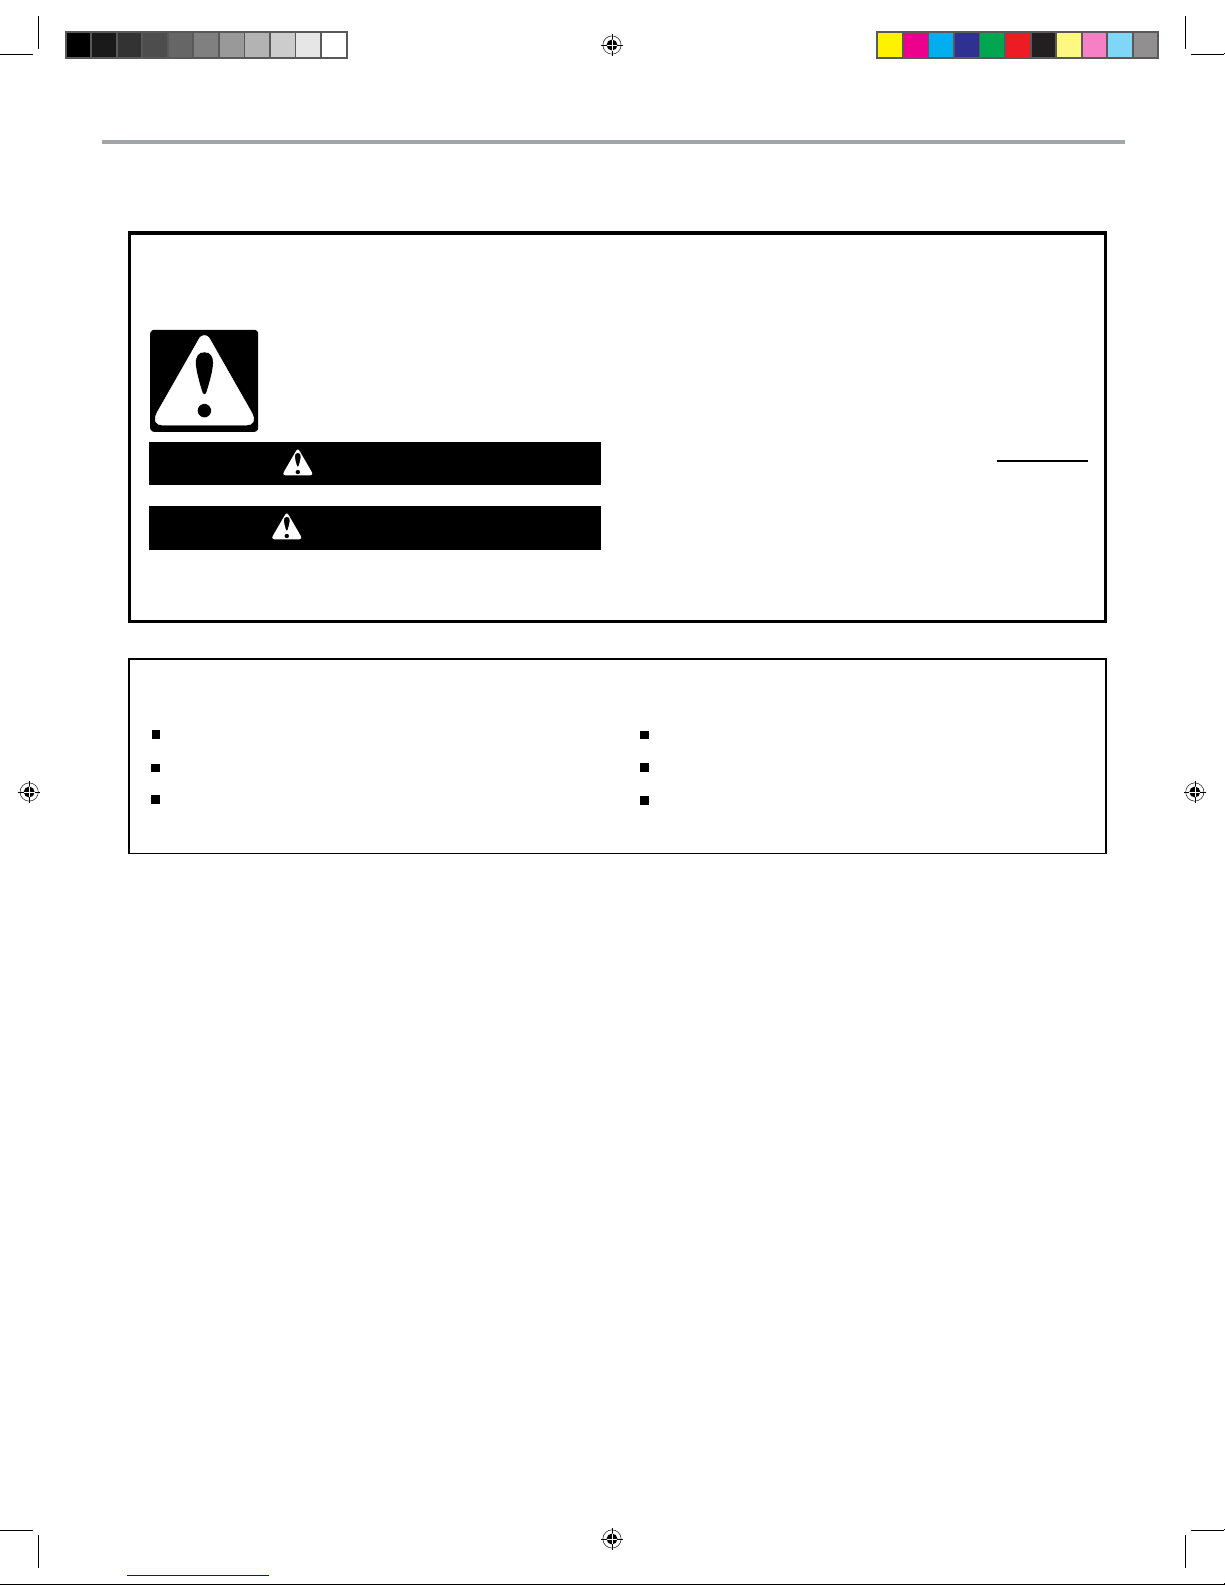
AIR CONDITIONER SAFETY
You can be killed or seriously injured if you don't immediately
You can be killed or seriously injured if you don't follow
All safety messages will tell you what the potential hazard is, tell you how to reduce the chance of injury, and tell you what can
happen if the instructions are not followed.
Your safety and the safety of others is very important.
We have provided many important safety messages in this manual and on your appliance. Always read and obey all safety
messages.
This is the safety alert symbol.
This symbol alerts you to potential hazards that can kill or hurt you and others.
All safety messages will follow the safety alert symbol and either the word “DANGER” or “WARNING.”
These words mean:
follow instructions.
instructions.
DANGER
WARNING
IMPORTANT SAFETY INSTRUCTIONS
WARNING:
To reduce the risk of fire, electrical shock or injury when using your air conditioner, follow these basic precautions:
SAVE THESE INSTRUCTIONS
Unplug air conditioner before servicing.
Use two or more people to move and install air conditioner.
Plug into a grounded 3 prong outlet.
Do not remove ground prong.
Do not use an adapter.
Do not use an extension cord.

INSTALLATION INSTRUCTIONS
Remove old air conditioner and inspect sleeve for the following:
Insallation--Make sure that sleeve is securely installed and in
sound structural condition.
Dimensions--Measure the size to make sure the air conditioner
will t.
Slope--There should be a rearward slope for condensate to
drain from the rear of the sleeve.
Chece against Fig.A.
There are sharp edges that can cause serious cuts.
When lifting the air conditioner,it is HEAVY. Use 2 peoples to lift.
CAUTION
For New Construction install Haier Wall Sleeve.
Manufacturer--So the method of installation can be determined.
If the installation and slope are suspect,then removal and
correct installation of a Haier Wall Sleeve,is recommended.
Check the conetents of the accessories supplied with your air
conditioner as shown below:
2
1
6
9
10
5
8
7
4
3
How to install
1.Identify the existing wall sleeve before installing the unit
from the listed below.
Note:All wall sleeves used to mount the new Air Conditioner
must be in sound structural condition and have a rear grille
that securely attaches to sleeve,or rear ange that serves as a
stop for the Air conditioner.
2.Clean the interior of the sleeve (do not disturb seals).
3.Repaint the sleeve if needed.
4.On 25
13/32”-26”sleeves:Replace the existing louvered grille
with the new one supplied in the package,shown in the Fig.B
4 5
REAR
Wall Sleeve
UNIT
LEVEL
FRONT
to
Fig.A
Brand
Wall Sleeve Dimensions(inches)
25-1/2
25-13/32
26
25-7/8
25-7/8
27
25-7/8
25-3/4
Height
15-1/4
15-3/4
15-9/16
Width
White-westinghouse
Haier
Amana
Frigidaire
Carrier(52F series)
General Electric /Hotpoint
15-5/8
Whirlpool
16-1/2
Fedders/Emerson
16-3/4
16-3/4
Sears/Kenmore
15-17/32
16-7/8
Carrier(51S series)
Depth
16,17-1/2
or 22
16-7/8
17-1/2
17-1/8
16-3/4
or 19-3/4
16-23/32
18-5/8
Emerson/Fedders
Friedrich
26-3/4
15-3/4
15
27
16-3/4
16-3/4
LG
25-7/8
15-17/32
16-23/32
Haier
Amana
Number Part name
QTY.
1
2
3
4
5
6
7
8
2
2
2
2
Wide Top/Bottom Trim Frame
Wide Side Trim Frame
Narrow Side Trim Frame
Narrow Top/Bottom Trim Frame
Universal Fit Rear Grille
1
Tapered Spacer Block
2
Board
1
Foam Seal
1
Screw
4
4
Washer
9
10
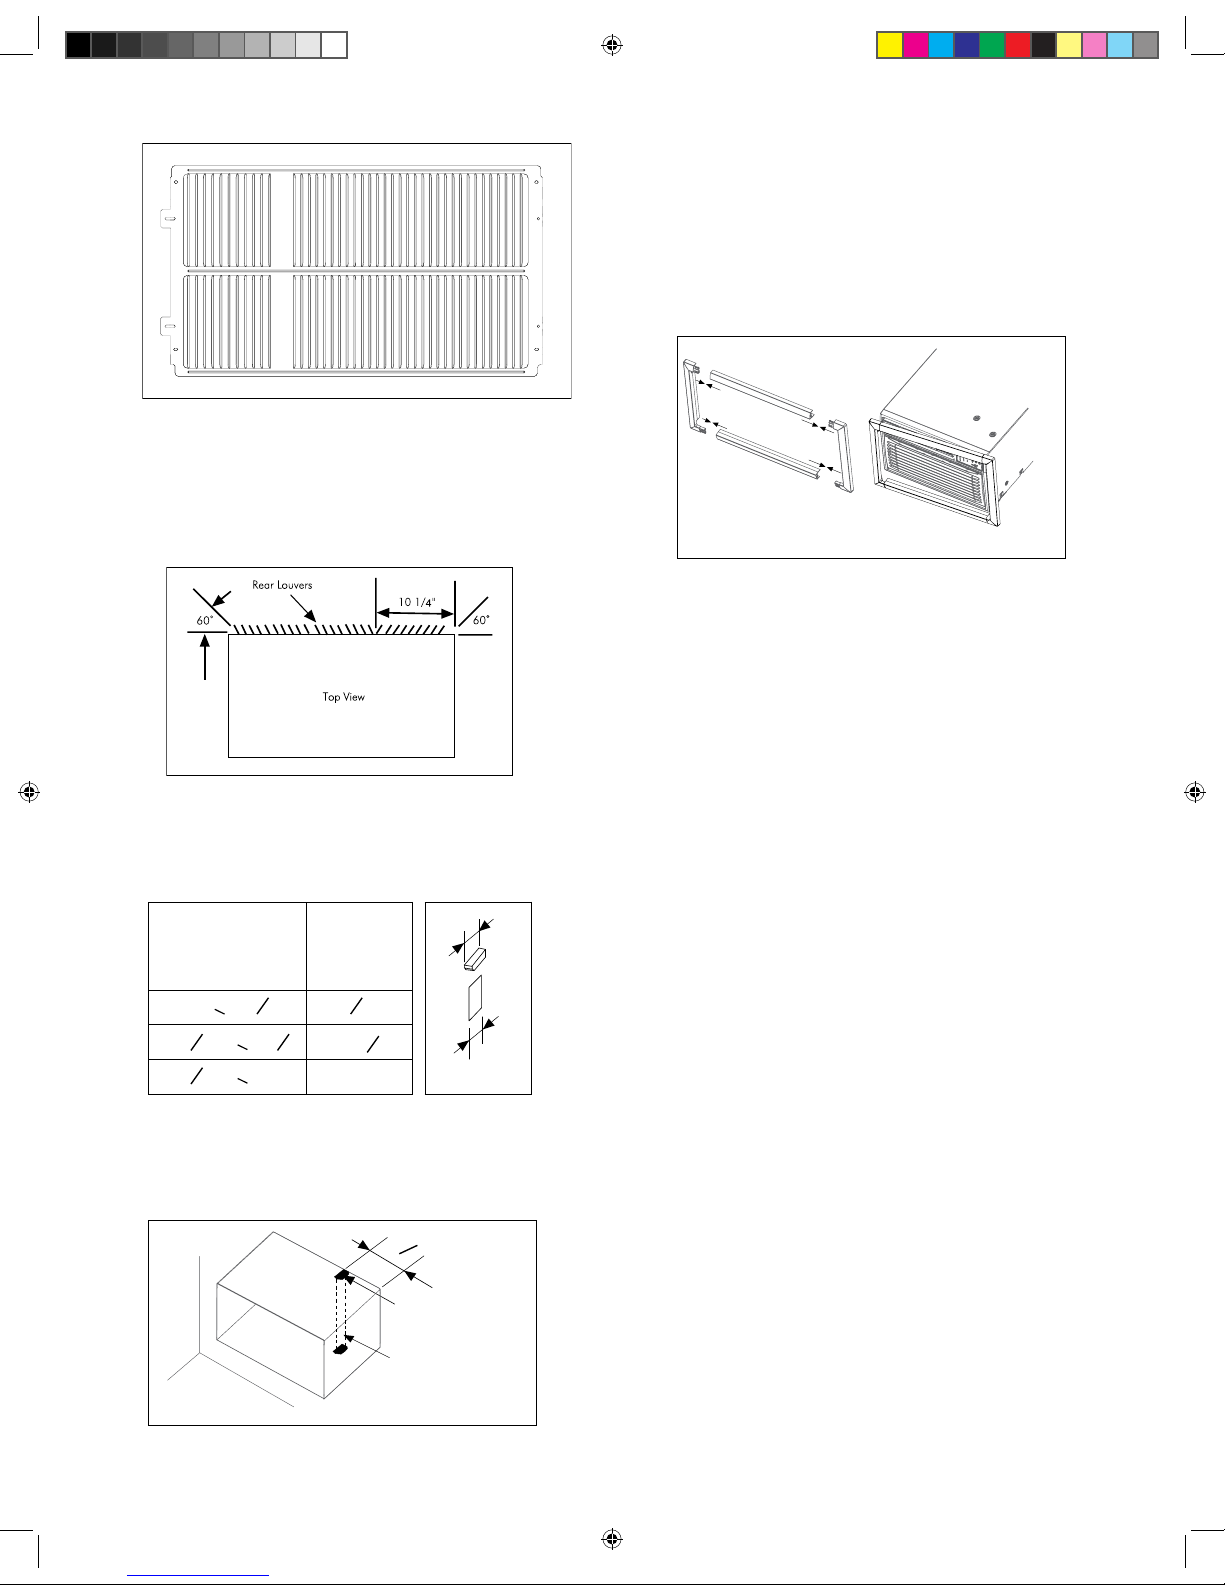
Fig.B
Mounting tabs can be bent or cut off if not needed.Please use
the correct holes to match the sleeve.
Fig.C
On 26
3/4”-27” sleeves:Use existing rear grille and redirect
louvers
to 60 angle as shown in Fig.C
5.If the depth of your existing wall sleeve is less than or equal
to 20”,skip to step 7.Otherwise,cut the bafes and the support
blocks according to length“A” in the table below.
6.Remove the backing from the support blocks and attach
them to the inside of the wall sleeve as shown FIG E.Slide the
bafe into solts of the support blocks.
8.Install the 1”x1
1/2”x84”long stuffer seal between the wall
sleeve and the unit.
9.To assemble trim,snap the tab of each piece into the slot of
the other piece as shown below.2-Trim frames are supplied
with unit.use the trim frame that best ts your sleeve.
Slide trim over the front of the air conditioner until trim is ush
with sleeve as shown below.
Note:Be sure to route the cord through the trim frame before
placing the trim frame on the unit.
7.Install the new unit into the wall sleeve.
Depth“D” of the
existing wall
sleeve(inches)
Length“A”
inches
20<D<20
20 <D<21
21 <D<24
1-
4
5
8
3
4
3
4
5
8
3
4
3
4
A
A
Fig.D
Tapered Spacer
Block Board
FRONT
Wall
Sleeve
Wall
Fig.E
Tapered Spacer
Block
6
1
2
”
Assemble Trim
Fig.F

Operating your air conditioner properly helps you to obtain the
best possible results.
This section explains proper air conditioner operation.
IMPORTANT:
■ If you turn off the air conditioner, wait at least 3 minutes before
turning it back on. This keeps the air conditioner from blowing a
fuse or tripping a circuit breaker.
■ Do not try to operate your air conditioner in the Cool mode when
outside temperature is below 61°F (16°C). The inside evaporator
coil will freeze up, and the air conditioner will not operate
properly.
AIR CONDITIONER USE
Starting Your Air Conditioner
6
Operating your air conditioner properly helps you
to obtain the best possible results.
This section explains how to operate this air
conditioner.
IMPORTANT:
STARTING THE AIR CONDITIONER
cont.
•
When you turn off the air conditioner , either at the
control panel or with the remote control,wait at
least 3 minutes before turning it back on. This
prevents the compressor from overloading. This 3
minute delay also applies when switching from cool
mode to fan and back.
•
Do not operate your air conditioner in the Cool
mode when the outside temperature is below
61°F
(16° C). The inside evaporator coil will freeze up, and
the air conditioner will not operate properly.
1. Carefully remove the clear plastic film from the
control panel.
2. rP ess POWER once to turn on the air conditioner.
NOTE: nehW the air conditioner is first plugged in,
the LED display will show “88” for 3 seconds.
After the air conditioner is turned on for the first
time, the display will show the
temperature 72 F
and
the fan is automatically set
to Low speed
and the Mode indicator will
show ENERGY SAVE.
NOTE: To switch the temperature display between
Fahrenheit (F) and Celsius(C), the air conditioner
must be plugged in, and turned ON. On the control
panel on the front of
the AC, press the UP and
DOWN button at the same time and hold for 3
seconds. The
change cannot be done using the
remote control.
3. Select Mode. Refer to “Mode.”
4. Select Speed. Refer to “Speed.”
5. Set Timer. Refer to “Temp/Time”
6. Reset the filter. Refer to “Filter Reset”
°
MODE
1. Press mode until you see the indicator light
come on next to the desired setting.
2. Choose Fan, Energy Save,Cool, or Dehum.
FAN― Only the fan runs. Press SPEED to select
High, Med or Low fan speed. The display shows
the
current room temperature.
ENERGY SAVE― In this mode the fan runs only
when cooling is
needed. The fan will run for 3
minute after the compressor shuts off. The fan
then cycles on for 2 minutes at 10 minute intervals
until the temperature in the room is above the set
temperature. The compressor then turns back on.
FAN
DEHUM
ENERGY
SAVE
HIGH
MED
LOW
ON
OFF
MODE SPEED TIMER
°F/°C
Hr
TEMP/TIME
CLEAN
POWER
FILTER
RESET
FILTER
ON/OFF
COOL
COOL― Cools the room. Press SPEED to select
High,Med , Low fan speed. Press the TEMP/TIME
up or down arrow button to adjust the temperature.

7
DEHUM― sdiA in removing humidity from the room. This setting will NOT cool the room.
NOTE:
•
muheD mode cannot be used to cool the room.
SPEED
1. rP ess FAN SPEED until you see the indicator light come on next to the
desired setting.
2. Choose High, Med, Low
HGIH ―For maximum cooling
DEM ―For normal cooling
LOW―For minimum cooling
TIMER
To set the air conditioner to turn off between 1 hour and 24 hours (The air
conditioner must be ON to set):
1. rP ess TIMER. Timer Off indicator light will be on. The display will show the
remaining hours before the air conditioner will turn off.
2. rP ess the TEMP/TIME up or down arrow button to change the delay time
from 1 hour to 24 hours.
3. retfA 5 seconds, Timer Off indicator light will remain on. The display will
show the left time to Timer Off.
To set the air conditioner to turn on between 1 hour and 24 hours:
1. rP ess TIMER. Timer On indicator light will be on. The display will show the remaining hours
before the air conditioner will turn on.
2. rP ess the TEMP/TIME up or down arrow button to change the delay time from 1 hour to 24
hours.
3. Timer On indicator light will remain on.

8
TO CLEAR TIMER PROGRAM:
NOTE: Air conditioner can be either on or off.
Press TIMER until Timer indicator light turns off.
TO VIEW OR CHANGE THE REMAINING TIME (IN HOURS):
TIMER OFF
1. Press the TEMP/TIME up or down arrow button to increase or decrease the time.
2. After 5 seconds, the display will show the remaining time to Timer OFF.
TIMER ON
1. The display will show the remaining time.
2. rP ess the TEMP/TIME up or down arrow button to increase or decrease the time.
3. After 5 seconds, the display will show the remaining time to Timer ON.
TEMP/TIME
1. rP ess the TEMP/TIME up arrow button to raise the temperature. Each time you press the
TEMP/TIME up arrow button, the temperature will go up 1°F until it reaches 86°F (30°C).
2.
rP ess the TEMP/TIME down arrow button to lower the temperature. Each time you press the
TEMP/TIME down arrow button, the temperature will go down 1°F until it reaches 61°F (16°C).
NOTE: retfA 5 seconds, under Fan mode, the display will show the current temperature. Under
Cool, Energy Save or Dehum mode, the display will show the set temperature.
FILTER RESET
This feature automatically notifies you that the air filter must be cleaned. The indicator light will
come on after 240 hours of operation. Clean the air filter (refer to Care and Cleaning), place it back
in the front panel, and press the Filter Reset button. The light will t
urn off.

9
NOTE: The raised dots are Braille for the visually impaired.
Remote control may differ in appearance from the image shown.
NOTE: Remove and discard protective film prior to use. The remote control runs
on one CR2025 battery (included). Replace battery after 6 months of use,
or when the remote control starts to lose power. To change battery, first
remove screw on back panel of remote.
POWER
Press ON/OFF to turn on the air conditioner.
Mode
Press MODE to choose Fan, Energy Save,Cool or Dehum.
Speed
Press SPEED to choose High, Med, Low.
TIMER
To set the air conditioner to turn off after a set amount between 1 hour and 24 hours (unit must
be ON):
1. rP ess TIMER. Timer OFF indicator light on the air conditioner control panel will be on.
2. rP ess the TEMP/TIME up or down arrow button to change the delay time from 1 hour to 24
hours.
3. retfA 5 seconds, Timer OFF indicator light on the air conditioner control panel will remain on.
TO SET THE AIR CONDITIONER TO TURN ON BETWEEN 1 HOUR AND 24 HOURS:
1. rP ess TIMER. Timer On indicator light on the air conditioner control panel will be on.
2. rP ess the TEMP/TIME up or down arrow button to change the delay time from 1 hour to 24
hours.
3. retfA 5 seconds, Timer On indicator light on the air conditioner control panel will remain on.
USING THE REMOTE CONTROL
ON/OFF
MODE
SPEED
TIMER
TEMP/TIME
TEMP/TIME

10
TO CLEAR TIMER DELAY PROGRAM:
NOTE: Air conditioner can be either on or off.
Press TIMER until Timer indicator light turns off.
TO SEE OR CHANGE THE REMAINING TIME (IN HOURS):
TIMER OFF:
1. rP ess the TEMP/TIME up or down arrow button to increase or decrease the time.
2. retfA 5 seconds, the display on the air conditioner control panel will show the remaining time to
Timer Off.
TIMER ON:
1. Display on the air conditioner control panel will show remaining time.
2. rP ess the TEMP/TIME up or down arrow button to increase or decrease the time.
TEMP/TIME
• rP ess the TEMP/TIME up arrow button to raise the temperature. Each time you press the TEMP/
TIME up arrow button, the temperature will go up 1°F until it reaches 86°F (30°C).
• rP ess the TEMP/TIME down arrow button to lower the temperature. Each time you press the
TEMP/TIME down arrow button, the temperature will go down 1°F until it reaches 61°F (16°C).

Your new air conditioner is designed to give you many years of
dependable service. This section tells you how to clean and care
for your air conditioner properly.
The air filter is removable for easy cleaning. A clean filter helps
remove dust, lint, and other particles from the air and is
important for best cooling and operating efficiency. Check the
filter every 2 weeks to see whether it needs cleaning.
NOTE: Do not operate the air conditioner without the filter in
place.
1. Turn off the air conditioner.
2. Remove the air filter by opening the front panel and removing
the air filter.
When your air conditioner is operating normally, you may hear sounds such as:
■
Droplets of water hitting the condenser, causing a pinging or clicking sound. The water droplets help cool the condenser.
■ Air movement from the fan.
■ Clicks from the thermostat cycle.
■ Vibrations or noise due to poor wall or window construction.
■
A high-pitched hum or pulsating noise caused by the modern high-efficiency compressor cycling on and off.
Normal Sounds
Cleaning the Air Filter
AIR CONDITIONER CARE
A. Air filter
B. Front panel
11
Changing Air Direction
4-Way Air Flow:The air directional louvers let you control the direction of the airflow to the desired direction.The airflow can be directed up-down.
A
A. 4-way Air Flow
A
B
left-right
 Loading...