

Page 1

EB-3190E
EB-40100E
EB-3190EG
Microwave Oven
Instruction for use
Page 2

Page 3
1
2
3
3
4
4
5
6
10
10
11
11
12
13
15
:
Page 4
L
N
EB-3190EG
HVC
L
L
()
( )
N
N
()
E
E
()
MF
MT
AK
H
V
T
HV
D
FA
F
EB-3190E / EB-40100E
L
L
( )
( )
L
N
N
E
()
N
()
E
CPU
CPU
RG
MF
MT
RW
RW
HVC
F
FA
HV
H
D
V
T
Page 5
.
..
Page 6
:
Page 7

Page 8
.
Page 9
Clock
Clock
Time
Time
TIME
TIME
Page 10
Enter
Enter
EB-3190E
EB-3190EG
g
Enter
Cook
Time
Cook
Time
Cook
EB-40100E
g
Enter
Cook
EB-40100E
'
6 30
'
9 20
15 10"
23 30"
'
2 00
'
2 35"
4 00
'
'
4 50
5 30"
'
1 25
'
2 00
'
3
'25
'
2 40"
4 40
'
Cook
EB-3190E
EB-3190EG
'
"
"
'
'
"
"
"
"
"
"
"
5 10
'
7 20
'
14 00"
20 10"
'
'
2 00
'
2 45"
4 25"
'
5 15"
'
5 55"
'
1 25
'
2 10
'
3
'40
'
2 30"
4 10
'
"
"
"
"
"
"
"
100
150
300
450
99
150
250
350
450
250
500
800
0.5
1.0
1
2
3
4
1
1
2
3
4
1
2
3
1
2
Page 11
0
"
'
30
13
'
19 30"
'
24 00"
'
5 05
'
'
7 15
"
'
9 30"
"
4'20
"
6 10
'
'
12 00
'
''''''
7 45"
10 25
'
11 45
'
Enter
Time
Enter
Time
Enter
Cook
Time
Enter
Cook
Time
14 1
"
"
"
"
"
30"
20
'
25 10"
'
5 40"
'
8 30"
'
11 00"
'
5'00
7
00
'
12 00
'
5 25"
'
''''''
7 00"
'
'
8 10"
"
"
"
0.4
0.8
1.0
0.2
0.4
0.6
0.2
0.5
1.0
0.7
1.0
1.2
1
2
3
1
2
3
1
2
3
1
2
3
Page 12

EB-3190E
EB-40100E
kg
Enter
EB-3190EG
kg
Enter
EB-3190E
EB-40100E
EB-3190EG
1
2
3
Page 13

.
.
.
.
Page 14

.
.
Page 15

10
11
12
13
1
2
3
4
5
6
7
8
9
14
-
9
-
1
-
0
1
-
11
-
12
-
13
-
14
-
2
-
3
-
4
-
5
-
6
7
-
8
-
T
Page 16

EB-3190EG
g
kg
Enter
Clock
Time
Cook
Enter
Clock
kg
g
Cook
Time
Page 17

EB-3190E / EB-40100E
g
kg
Enter
Clock
Time
Cook
Enter
Clock
kg
g
Cook
Time
Page 18

14.
.
Page 19

English
Instruction for use
Contents
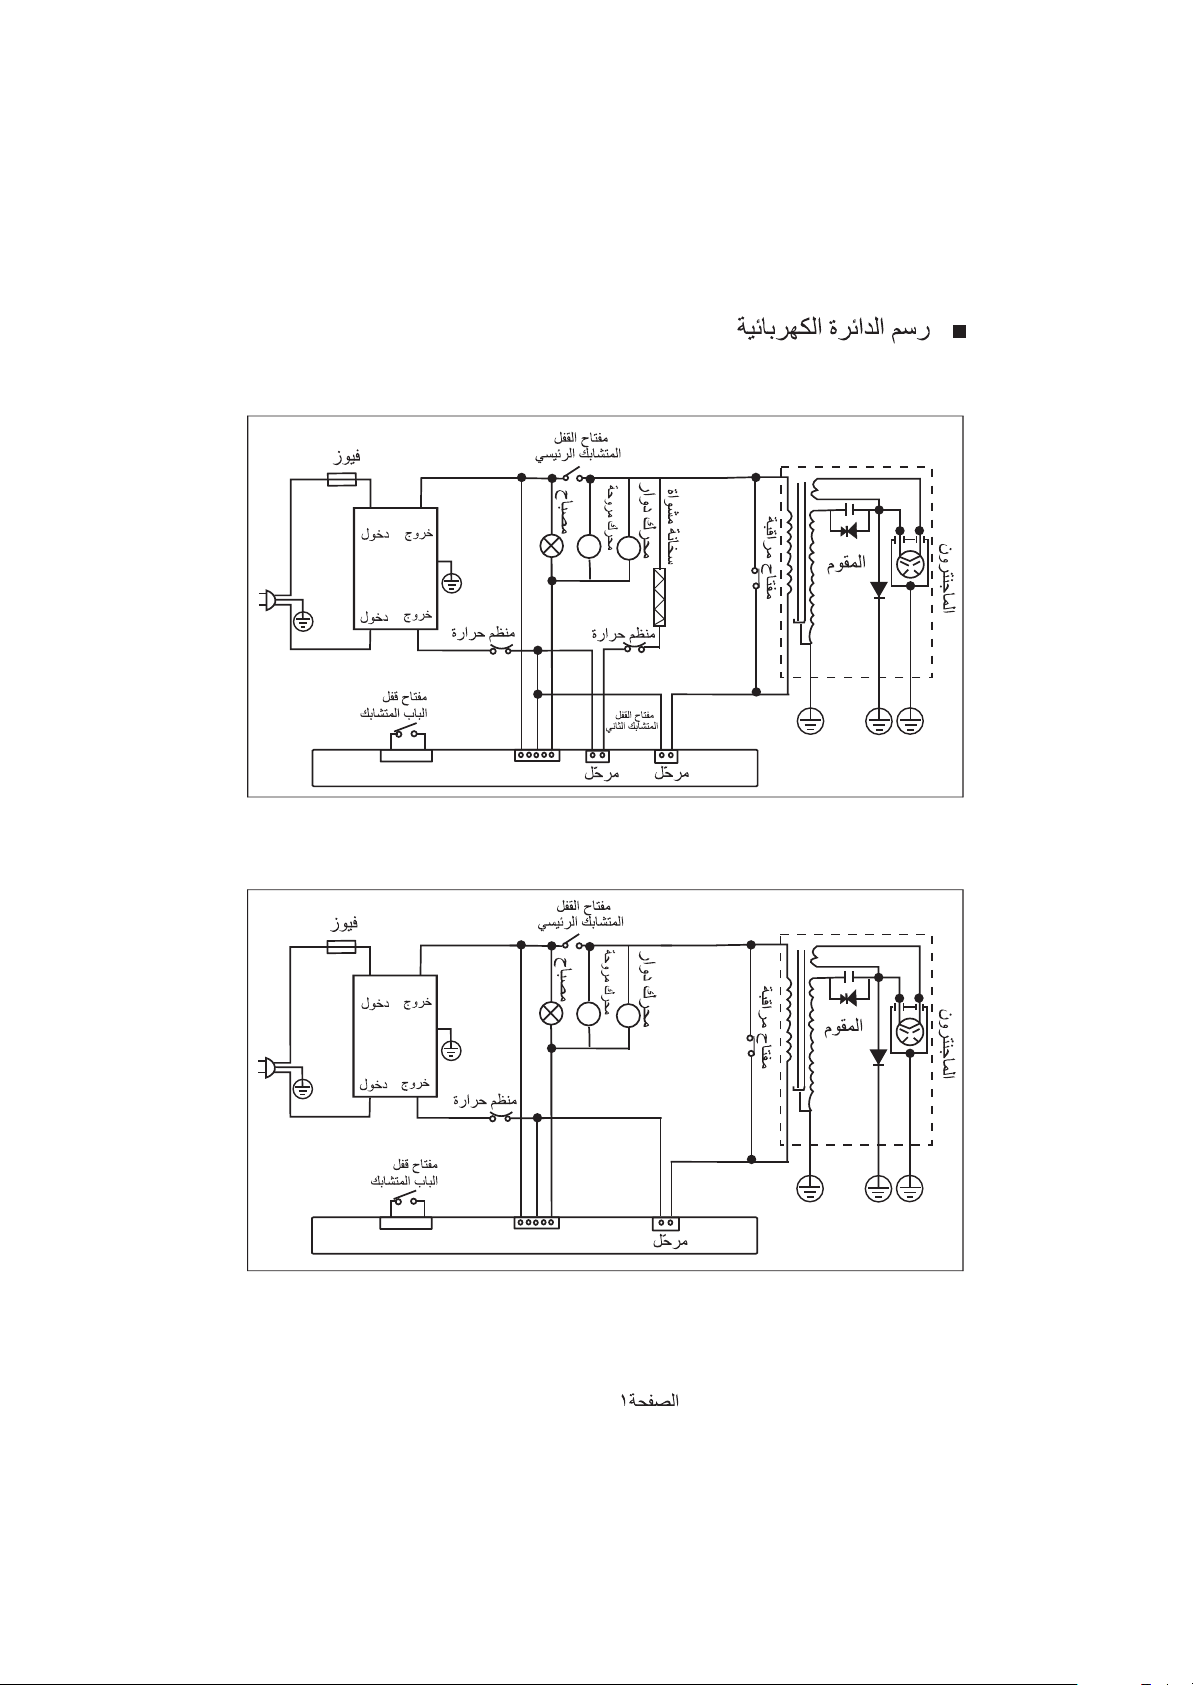
Electrical schematic diagram
1 Potential dangers
2 Where to install the oven
3 Installing the oven
4 Rating plate
5 Plugging in your appliance
6 Using the microwave oven
7 How to operate your microwave oven
8 Cleaning and care
9 Customer support service
10 Calling the customer support service
11 Guarantee
COMPONENTS
Operating panel
Warning
Caution
instructions for use. Therefore, please read the instruction manual carefully from start to finish before
you start to use your appliance. The manufacturer is not liable for any damage caused by failure to
pay heed to the operating instructions when operating the appliance. Highlight the points that are
especially important to you and keep this document in a place where it can be consulted at any time
and be passed on to future owners. This appliance must be kept out of children's reach.
Microwave oven may only be installed, plugged in and started up in full compliance with the
:
Page
1
2
3
3
4
4
5
6
10
10
11
11
12
13
15
Important
The appliance(s) described in this instruction manual is / are solely designed for domestic use and may
not be used for professional or commercial purposes.
You have chosen an excellent appliance which will serve you reliably for many years, if it is operated
and maintained properly.
Detailed drawings (FIG.A) with a legend you shall find on the page 12 of this manual.
Should your newly purchased appliance replace an old microwave oven, cut off the power cable of the
old appliance as close as possible to the cabinet. Please have the old appliance ecologically disposed
off by a company specialized in environmental protection. (ask your civic Center)
:
Page 20

Electrical schematic diagram
EB-3190EG
E
S
FU
L
L
(in)
(out)
L
N
E
N
(in)N(out)
E
Thermostat
The Primary
interlock switch
Fan motor
Lamp
MF
MT
Thermostat
Curbing motor
Grill heater
Monitoring switch
HVC
AK
Rectifier
HV
H
D
V
T
FA
F
Magnetron
The door
interlock switch
EB-3190E / EB-40100E
E
S
FU
L
L
(in)
(out)
L
N
N
(in)N(out)
E
The door
interlock switch
E
Thermostat
The secondary
interlock
switch
RG
CPU
RELAY
The Primary
interlock switch
Fan motor
Lamp
MF
CPU
MT
RELAY
Curbing motor
RELAY
RW
RW
Monitoring switch
HVC
AK
Rectifier
HV
H
D
V
T
FA
F
Magnetron
1
Page 21

English
Using your oven
In the following, please find all important instructions for the use of the oven.
As this manual applies to several microwave ovens, some specifications may differ from model to
model.
1 Potential dangers
Caution !
Microwave ovens may only be used to warm up or heat up food or drinks. Never use your
microwave oven for other purposes such as drying textiles or other objects, let alone life animals.
This may cause acute fire(s) or accident hazard.
If you install or start up your microwave oven without first reading the instructions for use:
1.
Misuse may damage your health and endanger your life.
Mistakes made in installation and connection may potentially damage the appliance itself and your
kitchen furniture
2.
Over boiling
When heated in a microwave oven, liquids may overheat beyond their boiling point without you
being able to see it (boiling causes non visible bubbling).
Caution: By merely touching a serving dish as you take it out, steam bubbles may unexpectedly and
suddenly form and the liquid in the serving dish may unexpectedly boil over.
(Danger to get severely scalded)
You can prevent such an occurrence, by simply putting a clean glass rod into the dish, filled with liquid.
However before removing the serving dish, observe if the boiling liquid bubbles up as usual.
Instruction for use
In mixed food with different moisture levels, the microwaves heat up the moister ingredients far
stronger.
Baby food heated up in glasses or bottles may only be handed to your child after having checked
the temperature of the food or drink.
As different ingredients may be warmed up at varying degrees, the dish/bottle containing baby food
may feel only lukewarm, whereas the food inside is far more heated up. For this reason, always
shake or stir the baby food evenly so that the heat is distributed.
3. Suitable cooking ware
Always ensure that your dishes and pots are compatible with microwave ovens.
Cooking ware made of the following materials is best suited:
Fire-resistant glass or ceramics
Heat-resistant and microwave suited plastic
Heat-resistant porcelain / stoneware
The following materials may be used only for brief operation (e.g. warming up) as long as it is under
constant supervision in case of fire and the manufacturer explicitly states that the materials are
suitable for microwaves.
2
Page 22

English
Wickerwork
Wood / wooden skewer
Plastic cups / dishes etc.
White paper trays / cartons
1.1 Very important !
The following items are under no circumstances suitable for microwave cooking:
Metal containers, cutlery or skewers
Containers with metal trimming (e.g. gold rim )
Bags sealed with metal parts (clips)
Cartons coated with plastic film or foil
Coloured or recycled paper
Metal objects may trigger off unwanted sparking and potentially damage the appliance.
Coated cartons, coloured or recycled paper may contain substances that may lead to overheating and fire.
If your appliance is also equipped with a fan or a grill function, make sure the dishes you use have a
high heat resistance.
2 Where to install the oven
1. Before installing your new appliance, you need to check as for visible external damage.
Under no circumstances should the appliance be started, if it is damaged.
Therefore, thoroughly check the appliance as for:
Instruction for use
Damaged packaging, indicating that the appliance may have been damaged during shipment
Damaged cabinet
Damaged door glass panel
Visible damage to the cable / plug
If you suspect any damage, please have the appliance tested by the customer support service.
At all costs prevent the emission of any hazardous microwave radiation by not starting up a damaged
oven.
3 Installing the oven:
(FIG. A)
a) Unpack the appliance
b) Remove all objects from the inside of the oven.
c) Carefully remove all plastic films and stickers from:
- the cabinet
- the door
- the turntable axle - drive shaft
Failure to carefully remove plastic films and stickers may lead to a fire hazard.
d) Clean the oven interior with a damp cloth.
Do not use sharp cleansers or scouring agents!
e) Unpack the turntable (not all models are equipped with) and its undercarriage
3
Page 23

English
f) Place the undercarriage in the circular track on the oven interior floor
g) Lay the turntable onto the undercarriage. By gently turning it, the guide fits into the drive shaft.
Place the appliance on an even and non-skid surface.
It must be stable enough to easily support the appliance even if the oven contains goods.
Leave a space of at least 15 cm between the foremost edge of the worktop and the front of
the oven door .
You will thus prevent the appliance from tilting forward when the door is open.
Install the oven in a place where it is protected against splashing water or dripping liquids.
Never operate the appliance outdoors. Sunlight and humidity may impair operational safety.
Never expose your microwave oven to direct sunlight (overheating hazard).
Do not install the appliance in the immediate vicinity of heat sources such as radiators or cookers.
The following minimum clearances between other objects / walls must be maintained for safety
purposes:
- Side l/r clearance at least 5 cm
- Rear clearance at least 30 cm
- Upper clearance at least 30 cm
The appliance must not be built into a cupboard.
The oven must not be built in underneath a panel or a cupboard.
Instruction for use
For some models a built under - mounting set is commercially available. Please ask your dealer or
the respective customer support service.
CAUTION!
During operation clouds of steam escape through the air vents of the appliance and it may get very hot
within the space of the above mentioned minimum clearances. The microwave oven should thus be
installed so that no objects sensitive to heat or moisture are located near the minimum clearances.
Avoid any possible overheating of the oven caused by unintentionally covering or sealing the air vents
When in operation the base of the oven may become very hot. The worktop must thus be accordingly
heat-resistant.
4 Rating plate
The rating plate with technical specifications is located on the cabinet, at the rear of the oven.
5 Plugging in your appliance
Your appliance must be connected to a power socket with grounded connection, which complies with
the respective regulations and has been installed by authorised specialists.
Before plugging the appliance into the wall socket, make sure that the voltage(V) and fuse amperage
(A) specified on the rating plate of the oven correspond with the electrical power supply in your home.
If these specifications do partly or not at all correspond, immediately contact your local customer support
service or your dealer and do no plug in the appliance under any circumstances.
4
Page 24

English
When operating the microwave oven for the first time, make sure that:
The power cable of the oven is not led underneath the oven base, which does get hot, and does not
come into contact with sharp edges or hot objects.
The power cable does not extend into the other kitchen work areas.
The power cable does not drop from the work top and nobody can get caught in it.
The power cable does not come into contact with moisture(e.g. when wiping the work top or rinsing).
The power plug is easily accessible and can quickly be unplugged in case of danger.
The power plug is always firmly inserted in the socket and loose contact cannot cause any fire hazards.
Slack power plugs or sockets must be immediately repaired by a skilled electrician.
No curtains are nearby.
6 Using the microwave oven
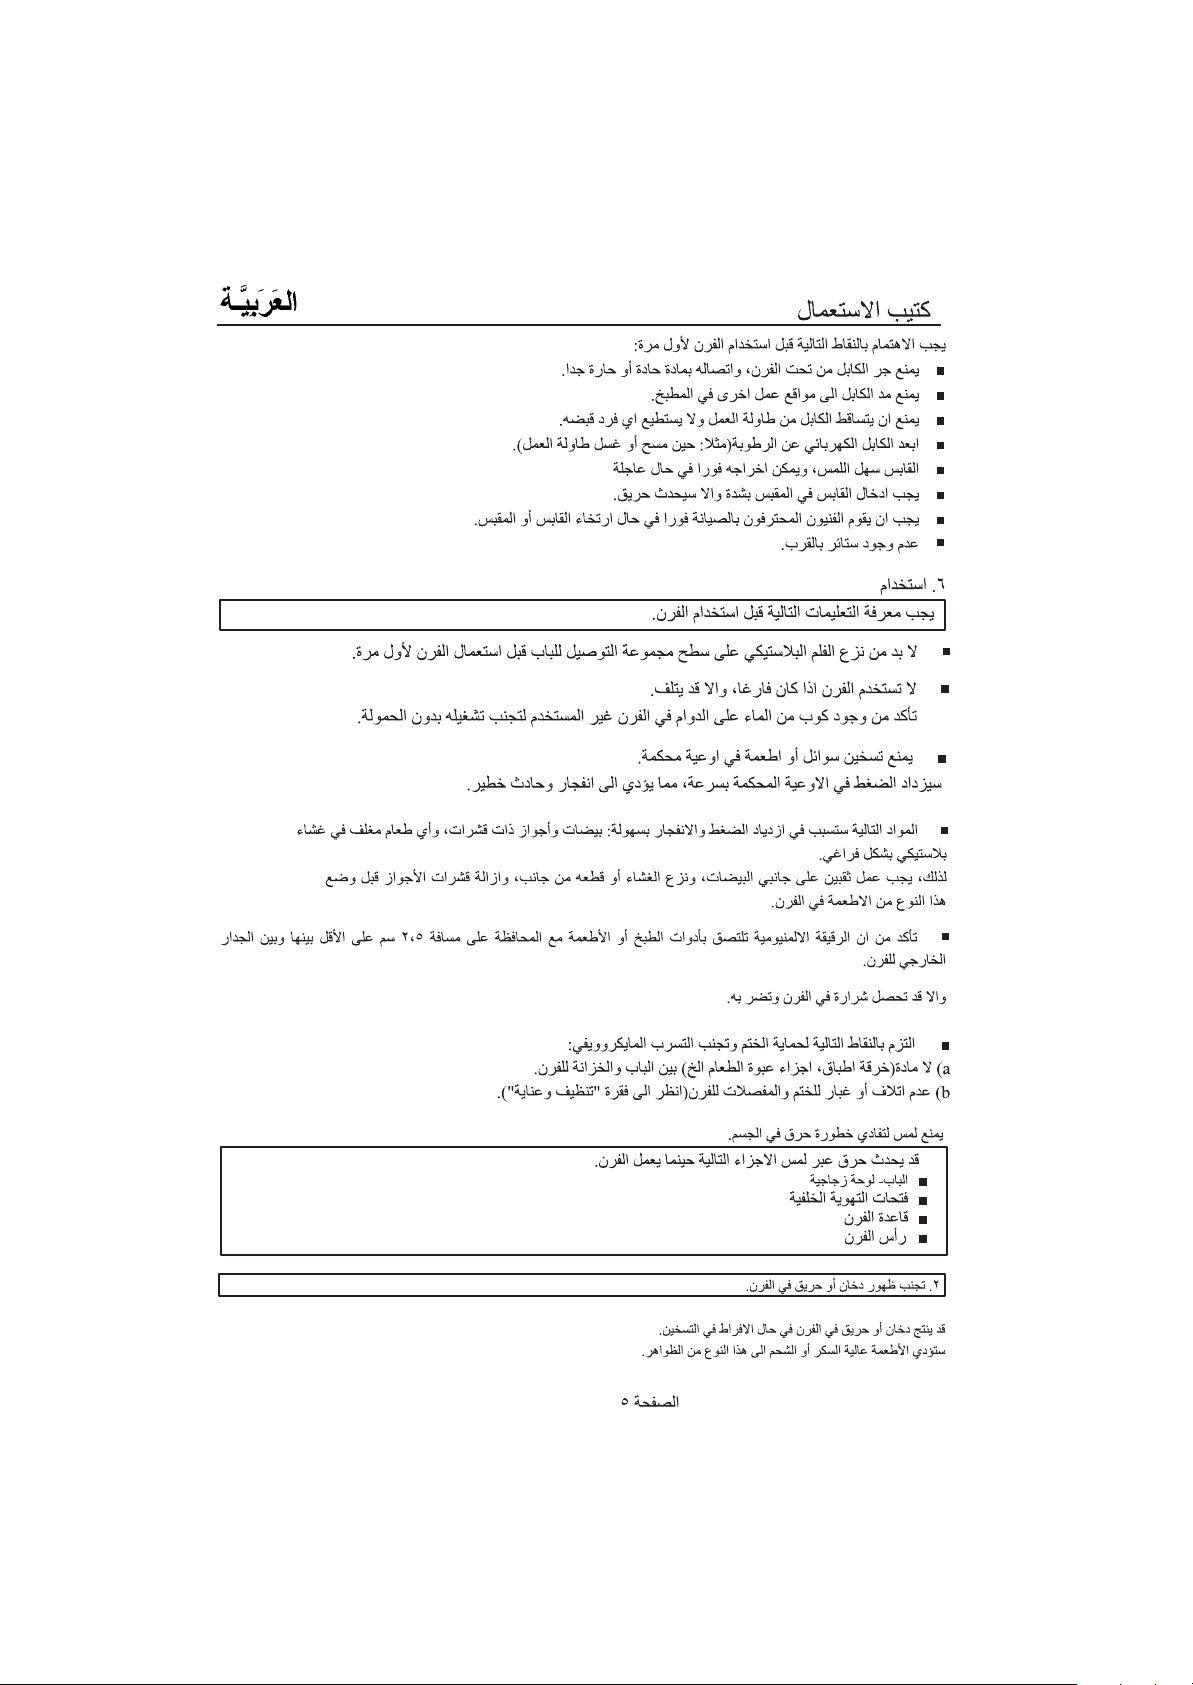
1. Before switching on the appliance, you should familiarizes yourself with the following guidelines:
Before your first use, please unveil the film on the surface of the door joining group.
Never operate the oven when it is empty otherwise it could get damaged..
To prevent the oven from being operated inadvertently without contents, always leave a glass of
water in the cavity when the appliance is out of use.
Never heat liquids or food(s) in sealed dishes
Within sealed dishes overpressure can quickly develop and thus cause the dish to burst. This leads to
potentially serious accidents.
The following items are also liable to burst due to developing overpressure: eggs in shells,
nuts in shells or any food(s) vacuum packed in plastic foil.
Therefore, always pierce raw eggs on two sides and remove the foil or at least cut it open on one whole
side, before you put it into the oven. Remove nutshells.
Should the use of aluminium foil be recommended in a recipe, make sure that it tightly adheres to
the cookware or food and a gap of at least 2.5 cm is left between the aluminium foil and the
cooking compartment walls.
Otherwise sparking may occur inside the oven and the appliance could consequently get damaged.
Instruction for use
In order to ensure that the seal is constantly protected adequately against hazardous escaping microwaves, always make sure that:
a) No objects (dishcloths, parts of food packaging etc.) are caught between the door and cabinet
b) Door seal or door hinges are not damaged or soiled (also see section on "Cleaning and care")
Do not touch - scalding hazard
During operation your microwave oven may present scalding hazards in the following components:
on the door - glass panel
on the lateral air vents
on the underside of the oven
on the top of the oven
2. Prevention of smoke or fire in the microwave oven
If food(s) overheats, smoke may develop or smouldering may start inside the oven.
Food(s) with a high sugar or fat content are particularly prone to this hazard.
5
Page 25

English
Instruction for use
The microwave oven is therefore not suitable for:
frying
Making popcorn
melting sugar or fats
cooking dried beans etc.
When preparing food(s) with uncertain compositions, you should keep an eye on the
appliance until the end of the set cooking time.
2.1 How to react when smoke develops inside the oven
Should smoke or fire develop inadvertently inside the oven, this problem can usually be easily overcome by taking the following correct steps:
Whatever happens, keep the oven door closed.
First thing, switch off the appliance immediately
Then switch off the power supply by unplugging the appliance or activating the fuse safety switch.
Open the oven to take out the burnt food only when you can no longer detect any smoke.
CAUTION ELECTRIC SHOCK
Under no circumstances should you attempt to extinguish smouldering or burning
food inside
the oven with water . In this case serious accidents may be caused by electric shock.
7 How to operate your microwave oven
(Look at the operate panel of the page 13 and 14)
Please read and fully understand the instructions before operating the Oven.
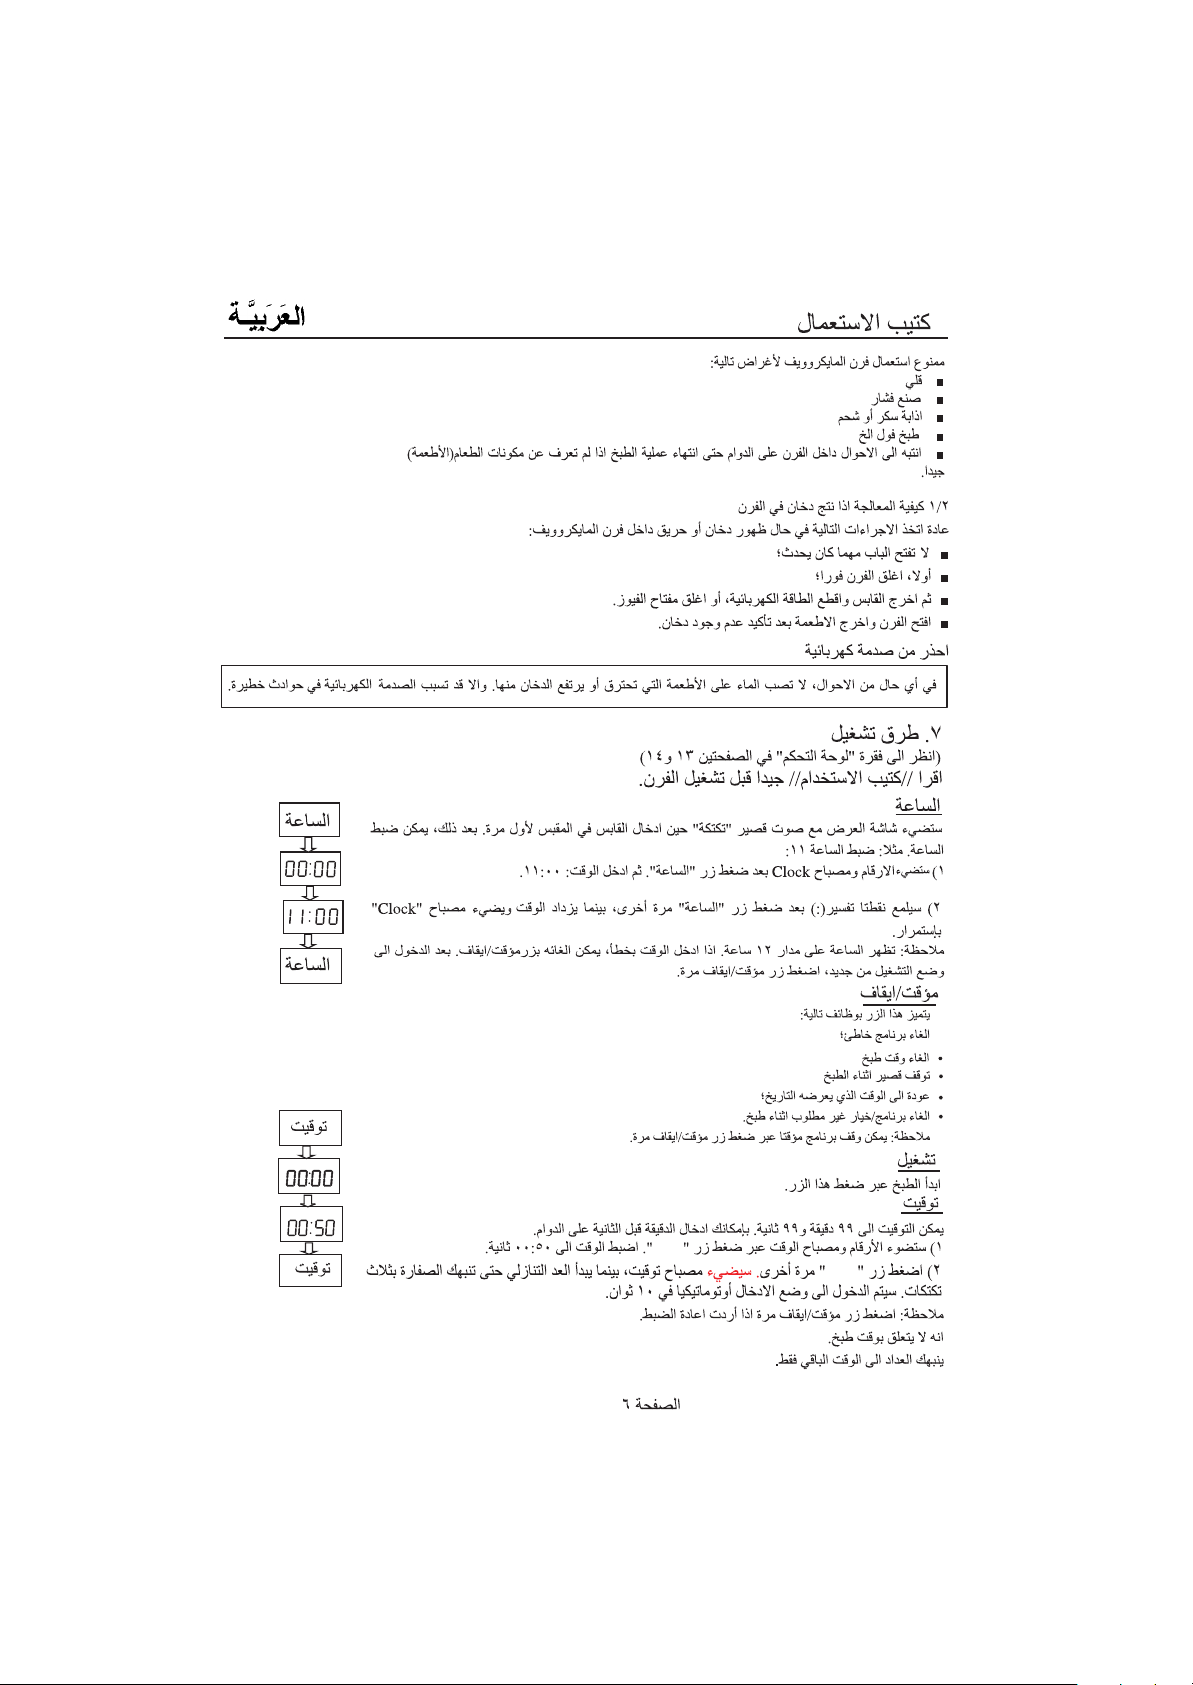
CLOCK
The first time you plug the power cord into an outlet, the display shows and the beep
a short tick. At this point, you can set the clock. 11:00 for example,
1.Touch CLOCK pad, the numbers and Clock indicator will flash. put the time 11:00 ,
Clock
CLOCK
Clock
2.Touch CLOCK pad again, the colon will flash and the time will go on, the Clock indicator keeps
lighting.
Note: Clock is 12-hour display, if you enter an incorrect time, The PAUSE/STOP pad will help
you to cancel it , If you want to reenter start states, please touch PAUSE/STOP pad for one time.
PAUSE/STOP
This keypad allows you to do the following:
Cancel any error programming you made.
Cancel cooking time.
Stop the oven for a short time during cooking.
Return to the time of the day display.
Cancel any program/selection you do not want during cooking.
NOTE: To pause a program press PAUSE/STOP pad one time
START
Press this pad to start cooking.
TIME
You can preset time up to 99 minutes 99 seconds. You can always enter minute before second.
1.Touch TIME pad, the numbers and Time indicator will flash, set the time 00:50.
2.Touch TIME again. the Time indicator will light, the time will count down until . the buzzer
of control panel will remind you with three short ticks. Then it returns to the enter states
automatic in 10 seconds
Note: If you want to reset time, please touch PAUSE/STOP pad for one time.
This has nothing to do with oven cooking time.
Rather it is just a kitchen timer to simply remind you of how much time is left on the timer.
6
Clock
CLOCK
TIME
Time
Time
TIME
Page 26

English
Instruction for use
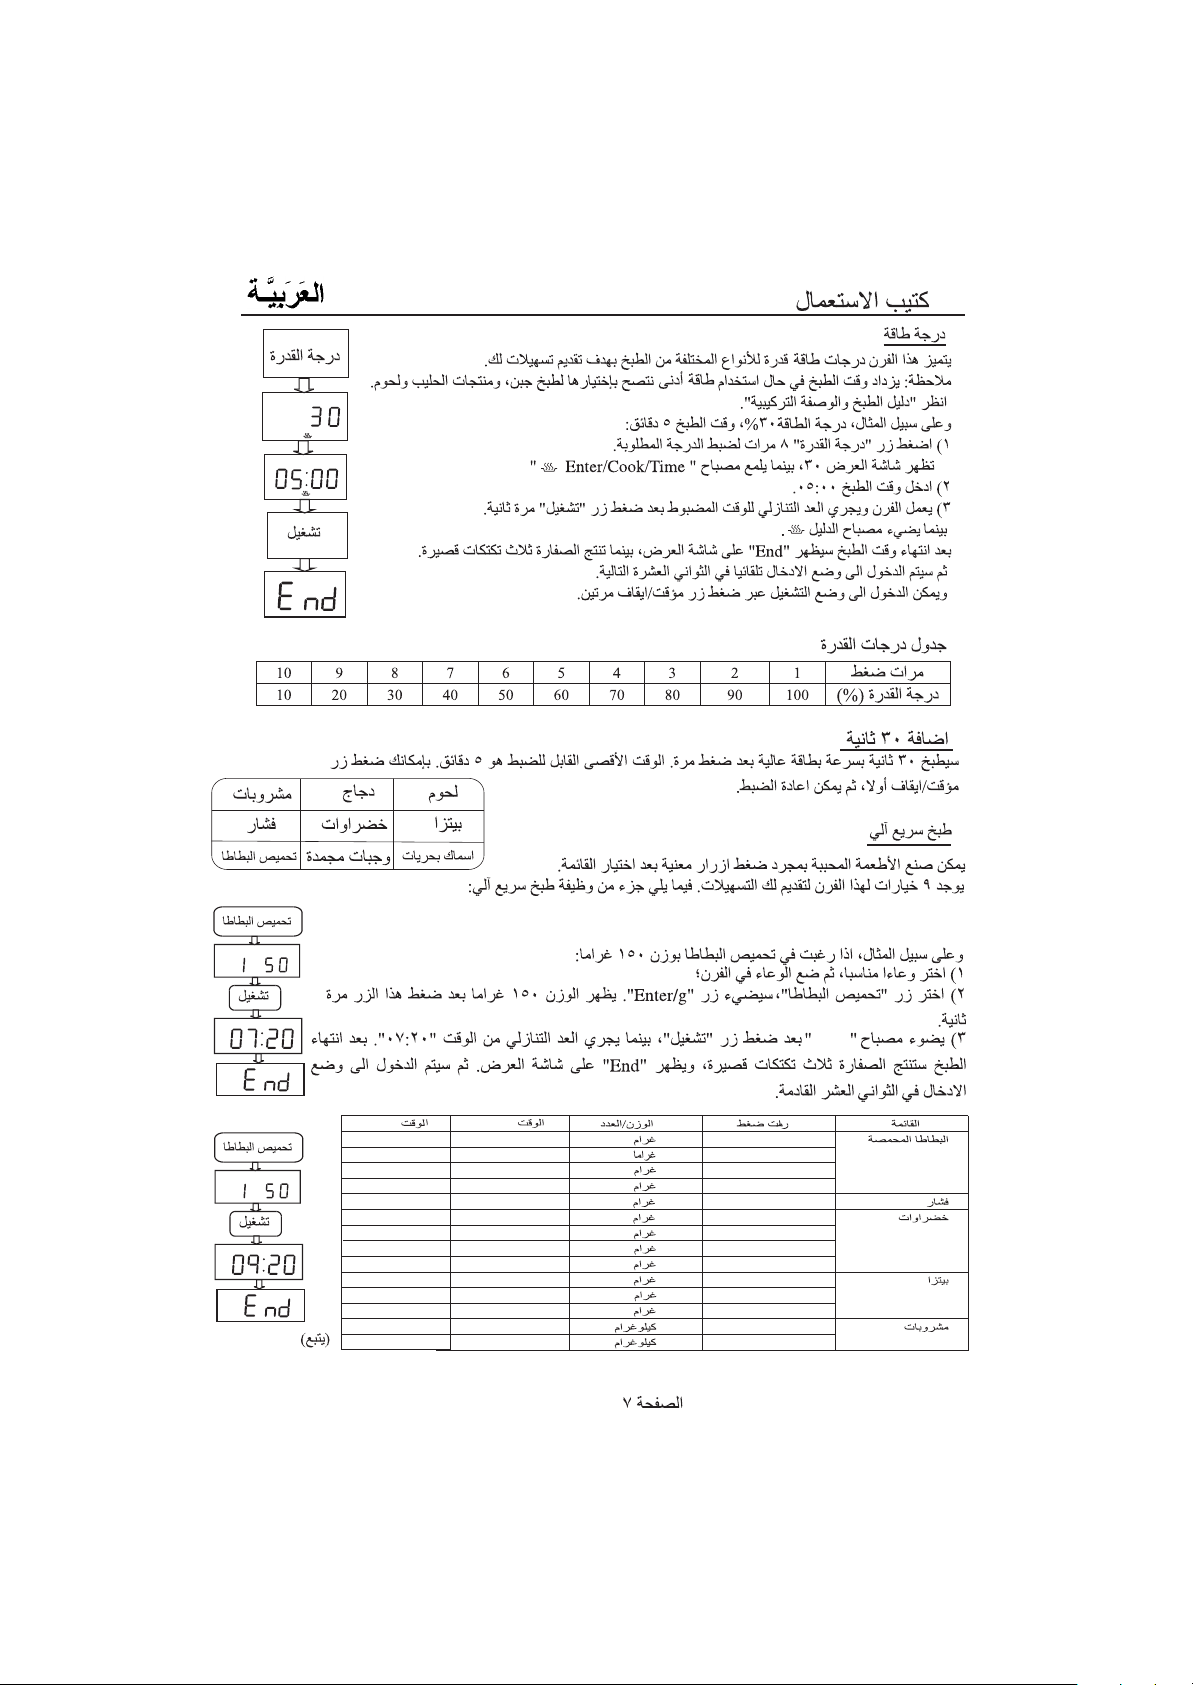
POWER LEVEL
For your convenience, there are ten preset power levels programmed for different types
of cooking.
Note: using lower power levels increase the cooking time which is recommended for
foods such as cheeses, milk and long slow cooking of meats. Please refer to cooking
guides and recipes for specific recommendations.
For example: suppose you want to cooking something for 5 minutes at 30%power level.
1.Enter the power level by touching POWER LEVEL 8 times.
The display shows 30 and Enter/Cook/Time/ indicator will flash.
2.Input cooking time 05:00.
3.Now touch START keypad, the oven start working and the time you setup will count
down. Indicator will light.
When the cooking is finished, The display shows , the buzzer of control panel will
remind you with three short ticks. Then it returns to the enter states automatically in
10 seconds. Or If you want to reenter start states, please touch PAUSE/STOP pad twice.
Please see the chart below for power level:
Touch Times
POWER LEVEL
(%)
1 2 3 4 5 6 7 8 9 10
100 90 80 70 60 50 40 30 20 10
Plus 30s
Press once for 30 seconds of cooking quickly at High Power , and the
5 minutes .you can put pad to restart after you put the pad.
Pause/Stop
Automatic express cooking
These Menus allow you to cook or reheat many of your
favourite foods by just touching the relevant keypad.
For your convenience, the microwave is programmed with
9 one touch selection. The follow is part of automatic
express cooking:
For example: if you want to cook a baked potato for 150 g.
1.Put the potato in the proper container and place it in the oven.
2.Touch Baked potato keypad Enter/g will indicator flash, touch
the pad two times and it displays the weight of 150,
3.Touch Start , Cook indicator lights. the time of 09:20 will cut down
When the cooking is finished, the buzzer of control panel will remind
you with three short ticks, and the screen displays . It will
return to the enter states automatically in 10 seconds.
max time you can setup is
Beverage
Popcorn
Fish/Seafood
Poultry
Vegetables
Frozen dinner
EB-40100E
Baked potato
g
Enter
Start
Cook
POWER
LEVEL
Enter
Enter
Meat
Pizza
Baked potato
EB-3190E
EB-3190EG
Baked potato
g
Enter
Start
Cook
Cook
Time
Cook
Time
Menu
Baked potato
Popcorn
Vegetables
Pizza
Beverage
Touch Times
1
2
3
4
1
1
2
3
4
1
2
3
1
2
Weight
800g
100g
150g
300g
450g
99g
150g
250g
350g
450g
250g
500g
0.5kg
1.0kg
/Quantity
EB-3190EG
7
Time
/ EB-3190E
'
5 10
'
7 20
'
14 00"
20 10"
'
'
2 00
'
2 45"
4 25"
'
5 15"
'
5 55"
'
1 25
'
2 10
'
3
'40
'
2 30"
4 10
'
"
"
"
"
"
"
"
Time
EB-40100E
'
6 30
'
9 20
'
15 10"
23 30"
'
'
2 00
'
2 35"
4 00
'
'
4 50
5 30"
'
1 25
'
2 00
'
3
'25
'
2 40"
4 40
'
"
"
"
"
"
"
"
"
"
(To be continued at next page)
Page 27

English
POULTRY
MEAT
FISH/SEAFOOD
FROZEN DINNER
0
"
'
1
2
3
1
2
3
1
2
3
1
2
3
0.4kg
0.8kg
1.0kg
0.2kg
0.4kg
0.6kg
0.2kg
0.5kg
1.0kg
0.7kg
1.0kg
1.2kg
14 1
30"
20
'
25 10"
'
5 40"
'
8 30"
'
11 00"
'
5'00
7
00
'
12 00
'
5 25"
'
''''''
7 00"
'
'
8 10"
"
"
"
30
13
'
19 30"
'
24 00"
'
5 05
'
'
7 15
'
9 30"
4'20
6 10
'
'
12 00
'
''''''
7 45"
10 25
'
11 45
'
"
"
"
"
"
"
"
"
Instruction for use
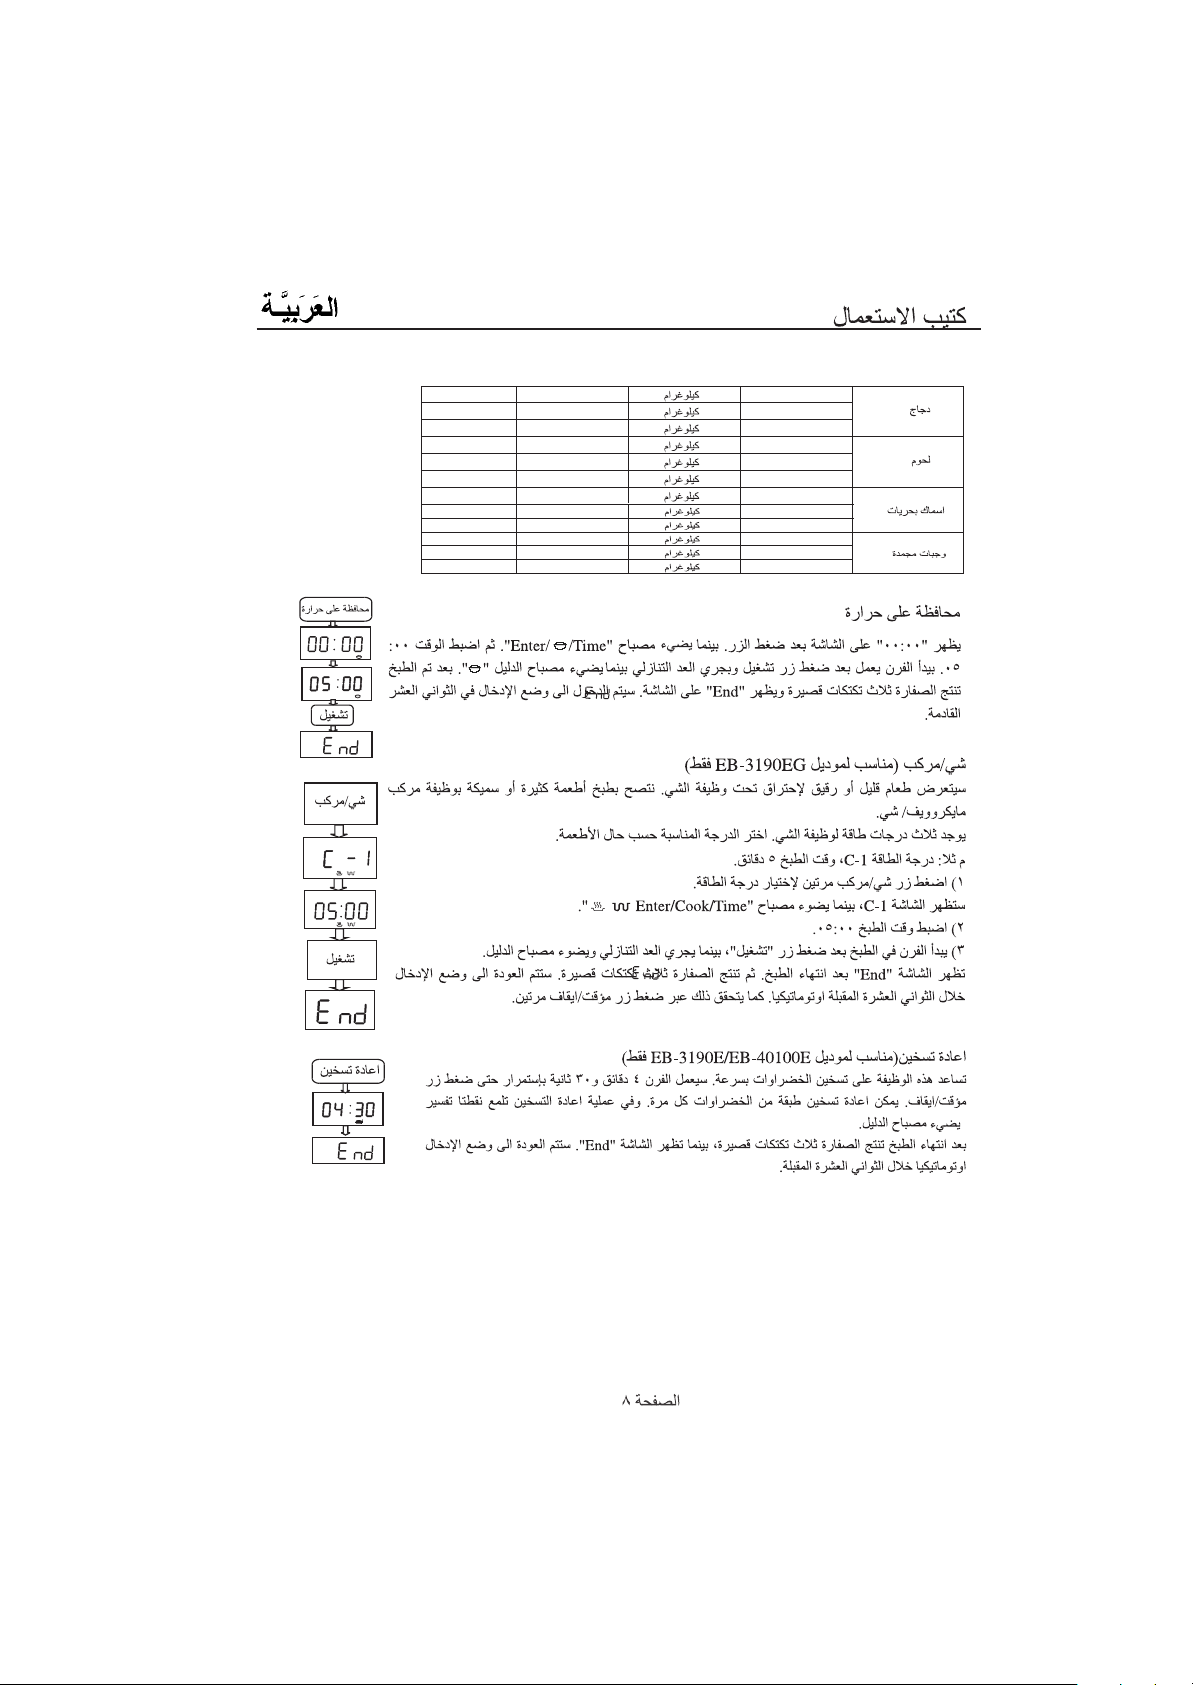
KEEP WARM
Touch the pad, 00:00 flashes in the display, Enter/ /Time indicator will flash, set time 05:00
and touch START pad, the microwave begins to work and the time counts down.
indicator lights. When the cooking is finished, the buzzer of control panel will remind you
with three short ticks, and the screen display .It will return to the enter states
automatically in 10seconds.
GRILL/COMBI
Small quantities and thin pieces can be browned in the grill function, and it is recommended
to cook larger quantities and thicker pieces in the COMBINATION MICROWAVE & GRILL.
The grill has three power levels. Select the power level most suitable for the kind of food
to cooked.
For example: suppose you want to cook something for 5 minutes on power level C-1.
1.Enter the power level by touching GRILL/COMBI twice.
The display shows C-1 and Enter/Cook/Time/ indicator will flash.
2.Input cooking time 05:00.
3.Now touch START keypad, the oven start working and the time you setup will count
down. Indicator will light.
When the cooking is finished, The display shows , the buzzer of control panel will
remind you with three short ticks. Then it returns to the enter states automatically in
10 seconds. Or If you want to reenter start states, please touch PAUSE/STOP pad twice.
KEEP WARM
Enter
Enter
Time
GRILL/
COMBI
Enter
Cook
Time
Enter
Cook
Time
Time
REHEAT
This pad helps you to reheat vegetables fast. The oven will work for 4 minutes and 30
seconds unless you touch PAUSE/STOP pad, you can reheat a plate of vegetables each
time. During the cooking time colon of the time flashes and the reheat indicator lights.
When the cooking is finished the buzzer of control panel will remind you with three short
beeps, and the display shows .It will return to the enter states automatically in 10
seconds.
8
REHEAT
Page 28

English
Instruction for use
EB-3190E
EB-40100E
DEFROST 3 MENU
kg
Enter
DEFROST 3 MENU
1.For example to defrost poultry of 0.1kg :Touch the pad two times,
EB-3190EG
DEFROST 3 MENU
kg
Enter
the Enter/ /kg indicator will flash, input the weight 0.1 , then touch START
pad, the oven begins to work. When the cooking is finished, the buzzer
of control panel will remind you with three short ticks, and the screen
displays . It will return to the enter states automatically in 10 seconds.
Note: the weight you input is the multiple of 100g,
you can setup freely from 0.1kg to 3kg.
Menu
DEFROST 3 MENU
MEAT
POULTRY
FISH
Touch Times
1
2
3
EB-3190EG
Display
EB-3190E
/ EB-40100E
Note: If you want to temporarily stop an AUTOMATIC EXPRESS COOKING process, press the
PAUSE/STOP pad once and then you can start the cooking by press START; or press the
PAUSE/STOP pad twice to cancel the cooking program altogether, then the microwave oven
returns to the electrified state.
CHILD SAFETY LOCK
Press and Hold the PAUSE/STOP pad until it locks the controls, and in the right of the
display shows L .
Press and Hold the PAUSE/STOP pad until it unlocks the controls. It returns to the enter state.
Note: To lock or unlock the child safety lock function, the buzzer of the microwave oven will beep
twice.
9
Page 29

English
8 .Cleaning and care
Caution !
The microwave oven must be unplugged from the power supply before cleaning it (on the external or interior side).
Pull out the power plug, or activate fuse safety switch.
If you cannot reach the plug, keep the oven door open (also when cleaning the outside).
Only in this way you can prevent the appliance from being switched on when the function keys or
switches are inadvertently activated.
1. Cleaning the cabinet
Caution ! Under no circumstances should water or a cleaning fluid get into the inside of the oven.
This is particularly important when cleaning around the air vents or rear wall.
Otherwise serious accidents may ensue due to electric shock and the appliance may be damaged.
Only use clear water with just a little washing-up liquid for cleaning. Do not under any circumstances use sharp cleaning or scouring agent. Lastly wipe the cabinet dry with a soft cloth.
Carefully remove food particles and dirt deposits between the door and cabinet, so that the door
always shuts properly and tightly.
Warning !
Under no circumstances should you continue to use the appliance if you have detected any damage on
the door seal or on the adjoining surfaces.
hinges. Otherwise, hazardous microwave radiation may escape from these locations. This kind of dam-
age must be repaired by a trained customer service engineer
2. Cleaning the inside of the oven
Never pour water into the oven interiors . Water may enter the interior of the oven through the air
vents and damage the appliance. Moreover serious accidents can ensue due to electric shock.
The same applies to damage detected on the door itself or door
, before you can use your appliance again.
Instruction for use
Clean the oven interior thoroughly. Particles of fat and food may overheat and potentially cause fire
hazard. Moreover food and dirt deposits inside the oven affect the performance of the microwave oven.
Use only clear water with a little washing-up liquid to clean the interior of the oven. Do not under any
circumstances use sharp cleaning or acid. Lastly wipe the cooking chamber dry with soft cloth.
3. Cleaning the turntable
Thoroughly clean the turntable (if equipped with) after every use to prevent smoke from developing
due to food particles.
CAUTION ! The turntable might still be hot.
Likewise clean the turntable undercarriage and the oven interior regularly, so that it always works
perfectly.
9 Customer support service
Check on the enclosed guarantee card or the separately enclosed customer service directory which
firm is responsible for the customer support service of your appliance.
If your appliance documentation does not mention the responsible customer support service, please
contact your dealer.
If your appliance does not work despite observance and compliance with all tips and guidelines described in these instructions for use, then please do the following check "What is when...", before you
call the customer support service:
10
Page 30

English
Customer service jobs resulting from improper operation of the oven are liable for payment even during
the guarantee period.
What is when.........
Is the plug firmly inserted in the socket?
Is the power socket under current?
(test this by plugging in another kitchen appliance)
Is the fuse intact?
Was the timer set properly? (first turn beyond the required time and then back accordingly)
Does the oven door close tightly?
Is anything stuck in the door?
Under no circumstances should you subject the appliance to any tests other than those described here or attempt to repair it yourself by technical means.
Warning !
The interior lamp may only be replaced by specially trained customer service personnel who is aware
of the related dangers.
The appliance works independently from the interior light. It can thus also be operated easily even if the
interior lamp has failed.
Steam escaping from the air vent is quite normal during operation. This is not a malfunction.
10 Calling the customer support service
Instruction for use
To ensure prompt help when needed, please have ready the following data before calling the customer
support service:
Appliance Type / Model (see rating plate)
Date of purchase
Name and location of your dealer
Description of the malfunction
The address and phone number of the customer support service center responsible for your
appliance can be found in the attached customer support service directory , or in the guarantee card.
Otherwise contact your dealer .
11 Guarantee
Please note the general guarantee terms and the guarantee period stated in the attached guarantee
card. If the appliance documentation does not include a guarantee card, please contact your dealer .
The manufacturer works constantly at the further development of all products. Please therefore bear
this in mind as the form, set up and technology are subject to change, without prior notice.
11
Page 31

English
Instruction for use
FIG. A
10
11
12
13
Legend of components
vailability of components depending on Mod. / Type of appliance
A
COMPONENTS
1
2
3
4
5
6
7
8
9
14
-
1
Cabinet
-
2
Interior light
-
3
Control panel
4
-
LED display
5
-
Operation pad
6
-
Circular track
(for turntable undercarriage)
7
-
Turntable drive
8
-
Turntable undercarriage
12
9
Turntable
-
10
Oven interior
-
-
Door hinge
11
-
Door
12
-
Door seal
13
-
Gridiron
14
(Only for model EB-3190EG)
Page 32

English
Operating panel
Control Panel Buttons
EB-3190EG
g
kg
Enter
Clock
BEVERAGE
POPCORN
FISH/SEAFOOD
PLUS
30S
DEFROST
3 MENU
GRILL/
COMBI
KEEP
WARM
POWER
LEVEL
POULTRY
VEGETABLES
FROZEN DINNER
1
4
7
TIME
PAUSE/STOP
Cook
2
5
8
0
Time
MEAT
PIZZA
BAKED POTATO
3
6
9
CLOCK
START
Instruction for use
Page 7
Page 7
Page 9
Page 8
Page 8
Page 6
Page 6
Page 6
Page 7
Page 6
Visual Displays
Words around the display will light to indicate what function in progress
Please see the following pages.
g
Enter
Clock
kg
Cook
Time
13
Defrost
Microwave
Grill
Keep
Warm
Page 33

Control Panel Buttons
EB-3190E / EB-40100E
Visual Displays
Words around the display will light to indicate what function in progress
Please see the following pages.
Enter
Clock
BEVERAGE
POPCORN
FISH/SEAFOOD
PLUS
30S
DEFROST
3 MENU
REHEAT
KEEP
WARM
POWER
LEVEL
g
kg
POULTRY
VEGETABLES
FROZEN DINNER
1
4
7
TIME
PAUSE/STOP
Cook
BAKED POTATO
2
5
8
0
Time
MEAT
PIZZA
3
6
9
CLOCK
START
Page 7
Page 7
Page 9
Page 8
Page 8
Page 6
Page 6
Page 6
Page 7
Page 6
Enter
Clock
kg
g
Cook
Time
DEFROST
MICROWAVE
REHEAT
KEEP
14
WARM
Page 34

War ning!
No one except the professional technicians can decompose the microwave oven. Electric shock
1.
danger may occur!
2.
Do not put metal stick into the interlock hole at the front of the cavity. It may cause microwave leakage!
3.
Do not add excessive force to opposite direction on the door. Otherwise the door may be deformed
and cause microwave leakage.
4.
Do not cook food with vacuum package or packed into enclosed container. For the food with skin,
remember to puncture it before cooking.
5.
Do not cook eggs with shell. It may cause bursting.
Remove the grease remained in the cavity . Otherwise it may cause smoking or fire in heating.
6.
7.
Do not use the microwave oven for purposes other than cooking.
Be sure to earth the microwave oven reliably in installation and usage.
8.
Reserve enough space for the rotation of the tray At least 5cm space above the microwave oven.
9.
is required for heat radiation.
Do not put microwave oven in humid or high-temperature environment.
10.
Do not touch the upper part of the shell and the outer screen of the door . It may cause scalding.
11.
12.
Do not run the microwave oven without load. It may damage the microwave oven.
Do not use metal container to cook with microwave oven. It may cause igniting phenomenon.
13.
14.
After long time cooking, the cavity is under high temperature. It is suggested to wait for some time
to cool it down before next usage.
15.
Before usage, please check if the cooking utensils are applicable for microwave oven.
When cooking food with plastic or paper package, be sure to check if it strikes a fire.
16.
17.
If there's smoking during cooking with microwave oven, please keep the oven door closed and pull
off the power plug.
18.
If you heat beverage, it will slowly expand. Be sure to watch out for bursting.
For those drinks or food prepared for children, be sure to stir or shake evenly and check the tem-
19.
perature before feeding to avoid scalding.
20.
If the door , door frame or door seal is damaged, do not use the oven before it is repaired by the
professional technicians.
During maintenance, be sure to switch off the power supply . To decompose the shell of the oven, be
21.
sure to have it done by professional technicians. The inner components are electrified, and may
cause electric shock.
22.
Children shall use the microwave oven under the instruction of adult, or use the oven by self after
they have received complete instruction and description from the adult. The adult shall teach the
children the general knowledge on the danger of operating the microwave oven.
The door seal and all of the relative parts shall be cleaned with soap liquor once each week to keep
23.
the cavity clean.
If the power cord is damaged, only the sellers or professional technicians authorized by the manu-
24.
facturer can make maintenance to avoid any electric shock danger.
25.
If you use cook utensils not recommended by us, be sure to watch out for the cooking proceeding in
the microwave oven.
If you heat liquor , in handling the liquor , please notice that the boiled liquor may have delayed
26.
bursting and cause scalding.
15
Page 35

Page 36

Specific Number:0050502179F
MADE IN CHINA
 Loading...