

Page 1
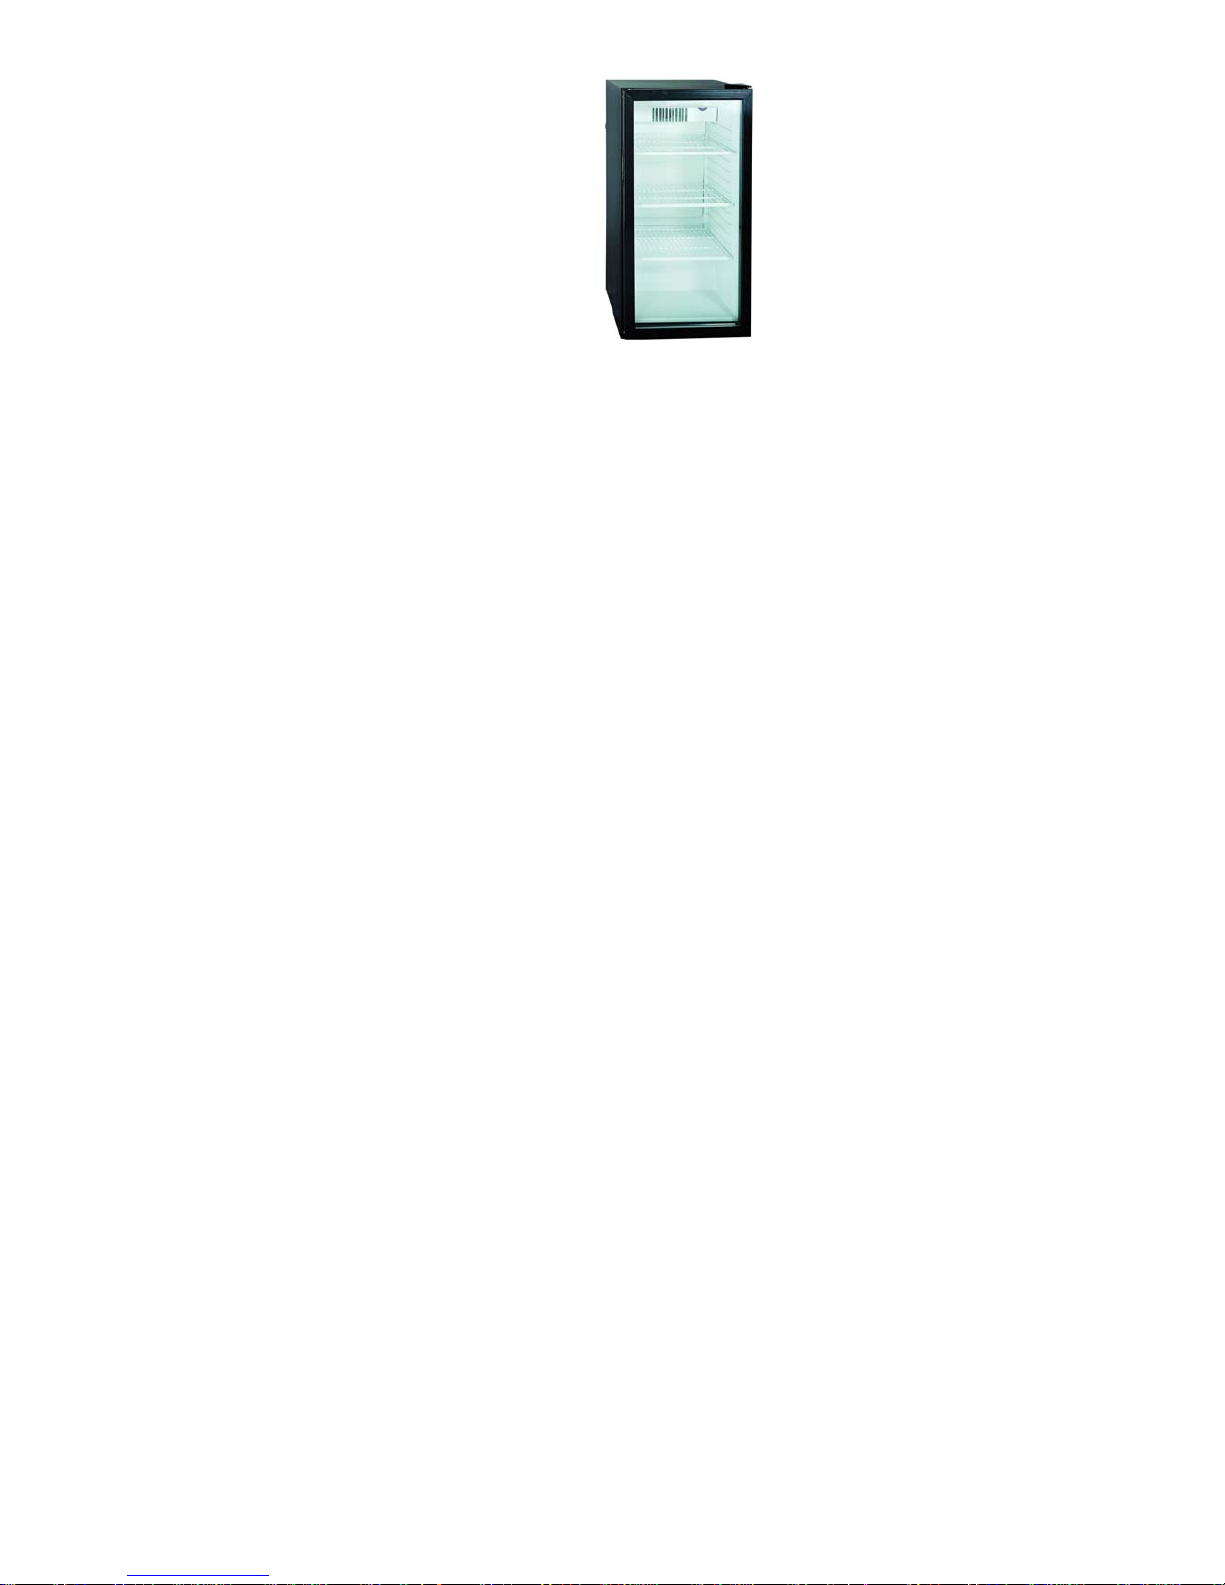
Beverage Cabinet
User’s Manual
Safety precautions
When using this appliance, always exercise the following basic safety precautions.
1. Read all of the instructions before using this appliance.
2. Use this appliance only for its intended purpose as described in this User’s Manual.
3. This cabinet must be properly installed in accordance with the installation instructions before
it is used. See grounding instructions in the installation section.
4. Never unplug your cabinet by pulling on the power cord. Always grasp the plug firmly and
pull straight out from the outlet.
5. Unplug your cabinet before cleaning or making any repairs.
Note: If for any reason this product requires service, we strongly recommend that a certified
technician performs the service.
6. Repair or replace immediately all electric service cords that have become frayed or otherwise
damaged. Do not use a cord that shows cracks or abrasion damage along its length, the plug
or the connector end.
7. This cabinet should not be recessed or built-in an enclosed cabinet. It is designed for
freestanding installation only.
8. If your cabinet is to be discarded, we recommend that you remove the door and leave the
shelves in place. This will reduce the possibility of danger to children.
9. Do not operate your cabinet in the presence of explosive fumes.
10. Do not load the freezer with the food before desired temperature has not been reached to
avoid bacteria reproduction.
Please save these instructions.
Danger!
Risk of child entrapment. Before you discard your old cabinet, take off the doors so that children
may not easily climb inside.
Thank you for using our product. This manual
will guide you in getting the best use of your
cabinet.
Remember to record the model and serial
number. They are on a label in back of the
cabinet.
Model number
Serial number
Date of purchase
Staple your receipt to your manual. You will need it to obtain warranty service.
Page 2

Table of contents
Safety precautions
Parts
Installation
Unpacking
Leveling
Proper air circulation
Electrical requirements
Features and use
Initial set up
Temperature adjustment
Shelving
Interior light
Normal operating sounds
Proper care and cleaning
Cleaning and maintenance
Power interruptions
Vacation and moving care
Lamp replacement
Troubleshooting
Parts
5
1. Lampe shade
2. Thermostat knob
3. Light switch
4. Handle
5. Leveling bolt
6. Shelf
4
6
1
3
2
Page 3

Installation
Unpacking
1. Remove all packaging material, including the foam base and all adhesive tape holding the
cabinet accessories inside and outside. Slide out and remove plastic or foam guard used to
secure the compressor from shipping damage due to vibration and shock.
2. Inspect and remove any remains of packing, tape or printed materials before powering on the
cabinet.
Leveling
Your cabinet has 4 leveling bolts located in the front and rear corners of your cabinet. After
properly placing your cabinet in its final position, you can level your cabinet.
z Leveling bolts can be adjusted by turning clockwise to raise or counterclockwise to lower
your cabinet. The cabinet door will close more easily when the leveling bolts are extended.
Proper air circulation
z To assure your cabinet works at the maximum efficiency it was designed for, you should
install it in a location where there is proper air circulation, plumbing and electrical
connections.
z The following are recommended clearances around the cabinet:
Sides: 2” (50mm)
Top: 2” (50mm)
Back: 2” (50mm)
z Do not over fill your cabinet for proper internal air circulation.
Electrical requirements
z Make sure there is a suitable power outlet (250 volts 16 amps) with proper grounding to
power the cabinet.
z Avoid using 3 plug adapters or cutting off the third grounding in order to accommodate a 2
plug outlet. This is a dangerous practice since it provides no effective grounding for the
cabinet and may result in shock hazard.
Install limitations
z Do not install your cabinet in any location not properly insulated or heated. Your cabinet is
not designed to operate in temperature settings below 12°C.
z Locate the cabinet on a hard and flat surface away from direct sunlight or heat source, e.g.
radiators, baseboard heaters, cooking appliances etc. Any floor unevenness should be
corrected by leveling legs located on the front and rear bottom corners of the cabinet.
z Your cabinet is designed for free-standing installation only, not for built-in application.
Page 4

Features and use
Temperature adjustments
z The temperature in the cabinet is controlled by the thermostat according to the ambient
temperature and condition of the food in storage. The thermostat knob can be rotated
clockwise or counter-clockwise between the scale of “0” and “6” (The numerals do not
represent temperature degree, but temperature changes. With the value decreasing or
increasing, the temperature in the refrigerator will go up or down, respectively. If scale “0” is
selected, the appliance will cease operation), It is recommended that the thermostat be set to
position “3” or “4” typical climate conditions, then closer to “0” in summer and to “6” in
winter.
z Verify that the thermostat is properly set before setup and should not be adjusted unless
necessary.
Shelf
z The shelves are designed for both aesthetics and cleaning efficiency. The shelves can be
removed and relocated. Especially, these shelves prevent bottles from contacting the
evaporator.
Light (Figure 2)
z For the sake of decoration and practical operation, a mild light bulb is installed in the cabinet.
The light is controlled by the switch on the fan shield.
Normal operating sounds
z Boiling water, gurgling sounds or slight vibrations that are the result of the refrigerant
circulating through the cooling coils.
z The thermostat control will click when it cycles on and off.
Proper care and cleaning
Cleaning and maintenance
Warning:
To avoid electric shock, always unplug your cabinet before cleaning. Ignoring this warning may
result in fatal or serious injuries.
Caution:
Before using cleaning products, always read and follow manufacturer’s instructions and
warnings to avoid personal injury or product damage.
Page 5
General:
z Prepare a cleaning solution of 3-4 tablespoons of baking soda mixed with warm water. Use
sponge or soft cloth dampened with the cleaning solution to wipe your cabinet.
z Rinse with clean arm water and dry with a soft cloth.
z Do not use harsh chemicals, abrasives, ammonia, chlorine bleach, concentrated detergents,
solvents or metal scouring pads. Some of these chemicals may dissolve, damage and/or
discolor your cabinet.
Door gasket:
z Clean the door gasket once every three months to keep it clean and pliable for proper seal.
Power interruptions
z When occasionally power supply is interrupted due to thunderstorms or other causes, remove
the power cord from the outlet. Wh en power has been restored, plug the power cord to the
outlet.
Vacation and moving care
z For long vacations or absences, unplug the cabinet and clean the cabinet and door gaskets
according to “General cleaning” section.
z The cabinet is always moved vertically to avoid possible damage to the sealed system.
z Attention should be paid to avoid damage of the cooling tubes and refrigerant leaks. Connect
the appliance to the power source 24 hours later.
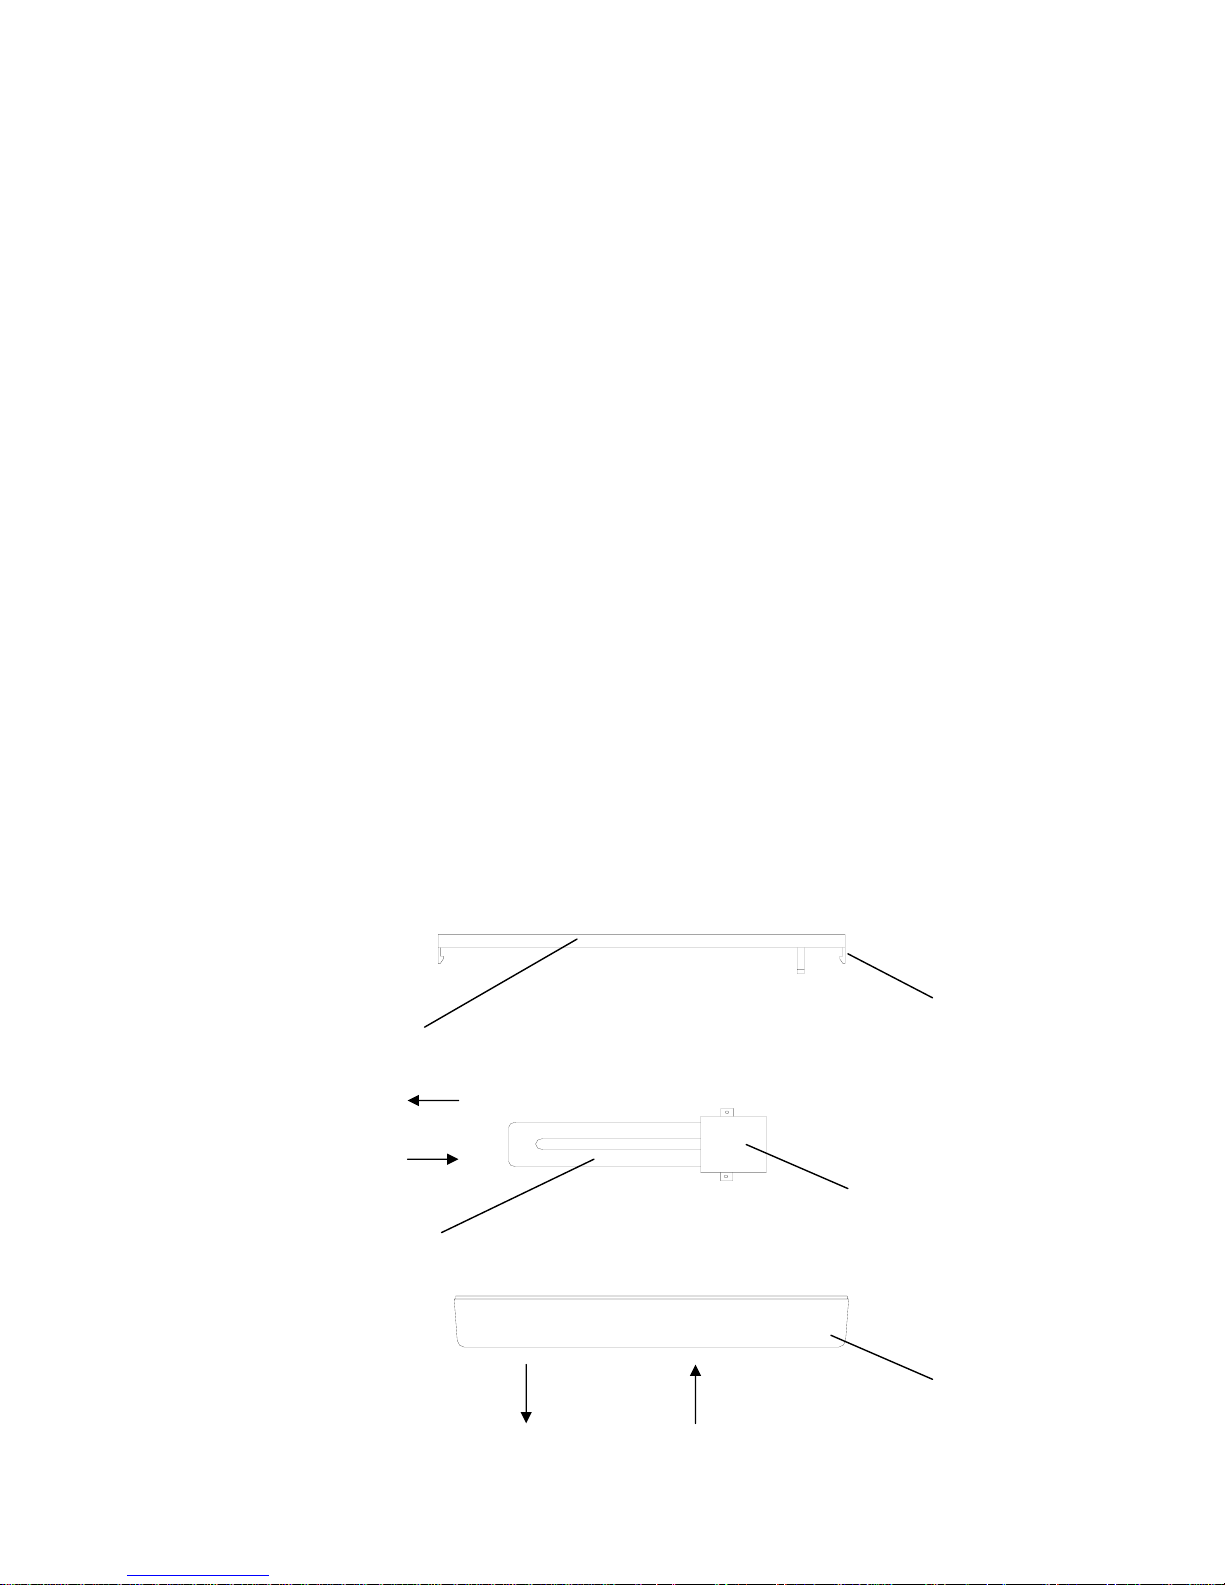
Lamp replacement
Lug
Holder
step 2
step 3
Lamp holder
Lamp tube
Lamp cover
step 1 step 4
Page 6

1. Loosen the lug slightly and remove the lampshade. (Step 1)
2. Remove the U lamp tube from the holder. (Step 2)
3. Place a new lamp tube to the holder. (Step 3)
4. Replace the lampshade. (Step 4)
Troubleshooting
Cabinet does not operate.
z Verify if the cabinet is properly plugged in.
z Verify if the power is supplied.
Inside temperature appears too high.
z Frequent door openings.
z Short storage period
z Verify if the gaskets is in good condition
z The condenser coils need cleaning.
z Verify if the thermostat is properly adjusted.
Wine temperature is too cold.
z Verify if temperature control setting is too cold.
Cabinet runs too frequently.
z This may be normal to maintain constant temperature during high temperature and
humid days.
z Doors may have been opened frequently or for an extended period of time.
z Clean condenser coils.
z Check gasket for proper seal.
z Check to see if doors are completely closed.
Moisture buildup on interior or exterior of the cabinet.
z This is normal during high humidity periods.
z Prolonged or frequent door openings.
z Check door gaskets for proper seal.
Cabinet door does not shut properly.
z Level the cabinet.
z Check for blockages e.g. beverage bottles, shelves.
Page 7

Haier
Armoire à boisson
Notice d’utilisation
Précautions de sécurité
Lors de l’utilisation de cet appareil, prendre toutes les mesures de sécurité, y compris les
suivantes:
1. Lire l’ensemble des instructions avant d’utiliser l’appareil.
2. N’utiliser cet appareil qu’à l’usage pour lequel il est prévu, tel qu’il est indiqué dans la notice
d’utilisation.
3. Cet appareil doit être correctement installé conformément aux instructions d’installation
avant d’être utilisé. Consulter les instructions de mise à la terre dans la section d’Installation.
4. Ne jamais débrancher l’appareil en tirant sur le cordon d’alimentation. Toujours saisir
fermement la fiche et retirer-la directement de la prise de courant.
5. Débrancher l’appareil avant de le nettoyer ou réparer.
Remarque: N’essayez pas de faire les réparations par vous-mêmes. Contactez un agent de
service ou un technicien qualifié pour toute réparation.
6. Réparer ou remplacer immédiatement tous les cordons d’alimentation qui sont frangés ou
endommagés. Ne pas utiliser de cordon qui présente des fissures ou de l’abrasion sur le fil ou
aux extrémités.
7. Ce produit ne doit pas être encastré, et il est conçu pour être installé de façon indépendante.
8. Si vous remplacez votre vieux appareil, mais qui est encore laissé dans la chambre, il est
recommandé d’enlever la porte afin de réduire les dangers potentiels pour des enfants.
9. Ne pas faire fonctionner l’appareil en présence d’émanations explosives.
10. Ne pas introduire de denrée dans l’armoire avant que la température désirée n'est pas atteint
pour éviter la reproduction de bactérie.
Veuillez bien garder cette notice.
Danger!
Les enfants pourraient se retrouver coincés dans l’armoire à boisson. Veuillez retirer la porte et
placer les clayettes à place de manière ce que les enfants ne puissent pas grimper facilement à
l’intérieur.
Merci d’avoir fait l’acquisition de ce matériel
Haier. Cette notice d’utilisation vous permet
une utilisation optimum de l’appareil.
Veuillez prendre note des numéros de modèle et
de série, qui sont inscrits sur une plaquette
apposée sur l’arrière de l’appareil.
Modèle ——————
Numéro de série ——————
Date d’achat ————
Agrafez à cette notice votre facture d’achat, qui devra être présentée pour le service après-vente.
Page 8

Table des matières
Précautions de sécurité
Noms des composants
Installation
Désemballage
Mise à niveau
Circulation d’air adéquate
Caractéristiques électriques
Caractéristiques et opération
Réglage
Ajustements de température
Clayettes
Eclairage interne
Bruits de fonctionnement normals
Entretien et nettoyage
Nettoyage et maintenance
Coupures de courant
Vacances et déménagement
Remplacement de la lampe
Dépannage
Noms des composants
1. Couvercle de la lampe
2. Bouton de thermostat
3. Interrupteur d’éclairage
4. Poignet
5. Pied ajustable
6. Clayette ajustable
Installation
Désemballage
1. Retirer l’ensemble du matériel d’emballage, qui comprend la base en mousse ainsi que
l’ensemble du matériel adhésif qui maintient les accessoires de l’appareil à l’intérieur et à
l’extérieur. Enlever la protection plastique ou en mousse servant à préserver le compresseur de
tout dommange causé par les vibrations.
2. Inspecter et enlever tout restant d’emballage, de scotch ou de matériaux imprimés avant de
brancher l’appareil.
Mise à niveau
z Votre armoire à boisson a quatre pieds ajustables dans les coins avant et arrière de l’appareil.
Page 9

z Tourner les pieds ajustables dans le sens des aiguilles d’une montre afin de surélever
l’appareil et dans le sens inverse pour l’abaisser. La porte de l’armoire se ferme plus
facilement lorsque les pieds sont correctement réglés.
Circulation d’air adéquate
z Pour être sûr que l’appareil fonctionne à son maximum d’efficacité, l’installer dans un
endroit favorable à une bonne circulation d’air et possédant des connexions de plomberie et
d’électricité saines.
z Les indications suivantes cocernant l’espace recommandé autour de l’appareil:
Latéralement…………………..2” (50mm)
Partie supérieure………………2” (50mm)
Arrière…………………………2” (50mm)
z Ne pas trop charger l’armoire à boisson pour garantir une bonne circulation itérieure.
Caractéristiques électriques
z Pour l’alimentation de l’appareil, veuiller à utiliser une prise de courant appropirée (prise de
250 volts, 16 ampère) et sûrement mise à la terre.
z Eviter d’utiliser des adapteurs à trois fiches ou de sectionner la troisième fiche reliée à la terre
dans le but d’utiliser un branchement à deux fiches. Cette pratique pourrait s’avérer
dangereuse dans la mesure où l’appareil n’est pas relié convenablement à la terre, et
risquerait de causer des risques d’électrocution.
Limitations relatives à l’installation
z Ne pas installer l’appareil dans un endroit qui n’est pas convenablement isolé ou chauffé,
comme par exemple un garage, etc. L’appareil n’est pas conçu pour fonctionner à des
températures inférieures à 12°C.
z Choisir un endroit convenable et placer l’appareil sur une surface solide et plane, loin de
sources de chaleur telles que les radiateurs, les éléments chauffants à plinths, les cuisinières,
etc. N’importe quelle inégalité de plancher devrait être corrigée avec les pieds ajustables.
z Ce produit ne doit pas être encastré, et il est conçu pour être installé de façon indépendante.
Caractéristiques et opération
Ajustements de température
z La température du combiné peut être réglée avec le buton de thermostat selon la température
ambiante et l’état de denrée conservée. Le bouton de thermostat peut être tourné dans le sens
des aiguilles d'une montre ou dans le sens inverse en t re l'échelle de «0» et «6 » (les ch i ffres ne
représentent pas les degrés précises de température, mais les changements de température.
Avec la valeur diminuant ou augmentant, la température dans l’armoire sera plus élevée ou
basse respectivement. Si la position «0» est choisie, l'appareil cessera l'opération). Il est
recommandé que le thermostat soit réglé à la position entre «3» et «4» en cas général, et plus
près de «0» en été et de «6» en hiver.
Page 10

z Vérifier que le thermostat est correctement positioné avant l’utilisation. Il est conseillé de ne
pas régler le thermostat à moins qu’il soit nécessaire.
(Figure 1)
Clayettes
z Les clayettes ajustables ayant une belle apparence sont faciles à nettoyer. Elles peuvent être
enlevées et replacées selon votre demandes. En particulier, ces clayettes perment d’empêcher
des bouteilles d'entrer en contact avec le vaporisateur.
Eclairage interne (voire Figure 2)
z Pour garantir une belle apparence et une opération pratique, l’armoire est munie d’une
éclairage douce à l’intérieure. Cette éclairage peut être commandée par l’interrupteur de
lampe situé sur la chicane du ventilateur
Bruits de fonctionnement normals
z Les élements de refroidissement tubulaires font des bruits d’ébullition, des gargouillements et
provoquent de légères vibrations.
z La commande du thermostat émettra un déclic lorsqu’un cycle de marche commence ou
s’arrête.
Entretien et nettoyage
Nettoyage et maintenance
Attention:
Pour éviter les risques d’électrocution, toujours débrancher l’appareil avant de le nettoyer. Le
non-respect de cette mesure peut entraîner des blessures graves ou mortelles.
Précautions:
Avant d’avoir recours à des produits d’entretien, toujours consulter et suivre les instructions et
recommendations précisées par fabricant afin d’éviter toute blessure éventuelle et risque de
dégât de matériel.
Généralité:
z Préparer une solution de nettoyage comportant 3 à 4 cuillerées à soupe de bicarbonate de
soda mélangé à de l’eau chaude. A l’aide d’une éponge ou un tissu doux humecté de
solution de nettoyage, essuyer l’appareil.
z Rincer à l’eau chaude et sécher à l’aide d’un tissu doux.
z Ne pas utiliser de détergents chimiques, abrasives, ou contenant de l’ammoniaque ou du
chlore, ni de solvants ou de tampons à récurer en métal. Certains de ces produits
chimiques peuvent dissoudre, endommager et/ou décolorer l’appareil.
Page 11

Joints de porte :
z Nettoyer les joints de porte tous les trois mois en suivant les instructions générales
fournies. Les joints doivent rester propres et flexibles afin d’assurer une bonne
étanchéité.
Coupures de courant
z Des pannes d’alimentation occasionnelles peuvent survenir à cause d’une tempête ou de
causes autres. Retirer le cordon d’alimentation de la prise CA pendant toute la durée de la
coupure d’alimentation. Lorsque le courant électrique est rétabli, rebrancher le cordon dans la
prise CA.
Vacances et déménagement
z Pendant les périodes de vacances ou d’absence prolongée, débrancher l’appareil et nettoyer
l’appareil ainsi que les joints de porte en suivant les instructions du chapitre «Nettoyage».
z Toujours déplacer l’appareil en position verticale. Ne jamais déplacer l’appareil en position
horizontale. Ceci pourrait endommager le système d’étanchéit é.
z Prendre soins d’éviter des dommages des tubes de réfrigérant et des fuites éventuelles du
réfrigérant. Rebrancher l’appareil 24 heures après.
Remplacement de la lampe
griffe
support
étape 2
étape 3
support de la lampe
lampe
couvercle de la lampe
étape 1 étape 4
1. Détacher les griffes légèrement et enlever le couvercle de la lampe. (étape 1)
2. Enlevez la lampe U du support de la lampe. (étape 2)
3. Replacer une nouvelle lampe au support de la lampe. (étape 3)
4. Remettre le couvercle de la lampe au support. (étape 4)
Page 12

Dépannage
L’appareil ne fonctionne pas:
z Vérifier si la fiche de l’appareil est branché.
z Vérifier si la prise de courant est alimentée.
La température interne est très élevée:
z La porte est ouverte trop fréquemment.
z Les aliments sont récemment introduits.
z Vérifier l’étanchéité des joints.
z Nettoyer la conduite de condenseur.
z Vérifier si le bouton de thermostat est correctement ajusté.
La température interne est très basse:
z Si la température réglée est basse.
L’appareil se met en marche trop fréquemment:
z Il peut s’agir de l’activité normale lorsque la température ou le taux d’humidité sont
élevés.
z La porte a été ouverts trop fréquemment ou pendant une période prolongée.
z Nettoyer la conduite de condenseur.
z Vérifier l’étanchéité des joints.
z Vérifier si la porte est bien fermée.
De la buée se forme sur la surface extérieure de l’appareil:
z Il peut s’agir de l’activité normale lorsque la température ou le taux d’humidité sont
élevés.
z La porte a été ouverte trop fréquemment ou pendant une période prolongée.
z Vérifier l’étanchéité des joints.
La porte ne peut pas être bien fermée:
z Remettre l’appareil à niveau.
z Vérifier s’il y a des obturations, par exemple bouteille, clayette, etc.
Page 13

Haier
Getränkeschrank
Bedienungsanleitung
Sicherheitsvorschriften
Das Gerät immer nach unten beschriebenen Vorschriften bedienen.
1. Lesen Sie vor der Inbetriebnahme dieses Gerätes die Bedienungsanleitung genau.
2. Den Getränkeschrank nur zum beschriebenen Zweck verwenden.
3. Den Getränkeschrank vor der Inbetriebnahme vorschriftsmäßig richtig installieren. Siehe
Erdungshinweise unter Kapitel Installation.
4. Anschlußkabel auf keinen Fall direkt aus der Steckdose herausziehen - Stecker fest halten
und ziehen.
5. Vor der Reinigung und Reparatur den Netzstecker herausziehen.
Hinweis: Reparatur des Getränkeschranks nur durch Fachleute.
6. Beschädigtes Anschlußkabel sofort reparieren oder auswechseln lassen. Anschlußkabel mit
Rissen oder abgenutzte Stecker nicht verwenden.
7. Den Getränkeschrank nicht an die Wand oder in eine verschlossene Kabine einbauen. Das
Gerät nur frei stehend installieren.
8. Alte Gerätetür entfernen, wenn sich das Gerät nach dem Auswechseln in der Nähe von der
Wohnung befindet, um zu verhindern, daß spielende Kinder sich selbst einsperren und damit
in Lebensgefahr kommen.
9. Den Getränkeschrank nicht in der Nähe von leicht explosivem Gas verwenden.
10. Nahrungsmittel keinenfalls in den Kühlschrank beschicken, bevor die innere Temperatur den
vorgeschriebenen Wert für Aufbewahrung der Nahrungsmittel oder Abhaltung von Bakterien
erreicht.
Diese Bedienungsanleitung sorgfältig aufbewahren.
Gefahr!
Alte Gerätetür vor dem Wegschmeißen abnehmen um zu verhindern, daß spielende Kinder sich
selbst einsperren und damit in Lebensgefahr kommen.
Vielen Dank für Ihre Wahl von Haier Produkt. Diese
Bedienungsanleitung sorgfältig lessen und befolgen, um
Ihr Gerät richtig zu verwenden.
Modell- bzw. Serien Nr. an dem Typenschild hinter
dem Getränkeschrank aufschreiben.
Modell Nr. ——————
Serien Nr. ——————
Kaufdatum —————
Der Bedienungsanleitung die Quittung beifügen. Beides bei späteren Wartung innerhalb der
Garantiefrist vorlegen.
Page 14

Inhaltsübersicht
Sicherheitsregeln
Bauteile
Installation
Auspacken
Nivellieren
Richtige Be- und Entlüftung
Elektrische Anforderungen
Eigenschaften und Verwendung
Anfangseinstellung
Temperatureinstellung
Absteller
Innere Beleuchtung
Normales Betriebsgeräusch
Richtige Wartung und Reinigung
Wartung und Reinigung
Stromausfall
Ausser Betrieb und Hinweise bei der Bewegung
Auswechseln der Beleuchtung
Störungen beheben
Bauteile
1. Lampenschirm
2. Thermostat
3. Beleuchtungsschalter
4. Handgriff
5. Nivellierungsstandfüße
6. Einst ell barer Abstel ler
Installation
Auspacken
1. Alle Verpackungen einschließlich Schaumstoffstütze und alle Klebstoffe zur Befestigung der
inneren/äußeren Teile des Getränkeschranks entfernen. Kunststoff oder Schaumstoffschütze,
die vor der Beschädigung des Kompressors durch Vibration und Stoß schützt, entfernen.
2. Vor der Inbetriebnahme überprüfen, ob noch Verpackung, Klebband oder Druckmaterial
bleibt.
Nivellierung
Der Getränkeschrank ist mit vier Ausrichtungsfüßen versehen, die sich an der vorderen und
Page 15

hinteren Ecke des Getränkeschranks befinden. Den Getränkeschrank nach dem endgültigen
Aufstellen nivellieren.
z Die Ausrichtungsfüße in die Uhrzeigerrichtung drehen und den Getränkeschrank dadurch
erhöhen; die Ausrichtungsfüße in die Gegenuhrzeigerrichtung drehen und den
Getränkeschrank dadurch versenken. Die Tür läßt sich leichter zumachen, wenn sich die
Ausrichtungsfüße erstreckt haben.
Richtige Be- und Entlüftung
z Den Getränkeschrank in eine Umgebung mit guter Be- und Entlüftung, richtigen
Rohrleitungen und elektrischen Verbindungen einsetzen, um die gewünschte maximale
Leistung zu erzielen.
z Spezifikation der empfohlenen Zwischenräume um den Getränkeschrank:
Seiten..…….2’’(50mm)
Oben……... 2’’(50mm)
Hinten…….2’’(50mm)
z Den Getränkeschrank nicht überfüllen, um gute Be- und Entlüftung sicherzustellen.
Elektrische Anforderungen
z Eine angemessene Steckdose (250V, 16A) mit richtiger Erdungsmaßnahme ist nötig.
z Vorschriftsmäßig geerdete dreiadrige Schutzkontakt-Steckdose darf keinen Fall geschnitten
oder ausgebaut werden, da sonst keine rationelle Erdung gesichert werden und dadurch
Stromschlag verursacht werden kann.
Installationsbeschränkungen
z Den Getränkeschrank nicht in eine Umgebung ohne richtiger Isollierung oder Erwärmung
etwa Garage verwenden. Die Umgebungstemperatur darf nicht niedriger als 12°C sein.
z Den Getränkeschrank auf den harten und ebenen Boden aufstellen und vor
Sonnenbestrahlung oder Wärmequelle etwa Heizkörper, Bodenhitzer, Kochgeräte usw
schützen. Unebenheiten müssen durch die Ausrichtungsfüße, die sich an der
vorderen/hinteren Ecke des Getränkeschranks befinden, ausglei che n.
z Der Getränkeschrank ist nur zur unabhängigen Installation entworfen. Einbauen in andere
Geräte ist verboten.
Eigenschaften und Verwendung
Temperatureinstellung
z Die Temperatur im Kühlraum läßt sich durch das Thermostat an der Blende des Ventilators
nach der Umgebungstemperatur und den Nahrungsmitteln einstellen. Die Temperatur wird
sich verringern wenn das Thermostat in die Uhrzeigerrichtung von “0” bis “6” gedreht wird
(Je größer die Zahl ist desto niedriger beträgt die Temperatur. “0” zeigt Ausschalten).
Normalerweise soll die Temperatur im Bereich von den Gängen “3-4” eingestellt werden. Es
empfieht sich, die Temperatur im Sommer etwa niedriger (in die Uhrzeigerrichtung) und im
Winter etwa höher (in die Gegenuhrzei gerrichtung) einzustellen.
z Es empfiehlt sich, vor der Inbetriebnahme die Temperatureinstellung zu prüfen.
Page 16

(Abbildung 1)
Absteller
z Die Absteller sind so entworfen, daß sie gutes Aussehen besitzen und sich leicht reinigen läßt.
Die Absteller können aufwärts oder abwärts in jede Schiene geschiebt werden. Es ist zu
bemerken, daß das Design der Absteller einen Zwischenraum unter den Flaschen ermöglicht,
welches die direkte Berührung der Flaschen vermeidet und bessere Be- und Entlüftung
sicherstellt.
Innere Beleuchtung (Siehe Fig. 2)
z Zum Zweck der Schönheit und der Anwendbarkeit ist das Gerät mit einer Beleuchtung versehen,
die nach Bedarf durch den Beleuchtungsschalter an der Blende des Ventilators betätigt wird.
Normales Betriebsgeräusch
z Kochendes Wasser, gluckerndes Geräusch und leichte Vibrationen sind von dem Fließen der
Kühlmittels durch die Abk ü hll eit un g hergestellt.
z Der Thermostatkontroller wird beim Anfang und Beenden einer Zirkulation klicken.
Richtige Wartung und Reinigung
Wartung und Reinigung
Warnung:
Den Stecker vor der Reinigung des Getränkeschranks aus der Steckdose ziehen, um
elektrischen Schlag zu vermeiden, da sonst Lebensgefahr oder Verletztungen verursachen
werden könnten.
Hinweise:
Vor der Verwendung der Reinigungsmittel die mitgelieferte Hinweise und Warnungen vom
Hersteller genau lesen und befolgen, um Personenverletzung oder Beschädigung der
Gegenstände zu vermeiden.
Allgemeine:
z Die Reinigungslösung von 3-4 Löffeln vorbereiten, die von Natron und warmem Wa sser
gemischt wird. Dann mit von der Reinigungslösung eingeweichtem Schwamm oder
weichem Tuch den Getränkeschrank reinigen.
z Mit klarem Wasser reinigen und mit einem weichen Tuch trocknen.
z Starke chemische Stoffe, Schleifmittel, Ammoniak, Chlorbleichmittel,
Waschmittelkonzentrat, Lösungsmittel sowie Metallabwischflüssigkeit nicht verwenden,
da manche davon den Getränkeschrank auflösen, beschädigen und/oder verfärben lassen
könnten.
Türdichtungen:
Page 17

z Alle drei Monate nach den allgemeinen Hinweisen die Türdichtungen reinigen, um sie
leicht beeinflußen und richtig versiegeln zu lassen.
Stromausfall
z Das Anschlußkabel aus der Steckdose ziehen im Fall von Stromausfall durch Gewitter oder
andere Ursachen. Das Kabel wieder zurück stellten, wenn Strom wiedergegeben wird.
Außer Betrieb und Hinweise beim Bewegen
z Den Netzstecker herausziehen und den Getränkeschrank sowie die Türdichtungen nach den
Vorschriften im Teil “Allgemeine Reinigung” reinigen.
z Den Getränkeschrank immer vertikal bewegen. Schiefes Bewegen des Getränkeschranks ist
verboten, da sonst das Dichtungssystem beschädigt werden könnte.
z Den Schlauch für Kältemittel nicht beschädigen um Leckage zu vermeiden. Den Stecker erst
nach 24 Stunden einstecken.
Auswechseln der Beleuchtung
Klipp
Sockel
Schritt 2
Schritt 3
Fassung
Beleuchtung
Lampenschirm
Schritt 1 Schritt 4
1. Den Klipp leicht nach Außenseite bewegen um die Abdeckung zu entfernen (Schritt 1)
2. Die U-förmige Beleuchtung von der Fassung entfernen (Schritt 2)
3. Die neue Beleuchtung in die Fassung anbringen und befestigen (Schritt 3)
4. Die Abdeckung zurück an den Sockel anbringen (Schritt 4)
Störungen beheben
Page 18

Getränkeschrank läuft nicht:
z Prüfen, ob der Stecker eingesteckt wird.
z Prüfen, ob die AC Steckdose Strom hat.
T emperatur nicht niedrig genug:
z Häufiges Öffnen der Gerätetür.
z Neue Einlegung braucht Zeit, um die gewünschte Temperatur zu erreichen.
z Die Verschließung der Türdichtung prüfen.
z Kondensatorspulen Reinigen.
z Temperatur niedriger einstellen.
Temperatur zu niedrig:
z Unangemessene Tem peratureinstellung
Häufiger Lauf des Kompressors:
z Normal in feuchter Jahreszeit mit hoher Temperatur.
z Häufiges oder langes Öffnen der Tür.
z Kondensatorspulen Reinigen.
z Die Dichtheit der Türdichtung prüfen.
z Prüfen, ob die Türe vollständig geschlossen werden.
Tropfenbildung im Innen oder Außen des Getränkeschranks
z Normal in der Jahreszeit mit hoher Feuchtigkeit.
z Häufiges oder langes Öffnen der Tür.
z Die Dichtheit der Türdichtungen prüfen.
Die Tür kann nicht richtig geschlossen werden.
z Den Getränkeschrank Nivellieren.
z Mögliche Sperrung etwa Flaschen oder Absteller prüfen.
 Loading...