

Haier AW24ES2VHB, AW24ES2VHA, AW18LC2VHB, AW18LC2VHA, AW18ES2VHB Owner’s Manual
...
Ductless Split Air Conditioner
User Manual
Design may vary by model number.
Indoor
AW09ES2VHA
AW12ES2VHA
AW18ES2VHA
AW24ES2VHA
AW07LC2VHA/AW07LC2VHB
AW09LC2VHA/AW09LC2VHB
AW12LC2VHA/AW12LC2VHB
AW18LC2VHA/AW18LC2VHB
!
WARNING
ŢThis system should be installed by a
HVAC professional. Do not attempt to install
the air conditioner by yourself because
incorrect installation may cause
leakage, personal injury or death.
Ţ When abnormalities such as a burnt-smell are
found, immediately power
and contact a licensed contractor.
Ţ Do not obstruct or cover the ventilation grille
on the air conditioner. Do not put
any other things into the inlet/outlet or swing
louver.
Ţ Do not allow children to play with the air
conditioner. Children should never be allowed
to sit on the outdoor unit
0010586611
the main switch
water
Ţ Please read this manual before using the air conditioner.
Ţ Keep this user manual for future reference.
TABLE OF CONTENTS
Cautions and Warnings ................................. 1
Controller Features & Settings ...................... 2
Emergency Operation & Maintenance ........... 5
Troubleshooting ............................................ 6
Limited Warranty .......................................... 7
or
PAGE 1

ENGLISH
11
15
13
17
18
Remote Controller
7
2
3
4
1
5
6
109
8
12
14
16
19
Note:
TURBO/QUIET modes are only available when the unit is under cooling or heating mode (not for auto or fan mode).
Running the unit in QUIET mode for a long period of time
may cause the room temperature to not reach the set
temperature. If this occurs, cancel QUIET mode and set the
fan speed to a higher setting.
3
COOL Button
In COO/ mode, the unit operates in cooling. When FAN is
set to AUTO, the air conditioner automatically adjusts the
fan speed according to room temperature. The
displayed during COOL mode.
4
HEAT Button
In HEAT mode, warm air will blow out after a short period of
the time due to cold-air prevention function. When FAN is
set to AUTO, the air conditioner automatically adjusts the
fan speed according to room temperature. The
displayed during HEAT mode.
5
DRY Button
DR< mode is used to reduce humidity. In DR< mode, when
room temperature becomes lower than temp. setting 2rF,
unit will run intermittently at LOW speed regardless of FAN
setting. The
6
Temperature +/- Buttons
Temp Every time the button is pressed, the temperature
setting increases.
Temp - Every time the button is pressed, temperature
setting decreases.
The operating temperature range is 60rF-86rF (16rC-30rC).
will be displayed during DR< mode.
will be
will be
1
Power Button
Press the ON/OFF button on the remote control to start
the unit.
2
TURBO/QUIET Button
The TURBO function is used for fast heating or cooling.
Press the TURBO/QUIET
control will display the TURBO
side of the remote display and switch the unit to the TURBO
function.
The QUIET function may be used when silence is needed for
fast rest or reading. Press the TURBO/QUIET
again to switch to QUIET mode and the remote control will
display the QUIET
remote display.
Press the TURBO/QUIET
TURBO/QUIET and return to normal operation.
icon on the bottom left side of the
button once and the remote
icon on the bottom right
button
button a third time to cancel
7
AUTO Button
Under the mode of auto operation, the air conditioner will
automatically select Cool, Heat, or Fan operation according
to set temperature. When FAN is set to AUTO the air conditioner automatically adjusts the fan speed according to room
temperature. The
8
FAN Button
Fan speed selection
Press the FAN
as follows:
Remote control:
MED HI
LOW
The air conditioner fan will run according to the displayed fan
speed.
When FAN is set to AUTO, the air conditioner automatically
adjusts the fan speed according to room temperature.
9
Louver SWING Button - Vertical
will be displayed during AUTO mode.
button. For each press, fan speed changes
Display
circulated
AUTO
CONTROLLER FEATURES & SETTINGSPAGE 2
Air Flow Direction Adjustment
Press the SWING UP/DOWN button to choose the position of
the vertical airƫow louvers.
this setting.
The remote control display changes as follows:
0.5h
TIMER ON TIMER OFF TIMER ON-OFF
0.5h 0.5h
0.5h
TIMER OFF-ON
BLANK
ENGLISH
Status display of air ƫow
COOL/DRY:
HEAT:
Caution:
Ţ It is advisable not to keep the vertical louver in the down-
ward position for an e[tended period of time in COOL or
DRY mode, otherwise condensate water may form on the
louver.
Ţ
Note:
When turning the unit on, the remote control will automatically
return the louver to the previous set swing position. When turn-
LQJWKHXQLWRƩWKHORXYHUZLOOURWDWHWRWKHIXOORSHQSRVLWLRQ
prior to closing.
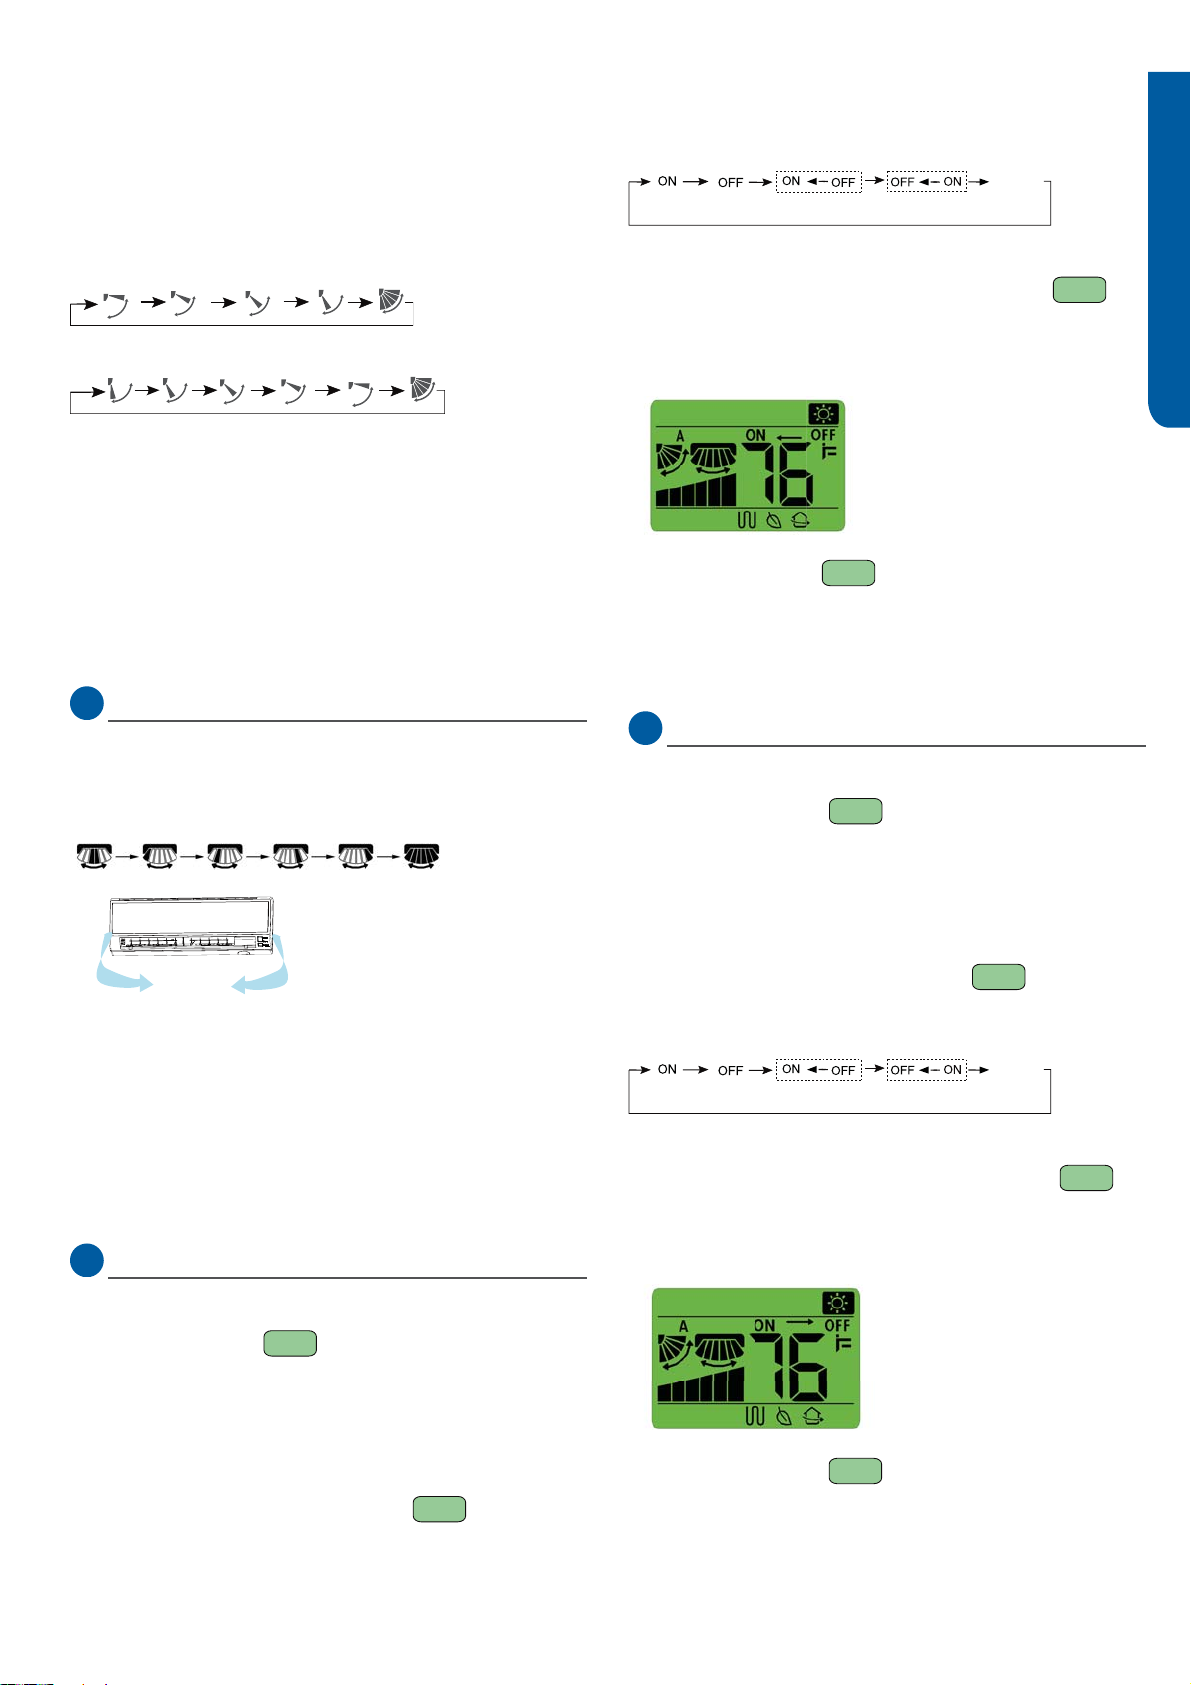
10
Louver SWING Button - Horizontal
Press the SWING UP/DOWN button to choose the position of
the hori]ontal airƫow louvers.
Status display of air ƫow
COOL/DRY/HEAT:
'
Caution:
Ţ When humidity levels are high, condensate water may oc-
cur at the air outlet if all hori]ontal louvers are adjusted to
left or right.
Note:
When turning the unit on, the remote control will automatically
return the louver to the previous set swing position. When turn-
LQJWKHXQLWRƩWKHORXYHUZLOOURWDWHWRWKHIXOORSHQSRVLWLRQ
prior to closing.
11
Timer ON Button
On-OƩ Operation
1. Start the unit and select the desired operating mode.
2. Press the TIMER ON
mode. The remote control will start ƫashing ŝONŞ.
3. Every time the TIMER ON button is pressed the length of
time increases in 0.5 hour increments between hours 0 and
12, and 1 hour increments for times between hours 12 and
24.
4. Once the desired length of time is selected for the unit to
turn on, press the CONFIRM/CANCEL
button to enter the TIMER ON
to conƪrm
Cancel TIMER ON setting:
With a TIMER ON set, press the CONFIRM/CANEL
button once to cancel the TIMER ON.
Turning the unit ON with the TIMER from it being OFF will look
like this on the remote control display:
Note:
Holding the TIMER ON
button down will rapidly cycle
the time. After replacing batteries or a power failure occurs,
the time setting will need to be reset.
According to the Time setting sequence of TIMER ON or
TIMER OFF, either Start-Stop or Stop-Start can be achieved.
12
Timer OFF Button
On-OƩ Operation
1. Start the unit and select the desired operating mode.
2. Press the TIMER OFF
button to enter the TIMER OFF
mode. The remote control will start ƫashing ŝOFFŞ.
3. Every time the TIMER OFF button is pressed the length of
time decreases in 0.5 hour increments between hours 0
and 12, and 1 hour increments for times between hours 12
and 24.
4. Once the desired length of time is selected for the unit to
turn oƩ, press the CONFIRM/CANCEL
this setting.
The remote control display changes as follows:
0.5h
TIMER ON TIMER OFF TIMER ON-OFF
0.5h 0.5h
0.5h
TIMER OFF-ON
BLANK
Cancel TIMER OFF setting:
With a TIMER OFF set, press the CONFIRM/CANEL
button once to cancel the TIMER OFF.
Turning the unit OFF with the TIMER from it being ON will look
like this on the remote control display:
Note:
Holding the TIMER OFF
button down will rapidly cycle
the time. After replacing batteries or a power failure occurs,
the time setting will need to be reset.
to conƪrm
CONTROLLER FEATURES & SETTINGS PAGE 3
 Loading...