

Haier AM09AA1TAA, AM12AA1TAA, AM09AA1GAA, AM12AA1GAA Installation And User Manual
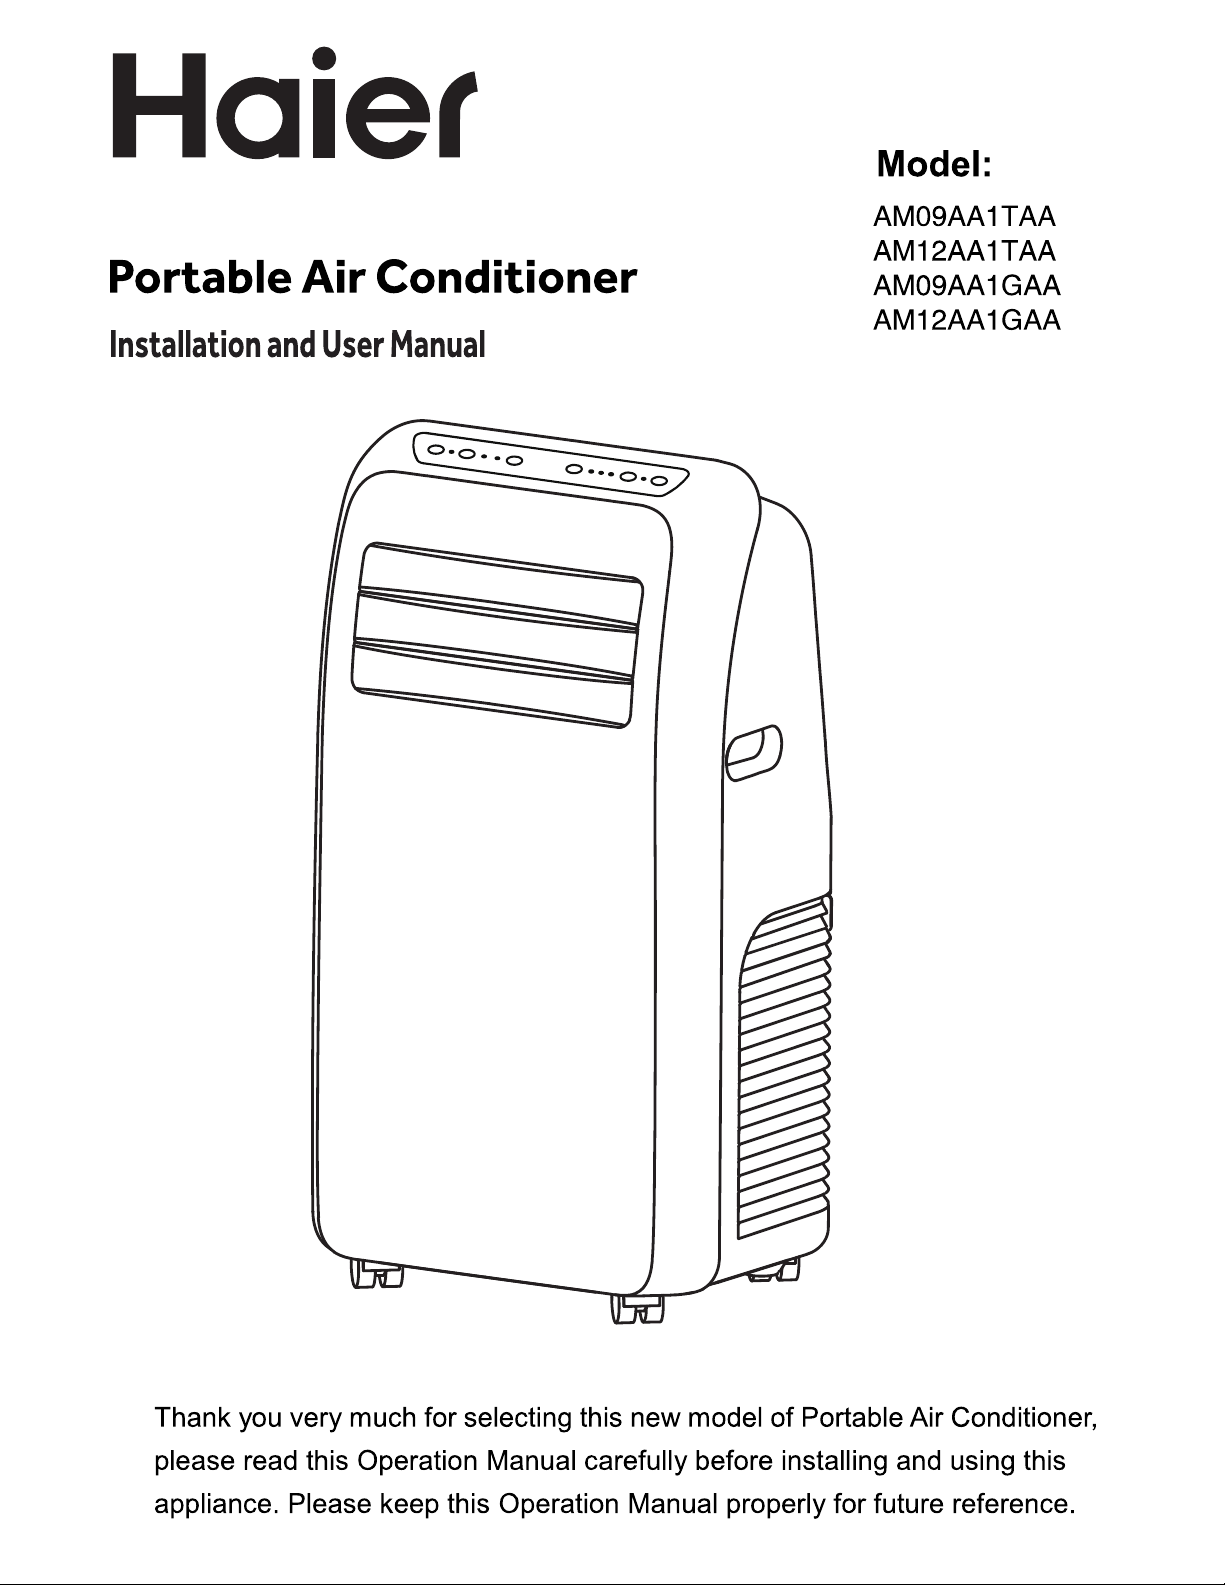

TABLE OF CONTENTS
AIR CONDITIONER SAFETY ....................................................................................................................................... 2
PARTS AND FEATURES .............................................................................................................................................. 3
INSTALLATION REQUIREMENTS ................................................................................................................................ 3
Tools and Parts .................................................................................................................................................. 3
Location Requirements ...................................................................................................................................... 4
Electrical Requirements ...................................................................................................................................... 4
INSTALLATION INSTRUCTIONS ................................................................................................................................. 5
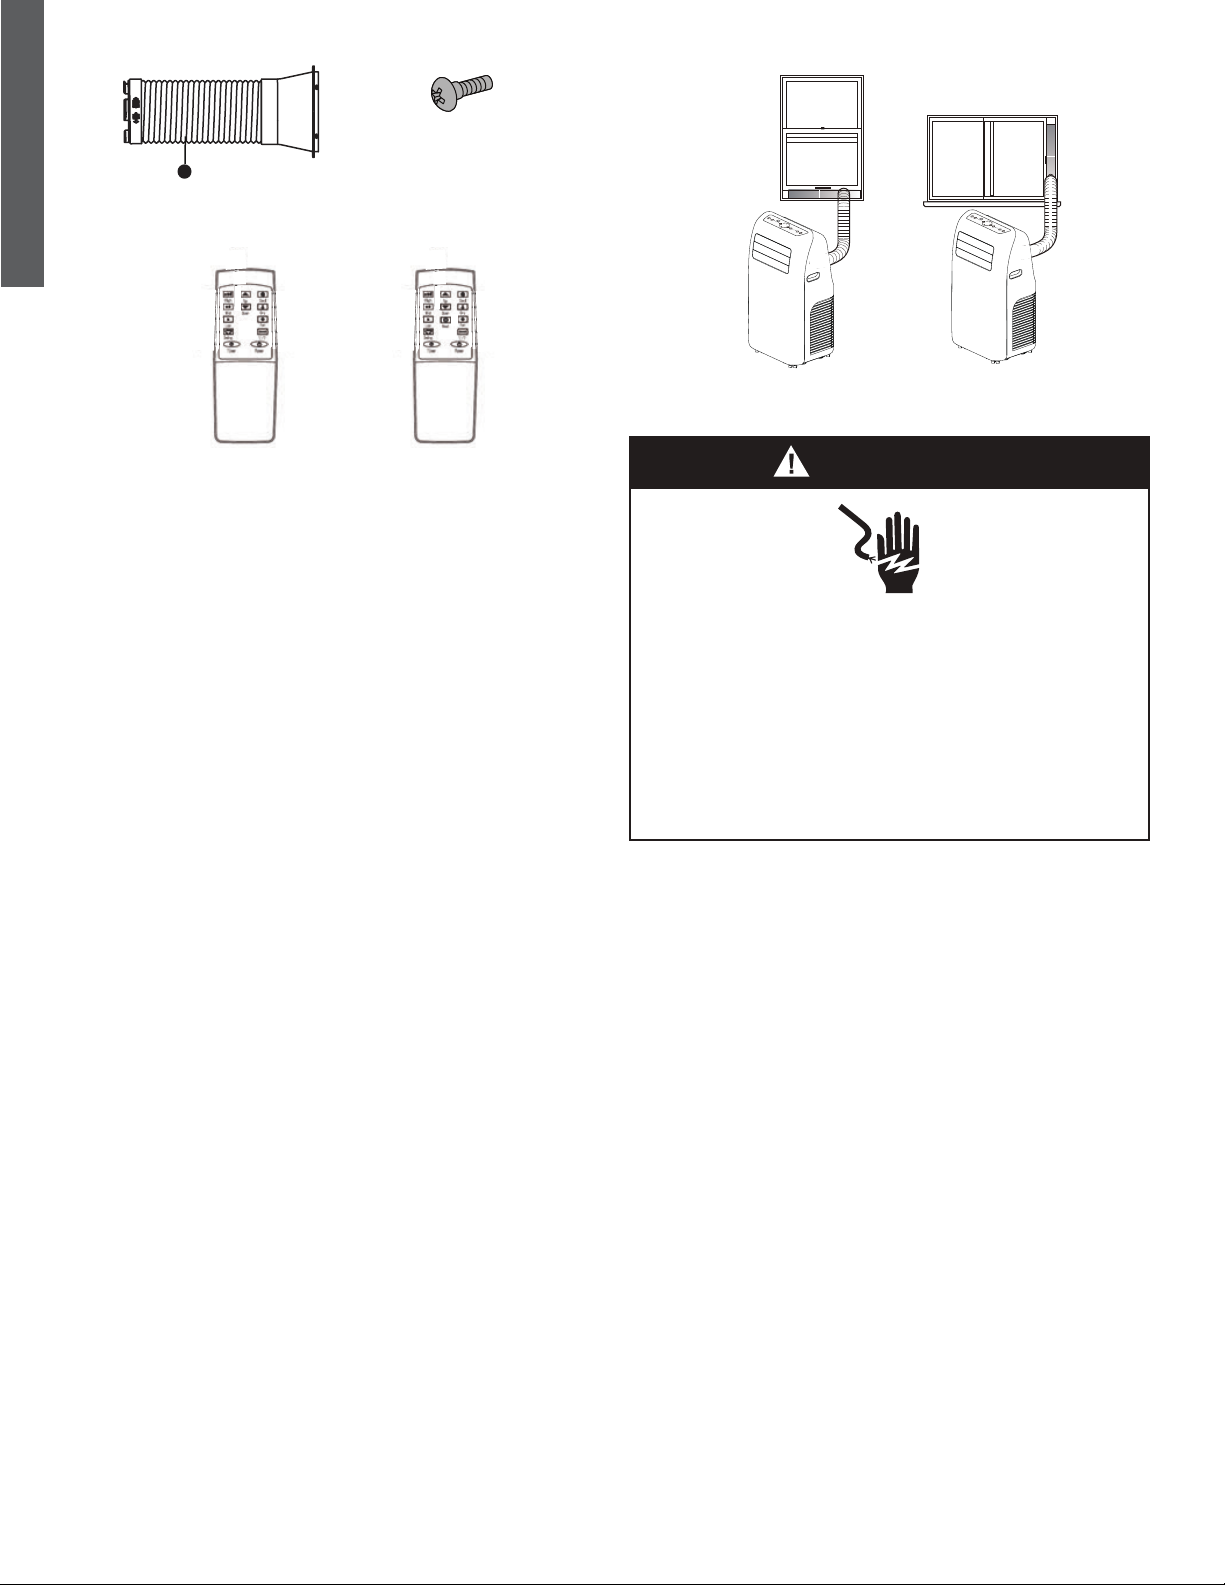
Step 1 - Unpack Air Conditioner ........................................................................................................................... 5
Step 2 - Install Exhaust Nozzle to Main Window Panel ............................................................................................. 5
Step 3 - Attach Exhaust Pipe Assembly To The Window Panel
Step 4 - Connect Exhaust Hose To The Air Conditioner
Step 5 - Complete Installation .............................................................................................................................
CONTROL PANEL ......................................................................................................................................................
Buttons ............................................................................................................................................................
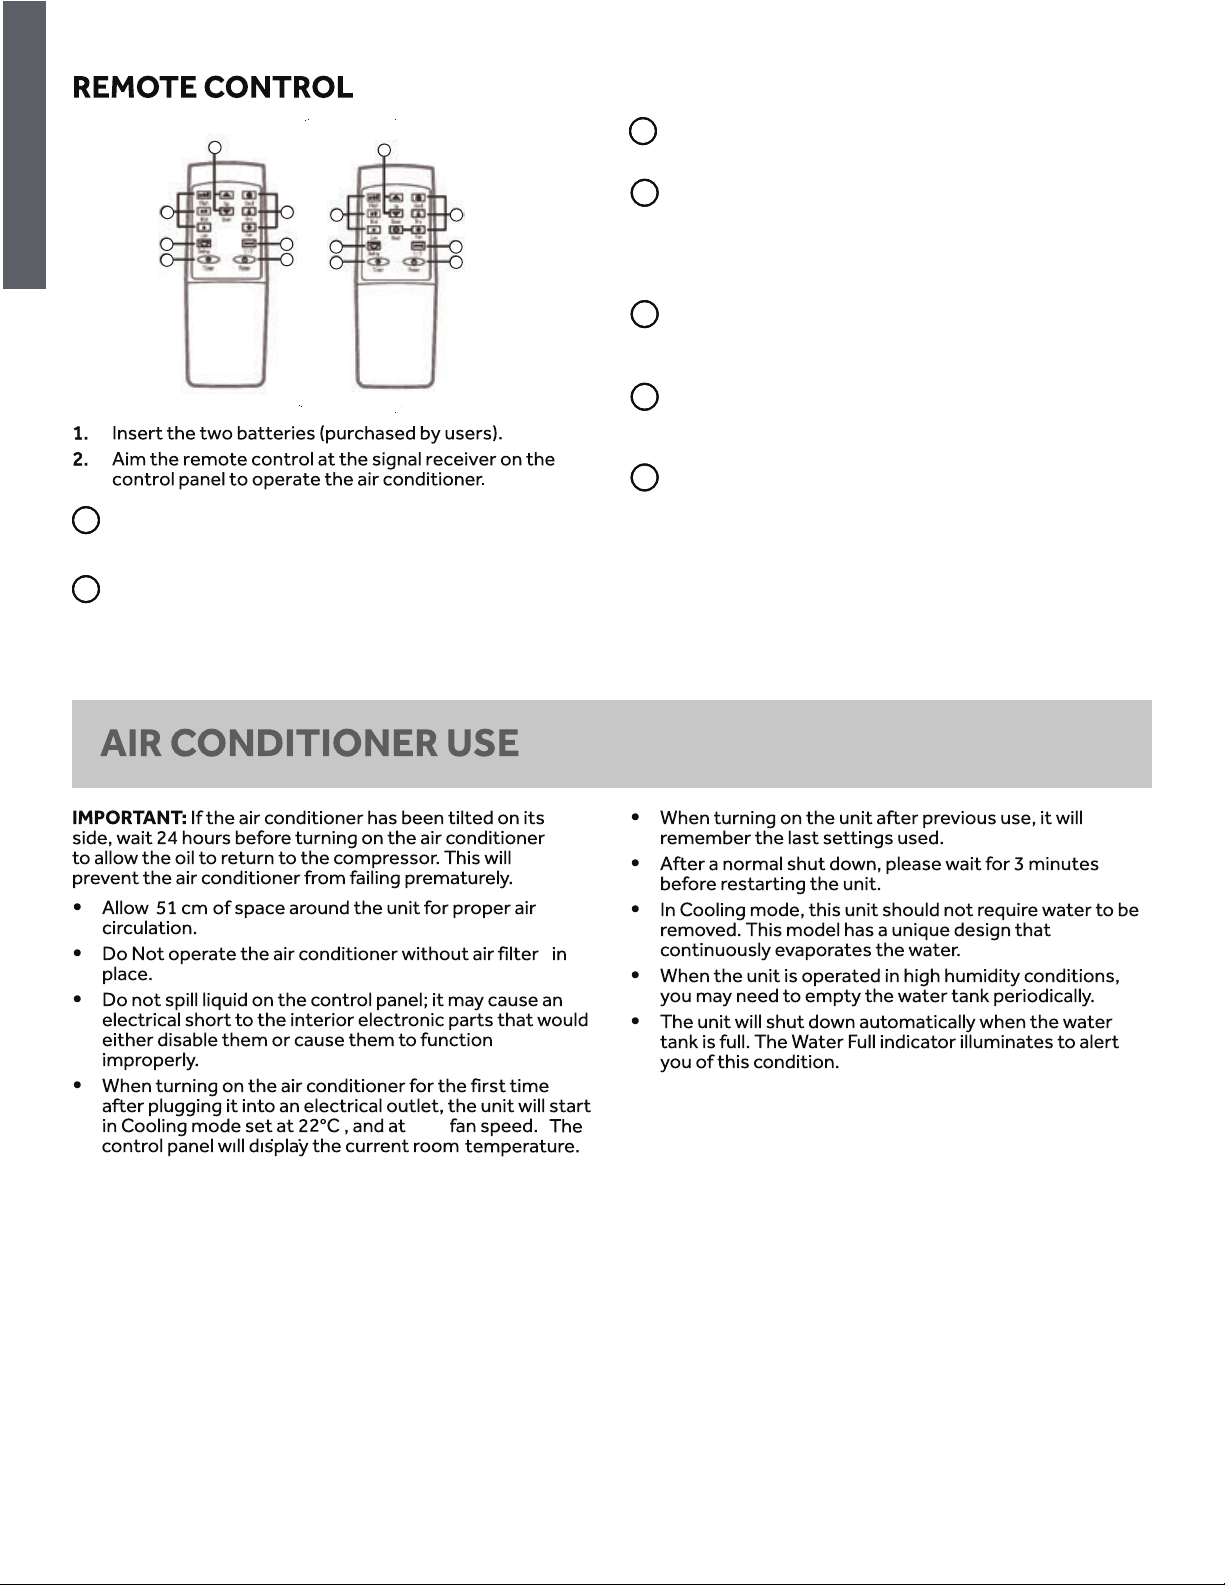
Remote Control .................................................................................................................................................
Indicator Lights .................................................................................................................................................
AIR CONDITIONER USE .............................................................................................................................................
D
RAINAGE INSTRUCTION ......................................................................................................................................... 9
...............................................................................
..........................................................................................
5&6
ENGLISH
6
AIR CONDITIONER CARE .........................................................................................................................................
Cleaning ......................................................................................................................................................... 1
Air Filters ........................................................................................................................................................ 1
Internal Water Tank .......................................................................................................................................... 1
Storage ........................................................................................................................................................... 1
TROUBLESHOOTING .............................................................................................................................................. 1 1
S
ECI ICATION .............................................................................................................................................. 1 2
1
RECORD KEEPING
Thank you for purchasing this GE product. This user
manual will help you get the best performance from your new air
conditioner.
For future reference, record the model and serial number located on
the label on the side of your air conditioner, and the date of
purchase.
Staple your proof of purchase to this manual to aid in obtaining warranty service if needed.
_______________________________________
Model number
_______________________________________
Serial number
_______________________________________
Date of purchase
0
0
0
0
0
1
ENGLISH
AIR CONDITIONER SAFETY
Your safety and the safety of others are very important.
We have provided many important safety messages in this manual and on your appliance. Always read and obey all
safety messages.
This is the safety alert symbol.
This symbol alerts you to potential hazards that can kill or hurt you and others. All safety messages will
follow the safety alert symbol and either the word “DANGER,” “WARNING” or “CAUTION.”
These words mean:
An imminently hazardous situation. You could be killed or seriously injured if you don’t
DANGER
WARNING
CAUTION
All safety messages will tell you what the potential hazard is, tell you how to reduce the chance of injury, and tell you what
can happen if the instructions are not followed.
immediately follow instructions.
A potentially hazardous situation which, if not avoided, could result in death or serious
bodily injury.
A potentially hazardous situation which, if not avoided, may result in moderate or minor
injury.
IMPORTANT SAFETY INSTRUCTIONS
WARNING: To reduce the risk of fire electrical shock, injury to persons, or damage when using the air conditioner,
follow basic precautions, including the following:
• Read all of the instructions before using this appliance.
• Plug into a grounded outlet .
• Do not remove ground
p .
• Do not use an adapter.
• Do not use an extension cord.
• Do not operate the air conditioner if it has a damaged
cord or plug, if it is not working properly, or if it has
been damaged or dropped.
• The air conditioner should be serviced only by
qualified service personnel. Call an authorized service
company for examination, repair, or adjustment.
Disconnect power before cleaning.
•
NOTE: Turning power by pressing the Power button
does NOT disconnect the appliance from the power
supply.
Do not install or use the air conditioner in any area where
•
the atmosphere contains combustible gases or where the
atmosphere is contaminated. Avoid any chemicals coming
in contact with your air conditioner.
Do not store anything directly on top of the air conditioner.
•
Use two or more people to move and install air conditioner.
•
Never operate the air conditioner without the filter in
•
place.
Do not use the air conditioner near a bathtub, shower or
•
wash basin or other wet area.
READ AND SAVE THESE INSTRUCTIONS
2

AND FEATURES
w
Lo
d
i
M
h
g
y
r
D
n
Fa
l
o
Co
Hi
1
2
3
4
7
8
6
9
1
Han dle
2
Air inlet
3
Con trol pan el
4
Wind guide bar
5
Cast er
ON REQUIREMENTS
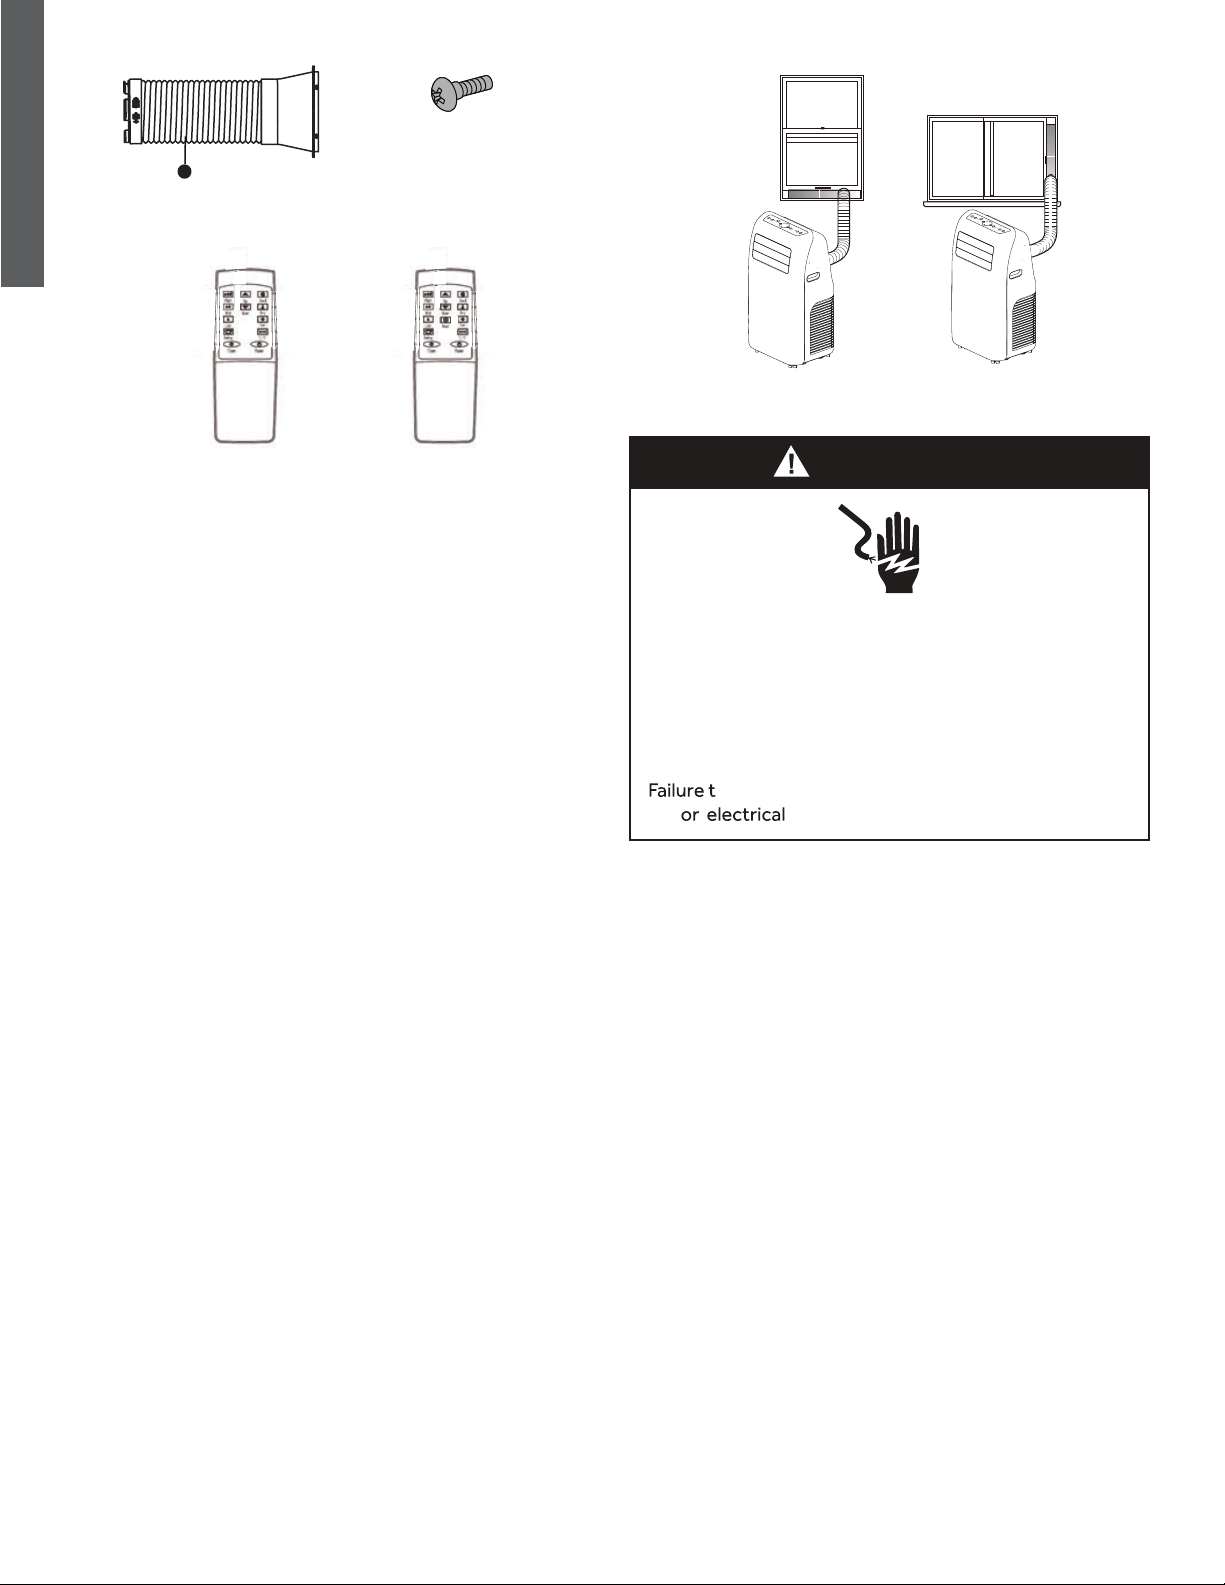
TOOLS AND PARTS
Gather the required tools and parts befiore starting
installation.
5
6
Air inlet
7
Air outlet
8
Deh umidifica tion drainag e nozzle
9
Air inlet grille
PARTS SUPPLIED
TOOLS NEEDED
Flat-blade Screwdriver
Main Window Panel
3
Extension Panel
ENGLISH
11
•
Exhaust pipe assembly
Remote Control for
•
Cooling Only Model
• Screw (2)
for extension panels
1
for nozzle
1
Remote Control for
•
Cooling&Heating
Model
LOCATION REQUIREMENTS
•
Place the air conditioner on a flat level surface in a
location that is at least 51 cm from any wall.
NOTE: A minimum clearance of 51 cm from the air
conditioner to the wall must be maintained to ensure
proper airflow
• Maintain a minimum 51 cm clearance around the air
conditioner to not block airflow
•
Keep the air conditioner free of any obstructions such as
drapes, curtains, blinds, etc.
• The exhaust hose should be free of any obstructions.
• Do not place the air conditioner on an unstable or raised
surface because it could fall and cause damage or injury.
• Do not place the air conditioner in direct sunlight or near
a heat source such as baseboard heaters, stoves, etc.
• The window panel can be installed in a window with a
90 cm to a maximum 130cm opening.
Co
o
l
F
an
D
r
C
ool
F
an
D
r
y
Au
t
o
H
i
g
h
M
i
d
L
o
w
y
A
u
t
o
Hi
gh
M
i
d
L
o
w
ELECTRICAL REQUIREMENTS
WARNING
Electrical Shock Hazard
Plug into a grounded outlet only.
Do not remove the ground contacts from the power
cord plug.
Do not use an adapter.
Do not use an extension cord.
o follow these instructions can result in death,
fire shock.
POWER SUPPLY CORD
Wiring Requirements
• 230 Volt, 50Hz, 16-amp fused grounded outlet
• The use of a time-delay fuse or time-delay circuit breaker
is recommended.
• Use a dedicated circuit only.
NOTE: Do not operate any other electrical
appliances on this circuit or you may trip the circuit
breaker/fuse.
If this power supply cord is damaged, it cannot be repaired. It
must be replaced with a cord from the product manufacturer.
4

REQUIRED GROUNDING METHOD
a
a
This air conditioner must be grounded. The air conditioner is
equipped with a power supply cord that has a grounding
plug. The power supply cord must be plugged into a mating,
grounded outlet, and grounded in accordance with all local
codes and ordinances.
INSTALLATION INSTRUCTIONS
230V
16 Amp
ENGLISH
STEP 1 - UNPACK AIR
CONDITIONER
WARNING
Excessive Weight Hazard
Use two or more people to move and install air
conditioner.
Failure to do so can result in back or other injury.
Remove packaging materials. Save the carton and the
•
foam packaging for storing the air conditioner when not
in use.
NOTE: There are NO packing materials inside the
air conditioner to remove―Do Not open the cabinet.
Properly dispose of/recycle all packing material.
•
Handle the air conditioner gently.
•
Keep the air conditioner upright and level. Do not set the
•
air conditioner on its side, front, back or upside down.
STEP 2 - INSTALL MAIN WINDOW
PANEL AND EXTENSION PANELS
NOTE: Depending on the size of your window opening,
use the main panel and one or both of the extension
panels.
1. Open the window and place the main window panel into
the window.
NOTE: The window assembly is designed to
accommodate either a vertical slide or horizontal
slide window.
Vertical Slide Window
Horizontal Slide Window
Main Window Panel
A
2. Adjust the extension panel to
of the window as shown.
NOTE: Some window installations may require the
extension panels to be trimmed.
3. Use one flat screw to secure the main panel to
the extension panel.
t the width or height
STEP 3 - ATTACH EXHAUST PIPE
ASSEMBLY TO THE WINDOW PANEL
1. Grasp both ends of the exhaust hose and gently pull to
expand the hose.
NOTE: Do not attach additional hoses to extend the
length. This would decrease cooling efficiency and
may damage the air conditioner.
Main Window Panel
A
2. Insert the air exhaust hose into the
fix it with screws
5
window sealing plate,
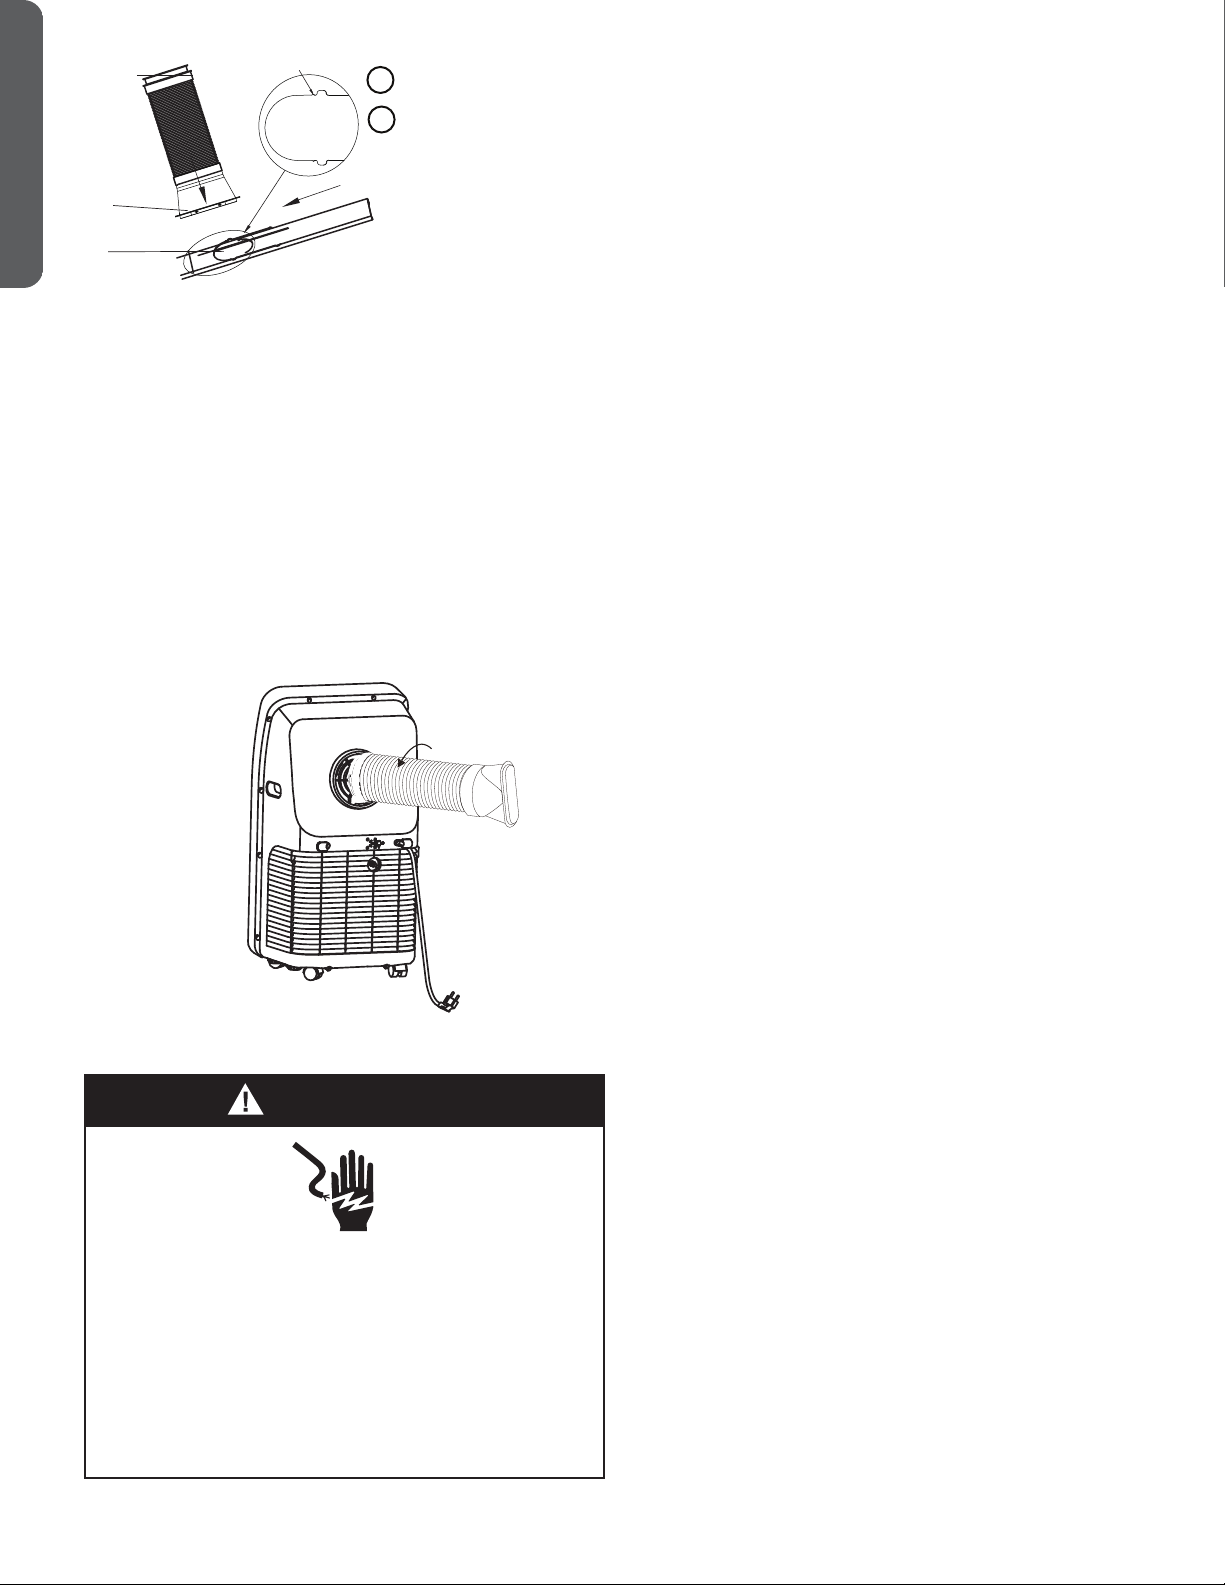
Exhaust pipe assembly
ENGLISH
A
B
Window panel
A
B
STEP 4 - CONNECT EXHAUST HOSE
TO THE AIR CONDITIONER
IMPORTANT: When connecting the hose, the air
conditioner must be close enough to the window that
you will not dislodge the window seal plate. Once the
hose is connected, move the air conditioner 51 cm from the
wall.
1. Align the notches on the connector end of the exhaust
hose with the ridges in the opening on the back of the
air conditioner.
2. Using a counterclockwise motion, screw the exhaust
hose (connector end) into the air outlet located on the
back of the air conditioner.
STEP 5 - COMPLETE INSTALLATION
WARNING
Electrical Shock Hazard
Plug into a grounded outlet only.
Do not remove the ground contacts from the
power cord plug.
Do not use an adapter.
Do not use an extension cord.
Failure to follow these instructions can result in
death, fire or electrical shock.
6

POWER BUTTON
SWING BUTTON
Press this key at any time after turning on the A/C to
swing the wind guide bar automatically.
ENGLISH
TIMER BUTTON
FAN SPEED BUTTON
UP AND DOWN ARROW BUTTONS
three
6
CONTROL PANEL DISPLAY
H
REMOTE CONTROL SIGNAL RECEIVING WINDOW
E
MODE BUTTON
7
ENGLISH
A
B
D
C
B
F
E
G
A
D
C
B
F
E
G
A
POWER KEY
Press the key to turn ON/OFF the A/C.
SWING KEY
Press this key at any time after turning on the A/C to swing
the wind guide bar automatically.
SPEED KEY
C
Press the key to choose high/ low gear wind speed.
TEMPERATURE/ TIME ADJUSTING KEY
D
Press the key at cooling mode to increase/reduce the setting
temperature; press it at timing mode to adjust timing ON/OFF
time; press Up and Down keys simultaneously to switch
Fahrenheit and Centigrade degree temperature.
MODE KEY
E
Press the key to choose cooling, fan, dehumidification and
heating(only for cooling&heating model) .
TIMER KEY
F
Press the key at standby mode to set ON time. Press this key
at ON mode to set OFF time.
℃ /℉ SWITCHING KEY
G
Press the key to switch ℃ and
℉
.
low
8
-
two
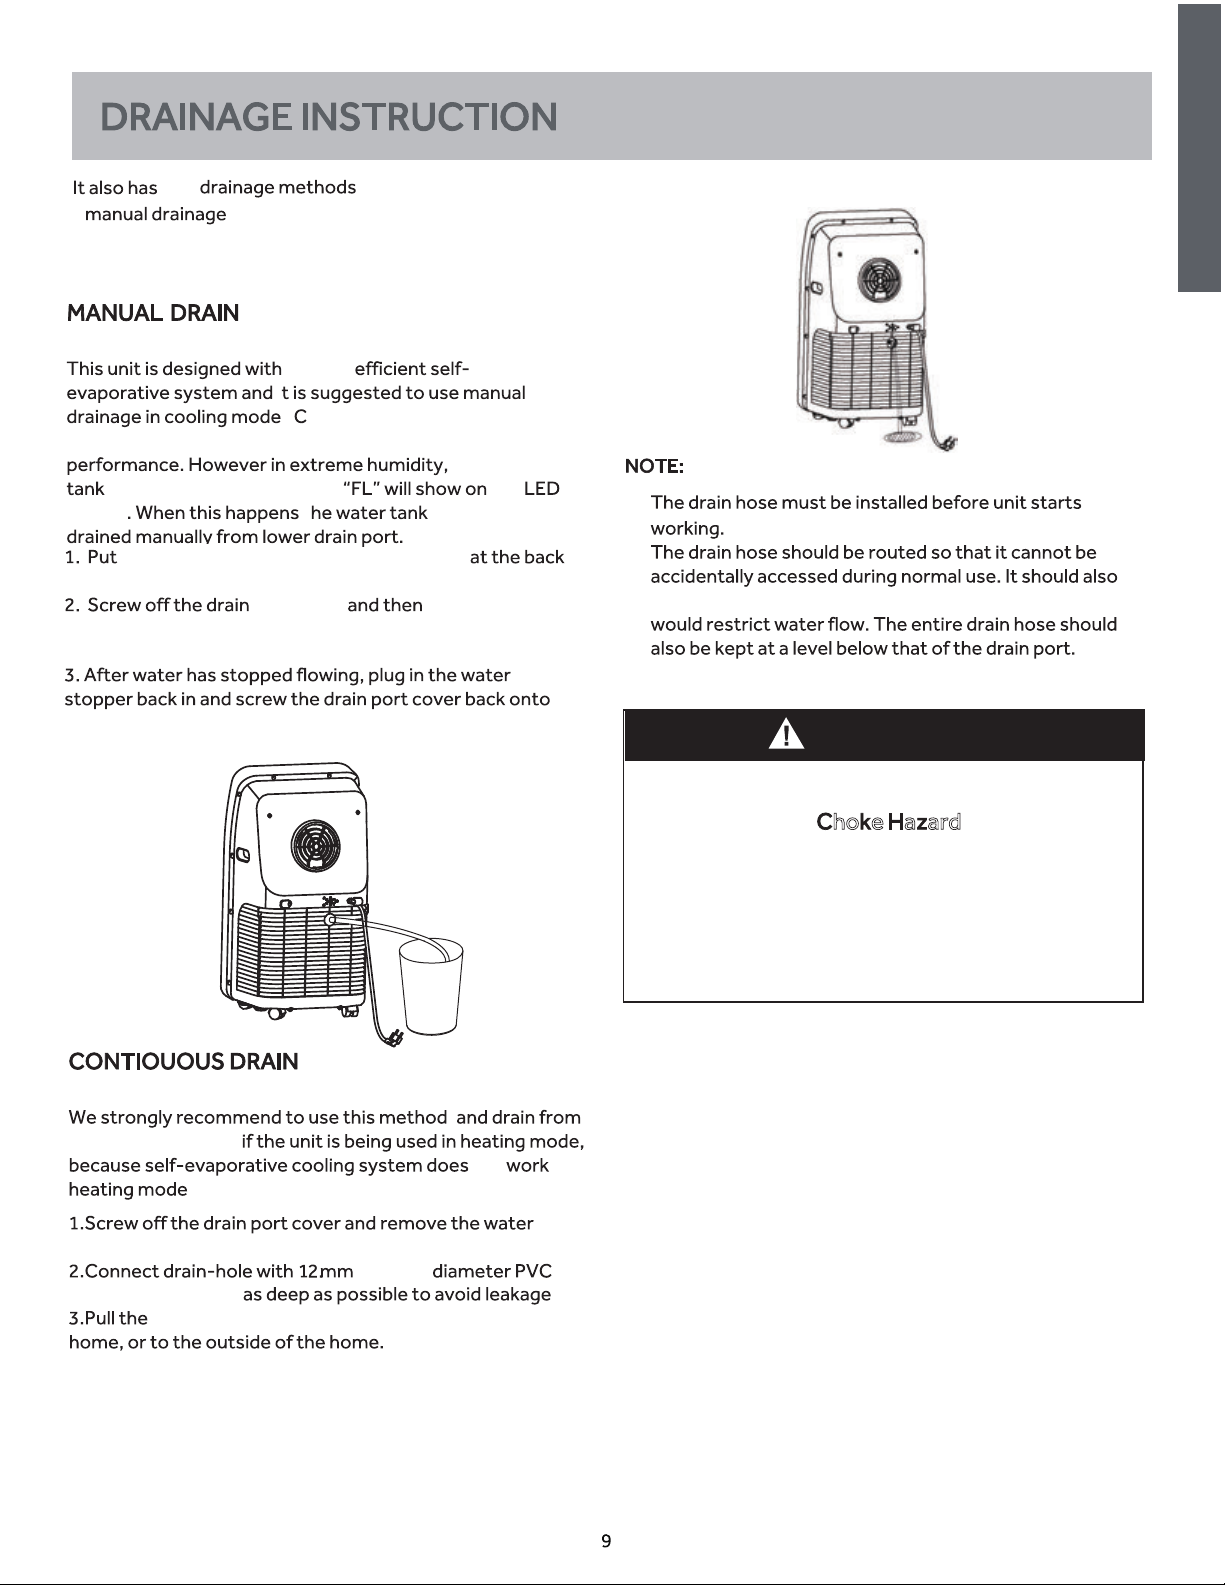
and continuous drainage.
that can be used
a highly
i
. ondensate will recycle in the
unit to cool the condenser and enhance cooling
the water
in the chassis will fill up and the
display t needs to be
a shallow tray below the lower drain port
water wedge
of the unit.
port cover
12mm external diameter PVC drain hose to allow water flow into
the water wedge.
the drain port tightly.
upper
connect drain-hole
ENGLISH
·
·
be laid as straight as possible, with no sharp bends that
WARNING
,
the lower drain port
not in
.
.
internal
drain hose, inserted s .
end of the drain hose to a drain outlet within the
ho e a ard
Keep the drain cover and the water stopper stored
safely, out of the sight and reach of infants and children,
when continuous drainage has been adopted.
AIR CONDITIONER CARE
WARNING
Electrical Shock Hazard
Disconnect power before cleaning.
Failure to do so can result in death or electrical shock.
CLEANING
1. Unplug or disconnect power.
2. Use only a soft cloth dampened with water to clean the
cabinet.
NOTE:
Do not use a liquid or spray cleaner to clean the
•
air conditioner.
DO NOT use chemicals, abrasives, ammonia,
•
chlorine bleach, concentrated detergents,
solvents or scouring pads. Some of these
chemicals/items may damage and/or discolor
your air conditioner.
3. Dry thoroughly with a soft cloth.
4. Plug in or reconnect power.
AIR FILTERS
The air filter should be cleaned at least once a week for your
unit to operate at optimum efficienc
IMPORTANT: Do Not operate the air conditioner without
air filter in place.
1. Unplug or disconnect power.
2. Take out the air inlet grille and pull out the filter screen
at both sides according to the direction shown in the
following figures.
3. Put the filter screen into the warm water (about 40℃) added
with neutral detergent, dry it at a shady place after cleaning.
4. Reinstall the filters
5. Plug in or reconnect power.
STORAGE
If the unit is not being used for a long period of time:
1. Unplug or disconnect power.
2. Drain the water from the water tank. See “Air
Conditioner Care.”
3. Use the original packaging to repack the unit to avoid a
buildup of dust or dirt.
4. Store the air conditioner in a cool, dry location.
ENGLISH
10
ENGLISH
TROUBLESHOOTING
First try the solutions suggested here to possibly avoid the cost of a service call.
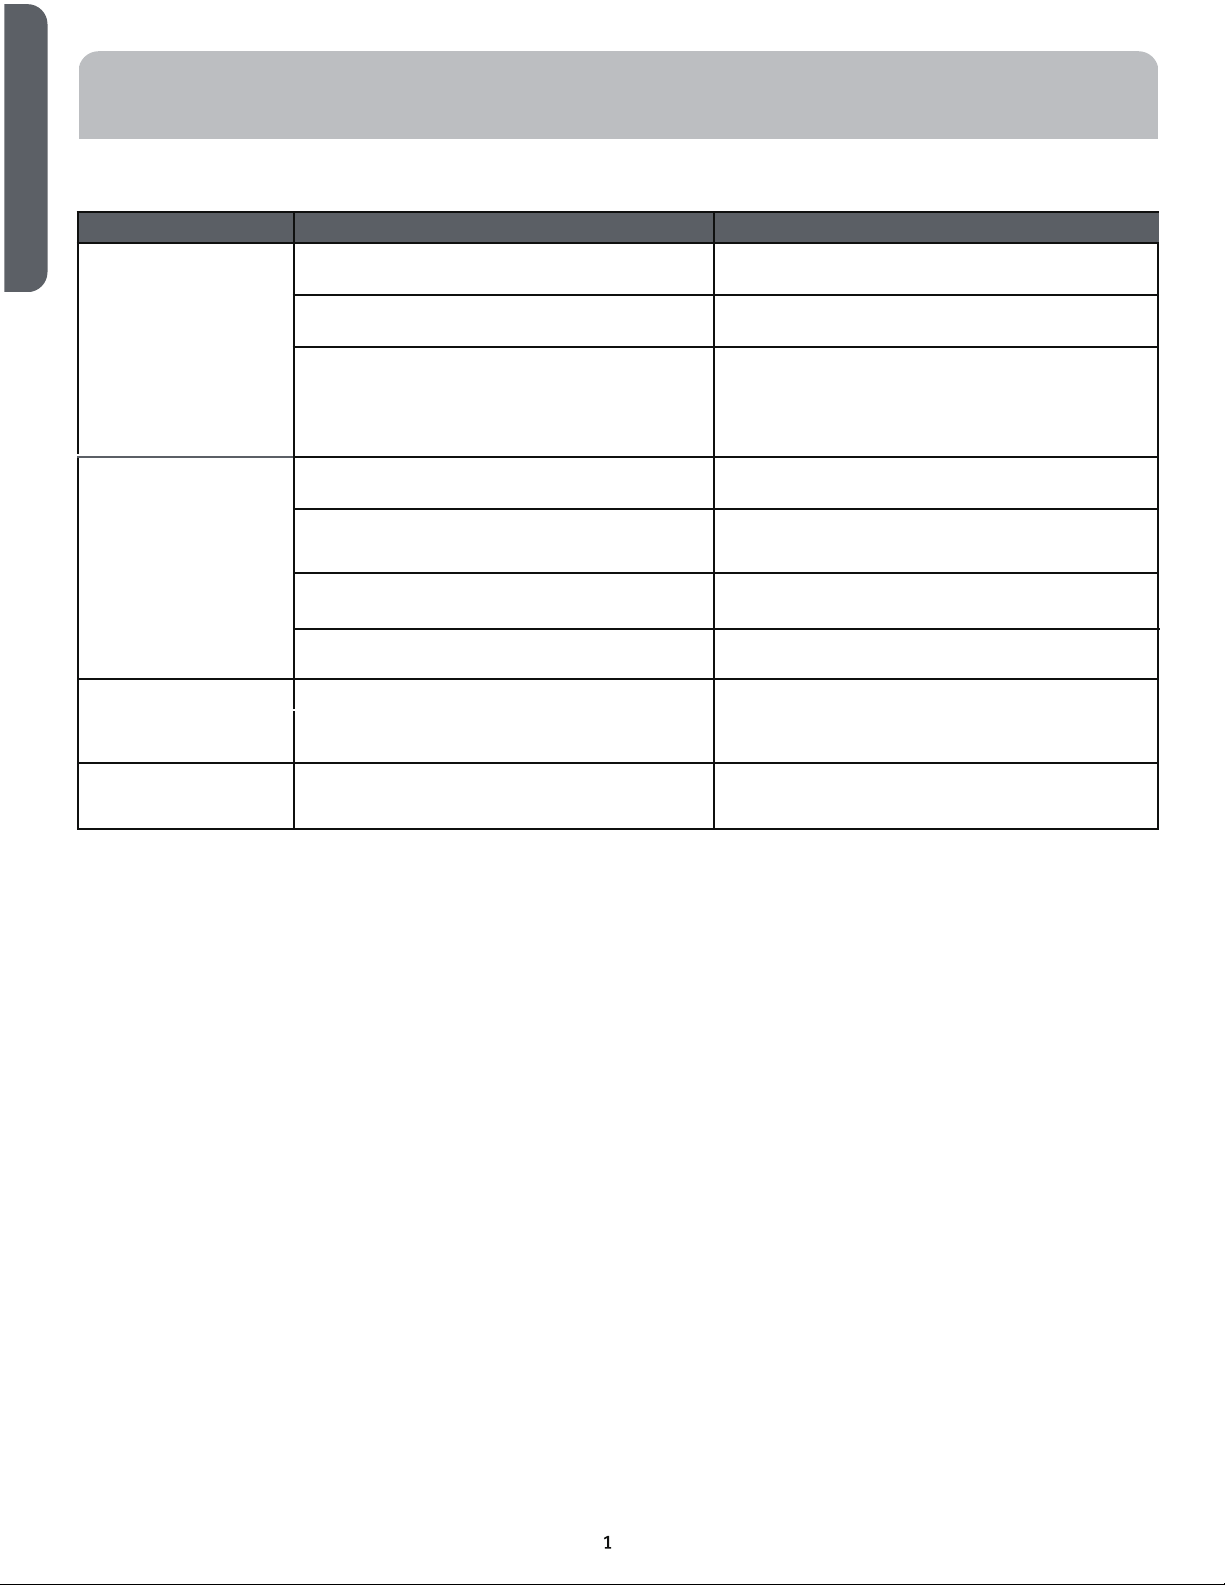
TROUBLE CAUSE SOLUTION
The A/C doesn’t work Not plug in
Plug in
The display panel displays“FL” Restart the A/C after power off anddraining, then it
will become normal
Time OFF function is started
The A/C can be restarted 3 minutes after being
turning off.
The A/C starts
frequently
Big noise of the
A/C
The compressor
doesn’t work
Direct sunlight Draw the curtain
Doors and windows keep open; there are lots
of people or heat source in room
Filter screen is very dirty
Air inlet or air outlet is blocked
The A/C is placed unevenly
Its delay protection is started
Close doors and windows, remove heat source
Clean or replace it
Remove the stem
Place it at even and firm ground,avoid shaking
Wait for 3min., turn on it after temperature
decreases
1
R290
AM09AA2TAA/AM09AA2GAA
0.235
3
0.000705
AM12AA2TAA/AM12AA2GAA
0.245
3
0.000735
ENGLISH
12
Installation et manuel d'utilisation
Modèle:
Merci beaucoup pour la sélection de ce nouveau modèle de climatiseur portable,
Veuillez lire attentivement ce mode d'emploi avant d'installer et d'utiliser Appareil.
Veuillez conserver ce manuel d'utilisation correctement pour référence ultérieure.


Sommaire
SECURITE DU CLIMATISEUR....................................................................................................................................... 2
PIECES ET CARACTERISTIQUES................................................................................................................................. 3
CONDITIONS REQUISES DE L'INSTALLATION ............................................................................................................ 3
Outils et pièces .................................................................................................................................................. 3
Conditions d'emplacement ................................................................................................................................... 4
Exigences de sécurité électrique.......................................................................................................................... 4
INSTRUCTIONS D'INSTALLATION ............................................................................................................................. 5
Etape 1-Déballage du climatiseur ........................................................................................................................... 5
Étape 2-Installer la buse d'échappement sur le panneau de la fenêtre principale ................................................................. 5
Étape 3-Fixez l'assemblage du tuyau d'échappement au panneau de fenêtre
Étape 4-Raccorder le tuyau d'échappement au climatiseur
Étape 5-Installation complète .............................................................................................................................
PANNEAU DE CONTRÔLE..........................................................................................................................................
Buttons ............................................................................................................................................................
Télécommande ..................................................................................................................................................
Voyants lumineux ...............................................................................................................................................
UTILISATION DU CLIMATISEUR .................................................................................................................................
..........................................................................................
.................................................................
5&6
FRANÇAIS
6
INSTRUCTION DE DRAINAGE
ENTRETIEN DU CLIMATISEUR .................................................................................................................................
DÉPANNAGE
La SECIICATION
.................................................................................................................................... 9
Impression d'une page de nettoyage. ................................................................................................................... 1
Filtres à air........................................................................................................................................................ 1
Réservoir d'eau interne...................................................................................................................................... 1
Stockage. ........................................................................................................................................................ 1
.............................................................. ............................................................................................... 1 1
.............................................................................................................................................. 1 2
TENUE
Merci d'avoir acheté ce produit GE.Ce mode d'emploi vous aidera à
obtenir les meilleures performances de votre nouveau climatiseur.
Pour référence ultérieure, enregistrer le modèle et le numéro de
série situés sur l'étiquette sur le côté de votre climatiseur, et la
date d'achat.
Agrafez votre preuve d'achat à ce manuel pour vous aider à obtenir
le service de garantie si nécessaire.
_______________________________________
Numéro de modèle
_______________________________________
Numéro de série
_______________________________________
Date d'achat
0
1
0
0
0
0
1

FRANÇAIS
SECURITE DU CLIMATISEUR
Votre sécurité et la sécurité des autres sont très importantes.
Nous avons fourni de nombreux messages de sécurité importants dans ce manuel et sur votre appareil.Toujours
lire et obéir à tous les messages de sécurité.
C'est le symbole d'alerte de sécurité.
Ce symbole vous avertit des dangers potentiels qui peuvent vous tuer ou vous blesser et d'autres.Tous
les messages de sécurité suivront le symbole d'alerte de sécurité et soit le mot «DANGER», «AVERTISSEMENT» ou «ATTENTION».
Ces mots signifient:
Une situation dangereuse imminente.Vous pourriez être tué ou gravement blessé si
DANGER
vous ne suivez pas immédiatement les instructions.
AVERTISSEMENT
ATTENTION
Tous les messages de sécurité vous diront quel est le danger potentiel, vous dire comment réduire les risques de blessure, et vous dire ce qui peut arriver si les instructions ne sont pas suivies.
AVERTISSEMENT indique une situation potentiellement dangereuse qui, si elle n'est pas
évitée, peut entraîner la mort ou des blessures graves.
PRUDENCEindique une situation potentiellement dangereuse qui, si elle n'est pas
évitée, peut entraîner une blessure mineure ou modérée.
CONSIGNES DE SÉCURITÉ IMPORTANTES
AVERTISSEMENT: Pour réduire le risque de choc électrique, de blessure ou d'endommagement lors de l'utilisation du
climatiseur, suivez les précautions de base, y compris les suivantes:
Lisez toutes les instructions avant d'utiliser cet
• •
appareil.
Brancher uniquement sur une prise de terre.
•
Ne pas enlever les contacts au sol de la fiche du
•
cordon d'alimentation.
N'utilisez pas d'adaptateur.
•
N'utilisez pas de rallonge.
•
Ne jamais utiliser ce produit si le cordon ou la fiche
•
sont endommagés, s'il ne fonctionne pas correctement, s'il est tombé ou endommagé ou s'il est tombé
dans l'eau.
Le climatiseur ne doit être entretenu que par un
•
technicien qualifié.Appelez une compagnie de service
agréée pour l'examen, la réparation ou l'ajustement.
Débranchez l'alimentation avant de le nettoyer.
Remarque: Le fait d'éteindre l'alimentation en appuy-
ant sur le bouton d'alimentation ne déconnecte pas
l'appareil de l'alimentation.
Ne pas installer ou utiliser le climatiseur dans une zone
•
où l'atmosphère contient des gaz combustibles ou où
l'atmosphère est contaminée.Évitez les produits
chimiques entrant en contact avec votre climatiseur.
•
Ne rangez rien directement au-dessus du climatiseur.
•
Il faut deux personnes ou plus pour déplacer et
installer le climatiseur.
•
Ne jamais utiliser le climatiseur sans le filtre en place.
•
Ne pas utiliser le climatiseur près d'une baignoire, d'une
douche ou d'un lavabo ou d'une autre zone humide.
LISEZ ET ENREGISTREZ CES INSTRUCTIONS
2
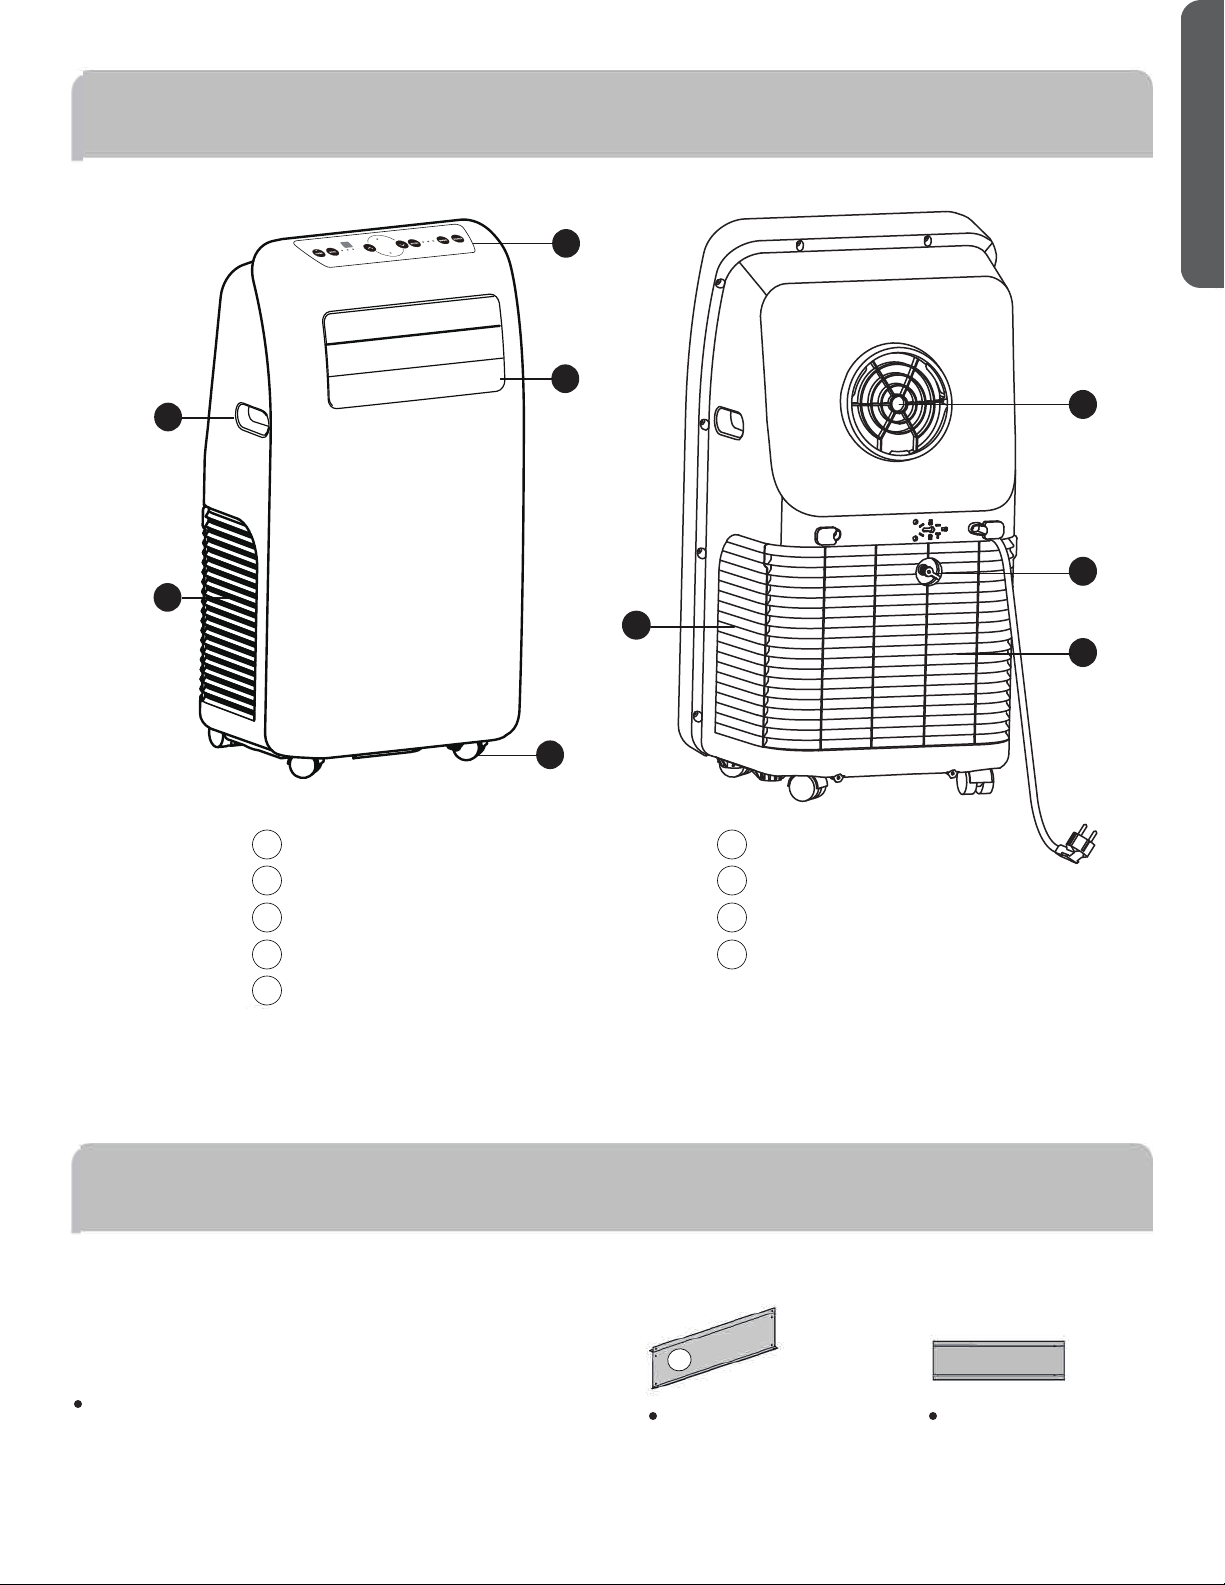
PIECES ET CARACTERISTIQUES
w
Lo
d
i
M
h
g
y
r
D
n
Fa
l
o
Co
Hi
1
2
3
4
FRANÇAIS
7
8
6
9
5
1
Poignée
Entrée d'air
2
Panneau de contrôle
3
Barre de guidage du vent
4
Roulette
5
6
Entrée d'air
Sortie d'air
7
Buse de drainage de déshumidification
8
Grille d'entrée d'air
9
CONDITIONS REQUISES DE L'INSTALLATION
OUTILS ET PICES
Rassembler les outils nécessaires et les pièces
fiois démarrage installation.
PICES FOURNIES
OUTILS NCESSAIRES
Tournevis à lame plate
Panneau de
fenêtre principal
3
Panneau d'extension
FRANÇAIS
H
i
g
h
C
o
o
l
F
a
n
D
r
y
A
ut
o
M
i
d
L
o
w
H
i
g
h
C
o
ol
F
an
D
r
y
A
u
t
o
M
i
d
L
o
w
11
• Ensemble tuyau
• Vis (2)
1 pour les panneaux d'extension
1 pour buse
d'échappement
Télécommande pour le
•
modèle de refroidissement uniquement
Télécommande pour
•
le refroidissement et
le modèle de
chauffage
CONDITIONS D'EMPLACEMENT
•
Placez le climatiseur sur une surface plane à un
endroit situé à au moins 51 cm de tout mur.
Remarque:Un dégagement minimal de 51 cm du
climatiseur au mur doit être maintenu pour assurer
une bonne circulation d'air
•
Maintenir un dégagement minimal de 51 cm autour
du climatiseur pour ne pas bloquer le débit d'air
Gardez l'air conditionné exempt de tout obstacle tel
•
que rideaux, stores, etc.
•
Le tuyau d'échappement doit être exempt de toute
obstruction.
Ne placez pas le climatiseur sur une surface instable
•
ou surélevée parce qu'il pourrait tomber et causer
des dommages ou des blessures.
Ne placez pas le climatiseur à la lumière directe du
•
soleil ou à proximité d'une source de chaleur telle
que des chauffe-plinthes, des poêles, etc.
Le panneau de fenêtre peut être installé dans une
•
fenêtre de 90 cm à une ouverture maximale de
130cm.
EXIGENCES DE SÉCURITÉ ÉLECTRIQUE
AVERTISSEMENT
Risque de choc électrique
Brancher uniquement sur une prise de terre.
Ne retirez pas les contacts au sol de la fiche du cordon
d'alimentation.
N'utilisez pas d'adaptateur..
N'utilisez pas de rallonge.
Le non-respect de ces instructions peut entraîner la
mort, un incendie ou un choc électrique.
LE FIL D'ALIMENTATION ÉLECTRIQUE EST
DÉCONNECT?
Exigences de câblage
•
Prise de courant mise à la terre avec fusible de 230 V, 50
Hz, 16 A
•
L'utilisation d'un fusible temporisé ou d'un disjoncteur
différé est recommandée.
• Utilisez uniquement un circuit dédié..
Remarque:N'utilisez pas d'autres appareils électriques
sur ce circuit ou vous risquez de déclencher le
disjoncteur/fusible.
Si ce cordon d'alimentation est endommagé, il ne peut pas
être réparé.Il doit être remplacé par un cordon du fabricant
du produit.
4
a
MÉTHODE DE MISE À LA TERRE REQUISE
a
Cet air conditionné doit être mis à la terre.Le climatiseur est
équipé d'un cordon d'alimentation qui possède une fiche de
mise à la terre.Le cordon d'alimentation doit être branché
sur une prise d'accouplement, mise à la terre, et mis à la
terre conformément à tous les codes et ordonnances
locaux.
INSTRUCTIONS D'INSTALLATION
ETAPE 1-DÉBALLAGE DU
CLIMATISEUR
AVERTISSEMENT
Risque de poids excessif
Il faut deux personnes ou plus pour déplacer et
installer le climatiseur.
Le défaut de le faire peut entraîner un retour ou une
autre blessure.
Retirez tous les matériaux d'emballage.Conservez le carton
•
et l'emballage en mousse pour ranger le climatiseur lorsqu'il
n'est pas utilisé.
Remarque:Il n'y a pas de matériaux d'emballage à
l'intérieur du climatiseur à enlever ― n'ouvrez pas
l'armoire.
Disposer correctement/recycler tout le matériel d'emballage.
•
Manipulez le climatiseur en douceur.
•
•
Maintenez le climatiseur à la verticale et au niveau.Ne pas mettre
le climatiseur sur le côté, le devant, le dos ou l'envers.
2. Ajustez le panneau d'extension pour qu'il s'adapte à la
3. Utilisez une vis plate pour fixer le panneau principal au
230V
16 Amp
Fenêtre de diapositive horizontale
Panneau de fenêtre
A
principal
largeur ou à la hauteur de la fenêtre, comme illustré.
Remarque: Certaines installations de
fenêtres peuvent nécessiter la rognée des
panneaux d'extension.
panneau d'extension.
FRANÇAIS
ETAPE 2-INSTALLATION DU PANNEAU
DE FENÊTRE PRINCIPAL ET DES PANNEAUX D'EXTENSION
Remarque:En fonction de la taille de l'ouverture de la fenêtre,
utilisez le panneau principal et un ou les deux panneaux
d'extension.
1.
Ouvrez la fenêtre et placez le panneau de la fenêtre
principale dans la fenêtre.
Remarque: L'ensemble de fenêtres est conçu pour
accueillir soit une glissière verticale ou une fenêtre
coulissante horizontale.
Fenêtre de diapositive verticale
Panneau de fenêtre principal
A
ÉTAPE 3-FIXEZ L'ASSEMBLAGE DU
TUYAU D'ÉCHAPPEMENT AU PANNEAU DE FENÊTRE
1.
Saisir les deux extrémités du tuyau d'échappement et
tirer doucement pour agrandir le tuyau.
Remarque:Ne pas attacher de tuyaux supplémentaires
pour prolonger la longueur.Cela diminuerait l'efficacité de
refroidissement et pourrait endommager le climatiseur.
2.
Insérez le tuyau d'échappement d'air dans la plaque
d'étanchéité de la fenêtre, fixez-le avec des vis
5
 Loading...