

Haier 21FA18-T, 21F9D, 21T9D, 21F9K, 21F5A Owner's Manual
...
COLOUR TV RECEIVER
OWNER'S MANUAL
Please read this manual carefully
before operating the unit, and keep
it for future reference.
The Owner's Manual for the Follow Models:
21F9D, 21T9D, 21F9K, 21F5A, 21T5A,
21FA1, 21TA1, 21T9D(D), 21T9D(S),
21T9D(B) , 21FA11, 15F6B, HT-3768,
HT-3728, 21FA1N, 21FA12, 21SF1N

CONTENTS
Before Operation
Basic Operation
Others
Technical operation
War nin g and C aut ions...............................................................................................................
Ins tal lat ion ..................................................................................................................................
Ant enn a con nec tio n ..............................................................................................................
Pre par ati on fo r the r emo te co ntr ol .....................................................................................
Pos iti on of k eys a nd pl ug- ins ..................................................................................................
Fro nt an d sid e pan el ..............................................................................................................
Bac k pan el ..............................................................................................................................5
the r emo te co ntr ol( 1) .....................................................................................................6
the r emo te co ntr ol( 2)......................................................................................................7
Pow er on a nd po wer o ff ............................................................................................................8
Vie win g TV prog ram s ................................................................................................................9
Vie win g TV prog ram s ............................................................................................................9
Pro gra m sca n and scre en di spl ay .......................................................................................10
Tun ing .........................................................................................................................................12
Aut oma tic s earch ...................................................................................................................12
Man ual s ear ch ...................................................................................................................13
MFT .........................................................................................................................................
Ski p..........................................................................................................................................
Adj ust ing t he pictu re an d the s oun d........................................................................................
S.C .C, aut o off and mu te .......................................................................................................
Set tin g the Ti mer........................................................................................................................
Tim er of f ..................................................................................................................................
Set tin g the o ther fun cti on .........................................................................................................21
and s cre en pr otecti on .............................................................................................22
Cur tai n fun ction, cal end ar di spl ay ......................................................................................23
Cha nne l exc hange.................................................................................................................2 4
Set tin g the l ock ..........................................................................................................................25
Cha ngi ng yo ur passw ord ......................................................................................................25
Con nectin g Add iti ona l Eq uip men ts .........................................................................................28
Tro ubl esh oot ing ........................................................................................................................2 9
Spe cif ica tio ns ............................................................................................................................30
2
3
3
3
4
4
Using
Using
14
15
16
Mul tip le pi cture mo des ..........................................................................................................16
Mul tip le so und mode s and s ett ing t he so und ....................................................................17
18
19
19
Sle ep ti mer a nd on time r .....................................................................................................20
Channels appointment....................................................................................... 21
3A filter
Set tin g the l ock ......................................................................................................................26
Gam e...........................................................................................................................................2 7
Gam e con tro l button s and m eth od of p lay ing t he ga me..................................................27
Sav ing m ode .favor ite p rog ram ...........................................................................................11
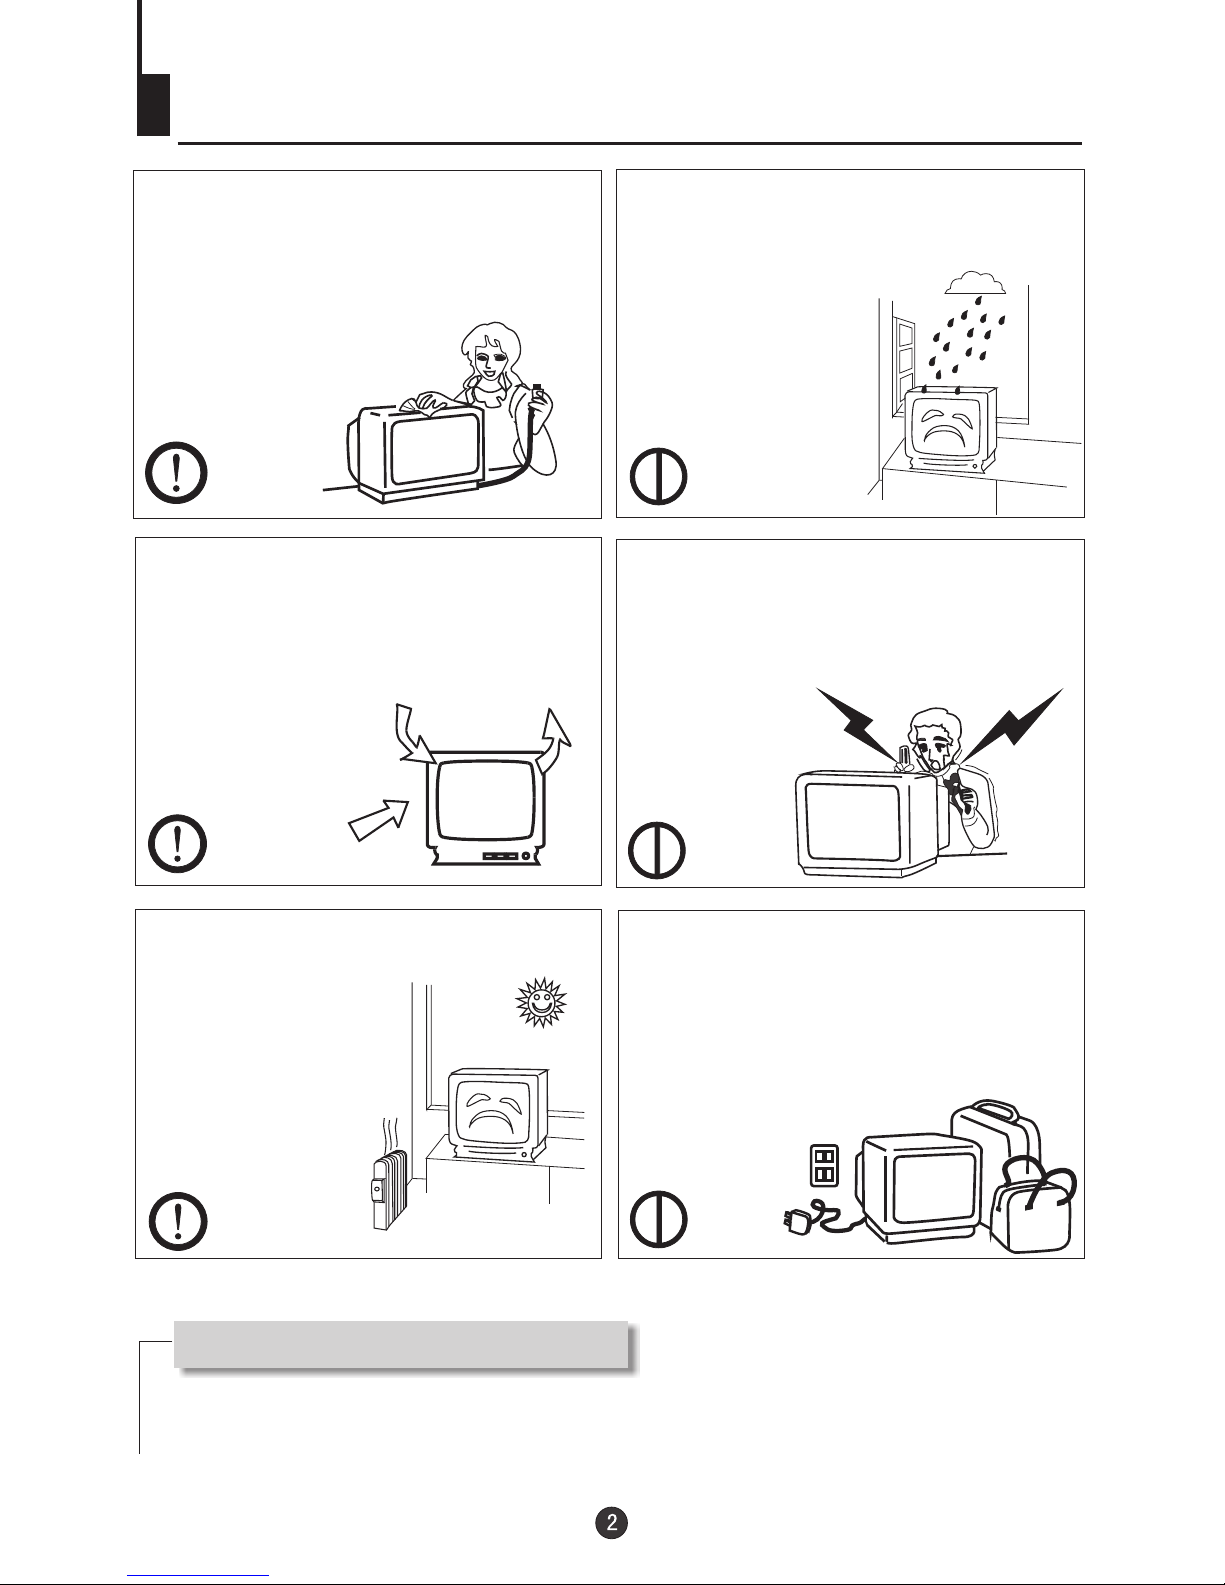
Warning and Cautions
1. When you clean the TV set, please
pull out the power plug from AC outlet.
Don't clean the cabinet and the
screen with benzene, petrol and other
chemicals.
4. To prevent the TV set from firing
and electric shock, don't expose the
TV set to rain or moisture.
2. In order to prolong the using life of
the TV set, please place it on a
ventilated place.
5. Don't open the back cover,
otherwise it is possible to damage the
components in the TV set and harm
you.
3. Don't place the
TV set in the
sunshine or near
heat source.
6. When the TV set isn't going to be
used for long time or it is in thunder
and lightening, please pull out the
plug from AC outlet and the antenna
plug from the cover of the TV set.
Explanation on the display tube
In general, it is not needed to clean the tube surface. However, necessary,
it's surface can be cleaned with a dry cotton cloth after cutting off the power.
Don't use any cleanser. If using hard cloth, the tube surface will be damaged.
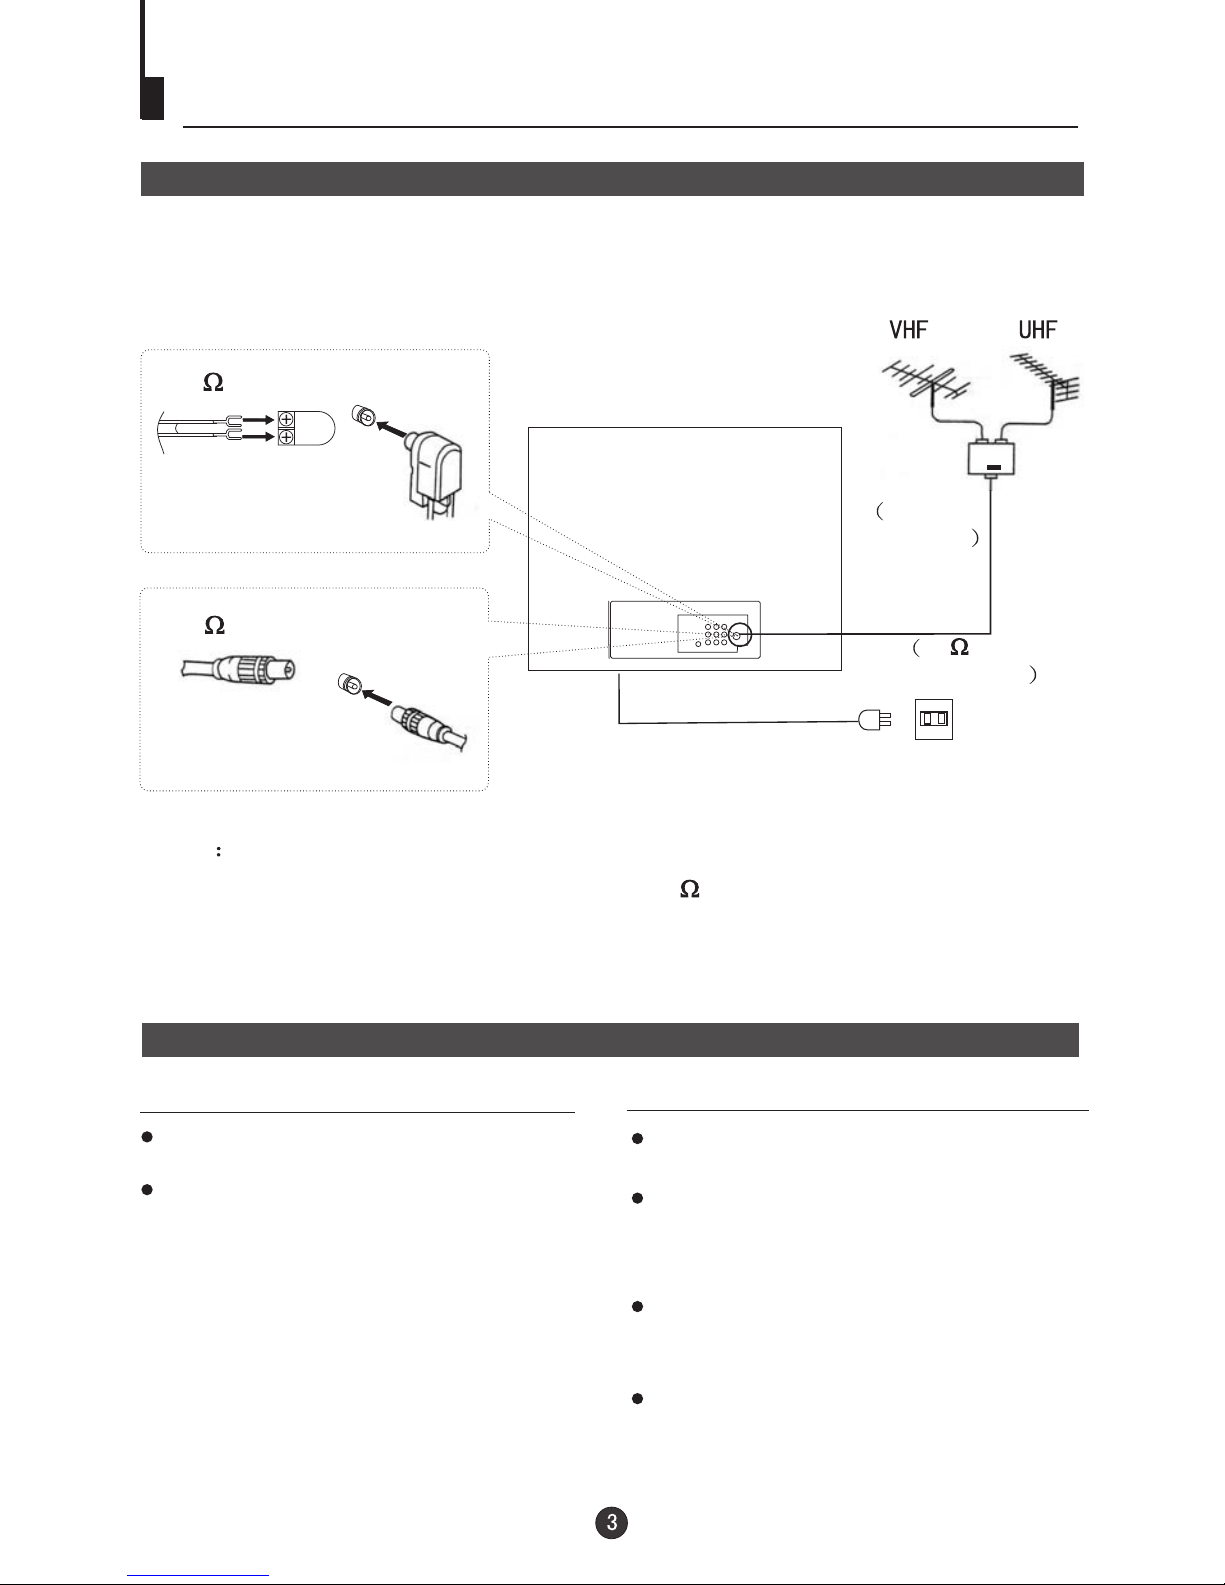
Installation
Antenna connection
Generally speaking, to enjoy a clearer picture, we recommend that you use a CATV
system or an outdoor antenna .In different places, the suitable antenna type and position
are different.
300 twin-lead cable
Antenna adapter
75 coaxial cable
Plug
(additional purchase)
AC power socket
Antenna input
75 standard
coaxial type
Mixer
additional
purchase
Note
* It is recommended that you'd better use 75
* Don't bind antenna cable and electric wire together.
coaxial cable to remove the
disturbance caused by airwave.
Preparation for the remote control
Battery installation
Tips for remote operation
Remove the batteries cover.
The battery life should be about one year
under normal use.
If the remote control will not be used for a
long period of time or when the batteries are
worn out, remove the batteries to prevent
leakage.
Do not throw the batteries into fire.
Dispose of used batteries in the specified
manner.
Do not drop, dampen or disassemble the
remote control.
Insert two size AA batteries matching
the +/-polarities of the battery to the +/marks inside the battery compartment.
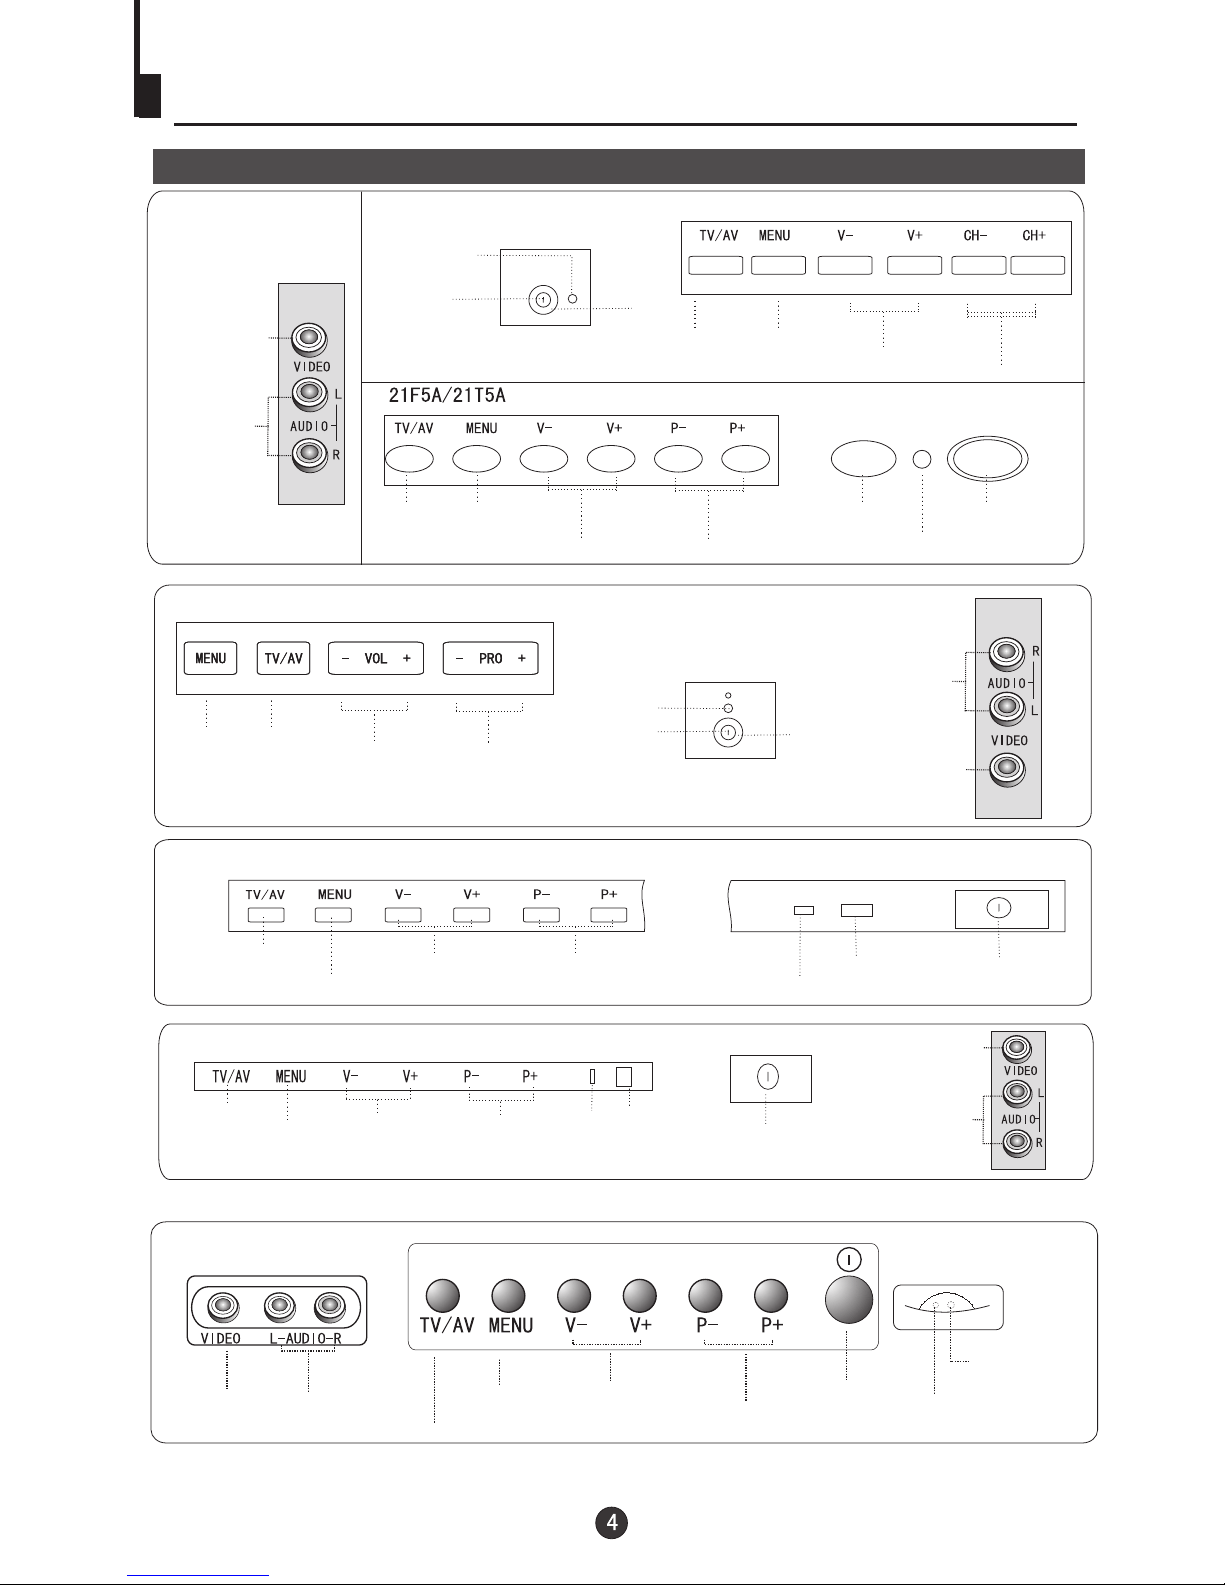
Position of Keys and Plug-ins
Front and side panel
Signal receiver
Power switch
Power
indicator
VIDEO
L/R audio
Menu
Volume down/up
Channel down/up
TV/AV switch
21FA1/21TA1
21F5A/21T5A
21F9K
21F9D/21T9D/21T9D(D)/21T9D(S)/21T9D(B)
21FA1/21TA1
Power switch
Power
indicator
Signal receiver
Channel down/up
Volume down/up
Menu
TV/AV switch
Menu
TV/AV switch
Volume down/up
Channel down/up
Signal receiver
Power switch
Power
indicator
L/R audio
VIDEO
TV/AV switch
Menu
Volume down/up
Channel down/up
Power
indicator
Signal receiver
Power switch
VIDEO
L/R audio
21FA11
Channel down/up
Power
indicator
Signal receiver
Power switch
Volume down/up
Menu
TV/AV switch
HT-3728
Signal receiver
Power
indicator
Power switch
VIDEO
L/R audio
TV/AV switch
Menu
Volume down/up
Channel down/up
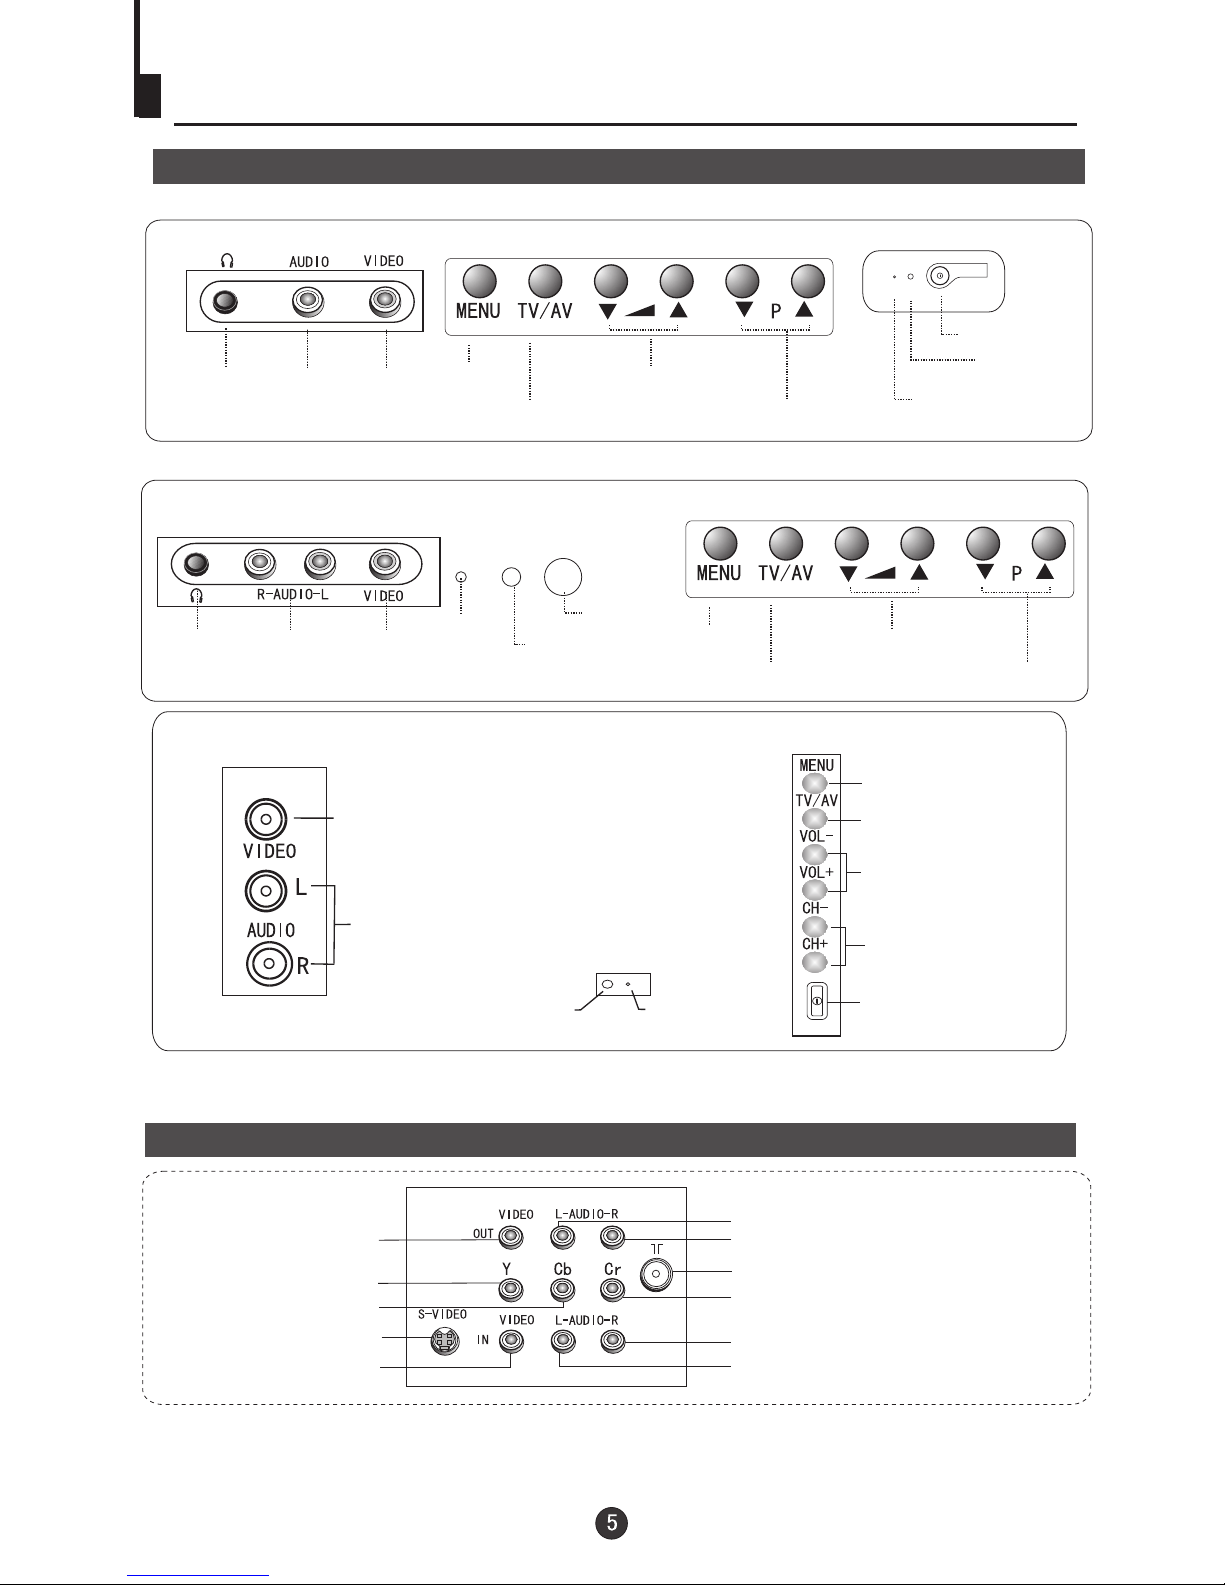
Position of Keys and Plug-ins
Front and side panel
15F6B
Signal receiver
Power
indicator
Power switch
VIDEO
Menu
TV/AV switch
Volume down/up
Channel down/up
AUDIOHEADPHONE
Menu
TV/AV switch
Volume down/up
Channel down/up
AUDIO R/LHEADPHONE VIDEO
Power switch
Signal receiver
Power
indicator
HT-3768
Video input terminal
Audio input terminal
Power
indicator
Signal
receiver
Menu
TV/AV
switch
Volume
up/ down
Channel position
up/down
Power
switch
Back panel
Antenna input socket
Video Cr input terminal
Audio left channel input terminal
Audio right channel input terminal
Audio left channel output terminal
Audio right channel output terminal
Video Cb input terminal
Video Y input terminal
Video input terminal
Video output terminal
S-VIDEO input terminal
ÒôƵ×óÉùµÀÊä³ö¶Ë×Ó
ТфЖµУТЙщµАКдИл¶ЛЧУ
ÒôƵ×óÉùµÀÊä³ö¶Ë×Ó
ÒôƵ×óÉùµÀÊä³ö¶Ë×Ó
Note: Please do not use the side(front) and back AV terminals simultaneously.
21FA12/21SF1N
Note: The audio channel in some models does not have the function of stereo.
S-VIDEO and AV output terminals are only available in some models.
The terminals above are just for reference, please see the real.
TDX
SCAN
TV/AV
S.STD
P.STD
PRE
BACK
CH+
CH-
VOL+
VOL-
MENU
DISP
SYSTEM
LOCK
CALENDAR
EXIT
QSET
GAME
FAVORITE
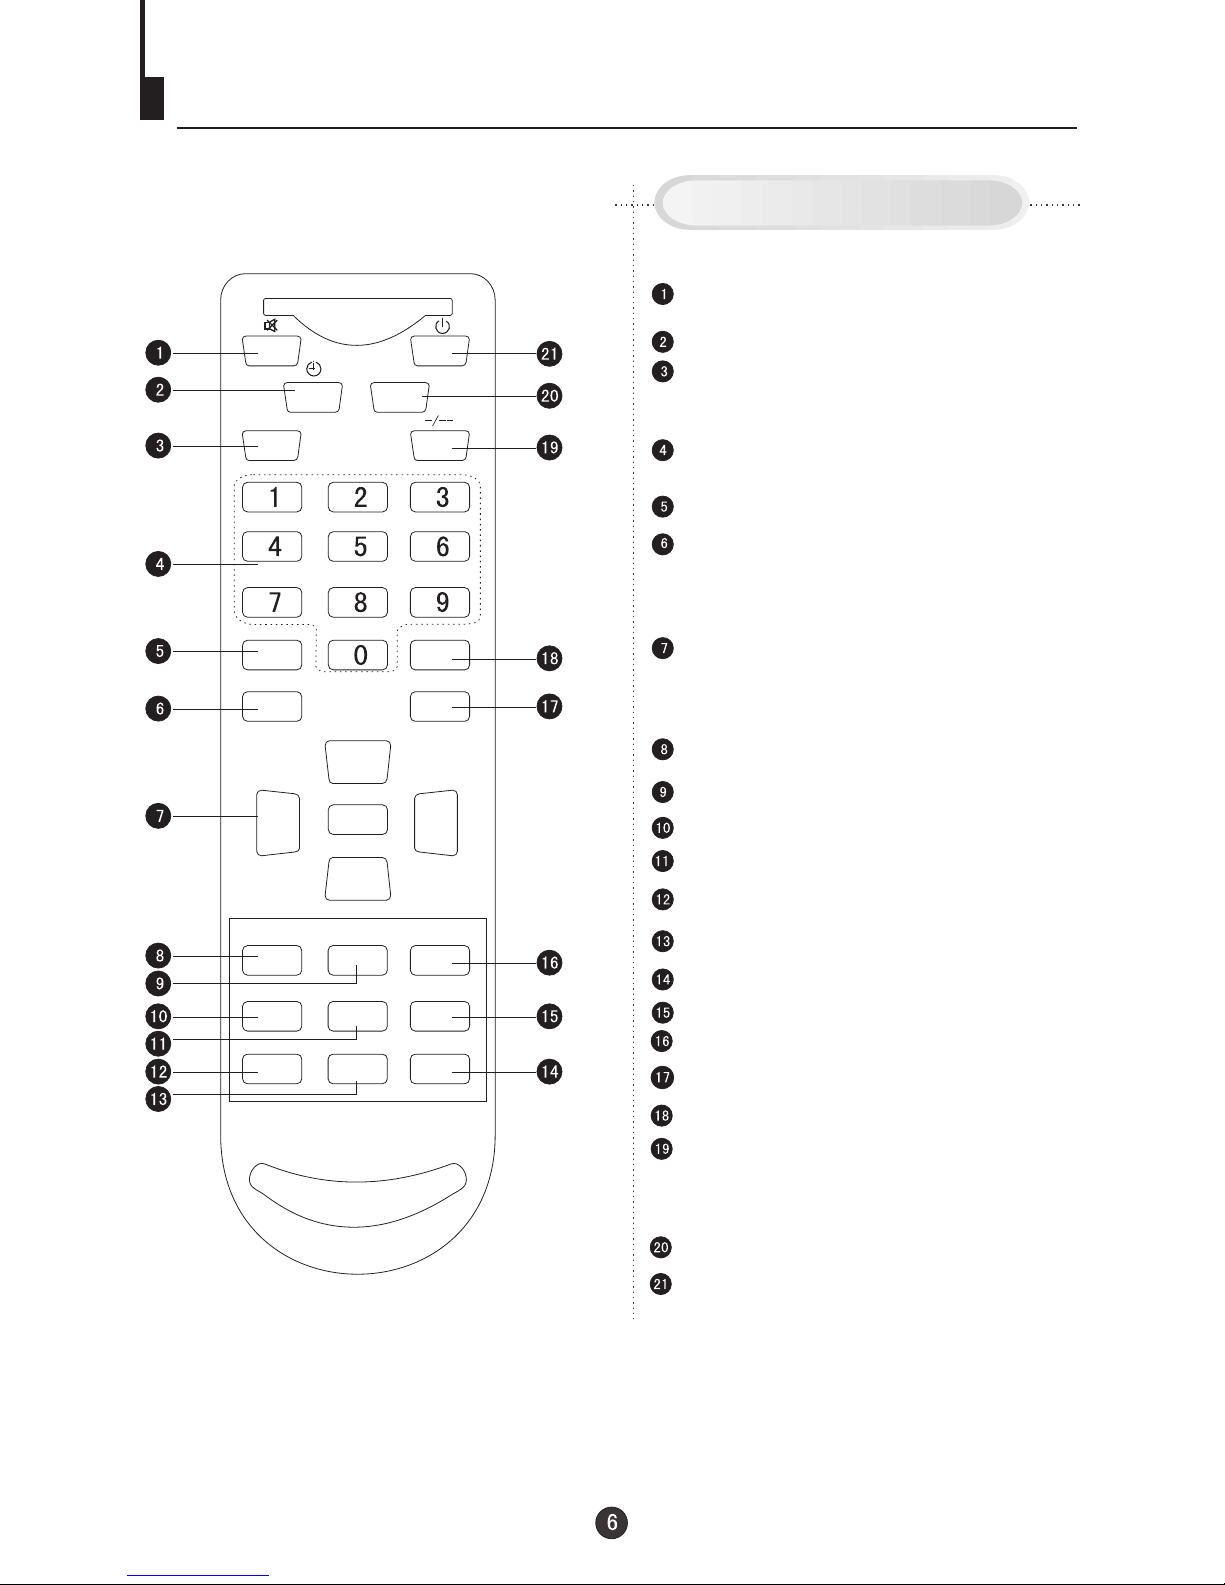
Using the Remote Control(1)
Buttons and Descriptions
Screen Display Button
TV and AV Exchange Button
To exchange between TV and
other available video inputs
Mute Button
Press to conceal the sound of programs.
System Adjust Button
Direct-digit Choosing Button
Directly select channel numbers
Menu Select/ Adjust Button
Use this button to adjust the menu,
the volume and the channels, as well
as to control the game.
Program Play-forward Button
Digit Select Button
Change the channel position number
between one digit, two-digit and three
-digit.
Picture Mode Select Button
There are DYNAMIC, STANDARD,
MILD,MEMORY, PICTURE MUTEand
COLOR MUTE six modes of picture.
Favorite program button
No available
Lock Setting button
Calendar
Start/Restart Game Button
Game Exit Button
Program Play-backward Button
Program Scan Button
DC Standby Button
Sleep Timer Button
Saving mode on/off button
Sound Mode Select Button
NOTE: Remote Contorl(1) on this page and Remote Control(2) on page 7 are for the different
models.
The instructions on this manual is just take Remote Control(2) for example.
Just see your real set and the instructions on the manual for references.
Remote Control(1)
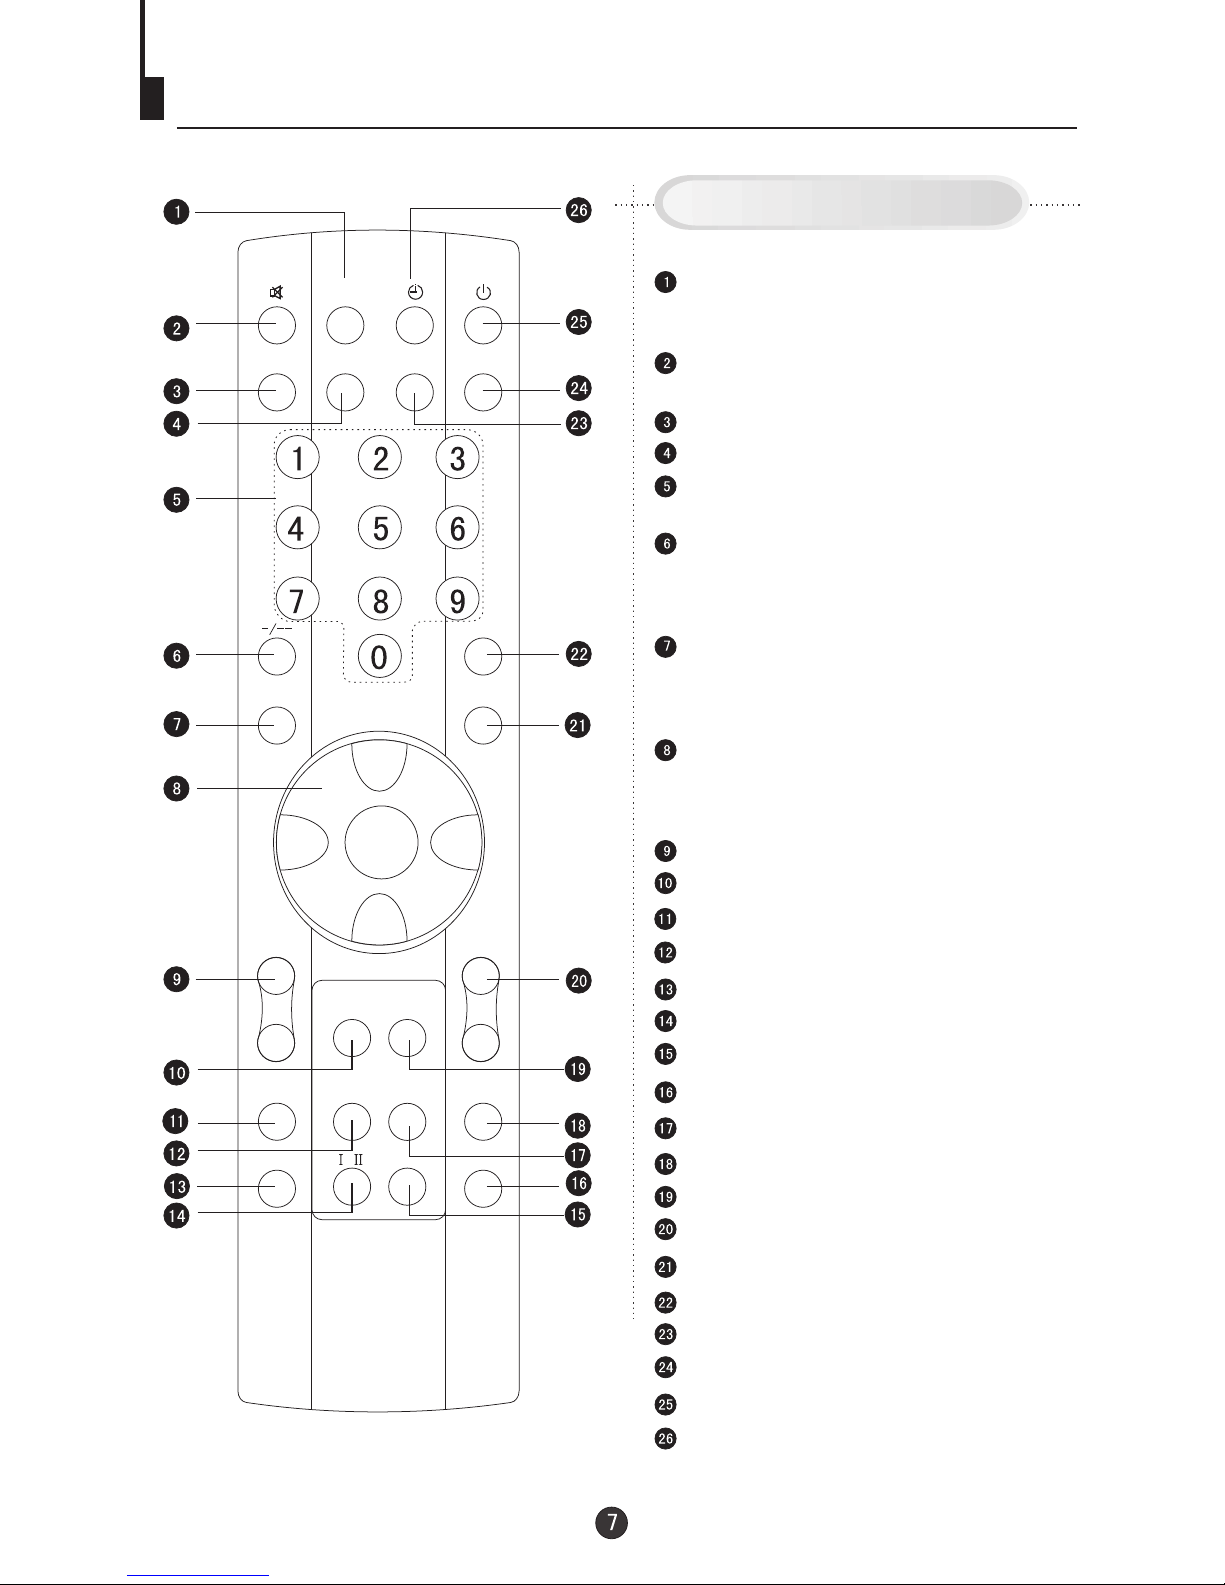
Using the Remote Control(2)
TV/AV
DISP
SYSTEM
SCAN
S.STD
P.STD
LOCK
PRE
BACK
CALENDAR
EXIT
QSET
MODE
Buttons and Descriptions
TV and AV Exchange Button
To exchanger between TV and
other available video inputs
Mute Button
Press to conceal the sound of programs.
Screen Display Button
System Adjust Button
Direct-digit Choosing Button
Directly select channel numbers
Lock Setting button
Menu Select/ Adjust Button
Use this button to adjust the menu,
the volume and the channels, as well
as to control the game.
Program Play-forward Button
Calendar
Change the aspect ratio
Start/Restart Game Button
Game Exit Button
Program Play-backward Button
Sound Mode Select Button
Digit Select Button
Change the channel position number
between one digit, two-digits and three
-digits.
Picture Mode Select Button
There are DYNAMIC, STANDARD,
MILD,MEMORY, PICTURE MUTEand
COLOR MUTE six modes of picture.
Program Scan Button
DC Standby Button
Sleep Timer Button
GAME
CH+
CH-
VOL+
VOL-
MENU
FAVORITE
Favorite program button
SHUTTLE
ZOOM
TDX
/
Game Background Select Button
No available
No available
No available
Saving mode on/off button
Shuttle button
Remote Control(2)
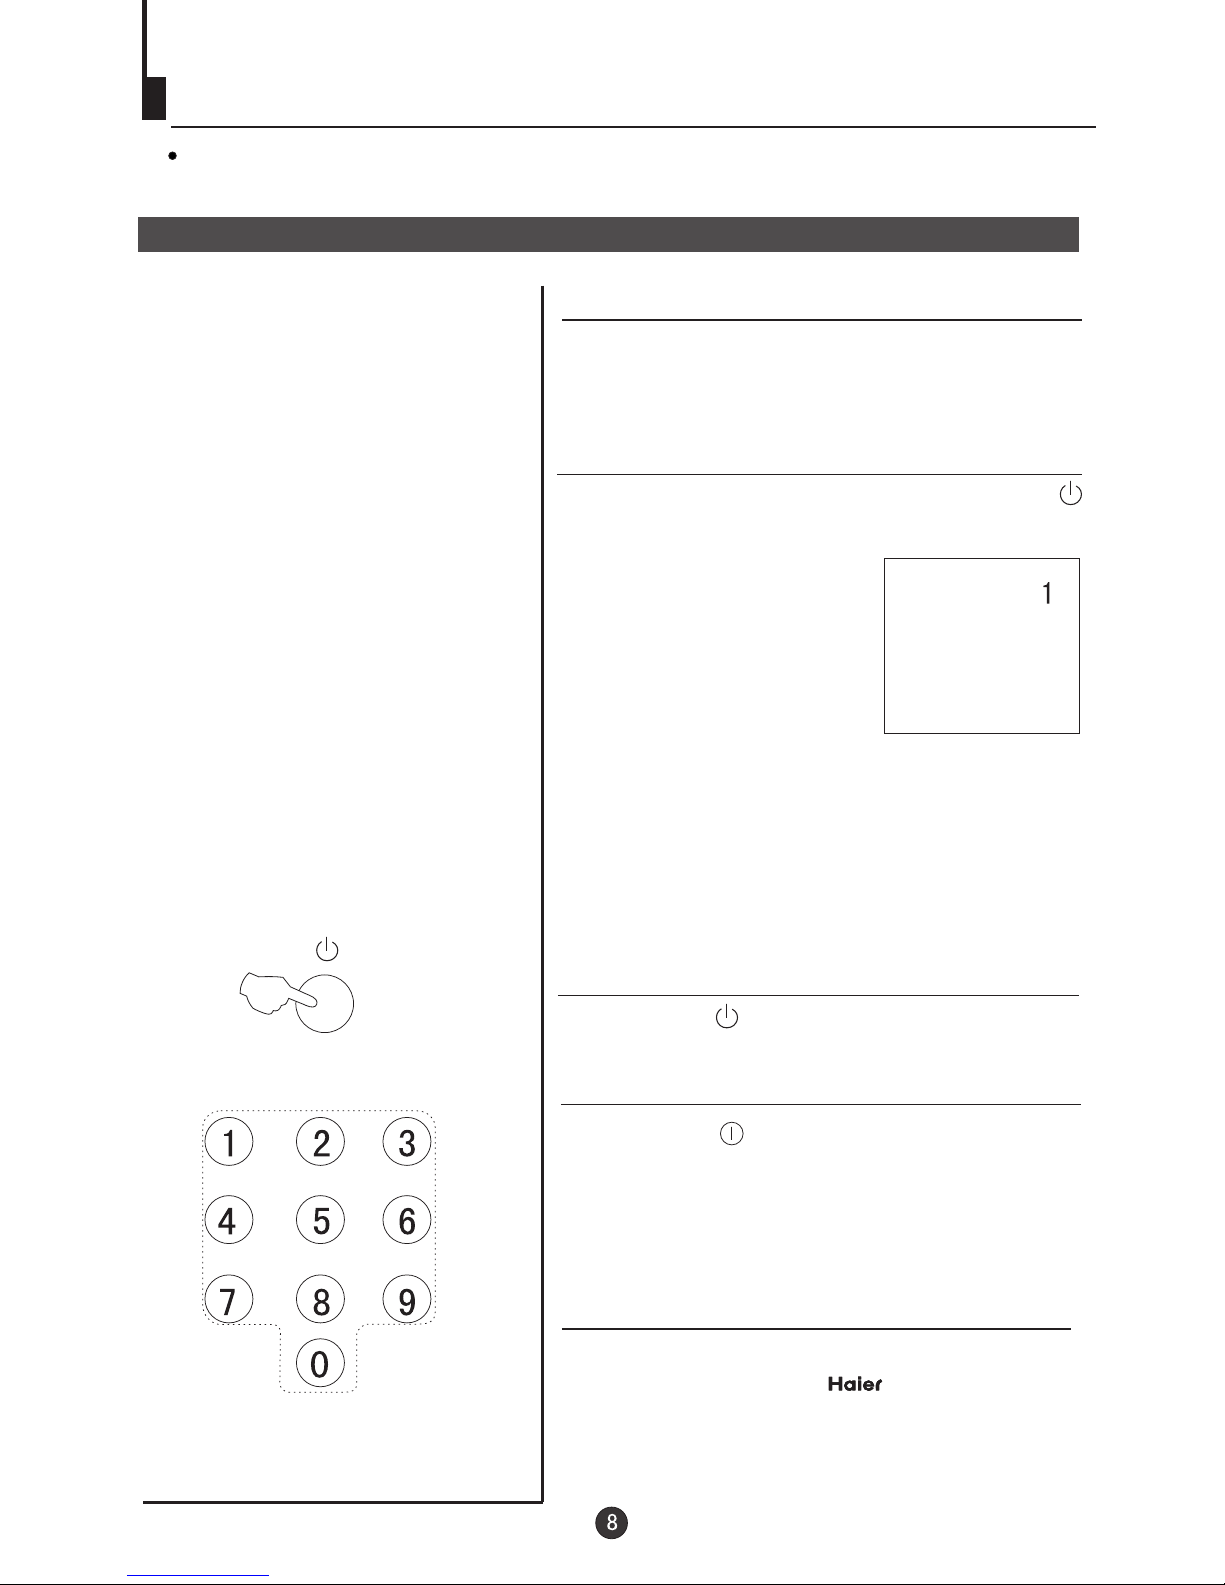
Power On and Power Off
Below are methods on how to power on/off the TV set with the switch on the TV and
on the remote control.
es
Power on/off
Connect/disconnect to the power
1. Connect the power supply wire, then press
power switch button, the power indicator will
light, in several seconds the picture will appear
on the screen.
2. If the TV is in the state of standby, press the
button on the remote control.
3. Press the button on the remote control
to get into the standby state.
4. Press the button on the TV set to
completely turn off the TV.
NOTE
1. You can also press the 0-9
button to call off the standby
status instead of pressing the
DC Standby button. Press the
digit button of the preset channel
(limited to one digit) , you can
complete the selection of channel while you turn on the
TV set( To operate the preset of TV channel, please see
TUNING on page 11-14).
2. When you do not use the remote control, you can
directly press the CH+/- button on the television to
call off the standby status.
Power supply auto-off function
DC Standby Button
Direct-digit Choosing Button
When the is set ON,
and there is no signal , screen protection
works, and ,in15 minutes later without any
operation, it will change into standby status.
B.B(black background)
VOLUME
PRE BACK
SYSTEM
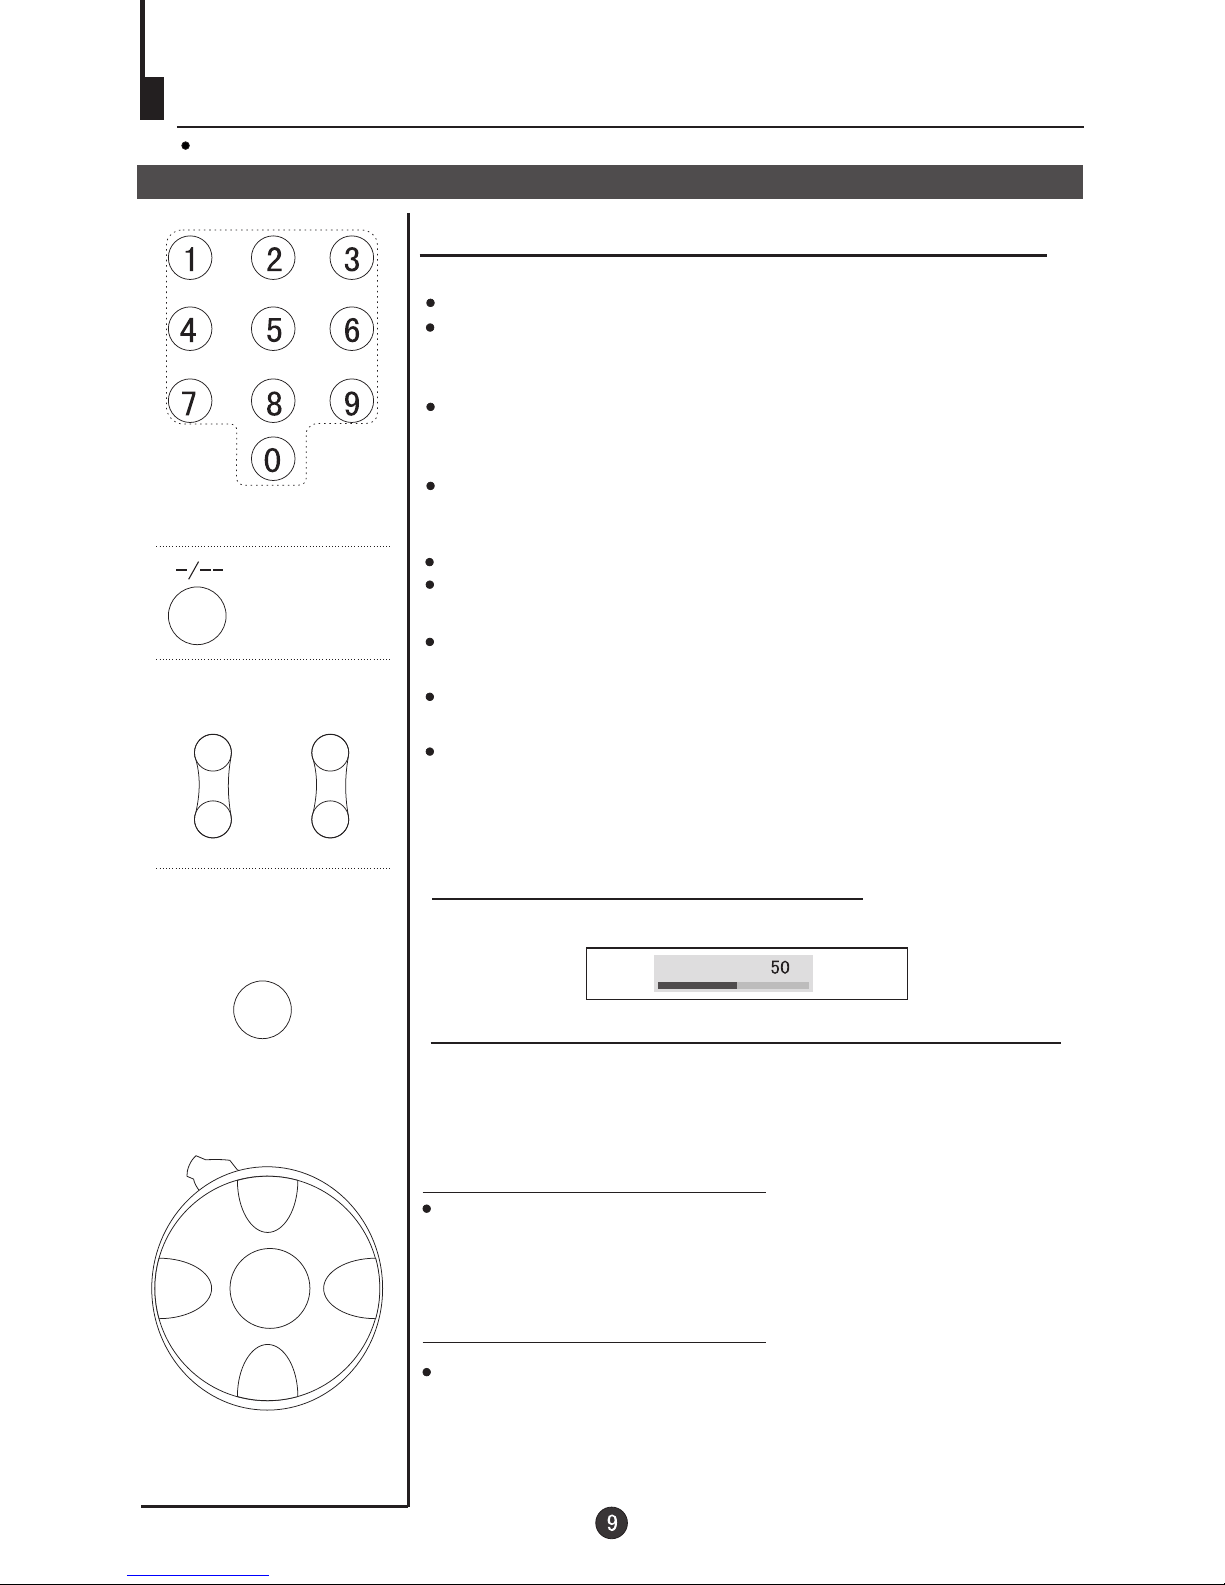
Viewing TV Programs
The channels amount to 218 .
Viewing TV programs
How to select the TV program
1. Use the direct-digit choosing button
2. Use CH+/- button
Press CH+ to increase the channel position number.
Press CH- to decrease the channel position number.
Press the button from 0-9 to select a one digit channel.
If you want to select a two-digit channel, press the
Digit Select button and change it into two-digit mode,
then press the number of the channel.
If you want to select a three-digit channel, press the
Digit Select button and change it into three-digits mode,
then press the number of the channel.
3. Use PRE button and BACK button
Press PRE button, you can go back to the channels you
viewed (as many as four).
Then, press BACK button, you can return to the channels you
were watching just now (as many as four) .
For example, if you have viewed channel 1,2,3,4,5,6 after the
TV is powered on, and the channel you are watching now is
number 7, then press PRE button, you can view channel 6,5,
4,3, and you may press the Back button to return to channel 7.
If the channel position number you select is larger than 218,
the TV will use the first two number as the channel position.
Choose the proper volume you like
Press VOL+/- button to adjust the volume.
If the color of one channel is abnormal
It might be because the color has been
set improperly.You may follow the
instruction below to adjust it. Press
SYSTEM button, and you can see
the form.
Press CH+/- button, and move the indicator to COLOR,
and press VOL+/- button to select the proper color(AUTO,
NTSC3.58,NTSC4.43 and PAL will appear alternately).
Generally, please set to AUTO.
If the color of the picture is abnormal
MENU
CH+
CH-
VOL- VOL+
Direct-digit Choosing
button
Digit Select
button
Press CH+/- button, and move the indicator to SOUND,
and press VOL+/- button to select the proper sound.
(If there is only one sound system for your country, the sound
system may not be adjust)
If the sound is abnormal
 Loading...