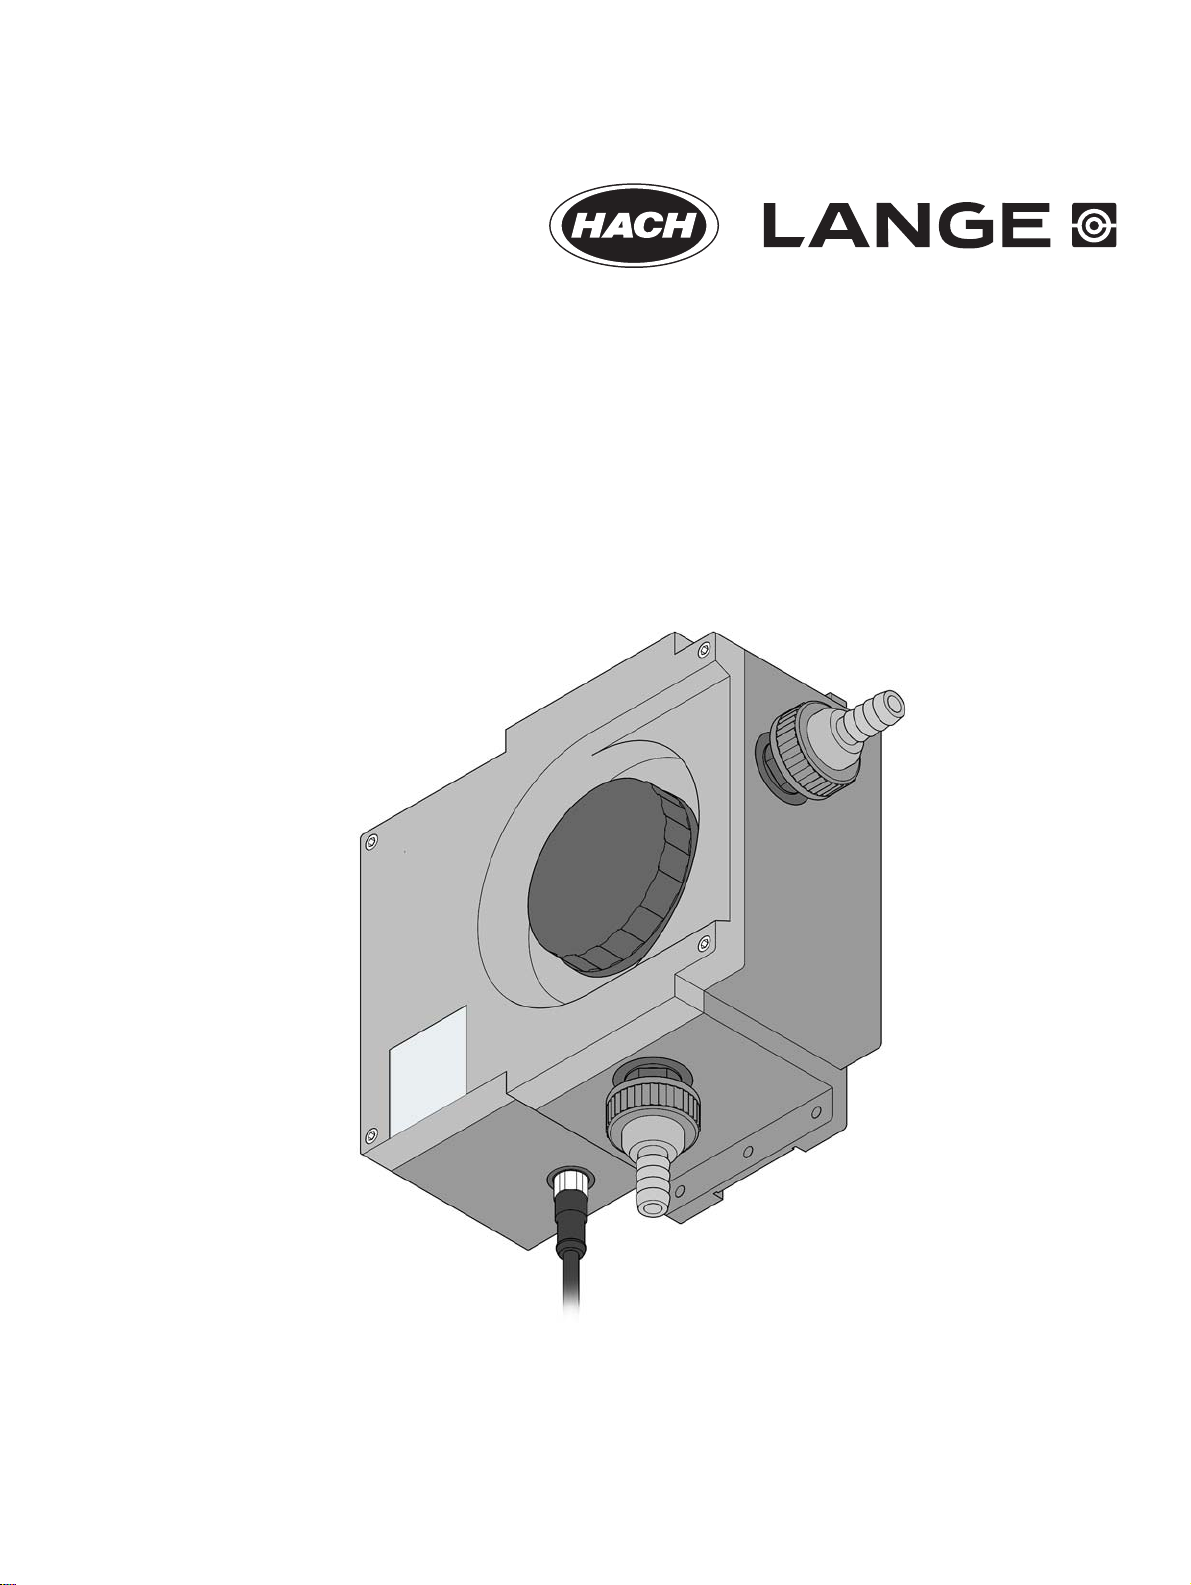
Hach-Lange ULTRATURB sc User Manual

DOC023.52.03231
ULTRATURB sc
basic/plus/seawater
User Manual
01/2010, Edition 6A
© HACH-LANGE GmbH, 2007–2010. All rights reserved. Printed in Germany


Table of contents
Section 1 Specifications .............................................................................................................................................. 5
1.1 Dimensions................................................................................................................................................................ 6
Section 2 General information ..................................................................................................................................... 7
2.1 Safety information...................................................................................................................................................... 7
2.1.1 Use of hazard information ................................................................................................................................ 7
2.1.2 Precautionary labels ........................................................................................................................................ 7
2.2 Applications ............................................................................................................................................................... 8
2.3 Measuring principle ................................................................................................................................................... 8
2.4 Handling .................................................................................................................................................................... 8
2.5 Items supplied ........................................................................................................................................................... 9
2.6 Function check .......................................................................................................................................................... 9
Section 3 Installation....................................................................................................................................................11
3.1 Assembling .............................................................................................................................................................. 11
3.1.1 Connectors..................................................................................................................................................... 12
3.2 Instrument layout ..................................................................................................................................................... 13
3.3 Connecting sensor cable ......................................................................................................................................... 14
Section 4 Operation..................................................................................................................................................... 15
4.1 Operating the sc controller ...................................................................................................................................... 15
4.2 Sensor setup ........................................................................................................................................................... 15
4.3 Sensor data logger .................................................................................................................................................. 15
4.4 Menu structure......................................................................................................................................................... 15
4.4.1 SENSOR DIAG .............................................................................................................................................. 15
4.4.2 SENSOR SETUP ........................................................................................................................................... 16
4.5 Calibration with standard solution............................................................................................................................ 18
4.6 Verify using dry standard CVM................................................................................................................................ 19
4.7 Zero point setting..................................................................................................................................................... 19
Section 5 Maintenance ................................................................................................................................................ 21
5.1 Maintenance schedule............................................................................................................................................. 21
5.2 Cleaning measuring chamber.................................................................................................................................. 21
5.3 Replacing wiper profiles (only plus and seawater version)...................................................................................... 22
5.4 Replacing desiccant ................................................................................................................................................ 23
5.5 Monitoring test equipment ....................................................................................................................................... 24
5.5.1 Preparing formazine solution in accordance with DIN EN ISO 7027 ............................................................. 24
Section 6 Faults, causes, rectification ...................................................................................................................... 27
6.1 Error messages ....................................................................................................................................................... 27
6.2 Warnings ................................................................................................................................................................. 27
Section 7 Replacement parts and accessories ...................................................................................................... 29
7.1 Sensor options......................................................................................................................................................... 29
7.2 Replacement parts .................................................................................................................................................. 29
7.3 Accessories ............................................................................................................................................................. 30
Section 8 Warranty, liability and complaints............................................................................................................. 31
Section 9 Contact ....................................................................................................................................................... 33
Appendix A ModBUS Register Information ............................................................................................................. 35
3

Table of contents
4

Section 1 Specifications
Components
Measuring technique 90° infrared pulse scattered light technique in accordance with DIN EN ISO 7027
Measuring range
Resolution 0.0001–0.9999 / 1.00–9.99 / 10.0–99.9 / 100–1000 FNU
Precision ±0.008 FNU or ±1 % of the measured value (0–10 FNU)
Reproducibility ±0.003 FNU or ±0.5 % of the measured value (0–2 FNU)
Technique variation coefficient 1 % in accordance with DIN 38402
Response time 1–60 s (can be programmed as required)
Air bubble compensation Physical-mathematical
Calibration
Sample flow rate Min. 0.2 L/min, max. 1 L/min, max. 6 bar (at 20 °C (at 68 °F))
Sample temperature Max. 50 °C (Max. 122 °F)
Salt content of the probe
(only for seawater)
Ambient temperature +2 °C to +40 °C (+ 36 °F to +104 °F)
Microprocessor-controlled turbidity bypass sensor ULTRATURB sc for
very low to medium turbidities with comprehensive self-diagnostics
0.0001–1000 FNU (TE/F, NTU, FTU) can be programmed as required
(0.0001–250 EBC = 2500 ppm SiO2)
Permanently set in the factory
(Validation using formazine, StablCal, dry standard CVM)
Tested up to 65 g/L
Sample connection Tubing (ID 13 mm) or fixed connection (PVC system component pipework)
Automatic cleaning of the
measuring chamber
(only for plus and seawater)
Materials
Housing
Inspection interval
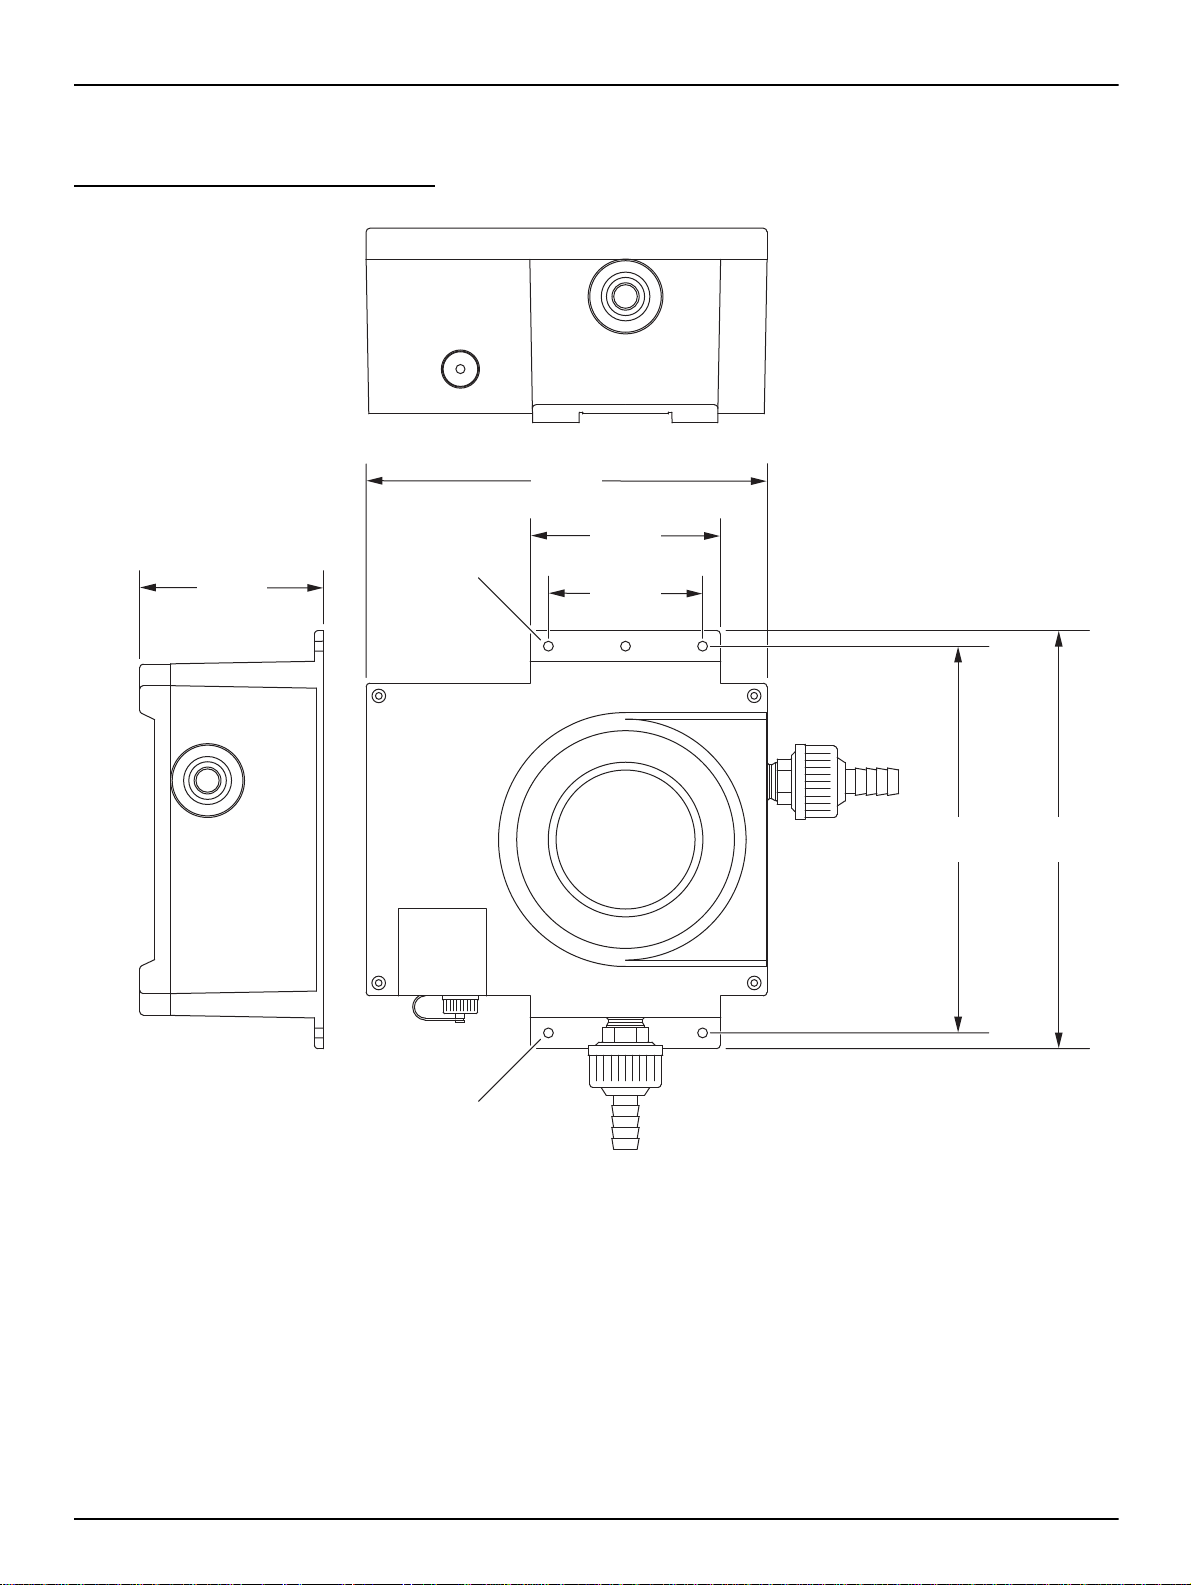
Dimensions (W × H × D) 250 × 240 × 110 mm
Mass Approx. 1.5 kg
User maintenance
Automatic wiper cleaning, time controlled and as required
Measuring window: quartz
Measuring chamber: Noryl GFN2
Wiper axle: stainless steel 1.4571
Wiperarm (seawater): titanium alloy
Wiper profile: silicone
Enclosure rating: IP 65
Plastic housing ASA
Once a year, service contract on request with warranty extension of five years;
please request a quote
basic: 2 h / month, typical
plus and seawater: 0.5 h / month, typical
Specifications are subject to change without notice.
5

Specifications
105.15 mm
[4.14 in]
221 mm
[8.7 in]
216 mm
[8.5 in]
233,4 mm
[9.19 in]
111 mm
[4.37 in]
85 mm
[3.35 in]
Ø 5.4 mm
[0.21 in]
Ø 5.4 mm
[0.21 in]
1.1 Dimensions
Fig. 1 ULTRATURB sc dimensions
6

Section 2 General information
2.1 Safety information
Please read this entire manual before unpacking, setting up or operating this
equipment. Pay attention to all danger and caution statements. Failure to do so
could result in serious injury to the operator or damage to the equipment.
To ensure that the protection provided by this equipment is not impaired, do not
use or install this equipment in any manner other than that specified in this
manual.
2.1.1 Use of hazard information
DANGER
Indicates a potentially or imminently hazardous situation which, if not
avoided, could result in death or serious injury.
CAUTION
Indicates a potentially hazardous situation that may result in minor or
moderate injury.
2.1.2 Precautionary labels
This symbol, if noted on the instrument, references the instruction manual for operation and/or safety information.
Electrical equipment marked with this symbol may not be disposed of in European public disposal systems after 12
August of 2005. In conformity with European local and national regulations (EU Directive 2002/96/EC), European
electrical equipment users must now return old or end-of life equipment to the Producer for disposal at no charge to
the user.
Note: For return for recycling, please contact the equipment producer or supplier for instructions on how to return
end-of-life equipment, producer-supplied electrical accessories and all auxiliary items for proper disposal.
This symbol, when noted on a product enclosure or barrier, indicates that a risk of electrical shock and/or
electrocution exists.
Important note: Information that requires special emphasis.
Note: Information that supplements points in the main text.
Read all labels and tags attached to the instrument. Personal injury or damage to
the instrument could occur if not observed. A symbol, if noted on the instrument,
will be included with a danger or caution statement in the manual.
7

General information
2.2 Applications
ULTRATURB sc bypass sensors are innovative precision turbidity measuring
instruments developed using the latest technical findings.
ULTRATURB sc bypass sensos are developed primary for waste and drinking
water applications. The very robust seawater version is developed especially for
seawater applications with high salt concentrations (e.g. drinking water
abstraction from seawater, fish farming or seawater aquariums).
Turbidities in the range of FNU (NTU) 0.0001
alphanumerically using a controller. This high resolution facilitates precision
differentiation, even for ultra clear liquids.
A pulsed, long-life IR radiation source (LED) ensures that costs are minimised.
ULTRATURB sc turbidity sensors are designed in accordance with
DIN EN ISO 7027 and are permanently calibrated before leaving the factory. All
key data is set to practical standard values.
The instruments are immediately ready for use after connection to the power
supply and the supply of sample water. The measuring range and all data outputs
are modified to suit requirements using menus on the controller.
All optical and electronic assemblies are installed in housings that are physically
very strong and proof against water jets.
–1000 are measured and displayed
2.3 Measuring principle
2.4 Handling
ULTRATURB sc turbidity sensors are available in the classic basic version, the
convenient plus version and the robust seawater version.
The measuring chambers of the ULTRATURB plus sc and of the
ULTRATURB seawater sc also have automatic wiper cleaning that reliably
prevents soiling of the optical systems as it starts to build up and significantly
reduces the user maintenance. Cleaning is performed at an interval set to suit
local requirements. The cleaning intervals are adjusted to suit the expected level
of soiling during commissioning. The user can straightforwardly change the
interval at a later date. The number of cleaning operations already performed can
be checked on the SENSOR SETUP menu using the COUNTER command.
The nephelometric scattered light technique is a method for the determination of
the very low to medium turbidities in liquids that is comparable worldwide.
Using this method, the light scattered sideways by the turbidity particles is
measured over an angle of 90°. The low acquisition limit for this method makes it
possible to even reliably differentiate turbidity particles in distilled water. This
technique is defined in DIN EN ISO 7027. ULTRATURB sc sensors are designed
in accordance with the requirements in this standard.
The sensor contains high-quality optical and electronic assemblies. For this
reason attention is to be paid to ensuring that the sensor is not subjected to any
hard mechanical knocks. There are no components that can be maintained by the
user inside the sensor or the display unit – except the manual cleaning of the
measuring chamber and the replacement of the wiper profiles and the desiccant.
8

2.5 Items supplied
2.6 Function check
General information
• ULTRATURB sc sensor
• Connecting cable (length as per order)
• User Manual
• Factory test certificate
• Accessory set LZP816
• Wiper set (for 4 changes) LZV275
(only plus and seawater version)
After unpacking, all components should be checked for any transport damage and
a short function check performed prior to installation.
For this purpose the sensor is connected to the display unit and the display unit
plugged into the mains. Shortly after the display unit is plugged in, the display is
activated and the instrument switches to the display of measurements. Here the
measured value taken in air is meaningless.
Note: It is only possible to check the operative zero point using very high purity water!
If no messages appear in the lower part of the display, the function check is then
complete.
9

General information
10

Section 3 Installation
DANGER
Installation may only be carried out by qualified experts in accordance with
all local safety regulations.
3.1 Assembling
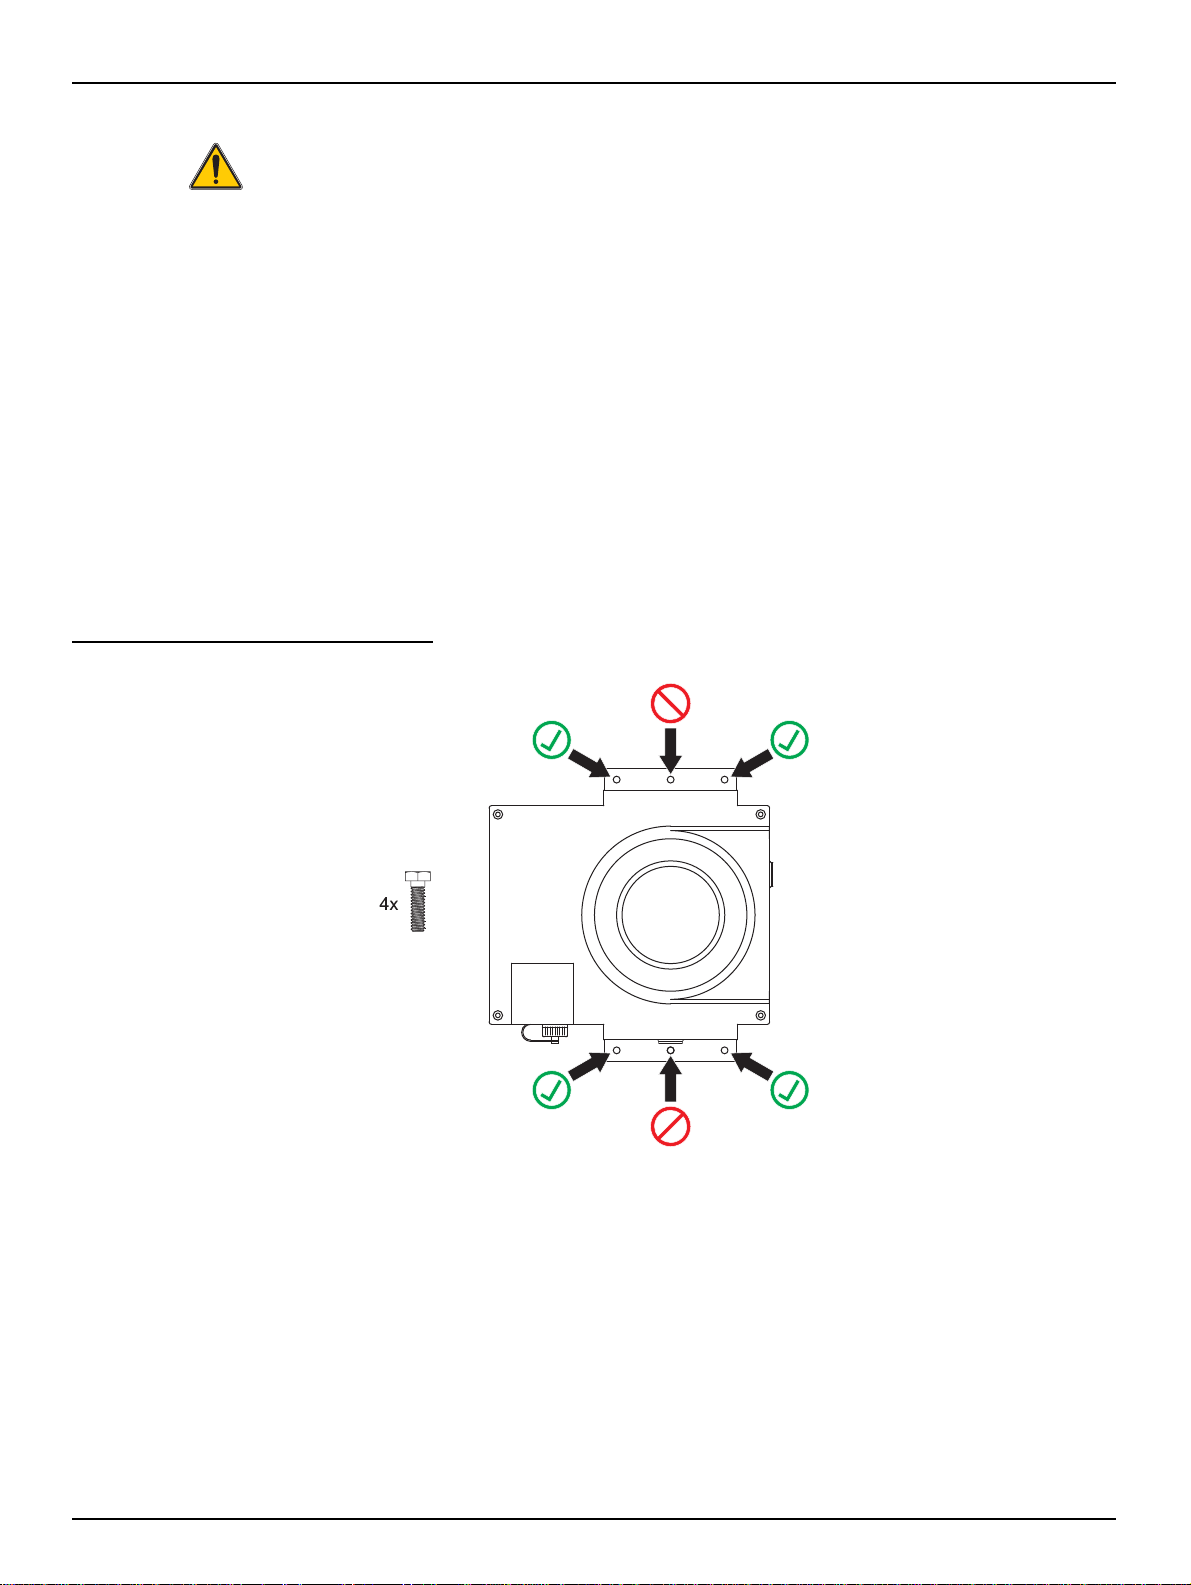
Select an appropriate installation location for the instrument to guarantee
• safe installation
• safe operation
• problem-free maintenance
Plan how to lay cables and hoses and their path in advance. Lay the hoses, data
cables and power cables without any bends. Only original replacement and
accessory parts recommended by the manufacturer may be used.
Make sure the mount has a sufficient bearing capacity. The dowels must be
selected and authorized according to the condition of the wall. The manufacturer
shall accept no liability if the instrument is installed incorrectly.
Install the instrument in a horizontal position.
Fig. 2 Assembling
11
 Loading...