

Page 1
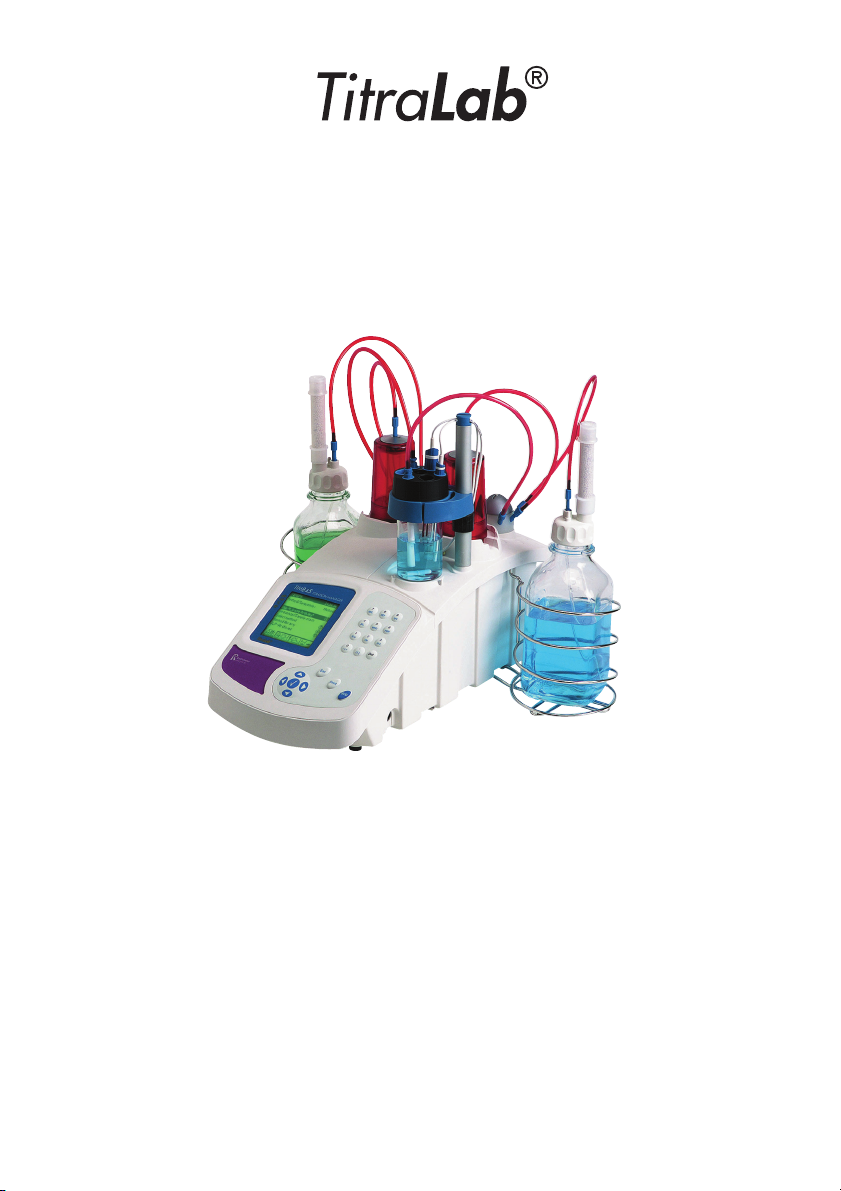
TIM840 and TIM845
Titration Workstations
D21T065
User’s Guide
Page 2

D21T065 • Printed by Radiometer Analytical SAS • 2008-09C
Page 3
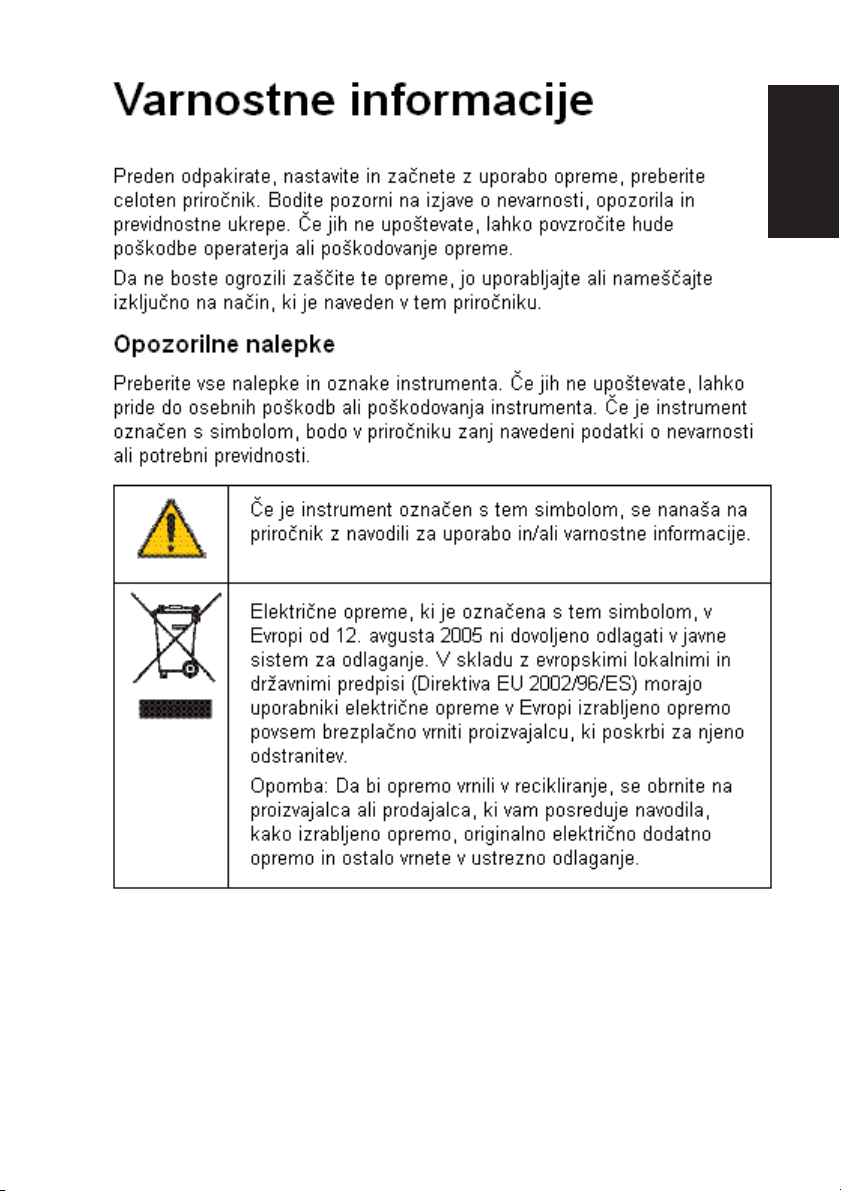
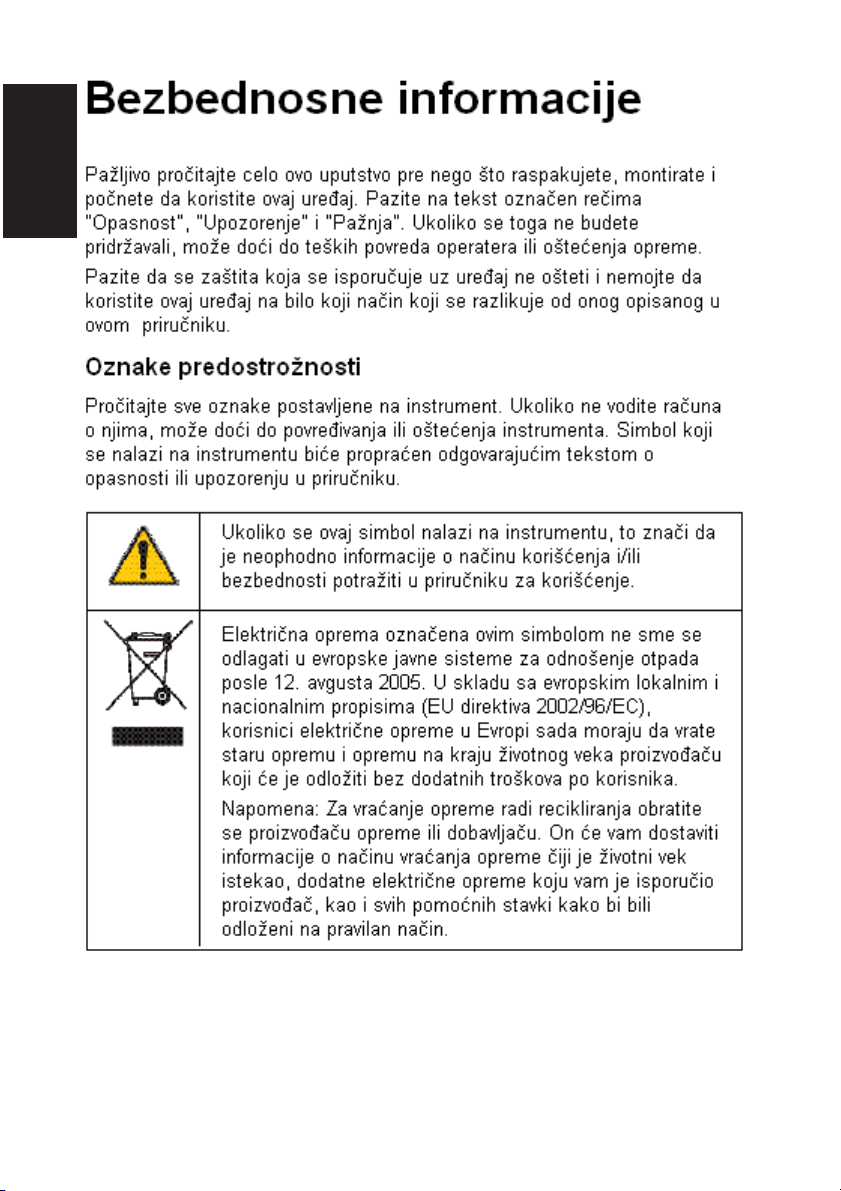
Safety inforSafety infor
Safety infor
Safety inforSafety infor
mationmation
mation
mationmation
Please read this entire manual before unpacking, setting up, or operating
this equipment. Pay attention to all danger and caution statements.
Failure to do so could result in serious injury to the operator or damage to
the equipment. To ensure that the protection provided by this equipment
is not impaired, do not use and do not install this equipment in any
manner other than that specified in this manual.
Precautionary labelsPrecautionary labels
Precautionary labels
Precautionary labelsPrecautionary labels
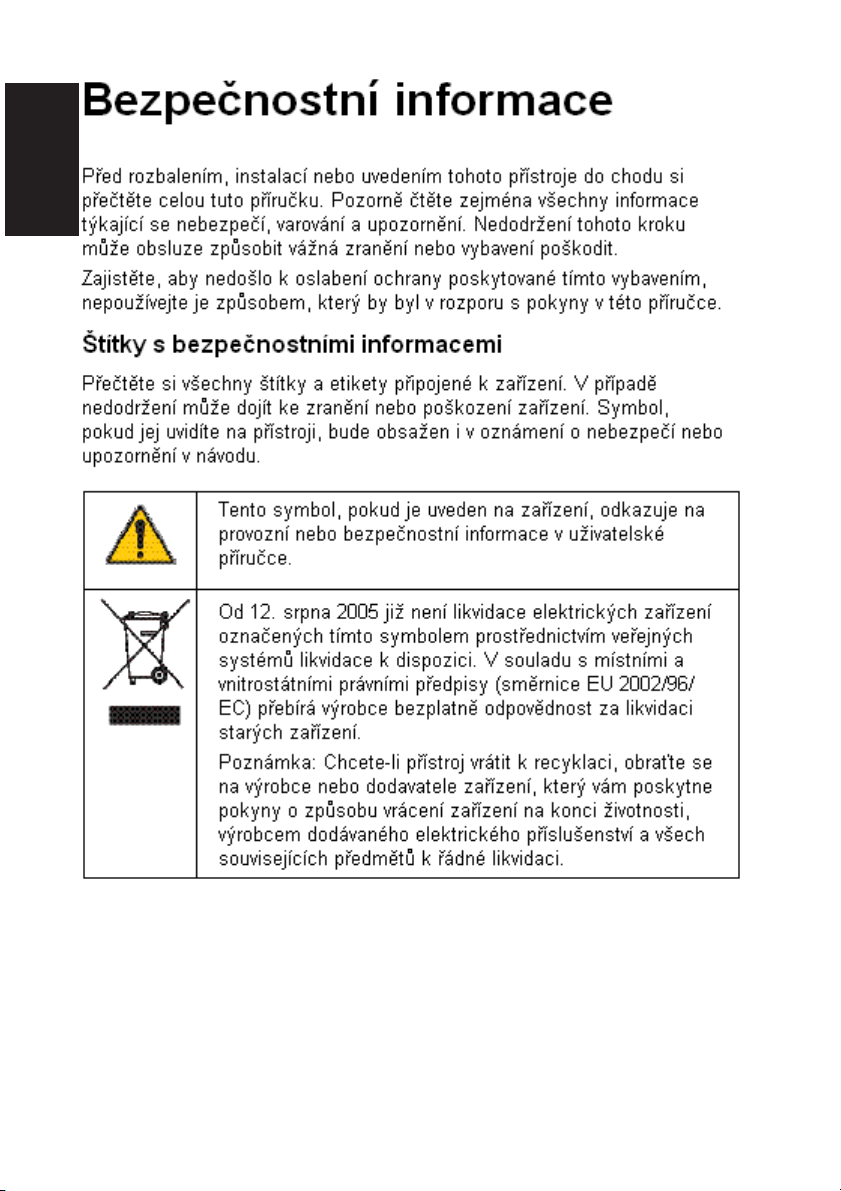
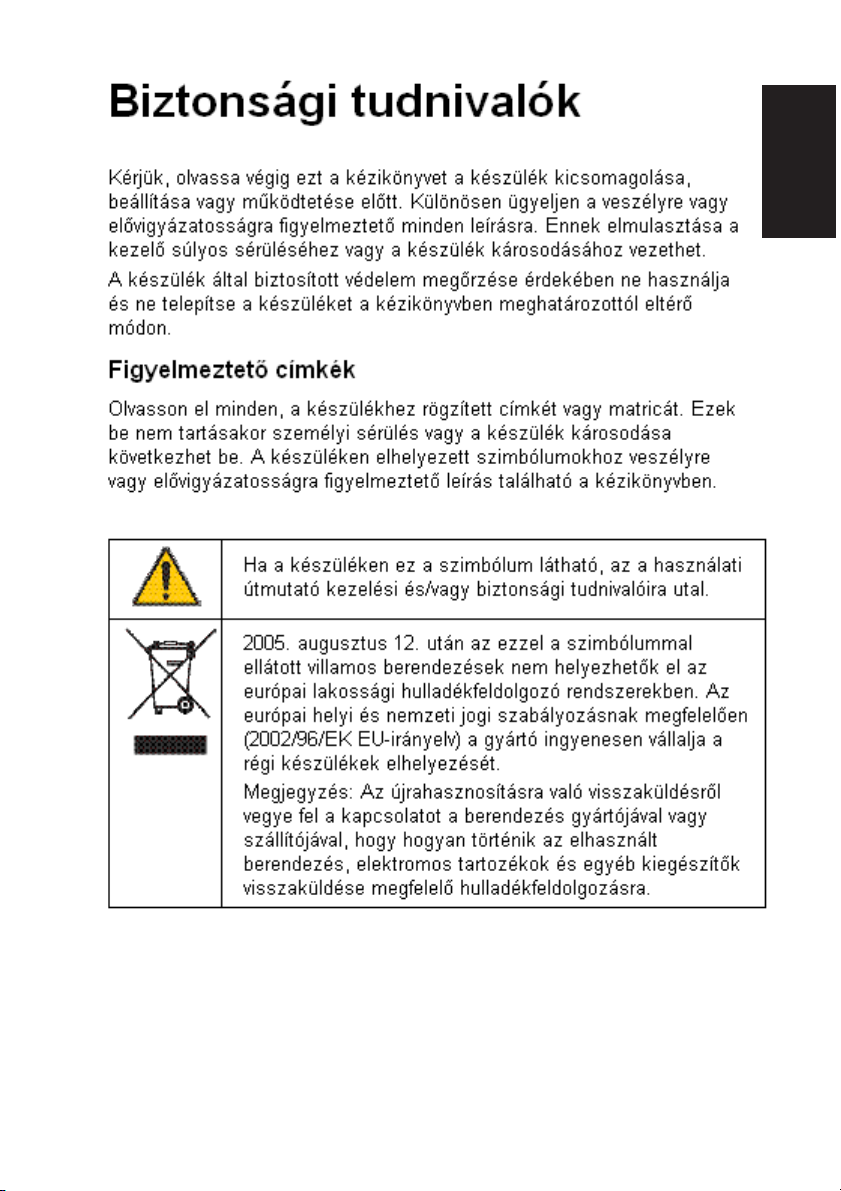
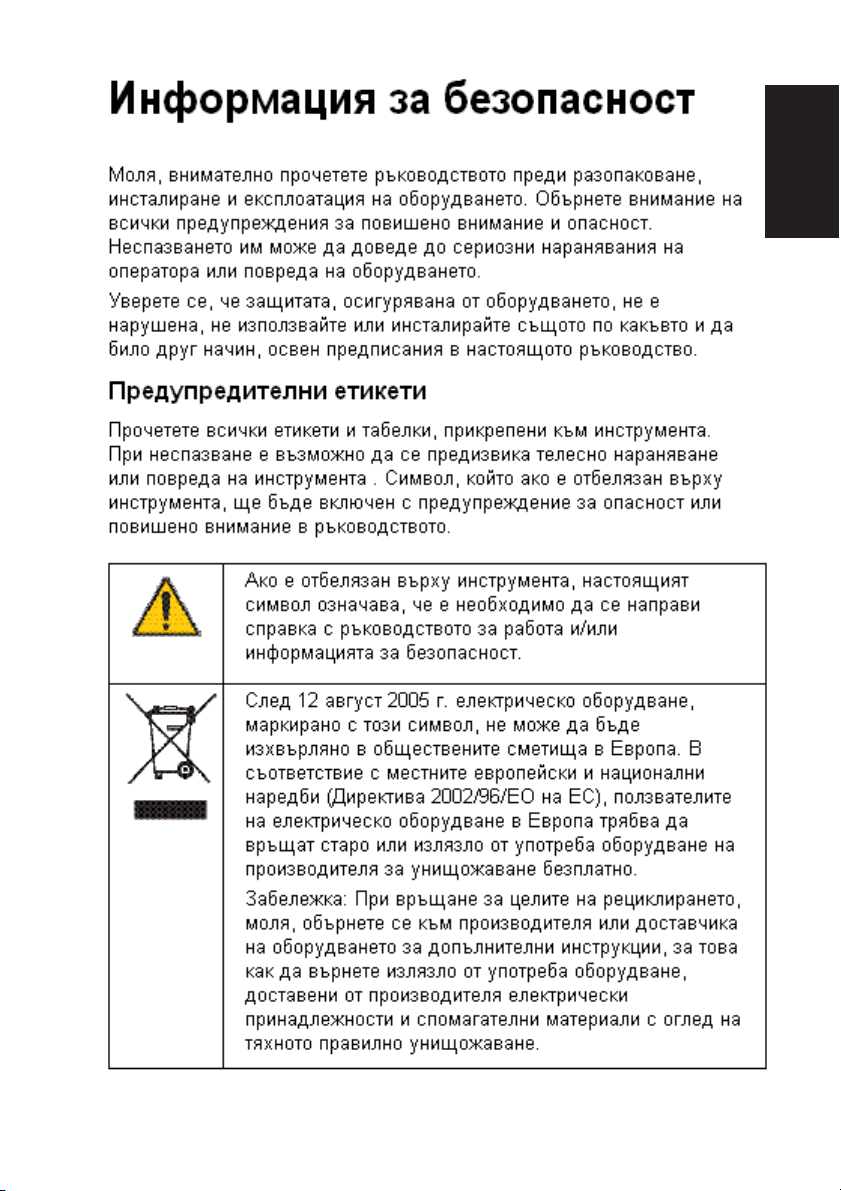
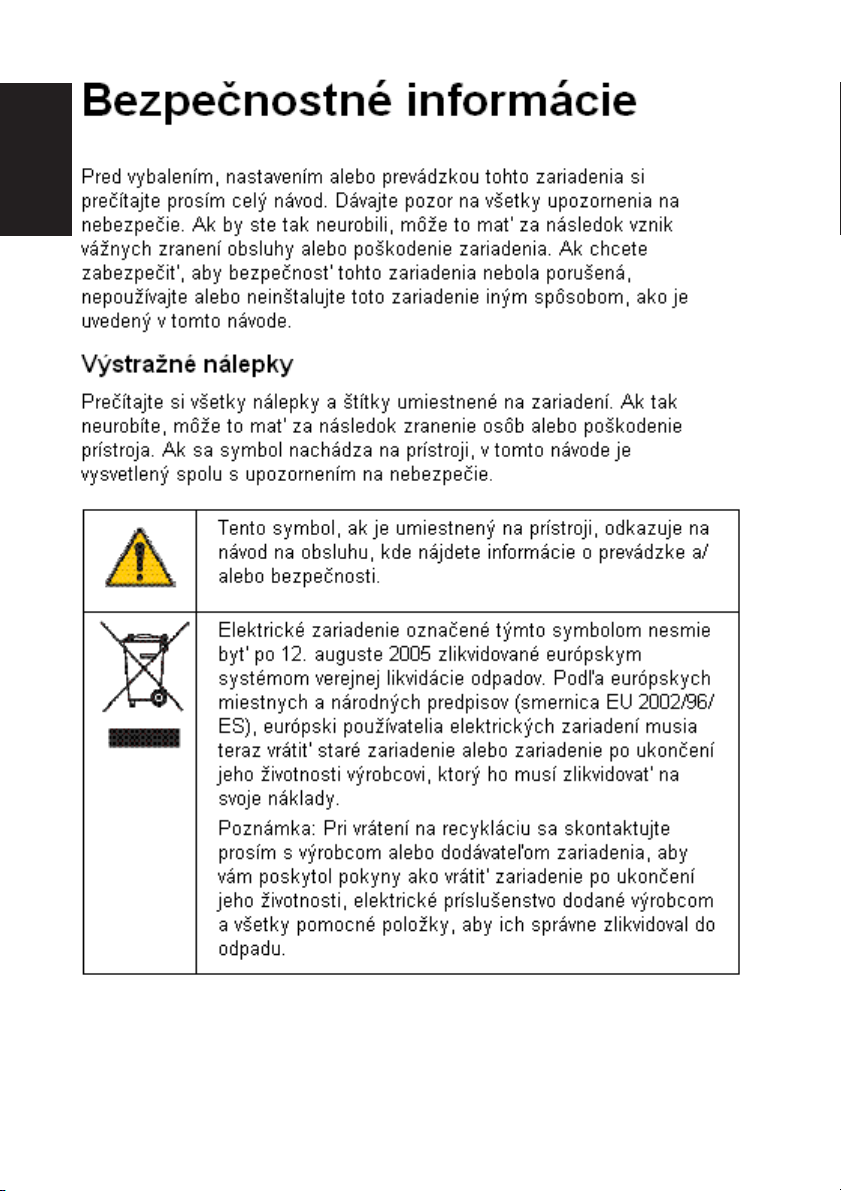
Read all labels and tags attached to the instrument. Personal injury or
damage to the instrument could occur if not observed. A symbol, if noted
on the instrument, will be included with a danger or caution statement in
the manual.
This symbol, if noted on the instrument, references the
instruction manual for operation and/or safety information.
Electrical equipment marked with this symbol may not be
disposed of in European public disposal systems after 12
August of 2005. In conformity with European local and
national regulations (EU Directive 2002/96/EC), European
electrical equipment users must now return old or end-of
life equipment to the Producer for disposal at no charge to
the user.
Note: For return for recycling, please contact the
equipment producer or supplier for instructions on how to
return end-of-life equipment, producer-supplied electrical
accessories and all auxiliary items for proper disposal.
English
Page 4
Consignes de sécuritéConsignes de sécurité
Consignes de sécurité
Consignes de sécuritéConsignes de sécurité
Veuillez lire entièrement ce manuel avant de déballer, d’installer, ou
d’utiliser cet équipement. Prêtez une attention particulière à tous les
Français
paragraphes intitulés "Danger !" ou "Attention !". L’absence de cette
précaution pourrait occasionner des dommages corporels ou matériels.
Pour s'assurer de manipuler cet équipement en toute sécurité, n'utilisez
pas ou n'installez pas cet équipement d'une autre façon que celle
indiquée dans ce manuel.
Etiquettes de précautionEtiquettes de précaution
Etiquettes de précaution
Etiquettes de précautionEtiquettes de précaution
Lisez toutes les étiquettes apposées sur l’appareil. En cas de nonrespect, vous risquez de vous blesser ou d’endommager l’appareil. Si un
symbole apparaît sur l'instrument, il apparaîtra avec un message de
danger ou de précaution dans le manuel.
Ce symbole, signalé sur l’appareil, renvoie au manuel de
référence pour une information relative à l’utilisation de
l’appareil et/ou à une consigne de sécurité.
Il est interdit de jeter le matériel électrique portant la
marque de ce symbole dans les décharges publiques
européennes depuis le 12 août 2005. Conformément aux
réglementations européenne, locales et nationales
(Directive EU 2002/96/EC), les utilisateurs de matériel
électrique de marque européenne doivent dorénavant
retourner le matériel ancien ou en fin de vie à son fabricant
lorsqu'ils souhaitent s'en débarrasser, sans que cela leur
soit facturé.
Note : Pour le recyclage, veuillez contacter le fabricant ou
le revendeur du matériel afin de savoir comment retourner
le matériel, les accessoires électriques fournis par le
fabricant et tous les accessoires auxiliaires en fin de vie,
afin qu'ils soient traités correctement.
Page 5
SicherheitshinweiseSicherheitshinweise
Sicherheitshinweise
SicherheitshinweiseSicherheitshinweise
Lesen Sie die Bedienungsanleitung sorgfältig und vollständig durch, bevor
Sie das Gerät auspacken, aufstellen und in Betrieb nehmen. Beachten
Sie bitte alle Hinweise, die mit Gefahr, Vorsicht bzw. Achtung
gekennzeichnet sind. Nichtbeachtung dieser Informationen kann
schwerwiegende Verletzungen der Anwender oder Beschädigung am
Gerät zur Folge haben.
Damit die im Gerät vorgesehenen Schutzvorrichtungen nicht beeinträchtigt
werden, darf das Gerät auf keinen Fall anders installiert oder benutzt
werden, als in dieser Bedienungsanleitung beschrieben.
WarnetikettenWarnetiketten
Warnetiketten
WarnetikettenWarnetiketten
Beachten Sie alle am Gerät angebrachten Etiketten, Schilder und
Aufkleber. Bei Nichtbeachtung dieser Warnetiketten können Verletzungen
oder Schäden am Gerät auftreten. Wenn dieses Symbol am Gerät
angebracht ist, sollten die zugehörigen Gefahrenhinweise oder
Vorsichtsmaßnahmen in der Bedienungsanleitung beachtet werden.
Wenn dieses Symbol am Gerät angebracht ist, verweist
es auf Bedienungs- und/oder Sicherheitshinweise in der
Bedienungsanleitung.
German
Elektrogeräte, die mit diesem Symbol gekennzeichnet
sind, dürfen nach dem 12. August 2005 nicht im normalen
öffentlichen Abfallsystem entsorgt werden, sondern
müssen gesondert gesammelt werden. Nach den
Maßgaben der EU-Richtlinie 2002/96/EG müssen Elektround Elektronik-Altgeräte kostenlos von den Nutzern zur
Entsorgung an den Hersteller zurückgegeben werden
können.
Hinweis: Zur Rücknahme zwecks Recycling wenden Sie
sich bitte an den Hersteller oder Lieferanten des Geräts,
um Informationen zur Rückgabe von Elektro- und
Elektronik-Altgeräten, zu den vom Hersteller geliefertem
Elektrozubehör und zu allen Zusatzteilen zur
vorschriftsmäßigen Entsorgung zu erhalten
Page 6
InforInfor
Infor
InforInfor
Le rogamos se sirva leer todo el manual antes de desembalar, de instalar
o de trabajar con este instrumento. Preste especial atención a todas las
Spanish
indicaciones de peligro y advertencia, pues el no hacerlo puede provocar
lesiones graves al usuario o averiar el equipo.
Para asegurar que no se deteriora la protección que ofrece este equipo,
no use o instale el mismo de manera diferente a la especificada en este
manual.
Etiquetas de seguridadEtiquetas de seguridad
Etiquetas de seguridad
Etiquetas de seguridadEtiquetas de seguridad
Lea todas las etiquetas y rótulos que lleva el instrumento. Si no se
cumplen las indicaciones de los mismos podrían producirse lesiones
personales o averías del instrumento. Los símbolos que aparezcan en el
instrumento estarán incluidos en una indicación de peligro y advertencia
del manual.
mación de seguridadmación de seguridad
mación de seguridad
mación de seguridadmación de seguridad
Si se encuentra este símbolo en el instrumento, consulte
el manual de instrucciones para información de seguridad
y/o funcionamiento.
El equipo eléctrico marcado con este símbolo no se podrá
desechar por medio de lo sistemas europeos públicos de
eliminación después del 12 de agosto de 2005. En
cumplimiento de las reglamentaciones legales nacionales
y locales (directiva europea 2002/96/CE), el fabricante se
encarga de la eliminación gratuita de viejos instrumentos.
Nota: Para el reciclado, póngase en contacto con el
fabricante o distribuidor del equipo para obtener
instrucciones sobre la correcta eliminación de
instrumentos viejos, accesorios eléctricos suministrados
por el fabricante y todos los elementos auxiliares.
Page 7
InforInfor
Infor
InforInfor
mazioni sulla sicurmazioni sulla sicur
mazioni sulla sicur
mazioni sulla sicurmazioni sulla sicur
ezzaezza
ezza
ezzaezza
Si prega di leggere attentamente tutto il presente manuale prima di
disimballare, configurare o porre in funzione lo strumento. Prestare
attenzione a tutte le indicazioni di pericolo, attenzione o avvertenza. La
mancata osservanza di tali indicazioni può causare lesioni, anche gravi,
all'operatore o danneggiare lo strumento.
Per non pregiudicare la protezione intrinseca fornita da questo strumento,
non utilizzarlo o installarlo con modalità diverse da quelle prescritte nel
presente manuale.
Etichette di avvertimentoEtichette di avvertimento
Etichette di avvertimento
Etichette di avvertimentoEtichette di avvertimento
Leggere tutte le etichette e le targhette affisse sullo strumento. La
mancata osservanza delle stesse può infatti causare lesioni personali o
danni allo strumento. Ad ogni simbolo riportato sullo strumento
corrisponderà un'indicazione di pericolo o avvertenza segnalata sul
manuale.
Questo simbolo, se riportato sullo strumento, rimanda al
manuale d'istruzione per le informazioni operative e/o
relative alla sicurezza.
Le apparecchiature elettriche contrassegnate con questo
simbolo non possono essere smaltite attraverso sistemi di
smaltimento pubblici europei dopo la data 12 agosto
2005. In conformità con i regolamenti europei locali e
nazionali (a norma della direttiva UE 2002/96/CE), gli
utenti dovranno restituire le apparecchiature vecchie o non
più utilizzabili al produttore, il quale è tenuto a provvedere
allo smaltimento gratuito.
Nota: Per la restituzione finalizzata al riciclaggio,
contattare il produttore o il fornitore dell'apparecchiatura
per ottenere informazioni sulle modalità di restituzione
dell'apparecchiatura, degli accessori e di tutti gli elementi
accessori non più utilizzabili ai fini del corretto
smaltimento
Italian
Page 8

VV
eiligheidsinforeiligheidsinfor
V
eiligheidsinfor
VV
eiligheidsinforeiligheidsinfor
Lees de gehele gebruiksaanwijzing door alvorens dit instrument uit te
Dutch
pakken, in te stellen of te gebruiken. Besteed speciaal aandacht aan alle
waarschuwingen voor gevaren en aan de vermelde voorzorgsmaatregelen.
Wanneer u dit nalaat, kan dit leiden tot ernstig letsel, of beschadigingen
aan het instrument.
U mag dit instrument op geen enkele andere wijze gebruiken dan is
gespecificeerd in deze handleiding, om er zeker van te zijn dat de
bescherming die door dit instrument wordt geboden niet wordt belemmerd.
WaarschuwingsetikettenWaarschuwingsetiketten
Waarschuwingsetiketten
WaarschuwingsetikettenWaarschuwingsetiketten
Lees alle labels en etiketten die aan en op het instrument zijn bevestigd.
Niet naleven van deze waarschuwingen kan leiden tot persoonlijk letsel of
beschadiging van het instrument. Als er op het instrument een pictogram
is afgebeeld, staat er in de handleiding een desbetreffende waarschuwing.
Dit pictogram, indien het op het instrument wordt
aangegeven, verwijst naar de bedieningshandleiding voor
informatie ten aanzien van het gebruik en/of de veiligheid.
Elektrische uitrusting met dit pictogram mag vanaf 12
augustus 2005 in Europa niet bij het afval worden
gedeponeerd. In overeenstemming met Europese lokale
en nationale voorschriften (EU-richtlijn 2002/96/EG) dienen
Europese gebruikers van elektrische instrumenten hun
oude of versleten apparatuur naar de fabrikant te
retourneren voor kosteloze verwerking.
Opmerking: Voor recycling moet u contact opnemen met
de fabrikant of leverancier van het instrument voor
instructies hoe het versleten instrument, de meegeleverde
elektrische en overige accessoires moeten worden
geretourneerd.
matiematie
matie
matiematie
Page 9
SikkerhedsoplysningerSikkerhedsoplysninger
Sikkerhedsoplysninger
SikkerhedsoplysningerSikkerhedsoplysninger
Læs hele manualen, inden udpakning installation eller betjening af dette
udstyr. Vær opmærksom på alle oplysninger om fare- og
advarselsangivelser. Ellers kan operatøren få alvorlige kvæstelser, eller
udstyret kan blive beskadiget.
For at sikre, at den beskyttelse, som dette udstyr giver, ikke forringes,
må du ikke bruge eller installere dette udstyr på nogen anden måde end
den, der er angivet i denne manual.
ForsigtighedsmærkningerForsigtighedsmærkninger
Forsigtighedsmærkninger
ForsigtighedsmærkningerForsigtighedsmærkninger
Læs alle mærkater og etiketter, der er sat på instrumentet. Der er risiko
for personskade eller beskadigelse af instrumentet, hvis der ikke tages
hensyn til dem. Hvis et symbol findes på instrumentet, findes det med en
fare- eller forsigtighedsbemærkning i manualen.
Hvis dette symbol findes på instrumentet, henviser det til
instruktionsmanualen for drift og/eller
sikkerhedsoplysninger.
Fra 12. august 2005 må bortskaffelse af udtjente
elektroniske instrumenter med dette symbol ikke længere
ske via de offentlige affaldshåndteringssystemer. I
overensstemmelse med gældende lokale og nationale
europæiske regler (EU-direktiv 2002/96/EF) skal
europæiske brugere af elektrisk udstyr nu returnere
gammelt eller udtjent udstyr til producenten uden
beregning.
Bemærk: I forbindelse med returnering til genbrug skal du
kontakte producenten eller leverandøren af udstyret for at
få instruktioner for, hvordan udtjent udstyr, elektrisk
tilbehør leveret af producenten samt alle
hjælpekomponenter bortskaffes korrekt.
Danish
Page 10

SäkerhetsinforSäkerhetsinfor
Säkerhetsinfor
SäkerhetsinforSäkerhetsinfor
Läs igenom hela handboken innan instrumentet packas upp, monteras
eller startas. Beakta särskilt alla risk- och varningshänvisningar.
Swedish
Missaktas dessa kan operatören råka i fara eller utrustningen ta skada.
Säkerställ att utrustningens inbyggda skydd ej skadas genom att den
används eller installeras på annat sätt än angivet i denna handbok.
SäkerhetsskyltarSäkerhetsskyltar
Säkerhetsskyltar
SäkerhetsskyltarSäkerhetsskyltar
Beakta samtliga märken och skyltar på instrumentet. Personskador eller
skador på instrumentet kan förekomma om de ej beaktas. Den här
symbolen på instrumentet finns i handboken tillsammans med risk- och
varningsinformation.
Denna symbol på instrumentet hänvisar till handboken för
drift och/eller säkerhetsinformation.
Efter den 12 augusti 2005 får elektrisk utrustning som har
den här symbolen inte längre kastas på offentliga
avfallsanläggningar i Europa. I överensstämmelse med de
lokala och nationella föreskrifterna i Europa (EU-direktiv
2002/96/EC) ska användare av elektrisk utrustning inom
Europa returnera gammal eller förbrukad utrustning till
tillverkaren för avyttring utan kostnad.
Obs! Vid returnering för återvinning, kontakta tillverkaren
eller återförsäljaren för instruktioner om hur förbrukad
utrustning, tillhörande elektrisk kringutrustning och
tillbehör ska returneras på rätt sätt.
mationmation
mation
mationmation
Page 11
InforInfor
Infor
InforInfor
Antes de desembalar, instalar ou colocar este instrumento em
funcionamento, leia este manual na sua totalidade. Preste especial
atenção às indicações de perigo, aviso e cuidado. A inobservância
destas indicações poderá resultar em ferimentos graves para o operador
ou em danos no equipamento.
De modo a não comprometer a protecção fornecida por este
equipamento, não deverá utilizar ou instalar o mesmo de outra maneira
que não a especificada no presente manual.
Etiquetas de precauçãoEtiquetas de precaução
Etiquetas de precaução
Etiquetas de precauçãoEtiquetas de precaução
Leia todas as etiquetas e indicações fixadas no instrumento. A
inobservância destas indicações poderá resultar em ferimentos ou em
danos no instrumento. Os símbolos apresentados no instrumento estão
incluídos no manual com uma indicação de perigo ou de cuidado.
mações de segurançamações de segurança
mações de segurança
mações de segurançamações de segurança
Quando encontrar este símbolo no instrumento, isto
significa que deverá consultar o manual de instruções
para obter informações sobre o funcionamento do
instrumento e/ou de segurança.
Desde 13 de Agosto de 2005, os equipamentos eléctricos
marcados com este símbolo não poderão ser depositados
nos sistemas europeus públicos de recolha de resíduos.
Em conformidade com a legislação europeia e nacional
(Directiva europeia 2002/96/EC), os utilizadores europeus
de equipamento eléctrico deverão devolver os
equipamentos usados ou em fim de vida ao Fabricante,
que procederá à sua eliminação sem quaisquer custos
para o utilizador.
Nota: Para recolha dos equipamentos a reciclar, contacte
o respectivo fabricante ou fornecedor relativamente às
instruções para devolução de equipamento em fim de
vida, de acessórios eléctricos fornecidos pelo fabricante e
das peças auxiliares para a devida eliminação
Portuguese
Page 12
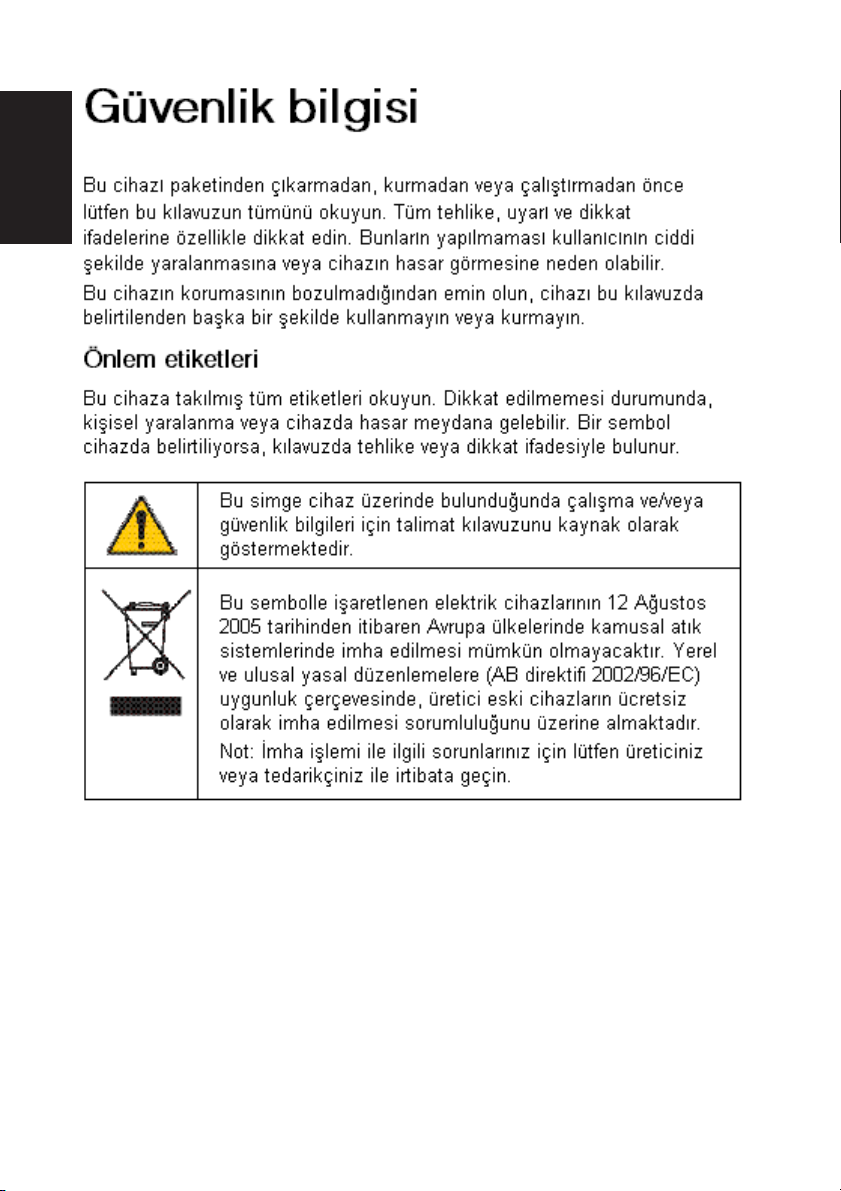
Turkish
Page 13
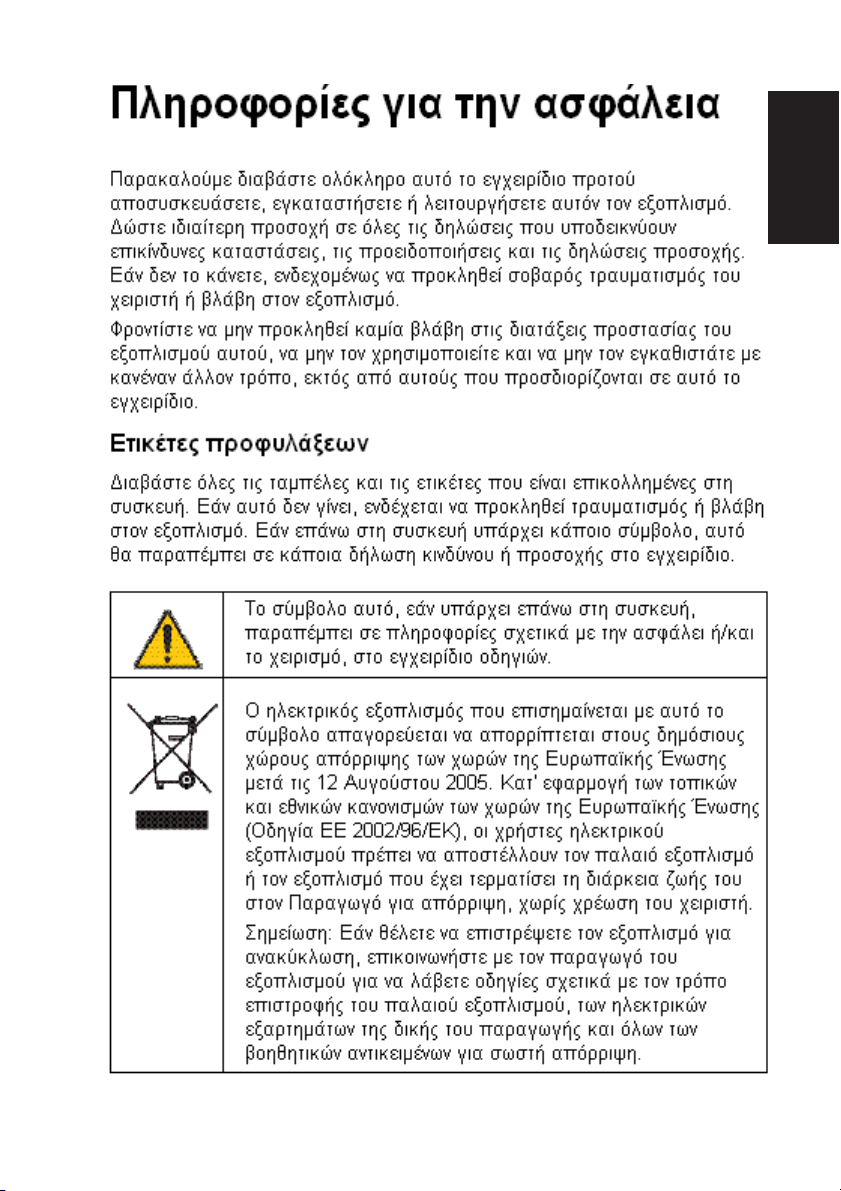
Greek
Page 14
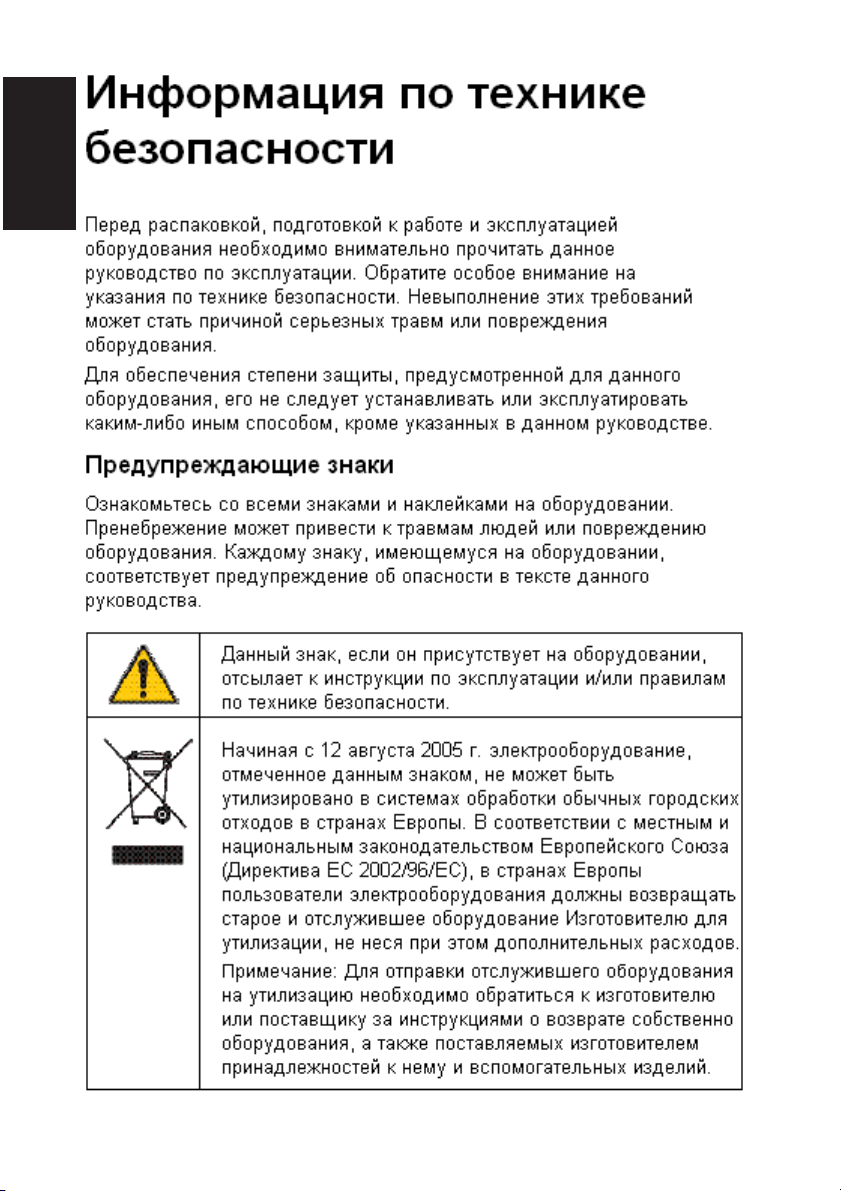
Russian
Page 15
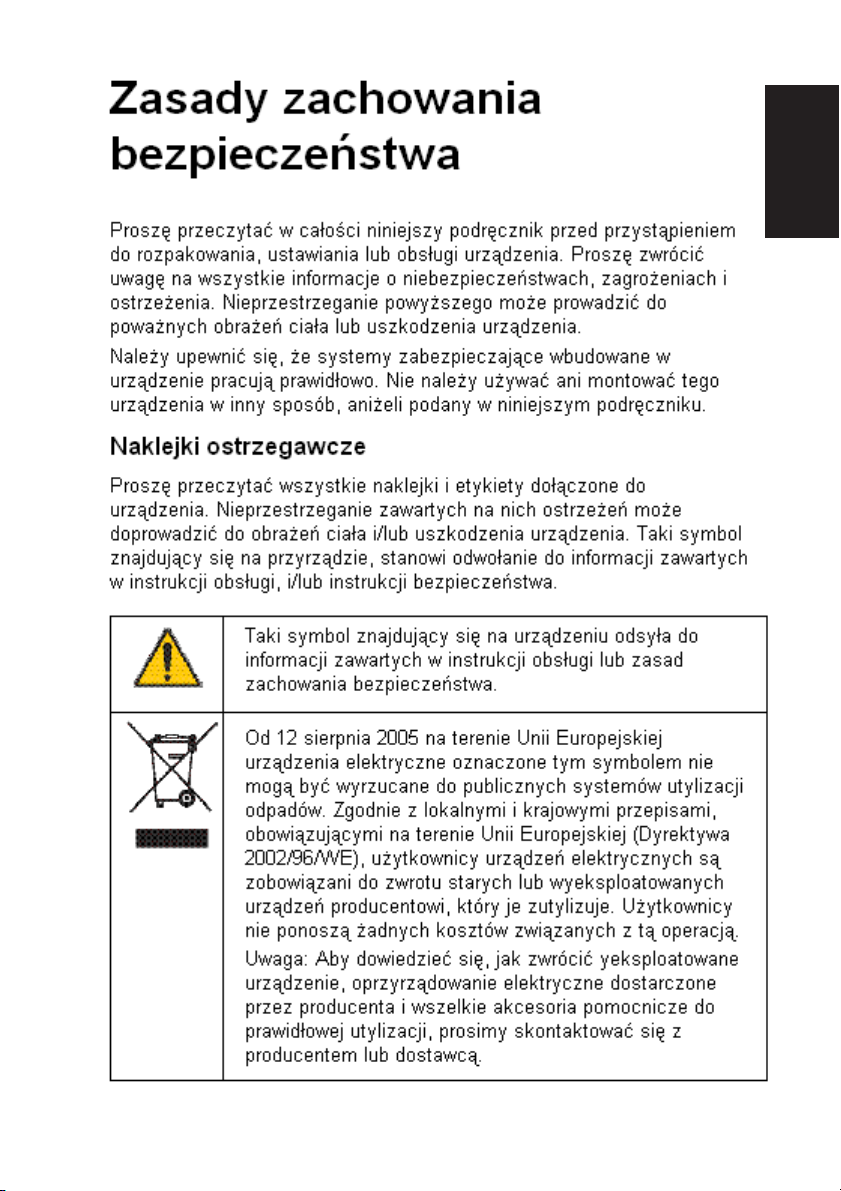
Polish
Page 16
Czech
Page 17
Hungarian
Page 18

Romanian
Page 19
Bulgarian
Page 20
Slovak
Page 21
Slovenian
Page 22
Serbian
Page 23

ContentsContents
Contents
ContentsContents
Safety information ................................................................. 3
1. Introduction ........................................................................ 25
Read me! ........................................................................................... 25
2. Getting started ....................................................................29
Keyboard............................................................................................ 29
Basic principles ................................................................................. 30
Main window ...................................................................................... 31
Reagents window ............................................................................... 32
Electrodes window ............................................................................. 34
Cell window ........................................................................................ 36
System configuration ......................................................................... 37
3. Programming guidelines ................................................... 45
Create an electrode ............................................................................ 46
Edit electrode screen ......................................................................... 49
Programming electrode parameters .................................................... 51
Create a reagent ................................................................................ 52
Edit reagent screen ............................................................................ 53
Programming reagent parameters ...................................................... 55
Create a method ................................................................................ 56
Edit method screen ............................................................................ 57
Programming method parameters ...................................................... 59
4. Running analyses ...............................................................61
Run electrode calibration .................................................................... 62
Run reagent calibration....................................................................... 62
Run method ....................................................................................... 62
Run sequence .................................................................................... 63
Run direct measurement .................................................................... 63
Page 24

5. Viewing data ........................................................................65
Sample results ................................................................................... 65
Reagent calibration results ................................................................. 67
Electrode calibration results ............................................................... 68
6. Printing data ....................................................................... 69
Manual printouts ................................................................................ 70
Automatic printouts ............................................................................ 72
7. Connection of peripherals .................................................73
8. General information ...........................................................75
Cleaning ............................................................................................. 75
Transporting the instrument ................................................................ 75
Servicing ............................................................................................ 75
International Standards ......................................................... 76
Page 25

1. Intr1. Intr
1. Intr
1. Intr1. Intr
Warning !
The TitraLab 84x system has been developed to meet the requirements
of volumetric titration applications. It is therefore aimed at experienced
users who have the knowledge required to operate the instrument and
implement the security instructions enclosed. Please remember that the
TitraLab 8xx system must not, under any circumstances, be used to
perform tests on living beings.
We accept no responsibility for using the TitraLab 84x system and its
peripheral devices under conditions that are not specified in this
User's Guide.
Read me!Read me!
Read me!
Read me!Read me!
The interface of the Titration Manager has been specially designed to
clearly guide you through every step of the programming and running of
the analyses, whether you are a supervisor or a routine user.
An important part of this interface is to check and control the presence of
different elements necessary to run the defined application.
Working in Supervisor modeWorking in Supervisor mode
Working in Supervisor mode
Working in Supervisor modeWorking in Supervisor mode
oductionoduction
oduction
oductionoduction
When programming in “SUPERVISOR” mode, it is recommended to
work in stages. These stages
below:
To program a methodTo program a method
To program a method
To program a methodTo program a method
1. Define your electrode(s)
Identify electrodes (including temperature sensors) to be used for the
analysis.
Electrodes can be created from the following lists, Catalogue, Other or
Copy from. When creating the electrode, define if electrode calibration is
required (or not), if yes specify the “periodicity” of the calibrations and the
pH standards to be used. Refer to chapter 3.
should
be carried out in the order described
Introduction 25
Page 26

2. Define reagent
Identify reagents to be used for the analysis.
Reagents can be created from the following lists, Catalogue, Other,
Copy from. When creating the reagent, define if reagent calibration is
required (or titre entered manually), if yes specify the “periodicity” of the
calibrations and the calibration method. Refer to chapter 3.
If you are to perform a calibration, make sure that the electrode(s)
used for the calibration are the same as those used in the method.
3. Create a new method or Edit a pre-programmed one
Create the measurement or titration method to be used for the analyses.
Enter the parameters required to calculate the results, refer to chapter 3.
When you have finished programming, select the method or preprogrammed application, refer to Short-Form Reminder no. 3.
If a sample changer is to be used, define the sample changer in the
Configuration menu.
4. Check icons
The following icons indicate the exact state of your working system.
Sunny icon:
Everything is OK. Run the method or sequence.
Sunny icons are required to run the method
.
Cloudy icon:
Action required within 12 or 24 hours. For example
electrode and/or reagent calibration.
Stormy icon:
Electrode/reagent calibration date elapsed or reagent not
installed.
Question mark:
It is a programming error, reagent and/or electrode is/are
not defined in the selected method. Revise the method
programming.
Refer to Reagent and Electrode windows.
26 Chapter 1
Page 27

When Cloudy/Stormy/Question mark icons appear, Press 1
“Check”. The Titration Manager will automatically guide you
through the operations necessary to solve the errors encountered
5. Running methods
To run a method or sequence, refer to chapter 4.
.
Introduction 27
Page 28

Working in Routine modeWorking in Routine mode
Working in Routine mode
Working in Routine modeWorking in Routine mode
In “ROUTINE” mode you are guided at every step, thanks to the cleartext messages and the icons present on the large graphic display.
Access methodsAccess methods
Access methods
Access methodsAccess methods
A Routine operator has access to all the displays for
Running methodsRunning methods
Running methods
Running methodsRunning methods
When working in “ROUTINE” mode, it is necessary to install your
titration system according to the selected method or sequence, prior to
running a method or sequence.
1. Select the method
Refer to chapter 4.
2. Check icons
The following icons indicate the exact state of your working system (see
page 6).
checking
purposes.
3. Running methods
To run a method or sequence, refer to chapter 4.
28 Chapter 1
Page 29

2. Getting star2. Getting star
2. Getting star
2. Getting star2. Getting star
KeyboardKeyboard
Keyboard
KeyboardKeyboard
7
1. Alphanumeric keypad to enter data and parameters on the same
principle as mobile telephones. These keys can also be used for
quick access to the different menus; refer to the display on the
following page.
2. Del: deletes the character on which the cursor is positioned.
Operator may end the analysis before the max. titration time or the
max. volume have been reached, if he considers his analysis
finished. Calculations are performed.
3. Esc: returns to the previous screen.
4. Print: prints the data concerning the screen displayed.
5. Stop: stops an analysis or a burette function. Press this key for 3
seconds in the Main window to gain access to the setup
parameters.
6. RIGHT, LEFT, UP, DOWN arrow keys are used to move to different
options within the menus.
7. ✓: confirms a data entry, a message or a function asked for by the
user.
tedted
ted
tedted
6
1
2
3
4
5
Getting started 29
Page 30

Basic principlesBasic principles
Basic principles
Basic principlesBasic principles
When the instrument is switched on, the Main window is displayed.
When the instrument is switched on for the first time the screen will be
as follows:
Title bar
Selected line
Menu options.
Press the
corresponding number
for quick access to the
different menus. For
example, press 5 to
enter the Method library
Method tab
If required, you can adjust the contrast of the display by:
• pressing 0 to increase the brightness,
• pressing 7 to decrease the brightness.
The title bar in the menu indicates the instrument name and the actual
time. You will be shown how to personalise the name and adjust the time
further on in the manual.
The RIGHT and LEFT arrow keys allow you to move from one tab to the
other and enter the Reagent, Electrode and Cell menus.
• Work your way through the 4 tabs, then back to the Main window.
The UP and DOWN keys allow you to select a line. To enter an option,
select the line, and press ✓. You can also press the corresponding
numerical key.
• Press 5 or select the line Method library and press ✓ to enter the
Method library screen. Press Esc to return to the Main window.
Reagent tab
Electrode tab Cell tab
30 Chapter 2
Page 31

Main windowMain window
Main window
Main windowMain window
When the instrument is switched on the Main window is displayed.
1
2
3
4
5
6
7
1. Title bar: indicates the instruments name and the current time.
2. Check or Run: check or run the selected method /sequence. The
method can be run when 2 sunny icons are displayed in the
Reagents and Electrodes tabs.
displayed, activate the "Check" command. The Titration
Manager will automatically guide you through the necessary
operations required to solve the problem(s)
3. Select method: select method and view the main parameters of
that method.
4. Sequence/sample stack: if a Sample Changer is used and declared
in the Configuration menu, program the sample stack. Select or edit
the sequence.
5. GLP-Archives: access GLP tables and visualise the stored method
sample results.
6. Method library: supervisor use only: create, edit, reset and delete
methods to correspond to your specific needs.
7. Method tab: Animated icon indicates when a method/sequence is
running.
If a cloudy/stormy icon is
.
Getting started 31
Page 32

Reagents windowReagents window
Reagents window
Reagents windowReagents window
Use the RIGHT arrow key to move to this window.
1
2
3
4
5
6
7
1. Title bar: indicates the name of the window.
2. Calibrate/Enter titre: determine the concentration of the titrant
(titre) by running a calibration or a calibration sequence or by
entering the titre manually.
3. Install reagents: install or replace reagents in a method or a
sequence.
4. Burette functions: fill, empty, flush, rinse and replace burette.
Global flush of all installed burettes simultaneously.
5. GLP-Archives: access GLP tables and visualise the last reagent
calibration results.
6. Reagent library- supervisor use only: create, edit, reset and delete
reagents to correspond to your specific needs.
7. Reagent tab: Reagent status icon indicates the state of the reagent
system.
Four types of icons can be displayed.
32 Chapter 2
Page 33

Sunny icon. The reagent calibration or manual entry of the
titre has been performed for all the reagents present in the
system. Everything is just right!
Cloudy icon. The reagent calibration of one of the reagents in
the system should be performed within 12 or 24 hours.
Stormy icon. The reagent calibration of one of the reagents
in the system has elapsed.
At least one of the reagents present in the system has not
been installed.
Check the sequence or method, (press 1 in the Main
window). The instrument prompts you to do the necessary
operations. You are guided step by step.
Question mark. There is a problem in the editing of the
reagent system. You need to be in Supervisor mode to solve
the problem. Check the sequence/method
parameters of the reagent or the electrode.
Check the sequence or method, (press 1 in the Main
window). The instrument indicates the possible errors and
prompts you to correct them until ? disappears.
Getting started 33
Page 34

Electrodes windowElectrodes window
Electrodes window
Electrodes windowElectrodes window
Use the RIGHT arrow key to move to this window.
1
2
3
4
5
6
1. Title bar: indicates the name of the window.
2. Calibrate electrode: run a calibration or a calibration sequence
using the installed electrodes.
3. Display measurement: displays mV and/or pH and/or temperature
at a connected electrode of the electrode system.
4. GLP-Archives: access GLP tables and visualise the last electrode
calibration results.
5. Electrode library - Supervisor use only: create, edit, reset and
delete electrodes stored in the instrument.
6. Electrode tab: Electrode status icon indicates the state of the
electrode system.
Four types of icons can be displayed.
34 Chapter 2
Page 35

Sunny icon. The calibration has been performed on the
electrode present in the system. Everything is just right!
Cloudy icon. The electrode calibration of the electrode
present in the system should be performed within 12 or 24
hours.
Stormy icon. The calibration date has elapsed for the
electrode present in the system.
If acceptance limits have been set for the calibration: at
least one calibration result lies outside the programmed
acceptance limits.
Check the sequence or method, (press 1 in the Main
window). The instrument prompts you to do the necessary
operations. You are guided step by step.
Question mark. There is a problem in the editing of the
electrode system. You need to be in Supervisor mode to
solve the problem. Check the sequence/method
parameters of the reagent or the electrode.
Check the sequence or method, (press 1 in the Main
window). The instrument indicates the possible errors and
prompts you to correct them until ? disappears.
Getting started 35
Page 36

Cell windowCell window
Cell window
Cell windowCell window
Use the RIGHT arrow key to move to this window.
1
2
3
4
1. Title bar: indicates the name of the window.
2. Internal stirring: command stirrer On/Off.
3. Speed: select the internal stirring speed, from 100 to 1100 rpm by
steps of 50 rpm.
4. Cell tab: animated icon indicates when the magnetic stirrer or
propeller is operating.
Apply internal stirringApply internal stirring
Apply internal stirring
Apply internal stirringApply internal stirring
1. Select Internal stirring = ON,
3. Press ✓ in the field Speed and select a stirring speed.
Apply external stirringApply external stirring
Apply external stirring
Apply external stirringApply external stirring
1. Connect the Stirring Propeller, part no. 847-731, to the Titration
Manager. Line 1 is automatically replaced by
External stirring.
2. Select External stirring = ON.
3. Adjust stirring by turning the stirring propeller knob. You can consult
the corresponding table between the position (1 to 9) and the stirring
speed by pressing ✓ in the field Speed setting.
36 Chapter 2
Page 37

System configurationSystem configuration
System configuration
System configurationSystem configuration
Proceed as follows to configurate your workstation
1. Press Stop for 3 seconds in the Main window to enter the Setup
menu.
2. Supervisor code:
Entering a Supervisor code enables you to differentiate
between the 2 operator modes: Routine and Supervisor:
In Routine mode, the user is able to select and run methods. In
Supervisor mode, the user can create, edit, select and run
methods. A Supervisor code is also used to protect your
parameters from any unwanted changes.
• Continue without entering a Supervisor code.
3. Press 1 to enter the Configuration menu.
Use the UP and
DOWN arrow
keys to select
the parameter.
Horizontal
scroll bar
The position of the bar indicates the first screen in the
Configuration menu. Use the RIGHT arrow key
to move to the next screen.
Getting started 37
Page 38

4. Press the RIGHT arrow key.
5. Press the UP arrow key.
The position of the bar indicates
the last screen in the
Configuration menu.
6. Press the LEFT arrow key to return to the first screen in the
Configuration menu.
38 Chapter 2
Page 39

Choosing the languageChoosing the language
Choosing the language
Choosing the languageChoosing the language
Choose your language for displays and printouts in the following way:
1. Use the UP and DOWN arrow keys to select the Language line.
2. Press ✓ to change a parameter as indicated at the bottom of the
screen.
3. Select the language.
Esc allows you to leave the screen without changing the language.
Getting started 39
Page 40

Setting the date and timeSetting the date and time
Setting the date and time
Setting the date and timeSetting the date and time
The current date and time are entered in the following displays:
1. Select Time.
Enter the hours (from 00 to 23).
2. RIGHT arrow key.
Enter the minutes (from 00 to 59).
3. RIGHT arrow key.
Enter the seconds (from 00 to 59).
The LEFT arrow key allows you to return to the previous screen to
modify an entered value.
4. Press ✓ to confirm (as indicated on the screen).
40 Chapter 2
Page 41

5. Select Date.
6. Press RIGHT arrow key.
7. Press RIGHT arrow key.
Enter the day (from 00 to 31).
Use the UP/DOWN keys to select the
month.
8. Press ✓.
Enter the year (from 2000 to 2069).
Getting started 41
Page 42

Customising the workstationCustomising the workstation
Customising the workstation
Customising the workstationCustomising the workstation
You can assign a name to your workstation, which will be permanently
displayed in the title bar of the Main window. Typing the name will
allow you to get used to using the instruments keypad.
1. Before leaving the Configuration menu:
• Select PC keyboard,
• select English (US).
This allows you to use a QWERTY keyboard.
2. Press Esc to return to the SETUP menu.
3. Press 3 (Customise).
Customise screen
displayed for a
TIM840.
4. Press
5. To replace "TIM840" by "Chem.lab-1", proceed as follows:
✓✓
✓ to select the Station parameter.
✓✓
• Press 7 until the letter "C" appears, then release the key. The
cursor moves to the next position.
42 Chapter 2
Page 43

7
ABC
• Press 9 until the letter "h" appears.
• Continue until you have entered (em.lab-1).
• To correct a typing error, proceed as follows:
Press the LEFT arrow key to position the cursor on the letter
"E". Press 7 to enter the letter "A".
The letter E has been inserted between the letter "A" and the
letter "B".
Press Del to delete the "E".
• Press ✓ to confirm the entry.
Getting started 43
Page 44

6. You can also use a PC keyboard to enter alphanumeric characters.
• Connect the PC keyboard to the 6-pin plug situated on the left
hand side of the instrument.
• Select the line Radiometer Analytical. This line is used
to enter information concerning the workplace, user(s) name(s),
location, address etc.
• Enter the text using the PC keyboard (maximum of 32 characters
can be used).
If the characters shown on the display do not correspond to the
ones typed on the keyboard, redefine your keyboard type. To do
this, press Esc then 1 and select PC keyboard.
• Press ✓ to confirm.
You have now finished the getting started section. Press Esc to leave the
Customise screen, then press 5 to quit the SETUP menu.
44 Chapter 2
Page 45

3. Pr3. Pr
3. Pr
3. Pr3. Pr
Only the Supervisor is allowed to program the menus, Electrode, Reagent,
and Method.
To select the Supervisor mode, press Stop for 3 seconds in the Main
window and enter the Supervisor code. Press 5 (Exit) and select
Return in mode = Supervisor.
For first time users, it is recommended to program the instrument as
follows:
1. Create the electrode(s) to be used to perform the measurements.
2. Create the reagent(s) to be used during the titration.
Then finally,
3. Create the method(s), which will consequently use the electrode(s)
Once you have finished programming, make sure that NO question
marks "?" are displayed in the Reagent and Electrode tabs!
ogramming guidelinesogramming guidelines
ogramming guidelines
ogramming guidelinesogramming guidelines
✶
IMPORTANT
and reagent(s) created in the first two steps of programming.
✶
Programming guidelines 45
Page 46

Create an electrodeCreate an electrode
Create an electrode
Create an electrodeCreate an electrode
1. Press 4 Electrode Library, then 1 New electrode.
2. Press ✓ in the Function field and select the function of the
electrode, refer to the table below:
Electrode type Select function
pH single pH
pH combined w/wo temp. sensor pH
Single metal/redox mV (i=0)
Combined metal/redox w/wo temp. sensor mV (i=0)
ISE single mV (i=0)
ISE Combined w/wo temp. sensor mV (i=0)
Reference single Reference
Temperature sensor T°C
Ground metal Ground
Double metal mV (i > 0)
3. Press ✓ in the ID field.
4. Select Other in the From field.
The option
electrode from a list of Radiometer Analytical electrodes.
5. Enter the identification (ID) of the electrode, (up to 16 characters).
6. Press 1 twice.
From = Catalogue
allows you to create an
46 Chapter 3
Page 47

7. Select the electrode Type, for electrodes with pH or mV functions:
• Single pH - pH electrode (no reference part),
• Combined pH - pH electrode with a reference part (with or
without temperature sensor),
• Single metal/redox - mV (i=0) function electrode with a reference part,
• Combined metal/redox - mV (i=0) function electrode with a
reference part (with or without temperature sensor).
8. When a combined electrode has been defined, the instrument will
prompt you to specify if it has a built-in temperature sensor or not.
When a single electrode has been defined, the instrument will
prompt you to define a reference electrode in the Edit
electrode screen.
9. When a combined or a reference electrode has been defined,
enter the potential (in mV) of the reference element versus the
Standard Hydrogen Electrode (SHE).
This parameter enables to run calibration with automatic buffer
recognition when working with different reference electrode systems.
On the next page, see the table giving the potential at 25°C versus
the SHE of a few "reference elements/filling solution" couples.
10. When a combined pH or a single pH electrodes has been defined,
enter the internal pH of the electrode (pH int).
11. Press 1 to confirm.
12. Edit the electrode parameters.
Programming guidelines 47
Page 48

Reference element and filling Potential Radiometer Analytical
solution versus SHE Electrodes
Hg/Hg2Cl2 - Saturated KCl +244 mV pHC4000, pHC4001, pHC4006,
SCE: Saturated Calomel Electrode
Hg/Hg2Cl2 - 1M LiCl +280 mV REF921
NCE: Normal Calomel Electrode
Hg/Hg2SO4 - Saturated K2SO
Hg/Hg2SO4 - 1 M H2SO
4
4
+651 mV REF601, REF621, XR200,
+616 mV
Hg/HgO - 0.1 M KOH +174 mV XR400, XR430, XR440
Ag/AgCl - Saturated KCl +199 mV XR300, XR820, XC100, XC111,
Ag/AgCl - 3 M KCl +208 mV pHC3001, pHC3005, pHC3006,
Ag/AgCl - 1 M KCl +235 mV
Ag/AgCl - 0.6 M KCl (sea water) +250 mV
Red Rod - Saturated KCl +199 mV pHC2001, pHC2002, pHC2003,
XC601, REF401, REF421,
REF451, XR100, XR110,
XR130, XR150, MC408Pt
XR230, MC602Pt, MC6091Ag
XC120, XC161, XC200, XC250,
pHC3011, pHC3081, pHC3185,
REF321, REF361, MC3051Pt,
ISEC301F
pHC2005, pHC2011, pHC2015,
pHC2051, pHC2085, pHC2401,
pHC2441, pHC2501, pHC2601,
pHC2701, REF200, REF201,
REF251, REF261, MC2095Sb,
MC201Au-8
48 Chapter 3
Page 49

Edit electrode screenEdit electrode screen
Edit electrode screen
Edit electrode screenEdit electrode screen
1. Press 4 Electrode library.
2. Press ✓ and select the electrode to be edited from the list.
3. Press 2 Edit electrode.
4. Edit the necessary parameters.
a. Electrode address: indicates which Titration Manager socket the
electrode is connected to:
TIM / E1, Ref, Temp, GND or Pt-Pt.
b. Select whether the electrode should be calibrated or not
(Calibration request = Yes or No).
If Calibration request = No, the electrode parameter
edition is completed.
Programming guidelines 49
Page 50

c. Enter the Periodicity.
Indicates the maximum period of time between two calibrations. If
the period of time is exceeded, pH measurements can no longer be
performed using this pH electrode. The electrode must be
calibrated.
d. Enter the Number of buffers
Enter the number of standards (1 to 5) to be used for the
calibration.
f. Specify if a temperature sensor is in use.
If a temperature sensor is in use, select Probe.
If the temperature is entered manually via the numeric keypad,
select Entered.
If the calibration is to be performed at 25°C, select Fixed 25°C.
If you have selected Temperature = Probe, a temperature
sensor must have been selected in the Parameters screen.
.
50 Chapter 3
Page 51

Programming electrode parametersProgramming electrode parameters
Programming electrode parameters
Programming electrode parametersProgramming electrode parameters
1. If Calibrate request = yes, enter the electrode definition
parameters and go to the last Edit electrode screen.
2. Press 1:
To enter Calibration parameters: general parameters
used during the calibration,
3. Press 2:
To enter Calibration solutions parameters concerning
the standards used for the calibration,
4. Press 3:
To enter the Results parameters concerning acceptation criteria
that you can set on the results.
5. Press 4:
To enter Printouts parameters defining the calibration report to
be printed.
Programming guidelines 51
Page 52

Create a reagentCreate a reagent
Create a reagent
Create a reagentCreate a reagent
1. Press 5 Reagent library then 1 New reagent.
2. Press ✓ in the New reagent screen.
3. Select From = Other.
The option
reagent from a list of Radiometer Analytical reagents.
4. Press ✓ in the ID field and enter the reagent name (up to 16
characters).
5. Enter the "approximate" titre of the reagent (5 characters) in the
Target titre field.
From = Catalogue
allows you to create a
6. Enter the units (mM, M, mN, N) indicated on the reagent bottle. Use
the following: mM = mmol/l, M = mol/l, mN = meq/l or N = eq/l).
Note: If molar units are selected (mM or M), it is necessary to enter
the stoichiometric coefficients for the chemical reaction in the
Results screen.
For info: once the units have been confirmed, they are added to
the reagent ID and target titre.
7. Press 1 twice to create the reagent.
8. Edit the reagent parameters (see next page).
52 Chapter 3
Page 53

Edit reagent screenEdit reagent screen
Edit reagent screen
Edit reagent screenEdit reagent screen
1. Press 5 Reagent library.
2. Press ✓ and select the reagent to be edited from the list.
3. Press 2 Edit reagent.
4. Edit the necessary parameters.
a. Modify the units (mM, M, mN, N) indicated on the reagent bottle. Use
the following: mM = mmol/l, M = mol/l, mN = meq/l or N = eq/l).
b. Address (TIM845 only):
Indicates the location of the burette containing the reagent: TIM/1 or
TIM/2 (position 1 or 2 on the TIM845)
Programming guidelines 53
Page 54

c. Select Titre = Enter or Calibrate,
Select Enter if you already know the titrant concentration and
do not wish to perform a calibration.
Select Calibrate, if you wish to perform a calibration. Enter the
calibration parameters; see below.
d. Select the type of method for Mode. You have the choice between
End Point, Monotonic IP, Dynamic IP or Continuous IP.
e. Select the measurement mode for the calibration (pH, mV or mV at
imposed current).
f. Enter the Periodicity.
Indicates the maximum period of time between two calibrations. If
the period of time has elapsed, titrations can no longer be performed
using this titrant.
g. Enter the Number of tests.
This is the number of times the calibration method will be repeated,
i.e. the number of beakers to prepare for the calibration.
h. Specify if a temperature sensor is in use.
If a temperature sensor is in use, select Probe.
If the temperature is entered manually via the numeric keypad,
select Entered.
If the calibration is to be performed at 25°C, select Fixed 25°C.
If you have selected Temperature = Probe, a temperature
sensor must be selected in the Calibration parameters
screen.
i. If you want a message to be displayed upon starting the calibration,
select Notification = Yes then enter the message (3 lines
of 32 characters maximum).
54 Chapter 3
Page 55

Programming reagent parametersProgramming reagent parameters
Programming reagent parameters
Programming reagent parametersProgramming reagent parameters
1. If Titre = Calibrated, enter the reagent definition
parameters and go to the last Edit method screen.
2. Press 1:
To enter Calibration parameters: general parameters
used during the calibration.
3. Press 2:
To enter Standard parameters concerning the standard solution
used for the calibration.
4. Press 3:
To enter the Results parameters concerning stoichiometric
coefficients for the chemical reaction (if required).
5. Press 4:
To enter Printouts parameters defining the calibration report to
be printed.
Programming guidelines 55
Page 56

Create a methodCreate a method
Create a method
Create a methodCreate a method
1. Press 5 Method library then 1 New method.
2. Press ✓ in the ID field.
3. Enter a method name (up to 16 characters).
4. Press 1 and edit the method parameters (see the next page).
56 Chapter 3
Page 57

Edit method screenEdit method screen
Edit method screen
Edit method screenEdit method screen
1. Press 5 Method library.
2. Press ✓, select the method to be edited from the list then press 2
Edit method.
3. Edit the necessary parameters.
a. Select the method mode. The modes available are:
• Measurement (pH, mV or mV at imposed current)
• End point (titration to a preset mV or pH end point)
• Coupled (methods chained in a same beaker)
• Continuous IP (Inflection point detection with continuous addition
of the titrant)
Programming guidelines 57
Page 58

• Monotonic IP (Inflection point detection with incremental addition
of the titrant, increments of equal size)
• Dynamic IP (Inflection point detection with incremental addition
of the titrant, increments of varying size)
b. Select the measurement mode: pH, mV or mV at imposed current.
c. Select the way the temperature is to be measured.
• Probe: temperature sensor is required during measurements.
• Entered: temperature is to be entered manually using the
keypad.
• Fixed 25°C: measurements are assumed to be performed at
25°C.
d. Enter the Number of tests, i.e. the number of times the
method is to be repeated.
e. If you want a message to be displayed upon starting the method,
select Notification = Yes then enter the message (3
lines of 32 characters maximum).
f. Select the way the cell grounding of the measuring electrode will be
performed:
• Reference: reference electrode connected to the Ref
socket on the titration system.
• Metal: metal electrode connected to the GND socket on the
titration system. For titrations in very resistant medium.
• Other: an electrode which does not belong to the electrode
system.
g. Blank: A blank or blank sample is usually a solvent used to dissolve
or dilute the sample. This blank may contain traces of the species
you are analysing. Select Yes for Blank when you want to
subtract the volume of titrant used to titrate the solvent from the
volume found for the dissolved or diluted sample.
58 Chapter 3
Page 59

Programming method parametersProgramming method parameters
Programming method parameters
Programming method parametersProgramming method parameters
1. Go to the last Edit method screen.
2. Enter the parameters. The parameters displayed will all depend on
the measurement type and mode selected.
3. Press 1:
To enter the Method parameters: general parameters
concerning the electrode and reagent (when required) used by the
method and the titration parameters.
4. Press 2:
To enter the Sample parameters: concerning the sample amount
analysed.
5. Press 3:
To enter the Results parameters defining the results and
stoichiometric coefficients for the chemical reaction (if required).
6. Press 4:
To enter the Printouts: parameters defining the analysis report
to be printed.
Programming guidelines 59
Page 60

60 Chapter 3
Page 61

4. Running analyses4. Running analyses
4. Running analyses
4. Running analyses4. Running analyses
✶
IMPORTANT
Before pressing the Run key, check the following points listed below:
1. Select the method by pressing 2 in the Main window.
2. If Question marks "?" are present in the electrode and/or reagent
tabs. Programming error due to missing electrode/reagent
parameters. Contact your supervisor.
✶
3. Connect/Check electrode(s).
When installing/checking an electrode system, do not forget to
connect all the electrodes to the Titration Manager and disconnect
all the electrodes that are not used by the method.
4. Install/Check reagent(s).
5. Run the analysis when Sunny icons are visible in the electrode and
reagent tabs.
6. Run an electrode calibration when a Stormy icon appears in the
electrode tab.
7. Run a reagent calibration when a Stormy icon appears in the titrant
tab.
8. If you are unable to display the "Run" command due to the presence
of Cloudy/Stormy icons in the Reagent and Electrode windows,
activate the "Check" command. The Titration Manager will
automatically guide you through the necessary operations required to
solve the problem(s).
Refer to Short-Form Reminder no. 1.
Refer to Short-Form Reminder no. 2
.
Running analyses 61
Page 62

Run electrode calibrationRun electrode calibration
Run electrode calibration
Run electrode calibrationRun electrode calibration
Refer to Short-Form Reminder no. 4
1. Select the method.
2. Install the electrode group.
3. Enter the Electrodes window.
4. Select 1 Calibrate electrodes. Press ✓ to select the
electrode to be calibrated from the proposed list.
5. Press 1 to start the calibration.
Run reagent calibrationRun reagent calibration
Run reagent calibration
Run reagent calibrationRun reagent calibration
Refer to Short-Form Reminder no. 5
1. Select the method.
2. Install the reagent to be calibrated.
3. Install the electrode group to be used to perform the calibration.
4. Enter the Reagents window.
5. Select 1 Calibrate/Enter titre. Press ✓ and select the
reagent from the proposed list.
6. Press 1 to start the calibration.
.
.
Run methodRun method
Run method
Run methodRun method
Refer to Short-Form Reminder no. 6.
1. Select the method.
2. Install the electrode then the reagent groups to be used to perform
the analysis.
3. Display the Main window.
4. Press 1 to start the analysis.
62 Chapter 4
Page 63

Run sequenceRun sequence
Run sequence
Run sequenceRun sequence
Refer to Short-Form Reminder no. 7.
1. Install the electrode then the reagent groups to be used to perform
the analysis.
2. Display the Main window. Press 3 then 1 and prepare the sample
stack.
3. Display the Main window. Press 1 to start the analysis.
Run direct measurementRun direct measurement
Run direct measurement
Run direct measurementRun direct measurement
Refer to Short-Form Reminder no. 8.
1. Select the method.
2. Install the electrode group.
3. Display the Electrodes window.
4. Press 2 to start the measurement.
5. Select the electrode in the list. You can stop or start stirring by
pressing 1.
Running analyses 63
Page 64

64 Chapter 4
Page 65

5. V5. V
5. V
5. V5. V
Sample resultsSample results
Sample results
Sample resultsSample results
The last 60 results are saved in the archives.
Access: Select the method, enter the Main window and press 4 GLP-
Archives to access.
The RIGHT and LEFT arrow keys allow you to move from one screen to
the other. 4 is the number of results saved for the selected method.
iewing dataiewing data
iewing data
iewing dataiewing data
Result no. 1/4 = Mean
1/4 = Mean and standard deviation
calculated on R1 test results.
Result no. 2/4 = Test no.1
R1 result for test no. 1.
Mean and standard deviation
calculated on R2 test results.
R2 result for test no. 1.
Viewing data 65
Page 66

Result no. 3/4 = Test no.2
R1 result for test no. 2.
R1 result for test no. 3.
R2 result for test no. 2.
Result no. 4/4 = Test no.3
R2 result for test no. 3.
66 Chapter 5
Page 67

Reagent calibration resultsReagent calibration results
Reagent calibration results
Reagent calibration resultsReagent calibration results
The last performed (current) calibration of each reagent is saved in the
archives.
Access:
Select the method which uses the reagent.
Enter the Reagents window.
Press 4 GLP-Archives to access.
Viewing data 67
Page 68

Electrode calibration resultsElectrode calibration results
Electrode calibration results
Electrode calibration resultsElectrode calibration results
The last performed (current) calibration of each electrode is saved in the
archives.
Access:
Select the method which uses the electrode.
Enter the Electrodes window.
Press 3 GLP-Archives to access.
68 Chapter 5
Page 69

6. Printing data6. Printing data
6. Printing data
6. Printing data6. Printing data
✶
IMPORTANT
Before printing, it is necessary to perform the following:
1. Enter the Setup window: press Stop 3 seconds in the Main
window.
2. Select the Printer
Press 1.
In Configuration, select Printer = 80 columns and
Format = Listing or Page by Page.
3. Enter User ID (if required)
In Configuration, select User ID = Yes. You will be
prompted to enter a user ID at the start of a run method. This ID will
appear on the printouts.
4. Customise the printout (if required)
In Configuration, press 3.
In Customise, enter the name of your workstation (max. 4 lines
of 32 characters). This information will appear as a header at the
start of the printout.
✶
5. For automatic printout - select a condensed or detailed printout
In the Printouts screen of the Edit method/reagent/electrode,
select Detailed = High to obtain a full detailed printout.
Select Low for condensed printout.
Printing data 69
Page 70

Manual printoutsManual printouts
Manual printouts
Manual printoutsManual printouts
Method libraryMethod library
Method library
Method libraryMethod library
Press Print, in the Main window to give you an overview of the methods
available in the method list.
Reagent libraryReagent library
Reagent library
Reagent libraryReagent library
Press Print, in the Reagents window to give you an overview of the
reagents available in the reagent list.
Electrode libraryElectrode library
Electrode library
Electrode libraryElectrode library
Press Print, in the Electrodes window to give you an overview of
the electrodes available in the electrode list.
70 Chapter 6
Page 71

Edit method dataEdit method data
Edit method data
Edit method dataEdit method data
In the Main window, press 5 Method library then Print to give you
an overview of the parameters of the current programmed method. These
are the parameters entered in the Edit method screen (press 2 to
access).
Edit reagent dataEdit reagent data
Edit reagent data
Edit reagent dataEdit reagent data
Press 5 Reagent library in the Reagents window then Print to
give you an overview of the parameters of the current programmed
reagent. These are the parameters entered in the Edit reagent
screen (press 2 to access).
Edit electrode dataEdit electrode data
Edit electrode data
Edit electrode dataEdit electrode data
Press 4 Electrode library in the Electrodes window then
Print to give you an overview of the parameters of the current
programmed electrode. These are the parameters entered in the Edit
electrode screen (press 2 to access).
Printing data 71
Page 72

Automatic printoutsAutomatic printouts
Automatic printouts
Automatic printoutsAutomatic printouts
The Print key is inactive during a titration, pH/mV measurement,
electrode or reagent calibration.
The results obtained during a "Run" are printed automatically.
Depending on the option selected for Detailed in the Edit method/
reagent/electrode - Printout window, you will obtain different types of
printouts.
Example of a printout for a titration
Header: information entered
in the Customise screen
of the Setup window.
Title of report:
entered in Printouts
screen during
method editing
Analysis ID: User ID and
Sample ID entered at the start
of the titration (if option selected
during editing)
72 Chapter 6
Titration results: obtained at
the end of the analysis
Calibration data: of the electrode
and reagent used to perform the
titration
Page 73

7. Connection of peripherals7. Connection of peripherals
E1
PROPELLER
TTL
90-264
ac
47-63
Hz 115VAVA
PC/PRINTER
BALANCE
SAC
AUX.
MADE IN FRANCE
RADIOMETER ANALYTICAL SAS
SLAVE
LINE FUSE T1A L250V
TEMP
GND
REF
Pt-Pt
7. Connection of peripherals
7. Connection of peripherals7. Connection of peripherals
PC, cable A95X501
Printer, cables A95P201/
Sample Changer, cable
A95A202
A95X506
Balance Mettler (A95Z201,
A95Z205, A95Z206)
Sartorius, (A95Z202, A95Z204)
MADE IN FRANCE
RADIOMETER ANALYTICAL SAS
PC/PRINTER
SLAVE
LINE FUSE T1A L250V
90-264
Vac
47-63
Hz 115
PROPELLER
I
O
BALANCE
SAC
AUX.
TTL
E1
TEMP
REF
Pt-Pt
GND
Line cord,
230 V (A95S001),
115 V (A95S002)
Single metal electrodes
for grounding only
Temperature sensors
Double metal electrodes
Reference electrodes
Combined pH or ISE
electrodes w/wo
temperature sensor
Single pH or ISE
electrodes
Single or combined metal
electrodes (Redox
measurements)
Connection of peripherals 73
Page 74

74 Chapter 7
Page 75

8. General infor8. General infor
8. General infor
8. General infor8. General infor
CleaningCleaning
Cleaning
CleaningCleaning
The Titration Manager requires minimum maintenance. The exterior
surface can be cleaned with tepid water and wiped dry with a soft cloth.
Never use another solvent unless you have first consulted your
Radiometer Analytical representative
TT
ransporranspor
T
ranspor
TT
ransporranspor
Always use the packaging supplied by the manufacturer.
IMPORTANT!
Remove the metal rod before transporting the instrument.
Never pick-up or carry the instrument by the metal rod.
ServicingServicing
Servicing
ServicingServicing
DO NOT ATTEMPT TO SERVICE THIS PRODUCT YOURSELF, except
as noted in the Reference Manual. For servicing, please contact your
Radiometer Analytical service representative.
List available at
ting the instrumentting the instrument
ting the instrument
ting the instrumentting the instrument
http://www.radiometer-analytical.com/en_distributors.asp
mationmation
mation
mationmation
.
Your local contact:
_________________________________
_________________________________
_________________________________
_________________________________
General information 75
Page 76

InterInter
Inter
InterInter
RADIOMETER ANALYTICAL SAS
72 rue d’Alsace 69627 Villeurbanne Cedex, France
E-mail : radiometer@nalytical.com Web : www.radiometer-analytical.com
Tél. : +33 (0)4 78 03 38 38 - Fax : +33 (0)4 78 68 88 12
national Standarnational Standar
national Standar
national Standarnational Standar
dsds
ds
dsds
CE Marking
DECLARATION OF CONFORMITY
Radiometer Analytical SAS
We,
declare under our sole responsibility that the Potentiometric Titration Workstations
including TIM840, TIM845, TIM850, TIM854, TIM855, TIM856, TIM860, TIM865, TIM870, TIM880,
AutoCAT, TIM Aqua and ABU52
are in conformity with the provisions of:
Low voltage directive
EMC directive
CE harmonisation directive
following standards and severity levels of:
EN 61010-1
, 1995
EN 55011
(radio frequency interference) 1991,
EN 61000-3-2
EN 61000-3-3
EN 61000-4-2
EN 61000-4-3
EN 61000-4-4
EN 61000-4-5
EN 61000-4-6
EN 61000-4-11
after tests and qualification of our products, regarding "EMC" directive, performed by:
AEMC Mesures
competent and notified body
qualification report no. L03235
TIM850 & TIM870 workstations, completed by internal reports A058B15A & A058B28E,
APAVE
, Tassin la Demi lune (69), independent laboratory, with an
report no. 20111436
workstation, completed by our internal report A058B08A
,
73/23/EEC, dated 19/2/73
89/336/EEC, dated 3/5/1989, 92/31/EEC, dated 28/4/1992,
93/68/EEC, dated 22/7/1993,
class A
, 1995,
, 1995,
level 2
, 1995,
, 1996,
, 1995,
, 1995,
, 1996,
(4kV) with contact discharges and
level 1
(1V/m),
level 2
(1kV) on AC power line and
level 2
level 1
(1V),
, 1994,
, Chassieu (69) independent laboratory,
, with a
, dated April 17, 2003 which attests
, dated February 21, 2001, which attests the conformity of the TIM850
class A,
level 3
level 2
(0.5kV) on I/O signals,
Cofrac
qualification report no. L01033
accredited under the number 1-0543,
electrical security qualification
(8kV) with air discharges,
, dated February 14, 2001 and a
the EMC conformity
TIM8xx
,
of the
Year of the first CE marking:
Villeurbanne, July 6, 2005
Ref. Document: A058B30F Page1/1
2001
.
Georges RIVOIRARD
Quality Manager
76 Chapter 8
Page 77

The Titration Manager complies with the following standards:
UL 61010A - 1
CAN / CSA C22 2 N° 1010.1 - 92.
General information 77
Page 78

78 Chapter 8
Page 79

Electrical and electronical equipment marked with this symbol may
not be disposed of in European public disposal systems after 13
August of 2005. In conformity with European local and national
regulations (EU Directive 2002/96/EC), European electrical equipment
users must now return old or end-of life equipment to the Producer
for disposal at no charge to the user.
Note: For equipment produced by "Radiometer Analytical", please talk
to your local contact.
Important document. Retain with product records.
GERMAN
Elektrogeräte, die mit diesem Symbol gekennzeichnet sind, dürfen in Europa nach dem
13. August 2005 nicht mehr über die öffentliche Abfallentsorgung entsorgt werden. In
Übereinstimmung mit lokalen und nationalen europäischen Bestimmungen (EU-Richtlinie
2002/96/EC), müssen Benutzer von Elektrogeräten in Europa ab diesem Zeitpunkt alte
bzw. zu verschrottende Geräte zur Entsorgung kostenfrei an den Hersteller zurückgeben.
Hinweis: Für die Entsorgung von elektronischen Geräten, die von "Radiometer Analytical"
geliefert oder produziert wurden, bitte kontaktieren Sie Ihren lokalen Ansprechpartner.
Wichtige Informationen. Bitte zusammen mit den Produktinformationen aufbewahren.
FRENCH
Les équipements électriques et électroniques repérés par ce symbole ne devront plus
être déposés dans un système de collecte d’ordures ménagères d’un pays européen à
partir du 13 août 2005. Conformément à la réglementation Européenne et nationale
(Directive EU 2002/96/CE), les utilisateurs européens d’appareillage électrique doivent à
présent retourner au fabricant leurs équipements anciens ou en fin de vie pour être
recyclés. Les frais de traitement sont à la charge du fabricant.
Note : Pour un équipement produit par "Radiometer Analytical", nous vous saurions gré de
bien vouloir contacter votre partenaire local.
Ce document est important. Conservez-le dans le dossier du produit.
ITALIAN
Le apparecchiature elettriche con apposto questo simbolo non possono essere smaltite
nelle discariche pubbliche europee successivamente al 13 agosto 2005. In conformità alle
normative europee locali e nazionali (Direttiva UE 2002/96/EC), gli utilizzatori europei di
apparecchiature elettriche devono restituire al produttore le apparecchiature vecchie o a
fine vita per lo smaltimento senza alcun costo a carico dell’utilizzatore.
N.B.: per l'equipaggiamento prodotto da "Radiometer Analytical", si prega di contattare il
responsabile locale.
Documento importante. Conservare con la documentazione del prodotto.
DANISH
Elektriske apparater, der er mærket med dette symbol, må ikke bortskaffes i europæiske
offentlige affaldssystemer efter den 13. august 2005. I henhold til europæiske lokale og
nationale regler (EU-direktiv 2002/96/EF) skal europæiske brugere af elektriske apparater
nu returnere gamle eller udtjente apparater til producenten med henblik på bortskaffelse
uden omkostninger for brugeren.
Bemærk: For udstyr produceret af "Radiometer Analytical", affaldsanlæg, kontakt den
lokale kontaktperson.
Vigtigt dokument. Opbevares sammen med produktdokumenterne.
Page 80

SWEDISH
Elektronikutrustning som är märkt med denna symbol kanske inte kan lämnas in på
europeiska offentliga sopstationer efter 2005-08-13. Enligt europeiska lokala och
nationella föreskrifter (EU-direktiv 2002/96/EC) måste användare av elektronikutrustning i
Europa nu återlämna gammal eller utrangerad utrustning till tillverkaren för kassering utan
kostnad för användaren.
Observera: För utrustning som levererats eller tillverkats av "Radiometer Analytical", var
snäll och ta kontakt med den lokala representanten.
Viktigt dokument. Spara tillsammans med dina produktbeskrivningar.
SPANISH
A partir del 13 de agosto de 2005, los equipos eléctricos que lleven este símbolo no
deberán ser desechados en los puntos limpios europeos. De conformidad con las
normativas europeas locales y nacionales (Directiva de la UE 2002/96/EC), a partir de
esa fecha, los usuarios europeos de equipos eléctricos deberán devolver los equipos
usados u obsoletos al fabricante de los mismos para su reciclado, sin coste alguno para
el usuario.
Nota: Para equipos fabricados por "Radiometer Analytical", desechos, sírvase consultar
con el responsable para su zona.
Documento importante. Guardar junto con los registros de los equipos.
DUTCH
Elektrische apparatuur die is voorzien van dit symbool mag na 13 augustus 2005 niet
meer worden afgevoerd naar Europese openbare afvalsystemen. Conform Europese lokale
en nationale wetgegeving (EU-richtlijn 2002/96/EC) dienen gebruikers van elektrische
apparaten voortaan hun oude of afgedankte apparatuur kosteloos voor recycling of
vernietiging naar de producent terug te brengen.
Opmerking: neem voor apparatuur die wordt geproduceerd door "Radiometer
Analytical", gelieve contact op te nemen met uw lokale contacpersoon.
Belangrijk document. Bewaar het bij de productpapieren.
POLISH
PORTUGESE
Qualquer equipamento eléctrico que ostente este símbolo não poderá ser eliminado
através dos sistemas públicos europeus de tratamento de resíduos sólidos a partir de 13
de Agosto de 2005. De acordo com as normas locais e europeias (Directiva Europeia
2002/96/EC), os utilizadores europeus de equipamentos eléctricos deverão agora
devolver os seus equipamentos velhos ou em fim de vida ao produtor para o respectivo
tratamento sem quaisquer custos para o utilizador.
Nota: Relativamente ao equipamento produzido por "Radiometer Analytical", é favor
recomendamos-vos que contacte o vosso parceiro local.
Documento importante. Mantenha junto dos registos do produto.
 Loading...