

HAB ibinds v3 User Manual
v3
User Guide
Z-WaveTM and Z-Wave PlusTM are
registered trademarks of Silicon
Labs and it’s subsidiaries in the
United States and other countries.

ibinds v3 User Guide – v3.0 Page 2
©HAB Home Intelligence, LLC. 09/2020
WARNING
Read all warnings and instructions prior to installing the device. Failure to follow these instructions may result in property
damage or serious personal injury.
Before installation, check that this product is compatible with the associate equipment and accessories.
Do not use the device for anything other than its intended use. Any use outside the sphere of application specified by HAB
Home Intelligence is not approved. Such use, or any failure to comply with the instructions given herein will invalidate the
warranty and HAB Home Intelligence refuses to accept liability.
CAUTION
• To avoid damaging the product never immerse it in liquid, avoid impacts, never drill holes in it and do not drop it.
• Existing metal blinds may have sharp edges. Use gloves to prevent cuts or abrasions when removing and reinstalling
blinds.
• To prevent cable damage or abrasion, do not expose cables to edges of sheet metal or other sharp objects.
FCC Statement
This equipment has been tested and found to comply with the limits for a Class B digital device, pursuant to Part 15 of the FCC
Rules. These limits are designed to provide reasonable protection against harmful interference in a residential installation. This
equipment generates uses and can radiate radio frequency energy and, if not installed and used in accordance with the
instructions, may cause harmful interference to radio communications. However, there is no guarantee that interference will
not occur in a particular installation. If this equipment does cause harmful interference to radio or television reception, which
can be determined by turning the equipment off and on, the user is encouraged to try to correct the interference by one or
more of the following measures:
• Reorient or relocate the receiving antenna.
• Increase the separation between the equipment and receiver.
• Connect the equipment into an outlet on a circuit different from that to which the receiver is connected.
• Consult the dealer or an experienced radio/TV technician for help.
This device complies with part 15 of the FCC Rules. Operation is subject to the following two conditions: (1) This device may not
cause harmful interference, and (2) this device must accept any interference received, including interference that may cause
undesired operation.
Any changes or modifications not expressly approved by the party responsible for compliance could void the user's authority to
operate the equipment.
SAFETY INFORMATION
ibinds v3 User Guide – v3.0 Page 3
©HAB Home Intelligence, LLC. 09/2020
ibinds v3 User Guide – v3.0 Page 4
©HAB Home Intelligence, LLC. 09/2020
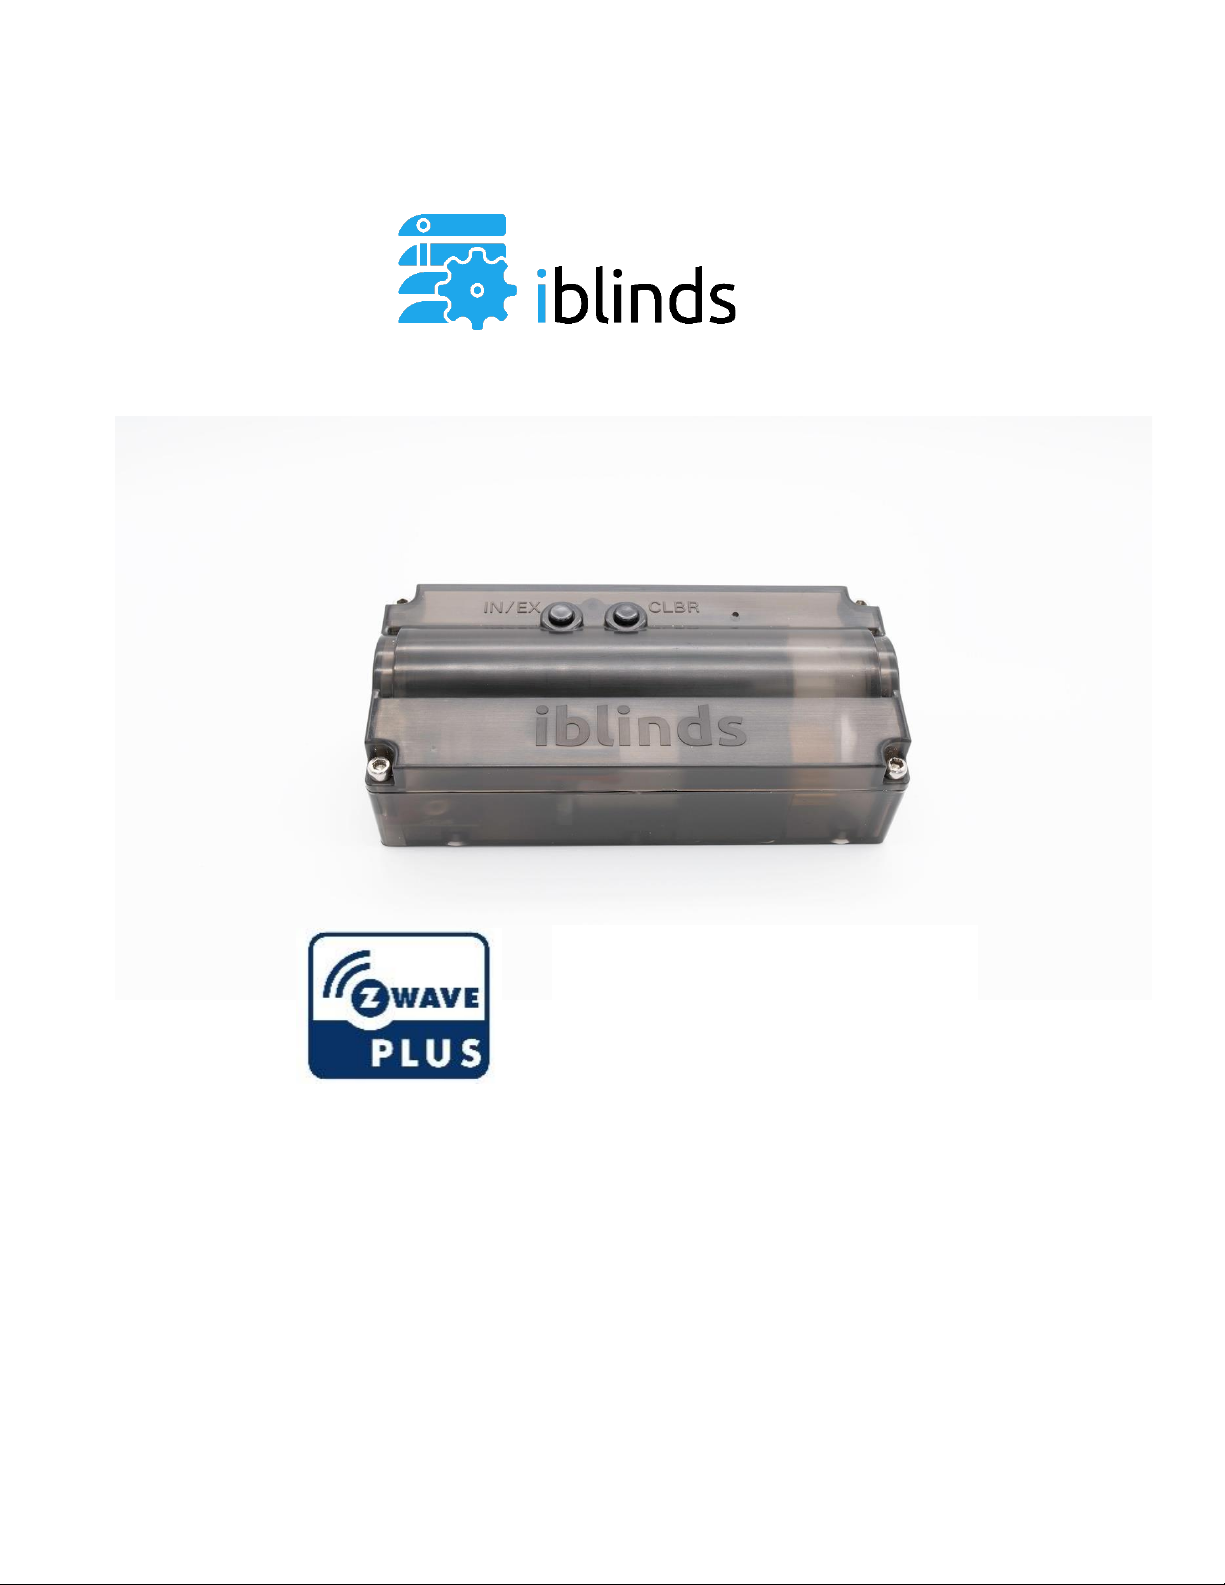
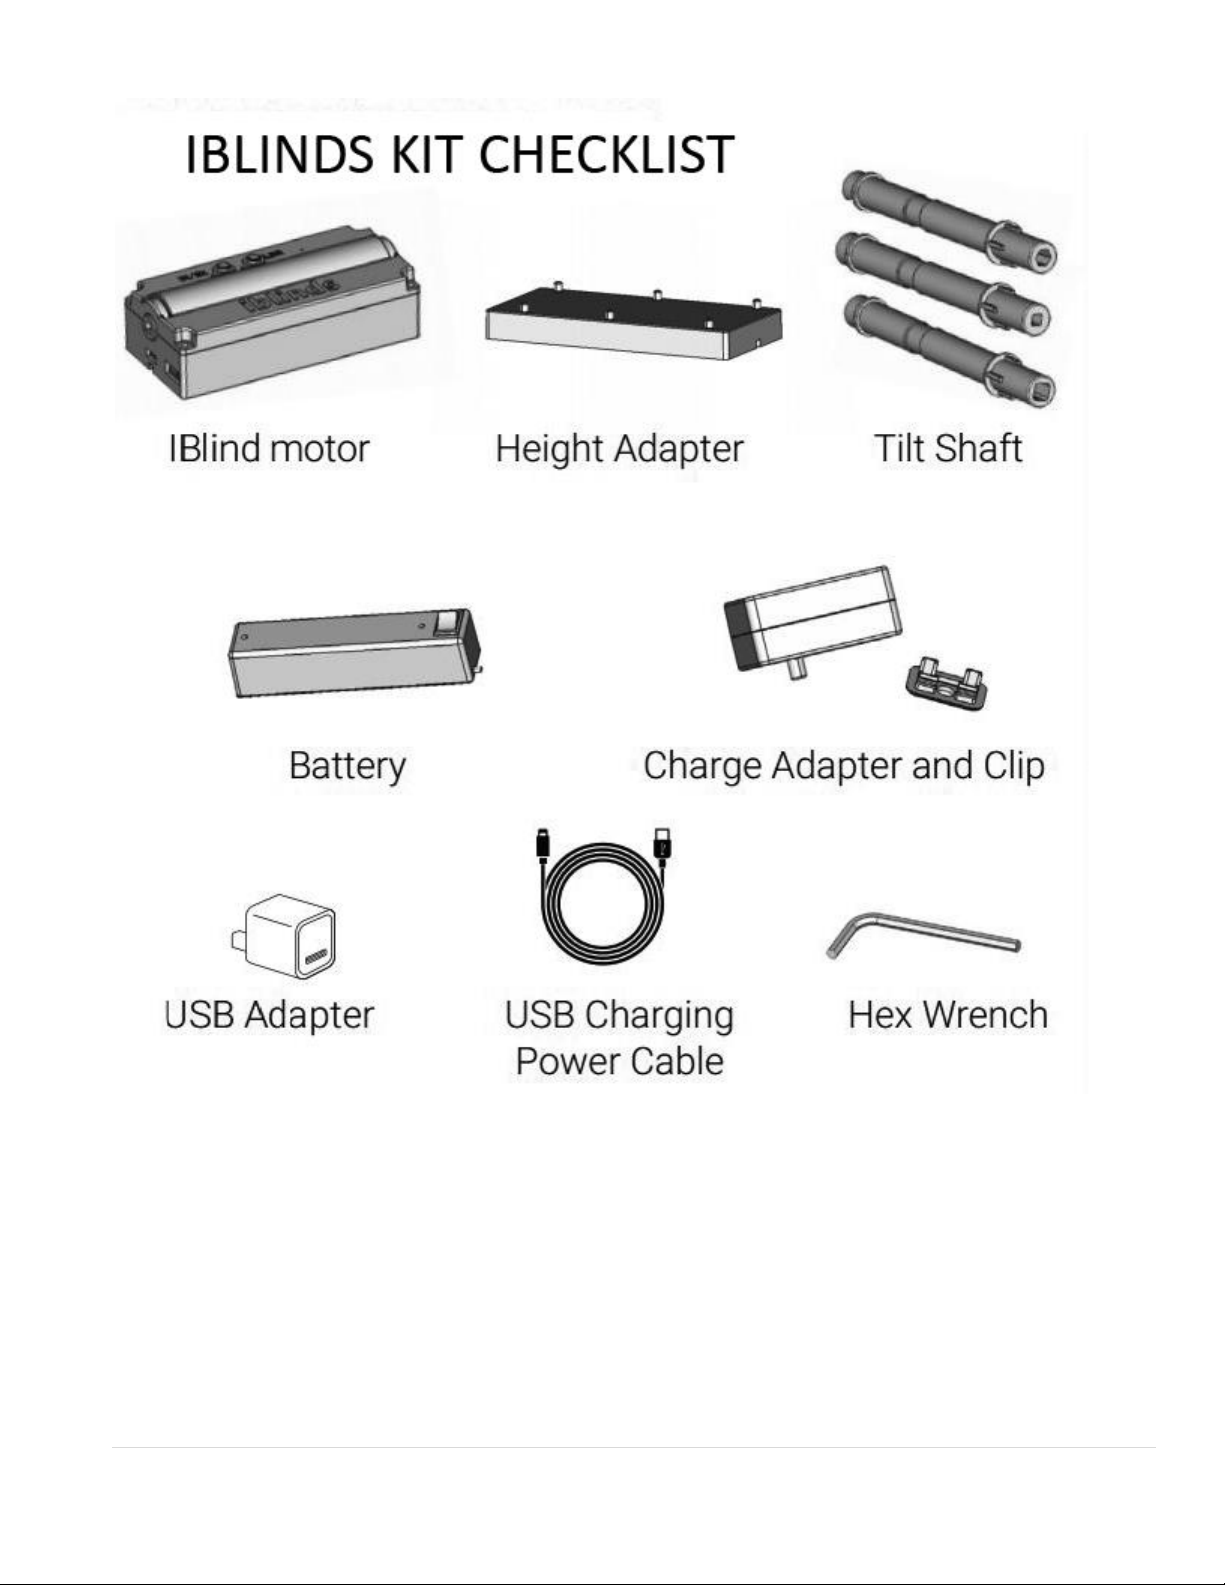
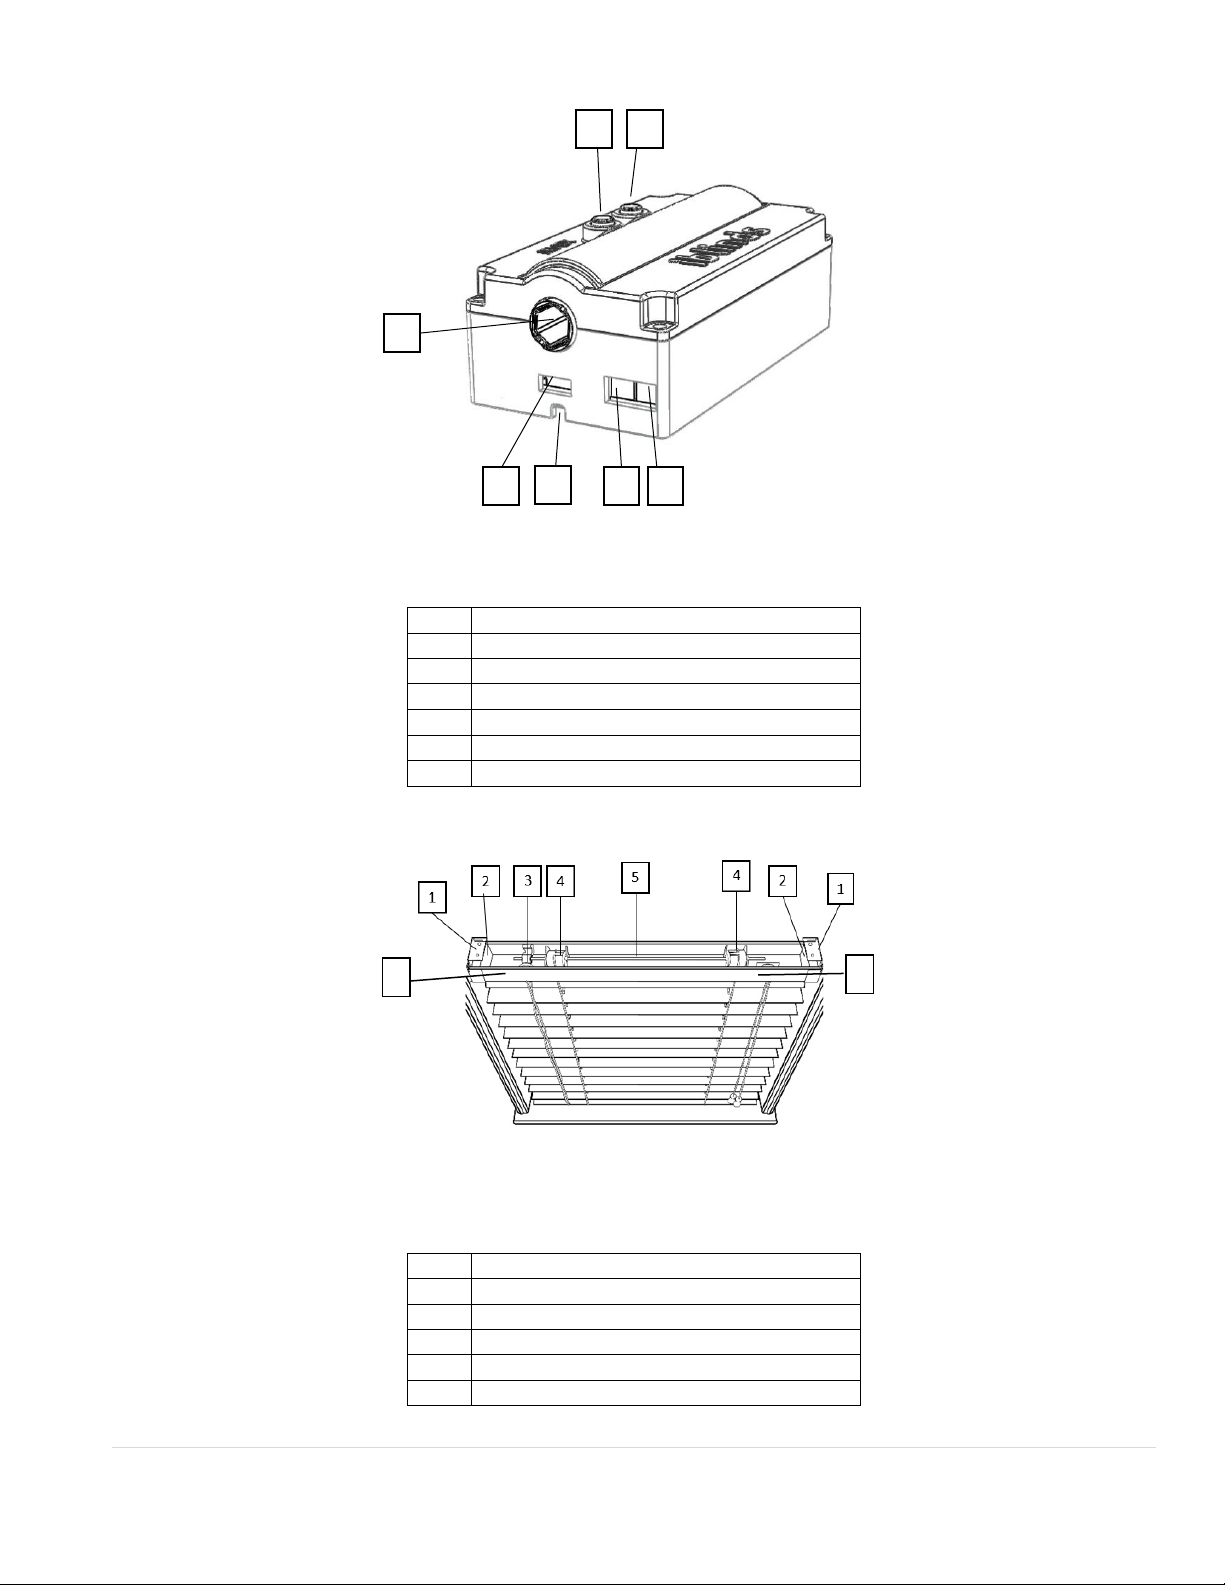
iblinds Motor
1.
Z-Wave Include / Exclude Button
2.
Calibration Reset Button
3.
Battery Connector
4.
Solar Connector
5.
String Pass-Through Channel
6.
Micro USB Connector
7.
iblinds Motor Tilt Shaft
Window Blind Components
1.
Window Blind Mounting Bracket
2.
End Cap
3.
Tilting Mechanism
4.
Tilt Drum
5.
Tilt Rod
6.
Headrail
2
1
3
4
5
6
7
6
6
ibinds v3 User Guide – v3.0 Page 5
©HAB Home Intelligence, LLC. 09/2020
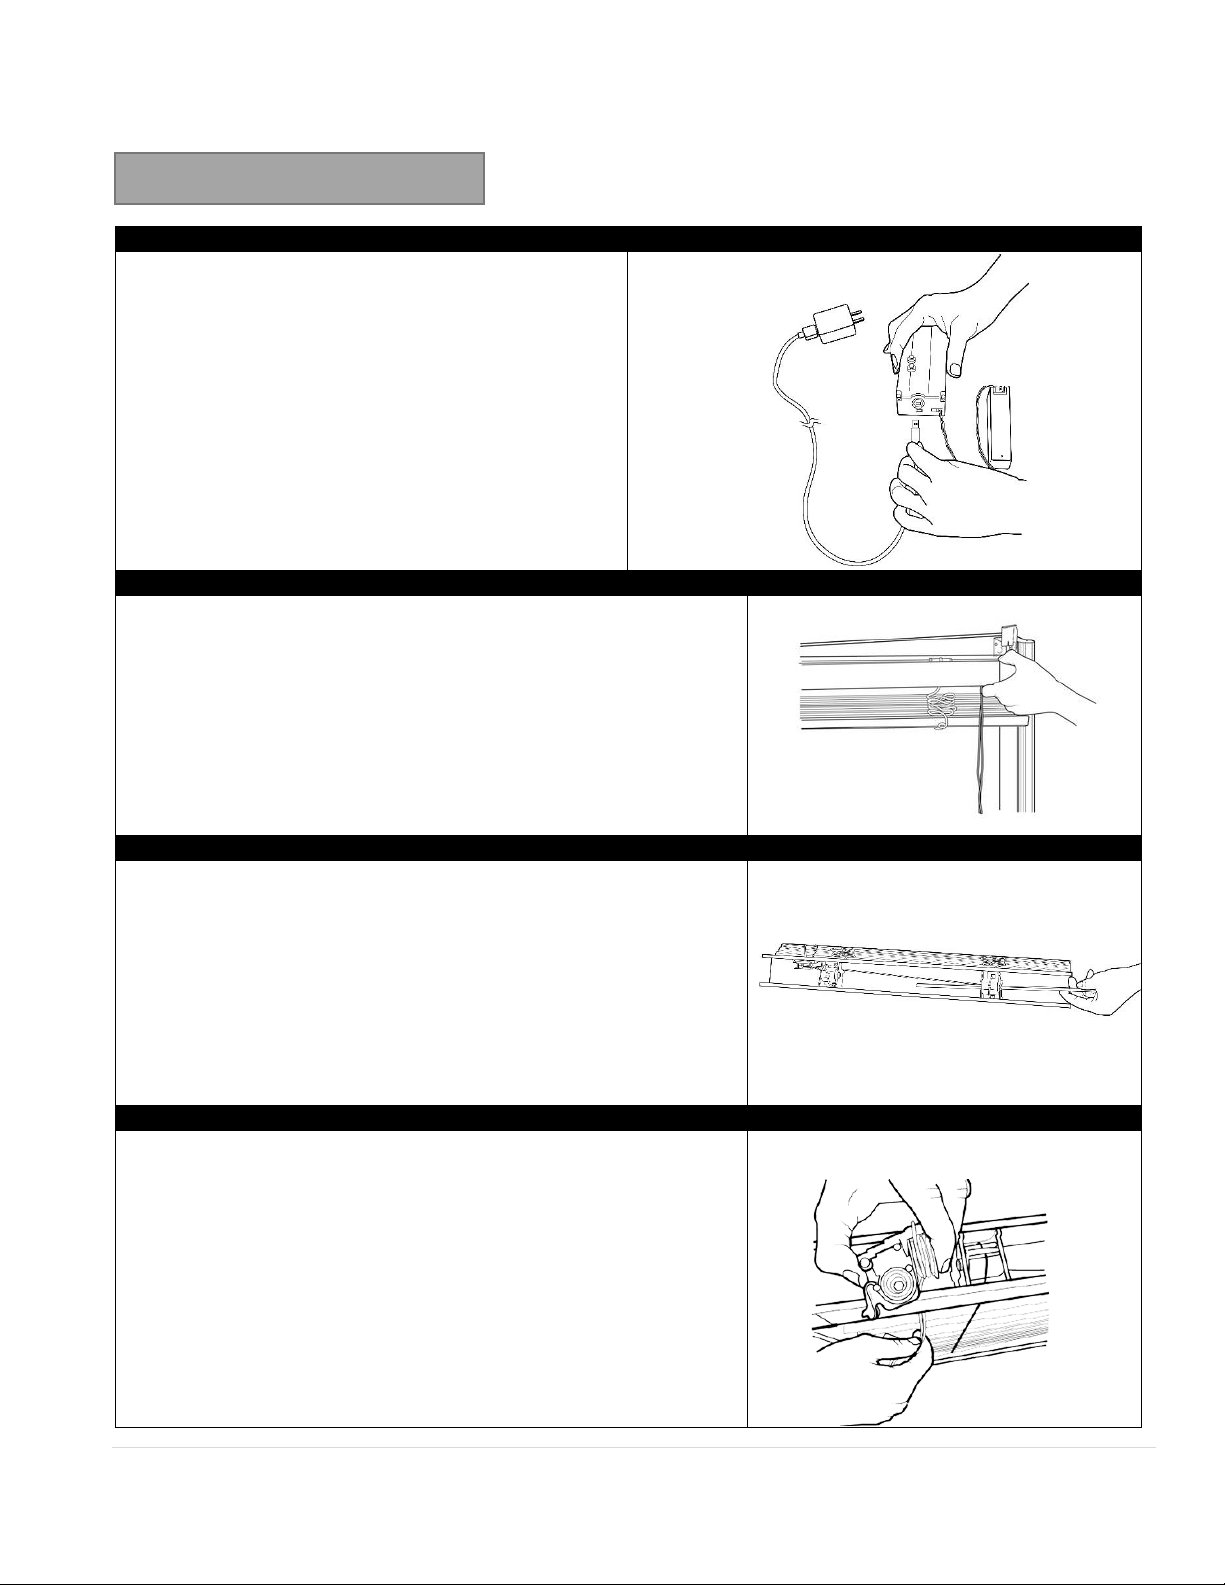
1. Charge Battery
Add battery charge instructions and image
IMPORTANT! Charge battery before first use.
Connect battery cable to the red BAT port. Connect
USB Charging Power Cable to the USB Port. Move
battery switch to the ON [I] position. Plug USB power
outlet into a wall outlet.
Charge battery until the Motor LED Indicator turn
green
2. Remove Blind from Window:
Tilt the blind slats to the fully open position and then raise the
window blind. Remove any window blind valances and remove the
blind from the window mounting brackets.
3. Remove the Tilt Rod
With your window blind on a flat surface, note the orientation of the
tilt drums in the headrail. You want to make sure the tilt drums all
have the same orientation when the tilt rod is reinserted. Carefully
remove the tilt rod.
Note: Many blinds will have end caps and a rubber gasket to keep the
rod from sliding. These must first be removed before the tilt rod can
be removed.
4. Remove Tilt Mechanism
Locate your tilting mechanism (String or Twist Rod).
String: Remove any tassels first. Then remove the tilt mechanism.
Twist Rod: Remove the twist rod first. Then remove the tilt
mechanism.
Note: Removing the tilt mechanism disables your ability to control
your blinds manually.
Installation

ibinds v3 User Guide – v3.0 Page 6
©HAB Home Intelligence, LLC. 09/2020
4. Determine iblinds Motor Location
The motor should be installed near the center of the headrail. Make a
note of where the iblinds motor will be installed. All wires will be run
to this area.
5. Determine Tilt Shaft Shape
Your iblinds Kit comes with 3 different tilt shafts- Large Square, Small
Square and Hexagonal. Choose the tilt shaft that matches the tilt rod
in your blinds.
6. Remove the Motor Case Lid & Tilt Shaft
Use the enclosed hex wrench to unscrew all four screws on the Motor
Case lid. Lift Tilt Shaft with bearings out of the case.
Note: It is not necessary to remove the screws all the way. It’s easier to
unscrew them partway & lift the top off.
7. Remove Bearings & Shaft Gear
Slide the bearings off each end of the tilt shaft & remove the shaft
gear.
8. Install New Tilt Shaft & Close Motor Case
Place the Shaft Gear on the Tilt Shaft with the correct shape. Make
sure the gear is turned so the grooves fit over & it is pushed all the
way down to the ridge.
Place a bearing on each end of the new Tilt Shaft.
Place the Tilt Shaft into the Motor Case, making sure the shaft gear is
engaged with the gear inside the motor.
 Loading...