

Page 1
Manual Version:6PW103-20100914
H3C SR6600 Routers Chassis Accessories Installation Guide
1 Introduction
z Before installing an RPE-X1 on the SR6604, SR6608, or SR6616, you need to install a chassis
accessory. For an SR6604 or SR6608, you can install the chassis accessory in slot 0 and slot 1; for
an SR6616, you can install the chassis accessory in slot 4 and slot 5.
z This installation guide takes the SR6616 for example to illustrate how to install a chassis accessory.
The chassis accessory can bear two RPE-X1s.
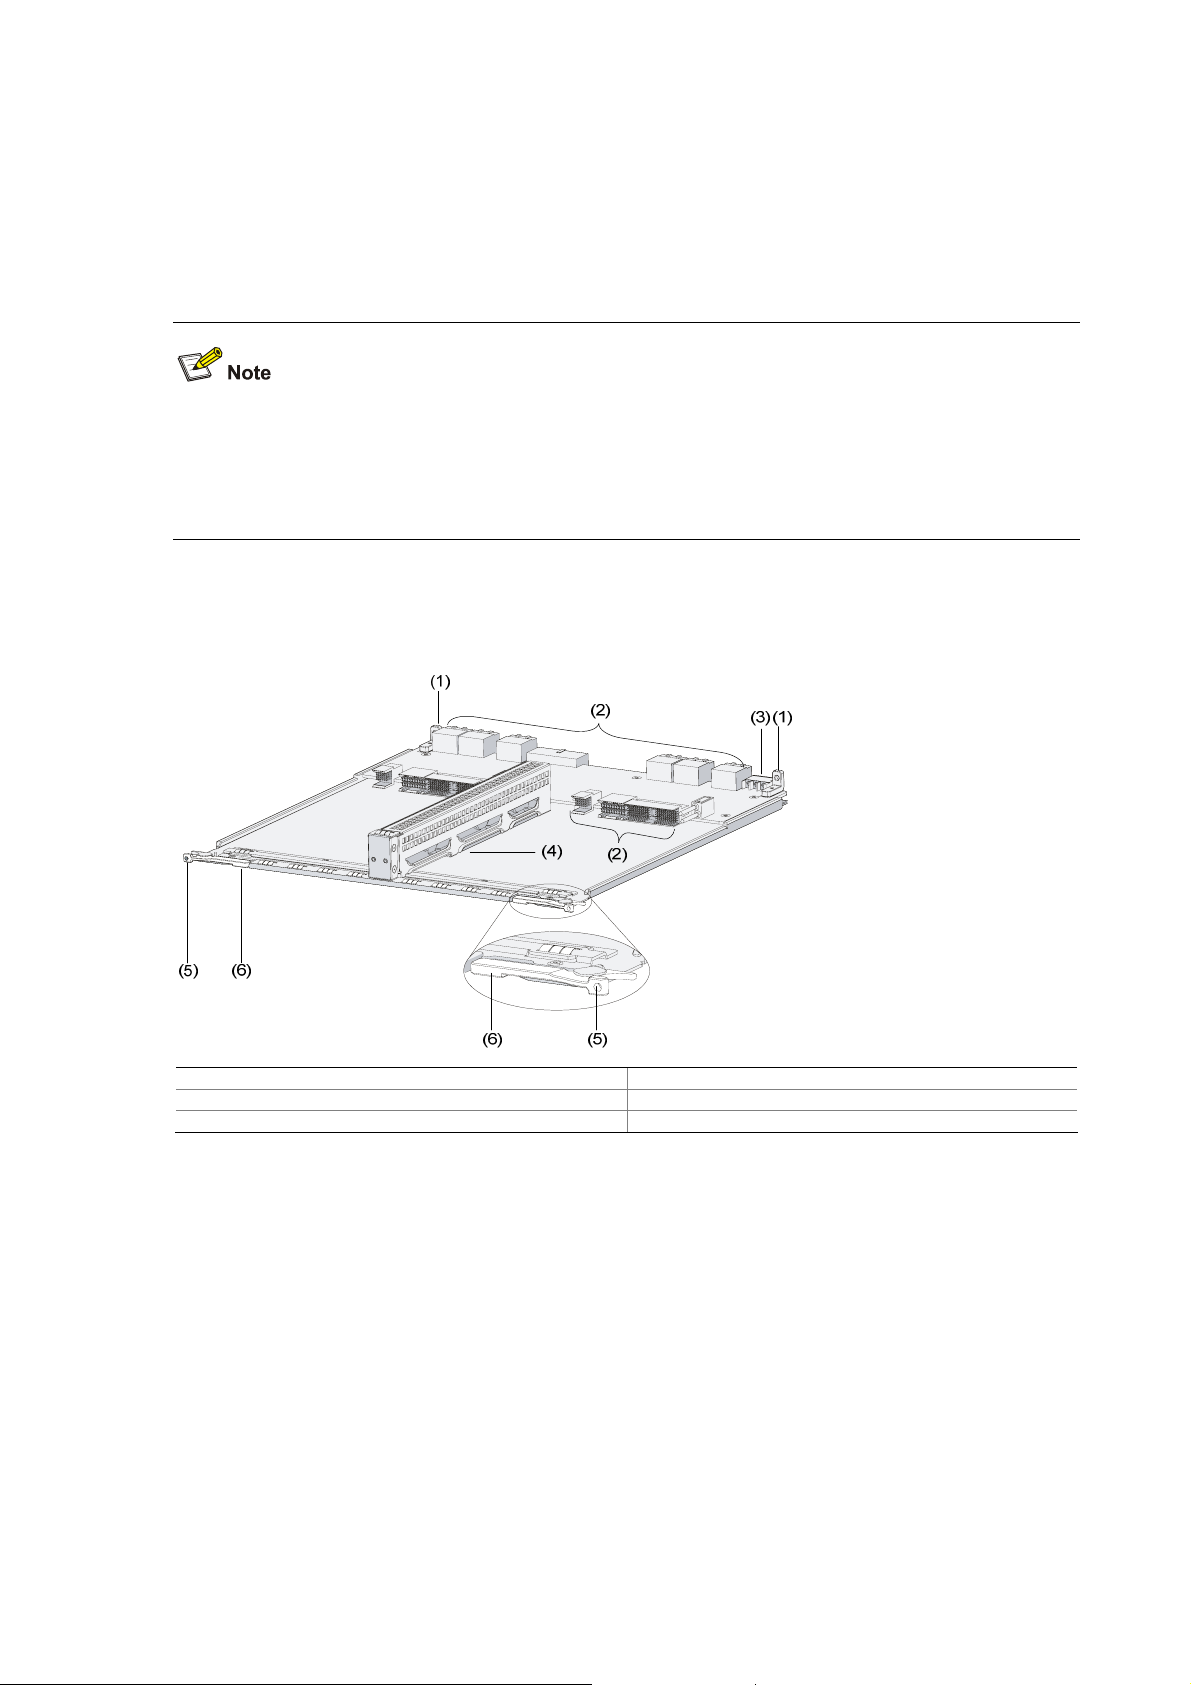
Figure1 Structure of the chassis accessory
BOM:3105A017
(1) Mounting holes (2) Bus connectors1
(3) Power connector (4) Slide rail
(5) Mounting holes (outside the ejector levers) (6) Ejector levers
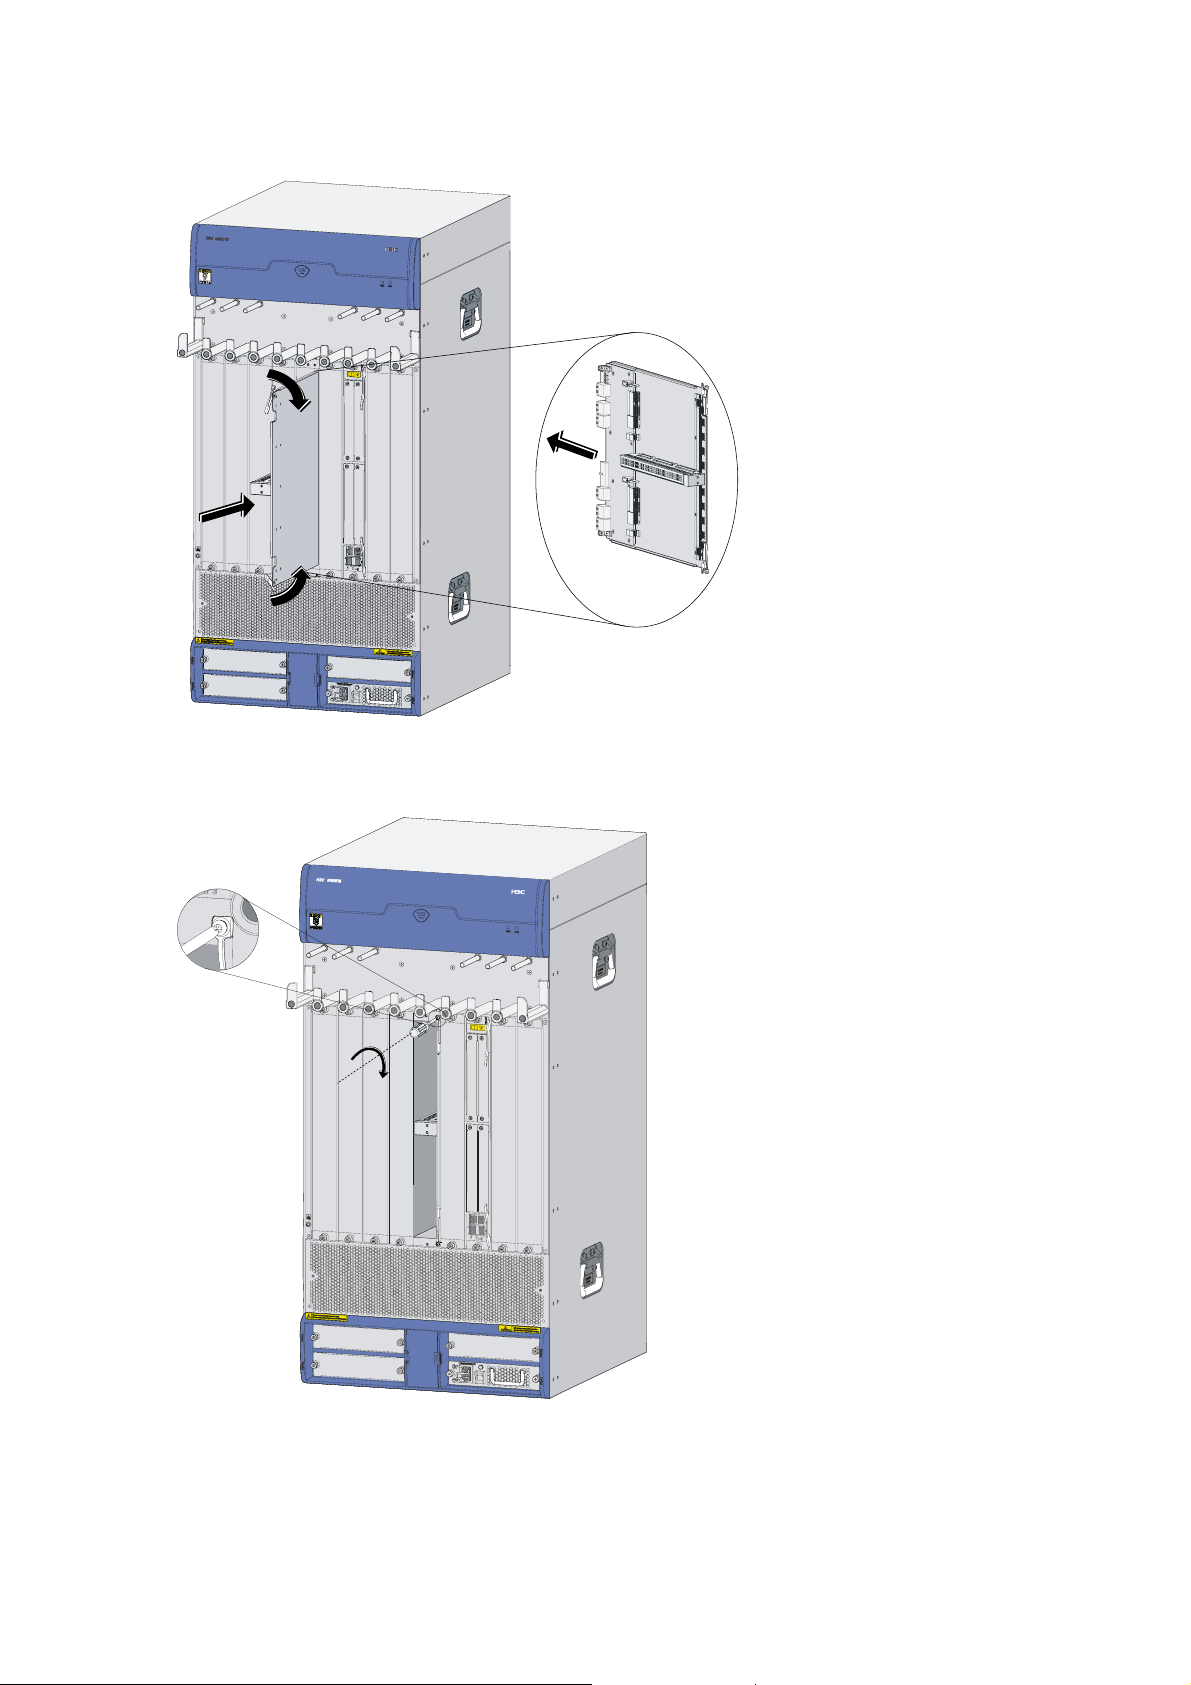
2 Installing a Chassis Accessory
(1) Face the front panel of the router.
(2) Locate the slot where you will install the RPE-X1 (Slot 4 or Slot 5, the figures below illustrate how
to install an RPE-X1 to Slot 5)
(3) Remove the plastic bag stuck to the chassis accessory and take out the two mounting screws.
(4) Gently push the chassis accessory (with the components facing left) into Slot 4 or Slot 5 along the
slide rails until the positioning pins on the backplane are seated in the mounting holes at the
bottom of the chassis accessory, then push the ejector levers inward to lock the chassis
accessory in position.
i
Page 2
Manual Version:6PW103-20100914
Figure2 Install a chassis accessory
BOM:3105A017
(5) Insert the two mounting screws in the mounting holes and fasten them tightly.
Figure3 Fasten the mounting screws
Install the RPE-X1 after installing the chassis accessory. For how to install an RPE-X1, see Chapter 8
of H3C SR6616 Router Installation Guide.
Copyright © 2008-2010 Hangzhou H3C Technologies Co., Ltd.
ii
Page 3

资料版本:6PW103-20100914 BOM:3105A017
1 机箱附件简介
z 在 SR6604、SR6608、SR6616 路由器上安装主控单元 RPE-X1 前,需要先安装机箱附件。在
SR6604、SR6608 上,机箱附件可以安装到 Slot0和 Slot1槽位;在 SR6616 上可以安装到 Slot4
和 Solt5槽位。
z 本手册以 SR6616 路由器为例介绍机箱附件的安装过程。
一个机箱附件可以承载两个主控单元 RPE-X1。
机箱附件的外观如下图所示:
图1 机箱附件结构图
H3C SR6600
路由器机箱附件安装说明
(1) 导向销 (2) 总线连接器
(3) 电源连接器 (4) 滑道
(5) 紧固螺丝插孔(位于扳手外侧) (6) 扳手
2 机箱附件的安装
(1) 操作者面对设备的正面。
(2) 选择安装主控单元的插槽(可以安装在 Slot4或者 Slot5,这里以安装在 Slot5 为例)。
(3) 取下粘在机箱附件上的塑料袋,取出塑料袋中的紧固螺丝备用。
(4) 将机箱附件的器件侧朝左沿着插槽导轨,水平缓慢的推进 Slot4/Slot5 插槽,直到机箱附件底
部的导向销套到背板的导向柱上,然后将扳手用力向内扣合。
1
Page 4

资料版本:6PW103-20100914 BOM:3105A017
图2 安装机箱附件
(5) 机箱附件完全插入后,将第 (3)步中取出的两颗紧固螺丝,插入紧固螺丝插孔,然后用螺丝刀
拧紧。
图3 拧紧紧固螺丝
完成机箱附件的安装后就可以安装主控板 RPE-X1,主控板的安装请参见“《H3C SR6616路由器
安装指导》第 8章”。
Copyright © 2008-2010 杭州华三通信技术有限公司
2
 Loading...