

H3C S5130-28S-EI, S5130-52S-PWR-EI, S5130-28TP-PWR-EI, S5130-52S-EI, S5130-52TP-EI Installation Manual
...Page 1

New H3C Technologies Co., Ltd.
http://www.h3c.com
Document version: 6W106-20190409
H3C S5130-EI Switch Series
Installation Guide
Page 2

Copyright © 2014-2019, New H3C Technologies Co., Ltd. and its licensors
All rights reserved
No part of this manual may be reproduced or transmitted in any form or by any means without prior written
consent of New H3C Technologies Co., Ltd.
Trademarks
Except for the trademarks of New H3C Technologies Co., Ltd., any trademarks that may be mentioned in this
document are the property of their respective owners.
Notice
The information in this document is subject to change without notice. All contents in this document, including
statements, information, and recommendations, are believed to be accurate, but they are presented without
warranty of any kind, express or implied. H3C shall not be liable for technical or editorial errors or omissions
contained herein.
Environmental protection
This product has been designed to comply with the environmental protection requirements. The storage, use,
and disposal of this product must meet the applicable national laws and regulations.
Page 3

Preface
H3C S5130-EI Switch Series Installation Guide describes the appearance, installation, power-on,
maintenance, and troubleshooting of the H3C S5130-EI Switch Series.
This preface includes the following topics about the documentation:
• Audience.
• Conventions.
• Documentation feedback.
Audience
This documentation is intended for:
• Network planners.
• Field technical support and servicing engineers.
• Network administrators working with the S5560X-EI switch series.
Conventions
The following information describes the conventions used in the documentation.
Command conventions
Convention Description
Boldface Bold
Italic
[ ] Square brackets enclose syntax choices (keywords or arguments) that are optional.
{ x | y | ... }
[ x | y | ... ]
{ x | y | ... } *
[ x | y | ... ] *
&<1-n>
# A line that starts with a pound (#) sign is comments.
GUI conventions
Convention Description
Boldface
text represents commands and keywords that you enter literally as shown.
Italic text represents arguments that you replace with actual values.
Braces enclose a set of required syntax choices separated by vertical bars, from which
you select one.
Square brackets enclose a set of optional syntax choices separated by vertical bars,
from which you select one or none.
Asterisk marked braces enclose a set of required syntax choices separated by vertical
bars, from which you select a minimum of one.
Asterisk marked square brackets enclose optional syntax choices separated by vertical
bars, from which you select one choice, multiple choices, or none.
The argument or keyword and argument combination before the ampersand (&) sign
can be entered 1 to n times.
Window names, button names, field names, and menu items are in Boldface. For
example, the
New User
window opens; click OK.
File
>
Multi-level menus are separated by angle brackets. For example,
Folder
.
>
Create
>
Page 4
Symbols
Convention Description
WARNING!
An alert that calls attention to important information that if not understood or followed
can result in personal injury.
CAUTION:
IMPORTANT:
NOTE:
TIP:
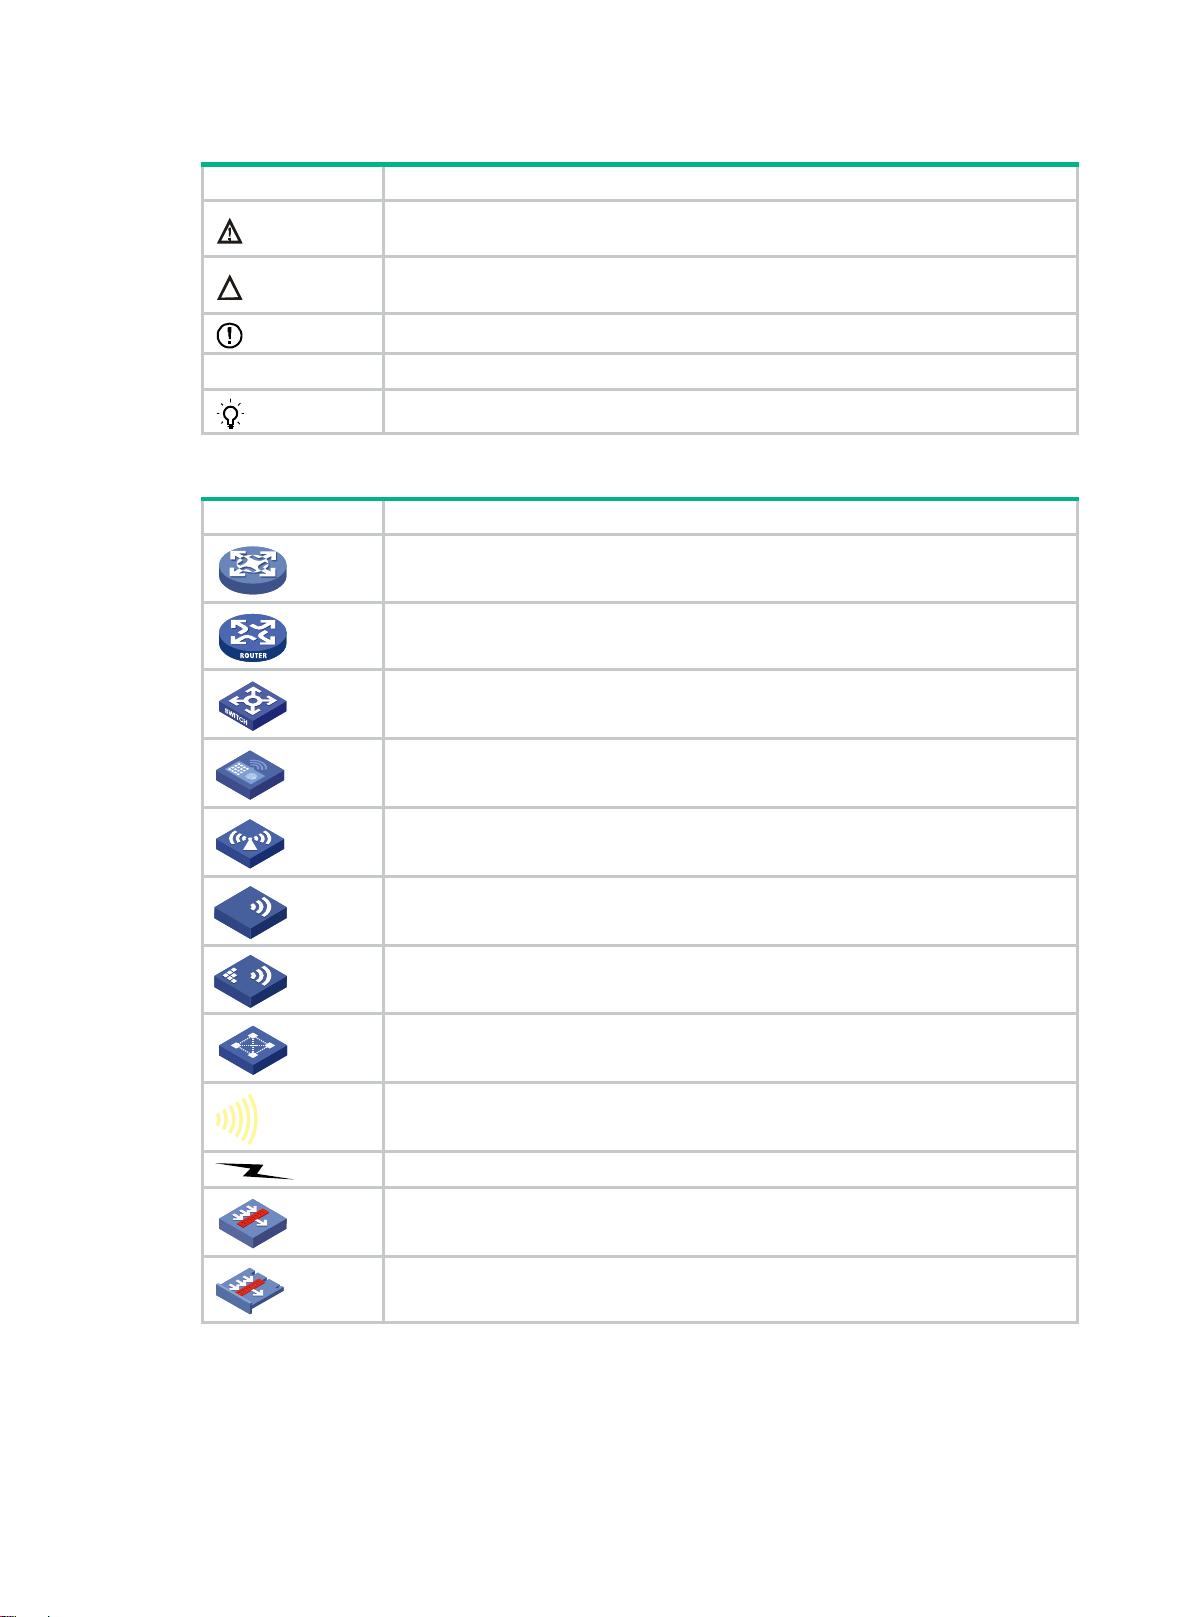
Network topology icons
Convention Description
An alert that calls attention to important information that if not understood or followed
can result in data loss, data corruption, or damage to hardware or software.
An alert that calls attention to essential information.
An alert that contains additional or supplementary information.
An alert that provides helpful information.
Represents a generic network device, such as a router, switch, or firewall.
Represents a routing-capable device, such as a router or Layer 3 switch.
Represents a generic switch, such as a Layer 2 or Layer 3 switch, or a router that
supports Layer 2 forwarding and other Layer 2 features.
Represents an access controller, a unified wired-WLAN module, or the access
controller engine on a unified wired-WLAN switch.
Represents an access point.
T
T
T
T
Represents a wireless terminator unit.
Represents a wireless terminator.
Represents a mesh access point.
Represents omnidirectional signals.
Represents directional signals.
Represents a security product, such as a firewall, UTM, multiservice security
gateway, or load balancing device.
Represents a security module, such as a firewall, load balancing, NetStream, SSL
VPN, IPS, or ACG module.
Examples provided in this document
Examples in this document might use devices that differ from your device in hardware model,
configuration, or software version. It is normal that the port numbers, sample output, screenshots,
and other information in the examples differ from what you have on your device.
Page 5

Documentation feedback
You can e-mail your comments about product documentation to info@h3c.com.
We appreciate your comments.
Page 6

Contents
Preparing for installation ···································································· 1
Safety recommendations ············································································································· 1
Examining the installation site ······································································································· 1
Temperature/humidity ·········································································································· 2
Cleanliness ························································································································ 2
EMI ·································································································································· 2
Laser safety ······················································································································· 3
Installation tools ························································································································· 3
Installing the switch ·········································································· 4
Installing the switch in a 19-inch rack ····························································································· 4
Mounting brackets ··············································································································· 4
Attaching the mounting brackets to the switch ··········································································· 5
Rack-mounting the switch ····································································································· 7
Mounting the switch on a workbench ······························································································ 7
Grounding the switch ·················································································································· 8
Grounding the switch with a grounding strip ·············································································· 8
Grounding the switch with a grounding conductor buried in the earth ground ···································· 9
Installing and removing a power module (S5130-28F-EI switch) ························································· 10
Installing a power module ···································································································· 11
Removing a power module ·································································································· 11
Connecting the power cord ········································································································ 12
Connecting the power cord for an AC power module ································································· 13
Connecting the power cord for a PSR150-D1 power module ······················································· 14
Connecting a power cord for the built-in DC power module (S5130-28PS-EI switch) ························ 15
Connecting a DC power cord for the built-in DC power module (other switch models than S5130-28PS-EI)
····································································································································· 16
Verifying the installation ············································································································· 17
Accessing the switch for the first time ················································· 18
Setting up the configuration environment ······················································································ 18
Connecting the console cable ····································································································· 18
Connecting the mini USB console cable (S5130-28PS-EI switch) ······················································· 19
Setting terminal parameters ······································································································· 21
Starting the switch ···················································································································· 21
Setting up an IRF fabric ··································································· 23
IRF fabric setup flowchart ·········································································································· 23
Planning IRF fabric setup ··········································································································· 24
Planning IRF fabric size and the installation site ······································································· 24
Identifying the master switch and planning IRF member IDs ······················································· 24
Planning IRF topology and connections·················································································· 24
Identifying physical IRF ports on the member switches ······························································ 25
Planning the cabling scheme ······························································································· 25
Configuring basic IRF settings ···································································································· 27
Connecting the physical IRF ports ······························································································· 27
Verifying the IRF fabric setup ······································································································ 28
Maintenance and troubleshooting ······················································ 29
Power module failure ················································································································ 29
Fixed power module failure ·································································································· 29
Hot-swappable power module failure ····················································································· 30
Configuration terminal problems ·································································································· 31
No display on the configuration terminal ················································································· 31
Garbled display on the configuration terminal ·········································································· 31
i
Page 7

Appendix A Chassis views and technical specifications ·························· 32
Chassis views ························································································································· 32
S5130-28S-EI ··················································································································· 32
S5130-28S-PWR-EI ··········································································································· 32
S5130-28S-HPWR-EI ········································································································· 33
S5130-28TP-EI ················································································································· 34
S5130-28TP-PWR-EI ········································································································· 34
S5130-52S-EI ··················································································································· 35
S5130-52S-PWR-EI ··········································································································· 36
S5130-52TP-EI ················································································································· 36
S5130-52TP-PWR-EI ········································································································· 37
S5130-28F-EI ··················································································································· 38
S5130-28PS-EI ················································································································· 39
Technical specifications ············································································································· 39
Appendix B FRUs ··········································································· 44
Appendix C Ports and LEDs ····························································· 45
Ports ····································································································································· 45
Console port ····················································································································· 45
SFP+ port ························································································································ 45
SFP port ·························································································································· 48
10/100/1000Base-T autosensing Ethernet port ········································································ 48
1/10GBase-T autosensing Ethernet port ················································································· 49
Combo interface ················································································································ 49
LEDs ····································································································································· 49
System status LED ············································································································ 49
Power module status LED ··································································································· 50
RPS status LED ················································································································ 50
MODE LED ······················································································································ 50
SFP port status LED ·········································································································· 51
SFP+ port status LED ········································································································· 51
10/100/1000Base-T autosensing Ethernet port LED ·································································· 52
1/10GBase-T autosensing Ethernet port LEDs ········································································· 54
Appendix D Cooling system ······························································ 55
ii
Page 8

Preparing for installation
The H3C S5130-EI Switch Series includes the following models:
• S5130-28S-EI.
• S5130-28S-PWR-EI.
• S5130-28S-HPWR-EI.
• S5130-28TP-EI.
• S5130-28TP-PWR-EI.
• S5130-52S-EI.
• S5130-52S-PWR-EI.
• S5130-52TP-EI.
• S5130-52TP-PWR-EI.
• S5130-28F-EI.
• S5130-28PS-EI.
Safety recommendations
To avoid equipment damage or bodily injury, read the following safety recommendations before
installation. Note that the recommendations do not cover every possible hazardous condition.
• Before cleaning the switch, remove all power cords from the switch. Do not clean the switch
with wet cloth or liquid.
• Do not place the switch near water or in a damp environment. Prevent water or moisture from
entering the switch chassis.
• Do not place the switch on an unstable case or desk.
• Ensure good ventilation at the installation site and keep the air inlet and outlet vents of the
switch free of obstruction.
• Connect the yellow-green protection grounding cable before power-on.
• Make sure the power source voltage is as required.
• To avoid electrical shocks, do not open the chassis while the switch is operating or when the
switch is just powered off.
• To avoid ESD damage, wear an ESD wrist strap to hot-swap a power module.
Examining the installation site
The S5130-EI switches must be used indoors. You can mount your switch in a rack or on a
workbench, but make sure:
• Adequate clearance is reserved at the air inlet and exhaust vents for ventilation.
• The rack or workbench has a good ventilation system.
• The rack is sturdy enough to support the switch and its accessories.
• The rack or workbench is reliably grounded.
To ensure correct operation and long service life of your switch, install it in an environment that meets
the requirements described in the following subsections.
1
Page 9

Temperature/humidity
Maintain temperature and humidity in the equipment room as described in "Technical specifications."
• Lasting high relative humidity can cause poor insulation, electricity leakage, mechanical
property change of materials, and metal corrosion.
• Lasting low relative humidity can cause washer contraction and ESD and bring problems
including loose mounting screws and circuit failure.
• High temperature can accelerate the aging of insulation materials and significantly lower the
reliability and lifespan of the switch.
For the temperature and humidity requirements of different switch models, see "Appendix A Chassis
views a
nd technical specifications."
Cleanliness
Dust buildup on the chassis might result in electrostatic adsorption, which causes poor contact of
metal components and contact points, especially when indoor relative humidity is low. In the worst
case, electrostatic adsorption can cause communication failure.
Table 1 Dust concentration limit in the equipment room
Substance Concentration limit (particles/m³)
EMI
Dust
NOTE:
Dust diameter ≥ 5 μm
≤ 3 x 10⁴ (no visible dust on the tabletop over three days)
The equipment room must also meet strict limits on salts, acids, and sulfides to eliminate corrosion
and premature aging of components, as shown in Tab l e 2 .
Table 2
Harmful gas limits in the equipment room
Gas Maximum concentration (mg/m
SO
2
H2S 0.006
NH3 0.05
Cl2 0.01
0.2
3
)
All electromagnetic interference (EMI) sources, from outside or inside of the switch and application
system, adversely affect the switch in the following ways:
• A conduction pattern of capacitance coupling.
• Inductance coupling.
• Electromagnetic wave radiation.
• Common impedance (including the grounding system) coupling.
To prevent EMI, use the following guidelines:
• If AC power is used, use a single-phase three-wire power receptacle with protective earth (PE)
to filter interference from the power grid.
2
Page 10

• Keep the switch far away from radio transmitting stations, radar stations, and high-frequency
devices to make sure the EMI levels do not exceed the compliant range.
• Use electromagnetic shielding when necessary. For example, use shielded interface cables.
• To prevent signal ports from getting damaged by over-voltage or over-current caused by
lightning strikes, only route interface cables indoors.
Laser safety
WARNING!
Do not stare into any fiber port when the switch has power. The laser light emitted from the optical
fiber might hurt your eyes.
The S5130-EI switches are Class 1 laser devices.
Installation tools
• Flat-blade screwdriver
• Phillips screwdriver
• ESD wrist strap
All these installation tools are user supplied.
3
Page 11

Installing the switch
CAUTION:
Keep the tamper-proof seal on a mounting screw on the chassis cover intact, and if you want to open
the chassis, contact H3C for permission. Otherwise, H3C shall not be liable for any consequence.
Figure 1 Hardware installation flow
Installing the switch in a 19-inch rack
Mounting brackets
Table 3 describes the mounting brackets provided with the switch.
Table 3 Mounting brackets provided with the switch
Switch model Mounting brackets Views
• S5130-28S-EI
• S5130-28TP-EI
• S5130-28PS-EI
One pair of 1U two-hole
mounting brackets
4
See Figure 2.
Page 12

Switch model Mounting brackets Views
• S5130-28S-PWR-EI
• S5130-28S-HPWR-EI
• S5130-28TP-PWR-EI
• S5130-52S-EI
• S5130-52S-PWR-EI
• S5130-52TP-EI
• S5130-52TP-PWR-EI
• S5130-28F-EI
One pair of 1U four-hole
mounting brackets
See Figure 3.
Figure 2 1U two-hole mounting bracket
(1) Screw hole for attaching the bracket to the switch
(2) Screw hole for attaching the bracket to the rack
post
Figure 3 1U four-hole mounting bracket
1
2
(1) Screw hole for attaching the bracket to the switch
(2) Screw hole for attaching the bracket to the rack
post
Attaching the mounting brackets to the switch
The switch provides two installation positions for mounting brackets: one front mounting position
(near the network ports) and one rear mounting position (near the power modules).
To attach the mounting brackets to the switch:
1. Determine the mounting position.
2. Align one mounting bracket with the screw holes at the mounting position. Use M4 screws
provided with the switch to attach the mounting bracket to the chassis.
{ For two-hole mounting bracket installation, see Figure 4 and Figure 5.
{ For four-hole mounting bracket installation, see Figure 6 and Figure 7.
3. Repeat step 2 to attach the other mo
unting bracket to the chassis.
5
Page 13

Figure 4 Attaching a two-hole mounting bracket to the front mounting position on an
S5130-28S-EI switch
Figure 5 Attaching a two-hole mounting bracket to the rear mounting position on an
S5130-28S-EI switch
Figure 6 Attaching a four-hole mounting bracket to the front mounting position on an
S5130-28F-EI switch
Figure 7 Attaching a four-hole mounting bracket to the rear mounting position on an
S5130-28F-EI switch
6
Page 14

Rack-mounting the switch
This task requires two people. To mount the switch in the rack:
1. Wear an ESD wrist strap and make sure it makes good skin contact and is reliably grounded.
2. Verify that the mounting brackets have been securely attached to the switch chassis.
3. Install cage nuts (user-supplied) in the mounting holes in the rack posts. Make sure the
corresponding cage nuts on the left and right front rack posts are at the same height.
4. One person holds the chassis and aligns the installation holes on the mounting brackets with
the cage nuts on the rack posts.
5. The other person attaches the mounting brackets with M6 screws (user-supplied) to the rack.
Figure 8 Mounting an S5130-28F-EI switch by the front mounting position
Figure 9 Mounting an S5130-28F-EI switch by the rear mounting position
Mounting the switch on a workbench
IMPORTANT:
• Ensure 10 cm (3.9 in) of clearance around the chassis for heat dissipation.
• Do not place heavy objects on the switch.
If a standard 19-inch rack is not available, you can place you switch on a workbench.
To mount the switch on a workbench:
1. Verify that the workbench is sturdy and reliably grounded.
2. Place the switch with bottom up, and clean the round holes in the chassis bottom with dry cloth.
3. Attach the rubber feet to the four round holes in the chassis bottom.
4. Place the switch with upside up on the workbench.
7
Page 15

Figure 10 Mounting the switch on a workbench
Grounding the switch
WARNING!
Correctly connecting the switch grounding cable is crucial to lightning protection and EMI protection.
The power input end of the switch has a noise filter, whose central ground is directly connected to the
chassis to form the chassis ground (commonly known as PGND). You must securely connect this
chassis ground to the earth to minimize the potential for system damage, maximize the safety at the
site, and minimize EMI susceptibility of the system.
You can ground the switch in one of the following ways, depending on the grounding conditions
available at the installation site:
• Grounding the switch with a grounding strip
• Grounding the switch with a grounding conductor buried in the earth ground
NOTE:
• To guarantee the grounding effect, use the grounding cable provided with the switch to connect to the
grounding strip in the equipment room as long as possible.
• The power and grounding terminals in this section are for illustration only.
Grounding the switch with a grounding strip
WARNING!
Connect the grounding cable to the grounding system in the equipment room. Do not connect it to a
fire main or lightning rod.
If a grounding strip is available at the installation site, use the grounding strip to ground the switch.
To ground the switch by using a grounding strip:
1. Connect one end of the grounding cable to the grounding screw on the switch.
a. Remove the grounding screw from the rear panel of the switch chassis.
b. Attach the grounding screw to the ring terminal of the grounding cable.
c. Use a screwdriver to fasten the grounding screw into the grounding screw hole.
8
Page 16

Figure 11 Connecting the grounding cable to the grounding hole of the switch
(1) Chassis rear panel (2) Grounding sign
(3) Grounding hole (4) Ring terminal
(5) Grounding cable (6) Grounding screw
2. Connect the other end of the grounding cable to the grounding strip.
a. Cut the grounding cable to a length according to the distance between the switch and the
grounding strip.
b. Peel 20 mm (0.79 in) of insulation sheath by using a wire stripper.
c. Use the needle-nose pliers to bend the bare wire.
d. Hook the grounding cable to the post on the grounding strip, and use the hex nut to secure
the cable to the post.
Figure 12 Connecting the grounding cable to a grounding strip
(1) Grounding post (2) Grounding strip
(3) Grounding cable (4) Hex nut
Grounding the switch with a grounding conductor buried in the earth ground
If the installation site has no grounding strips, but earth ground is available, hammer a 0.5 m (1.64 ft)
or longer angle iron or steel tube into the earth ground to serve as a grounding conductor.
9
Page 17

The dimensions of the angle iron must be at least 50 × 50 × 5 mm (1.97 × 1.97 × 0.20 in). The steel
tube must be zinc-coated and its wall thickness must be at least 3.5 mm (0.14 in).
Weld the yellow-green grounding cable to the angel iron or steel tube and treat the joint for corrosion
protection.
Figure 13 Grounding the switch by burying the grounding conductor into the earth ground
(1) Grounding screw (2) Grounding cable (3) Earth
(4) Joint (5) Grounding conductor (6) Chassis rear panel
Installing and removing a power module (S5130-28F-EI switch)
CAUTION:
Provide a circuit breaker for each power module and make sure the circuit breaker is off before
installation.
The S5130-28F-EI switch provides two power module slots and comes with power module slot 1
empty and a filler panel in power module slot 2. You can install one power module, or two power
modules for redundancy. For information about power modules available for the S5130-28F-EI
switch, see "Appendix B FRUs."
n two power modules are installed, you can hot-swap a power module. To avoid device damage
Whe
and bodily injury, follow the procedures in Figure 14 and Figure 15 to install
module.
Figure 14 Installation procedure
Figure 15 Removal procedure
and replace a power
The installation and removal procedures are the same for the PSR150-A1, PSR150-A, and
PSR150-D1 power modules. This guide uses the PSR150-A power module as an example.
10
Page 18

Installing a power module
1. Wear an ESD wrist strap and make sure it makes good skin contact and is reliably grounded.
2. Unpack the power module and verify that the power module model is as required.
3. Remove the filler panel (if any) from the target slot.
If you require only one power module, install it in power module slot 1 and make sure a filler
panel is installed in power module slot 2.
4. Orient the power module with the upside up. Grasp the handle of the power module with one
hand and support its bottom with the other, and slide the power module slowly along the guide
rails into the slot. See callout 1 in Figure 16.
To preve
power module gently. If you encounter a hard resistance or the power module tilts while
inserting the power module, pull out the power module, realign it with the slot, and then insert it
again.
5. Fasten the captive screws on the power module with a Phillips screwdriver to secure the power
module in the chassis. See callout 2 in Figure 16.
If the captive scre
Figure 16 Installing a PSR150-A power module
nt damage to the power module and the connector on the switch backplane, insert the
w cannot be tightly fastened, examine the installation of the power module.
Removing a power module
1. Wear an ESD wrist strap and make sure it makes good skin contact and is reliably grounded.
2. Power off the power module and remove the power cord.
3. Loosen the captive screws on the power module with a Phillips screwdriver until they are
completely disengaged from the chassis.
4. Grasp the handle of the power module with one hand and pull the module part way out. Support
the module bottom with the other hand, and pull the power module slowly along the guide rails
out of the slot.
5. Place the removed power module in an antistatic bag.
11
Page 19

Figure 17 Removing a PSR150-A power module
Connecting the power cord
CAUTION:
• Provide a circuit breaker for each power cord.
• Before connecting a power cord, make sure the circuit breaker for the power cord is turned off.
The S5130-28F-EI switch uses removable power modules: PSR150-A1, PSR150-A, or PSR150-D1.
The other switch models use built-in power modules.
Table 4 Power cord connection procedures at a glance
Switch model Available power source Connection procedure reference
S5130-28F-EI
• S5130-28S-EI
• S5130-28S-PWR-EI
• S5130-28TP-EI
S5130-28PS-EI
• S5130-52S-EI
• S5130-52TP-EI
PSR150-A: AC power source
PSR150-A1: AC power source or
240 VDC high-voltage power source
PSR150-D1: –48 VDC power
source in the equipment room or an
RPS (RPS800-A or RPS1600-A)
AC power source
AC power source
RPS (RPS800-A)
AC power source
–48 VDC power source in the
equipment room or an RPS
(RPS800-A or RPS1600-A)
Connecting the power cord for an AC
po
wer module
Connecting the power cord for a
PSR
150-D1 power module
Connecting the power cord for an AC
power module
Connecting the power cord for an AC
wer module
po
Connecting a power cord for the built-in
DC po
wer module (S5130-28PS-EI
switch)
Connecting the power cord for an AC
po
wer module
Connecting a DC power cord for the
built-in DC power module (other switch
models than S5130-28PS-EI)
RPS (RPS800-A or RPS1600-A)
12
Connecting a DC power cord for the
built-i
n DC power module (other switch
models than S5130-28PS-EI)
Page 20

Switch model Available power source Connection procedure reference
• S5130-28S-HPWR-EI
• S5130-28TP-PWR-EI
• S5130-52S-PWR-EI
• S5130-52TP-PWR-EI
AC power source
RPS (RPS1600-A)
Connecting the power cord for an AC power module
Connecting a DC power cord for the
built-i
n DC power module (other switch
models than S5130-28PS-EI)
Connecting the power cord for an AC power module
The power cord connection procedure is similar for a built-in AC power module and a
PSR150-A1/PSR150-A power module. The following procedure connects the power cord for a
PSR150-A1 power module.
To connect the power cord for an AC power module:
1. Pull the bail latch leftward, as shown in Figure 18.
2. Con
3. Pull the bail latc
4. Con
nect the female connector of the AC power cord to the power-input power receptacle on the
power module. See callout 1 in Figure 19.
h rightward to secure the connector to the power receptacle. See callout 2
in Figure 19.
nect the other end of the power cord to an external power source.
{ For a PSR150-A1 power module, connect the power cord to an AC power source or a 240V
high-voltage DC power source.
{ For a built-in power module or a PSR150-A power module, connect the power cord to an AC
power source.
Figure 18 Connecting the power cord for an AC power module (1)
13
Page 21

Figure 19 Connecting the power cord for an AC power module (2)
Connecting the power cord for a PSR150-D1 power module
CAUTION:
• To connect to a –48 VDC power source, use the power cord shipped with the power module.
• To connect to an H3C recommended RPS, use a power cord compatible with the RPS.
• To connect a DC power cord to a –48 VDC power source, identify the positive (+) and negative (-)
marks on the two wires of the power cord to avoid connection mistakes.
To connect the power cord for a PSR150-D1 module:
1. Correctly orient the connector of the power cord and align it with the power receptacle on the
power module, and insert the connector into the power receptacle. See callout 1 in Figure 20.
If you cannot inse
excessive force to push it in.
2. Fasten the screws on the connector with a flat-blade screwdriver to secure the connector to the
power receptacle. See callout 2 in Figure 20.
3. Con
nect the other end of the power cord to a –48 VDC power source or an RPS.
rt the connector into the receptacle, re-orient the connector rather than use
Figure 20 Connecting the power cord for a PSR150-D1 power module
14
Page 22

Connecting a power cord for the built-in DC power module (S5130-28PS-EI switch)
CAUTION:
The S5130-28PS-EI switch has a built-in DC power module with an RPS receptacle exposed
externally.
• You can use only a RPS800-A power module to supply power to the DC power module.
• No DC power cord is provided with the switch. You can use only a DC power cord with an H2*7
connector and compatible with the RPS800-A power module for the DC power module.
To connect a power cord for the built-in DC power module on an S5130-28PS-EI switch:
1. Remove the screws on the RPS receptacle cover and then remove the cover, as shown
in Figure 21.
Keep the rem
2. Correctly orient the RPS power cord connector and insert the connector into the RPS
receptacle on the switch. See callout 1 in Figure 22.
The RPS re
you cannot insert the connector into the receptacle, re-orient the connector rather than use
excessive force to push it in.
3. Use a flat-blade screwdriver to fasten the screws on the connector to secure the connector to
the receptacle. See callout 2 in Figure 22.
4. Con
nect the other end of the power cord to a RPS800-A power module.
oved cover secure. Reinstall the cover if you will not use the RPS receptacle.
ceptacle and RPS power cord connector have disorientation rejection designs. If
Figure 21 Connecting a power cord for the built-in power module on an S5130-28PS-EI
switch (1)
15
Page 23

Figure 22 Connecting a power cord for the built-in power module on an S5130-28PS-EI
switch (2)
Connecting a DC power cord for the built-in DC power module (other switch models than S5130-28PS-EI)
CAUTION:
• No DC power cord is provided with the switch that has a built-in DC power module. To use a –48
VDC power source for power supply, purchase an H3C recommended DC power cord yourself.
To use an RPS for power supply, purchase a power cord compatible with the RPS yourself.
• The DC-input power receptacle on the S5130-52S-EI or S5130-52TP-EI switch requires a DC
power cord with a JD5-A connector.
• The DC-input power receptacle on the S5130-28S-HPWR-EI, S5130-28TP-PWR-EI,
S5130-52S-PWR-EI, or S5130-52TP-PWR-EI switch requires a DC power cord with a JD5
connector.
• To connect a DC power cord to a –48 VDC power source, identify the positive (+) and negative (-)
marks on the two wires of the power cord to avoid connection mistakes.
To connect a DC power cord for the built-in DC power module on other switch models than
S5130-28PS-EI:
1. Correctly orient the power cord connector and insert the connector into the DC-input power
receptacle on the switch. See callout 1 in Figure 23.
The DC-i
designs. If you cannot insert the connector into the receptacle, re-orient the connector rather
than use excessive force to push it in.
2. Use a flat-blade screwdriver to fasten the screws on the connector to secure the connector to
the DC-input receptacle. See callout 2 in Figure 23.
3. Con
nput power receptacle and the power cord connector have disorientation rejection
nect the other end of the power cord to a –48 VDC power source or an RPS.
16
Page 24

Figure 23 Connecting a DC power cord for the built-in DC power module (S5130-52 S -EI)
Verifying the installation
After you complete the installation, verify the following items:
• There is enough space for heat dissipation around the switch, and the rack or workbench is
stable.
• The grounding cable is securely connected.
• The correct power source is used.
• The power cords are correctly connected.
• All the interface cables are cabled indoors. If any cable is routed outdoors, verify that the socket
strip with lightning protection and lightning arresters for network ports have been correctly
connected.
17
Page 25

Accessing the switch for the first time
Setting up the configuration environment
You can access the S5130-28PS-EI switch through the serial console port or the mini USB console
port.
You can access other S5130-EI switch models only through the serial console port.
No console cable or mini USB console cable is provided with the switch. Prepare yourself or
purchase it from H3C.
Figure 24 Connecting the serial console port to a PC
Connecting the console cable
A console cable is an 8-core shielded cable, with a crimped RJ-45 connector at one end for
connecting to the console port of the switch, and a DB-9 female connector at the other end for
connecting to the serial port on the configuration terminal.
Figure 25 Console cable
A side
Pin 9
A
Pin 1
Table 5 Console cable pinouts
Main label
8
1
B side
B
RJ-45 Signal DB-9 Signal
1 RTS 8 CTS
2 DTR 6 DSR
18
Page 26

RJ-45 Signal DB-9 Signal
3 TXD 2 RXD
4 SG 5 SG
5 SG 5 SG
6 RXD 3 TXD
7 DSR 4 DTR
8 CTS 7 RTS
To connect a terminal (for example, a PC) to the switch:
1. Plug the DB-9 female connector of the console cable to the serial port of the PC.
2. Connect the RJ-45 connector to the console port of the switch.
NOTE:
• Identify the mark on the console port and make sure you are connecting to the correct port.
• The serial ports on PCs do not support hot swapping. To connect a PC to an operating switch,
first connect the PC end. To disconnect a PC from an operating switch, first disconnect the switch
end.
Connecting the mini USB console cable (S5130-28PS-EI switch)
1. Connect the standard USB connector to the USB port of the PC or configuration terminal.
2. Connect the mini USB connector to the mini USB console port on the switch.
3. Click the following link, or copy it to the address bar on the browser to download the USB
console driver.
http://www.h3c.com.hk/Technical_Support___Do
/USB_Console/USB_Console/
4. Select a driver program according to the operating system you use:
{ XR21V1410_XR21B1411_Windows_Ver1840_x86_Installer.EXE—32-bit operating
system.
{ XR21V1410_XR21B1411_Windows_Ver1840_x64_Installer.EXE—64-bit operating
system.
5. Click Next on the installation wizard.
cuments/Software_Download/Other_Product
19
 Loading...