

Page 1

V 421 C
Deutsch D - 3
Originalbetriebsanleitung
BATTERIELADER
Translation of original operating instructions
BATTERY CHARGER
Traduction du mode d’emploi d’origine
Chargeur de batterie
Originální návod k provozu
NABÍJEČKA BATERIÍ
Slovenčina SK -22
Preklad originálneho návodu na prevádzku
Nederlands NL -27
Vertaling van de originele gebruiksaanwijzing
Traduzione del Manuale d’Uso originale
Ricarica della batteria
Az eredeti használati utasítás fordítása
Slovenščina SLO - 42
Originalna navodila za uporabo
POLNILEC ZA AKUMULATORJE
Hrvatski HR - 47
Originalne upute za upotrebu
PUNJAČ AKUMULATORA
Bošnjački BiH - 52
Originalna uputstva za upotrebu
PUNJAČ AKUMULATORA
Româna RO - 57
Mod de utilizare, versiune originală
ÎNCĂRCĂTOR BATERII
Български BG - 62
Оригинално упътване за обслужване
ЗАРЯДНО УСТРОЙСТВО ЗА БАТЕРИИ
English GB - 8
Français F - 12
Česky CZ - 17
Nabíjacka betérií
ACCU LADER
Italiano I - 32
Magyar H - 37
Akkumlátor töltö
#85074
© Güde GmbH & Co. KG – Birkichstrasse 6 – D-74549 Wolpertshausen – Germany
Page 2

2
1
6
5
4
7
8
8
2
9
1
2
3
3
5 4
6
7
Page 3
DE
3
Lesen Sie bitte diese Bedienungsanleitung sorgfältig durch, bevor Sie das Gerät in Betrieb nehmen.
A.V. 2 Nachdrucke, auch auszugsweise, bedürfen der Genehmigung. Technische Änderungen vorbehalten.
Gerät
Batterielader V 421 C
Ausstattung (serienmäßig)
Profi Ladekabel, Zangen mit isolierten Griffen, Amperemeter,
Verpolschutz, Thermoschutz, Zusatzsicherung 50 Ampere.
Einsatzgebiete:
Professionelles Start-Ladegerät zum Normal- und
Schnellladung, sowie zum Starten von Fahrzeugen. Bequem
fahrbar durch groß dimensionierte Räder.
Lieferumfang (Abb. 1+2)
1. Räder
2. Achse
3. Schrauben
4. Stützfuß
5. Radkappen
6. Schrauben
7. Griff
8. Batterielader
Gerätebeschreibung (Abb. 3)
1. Ein-/Ausschalter
2. 12 V Anschluss
3. Masseanschluss
4. 24 V Anschluss
5. Schmelzsicherung
6. Amperemeter
7. Schaltstufe 1 + 2
8. Min – Max Laden
9. Laden bzw. Starten der Batterie
Gewährleistung
Die Gewährleistung erstreckt sich ausschließlich auf Mängel,
die auf Material- oder Herstellungsfehler zurückzuführen sind.
Bei Geltendmachung eines Mangels im Sinne der
Gewährleistung ist der original Kaufbeleg mit Verkaufdatum
beizufügen.
Von der Gewährleistung ausgeschlossen sind unsachgemäße
Anwendungen, wie z. B. Überlastung des Gerätes,
Gewaltanwendung, Beschädigungen durch Fremdeinwirkung
oder durch Fremdkörper. Nichtbeachtung der Gebrauchs- und
Aufbauanleitung und normaler Verschleiß sind ebenfalls von
der Gewährleistung ausgeschlossen.
Allgemeine Sicherheitshinweise
Die Bedienungsanleitung muss vor der ersten
Anwendung des Gerätes ganz durchgelesen werden.
Falls über den Anschluss und die Bedienung des Gerätes
Zweifel entstehen sollten, wenden Sie sich an den Hersteller
(Service-Abteilung).
UM EINEN HOHEN GRAD AN SICHERHEIT ZU
GARANTIEREN, BEACHTEN SIE AUFMERKSAM
FOLGENDE HINWEISE:
Achtung: Nur mit FI (Fehlerstromschutzschalter)
betreiben!
ACHTUNG!
• Halten Sie den Arbeitsbereich sauber und
• Achten Sie auf die Umgebungsbedingungen, unter
aufgeräumt. Unordentliche Arbeitsplätze und
Werkbänke erhöhen die Gefahr von Unfällen und
Verletzungen.
denen Sie arbeiten. Verwenden Sie keine
Elektrowerkzeuge und Werkzeugmaschinen in feuchter
oder nasser Umgebung. Sorgen Sie für ausreichend
Beleuchtung. Setzen Sie elektrische Werkzeuge nicht
dem Regen oder hoher Luftfeuchtigkeit aus. Schalten
Sie elektrische Werkzeuge nicht in einer Umgebung mit
leicht entflammbaren Flüssigkeiten oder Gasen ein.
• Lassen Sie keine Fremden an die Maschine.
Besucher und Zuschauer, vor allem Kinder sowie kranke
und gebrechliche Personen, sollten vom Arbeitsplatz
fern gehalten werden.
• Sorgen Sie für die sichere Aufbewahrung von
Werkzeugen. Werkzeuge, die nicht gebraucht werden,
müssen an einem trockenen, möglichst hoch gelegenen
Platz aufbewahrt oder unzugänglich verwahrt werden.
• Achten Sie auf das Stromkabel. Ziehen Sie nicht am
Kabel. Fassen Sie zum Abziehen nur den Stecker.
Halten Sie das Kabel fern von Wärmequellen, Öl und
scharfen Kanten.
• Verhindern Sie unbeabsichtigtes Einschalten. Achten
Sie immer darauf, dass das Werkzeug am
Geräteschalter ausgeschaltet ist, bevor Sie den
Netzstecker in die Steckdose stecken.
• Verwenden Sie im Außenbereich spezielle
Verlängerungskabel. Für den Außeneinsatz benötigen
Sie spezielle Verlängerungskabel, die dafür geeignet
und entsprechend markiert sind.
• Bleiben sie immer aufmerksam. Achten Sie auf das,
was Sie tun. Setzen Sie Ihren gesunden
Menschenverstand ein. Verwenden Sie keine
Elektrowerkzeuge, wenn Sie müde sind.
• Achten Sie auf beschädigte Teile. Untersuchen Sie
das Werkzeug, bevor Sie es benutzen. Sind einzelne
Teile beschädigt? Fragen Sie sich bei leichten
Beschädigungen ernsthaft, ob das Werkzeug trotzdem
einwandfrei und sicher funktionieren wird.
• Beugen Sie Stromschlägen vor. Vermeiden Sie jeden
körperlichen Kontakt mit geerdeten Objekten, z.B.
Wasserleitungen, Heizkörpern, Kochern und
Kühlschrankgehäusen.
• Verwenden Sie nur zugelassene Teile. Verwenden Sie
bei Wartung und Reparatur nur identische Ersatzteile.
Wenden Sie sich für Ersatzteile an ein zugelassenes
Service Center.
• Warnung! Die Verwendung von Zubehör und
Anbauteilen, die nicht ausdrücklich in dieser
Bedienungsanleitung empfohlen werden, kann die
Gefährdung von Personen und Objekten nach sich
ziehen.
Sicherheitshinweise für Erstinbetriebnahme
- Ziehen Sie immer zuerst den Stecker ab, bevor Sie
Einstellungen oder Wartungsarbeiten vornehmen.
Schließen Sie das Ladegerät erst an die
Stromzufuhr an, wenn alle Einstellungen vorgenommen
und die Polklemmen korrekt angeschlossen sind.
- Nach dem Entfernen der Verpackung kontrollieren, dass
das Gerät und alle seine Teile in einwandfreiem Zustand
sind.
- Das Netzkabel ganz abwickeln und so auslegen, dass
die Polklemmen sich nicht berühren können.
- Falls erforderlich, das Netzkabel mit einem
Verlängerungskabel verlängern; dabei ist darauf Acht zu
geben, dass der Kabelquerschnitt dieselbe wie beim
Netzkabel ist; keine Kabel mit kleinerem Querschnitt
verwenden.
- Die Anschlusszangen, die Klemmen und die obere
Fläche der Batterie müssen sauber gehalten werden;
ggf. die Batterieklemmen mit einer Drahtbürste säubern;
dadurch wird ein guter elektrischer Kontakt und eine
bessere Wirksamkeit der Ladung ermöglicht.
Page 4
4
- Niemals die Polung der Anschlüsse vertauschen!
( (-) schwarz; (+) rot )
- Die Ladespannung des Batterieladegeräts muss gleich
der an der Batterie angegebenen Nennspannung sein;
sie stimmt mit der Anzahl der Batteriezellen mit zwei
multipliziert überein
(3 Zellen = 6 V; 6 Zellen = 12 V; 12 Zellen = 24 V).
- Das Gerät zum Laden sicher aufstellen und
sicherstellen, dass der Luftstrom durch die
entsprechenden Öffnungen nicht behindert wird. Eine
gute Kühlung muss gewährleistet sein.
- Nicht gleichzeitig mehrere Batterien laden.
- Die Batterieverschlüsse nur dann entfernen, nachdem
die Klemmen gesäubert worden sind, damit kein Staub
oder anderer Schmutz in die Wannen fallen kann, und
während der Aufladedauer so beibehalten.
- Sicherstellen, dass die Elektrolytflüssigkeit die Platten
mindestens 4 bis 5 mm bedeckt; ggf. mit destilliertem
Wasser, das für diesen Zweck im Handel erhältlich ist,
auffüllen.
1. Während der Ladephase entstehen explosive Gase,
vermeiden Sie deshalb Funken und offenes Feuer
bzw. Rauchen in der Umgebung.
2.
Laden Sie die Batterie nur in belüfteten
Räumen, es ist untersagt, das Gerät zum
Batterieladen im Fahrzeug oder unter geschlossener
Motorhaube zu verwenden.
3. Laden Sie Standardbatterien und wartungsfreie
Batterien nie zusammen.
4. Laden Sie niemals Einwegbatterien.
5. Lassen Sie hinter dem Gerät ausreichend Platz für die
Belüftung.
6. Halten Sie sich an die Anleitungen des Herstellers.
7. Überprüfen Sie den korrekten Säurestand der Batterie.
8. Überprüfen Sie stets den einwandfreien Zustand von
Netzkabel und Klemmkabel. Bei Beschädigungen des
Netzkabels sofort durch Fachpersonal ersetzten
lassen.
9. Das Gerät darf Witterungseinflüssen wie Regen und
Schnee nicht ausgesetzt werden.
10. Das Gerät nicht barfüßig benutzen. Das Gerät nicht mit
feuchten Händen oder nassen bzw. feuchten Füßen
berühren.
11. Stecker nicht an der Leitung oder durch Zerren am Gerät
aus der Steckdose ziehen.
12. Verhindern Sie, dass das Gerät von Kindern oder
Unbefugten benutzt wird.
Lassen Sie das Gerät nicht unbeaufsichtigt
eingeschaltet, da es zur Gefahrenquelle werden kann.
• Werden Sicherheits- oder Schutzvorrichtungen gewartet
oder repariert, müssen Sie nach Abschluss der Arbeiten
unverzüglich wieder korrekt eingebaut werden.
• Es ist unbedingt erforderlich, die am jeweiligen
Einsatzort geltenden Unfallverhütungsvorschriften zu
kennen wie auch alle anderen, allgemein anerkannten
Sicherheitsregeln.
• Bevor Sie dieses Werkzeug benutzen, müssen Sie
unbedingt die Sicherheitsvorrichtungen überprüfen.
Vergewissern Sie sich, dass scheinbar nur leicht
beeinträchtigte Teile tatsächlich ordnungsgemäß
funktionieren.
• Sofern in dieser Bedienungsanleitung nicht anders
ausgeführt, müssen beschädigte Teile und
Sicherheitsvorrichtungen durch ein autorisiertes Service
Center repariert oder ausgetauscht werden.
• Lassen Sie beschädigte Schalter von einem
autorisierten Service Center auswechseln.
• Dieses Werkzeug entspricht allen einschlägigen
Sicherheitsbestimmungen. Reparaturen dürfen nur von
qualifizierten Elektrofachkräften in autorisierten ServiceCentern und unter Verwendung der Originalersatzteile
durchgeführt werden. Bei Missachtung besteht die
Gefahr von Unfällen.
Verhalten im Notfall
Leiten Sie die der Verletzung entsprechend notwendigen
Erste Hilfe Maßnahmen ein und fordern Sie schnellst möglich
qualifizierte ärztliche Hilfe an. Bewahren Sie den Verletzten
vor weiteren Schädigungen und stellen Sie diesen ruhig.
Für einen eventuell eintretenden Unfall sollte immer ein
Verbandskasten nach DIN 13164 am Arbeitsplatz
griffbereit vorhanden sein. Dem Verbandskasten
entnommenes Material ist sofort wieder aufzufüllen.
Wenn Sie Hilfe anfordern, machen Sie folgende Angaben:
1. Ort des Unfalls
2. Art des Unfalls
3. Zahl der Verletzten
4. Art der Verletzungen
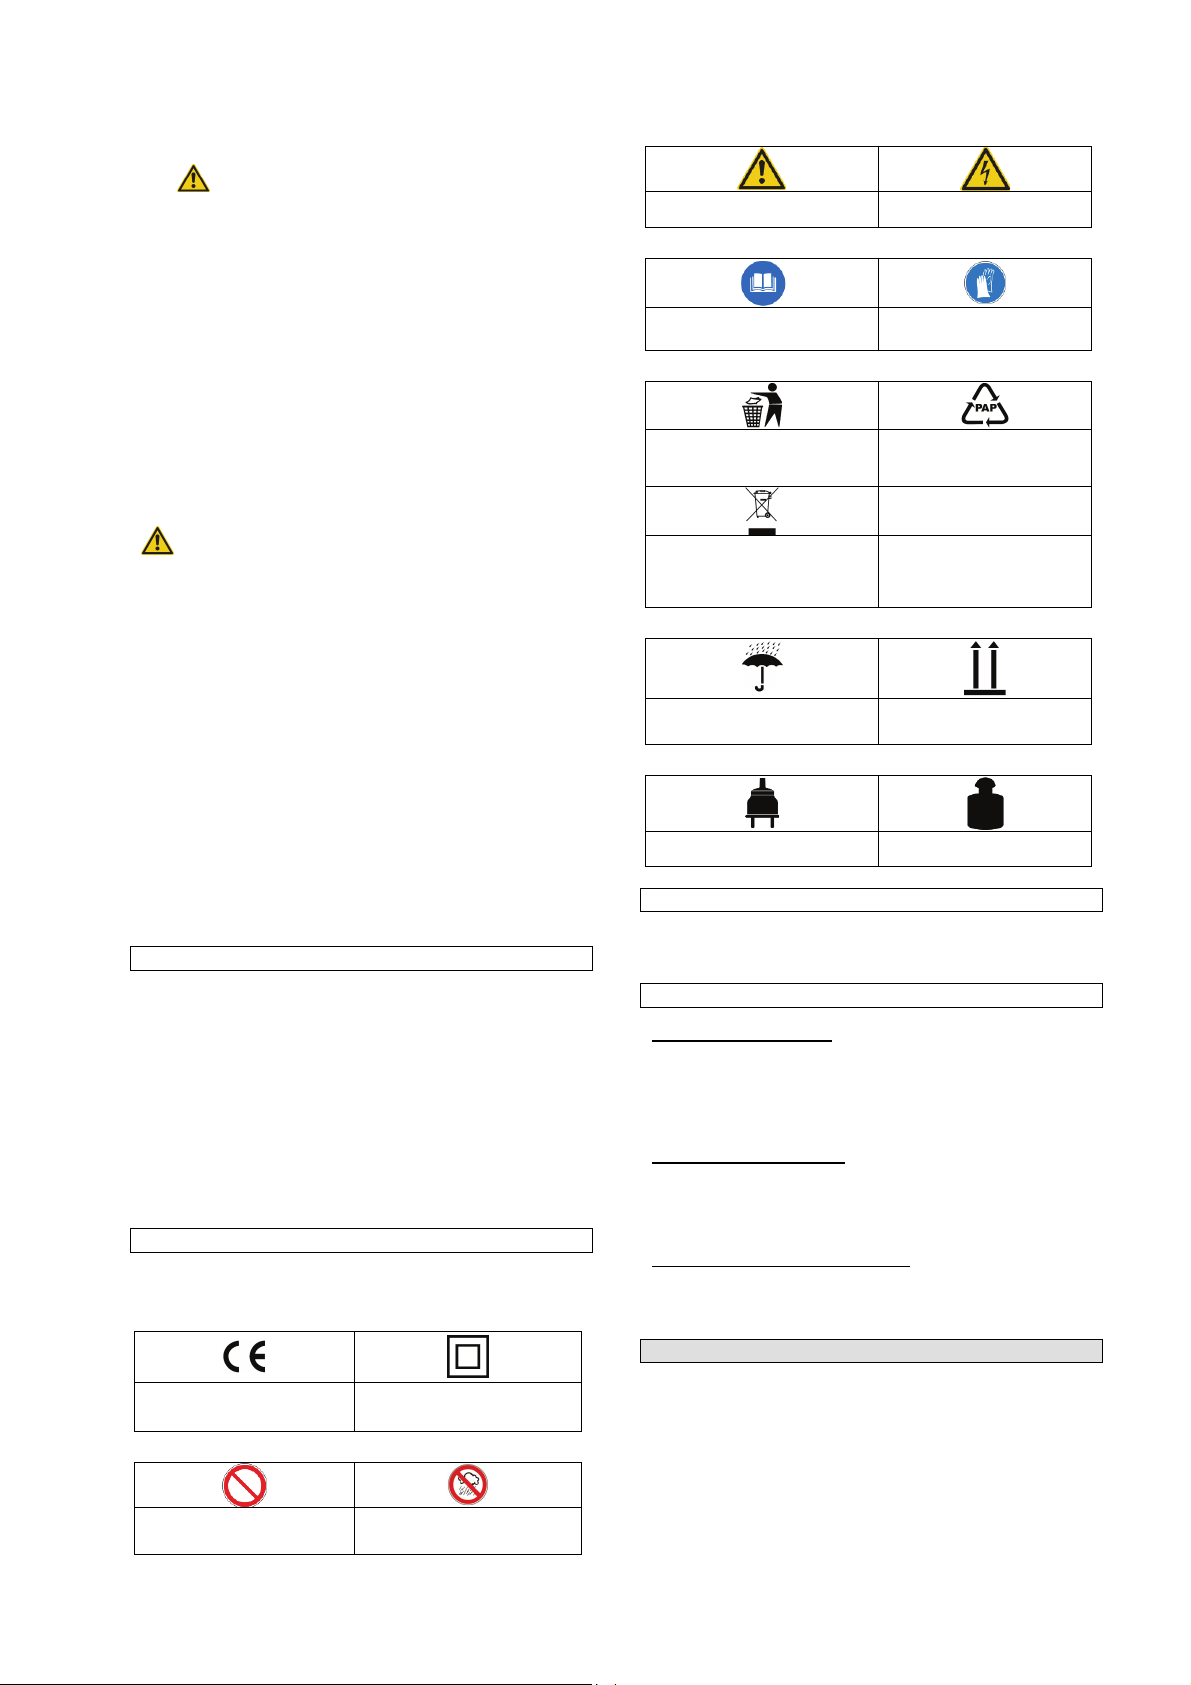
Erklärung der Symbole
In dieser Anleitung und/oder auf dem Gerät werden folgende
Symbole verwendet:
Produktsicherheit:
Produkt ist mit den einschlägigen
Normen der Europäischen
Gemeinschaft konform
Gerät ist schutzisoliert
Schutzklasse II
Verbote:
Verbot, allgemein
(in Verbindung mit anderem
Piktogramm)
Nicht bei Regen verwenden
Warnung:
Warnung/Achtung
Warnung vor gefährlicher
elektrischer Spannung
Gebote:
Vor Gebrauch
Bedienungsanleitung lesen
Schutzhandschuhe benutzen
Umweltschutz:
Abfall nicht in die Umwelt sondern
fachgerecht entsorgen.
Verpackungsmaterial aus
Pappe kann an den dafür
vorgesehen Recycling-Stellen
abgegeben werden.
Schadhafte und/oder zu
entsorgende elektrische oder
elektronische Geräte müssen an
den dafür vorgesehen Recycling-
Stellen abgegeben werden.
Verpackung:
Vor Nässe schützen Packungsorientierung Oben
Technische Daten:
Netzanschluss Gewicht
Page 5
5
Bestimmungsgemäße Verwendung
Professionelles Startladegerät zum Laden, Schnellladen,
sowie zum Starten von Fahrzeugen. Fahrbar durch
grossdimensionierte Räder.
Elektrische Restgefahren
Direkter elektrischer Kontakt
Ein defektes Kabel oder eine Stecker kann zum
Stromschlag führen.
Lassen Sie defekte Kabel oder Stecker immer vom
Fachmann austauschen. Verwenden Sie das Gerät nur an
einem Anschluss mit Fehlerstromschutzschalter (FI).
Indirekter elektrischer Kontakt
Verletzungen durch spannungsführende Teile bei
geöffneten elektrischen oder defekten Bauteilen.
Immer bei Wartungsarbeiten den Netzstecker ziehen. Nur an
FI-Schalter betreiben.
Unangemessene örtliche Beleuchtung
Mangelhafte Beleuchtung stellt ein hohes
Sicherheitsrisiko dar.
Sorgen Sie bei der Arbeit mit dem Gerät immer für
ausreichende Beleuchtung.
Entsorgung
Die Entsorgungshinweise ergeben sich aus den
Piktogrammen die auf dem Gerät bzw. der Verpackung
aufgebracht sind. Eine Beschreibung der einzelnen
Bedeutungen finden Sie im Kapitel „Kennzeichnung“.
Entsorgung der Transportverpackung
Die Verpackung schützt das Gerät vor Transportschäden. Die
Verpackungsmaterialien sind in der Regel nach
umweltverträglichen und entsorgungstechnischen
Gesichtspunkten ausgewählt und deshalb recycelbar.
Das Rückführen der Verpackung in den Materialkreislauf
spart Rohstoffe und verringert das Abfallaufkommen.
Verpackungsteile (z.B. Folien, Styropor®) können für Kinder
gefährlich sein. Es besteht Erstickungsgefahr!
Bewahren Sie Verpackungsteile außerhalb der Reichweite
von Kindern auf und entsorgen Sie sie so schnell wie möglich.
Innerhalb der EU weist dieses Symbol darauf hin,
dass dieses Produkt nicht über den Hausmüll
entsorgt werden darf. Altgeräte enthalten
wertvolle recyclingfähige Materialien, die einer
um der Umwelt bzw. der menschlichen Gesundheit nicht
durch unkontrollierte Müllbeseitigung zu schaden. Bitte
entsorgen Sie Altgeräte deshalb über geeignete
Sammelsysteme oder senden Sie das Gerät zur Entsorgung
an die Stelle, bei der Sie es gekauft haben. Diese wird dann
das Gerät der stofflichen Verwertung zuführen.
Anforderungen an den Bediener
Der Bediener muss vor Gebrauch des Gerätes aufmerksam
die Bedienungsanleitung gelesen haben.
Qualifikation
Außer einer ausführlichen Einweisung durch eine
sachkundige Person ist keine spezielle Qualifikation für den
Gebrauch des Gerätes notwendig.
Mindestalter
Das Gerät darf nur von Personen betrieben werden, die das
16. Lebensjahr vollendet haben.
Eine Ausnahme stellt die Benutzung als Jugendlicher dar,
wenn die Benutzung im Zuge einer Berufsausbildung zur
Erreichung der Fertigkeit unter Aufsicht eines Ausbilders
erfolgt.
Wiederverwertung zugeführt werden sollten und
Schulung
Die Benutzung des Gerätes bedarf lediglich einer
entsprechenden Unterweisung. Eine spezielle Schulung ist
nicht notwendig.
Technische Daten
Anschluss: 230 V/50-60 Hz
Lade-Startspannung: 12 V / 24 V umsteckbar
Ladestrom effektiv: 60 A
Ladestrom arithm.: 40 A
Startstrom ca.: 0 V: 390 A
1,5 V: 240 A
Max Netzleistung: 8 kW
Min. Absicherung: 16 A
Nennkapazität: 20-1000 Ah
Batteriestart: 35-50 Ah (ohne Vorladung)
Gewicht: 16 kg
Maße (mm): 330 x 250 x 600
Transport und Lagerung
• Bei längerer Lagerung sollte die Maschine gründlich
gereinigt werden.
• Schützen Sie das Gerät durch eine Kunststoffplane,
Karton oder Ähnliches vor Witterungseinflüssen.
Montage und Erstinbetriebnahme (Abb. 4+5+6)
Schrauben Sie den Griff wie in(Abb. 5) fest.
Nun Schieben Sie die Achse (Abb.1/2) durch den
Batterielader. Danach die mitgelieferten Sicherungsringe
anbringen. Nun noch die Räder (Abb.1/1) auf die Achse
setzten, diese ebenfalls mit den Sicherungsringen wie in
(Abb.6) sichern.
Nun noch die Radkappen auf die Räder setzten.
Zum Schluß schrauben Sie den Standfuß (Abb.1/4) mit den
mitgelieferten Schrauben (Abb.1/3) fest.
Bedienung
Vor allen Um- und Einstellungen des Batterieladers
ist der Netzstecker zu ziehen.
Ladefunktion (Abb.3)
• Schließen Sie das Ladegerät an die zu ladende Batterie
an.
• Das schwarze Polkabel muss immer zuerst an den
Minuspol angeschlossen werden, danach erst den
Pluspol anklemmen.
•
Klemmen Sie die Batterie für den Ladevorgang
komplett vom Fahrzeug ab.
• Stellen Sie das Ladegerät grundsätzlich auf die
niedrigste Ladestufe (min/1) (Abb.3/8)
• Stecken Sie nun den Netzstecker ein und regeln Sie die
Ladestufen nach oben, bis ein Ladestrom angezeigt
wird, der ca. 10% der Batteriekapazität entspricht.
• Die Ladestufen können bei fallendem Ladestrom erhöht
werden. (Abb.3/7)
• Bitte spätestens 3-5 Stunden nach vollendeter Ladung,
die Batterie abklemmen.
•
Die Ladestromanzeige geht nach beendeter
Ladung nicht ganz auf Null zurück.
Ladedauer der Batterie
• Die Ladedauer ist immer abhängig vom Batteriezustand
(fast geladen, zur Hälfte geladen oder völlig entladen)
• Zum Laden „als Auffrischung“ einer Batterie genügen 2-
4 Stunden. Zur Vollaufladung bedarf es 8-10 Stunden.
•
Eine maximale Ladedauer von 10 Stunden,
sollte nicht überstiegen werden.
65-100 Ah (mit Vorladung)
Page 6
6
Starthilfe
• ACHTUNG! Beim Startvorgang können
Überspannungen entstehen, die die Bordelektronik ihres
Fahrzeugs beschädigen können. Bitte besprechen Sie
die mit Ihrem KFZ Fachmann.
• Batterie wie unter Kapitel Ladevorgang anschließen und
am Fahrzeug angeklemmt lassen!
• Das Fahrzeug sollte grundsätzlich mit 2 Personen
gestartet werden.
• Das Ladegerät auf max. Leistung stellen:
Schaltstufe 2 (Abb. 3/7) und „BOOST“ (Abb. 3/8).
• Die erste Person betätigt den Startschalter am
Ladegerät. (Abb. 3/9) Die zweite Person startet sofort
den Zündvorgang.
• Sobald das Fahrzeug angesprungen ist , den
Startvorgang sofort unterbrechen, max. 9-10 Sek.
• Nach jedem nicht geglücktem Startversuch bitte ca. 5
Minuten warten bis das Gerät abgekühlt ist.
Tipp:
Wenn Sie die Batterie 10-15 Minuten vorladen,
benötigt die Batterie wesentlich weniger Startstrom.
Achtung: Wird die max. Startdauer von 10 sek.
Überschritten, können die Sicherungen durchbrennen
bzw. Schäden am Fahrzeug entstehen!
Achtung: Die Polklemmen dürfen sich nicht
berühren.
Achtung: Der Batterielader verfügt über eine
Überlastschutzsicherung.
Wichtig: Das Auswechseln von Schmelzsicherungen
(Abb. 3/5), die nicht mit denen des Gerätes
übereinstimmen, kann zu Sach- oder Personenschaden
führen.
Das Auswechseln von Schmelzsicherungen darf nur bei
gezogenem Netzkabel erfolgen!
Sicherheitshinweise für die Bedienung
• Alle Sicherheits- und Schutzvorrichtungen müssen
ordnungsgemäß eingebaut und an ihrem Platz sein,
bevor die Maschine eingeschaltet werden darf.
• Anlassversuche bei Fahrzeugen mit entladenen oder
schadhaften Batterien sind untersagt, da dies zur
Beschädigung des Gerätes führen würde.
• Anlassversuche der Batterie in der „Ladestellung“ statt
„Starthilfe“ können das Amperemeter beschädigen und
den Überlastschutz auslösen.
• Bevor Sie den Hauptschalter betätigen, vergewissern
Sie sich, dass das Ladegerät richtig angeschlossen ist.
• Warnung! Wenn sie Zweifel haben. Lassen Sie sich vor
dem Einsatz von einem Fachmann in einem
autorisierten Service-Center helfen.
• Benutzen Sie das Gerät erst nachdem Sie die
Bedienungsanleitung aufmerksam gelesen haben.
• Beachten Sie alle in der Anleitung aufgeführten
Sicherheitshinweise.
• Verhalten Sie sich verantwortungsvoll gegenüber
anderen Personen.
Schritt-für-Schritt-Anleitung
Laden
1. Batterielader anschließen.
2. Ladefunktion einstellen (min/1).(Abb.3/7)
3. Batterielader einschalten.
4. Netzkabel anschließen.
5. Batterie wird geladen. (max. 10 Stunden)
Starten
1. Batterielader anschließen.
2. Startfunktion einstellen. (Abb.3/9).
3. Netzkabel anschließen.
4. Batterielader einschalten, sofort dann das Fahrzeug
starten.
5. Sobald das Fahrzeug angesprungen ist, den
Startvorgang sofort unterbrechen und den Batterielader
ausschalten und abklemmen.
Störungen-Ursachen-Behebung
ACHTUNG: IMMER ZUERST DIE ÜBERLASTUNGSSICHERUNGEN ÜBERPRÜFEN!
Überlastschutzschalter:
1. Die rote Zange an den Pluspol (+) und die schwarze
Zange an den Minuspol (-) schließen.
2. Den Kontakt beseitigen und die Sicherungen überprüfen.
3. Niedrigere Ladestufe wählen.
4. Ist die Leistungsaufnahme der Batterie zu hoch, wird
empfohlen, die Batterie von einem Kfz-Elektriker laden
zu lassen und im Anschluss unter häufigem Gebrauch
des Batterieladegeräts das Ladungsniveau hoch zu
halten oder sich ein leistungsfähigeres Batterieladegerät
zu besorgen.
Die Batterie von einem Fachmann kontrollieren lassen.
Batterie auswechseln
Zu starker Ladestrom bei Ladebeginn.
1. Achtung: wenn der Ladestrom noch nach 15 - 20
Minuten hoch ist, kann das bedeuten, dass die Ladung
nicht hält.
Die Batterie von einem Fachmann kontrollieren lassen.
Batterie auswechseln
Zu schwacher Ladestrom.
1. ggf. probieren, die Ladestromregulierung höher
einzustellen
Amperemeterzeiger berührt den niedrigsten Skalastand.
1. Die Batterie von einem Fachmann kontrollieren lassen.
Batterie auswechseln.
2. Sicherstellen, dass die Netzspannung der vorgesehenen
Spannung entspricht.
Amperemeter zeigt nicht an.
1. Klemmen säubern und die Zangen wieder anbringen.
2. Von einem Fachmann kontrollieren lassen. Batterie
auswechseln.
3. Funktionstüchtigkeit des Batterieladegeräts an einer
anderen Batterie in einwandfreiem Zustand prüfen.
Ursachen der Überlastung
1. Falscher Anschluss der Zangen an die Batterie.
2. Ein versehentlicher oder indirekter Kontakt der Zangen
miteinander.
3. Die Batterie ist völlig bzw. stark entladen.
4. Die Batterie ist völlig entladen und hat eine höhere
Kapazität als das Batterieladegerät Leistung aufbringen
kann.
5. Batterie ist schadhaft oder beschädigt (beispielsweise
Kurzschluss interner Elemente)
Inspektion und Wartung
Ziehen Sie vor allen Arbeiten am Gerät den Netzstecker.
• Benutzen Sie zur Reinigung der Kunststoffteile einen
feuchten Lappen. Keine Reinigungsmittel, Lösungsmittel
oder spitze Gegenstände verwenden.
• Befreien Sie die Belüftungsöffnung und bewegliche Teile
nach jedem Gebrauch von festsitzendem Staub mit einer
weichen Bürste oder einem Pinsel.
Ölen Sie alle beweglichen Metallteile regelmäßig
Page 7
Sicherheitshinweise für die Inspektion und Wartung
7
Nach jedem Gebrauch
Belüftungsöffnungen und bewegliche Teile von Staub
befreien
Regelmäßig
Bewegliche Metallteile ölen. (Mehrzwecköl)
Regelmäßig
Überprüfen Sie alle Schrauben ob diese fest angezogen sind.
Service
Sie haben technische Fragen? Eine Reklamation?
Benötigen Ersatzteile oder eine Bedienungsanleitung?
Auf unserer Homepage www.guede.com im Bereich Service
helfen wir Ihnen schnell und unbürokratisch weiter. Bitte
helfen Sie uns Ihnen zu helfen. Um Ihr Gerät im
Reklamationsfall identifizieren zu können benötigen wir die
Seriennummer sowie Artikelnummer und Baujahr. Alle diese
Daten finden Sie auf dem Typenschild. Um diese Daten stets
zur Hand zu haben, tragen Sie diese bitte unten ein.
Seriennummer:
Artikelnummer:
Baujahr:
Tel.: +49 (0) 79 04 / 700-360
Fax: +49 (0) 79 04 / 700-51999
E-Mail: support@ts.guede.com
EG-KONFORMITÄTSERKLÄRUNG
Hiermit erklären wir,
Güde GmbH & Co. KG
Birkichstrasse 6
D-74549 Wolpertshausen
Deutschland
dass die nachfolgend bezeichneten Geräte aufgrund ihrer
Konzipierung und Bauart sowie in den von uns in Verkehr
gebrachten Ausführungen den einschlägigen, grundlegenden
Sicherheits- und Gesundheitsanforderungen der EGRichtlinien entsprechen.
Bei einer nicht mit uns abgestimmten Änderung der
Geräte verliert diese Erklärung ihre Gültigkeit.
Bezeichnung der Geräte: BATTERIELADER V 421 C
Artikel-Nr: 85074
Einschlägige EG-Richtlinien:
2006/95/EG
2004/108/EG
Angewandte harmonisierte Normen:
EN 60335-2-29:2004
EN 60335-1/A14:2010
EN 62233 :2008
EN 55014-1:2006
EN 55014-2/A2:2008
EN 61000-3-2:2006
EN 61000-3-3:2008
EN 61000-3-11:2000
Datum/Herstellerunterschrift: 10.08.2011
Angaben zum Unterzeichner: Geschäftsführer
Hr. Arnold
Technische Dokumentation: J. Bürkle FBL; QS
Page 8
GB
8
Please read carefully these operating instructions before putting the machine into operation.
A.V. 2 Reprints, even partial, are subject to approval. Technical changes reserved.
Devise
Battery Charger V 421 C
(Serial) Equipment
Professional charging cable, clamps with insulated handles,
ammeter, mixed poling protection, thermal protection,
additional fuse 50 A.
Area of Use.
The professional charger for normal and quick-acting
charging and vehicle start-up Large wheels facilitate easy
travel.
Scope (Fig. 1+2)
1. Wheels
2. Axle
3. Screws
4. supporting foot
5. Wheels covers
6. Screws
7. Handle
8. Charger
Description of Unit (Fig. 3)
1. On/Off switch .
2. connection 12 V
3. ground
4. connection 24 V
5. cut-out fuse
6. ammeter
7. switching degree 1 + 2
8. charging min – max
9. charging or battery start up
Guarantee
The guarantee solely covers inadequacies caused by material
defect or manufacturing defect.
Original payment voucher with the sales date needs to be
submitted for any claim in the guarantee period.
The guarantee does not cover any unauthorised use such as
appliance overloading, use of violence, damage as a result of
any unauthorised interference or caused by foreign items.
Failing to follow the operating and assembly instructions and
common wear are also not included in the guarantee.
General Safety Regulations
This instruction manual should be read carefully before
the initial use of the unit. If in doubt with regard to
connection and operation, contact the manufacturer (servicing
department).
Observe the instructions below carefully to provide for a
high degree of safety:
Warning: Do not operate unless with current
protection (FI) fitted!
Caution!
• Keep your workplace clean and tidy. Messy
workplace and disorder on the table increase the risk of
accident and injury.
• Mind the conditions of the environment you work in.
Do not use electric tools in moist and wet surroundings.
Provide for sufficient lighting. Do not expose the
electric tools to the rain or high atmospheric
moisture. Do not switch on in an area containing
inflammable liquids or gases.
• Do not admit any strangers to the machine. Visitors
and bystanders, children and the sick in particular keep
at a sufficient distance from your workplace.
• Provide for safe storage of the tools. The tools that
are not in current need should be stored at a dry
unapproachable or an elevated place.
• Watch out for the cable. Do not pull the cable. To
unplug, always grasp at the plug. Keep the cable at a
safe distance from sources of heat, oil and sharp edges.
• Provide against unintentional switching. Always
make sure that the tool switch is in OFF position before
plugging in.
• When working outdoors, use special extension
cables. To work outdoors, special extension cables are
needed, mark in the appropriate way.
• Always remain concentrated. Mind what you are
doing. Use common sense. Do not use electrical tools
when feeling tired. .
• Watch out for damaged parts. Check out the unit
before use. Are some parts damaged? If the damage is
slight, reconsider whether the unit is able of perfect and
safe operation.
• Prevent any electrical shock. Avoid any contact of
your body with grounded articles, e.g. water piping,
heating radiators, stoves and fridges.
• Use approved parts only. For maintenance and
repairs, use genuine spare parts only. The spare parts
may be obtained from an authorised servicing centre.
• Warning! Use of accessories and additional parts other
than those recommended in the operating manual may
present a threat for persons and things.
Initial Operation Safety Instructions
• Before starting set-up or maintenance of the unit,
disconnect it from the source.
Connect the charger until the power supply, if all
the settings and the terminals are properly connected.
• Having removed the packing, make sure that the
condition of the unit and any of its component is perfect.
• Unwind the power cable completely and put it so the
pole terminals cannot get in touch with each other.
• If necessary, use an extension cable to extend the
power cable; it must be of the same cross section as the
power cable. Never use cable of smaller cross section.
• Keep the clamps, terminals and upper surface of the
battery clean, if necessary, use the wire brush to clean
the battery terminals. In this way, a good electrical
contact will be provided and better charging efficiency
secured.
• Never mix connections poling! ( (-) black; (+) red )
• The charging voltage should be same as that shown on
the battery i; the value is equal to the number of cells of
a storage battery multiplied by two
(3 cells = 6 V; 6 cells = 12 V; 12 cells = 24 V).
• Before charging, put the unit on a stable base and make
sure that noting will prevent air flow through the
respective holes. A good cooling system must be
guaranteed.
• Do not charge more batteries at a time.
• The battery closure should be removed after cleaning
the terminals not to have dust and dirt falling in the tubs.
• Provide for the electrolyte covering the plates up to the
height of 4-5 mm at least, If necessary, add distilled
water that may be obtained at shops for this purpose.
Page 9
9
1. In the course of charging, explosive gases develop
abstain from smoking and naked fire or sparks.
2.
The batteries should be charged in well
ventilated spaces. The charger is prohibited for use
inside a vehicle or closed car bonnet.
3. Never charge standard and maintenance-free batteries
jointly.
4. Never recharge disposable batteries.
5. Leave sufficient ventilation space behind the unit.
6. Follow the manufacturer’s instructions.
7. Check ion the right level of the acid Kin battery. .
8. Always check whether condition of the power cable and
clamping cable is perfect. If the power cable is
damaged, have it replaced at a specialist’s.
9. The unit should not be exposed to weather effects –
snow and rain.
10. Do not use the unit bare footed. Do not touch the unit
with wet or damp hands or feet .
11. Never unplug by pulling the cable.
12. Prevent unauthorised persons or children from using the
unit.
Do not leave the switched-on unit unattended, it
could become a source of risk.
• If you do repairs of safety or protection devices, they
should be refit immediately after the job is completed.
• Injuries prevention regulations effective at a place of
particular use and any other generally recognised safety
rules must be known and observed.
• The safety devices should be checked on before the use
of unit. Make sure that even the parts, which are slightly
damaged seemingly, may work properly. .
• Unless otherwise stated in this manual, repairs and
replacement of damaged components and safety
devices should be done at an authorised servicing
centre.
• Have any damaged switches replaced at an authorised
servicing centre.
• This unit complies with any respective safety provisions.
The repairs are allowed to be done by skilled electricians
at authorised servicing centres only. Only genuine spare
parts may be used. A risk of injury is imminent if the
regulation is not observed.
Behaviour in case of emergency
Provide necessary first aid treatment corresponding to the
injury nature and seek qualified medical help as soon as
possible. Protect the injured person from other injuries and
calm him/her down. First aid kit must always be available
in the place of your work in case of accident in
accordance with DIN 13164. Material taken out of the first
aid kit needs to be supplemented right away.
If help is needed, please provide the following details:
1. Place of accident
2. Accident nature
3. Number of injured persons
4. Injury type
Meaning of Symbols
Symbols shown below are used throughout this manual
and/or on the unit:
Product Safety:
Product compliance with
respective EU standards
Bans:
General ban (in combination with
another pictograph)
There is protective insulation on
Protection class II
Do not use the unit in rain
the unit.
Precaution:
Warning/caution Beware of hazardous voltage
Commands:
Read operating manual before use Use protection gloves
Environment Protection:
Wastes to be disposed of in a
professional manner not to harm
the environment.
Cardboard packaging to be
collected for recycling.
Faulty and/or disposed of
electrical/electronic appliances to
be collected by authorised salvage
places.
Packaging:
Protect from moisture Keep Up
Technical Data:
Power connection Weight
Assigned Use
Professional starting charger to charge, quick-acting charging
and vehicle start up. Large wheels enable good travel.
Residual Electrical Hazards
Direct electrical contact
Defective cable one plug may cause an electrical shock
injury.
Have the defective cables and plugs replaced at a
specialist’s. Use the unit on a connection equipped with a
current protection (FI).
Indirect electrical contact
A risk of injury by conductive parts with open or
defective parts of the unit
Disconnect the unit from the source of power to maintain it.
Operate with a current protection only.
Insufficient Lighting of Workplace
Insufficient lighting always present a high safety risk.
Always provide for sufficient lighting when working with the
unit.
Disposal
Disposal instructions are illustrated in the form of pictograms
on the device or packaging. Description of the pictograms is
given in "Identification" chapter.
Disposal of transport packaging
Packaging protects the device against damage during
transport. Packaging materials are usually selected according
to their effect on environment and disposal methods and can
therefore be recycled. Returning of the packaging back to
circulation saves resources and costs for packaging disposal.
Page 10
10
Parts of the packaging (e.g. foil, styropor) may be dangerous
for children. Risk of suffocation! Keep these parts of the
packaging out of reach of children and dispose as soon as
possible.
In the EU, this symbol refers to the fact the given
product is not allowed to be disposed as
household waste. Old appliances contain
valuable materials that can be recycled and you
should take them to a collection point to prevent
any damage to the environment and human health by
uncontrolled waste disposal. Therefore, dispose any old
appliances through collection points or send them for disposal
to where you have bought them. By this, some materials from
these appliances will be reused.
Operator Requirements
The operator shall read the instruction manual carefully
before using the unit.
Qualification
No special qualification is required for use of the unit except
for detailed direction by a professional.
Minimum Age
Only persons above 16 years of age are allowed to work with
the unit. Exempted from the provision is the use of the
juvenile trainees if they work in the course of their
professional training with an aim to obtain the skill under
trainer supervision:
Training
Use of the unit requires adequate lesson by a professional or
the use of the manual only . Special training is not required.
Technical Data
Connector: 230 V/50-60 Hz
Charging voltage at start: 12V / 24 V
Charging rms current: 60 A
Charging arithmetic current: 40 A
Starting current app.: 0 V: 390 A
1.5 V: 240 A
Max. input: 8 kW
Min. protection: 16 A
Rated capacity: 20-1000 Ah
Battery start: 35-50 Ah (without
previous charging)
Weight: 16 kg
Dimensions (mm): 330 x 250 x 600
Transportation and Storage
• If putting the unit away for a prolonged storage, it should
be cleaned thoroughly.
• Protect the unit from weather effects with a tarpaulin,
carton etc.
Assembly and Initial Operation (Fig. 4+5+6)
Screw on the handle according to (Fig. 5).
Put the axle through the charger (Fig.1/2). Fit the supplied
safety rings on. Mount the wheels (Fig.1/1) on the axle and
secure them with safety rings (Fig .6).
Put the wheels covers on.
Screw on the foot (Fig. 1/4) using the supplied screws
(Fig.1/3).
65-100 Ah (with previous
charging)
Operation
Unplug before any adjustment and set up.
Charging (Fig .3)
• Connect the charger to the battery to be recharged
• Always connect the black cable first, to the negative pole.
Connect the red pole cable to the positive pole.
The battery should be completely disconnected from
the vehicle before getting down to charging.
• Always set the charger at the lowest charging degree
(min/1) (Fig.3/8)
• Now, plug in and control the charging degrees upwards
until charging current equal to ca 10% of the battery
capacity is displayed.
• Charging degrees may be increased by falling charging
current. (Fig.3/7)
• Do not disconnect the battery from terminals later than
3-5 hours after charging is finished.
•
Notice. The charging current indicator will not
come back to zero after charging is finished.
Charging Time
• The charging time always depends on the battery status
(nearly charged, half-charged or completely discharged)
• To recover a battery that is normally in use 2 – 4 hrs are
sufficient, while for full recharging 8-10 hrs are needed.
•
Charging time should not be exceeded (10 hrs
max.).
Start-up Assistance
• CAUTION! At the startup process can overvoltages
arise, the on-board electronics could damage their
vehicle. Please discuss with your automotive specialist.
• Connect the batteries as shown in part “Charging” and
leave it connected to the vehicle!
• On principle, two persons should always start up a
vehicle with chargers.
• The charger on max. Performance are:
Switching stage 2 (Fig. 3/7) and "BOOST" (Fig. 3/8).
• The first person shall push the Start button on the
charger (Fig. 3/9). The other one shall immediately start
the ignition, max. 9-10 sec.
• As the vehicle starts up, stop starting immediately
• If the attempt to start fails, wait about 5 minutes for the
charger to get cooled and only then begin another
attempt to start.
Tip: If you change the battery for 10-15 minutes to
subpoena requires much less battery power startup.
Warning: The fuses may burn through and the
vehicle damaged if the starting time is more than 10 s.
Note: The terminals may not touch.
Notice: The charger is equipped with overload
protection.
Important: A change of drop-out fuses for fuses (pic. 3/5)
not corresponding to fuses in the appliance can cause
material damage or injury of persons.
Change the drop-out fuses only when the power cord is
unplugged!
Operator Safety Instructions
• Any safety and protection devices must be fitted in
place before switching the unit on.
• It is forbidden to attempt starting vehicles, the batteries
of which are discharged or damaged as that would
result in damaging the unit.
Page 11
11
• Any attempts to start in position “charging” instead of
“starting” could damage the ammeter and start the
overload protection.
• Before pressing the main switch, make sure that the
unit is connected correctly.
• Warning! If in doubt, consult a specialist in an
authorized servicing centre.
• Do not use the unit until you have read the manual
carefully.
• Observe all the safety regulation in this manual.
• Be responsible to the others.
Step-by-step Instruction
Charging
1. Connect the charger .
2. Set the charging function up (min/1).(Fig. 3/7)
3. Switch the charger on .
4. Plug in .
5. Battery is being charged. (max. 10 hrs)
Starting
1. Connect the charger .
2. Set the starting up (Fig. 3/9).
3. Connect to the mains.
4. Switch the charger on and start the vehicle immediately.
5. Jas soon as the vehicle is up, stop starting and switch off
and disconnect the charger.
Troubles-Causes-Troubleshooting
Notice: Always check the overload protection first!
Overload circuit-breaker:
1. Connect the red clamp to the positive pole (+) and the
black one to the negative pole (-).
2. Remove the contact and check the fuses.
3. Set the charger at the lowest charging degree. .
4. If the battery power input is too high, it is recommended
to have the battery charging done by a skilled electrician
and to keep the level of charge high by frequent
charging or to get a more powerful charger.
Have the battery checked by a specialist. Replace the
battery.
Too heavy charging current at the beginning of charging
1. Watch out the charging current if it is high even after 15 -
20 minutes, it may mean that the charge would not hold
Have the battery checked at a specialist’s. Replace the
battery.
Too weak charging current .
1. Try to adjust the charging current control higher.
Ammeter pointer touches the lowest position of the scale
1. Have the battery checked at a specialist. Replace the
batteries
2. Ensure that the mains voltage is equal to the desired
value
Ammeter does not indicate.
1. Clean the terminals and put the clamp on again.
2. Have it checked at a specialist´s . Replace the battery.
Check on the charger working ability on a perfect
charged battery.
Overload Causes
1. Mixing up the poles when connecting the clamp to the
battery
2. The battery is heavily or completely discharged.
3. Battery is completely discharged and its capacity is
higher than the charger power
4. Battery is damaged or defective (internal elements short
circuit).
Inspections and Maintenance
Unplug before any work on the unit.
• Use a wet cloth to clean the plastic parts. Do not use
detergents, solvents and sharp articles.
• Use a soft brush or a paint brush to remove the settled
dust from the vent and moving parts.
Oil all the moving metal parts regularly
Inspections and Maintenance Safety Instructions
After every use
Clean the vents and moving parts from dust
Regularly
Oil the moving metal parts (multi-purpose oil)
Regularly
Check all the screws to see if they are tight.
Service
Any technical questions? Complaint? Do you need spare
parts or operation manual?
Go to our website www.guede.com and the section Service
will help you quickly and without bureaucracy. Please, help us
to help you. In order to identify your device in case of
complaint, please indicate serial number, order number and
year of manufacture. All information is available on the
product label. To have all information always at hand, put
them down.
Serial number:
Order number:
Year of manufacture:
Phone: +49 (0) 79 04 / 700-360
Fax: +49 (0) 79 04 / 700-51999
E-Mail: support@ts.guede.com
EC Declaration of Conformity
We,
Güde GmbH & Co. KG
Birkichstraße 6
74549 Wolpertshausen
Germany
hereby declare the conception and construction of the belowmentioned devices correspond - at the type of construction
being launched - to appropriate basic safety and hygienic
requirements of EC Directives.
In case of any change to devices not discussed with us
the Declaration expires.
Marking of devices: Battery Charger V 421 C
product No.: 85074
Appropriate EC Directives:
2006/95 EG
2004/108 EG
Harmonised standards used:
EN 60335-2-29:2004
EN 60335-1/A14:2010
EN 62233 :2008
EN 55014-1:2006
EN 55014-2/A2:2008
EN 61000-3-2:2006
EN 61000-3-3:2008
EN 61000-3-11:2000
Date/producer signature: 10.08.2011
Data on Signatory: executive officer
Mr. Arnold
Technical Documentation: J. Bürkle FBL; Q
Page 12
F
12
Avant de mettre l’appareil en marche, veuillez lire attentivement le mode d’emploi.
A.V. 2 Toute réimpression, même partielle, nécessite une autorisation. Modifications techniques réservées.
Appareil
Chargeur de batteries V 421 C
Équipement (en série)
Câble de charge profi, pince avec poignées isolées,
ampèremètre, protection contre l’inversement des pôles,
fusible thermique, fusible supplémentaire 50 A.
Domaine d’utilisation:
Chargeur professionnel pour chargement normal et rapide et
pour le démarrage de véhicules. Les grandes roues
permettent le déplacement du chargeur.
Contenu (fig. 1+2)
1. roues
2. axe
3. vis
4. pied de base
5. Caches des roues
6. vis
7. poignée
8. chargeur
Description de l’appareil (fig. 3)
1. interrupteur mise en marche/arrêt
2. raccord 12 V
3. mise à la terre
4. raccord 24 V
5. fusible de coupe-circuit
6. ampèremètre
7. degré de commutation 1 + 2
8. chargement min – max
9. chargement ou marche de la batterie
Garantie
La garantie concerne exclusivement les imperfections
provoquées par le défaut du matériel ou le défaut de
fabrication. En cas de réclamation pendant la durée de la
garantie, il est nécessaire de joindre l’original du justificatif
d’achat avec la date d’achat.
La garantie n’inclut pas une utilisation incompétente telle que
surcharge de l’appareil, utilisation de la force,
endommagement par intervention étrangère ou objets
étrangers. Le non respect du mode d’emploi et du mode de
montage ainsi que l’usure normale ne sont pas non plus
inclus dans la garantie.
Consignes générales de sécurité
Avant d’utiliser l’appareil, lisez complètement la notice. Si
vous avez des doutes sur le branchement et la manipulation
de l’appareil, contactez le fabricant (service après-vente).
AFIN D’ASSURER UN GRAND DEGRÉ DE SÉCURITÉ,
RESPECTEZ LES CONSIGNES SUIVANTES :
Attention : Utiliser uniquement avec un FI
(interrupteur de protection contre le courant de défaut)!
ATTENTION !
• Maintenez votre lieu de travail en ordre. Le désordre
sur le lieu de travail et l’établi augmente des risques
d’accidents et de blessures.
• Prenez en considération les conditions
atmosphériques. N’utilisez pas les outils et les
appareils électriques dans un milieu humide ou mouillé.
Assurez un éclairage suffisant. N’exposez pas les
outils électriques à la pluie ou à un taux d’humidité
élevé. Ne mettez pas les outils électriques en marche à
proximité des liquides ou des gaz inflammables.
• Empêchez l’accès à l’appareil aux personnes
étrangères. Éloignez les visiteurs, les spectateurs, en
particulier les enfants, les personnes malades ou faibles,
de votre lieu de travail.
• Assurez un rangement sûr des outils. Rangez les
outils que vous n’utilisez pas à un endroit sec, si
possible en hauteur ou fermez-les de façon à ce qu’ils
soient inaccessible aux autres personnes.
• Surveillez le câble d’alimentation. Ne tirez pas sur le
câble. Ne l’utilisez pas pour retirer la fiche de la prise.
Éloignez-le des sources de chaleur, de l’huile et des
bords tranchants.
• Évitez la mise en marche involontaire de l’appareil.
Avant de brancher la fiche à la prise, vérifiez que
l’interrupteur de l’appareil se trouve en position „arrêt“.
• Pour les travaux à l’extérieur, utilisez uniquement
des câbles de rallongement spéciaux. Pour les
travaux extérieurs, utilisez des câbles de rallongement
spéciaux adéquats marqués de façon correspondante.
• Soyez attentifs. Faites attention à ce que vous faites.
Utilisez le bon sens. N’utilisez pas les appareils
électriques si vous êtes fatigués.
• Faites attention aux pièces endommagées. Vérifiez
l’appareil avant de l’utiliser. Certaines pièces sont
endommagées ? En cas d’un endommagement léger,
réfléchissez si l’appareil peut fonctionner sûrement et
parfaitement.
• Protégez-vous de l’électrocution. Évitez le contact
physique avec les objets mis à la terre, par exemple,
conduites d’eau, corps de chauffe, réchauds et
réfrigérateurs.
• Utilisez uniquement les pièces détachées
autorisées. Lors de l’entretien et des réparations,
utilisez uniquement les pièces détachées adéquates.
Pour cela, adressez-vous au service après-vente
autorisé.
• Avertissement ! L’utilisation des accessoires et des
pièces supplémentaires non recommandés explicitement
dans cette notice peut représenter un danger pour des
personnes et des objets.
Consignes de sécurité relatives à la première mise en
service
• Avant de procéder au réglage ou à l’entretien, retirez
la fiche de la prise.
Branchez le chargeur avant de l'alimentation, si
tous les paramètres et les Polklemmen sont
correctement raccordés.
- Après avoir retiré l’appareil de l’emballage, vérifiez si
l’appareil et toutes ces pièces sont en parfait état.
- Déroulez complètement le câble et placez le de façon à
ce que les pinces polaires ne se touchent pas.
- Si nécessaire, prolongez le câble d’alimentation avec
une rallonge avec la même section, n’utilisez pas de
câbles avec section plus petite.
- Maintenez les pinces et la surface supérieure de la
batterie propre, si nécessaire, nettoyez les pinces à
l’aide d’une brosse métallique, ceci permet de créer un
bon contact électrique et d’augmenter l’efficacité du
chargement.
- N’inversez jamais les pôles des pinces! ((-) Noir, (+)
rouge)
- Le voltage de charge du chargeur doit être identique au
voltage nominal indiqué sur la batterie ; cette valeur
correspond au nombre d’élément de l’accumulateur
multiplié par deux
(3 éléments=6V; 6 éléments=12V; 12 éléments=24V).
Page 13
13
- Posez l’appareil avant le chargement sur un support
stable et veillez à ce que rien n’empêche la circulation
d’air par les orifices. Une ventilation doit être assurée.
- Ne chargez pas plusieurs batteries en même temps.
- Retirez les fermetures des batteries seulement après le
nettoyage des bornes, de façon à ce la poussière ou
autres impuretés ne tombent dans les bacs.
- Veillez à ce que l’électrolyte couvre les plaques jusqu’à
la hauteur de 4 à 5 mm au minium ; si nécessaire,
ajoutez de l’eau distillée disponible dans les magasins.
1. Des gaz explosifs se forment pendant la phase de
chargement, par conséquent, évitez de fumer et de
manipuler le feu ouvert ou de créer des étincelles.
2.
Chargez les batteries uniquement dans des
endroits bien ventilés, il est interdit d’utiliser le
chargeur de batterie dans le véhicule ou sous le
capot fermé du véhicule.
3. Ne chargez jamais en même temps une batterie
standard et une batterie sans entretien.
4. Ne chargez jamais les batteries à usage unique.
5. Laissez un espace suffisant derrière l’appareil pour la
ventilation.
6. Respectez les consignes du fabricant.
7. Contrôlez le niveau de l‘acide dans la batterie.
8. Contrôlez l’état du câble d’alimentation et du câble de
contact. Si le câble d’alimentation est endommagé,
faites-le remplacer dans les plus brefs délais par un
spécialiste.
9. L’appareil ne doit pas être exposé aux influences
atmosphériques, telles que neige ou pluie.
10. N’utilisez jamais l’appareil si vous êtes pieds nus. Ne
touchez pas l’appareil avec les mains ou les pieds
humides ou mouillés.
11. Ne retirez jamais la fiche de la prise en tirant sur le
câble.
12. Interdisez aux enfants et aux personnes non autorisées
d’utiliser l’appareil.
Ne laissez pas l’appareil en marche sans
surveillance, il pourrait devenir une source de danger.
• Après avoir effectué les travaux d’entretien et de
réparations des dispositifs de protection et de sécurité, il
est nécessaire de les remonter immédiatement.
• Il est absolument indispensable de connaître les règles
de sécurité en vigueur sur le lieu de travail, ainsi que
toutes les autres règles de sécurité générales.
• Avant d’utiliser l’appareil, contrôlez le dispositif de
sécurité. Assurez-vous que les pièces semblant
légèrement endommagées fonctionnent parfaitement.
• Si la notice ne stipule pas autrement, les pièces et les
dispositifs de sécurité endommagés doivent être réparés
ou remplacés par un atelier agréé.
• Faites réparer les interrupteurs endommagés dans un
service après-vente agréé.
• Cet appareil est conforme à tous les règlements de
sécurité correspondants. Les réparations doivent être
effectuées uniquement par un électricien qualifié dans
un atelier de réparations agréé en utilisant des pièces
détachées d’origine. Le non respect de cette consigne
peut engendrer des risques d’accidents.
Conduite en cas d’urgence
Effectuez les premiers gestes de secours et appelez
rapidement les premiers secours.
Protégez le blessé d’autres blessures et calmez-le.
Pour des raisons de risque d’accident, le lieu de travail
doit être équipé d’une armoire à pharmacie selon DIN
13164. Il est nécessaire de compléter immédiatement le
matériel pris dans l’armoire à pharmacie. Si vous appelez
les secours, fournissez les renseignements suivants:
1. Lieu d‘accident
2. Type d‘accident
3. Nombre de blessés
4. Type de blessure
Explication des symboles
Dans la notice et/ou sur l’appareil figurent les symboles
suivants:
Sécurité du produit:
Produit répond aux normes
correspondantes de la CE
Appareil équipé d’une isolation de
Classe de protection II
protection
Interdictions:
Interdiction générale (en
combinaison avec un autre
pictogramme)
Ne pas utiliser sous la pluie
Avertissement:
Avertissement/attention
Avertissement : tension
électrique dangereuse
Consignes:
Lisez la notice avant l’utilisation.
Utilisez des gants de protection
Protection de l’environnement:
Liquidez les déchets de manière à
ne pas nuire à l’environnement.
Déposez l’emballage en carton
au dépôt pour recyclage.
Déposez les appareils électriques
ou électroniques défectueux et/ou
destinés à liquidation au centre de
ramassage correspondant.
Emballage:
Protégez de l’humidité Sens de pose
Caractéristiques techniques:
Fiche de contact Poids
Utilisation de l’appareil en conformité avec la destination
Chargeur de batterie professionnel pour le chargement, le
chargement rapide et le démarrage de véhicules. Les
grandes roues permettent un déplacement facile.
Dangers résiduels et mesures de protection
Contact électrique direct
Câble ou fiche défectueux peut provoquer une
électrocution. Faites remplacer un câble ou une fiche
endommagé par un spécialiste. Utilisez l’appareil uniquement
avec un interrupteur contre le courant de défaut (FI).
Contact électrique indirect
Blessures provoquées par des pièces conductrices des
pièces de construction ouvertes ou défectueuses.
Avant tout entretien, retirez la fiche de la prise. Utilisez
l’appareil uniquement avec un interrupteur contre le courant
de défaut (FI).
Page 14
14
Éclairage local insuffisant
Un éclairage insuffisant représente un grand risque.
Assurez toujours un éclairage suffisant lors de la manipulation
de l’appareil.
Liquidation
Les consignes de liquidation résultent des pictogrammes
indiqués sur l’appareil ou sur l’emballage. La description des
significations individuelles se trouve dans le chapitre
« Indications sur l’appareil ».
Liquidation de l’emballage de transport
L’emballage protège l’appareil de l’endommagement lors du
transport. En général, le matériel d’emballage est choisi de
façon à ce qu’il réponde aux règles de protection de
l’environnement et de liquidation des déchets, par
conséquent, il peut être recyclé. La remise de l’emballage
dans le circuit de matières permet d’économiser des matières
premières et de réduire les déchets. Des parties de
l’emballage (telles que films, styropore) peuvent être
dangereux pour les enfants. Danger d’étouffement!
Rangez les parties de l’emballage hors de portée des enfants
et liquidez-les le plus rapidement possible.
Dans le cadre de l’UE, ce symbole avertit qu’il est
interdit de liquider ce produit en tant que déchet
domestique. Les appareils anciens contiennent
des matières précieuses pouvant être recyclées,
un centre de ramassage afin d’éviter de nuire à
l’environnement et à la santé humaine par un dépôt incontrôlé
de ce déchet. Veuillez liquider les vieux appareils par
l’intermédiaire de centres de ramassage ou envoyez-les au
revendeur pour liquidation. Ainsi, certaines matières
provenant de ces appareils seront réutilisées.
Opérateur
L’opérateur doit lire attentivement la notice avant d’utiliser
l’appareil.
Qualification
Mis à part l’instruction détaillée par un spécialiste, aucune
autre qualification spécifique n’est requise.
Âge minimal
L’appareil peut être utilisé uniquement par des personnes de
plus de 16 ans. Exception faite des adolescents manipulant
l’appareil dans le cadre de l’enseignement professionnel sous
la surveillance du formateur.
Formation
L’utilisation de l’appareil nécessite uniquement l’instruction
par un spécialiste, éventuellement par la notice. Une
formation spéciale n’est pas nécessaire.
Caractéristiques techniques
Fiche: 230 V/50-60 Hz
Courant de charge lors du
démarrage: 12V / 24 V
Courant de charge effectif: 60 A
Courant de charge arithmétique: 40 A
Courant de démarrage environ: 0 V: 390 A
1,5 V: 240 A
Courant d’entrée maximal: 8 kW
Protection minimale: 16 A
Capacité nominale: 20-1000 Ah
Démarrage de la batterie: 35-50 Ah (sans
chargement préalable)
65-100 Ah (avec
chargement préalable)
Poids: 16 kg
Dimensions (mm): 330 x 250 x 600
par conséquent, vous devriez les déposer dans
Transport et stockage
• Lors du stockage prolongé, nettoyez soigneusement
l’appareil.
• Protégez l’appareil des influences atmosphériques en la
couvrant avec une bâche plastique, un carton, etc.
Montage et première mise en service (fig. 4+5+6)
Vissez la poignée selon (fig. 5).
Passez l’axe de chargeur (fig.1/2). Montez ensuite les
anneaux de sûreté fournis. Montez les roues (fig.1/1) sur
l’axe et bloquez-les également par les anneaux de sûreté,
voir (fig. 6).
Montez les caches des roues.
Enfin, montez la patte (fig. 1/4) à l’aide des vis fournies (fig.
1/3).
Manipulation
Avant toute intervention sur l’appareil, retirez la
fiche de la prise
Fonction chargement (fig. 3)
• Raccordez le chargeur à la batterie à charger.
• Raccordez d’abord le câble polaire noir au pôle négatif,
seulement après raccordez le pôle positif.
•
Pour charger la batterie, débranchez la
complètement du véhicule.
• Réglez le chargeur au plus petit degré de chargement
(min/1) (fig. 3/8)
• Maintenant, branchez la fiche à la prise et augmentez le
degré de charge jusqu’à ce qu’apparaisse e le voltage
de charge correspondant à environ 10% de la capacité
de la batterie.
• Lorsque le voltage de charge baisse, il est possible
d’augmenter les degrés de charge (fig. 3/7)
• Débranchez la batterie des pinces au plus tard 3-5
heures après le chargement.
•
Le témoin de voltage de charge n’indique pas
complètement zéro à la fin du chargement.
Durée de charge de la batterie
• La durée de charge dépend de l’état de la batterie
(presque déchargée, chargé à moitié ou complètement
déchargée).
• 2 à 4 heures suffisent pour régénérer la batterie. Pour un
chargement complet, il faut compter 8-10 heures.
•
Il est déconseillé de dépasser la durée
maximale de charge de 10 heures.
Aide au démarrage
• ATTENTION! Au démarrage, pour les surtensions de
l'électronique à bord de leur véhicule peuvent
endommager. Veuillez discuter avec votre véhicule
professionnel
• Raccordez la batterie de la même manière que celle
décrite dans le chapitre Chargement et laissez la dans le
véhicule !
• Le démarrage à l’aide du chargeur devrait toujours être
effectué à deux.
• Le chargeur sur max. Performances sont les suivantes:
Commutation stade 2 (fig. 3/7) et «BOOSTER» (fig.
3/8).
• La première personne enclenche l’interrupteur de
démarrage sur le chargeur (fig. 3/9). L’autre personne
lance immédiatement le processus d’allumage.
• Dès que la voiture démarre, stoppez le démarrage, max.
9-10 sec
Page 15
15
• Si l’essai de démarrage échoue, attendez 5 minutes que
l’appareil refroidisse.
Astuce:
si la batterie de 10-15 minutes interprète sera, la
batterie a besoin de beaucoup moins de courant de
démarrage.
Attention: Le dépassement de la durée de
démarrage de 10 secondes peut griller les fusibles ou
endommager le véhicule !
Attention: Le pôle bornes ne doivent pas se toucher.
Attention: Le chargeur est équipé d’un fusible contre
la surcharge.
Important : Le remplacement des fusibles par des
fusibles (fig. 3/5) qui ne correspondent pas aux fusibles
dans l’appareil, peut provoquer des dommages matériels
ou des blessures des personnes.
Avant procédez au remplacement des fusibles, retirez
toujours le câble d’alimentation!
Consignes de sécurité relatives à la manipulation
• Avant la mise en marche de l’appareil, tous les
dispositifs de sécurité et de protection doivent être
correctement montés et à leur place.
• Il est interdit d’essayer de démarrer le véhicule avec une
batterie déchargée ou endommagée, ceci pourrait
endommager l’appareil.
• Les essais de démarrage dans la position „charge“ à la
place de „démarrage“ pourraient endommager
l’ampèremètre et enclencher la protection contre la
surcharge.
• Avant d’appuyer sur l’interrupteur principal, assurez-
vous que l’appareil est correctement branché.
• Avertissement ! Si vous avez un doute en ce qui
concerne le montage de cette scie circulaire sur table,
faites appel à un spécialiste d’un atelier de réparations
agréé.
• Avant d’utiliser l’appareil, lisez attentivement la notice.
• Respectez toutes les consignes de sécurité contenues
dans la notice.
• Comportez vous de façon responsable envers tierces
personnes.
Notice pas à pas
Chargement
1. Raccordez le chargeur.
2. Réglez la fonction de chargement (min/1) (fig. 3/7).
3. Mettez le chargeur en marche.
4. Branchez à la prise.
5. La batterie se charge (max. 10 heures)
Démarrage
1. Raccordez le chargeur.
2. Réglez la fonction de démarrage. (fig. 3/9).
3. Branchez à la prise.
4. Mettez le chargeur en marche et commencez
immédiatement à démarrer la voiture.
5. Dès que le véhicule démarre, stoppez immédiatement le
démarrage, arrêtez et débranchez le chargeur.
Pannes - causes - suppression
ATTENTION: CONTRÔLEZ D’ABORD LES FUSIBLES DE
SURCHAUFFE!
Fusible de protection contre la surcharge :
1. Raccordez la pince rouge au pôle positif (+) et la pince
noir au pôle négatif (-).
2. Retirez le contact et contrôlez les fusibles.
3. Sélectionnez le degré de chargement inférieur.
4. Si le courant d’entrée de la batterie est trop élevé, nous
recommandons de confier le chargement de la batterie à
un électricien qualifié et de maintenir ensuite la batterie
en la chargeant fréquemment avec un degré de charge
élevé ou de se procurer un chargeur plus performant.
Faites contrôler la batterie par un spécialiste. Remplacez
la batterie.
Un voltage de charge au début du chargement trop élevé.
1. Attention: si le voltage de charge est élevé après 15 - 20
minutes, cela peut signifier que le chargement ne tient
pas.
Faites contrôler la batterie par un spécialiste. Remplacez
la batterie.
Voltage de charge trop faible.
1. Essayer de régler le voltage de charge à la valeur
supérieure.
L’indicateur de l’ampèremètre touche le point le plus bas
de l’échelle.
1. Faites contrôler la batterie par un spécialiste. Remplacez
la batterie.
2. Veillez à ce que la tension de réseau corresponde à la
tension convenant au chargeur.
Ampèremètre n’affiche pas.
1. Nettoyez les bornes et remplacez les pinces.
2. Faites contrôler la batterie par un spécialiste. Remplacez
la batterie.
3. Vérifiez le fonctionnement du chargeur sur une batterie
chargée, en parfait état.
Causes de la surcharge
1. Raccordement incorrect de la pince à la batterie.
2. Contact involontaire ou indirect des pinces entre elles.
3. Batterie fortement ou complètement déchargée.
4. Batterie complètement déchargée et sa capacité est
supérieure à la puissance du chargeur.
Batterie endommagée ou défectueuse (par exemple,
court-circuit des éléments internes).
Révisions et entretien
Avant toute intervention, retirez la fiche de la prise.
• Pour nettoyer les pièces en plastique, utilisez un chiffon
humide. N’utilisez ni produits de nettoyage, ni
dissolvants, ni objets pointus.
• Après chaque utilisation, débarrassez l’orifice de
ventilation et les pièces mobiles de la poussière
déposée à l’aide d’une brosse douce ou d’un pinceau.
Graissez régulièrement toutes les pièces mobiles
métalliques.
Consignes relatives aux révisions et à l'entretien
Après chaque utilisation
Débarrassez les orifices de ventilation de la poussière.
Régulièrement
Graissez les parties métalliques à l’huile (huile universelle)
Régulièrement
Contrôlez le serrage correct de toutes les vis.
Page 16

16
Service
Vous avez des questions techniques ? Une réclamation ?
Vous avez besoin de pièces détachées ou d’un mode
d’emploi ?
Nous vous aiderons rapidement et sans bureaucratie inutile
par l’intermédiaire de nos pages Web www.guede.com dans
la rubrique Service. Aidez-nous pour que nous puissions
vous aider. Pour identifier votre appareil en cas de
réclamation, nous avons besoins du numéro de série, numéro
de produit et l’année de fabrication. Toutes ces informations
se trouvent sur la plaque signalétique. Pour avoir ces
informations toujours à porté de main, veuillez les inscrire ici :
Numéro de série :
N° de commande :
Année de fabrication
Tél.: +49 (0) 79 04 / 700-360
Fax: +49 (0) 79 04 / 700-51999
E-mail: support@ts.guede.com
Déclaration de conformité CE
Nous,
Güde GmbH & Co. KG
Birkichstraße 6
74549 Wolpertshausen
Germany
Déclarons par la présente que les appareils indiqués cidessous répondent du point de vue de leur conception,
construction ainsi que de leur réalisation mise sur le
marché, aux exigences fondamentales correspondantes
des directives de la CE en matière de sécurité et
d’hygiène.
Cette déclaration perd sa validité après une
modification de l’appareil sans notre approbation
préalable.
Description de l’appareil: Chargeur de batterie V 421 C
Numéro d’article: 85074
Directives CE applicables :
2006/95 EG
2004/108 EG
Normes harmonisées utilisées :
EN 60335-2-29:2004
EN 60335-1/A14:2010
EN 62233 :2008
EN 55014-1:2006
EN 55014-2/A2:2008
EN 61000-3-2:2006
EN 61000-3-3:2008
EN 61000-3-11:2000
Date/Signature du fabricant: 10.08.2011
Titre du Signataire: Gérant
Monsieur Arnold
Documentation technique: J. Buerkle FBL; QS
Page 17

17
CZ
Prosím, před uvedením přístroje do provozu si důkladně pročtěte tento návod k obsluze.
A.V. 2 K přetisku, a to i částí textu, je nutné povolení. Technické změny vyhrazeny.
Přístroj
Nabíječka baterií V 421 C
Vybavení (sériové)
Profesionální nabíjecí kabel, kleště s izolovanými rukojeťmi,
ampérmetr, ochrana proti přepólování, tepelná pojistka,
přídavná pojistka 50 A.
Oblasti použití:
Profesionální startovací nabíječka pro normální nabíjení i
rychlonabíjení a pro startování vozidel. Díky velkým
pojezdovým kolům se dá snadno převážet.
Rozsah dodávky (obr. 1+2)
1. Kola
2. Náprava
3. Šrouby
4. Opěrná noha
5. Kryty kol
6. Šrouby
7. Rukojeť
8. Nabíječka baterií
Popis přístroje (obr. 3)
1. Zapínač / vypínač
2. Přípojka 12 V
3. Ukostření
4. Přípojka 24 V
5. Tavná pojistka
6. Ampérmetr
7. Spínací stupeň 1 + 2
8. Nabíjení Min – Max
9. Nabíjení resp. startování baterie
Záruka
Záruka se vztahuje výhradně na závady způsobené vadou
materiálu nebo výrobní vadou. Při uplatnění závady ve
smyslu záruky je třeba přiložit originál dokladu o koupi
s datem prodeje. Záruka se nevztahuje na neodborné
zacházení, např. přetížení přístroje, použití násilí, poškození
cizím působením nebo cizími tělesy. Nedodržení návodu
k použití a obsluze a normální opotřebení jsou ze záruky
rovněž vyloučeny.
Všeobecné bezpečnostní pokyny
Před prvním použitím přístroje je nutno zcela pročíst
tento návod k obsluze. Pokud byste měli pochyby o
zapojení a obsluze přístroje, obraťte se na výrobce (servisní
oddělení.
PRO ZAJIŠTĚNÍ VYSOKÉHO STUPNĚ BEZPEČNOSTI JE
NUTNO POZORNĚ DODRŽOVAT TYTO POKYNY:
Pozor: Provozujte pouze s proudovým chráničem!
POZOR!
• Pracoviště udržujte čisté a uklizené. Nepořádek na
pracovišti a pracovním stole zvyšuje nebezpečí úrazů a
poranění.
• Dbejte na podmínky prostředí, v němž pracujete.
Elektrické nářadí ani obráběcí stroje nepoužívejte
v mokrém nebo vlhkém prostředí. Zajistěte dostatečné
osvětlení. Elektrické nářadí nevystavujte dešti nebo
vysoké vzdušné vlhkosti. Elektrické nářadí nezapínejte
v prostředí se zápalnými kapalinami nebo plyny.
• Ke stroji nepouštějte cizí osoby. Návštěvníky a
diváky, především děti a nemocné a vetché osoby byste
měli udržovat v bezpečné vzdálenosti od svého
pracoviště.
• Zajistěte bezpečné uložení nářadí. Nářadí, které
nepoužíváte, je nutno uložit na suchém, pokud možno
vyvýšeném místě, tak, aby nebyly přístupné
nepovolaným osobám.
• Dávejte pozor na elektrický kabel. Za kabel netahejte.
Chcete-li kabel vytáhnout ze zásuvky, uchopte jej za
zástrčku. Kabel udržujte v bezpečné vzdálenosti od
zdrojů tepla, oleje a ostrých hran.
• Zabraňte
zástrčky do zásuvky dávejte vždy pozor, aby nářadí bylo
vypnuté spínačem přístroje.
• Venku používejte speciální prodlužovací kabely. Pro
venkovní použití potřebujete speciální prodlužovací
kabely, které jsou k tomu vhodné a mají odpovídající
značení.
• Zůstaňte vždy pozorní. Dávejte pozor na to, co
děláte. Zapojte zdravý lidský rozum. Elektrické nářadí
nepoužívejte, jste-li unaveni.
• Dávejte pozor na poškozené díly. Před použitím
nářadí prohlédněte. Jsou některé díly poškozené? V
případě lehkého poškození se vážně zeptejte, zda bude
nářadí přesto fungovat bezpečně a bezvadně.
• Zabraňte úderům elektrickým proudem. Vyhněte se
jakémukoliv kontaktu svého těla s uzemněnými
předměty, např. vodovody, topnými tělesy, vařiči a
chladničkami.
• Použ
opravách použijte pouze identické náhradní díly.
Ohledně náhradních dílů se obraťte na autorizovanou
servisní dílnu.
• Výstraha! Používání příslušenství a nástavbových dílů,
které nebyly v tomto návodu k obsluze výslovně
doporučeny, může vést k ohrožení osob a předmětů.
Bezpečnostní pokyny pro první uvedení do provozu
- Před seřizováním nebo údržbou přístroje vždy
nejprve vytáhněte zástrčku ze zásuvky.
provedli veškerá nastavení a když jsou pólové svorky
správně zapojeny.
- Po odstranění obalu zkontrolujte, že je přístroj i všechny
jeho součásti v bezvadném stavu.
- Síťový kabel zcela odviňte a položte tak, aby se pólové
svorky nemohly vzájemně dotýkat.
- V případě potřeby síťový kabel nastavte prodlužovacím
kabelem; při tom dávejte pozor, aby průřez
prodlužovacího kabelu odpovídal průřezu síťového
kabelu; nepoužívejte kabely o menším průřezu.
- Přípojné kleště, svorky a horní plochu baterie je nutno
udržovat v čistotě; v případě potřeby očistěte svorky
baterie drátěným kartáčem; tím umožníte dobrý
elektrický kontakt a lepší účinnost nabíjení.
- Dejte pozor na záměnu pólování přípojek!
( (-) černá; (+) červená )
- Nabíjecí napětí nabíječky baterií musí souhlasit se
jmenovitým napětím na baterii; rovná se počtu článků
baterie krát dvě
(3 člán
- Před nabíjením přístroj instalujte tak, aby byl stabilní, a
zajistěte, aby příslušnými otvory mohl bez omezení
proudit vzduch. Musí být zajištěno dobré chlazení.
- Nenabíjejte současně několik baterií.
neúmyslnému zapnutí. Před zasunutím
ív
ejte pouze schválené díly. Při údržbě a
Nabíječku zapojte do sítě teprve tehdy, když jste
ky
= 6 V; 6 článků = 12 V; 12 článků = 24 V).
Page 18

18
- Uzávěry baterie odstraňte pouze v případě, že jste
předtím očistili svorky, aby do nádrží nemohl napadat
prach ani nečistoty, a během nabíjení takto udržujte.
- Zajistěte, aby elektrolyt dosahoval minimálně 4 až 5 mm
nad desky; v případě potřeby doplňte destilovanou
vodou, která je k tomuto účelu k dostání v obchodech.
1. Během fáze nabíjení vznikají výbušné plyny, proto
zabraňte jiskření a vyhněte se otevřenému ohni resp.
kouření v okolí.
2.
3. Nikdy nenabíjejte standardní a bezúdržbové baterie
4. Nikdy nenabíjejte jednorázové baterie.
5. Za přístrojem nechte dostatečný prostor pro větrání.
6. Dodržujte návody výrobce.
7. Kontrolujte správný stav kyseliny v baterii.
8. Neustále kontrolujte bezvadný stav síťového kabelu a
9. Přístroj není dovoleno vystavovat povětrnostním
10. Přístroj nepoužívejte, jste-li bosi. Nedotýkejte se jej
11. Zástrčku nevytahujte ze zásuvky škubáním za kabel.
12. Zabraňte používání přístroje dětmi nebo nepovolanými
stát zdrojem nebezpečí.
• Pokud provádíte opravu či údržbu bezpečnostních a
• Je naléhavě nutné znát předpisy pro prevenci úrazů,
• Před použitím tohoto nářadí musíte nutně prověřit
• Není-li v tomto návodu k obsluze uvedeno něco jiného,
• Poškozené spínače nechte vyměnit v autorizované
• Tento přístroj odpovídá všem příslušným bezpečnostním
Chování při havárii
Poskytněte první pomoc odpovídající poranění a co
nejrychleji přivolejte kvalifikovanou lékařskou pomoc.
Raněného uchraňte před dalšími škodami a uložte jej v klidu.
Pro případ úrazu by měla být na pracovišti vždy po ruce
lékárnička podle DIN 13164. Materiál, který z lékárničky
odeberete, je třeba ihned opět doplnit.
Při přivolávání pomocí uveďte tyto údaje:
1. Místo nehody
2. Druh nehody
3. Počet raněných
4. Druh poranění
Baterie nabíjejte pouze ve větraných
prostorách, je zakázáno používat přístroj k nabíjení
baterie ve vozidle nebo pod zavřenou kapotou
motoru.
společně.
svorkového kabelu. V případě poškození nechte
síťový kabel ihned vyměnit u odborníka.
vlivům, např. dešti a sněhu.
vlhkýma rukama nebo mokrýma či vlhkýma nohama.
osobami.
Zapnutý přístroj nenechávejte bez dozoru, může se
ochranných zařízení, musíte je po ukončení prací opět
řádně namontovat.
platné v místě používání přístroje, i veškerá ostatní
všeobecně uznávaná bezpečnostní pravidla.
bezpečnostní zařízení. Ujistěte se, že díly, které se zdají
být jen lehce poškozené, budou skutečně řádně
fungovat.
smí poškozené díly a bezpečnostní zařízení opravit
nebo vyměnit autorizovaná dílna.
opravně.
ustanovením. Opravy smějí prová
elektrikáři v autorizovaných opravnách při použití
originálních náhradních dílů. V případě nedodržení
tohoto pokynu hrozí nebezpečí úrazů.
dě
t pouze kvalifikovaní
Vysvětlení symbolů
V tomto návodu a/nebo na přístroji jsou použity tyto symboly:
Bezpečnost výrobku:
Výrobek odpovídá
příslušným normám
Evropského společenství
Zákazy:
Obecný zákaz (ve spojení
s jiným piktogramem
Výstraha:
Výstraha / pozor
Příkazy:
Před použitím si pročtěte
Ochrana životního prostředí:
návod
k obsluze
Odpad neodhazujte do okolí,
ale řádně jej likvidujte.
Přístroj má ochrannou izolaci
třída ochrany II
Nepoužívejte za deště
Výstraha před
nebezpečným elektrickým
Noste ochranné rukavice
Obalový materiál z lepenky
lze odevzdat ve sběrnách
k tomu určených.
napětím
Poškozené a/nebo likvidované
elektrické nebo elektronické
přístroje je nutno odevzdat ve
sběrnách k tomu určených.
Obal:
Chraňte před mokrem Orientace obalu nahoru
Technické údaje:
Přípojka Hmotnost
Použití přístroje v souladu s jeho určením
Profesionální startovací nabíječka k nabíjení, rychlonabíjení a
startování vozidel. Pojízdná díky velkým kolům.
Zbytková elektrická rizika
Přímý elektrický kontakt
Vadný kabel nebo zástrčka může vést k úrazu elektrickým
proudem.
Vadné kabely či zástrčky nechte vždy vyměnit u
odborníka. Přístroj používejte pouze, je-li přípojka vybavena
proudovým chráničem.
Page 19
19
Nepřímý elektrický kontakt
Poranění vodivými díly při otevřených nebo vadných
konstrukčních prvcích.
Při provádění údržby stroj vždy odpojte od zdroje elektrického
proudu. Provozujte pouze na přípojkách vybavených
proudovým chráničem.
Nepřiměřené místní osvětlení
Nedostatečné osvětlení představuje vysoké bezpečnostní
riziko.
Při práci s tímto přístrojem si vždy zajistěte dostatečné
osvětlení.
Likvidace
Pokyny pro likvidaci vyplývají z piktogramů uvedených na
přístroji resp. na obalu. Popis jednotlivých významů najdete
v kapitole „Značení“.
Likvidace přepravního obalu
Obal chrání přístroj před poškozením při přepravě. Obalový
materiál je zpravidla zvolen s ohledem na ochranu životního
prostředí a následnou likvidaci, a proto je recyklovatelný.
Vrácením obalu do koloběhu materiálu šetříte suroviny a
snižujete množství odpadu. Části obalu (např. fólie,
polystyren) mohou být nebezpečné pro děti. Hrozí nebezpečí
udušení! Části obalu ukládejte mimo dosah dětí a co
nejrychleji je likvidujte.
V rámci EU tento symbol upozorňuje na to, že
daný produkt není dovoleno likvidovat jako
domácí odpad. Staré přístroje obsahují cenné
materiály, které lze recyklovat, a měli byste je
odevzdat ve sběrně, abyste zabránili poškození
životního prostředí a lidského zdraví
nekontrolovaným uložením tohoto odpadu. Prosím, likvidujte
proto staré přístroje prostřednictvím sběren nebo je zašlete
k likvidaci tam, kde jste je koupili. Tak budou některé
materiály z těchto přístrojů znovu využity.
Požadavky na obsluhu
Obsluha přístroje musí před jeho použitím pozorně pročíst
tento návod k obsluze.
Kvalifikace
Kromě podrobného zaškolení kvalifikovanou osobou není pro
používání tohoto přístroje nutná zvláštní kvalifikace.
Minimální věk
Přístroj smějí provozovat pouze osoby, které dovršily 16. rok
věku. Výjimku představuje používání mladistvými v průběhu
přípravy na povolání za účelem dosažení dovednosti pod
dozorem pedagoga.
Školení
K používání tohoto přístroje je třeba pouze příslušné
instruktáže. Speciální školení není nutné.
Technické údaje
Přípojka: 230 V/50-60 Hz
Nabíjecí/startovací napětí: 12 V / 24 V přestavitelné
Efektivní nabíjecí proud: 60 A
Aritm. nabíjecí proud: 40 A
Startovací proud cca.: 0 V: 390 A/1,5 V: 240 A
Max výkon sítě: 8 kW
Min. jištění: 16 A
Jmenovitá kapacita: 20-1000 Ah
Start baterie: 35-50 Ah (bez předchozího
nabití) 65-100 Ah (s
předchozím nabitím)
Hmotnost: 16 kg
Rozměry (mm): 330 x 250 x 600
Přeprava a uložení
• Při uložení na delší dobu byste měli přístroj důkladně
vyčistit.
• Přístroj chraňte plastovou plachtou, kartonem nebo
podobným materiálem před povětrnostními vlivy.
Montáž a první uvedení do provozu (obr. 4+5+6)
Přišroubujte rukojeť podle obr. 5.
Nyní prostrčte nápravu (obr.1/2) nabíječkou. Pak namontujte
pojistné kroužky, které jsou součástí dodávky. Nyní na
nápravu nasaďte ještě kola (obr.1/1) a také je zajistěte
pojistnými kroužky (obr.6).
Na kola nasaďte kryty kol.
Na konec přišroubujte pomocí dodaných šroubů (obr.1/3)
nohu (obr.1/4).
Obsluha
Před každým přestavováním a seřizováním
nabíječky ji odpojte od zdroje elektrického napětí.
Funkce nabíjení (obr.3)
• Nabíječku připojte k nabíjené baterii.
• Černý pólový kabel je nutno vždy nejprve připojit
k zápornému pólu, pak teprve připojte svorkou kladný
pól.
•
Před nabíjením baterii kompletně odpojte od
vozidla.
• Nabíječku zásadně nastavte na nejnižší stupeň nabíjení
(min/1) (obr. 3/8)
• Nyní zasuňte zástrčku do zásuvky a regulujte stupně
nabíjení směrem nahoru, až bude nabíječka indikovat
nabíjecí proud, který odpovídá cca 10 % kapacity
baterie.
• Pokud nabíjecí proud klesá, lze nabíjecí stupně
zvyšovat. (obr.3/7)
• Nejpozději 3-5 hodin po dokončení nabíjení baterii
odpojte.
•
Indikace nabíjecího proudu se po ukončení
nabíjení nesníží úplně na nulu.
Doba nabíjení baterie
• Doba nabíjení je vždy závislá na stavu baterie (téměř
nabitá, z poloviny nabitá, plně vybitá)
• K regeneračnímu nabití baterie stačí 2-4 hodiny.
K plnému nabití je třeba 8-10 hodin.
•
Neměli byste překročit maximální dobu nabíjení
10 hodin.
Pomoc při startování
• POZOR! Při startování může vzniknout přepětí, které by
mohlo způsobit poškození palubní elektroniky Vašeho
vozidla. Konzultujte to, prosím, s automechanikem.
• Baterii připojte podle návodu v kapitole Nabíjení a
nechte ji připojenou svorkami k vozidlu!
• Vozidlo byste měli zásadně startovat ve dvou osobách.
• Nabíječku nastavte na maximální výkon:
Spínací stupeň 2 (obr. 3/7) a „BOOST“ (obr. 3/8).
• První osoba stiskne spínač startování na nabíječce.
(obr. 3/9) Druhá osoba ihned zahájí proces zapalování.
• Jakmile vozidlo naskočí, proces startování ihned
přerušte, max. 9-10 Sek.
• Po každém nepodařeném startovacím pokusu vyčkejte,
prosím, cca 5 minut, než přístroj vychladne.
Tip:
Pokud baterii před tím budete 10-15 minut nabíjet,
bude potřebovat podstatně menší startovací proud.
Page 20
20
Pozor: Překročíte-li maximální dobu startování 10
sekund, může dojít k propálení pojistek resp. poškození
vozidla!
Pozor: Pólové svorky se nesmí dotýkat.
Pozor: Nabíječka je vybavena pojistkou proti
přetížení.
Důležité: Výměna tavných pojistek
(obr. 3/5) za jiné, které jsou odlišné od tavných pojistek
použitých u přístroje, může vést k věcným škodám či
poranění osob.
Výměnu tavných pojistek provádějte pouze tehdy, je-li
síťový kabel vytažen ze zásuvky!
Bezpečnostní pokyny pro obsluhu
• Před zapnutím stroje musí být namontována a na svém
místě veškerá bezpečnostní a ochranná zařízení.
• Je zakázáno se pokoušet startovat vozidla s vybitou
nebo poškozenou baterií, mohlo by to vést k poškození
přístroje.
• Pokud se budete pokoušet startovat baterii v poloze
„nabíjení“ místo „pomoc při startování“, může dojít
k poškození ampérmetru a spuštění ochrany proti
přetížení.
• Před stisknutím hlavního spínače se ujistěte, že je
nabíječka správně zapojena.
• Výstraha! Máte-li pochybnosti, nechte si před použitím
přístroje pomoci od odborníka v autorizovaném
servisním středisku.
• Přístroj použijte teprve po důkladném pročtení návodu k
obsluze.
• Dodržujte všechny bezpečnostní předpisy uvedené v
návodu.
• Chovejte se odpovědně vůči jiným osobám.
Návod „krok za krokem“
Nabíjení
1. Připojte nabíječku baterií.
2. Nastavte funkci nabíjení (min/1).(obr.3/7)
3. Nabíječku zapněte.
4. Zapojte síťový kabel.
5. Baterie se bude nabíjet. (max. 10 hodin)
Startování
1. Připojte nabíječku baterií.
2. Nastavte funkci startování. (obr.3/9).
3. Zapojte síťový kabel.
4. Zapněte nabíječku, pak ihned startujte vozidlo.
5. Jakmile vozidlo naskočí, startování okamžitě přerušte a
nabíječku vypněte a odpojte od svorek.
Poruchy-příčiny-odstranění
POZOR: NEJDŘÍVE VŽDY ZKONTROLUJTE POJISTKY
PROTI PŘETÍŽENÍ!
Spínač ochrany proti přetížení :
1. Červené kleště napojte na kladný pól (+) a černé kleště
na záporný (-).
2. Kontakt rozpojte a zkontrolujte pojistky.
3. Zvolte nižší stupeň nabíjení.
4. Je-li příkon baterie příliš vysoký, doporučujeme nechat
baterii nabít u autoelektrikáře a poté častým používáním
nabíječky udržovat vysokou hladinu nabití, nebo si
obstarat výkonnější nabíječku.
Baterii nechte zkontrolovat u odborníka. Baterii vyměňte.
Příliš silný nabíjecí proud na začátku nabíjení.
1. Pozor: je-li nabíjecí proud ještě po 15 - 20 minutách
vysoký, může to znamenat, že se baterie zase vybíjí.
Nechte baterii zkontrolovat u odborníka. Baterii vyměňte.
Příliš slabý nabíjecí proud.
1. V případě potřeby zkuste nastavit na regulaci nabíjecího
proudu vyšší hodnotu.
Ukazatel ampérmetru se dotýká minima na stupnici.
1. Baterii nechte zkontrolovat u odborníka. Baterii vyměňte.
2. Zajistěte, aby síťové napětí odpovídalo napětí, které
potřebujete.
Ampérmetr neukazuje.
1. Očistěte svorky a opět nasaďte kleště.
2. Nechte zkontrolovat u odborníka. Baterii vyměňte.
3. Zkontrolujte funkčnost nabíječky na jiné baterii, která je
v bezvadném stavu.
Příčiny přetížení
1. Špatné připojení kleští k baterii.
2. Kleště se nedopatřením vzájemně dotýkají nebo dochází
k jejich nepřímému kontaktu.
3. Baterie je zcela resp. silně vybitá.
4. Baterie je zcela vybitá a má vyšší kapacitu než je výkon
nabíječky.
5. Baterie je poškozená nebo vadná (například zkrat
vnitřních prvků)
Prohlídky a údržba
Před každou prací stroj odpojte od zdroje elektrického napětí.
• K čištění plastových dílů použijte vlhký hadřík.
Nepoužívejte čisticí prostředky, rozpouštědla nebo ostré
předměty.
• Po každém použití odstraňte měkkým kartáčem nebo
štětečkem usazený prach z větracího otvoru a
pohyblivých dílů.
Všechny pohyblivé kovové součásti pravidelně mažte
olejem.
Bezpečnostní pokyny pro prohlídky a údržbu
Po každém použití
Odstraňte prach z větracích otvorů a pohyblivých dílů
Pravidelně
Mažte pohyblivé kovové součásti olejem (univerzální olej)
Pravidelně
Kontrolujte všechny šrouby, zda jsou pevně dotažené.
Servis
Máte technické dotazy? Reklamaci? Potřebujete náhradní
díly nebo návod k obsluze?
Na našich internetových stránkách www.guede.com v oddíle
Servis Vám pomůžeme rychle a bez zbytečné byrokracie.
Prosím, pomozte nám, abychom Vám mohli pomáhat.
Abychom Váš přístroj mohli v případě reklamace identifikovat,
potřebujeme sériové číslo, číslo výrobku a rok výroby.
Všechny tyto údaje najdete na typovém štítku. Abyste je měli
neustále po ruce, zapište si je, prosím, níže.
Sériové číslo:
Číslo výrobku:
Rok výroby:
Tel.: +49 (0) 79 04 / 700-360
Fax: +49 (0) 79 04 / 700-51999
E-Mail: support@ts.guede.com
Page 21

21
PROHLÁŠENÍ O SHODĚ ES
Tímto prohlašujeme my,
Güde GmbH & Co. KG
Birkichstrasse 6
D-74549 Wolpertshausen
Německo
že koncepce a konstrukce níže uvedených přístrojů
v provedeních, která uvádíme na trh, odpovídá příslušným
základním bezpečnostním a hygienickým požadavkům
směrnic ES.
V případě změny přístroje, která s námi nebyla
konzultována, ztrácí toto prohlášení platnost.
Označení přístroje: NABÍJEČKA BATERIÍ V 421 C
Č. výrobku: 85074
Příslušné směrnice ES:
2006/95/EG
2004/108/EG
Použité harmonizované normy:
EN 60335-2-29:2004
EN 60335-1/A14:2010
EN 62233 :2008
EN 55014-1:2006
EN 55014-2/A2:2008
EN 61000-3-2:2006
EN 61000-3-3:2008
EN 61000-3-11:2000
Datum / podpis výrobce: 10.08.2011
Údaje o podepsaném: jednatel
Hr. Arnold
Technická dokumentace: J. Bürkle FBL; QS
Page 22

22
SK
Pred uvedením prístroja do prevádzky si, prosím, starostlivo prečítajte tento návod na obsluhu.
A.V. 2 Na pretlač, a to aj jednotlivých častí textu, je potrebné povolenie. Technické zmeny vyhradené.
Prístroj
Nabíjacka betérií V 421 C
Vybavenie (sériové)
Nabíjací kábel profi, kliešte s izolovanými rukoväťami,
ampérmeter, ochrana proti prepólovaniu, tepelná poistka,
prídavná poistka 50 A.
Oblasti použitia:
Profesionálna nabíjačka pre normálne a rýchle nabíjanie a
pre štartovanie vozidiel. Veľké kolesá umožňujú pohodlný
pohyb.
Rozsah (obr. 1+2)
1. kolesá
2. náprava
3. skrutky
4. oporná noha
5. kryty kolies
6. skrutky
7. rukoväť
8. nabíjačka
Popis prístroja (obr. 3)
1. spínač zap./vyp.
2. prípojka 12 V
3. ukostrenie
4. prípojka 24 V
5. tavná poistka
6. ampérmeter
7. spínací stupeň 1 + 2
8. nabíjanie min – max
9. nabíjanie resp. spustenie batérie
10. Laden bzw. Starten der Batterie
Záruka
Záruka sa vzťahuje výhradne na nedostatky spôsobené
chybou materiálu alebo výrobnou chybou.
Pri reklamácii v záručnej lehote je potrebné priložiť originálny
doklad o kúpe s dátumom predaja.
Do záruky nespadá neodborné použitie, ako napr. preťaženie
prístroja, použitie násilia, poškodenie cudzím zásahom alebo
cudzími predmetmi. Nedodržanie návodu na použitie a
montáž a normálne opotrebenie tiež nespadá do záruky.
Všeobecné bezpečnostné predpisy
Tento návod na obsluhu je potrebné pred prvým použitím
prístroja podrobne prečítať. Ak by ste mali pochyby
týkajúce sa zapojenia a obsluhy prístroja, obráťte sa na
výrobcu (servisné oddelenie).
ABY BOL ZAISTENÝ VYSOKÝ STUPEŇ BEZPEČNOSTI,
DODRŽUJTE POZORNE TIETO POKYNY:
Pozor: Prevádzkujte iba s FI (prúdový chránič)!
POZOR!
• Pracovisko udržujte v čistote a upratané. Neporiadok
na pracovisku a pracovnom stole zvyšuje
nebezpečenstvo úrazu a poranenia.
• Dávajte pozor na podmienky prostredí, v ktorých
pracujete. Elektrické náradie nepoužívajte vo vlhkom
alebo mokrom prostredí. Zaistite dostatočné osvetlenie.
Elektrické náradie nevystavujte dažďu ani vysokej
vzdušnej vlhkosti. Nezapínajte ho v prostredí
s horľavými kvapalinami alebo plynmi.
• Nepúšťajte ku stroju nikoho cudzieho. Návštevníci a
diváci, predovšetkým deti a choré a neduživé osoby
udržujte v dostatočnej vzdialenosti od svojho pracoviska.
• Zaistite bezpečné uloženie nástrojov. Nástroje, ktoré
nepotrebujete, ukladajte na suchom neprístupnom alebo
vysoko položenom mieste.
• Dávajte pozor na kábel. Za kábel neťahajte. Pri
vyťahovaní zo zásuvky ho vždy uchopte za zástrčku.
Kábel udržujte v bezpečnej vzdialenosti od zdrojov tepla,
oleja a ostrých hrán.
• Zabráňte neúmyselnému zapnutiu. Než zapojíte
zástrčku do zásuvky, vždy dbajte na to, aby bol spínač
prístroja v polohe „vypnuté“.
• Pri práci vonku používajte špeciálne predlžovacie
káble. Pre prácu vonku potrebujete špeciálne
predlžovacie káble, ktoré sú pre vonkajšie použitie
vhodné a sú príslušným spôsobom označené.
• Vždy si udržte sústredenosť. Dávajte pozor na to, čo
robíte. Používajte zdravý rozum. Elektrické náradie
nepoužívajte, ak ste unavení.
• Dávajte pozor na poškodené diely. Pred použitím
prístroj prezrite. Sú niektoré diely poškodené? V prípade
ľahkých poškodení sa vážne zamyslite nad tým, či
prístroj napriek tomu bude fungovať bezchybne a
bezpečne.
• Predchá
derom elektrickým prúdom. Vyhnite
dzajte ú
sa každému kontaktu svojho tela s uzemnenými
predmetmi, napr. s vodovodným potrubím, výhrevnými
telesami, sporákmi a chladničkami.
• Používajte iba schválené diely. Pri údržbe a opravách
používajte iba identické náhradné diely. Náhradné diely
dostanete v autorizovanom servisnom stredisku.
• Výstraha! Používanie príslušenstva a prídavných dielov,
ktoré neboli výslovne odporúčané v tomto návode
na obsluhu, môže znamenať ohrozenie osôb a
predmetov.
Bezpečnostné pokyny pre prvé uvedenie do chodu
• Než začnete prístroj nastavovať alebo na ňom
vykonávať údržbu, vždy ho najprv odpojte od zdroja
elektrického napätia.
Pripojte nabíjačku do napájací zdroj, je-li všetky
nastavenia a terminály sú správne pripojený.
- Po odstránení obalu skontrolujte, či prístroj a všetky jeho
súčasti sú v stave.
- Sieťový kábel celkom odviňte a položte ho tak, aby sa
pólové svorky nemohli dotýkať.
- V prípade potreby použite na predĺženie sieťového kábla
predlžovací kábel; pri tom je potrebné dodržať rovnaký
prierez ako pri sieťovom kábli; nepoužívajte káble s
menším prierezom.
- Prípojné kliešte, svorky a hornú plochu batérie udržujte
v čistote; v prípade potreby svorky batérie očistite
drôtenou kefou; tým vytvoríte dobrý elektrický kontakt a
zaistíte lepšiu účinnosť nabíjania.
- Nikdy nezamieňajte polaritu prípojok! ( (-)čierna; (+)
červená )
- Nabíjacie napätie nabíjačky musí byť rovnaké ako
menovité napätie uvedené na batérii; táto hodnota
zodpovedá počtu článkov akumulátora vynásobené
dvoma (3 články = 6 V; 6 článkov = 12 V; 12 článkov =
24 V).
- Prístroj pred nabíjaním postavte na stabilný podklad a
zaistite, aby nič nebránilo prúdeniu vzduchu príslušnými
otvormi. A dobré chladiaci systém musí byť zaručená
- Nenabíjajte súčasne viac batérií.
Page 23

23
- Uzávery batérie odstráňte až po očistení svoriek, aby do
vaničiek nenapadal prach alebo iné nečistoty.
- Zaistite, aby elektrolyt pokrýval dosky do výšky min. 4 až
5 mm; v prípade potreby dolejte destilovanú vodu, ktorú
je pre tieto účely možné dostať v obchode.
1. Počas fázy nabíjania vznikajú výbušné plyny, preto
sa vyhnite fajčeniu a manipulácii s otvoreným
ohňom resp. iskrami.
2.
Batérie nabíjajte iba v dobre vetraných
priestoroch, prístroj pre nabíjanie batérií je zakázané
používať vo vozidle alebo pod zatvorenou kapotou
motora.
3. Nikdy nenabíjajte štandardné a bezúdržbové batérie
spoločne.
4. Nikdy nenabíjajte jednorazové batérie.
5. Za prístrojom ponechajte dostatok miesta pre vetranie.
6. Riaďte sa pokynmi výrobcu.
7. Kontrolujte správny stav kyseliny v batérii.
8. Vždy skontrolujte bezchybný stav sieťového kábla a
upínacieho kábla. V prípade poškodenia sieťového
kábla ho nechajte ihneď vymeniť u odborníka.
9. Prístroj sa nesmie vystavovať poveternostným
vplyvom, ako je sneh a dážď.
10. Prístroj nepoužívajte, keď ste bosí. Nedotýkajte sa
prístroja vlhkými alebo mokrými rukami či nohami.
11. Nikdy nevyťahujte zástrčku zo zásuvky ťahaním alebo
trhaním za kábel.
12. Zabráňte tomu, aby prístroj používali nepovolané osoby
alebo deti.
Nenechávajte prístroj zapnutý bez dozoru, mohol by
sa stať zdrojom nebezpečenstva.
• Ak vykonávate opravu bezpečnostných alebo
ochranných zariadení, musíte ich bezodkladne po
ukončení prác opäť riadne namontovať.
• Je nutné poznať a dodržiavať predpisy pre prevenciu
úrazov platné v konkrétnom mieste používania prístroja
aj všetky ostatné všeobecne uznávané pravidlá
bezpečnosti.
• Pred použitím prístroja je nutné skontrolovať
bezpečnostné zariadenia. Uistite sa, že aj súčasti, ktoré
majú zdanlivo len ľahké poškodenie, budú riadne
fungovať.
• Ak nie je v tomto návode na obsluhu uvedené niečo
iného, musí opravy a výmenu poškodených súčastí a
bezpečnostného zariadenia vykonávať autorizované
servisné stredisko.
• Poškodené spínače nechajte vymeniť v autorizovanom
servisnom stredisku.
• Tento nástroj zodpovedá všetkým príslušným
bezpečnostným ustanoveniam. Opravy smú vykonávať
iba kvalifikovaní elektrikári v autorizovaných servisných
strediskách s použitím originálnych náhradných dielov. V
prípade nedodržania tohto predpisu hrozí
nebezpečenstvo úrazov.
Správanie v prípade núdze
Zaveďte úrazu zodpovedajúcu potrebnú prvú pomoc a vyzvite
čo možno najrýchlejšie kvalifikovanú lekársku pomoc.
Chráňte zraneného pred ďalšími úrazmi a upokojte ho.
Kvôli prípadnej nehode musí byť na pracovisku vždy
poruke lekárnička prvej pomoci podľa DIN 13164.
Materiál, ktorý si z lekárničky vezmete, je potrebné ihneď
doplniť. Ak požadujete pomoc, uveďte tieto údaje:
1. Miesto nehody
2. Druh nehody
3. Počet zranených
4. Druh zranenia
Vysvetlenie symbolov
V tomto návode a/alebo na prístroji sú použité nasledujúce
symboly:
Bezpečnosť výrobku:
Výrobok zodpovedá príslušným
normám Európskeho
spoločenstva
Prístroj je opatrený ochrannou
Trieda ochrany II
izoláciou
Zákazy:
Zákaz, všeobecný
(v spojení s iným piktogramom)
Nepoužívajte za dažďa
Výstraha:
Výstraha / pozor
Výstraha pred nebezpečným
elektrickým napätím
Príkazy:
Pred použitím si prečítajte návod
na obsluhu
Používajte ochranné rukavice
Ochrana životného prostredia:
Odpad je potrebné odborne
likvidovať.
Obalové materiály z lepenky je
možné odovzdať v zberniach
na to určených.
Poškodené a/alebo vyradené
elektrické a elektronické prístroje je
potrebné odovzdať na likvidáciu v
zberniach na to určených.
Obal:
Chráňte pred mokrom Orientácia obalu: smer nahor
Technické údaje:
Sieťová prípojka Hmotnosť
Používanie prístroja v súlade s jeho určením
Profesionálna štartovacia nabíjačka pre nabíjanie,
rýchlonabíjanie a štartovanie vozidiel. Veľké kolesá umožňujú
dobrý pohyb.
Zvyškové elektrické nebezpečenstvá
Priamy kontakt s elektrinou
Chybný kábel alebo chybná zástrčka môžu byť príčinou
úrazu elektrickým prúdom. Chybné káble a zástrčky
nechajte vždy vymeniť u odborníka. Prístroj používajte iba
s prípojkou vybavenou prúdovým chráničom (FI).
Nepriamy kontakt s elektrinou
Nebezpečenstvo poranenia vodivými časťami pri
otvorených alebo chybných dieloch prístroja.
Pri údržbe stroj vždy odpojte od zdroja napätia. Prevádzkujte
iba s prúdovým chráničom.
Page 24

24
Neprimerané osvetlenie pracoviska
Nedostatočné osvetlenie predstavuje vždy vysoké
bezpečnostné riziko.
Pri práci s prístrojom zaistite vždy dostatočné osvetlenie.
Likvidácia
Pokyny na likvidáciu vyplývajú z piktogramov umiestnených
na prístroji, resp. obale. Popis jednotlivých významov nájdete
v kapitole „Označenia“.
Likvidácia prepravného obalu
Obal chráni prístroj pred poškodením pri preprave. Obalové
materiály sú zvolené spravidla podľa ich šetrnosti voči
životnému prostrediu a spôsobu likvidácie a je možné ich
preto recyklovať. Vrátenie obalu do obehu materiálu šetrí
suroviny a znižuje náklady na likvidáciu odpadov. Časti obalu
(napr. fólia, styropor) môžu byť nebezpečné pre deti. Existuje
riziko udusenia! Časti obalu uschovajte mimo dosahu detí a
čo najrýchlejšie zlikvidujte.
V rámci EÚ tento symbol upozorňuje na to, že
daný produkt nie je dovolené likvidovať ako
domový odpad. Staré prístroje obsahujú cenné
materiály, ktoré je možné recyklovať, a mali by
poškodeniu životného prostredia a ľudského zdravia
nekontrolovaným uložením tohto odpadu. Prosím, likvidujte
preto staré prístroje prostredníctvom zberní alebo ich zašlite
na likvidáciu tam, kde ste ich kúpili. Tak budú niektoré
materiály z týchto prístrojov znovu využité.
Požiadavky na obsluhu
Obsluha si musí pred použitím prístroja starostlivo prečítať
tento návod na obsluhu.
Kvalifikácia
Okrem podrobného zaškolenia osobou s odbornými
znalosťami nie je na používanie prístroja potrebná žiadna
špeciálna kvalifikácia.
Minimálny vek
Prístroj smú prevádzkovať iba osoby, ktoré dovŕšili 16. rok
veku. Výnimku tvorí používanie prístroja mladistvými v rámci
prípravy na povolanie za účelom dosiahnutia určitej
spôsobilosti pod dozorom inštruktora.
Školenie
Na používanie prístroja je potrebná iba zodpovedajúca
inštruktáž. Špeciálne školenie nie je nutné.
Technické údaje
Prípojka: 230 V/50-60 Hz
Nabíjacie napätie pri štarte: 12V / 24 V
Nabíjací prúd efektívny: 60 A
Nabíjací prúd aritmetický: 40 A
Spúšťací prúd cca: 0 V: 390 A
1,5 V: 240 A
Max. príkon: 8 kW
Min. istenie: 16 A
Menovitá kapacita: 20-1000 Ah
Štart batérie: 35 – 50 Ah (bez
predchádzajúceho nabitia)
Hmotnosť: 16 kg
Rozmery (mm): 330 x 250 x 600
Preprava a uloženie
• V prípade uloženia na dlhší čas by ste mali stroj
• Chráňte prístroj plachtou, kartónom a pod. pred
ste ich odovzdať v zberni, aby ste zabránili
65 – 100 Ah (s
predchádzajúcim nabitím)
dôkladne vyčistiť.
Montáž a prvé uvedenie do chodu (obr. 4+5+6)
Naskrutkujte rukoväť podľa (obr. 5).
Teraz prestrčte nabíjačkou nápravu (obr. 1/2). Potom
namontujte poistné krúžky, ktoré sú súčasťou dodávky. Teraz
ešte nasuňte kolesá (obr. 1/1) na nápravu, a tiež ich zaistite
poistnými krúžkami, pozri (obr. 6).
Teraz nasaďte kryty na kolesá.
Nakoniec naskrutkujte pomocou dodaných skrutiek (obr. 1/3)
nohu (obr. 1/4).
Obsluha
Pred akýmkoľvek nastavovaním nabíjačky je nutné
vytiahnuť zástrčku zo siete.
Funkcia nabíjania (obr. 3)
• Nabíjačku pripojte k nabíjanej batérii.
• Čierny pólový kábel je nutné vždy najprv pripojiť
k zápornému pólu, potom až pripojte svorkami kladný
pól.
• Za účelom nabíjania batériu celkom odpojte od
vozidla.
• Nabíjačku zásadne nastavte na najnižší stupeň
nabíjania (min/1) (obr. 3/8).
• Teraz zapojte zástrčku do zásuvky a nabíjacie stupne
regulujte smerom nahor, až sa ukáže nabíjací prúd,
ktorý zodpovedá cca 10% kapacity batérie.
• Nabíjacie stupne je možné pri klesajúcom nabíjacom
prúde zvýšiť. (obr. 3/7)
• Najneskôr 3-5 hodín po dokončenom nabíjaní batériu
odpojte od svoriek.
•
Indikácia nabíjacieho prúdu neukazuje po
ukončení nabíjania úplnú nulu.
Čas nabíjania batérie
• Čas nabíjania je vždy závislý na stave batérie (takmer
nabitá, spolovice nabitá alebo celkom vybitá).
• Pri nabíjaní „pre regeneráciu“ batérie stačí 2-4 hodiny.
Na plné nabitie je potrebné 8-10 hodín.
•
Nemal by byť prekročený maximálny čas
nabíjania 10 hodín.
Pomôcka pre štartovanie
• POZOR! Pri spustení procesu môže vzniknúť prepätie,
on-palube elektroniky by mohli poškodiť ich vozidla.
Prosím diskutovať so svojimi automobilovými špecialista.
• Batériu zapojte rovnako ako v kapitole Nabíjanie a
nechajte ju vo vozidle!
• Štartovanie pomocou nabíjačky by sa malo zásadne
vykonávať vo dvoch.
• Nabíjačka na max. Performance sú:
Prepínanie fázy 2 (obr. 3/7) a "BOOST" (obr. 3/8).
• Prvá osoba zapne štartovací spínač na nabíjačke (obr.
3/9). Druhá osoba ihneď spustí proces zapaľovania.
• Hneď ako vozidlo naskočí, ihneď prestaňte štartovať
max. 9-10 sec.
• Po nepodarenom štartovacom pokuse vyčkajte cca 5
minút, než prístroj vychladne.
Tip: Ak budete meniť batériu po dobu 10-15 minút na
predvolanie vyžaduje oveľa menej energie batérie štarte.
Pozor: Ak prekročíte maximálny čas štartovania 10
sekúnd, môže dôjsť k prepáleniu poistiek resp.
k poškodeniu vozidla!
Poznámka: Svorky nesmie dotknúť.
poveternostnými vplyvmi.
Page 25

25
Pozor: Nabíjačka je vybavená poistkou proti
preťaženiu.
Dôležité: Výmena tavných poistiek za poistky (obr. 3/5),
ktoré nesúhlasia s poistkami v prístroji, môže spôsobiť
vecné škody alebo poranenie osôb.
Tavné poistky vymieňajte iba pri vytiahnutom sieťovom
kábli!
Bezpečnostné pokyny pre obsluhu
• Pred zapnutím prístroja musia byť všetky bezpečnostné
• Je zakázané sa pokúšať o naštartovanie pri vozidlách
• Pokusy o naštartovanie v pozícii „nabíjanie“ miesto
• Než stlačíte hlavný spínač, uistite sa, že je prístroj
• Výstraha! Ak máte pochyby, nechajte si pred použitím
• Prístroj používajte až potom, čo ste si pozorne prečítali
• Dodržujte všetky bezpečnostné predpisy uvedené v
• Voči iným osobám sa správajte zodpovedne.
Návod „krok za krokom“
Nabíjanie
1. Pripojte nabíjačku.
2. Nastavte funkciu nabíjania (min/1). (obr. 3/7)
3. Nabíjačku zapnite.
4. Zapojte do sieťovej zásuvky.
5. Batéria sa nabíja. (max. 10 hodín)
Štartovanie
1. Pripojte nabíjačku.
2. Nastavte funkciu štartovania. (obr. 3/9)
3. Zapojte do siete.
4. Nabíjačku zapnite, potom ihneď začnite štartovať
5. Hneď ako vozidlo naskočí, so štartovaním hneď
Poruchy - príčiny - odstránenie
POZOR: VŽDY NAJPRV SKONTROLUJTE POISTKY
PROTI PREŤAŽENIU!
Ochranný istič proti preťaženiu:
1. Červené kliešte (+) pripojte ku kladnému pólu a čierne
2. Odstráňte kontakt a skontrolujte poistky.
3. Zvoľte nižší stupeň nabíjania.
4. Ak je príkon batérie príliš vysoký, odporúčame poveriť
Príliš silný nabíjací prúd na začiatku nabíjania.
1. Pozor: ak je nabíjací prúd po 15 - 20 minútach vysoký,
Príliš slabý nabíjací prúd.
1. Prípadne skúste nastaviť reguláciu nabíjacieho prúdu na
a ochranné zariadenia riadne namontované a na svojom
mieste.
s vybitou alebo poškodenou batériou, pretože by to
viedlo k poškodeniu prístroja.
„štartovanie“ by mohli poškodiť ampérmeter a spustiť
ochranu proti preťaženiu.
správne zapojený.
prístroja poradiť od odborníka v autorizovanom
servisnom stredisku.
návod na obsluhu.
návode.
vozidlo.
prestaňte a nabíjačku vypnite a odpojte.
kliešte k zápornému (-).
nabitím batérie kvalifikovaného elektrikára a následne
udržiavať batériu častým dobíjaním na vysokom stupni
nabitia, alebo si obstarať výkonnejšiu nabíjačku.
Batériu nechajte skontrolovať u odborníka. Batériu
vymeňte.
môže to znamenať, že nabitie nevydrží.
Batériu nechajte skontrolovať u odborníka. Batériu
vymeňte.
vyššiu hodnotu.
Ukazovateľ ampérmetra sa dotýka najnižšieho bodu
stupnice.
1. Nechajte batériu skontrolovať u odborníka. Batériu
vymeňte.
2. Zaistite, aby sieťové napätie zodpovedalo napätiu
vhodnému pre nabíjačku.
Ampérmeter neukazuje.
1. Očistite svorky a opäť nasaďte kliešte.
2. Nechajte skontrolova
3. Preverte funkčnosť nabíjačky na nabitej batérii, ktorá je
v bezchybnom stave.
Príčiny preťaženia
1. Chybné pripojenie klieští k batérii.
2. Nechcený alebo nepriamy kontakt klieští medzi sebou.
3. Batéria je silne alebo celkom vybitá.
4. Batéria je celkom vybitá a má vyššiu kapacitu, než je
výkon nabíjačky.
Batéria je chybná či poškodená (napríklad skratom
vnútorných prvkov)
Prehliadky a údržba
• Pred každou prácou na prístroji vytiahnite zástrčku zo
zásuvky.
• Na čistenie plastových dielov používajte vlhkú handričku.
Nepoužívajte čistiace prostriedky, rozpúšťadlá ani ostré
predmety.
• Po každom použití odstráňte mäkkou kefkou alebo
štetcom z vetracieho otvoru a pohyblivých súčastí
usadený prach.
• Všetky pohyblivé kovové súčasti pravidelne mažte
olejom.
Bezpečnostné pokyny pre prehliadky a údržbu
Po každom použití
Vetracie otvory a pohyblivé diely očistite od prachu.
Pravidelne
Pohyblivé kovové súčasti mažte olejom. (univerzálny olej).
Pravidelne
Kontrolujte všetky skrutky, či sú dotiahnuté
Servis
Máte technické otázky? Reklamáciu? Potrebujete náhradné
diely alebo návod na obsluhu?
Na našej domovskej stránke www.guede.com vám v oddiele
Servis pomôžeme rýchlo a nebyrokraticky. Pomôžte nám,
prosím, aby sme mohli pomôcť vám. Aby bolo možné váš
prístroj v prípade reklamácie identifikovať, potrebujeme
sériové číslo, objednávacie číslo a rok výroby. Všetky tieto
údaje nájdete na typovom štítku. Aby ste mali tieto údaje vždy
poruke, zapíšte si ich, prosím, dole.
Sériové číslo:
Objednávacie číslo:
Rok výroby:
Tel.: +49 (0) 79 04 / 700-360
Fax: +49 (0) 79 04 / 700-51999
E-mail: support@ts.guede.com
ť u odborník
a. Batériu vy
meňte.
Page 26

Vyhlásenie o zhode ES
26
Týmto vyhlasujeme my
Güde GmbH & Co. KG
Birkichstraße 6
74549 Wolpertshausen
Germany
že koncepcia a konštrukcia nižšie uvedených prístrojov a
vyhotovení, ktoré uvádzame do obehu, zodpovedajú
príslušným základným bezpečnostným a hygienickým
požiadavkám smerníc ES.
V prípade zmeny na stroji, ktorá s nami nebola
konzultovaná, stráca toto vyhlásenie platnosť.
Označenie prístrojov: Nabíjacka betérií V 421 C
číslo výrobku: 85074
Príslušné smernice ES:
2006/95/EG
2004/108/EG
Použité harmonizované normy:
EN 60335-2-29:2004
EN 60335-1/A14:2010
EN 62233 :2008
EN 55014-1:2006
EN 55014-2/A2:2008
EN 61000-3-2:2006
EN 61000-3-3:2008
EN 61000-3-11:2000
Dátum/podpis výrobcu: 10.08.2011
Údaje o padpísanom: konatel´
pán Arnold
Technická dokumentácia: J. Buerkle FBL; QS
Page 27

27
NL
Vóór ingebruikneming van het apparaat deze gebruiksaanwijzing aandachtig doorlezen.
A.V. 2 Voor nadruk en uittreksels is toestemming vereist. Technische wijzigingen voorbehouden.
Apparaat
Acculader V 421 C
Uitrusting (seriematig)
Professionele kabel, tang met geïsoleerde grepen,
ampèremeter, beveiliging tegen verwisselen van polen,
beveiliging tegen oververhitting, aanvullende zekering van 50
ampère.
Gebruiksdoelen:
Professioneel startlaadapparaat voor normaal en snelladen,
zoals voor het starten van voertuigen. Eenvoudig rijdbaar
door wielen van grote afmetingen.
Levering (afb. 1+2)
1. Wielen
2. As
3. Schroeven
4. Steunvoet
5. Wieldoppen
6. Schroeven
7. Greep
8. Acculader
Beschrijving van het apparaat (Afb. 3)
1. Aan/uit-schakelaar
2. 12 V aansluiting
3. Aardaansluiting
4. 24 V aansluiting
5. Smeltzekering
6. Ampèremeter
7. Schakelstanden 1 + 2
8. Min. – max. laden
9. Laden resp. starten van de accu
Garantie
De garantie heeft uitsluitend betrekking op onvolkomenheden
die op materiaal- of productiefouten betrekking hebben.
Bij een claim van een onvolkomenheid, in de zin van garantie,
dient de originele aankoopfactuur met de aankoopdatum
bijgesloten te worden.
Van garantie uitgesloten zijn verkeerd gebruik, zoals bijv.
overbelasting van het apparaat, gebruik van geweld,
beschadigingen door vreemde invloeden of door vreemde
voorwerpen. De niet-naleving van gebruiks- en
montageaanwijzingen en normale slijtage zijn eveneens van
garanties uitgesloten.
Algemene veiligheidsinstructies
De gebruiksaanwijzing dient, vóór de eerste
ingebruikneming van het apparaat, geheel doorgelezen te
worden. Indien over de aansluiting en bediening van het
apparaat twijfels bestaan, dient u zich tot de producent
(serviceafdeling) te wenden.
OM EEN HOGE GRAAD VAN VEILIGHEID TE
GARANDEREN DIENT U DE VOLGENDE INSTRUCTIES IN
ACHT TE NEMEN:
Let op: Uitsluitend met een FI (veiligheidsschakelaar
voor foutstroom) gebruiken!!
LET OP!
• Houd de werkomgeving schoon en opgeruimd.
Wanordelijke werkruimtes en werkbanken verhogen het
gevaar van ongevallen en letsels.
• Let op de omgevingscondities waaronder gewerkt
wordt. Gebruik geen elektrische werktuigen en
apparaten in een vochtige of natte omgeving. Zorg voor
een goede verlichting. Stel elektrische apparaten niet
aan regen of een hoge luchtvochtigheid bloot.
Schakel elektrische apparaten niet in een omgeving met
licht ontvlambare vloeistoffen of gassen in.
• Laat geen vreemde personen met het apparaat
werken. Bezoekers en toeschouwers, vooral kinderen
evenals zieke en moeilijk ter been zijnde personen
moeten van de werkplek weg gehouden worden.
• Zorg voor veilig opbergen van het apparaat.
Apparaten, die niet worden gebruikt, moeten op een
droge, mogelijk hoog gelegen plaats bewaard of, indien
mogelijk, ontoegankelijk opgesloten worden
• Let op de stroomkabel. Trek niet aan de kabel. Pak
voor het uitnemen enkel aan de stekker. Houd de kabel
op afstand van warmtebronnen, olie en scherpe kanten
• Vermijd ongewenst inschakelen. Let er altijd op dat
het apparaat met de apparaatschakelaar uitgeschakeld
is voordat u de netstekker uit het stopcontact neemt.
• Gebruik buiten een speciale verlengkabel. Gebruik
voor buitengebruik speciale geschikte verlengkabels die
overeenstemmend zijn gemerkt.
• Blijf altijd attent. Let op wat u doet. Gebruik uw
gezonde verstand. Gebruik geen elektrische apparaten
in geval van vermoeidheid.
• Let op beschadigde delen. Onderzoek het apparaat
voordat u het apparaat gaat gebruiken. Zijn afzonderlijke
delen beschadigd? Als afzonderlijke delen beschadigd
zijn vraagt u zich dan bij kleine beschadigingen serieus
af of het apparaat toch nog perfect kan functioneren.
• Voorkom stroomschokken. Vermijd ieder lichamelijk
contact met geaarde objecten, bijv. waterleidingen,
verwarmingselementen, haarden en behuizingen van
koelkasten.
• Gebruik uitsluitend goedgekeurde onderdelen.
Gebruik bij onderhoud en reparaties identieke
reserveonderdelen. Wendt u zich voor onderdelen tot
een officieel servicecentrum.
• Waarschuwing! Het gebruik van andere onderdelen of
aanbouwdelen, die in deze gebruiksaanwijzing niet
uitgesproken aanbevolen zijn, kan bedreiging van
personen en objecten tot gevolg hebben.
Veiligheidsinstructies voor de éérste ingebruikneming
• Neem altijd de netstekker uit voordat met het
instellen of onderhoudswerk wordt begonnen.
Sluit de lader totdat de stroomvoorziening, als alle
instellingen en de terminals zijn aangesloten.
- Na het verwijderen van de verpakking controleren of het
apparaat en alle onderdelen in een onberispelijke staat
zijn.
- De netkabel geheel afwikkelen en zodanig neerleggen
dat de poolklemmen elkaar niet raken.
- Indien vereist, de netkabel met een verlengkabel
verlengen; daarbij moet er op gelet worden dat de
kabeldoorsnede dezelfde is als van de netkabel; geen
kabel met een kleinere doorsnede gebruiken.
- De aansluittangen, de klemmen en de bovenste
oppervlakte van de accu moeten schoon gehouden
worden; zo nodig de accuklemmen met een draadborstel
schoonborstelen; daardoor wordt een goed elektrisch
contact en een maximale oplading bereikt.
- Nooit de polen van de aansluitingen verwisselen.
( (-) zwart; (+) rood )
Page 28

28
- De laadspanning van het laadapparaat moet gelijk zijn
aan de op de accu aangegeven nominale spanning; zij
komt met het aantal van de accucellen, verveelvoudigd
met twee, overeen
(3 cellen = 6 V; 6 cellen = 12 V; 12 cellen = 24 V).
- Het apparaat voor het laden veilig opstellen en zich
ervan overtuigen dat de luchtstroom door de
overeenkomstige openingen niet wordt belemmerd. Een
goede koeling systeem moet worden gewaarborgd.
- Niet tegelijk meerdere accu’s laden.
- De accusluitdoppen slechts dan verwijderen, nadat de
klemmen zijn schoongemaakt zodat geen stof en
dergelijk in de accubak kan komen. Tijdens de laadtijd
zo houden.
- Controleren of de elektrolytvloeistof minimaal 4 á 5 mm
boven de platen staat; eventueel met gedestilleerd
water, dat voor dit doel in de handel verkrijgbaar is,
aanvullen.
1. Tijdens de laadfase ontstaan explosieve gassen;
vermijd daarom vonken en open vuur, resp. roken in
de omgeving.
2.
Opladen van accu’s mag slechts in
geventileerde ruimtes plaatsvinden; het is streng
verboden het laadapparaat in het voertuig of onder
de gesloten motorkap te gebruiken.
3. Laad standaardaccu’s en onderhoudsvrije accu’s nooit
tegelijk op.
4. Laad nooit wegwerpaccu’s op.
5. Laat achter het apparaat altijd voldoende plaats voor
ventilatie.
6. Volg de aanwijzingen van de fabrikant op.
7. Controleer de correcte staat van het zuur in de accu.
8. Controleer steeds de vlekkeloze staat van netkabel en
kabelklem. Bij beschadigingen van de netkabel
onmiddellijk het vakpersoneel op de hoogte stellen.
9. Het apparaat mag niet aan weersinvloeden, regen en
sneeuw, blootgesteld worden.
10. Het apparaat niet blootsvoets gebruiken. Het apparaat
niet met vochtige handen of natte, resp. vochtige voeten
aanraken.
11. Stekker niet aan de kabel of door rukken aan het
apparaat uit het stopcontact nemen.
12. Verhinder dat het apparaat door kinderen of
onbevoegden wordt gebruikt.
Laat het apparaat niet zonder toezicht of nutteloos
ingeschakeld aanstaan omdat het een gevarenbron kan
zijn.
• Indien beveiligings- of bescherminrichtingen worden
onderhouden of gerepareerd, moeten deze na het
beëindigen van de werkzaamheden opnieuw correct
ingebouwd worden.
• Het is absoluut noodzakelijk de aan de betreffende
gebruiksplaats geldige voorschriften ter voorkoming van
ongevallen te kennen evenals andere, algemeen
erkende veiligheidsregels.
• Voordat u dit apparaat gaat gebruiken moet u beslist de
veiligheidsinrichtingen controleren. Overtuigt u zich dat
ook schijnbaar slechts licht beschadigde onderdelen
daadwerkelijk naar behoren functioneren.
• Voor zover in deze gebruiksaanwijzing niet anders
aangegeven, moeten beschadigde onderdelen en
veiligheidsinrichtingen door een geautoriseerd
servicecentrum gerepareerd of vervangen worden.
• Laat een beschadigde schakelaar door een
geautoriseerd servicecentrum repareren of vervangen.
• Dit apparaat voldoet aan alle desbetreffende
veiligheidsbepalingen. Reparaties mogen slechts door
een gekwalificeerde elektricien in een geautoriseerd
servicecentrum en met gebruik van originele
reserveonderdelen uitgevoerd worden. Bij niet
respecteren van deze regels bestaat gevaar van
ongevallen.
Handelswijze in noodgeval
Tref de noodzakelijke maatregelen om éérste hulp te
verlenen, die met het letsel overeenkomt en vraag zo snel
mogelijk gekwalificeerde medische hulp aan. Bescherm
gewonde personen voor overig letsel en stel ze gerust.
Voor het eventueel plaatsvinden van een ongeval zou
altijd een verbandtrommel, volgens DIN 13164, op de
werkplaats bij de hand moeten zijn. Het uit de
verbandtrommel genomen materiaal dient onmiddellijk
aangevuld te worden. Indien u hulp vraagt, geef de
volgende gegevens door:
1. Plaats van het ongeval
2. Soort van het ongeval
3. Aantal gewonden mensen
4. Soort verwondingen
Toelichting van de symbolen
In deze gebruiksaanwijzing en/of op dit apparaat worden de
volgende symbolen gebruikt.
Productveiligheid:
Het product is conform de
desbetreffende normen van de
Europese Gemeenschap
Apparaat is randgeaard
Beveiligingsklasse II
Verboden:
Verbod, algemeen
(in verbinding met ander
pictogram)
Niet bij regen gebruiken
Waarschuwing:
Waarschuwing/Let op
Waarschuwing voor gevaarlijke
elektrische spanning
Aanwijzingen:
gebruiken
Vóór gebruik gebruiksaanwijzing
lezen
Veiligheidshandschoenen
Milieubescherming:
Afval niet in het milieu, maar
vakkundig verwijderen
Verpakkingsmateriaal van
karton bij de daarvoor
bestemde recyclingplaatsen
afleveren
Beschadigde en/of verwijderde
elektrische of elektronische
apparaten bij de daarvoor
bestemde recyclingplaatsen
Verpakking:
Tegen vocht beschermen Verpakkingsoriëntering boven
Technische gegevens:
afleveren
Netaansluiting Gewicht
Page 29

29
Gebruik volgens bepalingen
Professioneel startlaadapparaat voor laden, snelladen, zoals
voor starten van voertuigen. Rijdbaar door wielen van grote
afmetingen.
Elektrische gevaren
Direct elektrisch contact
Een defecte kabel of stekker kan tot een elektrische
schok leiden.
Laat defecte kabels of stekkers altijd door een vakman
vervangen. Gebruik het apparaat slechts met een aansluiting
aan een veiligheidsschakelaar voor foutstroom (FI).
Indirect elektrisch contact
Letsels door spanninggeleidende onderdelen bij
geopende elektrische of defecten bouwdelen.
Tijdens onderhoudswerkzaamheden de netstekker uitnemen.
Slechts met FI-schakelaar aansluiten.
Onjuiste plaatselijke verlichting
Gebrekkige verlichting stelt een hoog risico voor.
Zorg bij het werken met het apparaat voor voldoende
verlichting.
Verwijdering
De verwijderinginstructies zijn met pictogrammen
aangegeven die op de machine, resp. op de verpakking, te
vinden zijn. Een beschrijving van de afzonderlijke
betekenissen is in het hoofdstuk “Aanduiding” te vinden.
Verwijdering van de transportverpakking
De verpakking beschermt het apparaat tegen
transportschades. De verpakkingsmaterialen zijn meestal
volgens milieuvriendelijke en verwijderingtechnische
standpunten gekozen en derhalve recyclebaar.
Het terugbrengen van de verpakking naar de
materiaalomloop spaart grondstoffen en verlaagt de
afvalhoeveelheden. Verpakkingsdelen (bijv. folies, styropor)
kunnen voor kinderen gevaarlijk zijn. Er bestaat
verstikkingsgevaar! Bewaar de verpakking buiten het bereik
van kinderen en verwijder deze zo snel mogelijk.
Binnen de EU wijzen deze symbolen er op dat dit
product niet met huishoudafval verwijderd mag
worden. Oude apparaten bevatten waardevolle
recycleerbare materialen, waaraan hergebruik
gezondheid niet schaden door ongecontroleerde
afvalverwijdering. Verwijder oude apparaten derhalve via
daarvoor ingerichte verzamelplaatsen of stuur het apparaat
voor verwijdering aan de verkoper terug. Deze zal het
apparaat voor verwijdering afvoeren.
Eisen aan de bedienende persoon
De bedienende persoon moet, vóór het gebruik van het
apparaat, de gebruiksaanwijzing goed gelezen hebben.
Kwalificatie
Behalve een uitvoerige instructie door vakkundig
verkooppersoneel is er geen speciale kwalificatie voor het
gebruik van het apparaat nodig.
Minimale leeftijd
Het apparaat mag slechts door personen gebruikt worden van
16 jaar of ouder.
Uitzondering hierop is het gebruik door jeugdige personen bij
een beroepsopleiding ter verkrijging van vaardigheid en
indien dit onder toezicht van een opleider plaats vindt.
Scholing
Voor het gebruik van het apparaat is passend onderricht
voldoende. Een speciale scholing is niet noodzakelijk.
toegekend kan worden om het milieu, resp. de
Technische gegevens
Aansluiting: 230 V/50-60 Hz
Startspanning laden: 12V / 24 V
Laadstroom effectief: 60 A
Laadstroom rekenk.: 40 A
Startstroom ca.: 0 V: 390 A
1,5 V: 240 A
Max. netvermogen: 8 kW
Min. beveiliging: 16 A
Nominale capaciteit: 20-1000 Ah
Accustart: 35-50 Ah (zonder voorladen)
65-100 Ah (zonder voorladen)
Gewicht: 16 kg
Afmetingen (mm): 330 x 250 x 600
Transport en opslag
• Bij een langdurige opslag moet het apparaat vooraf
grondig gereinigd worden.
• Bescherm de zaag door een kunststofplaat, karton of
iets dergelijks tegen weersinvloeden.
Montage en de éérste ingebruikneming (afb. 4+5+6)
Schroef de greep zoals in afb. 5 vast.
Plaats nu de as (afb. 1/2) door de acculader. Daarna de
meegeleverde borgringen aanbrengen. Nu enkel noch de
wielen (afb. 1/1) op de as plaatsen en deze eveneens met de
borgringen, zoals in afb. 6 aangegeven, borgen.
Als laatste de wieldoppen op de wielen plaatsen.
Schroef tenslotte de voet (afb. 1/4) met de meegeleverde
schroeven (afb. 1/3) vast.
Bediening
Bij alle om- en instellingen van de acculader altijd de
netstekker uitnemen.
Laadfunctie (afb. 3)
• Sluit het laadapparaat aan de te laden accu aan.
• De zwarte poolkabel moet altijd als éérste aangesloten
worden aan de minpool, daarna de pluspool
aanklemmen.
•
Klem de accu van het voertuig, voor het laden,
geheel af.
• Stel het laadapparaat altijd in op de laagste
laadspanning (min/1) (afb. 3/8).
• Steek nu de netstekker in het stopcontact en regel de
laadspanning naar `boven tot een laadstroom
aangegeven wordt die ca. 10% van de accucapaciteit is.
• De laadspanningen kunnen bij verlaagde laadstroom
verhoogd worden (afb. 3/7).
• Uiterlijk 3-5 uren, na de afgeronde lading, de accu
afklemmen.
•
De laadstroomindicatie gaat, na de afgeronde
lading, niet helemaal naar nul terug.
Laadtijd van de accu
• De laadtijd is altijd afhankelijk van de staat van de accu
(volledig geladen, tot de helft geladen of volledig
ontladen).
• Voor het laden „als opfrissing“ van een accu is 2 - 4 uur
nodig, Voor een volledige lading is 8 - 10 uur nodig.
•
Een maximale laadtijd van 10 uur niet
overschrijden.
Page 30

30
Starthulp
• LET OP! Tijdens het opstartproces kunnen
overspanningen ontstaan, de on-board elektronica
kunnen beschadigen hun voertuig. Bespreek met uw
auto-specialist.
• De accu, als onder het hoofdstuk “Laadproces”
aangegeven, aansluiten en aan het voertuig geklemd
laten!
• Het laadapparaat moet principieel met 2 personen
gestart worden.
• De lader op max. Prestaties zijn:
Switching fase 2 (Fig. 3/7) en "BOOST" (Fig. 3/8).
• De éérste persoon bedient de startschakelaar van het
laadapparaat. (Fig. 3, 9) De tweede persoon start
onmiddellijk daarna het voertuig.
• Zodra het voertuig is aangelopen, het startproces
onmiddellijk onderbreken, max. 9-10 sec.
• Na een niet gelukte startpoging gelieve ca. 5 minuten te
wachten, tot het apparaat afgekoeld is.
Tip: als u de batterij gedurende 10-15 minuten tot
dagvaarding vereist veel minder batterijcapaciteit
opstarten.
Let op: Wordt de max. startduur van 10 sec.
overschreden, dan kunnen de zekeringen doorbranden,
resp. schaden aan voertuig ontstaan!
Let op: De klemmen mogen niet aanraken.
Let op: De acculader beschikt over een zekering
voor overbelasting.
Belangrijk: Het vervangen van smeltzekeringen (afb. 3/5),
die met de waarden van het apparaat niet in
overeenstemming zijn, kan materiaal- en
persoonsschaden veroorzaken.
Het vervangen van smeltzekeringen mag slechts bij
uitgenomen netkabel plaatsvinden!
Veiligheidsinstructies voor de bediening
• Alle veiligheids- en beschermingsinrichtingen moeten
behoorlijk aangebouwd en op hun plaats zijn voordat het
apparaat ingeschakeld mag worden.
• Startpogingen van voertuigen met lege of defecte accu’s
zijn verboden omdat het tot beschadiging van het
apparaat kan leiden.
• Het starten met de accu in de positie “Laden” i.p.v.
“Starthulp” kan de ampèremeter beschadigen en de
overlastbeveiliging in werking zetten.
• Voordat de hoofdschakelaar wordt ingeschakeld, dient u
zich er van te overtuigen dat het juist is aangesloten.
• Waarschuwing! Indien u twijfels hebt: Laat u zich bij het
gebruik door een vakman in een geautoriseerd
servicecentrum voorlichten.
• Gebruik het apparaat pas nadat u de gebruiksaanwijzing
aandachtig hebt gelezen.
• Let op alle, in de gebruiksaanwijzing aangegeven,
veiligheidsinstructies.
• Gedraagt u zich verantwoord tegenover andere
personen.
Aanwijzingen stap voor stap
Laden
1. De acculader aansluiten.
2. Laadfunctie instellen (min/1) (afb. 3/7).
3. De acculader inschakelen.
4. De netkabel aansluiten.
5. De accu wordt geladen (max. 10 uur).
Starten
1. De acculader aansluiten.
2. Startfunctie instellen (afb. 3/9).
3. De netkabel aansluiten.
4. Acculader inschakelen, daarna onmiddellijk het voertuig
starten.
5. Zodra het voertuig is aangelopen, het startproces
onmiddellijk onderbreken en de acculader uitschakelen
en afkoppelen.
Storingen – Oorzaken - Oplossingen
LET OP: ALTIJD EERST DE OVERLASTBEVEILIGINGEN
CONTROLEREN!
Veiligheidsschakelaar:
1. De rode tang aan de pluspool (+) en de zwarte tang aan
de minpool (-) aansluiten.
2. Het contact verwijderen en de zekeringen controleren.
3. Lagere laadspanning kiezen.
4. Is de vermogensopname van de accu te hoog, dan
wordt aanbevolen de accu door een auto-elektromonteur
te laten laden en in de aansluiting, onder veel
voorkomend gebruik van de acculader, het laadniveau
hoog te houden of een krachtiger laadapparaat aan te
schaffen.
De accu door een vakman laten controleren. Accu
vervangen.
Te sterke laadstroom bij laadbegin
1. Let op: Indien de laadstroom na 15 - 20 minuten nog te
hoog is, kan het betekenen dat de lading niet blijft.
De accu door een vakman laten controleren. Accu
vervangen.
Te zwakke laadstroom
1. Eventueel proberen de laadstroomregulering hoger in te
stellen.
Ampèremeter wijst de laagste stand aan
1. De accu door een vakman laten controleren. Accu
vervangen.
2. Controleren of de netspanning in overeenkomst met de
voorgeschreven spanning is.
Ampèremeter wijst niet aan
1. De tangen schoonmaken en opnieuw aanbrengen.
2. De accu door een vakman laten controleren. Accu
vervangen.
3. Functiebekwaamheid van de acculader met een andere
accu, die in perfecte staat is, uitproberen.
Oorzaken van de overbelasting
1. Onjuiste aansluiting van de aansluittangen aan de accu.
2. Een vergeten of indirect contact van de aansluittangen
met elkaar.
3. De accu is volledig, resp. sterk ontladen.
4. De accu is volledig ontladen en heeft een hogere
capaciteit dan de acculader aan vermogen kan
opbrengen.
De accu is defect of beschadigd (bijvoorbeeld
kortsluiting van de interne elementen).
Inspectie en onderhoud
Neem voor alle werkzaamheden aan het apparaat de
netstekker uit.
• Gebruik voor het schoonmaken van de kunststofdelen
een vochtige doek. Geen schoonmaakmiddelen,
oplosmiddelen of puntachtige voorwerpen gebruiken.
• Verwijder uit de ventilatieopening en van de beweegbare
onderdelen, na ieder gebruik, vastzittend stof met een
zachte borstel of penseel.
Smeer alle beweegbare metaalonderdelen regelmatig
met olie in.
Veiligheidsinstructies voor inspectie en onderhoud
Na ieder gebruik
Ventilatieopeningen en beweegbare onderdelen van stof
ontdoen.
Regelmatig
Beweegbare metalen onderdelen met olie smeren.
(Universele olie)
Regelmatig
Controleer of alle schroeven goed zijn vastgedraaid.
Page 31

31
EG-Conformiteitverklaring
Hiermede verklaren wij,
Güde GmbH & Co. KG
Birkichstraße 6
74549 Wolpertshausen
Germany
dat het navolgend genoemde apparaat, op grond van zijn
ontwerp en bouwwijze, evenals de door ons in omloop
gebrachte uitvoeringen aan de desbetreffende fundamentele
veiligheids- en gezondheidverordeningen van de EGrichtlijnen voldoen.
Bij een niet met ons overeengekomen wijziging aan
het apparaat verliest deze verklaring haar geldigheid.
Benaming van het apparaat: Accu lader V 421 C
Artikel-Nr.: 85074
Desbetreffende EG-Richtlijnen:
2006/95 EG
2004/108 EG
Gebruikte harmoniserende normen:
EN 60335-2-29:2004
EN 60335-1/A14:2010
EN 62233 :2008
EN 55014-1:2006
EN 55014-2/A2:2008
EN 61000-3-2:2006
EN 61000-3-3:2008
EN 61000-3-11:2000
Datum/Handtekening fabrikant: 10.08.2011
Gegevens betr. ondertekende: bedrijfsleider
Dhr. Arnold
Technische Documentatie: J. Bürkle FBL; QS
Page 32

I
32
Prima di mettere l’apparecchio in funzione, leggere attentamente, per favore, il presente Manuale d’Uso
A.V. 2 Per le copie, anche delle singole parti del testo, deve essere emessa l’autorizzazione. Sono riservate le modifiche
tecniche.
Apparecchio
Ricarica della batteria V 421 C
Accessori (di serie):
Cavo da carica profi, pinza con manichi isolati, amperometro,
protezione al rovescio dei poli, termico, fusibile ausiliare 50°.
Campo d’applicazione:
Il caricabatteria professionale per caricamento normale e
rapido e per avviamento dei veicoli. Le ruota grandi
permettono il trasporto comodo.
Volume (fig. 1+2)
1. ruote
2. asse
3. viti
4. piede di sostegno
5. carter delle ruote
6. viti
7. manico
8. caricabatteria
Descrizione dell’apparecchio (fig. 3)
1. ON/OFF
2. allacciamento 12V
3. massa
4. allacciamento 24V
5. fusibile
6. amperometro
7. grado d’attivazione 1 + 2
8. caricamento min - max
9. caricamento/attivazione della batteria
Garanzia
La garanzia include esclusivamente gli inconvenienti dovuti
dal difetto del materiale oppure dal difetto dalla produzione.
Per la contestazione in garanzia occorre allegare l’originale
del documento d’acquisto riportante della data di vendita.
La garanzia non include l’uso profano, es. sovraccarico della
macchina, manomissione, danni dall’intervento estero oppure
dagli oggetti. La garanzia non include anche l’inosservanza
del Manuale d’Uso, del montaggio e l’usura normale.
Prescrizioni di sicurezza generali
Prima di utilizzare l’apparecchio, è necessario leggere
completamente il Manuale d’Uso. Nel caso dei dubbi sulla
connessione e manovra dell’apparecchio, rivolgersi al
costruttore (Centro d’Assistenza).
PERCHE’ SIA GARANTITO LIVELLO DI SICUREZZA
ALTO, MANTENERE ATTENTAMENTE LE SEGUENTI
ISTRUZIONI:
Attenzione: Utilizzare solo con FI (protezione alla
corrente falsa) !
ATTENZIONE!
• Mantenere la zona di lavoro pulita ed ordinata.
La zona di lavoro e banco da lavoro disordinati
aumentano il pericolo degli incidenti ed infortuni.
• Porre attenzione alle condizioni ambientali nelle quali
state lavorando. Non utilizzare gli attrezzi elettrici
nell’ambiente bagnato, né umido. Assicurare la buona
illuminazione. Non sottoporre gli attrezzi elettrici alla
pioggia, né all’alta umidità dell’ambiente. Non
accenderli nell’ambiente con i liquidi oppure gas
infiammabili.
• Impedire avvicinarsi alle persone non adatte Le visite
ed assistenti, soprattutto i bambini e le persone malate
e/o fisicamente incapaci, tenere in distanza sicura dalla
Vs. zona di lavoro.
• Provvedere alla sicura conservazione degli utensili.
Gli attrezzi inutili porre al luogo asciutto, inaccessibile
oppure in alto.
• Porre attenzione al cavo. Non tirare il cavo. Volendo
sconnetterlo dalla presa, reggerlo sempre sulla spina.
Tenere il cavo d’alimentazione in distanza sufficiente
dalle fonti del calore, olio ed angoli vivi.
• Evitare l’accensione involontaria Prima di collegare la
spina alla presa, badare sempre a che l’interruttore sia in
posizione “spento”.
• Per il lavoro all’aperto utilizzare i cavi di prolunga
speciali. Per il lavoro all’aperto sono necessari cavi di
prolunga speciali, adatti per i lavori esterni, che sono
indicati in modo relativo.
• Mantenersi sempre la concentrazione. Porre
attenzione a ciò, che state facendo. Utilizzare la
razionalità. Non utilizzare gli attrezzi elettrici, quando siete
stanchi.
• Porre attenzione alle parti danneggiate. Prima di
utilizzarlo, ispezionare l’apparecchio. Sono danneggiate
alcune parti? Nel caso del danneggiamento leggero
considerare, se la macchina funzionerà ancora con
sicurezza e perfettamente.
• Precedere alle scosse elettriche. Evitare ogni contatto
del corpo con gli oggetti messi a terra, ad es. acquedotti,
corpi di riscaldamento, stufe e frigoriferi.
• Utilizzare solo le parti approvate. Per manutenzione e
riparazioni utilizzare solamente i ricambi originali. I
ricambi sono disponibili solo presso il Centro d’Assistenza
autorizzato.
• Avviso! L’applicazione degli accessori e delle parti
aggiuntive, non consigliate univocamente nel presente
Manuale d’Uso, può condurre ai danni delle persone e
cose.
Istruzioni di sicurezza per prima messa in funzione
• Collegare il caricabatterie fino a quando
l'alimentazione, se tutte le impostazioni ei terminali sono
collegati correttamente.
- Dopo aver tolto l’imballo, controllare che l’apparecchio e
tutte sue parti sono in perfette condizioni.
- Svolgere totalmente il cavo d’alimentazione ed
appoggiarlo in modo che le pinze non possano entrare in
contatto.
- Se bisogna, utilizzare il cavo di prolunga; è necessario
mantenere la sezione identica con cavo d'alimentazione;
non utilizzare i cavi di sezione inferiore.
- Le pinze, morsetti e la superficie superiore della batteria
mantenere sempre puliti; nel caso di necessità pulirne
con la spazzola metallica; sarà così garantito buon
contatto elettrico e la migliore effettività del caricamento.
- Mai cambiare la polarità degli allacciamenti! ((-) Nero
(+) di colore rosso)
- La tensione di caricamento deve essere uguale di quella
nominale indicata sulla batteria; tal valore corrisponde al
numero degli elementi dell'accumulatore moltiplicati per
due (3 elementi = 6V; 6 elementi = 12V; 12 elementi =
24V).
- Appoggiare l’apparecchio sul suolo stabile ed assicurare
che niente impedisca la circolazione dell'aria attraverso i
relativi fori. Un buon sistema di raffreddamento deve
essere garantita.
Page 33

33
- Non caricare più batterie insieme.
- Togliere i coperchi delle batterie dopo di ché i morsetti
saranno puliti per evitare la caduta dello sporco nei vani.
- Assicurare che il livello dell’elettrolito sia sopra le piastre
fino a 4 – 5 mm; se bisogna, aggiungere l’acqua
distillata, disponibile per tali scopi nei negozi.
1. Durante la fase di caricamento si formano i gas
esplosivi; evitare perciò il fumare e la manipolazione
con la fiamma viva/scintille.
2.
Caricare le batterie solo nei locali ben ventilati;
è vietato utilizzare il caricabatteria all’interno del
veicolo oppure sotto il cofano del motore chiuso.
3. Mai caricare insieme le batterie standard e senza
manutenzione.
4. Mai caricare le batterie di uso unico.
5. Dietro l'apparecchio lasciare lo spazio sufficiente per la
ventilazione.
6. Rispettare le istruzioni del produttore.
7. Controllare la giusta concentrazione dell’acido contenuto
nella batteria.
8. Controllare sempre le perfette condizioni del cavo
d’alimentazione e del caricamento. Nel caso di
danneggiamento farli sostituire immediatamente dal
professionista
9. L’apparecchio non deve subire gli influssi
ambientali, di cui la neve e pioggia.
10. Non utilizzare l’apparecchio non avendo le scarpe. Non
mettersi in contatto all'apparecchio con le mani e/o piedi
umidi oppure bagnati.
11. Mai sconnettere la spina dalla presa tirando il cavo.
12. Evitare che l’apparecchio sia utilizzato dai bambini
oppure dalle persone non adatte.
Non lasciare l’apparecchio in marcia senza
sorveglianza perché può costituire la fonte del pericolo.
• Fatta la riparazione dei dispositivi di sicurezza e di
protezione, tali devono essere rimessi al suo posto
immediatamente dopo la terminazione dei lavori.
• E’ necessario conoscere e rispettare le prescrizioni di
prevenzione agli infortuni, vigenti nel luogo di utilizzo
dell’apparecchio, idem tutte altre regole generalmente
applicate.
• Prima di usare la macchina è indispensabile controllare i
dispositivi di sicurezza. Assicurarsi che anche le parti,
che sembrano danneggiate solo leggermente
funzionano bene.
• Se non descritto diversamente nel presente Manuale, le
riparazioni e sostituzioni delle parti difettose devono
essere svolte presso i Centri d’Assistenza autorizzati.
• Far sostituire gli interruttori presso l’officina autorizzata.
• Questo apparecchio è conforme a tutte relative istituzioni
di sicurezza. Le riparazioni devono essere svolte solo
dagli elettricisti specializzati presso le officine
autorizzate, che utilizzeranno i ricambi originali. Nel caso
di trascuratezza di tal istituzione c’è pericolo
dell’infortunio.
Comportamento nel caso d’emergenza
Applicare il pronto soccorso relativo all’incidente e rivolgersi
più rapidamente al medico qualificato. Proteggere il ferito agli
ulteriori incidenti e tranquillizzarlo.
Con riferimento alla DIN 13164, il luogo di lavoro deve
essere sempre dotato della cassetta di pronto soccorso
per eventuali incidenti. Il materiale utilizzato deve essere
aggiunto immediatamente. In caso di richiesta del pronto
soccorso comunicare le seguenti informazioni:
1. Luogo dell’incidente
2. Tipo dell’incidente
3. Numero dei feriti
4. Tipo della ferita
Spiegazione dei simboli
Sono riportati nel presente Manuale d’Uso, oppure applicati
sull’apparecchio, i seguenti simboli:
Sicurezza del prodotto:
Prodotto è conforme alle relative
norme CE
L’apparecchio è dotato
dell’isolamento di protezione
Classe di protezione II
Divieti:
Divieto generale
(unito con altro pittogramma)
Non utilizzare in pioggia
Avviso:
Avviso/attenzione
Avviso alla tensione elettrica
pericolosa
Direttive:
Prima dell’uso leggere il Manuale
d’Uso
Usare i guanti di protezione
Tutela dell’ambiente:
Smaltire i rifiuti in modo
professionale.
Il materiale d’imballo di cartone
può essere consegnato al
Centro di raccolta predisposto a
tal scopo.
Gli apparecchi elettrici/elettronici
difettosi e/o da smaltire devono
essere consegnati ai centri
Imballo:
Proteggere all’umidità
Dati tecnici:
Spina di connessione Peso
Uso in conformità alla destinazione
Il caricabatteria professionale per caricamento normale e
rapido delle batterie ed avviamento dei veicoli. Le ruote
grandi permettono la manipolazione comoda.
Pericoli residuali elettrici
Contatto diretto
Il cavo oppure la presa difettosi possono costituire la
causa dell’infortunio elettrico.
Il cavo e/o spina difettosi fa r sostituire sempre da specialista.
L’apparecchio può essere usato solamente con dispositivo di
protezione alla corrente falsa (FI).
autorizzati.
L’imballo deve essere rivolto
verso alto
Page 34

34
Contatto indiretto
Pericolo dell’incidente dalle parti dell’apparecchio
conducenti aperte e/o difettose.
Prima di fare la manutenzione scollegare sempre la fonte di
tensione dall’apparecchio. Utilizzare solo con la protezione
alla corrente falsa.
Illuminazione insufficiente
Illuminazione insufficiente della zona di lavoro
costituisce un notevole rischio per la sicurezza.
Lavorando con apparecchio, assicurare sempre
l’illuminazione sufficiente.
Smaltimento
Le istruzioni per lo smaltimento derivano dai pittogrammi
attaccati sull’apparecchio e sull’imballo. La descrizione dei
singoli significati riporta il capitolo "Segnaletica”.
Smaltimento dell’imballo da trasporto
L’imballo protegge l’apparecchio contro i danni durante il
trasporto. I materiali d’imballo sono scelti a seconda la tutela
dell’ambiente ed il modo di smaltimento, perciò possono
essere riciclati. Il ritorno dell’imballo in circolazione dei
materiali risparmia le materie prime e diminuisce i costi di
lavorazione dei rifiuti. Le singole parti dell’imballo (es. fogli,
styropor) possono essere pericolosi per i bambini. Esiste il
pericolo di soffocamento! Tenere le parti dell’imballo fuori
portata dei bambini e smaltirli prima possibile.
In ambito CE, il simbolo avverte di ciò, che non è
ammissibile smaltire il dato prodotto come un
rifiuto comunale. Gli apparecchi vecchi
contengono i materiali preziosi che possono
consegnati al Centro di raccolta per evitare i danni
sull'ambiente e sulla salute umana, provocati dal deposito
non controllato di tali rifiuti. Smaltire, per favore, gli
apparecchi vecchi tramite i Centri di raccolta, oppure inviarli
allo smaltimento là, dove sono stati comprati. Alcuni materiali
di tali apparecchi saranno così riutilizzati.
Requisiti all'operatore
L’operatore è obbligato, prima di usare l’apparecchio, leggere
attentamente il Manuale d’Uso.
Qualifica
Oltre le istruzioni dettagliate del professionista, per uso
dell’apparecchio non è necessaria alcuna qualifica speciale.
Età minima
Con apparecchio possono lavorare solo le persone che
hanno raggiunto 16 anni.
L’eccezione rappresenta lo sfruttamento dei minorenni per lo
scopo dell’addestramento professionale per raggiungere la
pratica sotto controllo dell‘istruttore.
Istruzioni
Utilizzo dell’apparecchio richiede solo le istruzioni adeguate
del professionista. Non sono necessarie le istruzioni speciali.
essere riciclati; dovrebbero perciò essere
Dati tecnici
Allacciamento: 230 V/50-60 Hz
Tensione di carico in
avviamento: 12V / 24 V
Corrente di carico effettiva: 60 A
Corrente di carico aritmetica: 40 A
Corrente d’avviamento cca: 0 V: 390 A
1,5 V: 240 A
Assorbimento Max.: 8 kW
Sicurezza Min.: 16 A
Capacità nominale: 20-1000 Ah
Start della batteria: 35-50 Ah (senza
caricamento precedente)
Peso: 16 kg
Dimensioni (mm): 330 x 250 x 600
Trasporto e stoccaggio
• Nel caso di stoccaggio per tempo più lungo, la macchina
• Proteggere l’apparecchio agli impatti ambientali
Montaggio e prima messa in funzione (fig. 4+5+6)
Avvitare il manico secondo la fig. 5).
Inserire l’asse al caricabatteria (fig. 1/2). Montare gli anelli
d’arresto in fornitura. Inastare le ruote (fig. 1/1) sull’asse e
bloccare con anelli d’arresto, vedi (fig. 6).
Mettere i carter sulle ruote.
In fine, con aiuto delle viti (fig. 1/3), montare il piede (fig. 1/4).
Manovra
del caricabatteria occorre sconnettere la spina dalla
presa.
Caricamento precedente)
dovrebbe essere perfettamente pulita.
coprendola del telone, cartone etc..
Prima di qualsiasi regolazione oppure impostazione
65-100Ah(con
Funzione caricamento (fig. 3)
• Collegare il caricabatteria alla batteria da caricare.
• Il cavo nero polare deve essere collegato prima al polo
negativo e poi con i morsetti al polo positivo.
•
• Il caricabatteria deve essere impostato sempre al grado
• Collegare la spina alla presa e regolare i gradi di
• In decrescenza della corrente di caricamento è possibile
• Non più tardi a 3-5 ore dalla terminazione del
•
Tempo di caricamento della batteria
• Il tempo di caricamento dipende sempre di stato della
• Per il caricamento “rigenerante” della batteria bastano 2-
•
Durante il caricamento scollegare la batteria dal
veicolo.
di caricamento minimo (min/1) (fig. 3/8).
caricamento verso alto, finché appare la corrente di
caricamento corrispondente a 10% di capacità della
batteria.
aumentare i gradi. (fig. 3/7)
caricamento scollegare la batteria dai morsetti.
L’indicatore della corrente di caricamento, dopo
la terminazione del caricamento, non indica lo zero
assoluto.
batteria (quasi caricata, metà caricata oppure totalmente
scaricata).
4 ora. Per il caricamento pieno sono necessarie 8-10
ore.
Non dovrebbe essere superato il tempo
massimo di caricamento 10 ore.
Page 35

35
Accessorio per avviamento
• ATTENZIONE! Al processo di avvio possono verificarsi
sovratensioni, dispositivi elettronici di bordo potrebbe
danneggiare il loro veicolo. Si prega di discutere con il
proprio specialista automobilistico.
• Collegare la batteria uguale del capitolo Caricamento e
lasciarla nel veicolo.
• L’avviamento tramite il caricabatteria dovrebbero
svolgere esclusivamente due persone.
• Il caricabatterie a max. Le prestazioni sono:
Commutazione fase 2 (fig. 3/7) e "BOOST" (fig. 3/8).
• Prima persona chiude il contattore d’avviamento sul
caricabatteria (fig. 3/9). La seconda avvia
immediatamente il processo d’accensione.
• Non appena parte il veicolo, interrompere
immediatamente la funzione dello START, max. 9-10
sec.
• Con il successo mancato attendere cca 5 minuti, finché
l’apparecchio non si raffredda.
Suggerimento: Se si cambia la batteria per 10-15 minuti a
citazione, richiede molta meno energia della batteria di
avvio.
Attenzione: Superando il tempo dello start massimo
10 secondi potrebbe avvenire la bruciatura dei fusibili
oppure il danneggiamento del veicolo.
Attenzione: I terminali non possono toccare.
Attenzione: Il caricabatteria è dotato della sicurezza
al sovraccarico.
Importante:
La sostituzione dei fusibili (fig. 3/5) con gli altri dispositivi
i cui non corrispondono ai fusibili nell’apparecchio può
provocare i danni sulle cose ovvero gli infortuni delle
persone. Eseguire il cambio dei fusibili solo con cavo
d’alimentazione sconnesso!
Istruzioni di sicurezza per la manovra
• Prima di accendere l’apparecchio, tutti dispositivi di
protezione e di sicurezza devono essere correttamente
montati al suo posto.
• E’ vietato provare l’avviamento dei veicoli con la batteria
scaricata oppure difettosa perché questo potrebbe
condurre al danneggiamento dell’apparecchio
• Le prove dello start in posizione “caricamento”, invece
“avviamento” potrebbero danneggiare l’amperometro ed
attivare la protezione al sovraccarico
• Prima di premere l’interruttore principale, accertarsi che
l’apparecchio sia correttamente collegato.
• Avviso! Nel caso dei dubbi, prima di utilizzare
l’apparecchio rivolgersi al professionista presso il Centro
d’Assistenza autorizzato.
• Utilizzare l’apparecchio solo dopo aver letto
attentamente il Manuale d’Uso.
• Rispettare tutte le prescrizioni di sicurezza riportate nel
Manuale d’Uso.
• Comportarsi con la responsabilità verso le altre persone.
Manuale “step by step”
Caricamento
1. Collegare il caricabatteria.
2. Impostare la funzione di caricamento (min/1) (fig. 1/7).
3. Accendere il caricabatteria.
4. Collegarlo alla presa di rete.
5. La batteria si carica. (max. 10 ore)
Avviamento
1. Collegare il caricabatteria.
2. Impostare la funzione Start (fig. 3/9).
3. Collegare alla rete.
4. Accendere il caricabatteria ed avviare immediatamente il
veicolo.
5. Non appena parte il veicolo, interrompere
immediatamente l’avviamento e spegnere e scollegare il
caricabatteria.
Guasti – cause - rimozione
ATTENZIONE: CONTROLLARE SEMPRE PRIMA I
TERMICI!
Interruttore di protezione al sovraccarico:
1. Collegare la pinza rossa al polo positivo (+) e la nera al
negativo (-).
2. Togliere il contatto e controllare i fusibili.
3. Scegliere il grado inferiore del caricamento.
4. S’è l’assorbimento della batteria troppo alto, consigliamo
affidare il caricamento della batteria all’elettricista
qualificato e poi mantenere la batteria in grado di carica
alto caricandola spesso, oppure comprare il
caricabatteria più potente.
Far controllare la batteria dal professionista. Sostituire la
batteria.
La corrente di caricamenti all’inizio di caricamento è
troppo forte.
1. Attenzione: Nel caso della corrente di caricamento alta
dopo 15 – 20 minuti, potrebbe significare che la carica
non durerà tanto.
Far controllare la batteria dal professionista. Sostituire la
batteria.
La corrente di caricamento troppo bassa.
1. Provare impostare la regolazione della corrente di
caricamento al valore superiore.
L’indicatore dell’amperometro tocca il punto più basso
della scala.
1. Far controllare la batteria dal professionista. Sostituire la
batteria.
2. Assicurare che la tensione della rete sia corrispondente
alla tensione adatta per il caricabatteria.
Amperometro non indica.
1. Pulire i morsetti e rimettere le pinze.
2. Far controllare dal professionista. Sostituire la batteria.
3. Verificare la funzione del caricabatteria con la batteria
caricata e nelle perfette condizioni.
Cause del sovraccarico
1. Errato collegamento delle pinze alla batteria.
2. Involontario contatto indiretto tra le pinze.
3. La batteria è molto oppure assolutamente scaricata.
4. La batteria è totalmente scaricata e ha la capacità
superiore alla potenza del caricabatteria.
La batteria è difettosa oppure danneggiata (ad es.
cortocircuito dei particolari interni).
Ispezioni e manutenzione
• Prima di qualsiasi lavoro sull’apparecchio scollegare la
spina dalla presa.
• Per la pulizia delle parti di plastica utilizzare il panno
umido. Non utilizzare i detergenti, solventi, né gli oggetti
appuntiti.
• Dopo ogni uso eliminare dal foro di ventilazione e dalle
parti mobili la polvere attaccata con la spazzola e/o
pennello morbidi.
• Tutte le parti mobili lubrificare periodicamente con olio.
Page 36

36
Istruzioni di sicurezza per ispezioni e manutenzione
Dopo ogni uso
Pulire dalla polvere i fori di ventilazione e le parti mobili.
Periodicamente
Parti mobili metalliche lubrificare con olio. (olio universale)
Periodicamente
Controllare tutte viti, se ben serrate.
Assistenza tecnica
Avete le domande tecniche? Contestazioni? Avete
bisogno dei ricambi oppure del Manuale d’Uso?
Sul nostro sito http://www.guede.com/support, nel settore
Assistenza tecnica, Vi aiuteremo velocemente ed in via non
burocratica. Ci dareste la mano, per favore, per poter aiutar
Vi? Per poter identificare il Vostro apparecchio nel caso di
contestazione abbiamo bisogno del numero di serie, cod. ord.
e l’anno di produzione. Tutte queste indicazioni troverete sulla
targhetta della macchina. Per avere questi dati sempre
disponibili, indicarli qui sotto, per favore:
N° serie:
Cod. ord.:
Anno di produzione:
Tel.: +49 (0) 79 04 / 700-360
Fax: +49 (0) 79 04 / 700-51999
E-Mail: support@ts.guede.com
Dichiarazione di conformità CE
Dichiariamo con il presente noi,
Güde GmbH & Co. KG
Birkichstraße 6
74549 Wolpertshausen
Germany
che la concezione e costruzione degli apparecchi sotto
elencati, nelle realizzazioni che stiamo introducendo alla
vendita, sono conforme ai requisiti principali delle direttive CE
sulla sicurezza ed igiene.
Nel caso della modifica dell’apparecchio da noi non
autorizzata, la presente dichiarazione perde la propria
validità.
Identificazione degli apparecchi: Ricarica della batteria
V 421 C
Cod.ord.: 85074
Direttive CE applicabili:
2006/95 EG
2004/108 EG
Applicate norme armonizzate:
EN 60335-2-29:2004
EN 60335-1/A14:2010
EN 62233 :2008
EN 55014-1:2006
EN 55014-2/A2:2008
EN 61000-3-2:2006
EN 61000-3-3:2008
EN 61000-3-11:2000
Data/firma del costruttore: 10.08.2011
Dati sul sottoscritto: Amministratore
Delegato, sig. Arnold
Documentazione tecnica: J. Buerkle FBL; QS
Page 37

H
37
Mielőtt a gépet üzembe helyezi, kérem, olvassa el figyelmesen a használati utasítást.
A.V. 2 Utánnyomást és részutánnyomást is jóvá kell hagyatni. Műszaki változások fenntartva.
Gép
Akkumulátor töltö V 421 C
Kellékek (sorozatos)
Professzionális töltőkábel, szigetelt kombináltfogó,
ampérmérő, pólusváltozás elleni biztositék, hőbiztosíték, 50 A
pótbiztosíték.
Használat:
A professzionális akkumulátortöltő alkalmas közönséges és
gyors töltésre, s a gépkocsik startolására. A berendezés
kényelmes mozgattatását nagy kerekek biztosítják be.
Tartozékok (1+2.ábra)
1. kerekek
2. tengely
3. csavarok
4. támasztó láb
5. kerékfedő
6. csavarok
7. markolat
8. akkumulátortöltő
A gép (3.ábra)
1. kapcsoló be-/ki-
2. csatlakozó 12 V
3. földelés
4. csatlakozó 24 V
5. olvadó biztosíték
6. ampérmérő
7. kapcsoló fokozat 1 + 2
8. feltöltés min – max
9. az akkumulátor feltöltése resp. indítása
Jótállás
A jótállás kizárólag az anyagi, vagy gyártási hibákból eredő
elégtelenségekre vonatkozik. Reklamáció esetén fel kell
mutatni az eredeti, a vásárláskor kapott, s a vásárlás
dátumával ellátott iratot.
A jótállás nem vonatkozik a géppel való szaktalan használat
következtében bekövetkező hibákra, pl. a gép túlterhelése,
erőszakos használata, vagy idegen tárgyakkal való
megrongálódása. A használati utasítás mellőzése
következményeire, szerelési és szokásos, normális
elhasználódásra sem vonatkozik a jótállás.
Általános biztonsági utasítások
A használati utasítást a gép első használata előtt
figyelmesen el kell olvasni. Az esetben, ha a gép
bekapcsolásával és használatával kapcsolatban kétségeik
lesznek forduljanak a gyártóhoz (szervíz osztály).
A MAGAS SZÍNVONALÚ BIZTONSÁG ÉRDEKÉBEN
TARTSA BE AZ ALÁBBI UTASÍTÁSOKAT
Vigyázz: Kizárólag FI hibaáram elleni
védőkapcsolóval szabad az áramkörbe bekapcsolni!
VIGYÁZZ!
• Munkahelyét tartsa tisztán, kitakarítva. A munkahelyen
és munkaasztalon lévő rendetlenség emeli a baleset és a
sebesülés veszélyét.
• Respektujte munkakörnyezete sajátosságait.
Villanyszerszámokat és gépeket ne használjon nyirkos,
vagy nedves környezetben. Biztosítsa be a megfelelő
világítást. Villanyszerszámokat ne hagyjon esőn,
vagy nedves levegőn, ne kapcsolja be könnyen
gyulékony folyadékok, vagy gázak közelében.
• A gép közelébe nem szabad idegen személyt
engedni. Látogatókat, nézőközönséget, főleg
gyerekeket, betegeket, vagy legyengült személyeket
tartson távol munkahelyétől
• Biztosítsa be az akkumulátortöltő biztonságos
raktározását. Azt a gépet, melyet nem használ,
raktározza száraz, idegen személyek számára
hozzáférhetetlen, vagy magas helyen.
• Vigyázzon a csatlakozó kábelre. A gépet nem szabad
a kábelnél fogva húzni. A konektorból való kihúzásnál
mindig tartsa egyik kézzel a konektort. A kábelt tartsa
hőforrásoktól, olajaktól és éles tárgyaktól biztonságos
távolságban.
• Akadályozza meg a gép véletlen bekapcsolódását.
Mielőtt a dugvillát a konektorba helyezi, győződjön meg
arról, hogy a kapcsoló „kikapcsolva“ helyzetben legyen.
• Kinti munkához használjon speciális hosszabbító
kábelt. Olyan hosszabbító kábelt használjon kinti
munkához, mely alkalmas kinti használatra, s ennek
megfelelően van megjelölve.
• Mindig legyen éber munka közben, ügyeljen arra, mit
csinál. Villamos szerszámmal nem szabad dolgoznia,
ha fáradt.
• Vigyázzon a megrongálódott alkatrészekre.
Használat előtt ellenőrizze a gépet. Ha egyes
alkatrészek kissé meg vannak károsodva, bizonyosodjon
meg arról, hogy a gép ennek ellenére, hiba nélkül és
biztonságosan fog működni.
• Előzze meg az áramütéseket. Kerülje ki teste
kapcsolatát minden leföldelt tárggyal, pl. vízvezetékkel,
fűtőtestekkel, rezsóval, vagy jégszekrénnyel.
• Kizárólag a
ártóval jóváhagyott alkaltrészeket
gy
szabad használni. Karbantartáshoz és javításhoz
kizárólag az eredetivel azonos alkatrészeket szabad
használni, melyeket az autorizált szervíz központokban
szerezhet meg.
• Figyelmeztetés! Az ebben a használati utasításban
nem ajánlott alkatrészek használata személyek és
tárgyak veszélyeztetésével járhat.
Biztonsági utasítások első üzembehelyezéshez
• A szabályozás és a karbantartás előtt a dugvillát
mindig el kell távolítani a konektorból.
Csatlakoztassa a töltőt, amíg a tápegység, ha
valamennyi, a beállítások és a terminálok megfelelő
csatlakozik.
• A berendezés kicsomagolásakor ellenőrizze, hogy a gép
minden alkatrésze hibátlan állapotban van-e.
• A villanyvezetéket teljesen tekerje le, s úgy helyezze le,
hogy a póluskapcsok ne érintkezzenek.
• Szükség esetén használjon megfelelő hosszabbító
kábelt, ügyeljen arra, hogy ugyanolyan legyen a kábel
átmérője, mint a használt villanyvezetéké, kisebb
átmérőjű kábelt nem szabad használni.
• A csatlakozó fogókat, a kapcsokat és az akkumulátor
felületét tartsa tisztán. Szükség esetén a kapcsokat
tisztítsa meg drótkefével, ezzel jobb kontaktust biztosít
be, s a töltés hatásosabb lesz.
• Soha nem szabad felcserélni a csatlakozók pólusát!
((-)fekete, (+) piros)
• Az akkumulátortöltő feszültsége akkora legyen, mint az
akumulátor címkéjén feltüntetett feszültség; ez az érték
az akkumulátorcella számának a kétszerese
(3 cella = 6 V; 6 cella = 12 V; 12 cella = 24 V).
Page 38

38
• A gépet töltés előtt helyezze stabil felületre, s biztosítsa
be, hogy semmi ne akadályozza meg az illető
nyílásokban a légáramlást. A jó hűtőrendszer garantálni
kell.
• Nem szabad egyszerre több akkumulátort tölteni.
• Az akkumulátor fedelét kizárólag a kapcsok tisztítása
után távolítsa el, hogy a kádba ne kerülhessen por, vagy
más szennyeződés.
• Biztosítsa be, hogy a deszkák az elektrolytba min. 4 až
5 mm magasságig be legyenek merülve; szükség esetén
töltse fel a folyadékot desztillált vízzel, melyet erre a
célra árulnak az üzletekben.
1. Töltés alatt robbanó gázok keletkeznek, s ezért tilos
a dohányzás és nyilt láng használata.
2.
Az akkumulátort kizárólag jól szellőztethető
térségben szabad tölteni, tilos használni
gépkocsiban, vagy bezárt motorházfedél mellett.
3. Nem szabad együtt tölteni standard és
karbantartásmentes akkumulátort.
4. Nem szabad tölteni nem tölthető akkumulátorokat.
5. A töltő mögött hagyjon elegendő helyet szellőztetésre.
6. Tartsa be a gyártó utasításait.
7. Ellenőrizze az akkumulátorban a sav állapotát.
8. Ellenőrizze, hogy az áramköri vezeték és a csatlakozó
kábel mindig hiba nélküli állapotban legyen.
Megkárosodás esetén azonnal cseréltesse ki
szakemberrel.
9. A gépet nem szabad kitenni az időjárás
viszontagságainak, pl. hó, eső.
10. A gépet nem szabad használni, ha mezitláb van. A
gépet nem szabad vizes kézzel, vagy lábbal
megérinteni.
11. A dugvillát soha nem szabad a kábelnél fogva kihúzni a
konektorból.
12. Akadályozza meg, hogy a gépet erre nem hívatott,
idegen személyek, vagy gyerekek használják.
A bekapcsolt gépet nem szabad felügyelet nélkül
hagyni, veszélyt idézhet elő.
• Az esetben, ha a biztonsági és védőberendezéseket
javítja, a munka befejeztével ezeket a berendezéseket
haladéktalanul szabályosan vissza kell szerelni.
• A gépkezelőnek feltétlenül ismernie kell és be kell
tartania az illető helyen érvényes sebesüléseket
megelőző előírásokat, s minden általános érvényű
biztonsági utasítást.
• A gép használata előtt ellenőrizni kell a biztonsági
berendezéseket. Bizonyosodjon meg arról, hogy azok az
alkatrészek, melyek hibásnak tünnek, hibátlanul fognak
működni.
• Ha a használati utasításban nincs másképp, a gép
javítását, a megrongálódott alkatrészek és a biztonsági
berendezés cseréjét, kizárólag autorizált szervíz
végezheti.
• A hibás kapcsolókat cseréltesse ki autorizált szervízben.
• A berendezés a biztonsági utasítások minden
követelményének eleget tesz. Kizárólag autorizált
szervízben szakképzett villanyszerelő javíthaja meg
eredeti alkatrészek felhasználásával. Ha ezt az utasítást
nem tartja be, balesetveszély fenyeget.
Viselkedés kényszerhelyzetben
Igyekezzen a balesetnek megfelelően elsősegélyt nyújtani,
s minél hamarabb biztosítson be orvosi segítségét.
A sebesültet nyugtassa meg, s védje további balesettől.
A DIN 13164 norma szerint az esetleges balesetek
esetére, a munkahelyen mindig kéznél legyen az
elsősegély készlet. Az anyagot, amit a készletből kivesz,
azonnal vissza kell pótolni. Az esetben, ha segítséget hív,
az alábbi adatokat jelentse be:
1. A baleset színhelye
2. A baleset tipusa
3. Sebesültek száma
4. A sebesülés tipusai
Jelzések a gépen
Ebben az utasításban és/vagy a gépen az alábbi
szimbólumok vannak feltüntetve
A gyártmány biztonsága:
A gyártmány megfelel az illető
EU normák követelményeinek
A gyyártmány védő szigeteléssel
II Védelmi osztály
van ellátvaí
Tilalom:
Általános figyelmeztetés
(más piktogarmmokkal együtt)
A gépet tilos esőbenn használni
Figyelmeztetés:
Figyelmeztetés/vigyázz
Figyelmeztetés! Veszélyes
magas feszültség
Utasítások:
Használat előtt olvassa el a
használati utasítást
Viseljen védőkesztyüt
Környezetvédelem:
A hulladékot úgy semmisítse meg,
hogy ne ártson a környezetnek.
A karton csomagolást át lehet
adni megsemmísítésre
hulladékgyűjtőbe
Hibás és/vagy tönkrement villany,
vagy elektromosgépeket át kell
adni az illetékes.
Csomagolás:
Védje nedvesség ellen
Műszaki adatok:
A gép rendeltetés szerinti használata
Profeszionális akkumulátortöltő közönséges és gyors töltésre
és gépkocsik startolására. A berendezés kényelmes
mozgattatását nagy kerekek biztosítják be.
Elektromos maradékveszély
Közvetlen kapcsolat villanyárammal
Hibás kábel, vagy dugvilla lehet az oka a villanyáram
okozta balesetnek.
A hibás kábelt és dugvillát haladéktalanul cseréltesse ki
szakemberrel. A gépet kizárólag hibaáram elleni
védőkapcsolóval (FI) szabad használni.
Nem közvetlen kapcsolat villanyárammal
Sebesülés veszélye a gép nyitott, vagy hibás, jó
áramvezető képességű, alkatrészeivel. Karbantartáskor a
gépet mindig kapcsolja ki az áramkörből. Kizárólag hibaáram
elleni védőkapcsolóval működtethető.
A csomagolást felállított
helyzetben tartsa
Dugvilla Súly
Page 39

39
A munkahely elégtelen megvilágítása
Elégtelen megvilágítás magas biztonsági kockázattal jár.
A géppel való munka közben biztosítson be megfelelő
megvilágítást.
Megsemmisítés
A berendezés megsemmisítése a gépen elhelyezett
piktogrammokból olvasható le. Az egyes jelzések értelmét a
„Jelzések“ fejezetben találja meg.
A csomagolás megsemmisítése
A csomagolás védi a gépet szállítás alatti megrongálódás
ellen. A csomagolás anyaga az ökológiai szempontok és
megsemmisítési lehetőségek szerint van kiválasztva, tehát
reciklálható. A csomagoló anyag körforgalomba való
visszatérése nyersanyagot spórol meg és csökkenti a
hulladék mennyiségét. A csomagoló anyag egyes részei (pl.
fólia, polisztirén), veszélyesek lehetnek gyerekek részére.
Fulladás veszélye fenyeget! Tehát a csomagoló anyag
illetékes darabjait raktározza olyan helyen, ahová nem
juthatnak gyerekek, s minél előbb semmisítse meg.
A szimbólum, az EU keretein belül arra
figyelmeztet, hogy az illetékes terméket
szigorúan tilos megsemmisíteni háztartási
hulladéként. A régi készülékek olyan értékes
annak érdekében, hogy megakadályozza a környezet
megkárosítását és az emberek egészségét ennek a
hulladéknak az ellenőrzés nélküli elhelyezésével, át kell adni
a hulladékgyűjtőbe. Kérem, a régi készülékeket, az illetékes
gyűjtőtelepek közvetítésével semmisítse meg, vagy küldje
megsemmisítésre oda, ahol vásárolta. Így, a készülékek
illetékes anyagai, újból felhasználásra kerülnek.
Követelmények a gép kezelőjére
A gép kezelője használat előtt figyelmesen olvassa el a
használati utasítást.
Szakképesítés
A gép használatához, szakemberrel való felvilágosításon
kívül nem szükséges speciális szakképesítés.
Minimális korhatár
A géppel kizárólag 16 éven felüli személyek dolgozhatnak.
Kivételt képez a fiatalkorúak foglalkoztatása szakképzés alatt
az oktató felügyelete mellet szakképzettség elsajátítása
érdekében.
Képzés
A gép használatához elegendő szakember felvilágosítása
resp. a használati utasítással való megismerkedés. Speciális
képzés nem szükséges.
Műszaki adatok
Csatlakozó: 230 V/50-60 Hz
Töltő start feszültség: 12V / 24 V
Effektív töltő áram: 60 A
Aritmetikus töltő áram: 40 A
Indító áram cca: 0 V: 390 A
1,5 V: 240 A
Max. áramszükséglet: 8 kW
Min. biztositás: 16 A
Névleges kapacitás: 20-1000 Ah
Akkumulátor startolása: 35-50 Ah (előzetes feltöltés
Súly: 16 kg 16 kg
Méretek (mm): 330 x 250 x 600
anyagokat tartalmaznak, melyek reciklálhatóak, s
nélkül)
65-100 Ah (előzetes
feltöltéssel)
Szállítás és raktározás
• Hosszabb raktározás esetén a gépet alaposan meg kell
tisztítani.
• Ponyvával, vagy kartonnal védje a gépet az időjárás
viszontagságaival szemben.
Szerelés és első üzembehelyezés (obr. 4+5+6)
A markolót az (5.ábra) szerint szerelje fel.
Az akkumulátortöltő illetékes helyére csúsztassa be a tengelyt
(1/2. ábra). Szerelje fel a tengelyre a géppel egy
csomagolásban átadott biztosító gyűrüket, majd a csúsztassa
fel a tengelyre a kerekeket (1/1.ábra), s erősítse fel biztosító
gyűrükkel (6. ábra).
Szerelje fel a kerékfedőket.
Végül a mellékelt csavarok (1/3 ábra) segítségével erősítse
fel a lábat (1/4 ábra).
Kezelés
A töltőt bármilyen beállítási, vagy karbantartási
munka előtt kapcsolja ki az áramkörből.
Töltés (3.ábra)
• A töltőt és a töltendő akkumulátort kapcsolja össze.
• Először a fekete pólusos kábelt kell mindig a negatív
pólushoz kapcsolni, utána kapcsolja hozzá kapcsokkal a
pozitiv pólust.
•
Az akkumulátort töltés alatt teljesen kapcsolja
ki a gépjárműből.
• A töltőt állítsa be a legalacsonyabb fel- töltési fokozatra
(perc/1) (obr. 3/8)
• Kapcsolja be a dugvillát a konektorba, s a feltöltési
fokozatot regulálja felfelé haladó irányban, addig, mig
meg nem jelenik az a feltöltési áram, mely kb. az
akkumulátor 10% kapacitásának felel meg.
• A feltöltési fokozatot, a töltő áram csökkenése estén,
növelni lehet az akumulátortöltőn elhelyezett
fokozatkapcsoló segítségévelt. (3/7.ábra)
• A befejezett töltés utáni legkésőbb 3-5 óra elteltével
kapcsolja le az akkumulátort a kapcsokról.
•
A feltöltő áram mutatója a töltés befejezése
után nincs teljesen a nullán.
Az akkumulátor feltöltési ideje
• A feltöltési idő hossza minden esetben az akkumulátor
állapotától függ (majdnem feltöltött, félig feltöltött, vagy
teljesen kisült akkumulátor)
• Az akkumulátor „regenerációjához“ elég 2-4 óra. Teljes
feltöltéshez 8-10 óra szükséges.
•
Nem szabad feltöltésnél túlhaladni a maximális
10 órát.
Segítség startoláshoz
• Vigyázz! Az indítási folyamat egymásután merülnek fel,
a fedélzeti elektronika károsíthatják a járművet. Kérjük,
beszélje meg autóipari szakember.
• Az akkumulátort kapcsolja be úgy, ahogy a „Feltöltés és
hagyja a gépkocsiban“ fejezetben van leírva!
• A gépkocsi startolásához, töltő segítségével, két
személyre van szükség.
• A töltőt a max. Teljesítmény:
Switching 2. szakasz (3/7. ábra) és a "BOOST"
(3/8. ábra).
• Az egyik személy bekapcsolja a töltőn a startoló
kapcsolót (3/9.ábra). A másik személy azonnal elindítja
a gyújtási folyamatot.
• Mihelyt a gépjármű beugrik, azonnal fejezze be a
startolást, 9-10 sec max.
• Sikertelen startolás után várjon kb. 5 percet, mig a
berendezés kihül.
Page 40

40
Tipp: Ha az akkumulátor 10-15 percet igényel idézés
sokkal kevesebb akkumulátort induláskor.
Vigyázz: Ha túl lépi a maximális 10 perces startolási
időt, kiéghetnek a biztosítékok, s esetleg megrongálódhat
a gépjármű!
ellátva.
Fontos: Az olvadó biztosítékok cseréje olyan
biztosítékokra,(3/5.ábra), melyek nem egyeznek meg a
készülék eredeti bizosítékaival, károkat és személyek
sebesülését idézheti elő.
Az olvadó biztosítékokat kizárólag a gép áramkörből való
kikapcsolását követően szabad kicserélni!
Kezelési biztonsági utasítások
A gép bekapcsolása előtt minden biztonsági és védelmi
bezendezésnek rendesen, az illetékes helyen, fel kell lennie
szerelve.
• Tilos olyan gépkocsik startolásával próbálkozni,
• Próbastartolás „startolás“ helyetti „töltési“ helyzetben
• Mielőtt lenyomja a főkapcsolót, győződjön meg, hogy a
• Figyelmeztetés! Ha kétségei vannak, a gép használata
• A gép használata előtt figyelmesen tanulmányozza át a
• Tartsa be a használati utasításban lévő biztonsági
• Felelősségteljesen viselkedjen más személyekkel
Utasítás lépésről lépésre
Feltöltés
1. Kapcsolja a töltőt az akkumulátorhoz.
2. Állítsa be a „feltöltés“ funkcióját (perc/1).(3/7.ábra)
3. Kapcsolja be a töltőt.
4. Kapcsolja be az áramkörbe.
5. Az akkumulátor feltöltődik. (max. 10 óra)
Startolás
1. Kapcsolja össze a töltőt a járművel.
2. Állítsa be a startolás funkcióját (3/9 ábra).
3. Kapcsolja be az áramkörbe.
4. Kapcsolja be a töltőt és azonnal kezdje startolni a
5. Mihelyt a motor beugrik, azonnal fejezze be a startolást,
Üzemzavarok - okok - eltávolításuk
VIGYÁZZ: ELLENŐRIZZE A BIZTOSÍTÉKOKAT,NEHOGY
TÚL LEGYENEK TERHELVE!
Túlterhelés elleni védőrelé:
1. A piros kapcsolót a pozitiv pólushoz, a feketét a negatív
2. Távolítsa el a kontaktust és ellenőrizze a biztosítékokat.
3. Alacsonyabb feltöltési fokozatot állítson be.
4. Ha az akkumulátor erőszükséglete magas, ajánlatos az
Az akkumulátort ellenőriztesse szakemberrel.
Az akkumulátort cserélje ki.
Megjegyzés: A terminálok nem lehet megérinteni.
Vigyázz: A töltő túlterhelés elleni biztosítékkal van
melyekben az akumulátor kisült, vagy meg van
károsodva , ugyanis ez a berendezés
megrongálódásához vezethet.
megrongálhatja az ampermérőt,
s egyúttal bekapcsolhatja a túlterhelés elleni
berendezést.
gép rendesen be van-e kapcsolva.
előtt forduljon autorizált szervízközponthoz.
használati utasítást.
előírásokat.
szemben.
gépjárművet.
a töltőt kapcsolja ki és szerelje le.
pólushoz csatolja.
akkumulátor töltését szakosított villanyszerelőre bízni,
továbbá az akkumulátort gyakori töltéssel magas
fokozatú feltöltési állapotban tartani, vagy nagyobb
teljesítményű töltőt beszerezni.
Túlságosan erős feltöltő áram a töltés kezdetén.
1. Vigyázz: ha 15-20 perc eltelte után a töltő áram
feszültsége magas, ez azt jelentheti, hogy a feltöltést
nem bírja ki.
2. Az akkumulátort ellenőriztesse szakemberrel.
Az akkumulátort cserélje ki.
Túlságosan gyenge feltöltő áram.
1. Próbálja meg a töltő áramot magasabb értékre beállítani.
Az ampérmérő mutatója a skála legalacsonyabb pontjára
kerül.
1. Ellenőriztesse az akkumulátort szakemberrel.
Cserélje ki az akkumulátort.
2. Ügyeljen arra, hogy az áramkör feszültsége megfeleljen
a töltőn feltüntetett megfelelő feszültségnek.
Ampérmérő nem működik.
1. Tisztítsa ki a kapcsokat és újra szerelje a fogóra.
2. Ellenőriztesse szakemberrel. Az akkumulátort cserélje
ki. Próbálja ki a töltő működésképességét hiba nélküli
akkumulátorral.
A túlterhelés okai
1. A fogók nem megfelő, hibás kapcsolása az
akkumulátorhoz.
2. Véletlen, vagy nem közvetlen kapcsolat kialakulása a
fogók között.
3. Az akkumulátor erősen, vagy teljesen ki van sülve.
4. Az akkumulátor teljesen ki van sülve, s nagyobb
kapacitású, mint a töltő teljesítménye.
5. Az akkumulátor hibás, vagy meg van rongálódva (pl. a
belső elemek rövidzárlata miatt).
Szemlék és karbantartás
A gépen végzendő minden munka előtt feltétlenül kapcsolja ki
a dugvillát a konektorból.
• A műanyag alkatrészek tisztításához nedves textiliát
használjon. Tisztítószerek, oldószerek és éles tárgyak
használata tilos.
• Minden használat előtt, puha kefével, vagy ecsettel,
távolítsa el a szellőztető nyílásokból és a mozgó
alkatrészekről a leülepedett port.
A mozgó fémalkatrészeket rendszeresen olajozza.
Szemlére és karbantartásra vonatkozó biztonsági
utasítások
Minden használat előtt
A szellőztető nyílásokat és a mozgó alkatrészeket tisztítsa
meg a portól
Rendszeresen
A mozgó fémalkatrészeket olajozza (univerzális olaj)
Rendszeresen
Ellenőrizze a csavarokat, be vannak-e húzva
Szervíz
Vannak műszaki kérdései? Reklamáció? Szüksége van
pótalkatrészekre, vagy használati utasításra?
Honlapunkon www.guede.com a Szerviz fejezetben gyorsan
és bürokráciát kizárva segítségére leszünk. Alternatív
elérhetőségünk: E-mail:support@ts.guede.com
Segítsenek, hogy segíthessünk Önöknek. Ahhoz, hogy
esetleges reklamáció esetén berendezését identifikálhassuk,
szükségünk van a széria számra, megrendelési számra és a
gyártási évre. Ezeket az adatokat megtalálja gépe
típuscímkéjén. Annak érdekében, hogy ezek az adatok
állandóan a keze ügyében legyenek, kérem, írja be ezeket az
alábbi táblázatba.
Széria szám:
Termékszám:
Gyártási év:
Tel.: +49 (0) 79 04 / 700-360
Fax: +49 (0) 79 04 / 700-51999
E-mail: support@ts.guede.com
Page 41

41
EU azonossági nyilatkozat
Ezennel a
Güde GmbH & Co. KG
Birkichstraße 6
74549 Wolpertshausen
Germany
kijelentjük, hogy a lentiekben megjelölt gépipari termék,
koncepciója és tervezése, az általunk forgalomba kerülő
kivitelezésben, megfelel az EU illetékes biztonsági és
higiéniai szabályzatok alapkövetelményeinek.
A gépen, a velünk való konzultáció nélkül végzett
változások esetén, a jelen nyilatkozat érvényét veszti.
Gép jelzése: Akkumlátor töltö V 421 C
Gyártási száma.: 85074
Az illetékes EU előírások:
2006/95/EG
2004/108/EG
Használt harmonizált normák
EN 60335-2-29:2004
EN 60335-1/A14:2010
EN 62233 :2008
EN 55014-1:2006
EN 55014-2/A2:2008
EN 61000-3-2:2006
EN 61000-3-3:2008
EN 61000-3-11:2000
Dátum/a gyártá aláírása: 10.08.2011
Az aláíró személy adatai: ügyvezető
Arnold úr
Műszaki dokumentáció: J. Buerkle FBL; QS
Page 42

SLO
42
Pred uvedbo naprave v pogon natančno preberite priložena navodila za uporabo.
A.V. 2 Ponatis celega dokumenta ali njegovih delov je možen po dogovoru s proizvajalcem. Tehnične spremembe pridržane.
Naprava
Polnilnik akumulatorjev V 421 C
Serijska oprema
Polnilni kabel za profesionalce, klešče z izoliranimi ročaji,
ampermeter, zaščita proti zamenjavi polov, toplotna
varovalka, dodatna varovalka 50 A.
Področje uporabe:
Profesionalni polnilec za običajno in hitro polnjenje
akumulatorjev ter zagon vozil. Zaradi kolesc, s katerimi je
opremljen, je naprava enostavno premestljiva.
Obseg dobave (slika 1+2)
1. Kolesa
2. Rešitev
3. Vijaki
4. Podpornik
5. Pokrovi koles
6. Vijaki
7. Ročaj
8. Polnilnik za akumulatorje
Opis naprave (slika 3)
1. Stikalo za vklop/izklop
2. Priključek 12 V
3. Ozemljitev
4. Priključek 24 V
5. Topljiva varovalka
6. Ampermeter
7. Stikalo z dvema stopnjama delovanja 1 + 2
8. Polnjenje min – max
9. Polnjenje oz. zagon akumulatorja
Garancija
Garancija velja le za tovarniške napake oz. napake, nastale
na materialih, iz katerih je naprava izdelana. Za morebitno
uveljavitev garancijskih predložite skupaj z izdelkom še
potrjen račun z datumom prodaje. Garancija ne velja za
poškodbe, ki bi nastale z nestrokovnim ravnanjem npr.
preobremenjevanje naprave, nasilno ravnanje, posredne
poškodbe ali neposredne s tujki. Za škode nastale zaradi
neupoštevanja navodil za uporabo in običajna obraba
garancija prav tako ne velja.
Splošni varnostni napotki
Pred prvo uporabo naprave natančno preberite celo
navodilo za uporabo. Za morebitna vprašanja glede
priključitve ali uporabe naprave, se obrnite na proizvajalca (ali
na njegov servisni center).
ZARADI VAŠE VARNOSTI NATANČNO UPOŠTEVAJTE
SLEDEČE NAPOTKE:
Opozorilo: Uporabljate samo skupaj s tokovno
varovalko.
POZOR!
• Delovno mesto naj bo vedno čisto. Nered in nesnaga
• Upoštevajte pogoje okolja, v katerem delate. Ne
na delovni mizi je potencialno neverna zaradi poškodb in
nesreč, ki jih lahko povzroči.
uporabljajte električnih naprav in obdelovanih strojev
v vlažnem ali mokrem okolju. Poskrbite za dobro
razsvetljavo. Ne izpostavljajte električne naprave
dežju niti preveliki vlagi. Ne vključujte električne
naprave v okolju, kjer so v bližini lahko vnetljive tekočine
ali plini.
• Pri delu preprečite dostop tujim osebam. Obiskovalci
in tuje osebe, predvsem pa otroci, bolniki ali slabotne
osebe naj bodo v varni razdalji od mesta, kjer delate.
• Orodje pospravite na varno mesto. Orodje ali
pripomočke, ki jih trenutno ne uporabljate, pospravite na
svoje mesto oz. tako, da bodo na varnem – nedostopne
nepoklicanim osebam.
• Pazite, da ne poškodujete električnega kabla. Ne
vlecite za kabel. Ne vlecite vtiča iz vtičnice na zidu za
električni kabel. Kabel naj bo vedno varno oddaljen od
virov toplote, olja in ostrih robov.
• Preprečite slučajen vklop. Pred vtikanjem vtiča
v vtičnico vedno preverite, če je glavno stikalo naprave
izključeno.
• Zunaj uporabljajte le posebne podaljševalne kable.
Zunaj potrebujete posebne podaljševalne kable, ki so
primerni za zunanjo uporabo in so tudi ustrezno
označeni.
• Vedno bodite previdni. Posvetite se delu, ki ga
opravljate. Ravnajte premišljeno. Ne uporabljajte
električnih strojev, če ste utrujeni.
• Pa
zit
e na poškodovane dele. Pred uporabo napravo
preglejte. Ali so kateri deli poškodovani? Dobro
premislite, če lahko napravo uporabljate kljub manjšim
poškodbam, ki ste jih morebiti odkrili in če bo delovala
varno in brezhibno.
• Izogibajte se električnemu udaru. Preprečite vsakršen
stik telesa z ozemljenimi predmeti npr. z vodovodnimi
cevmi, grelnimi telesi, štedilniki in hladilniki itd..
• Uporabljajte le originalne rezervne dele. Pri
vzdrževanju in servisiranju uporabljajte le originalne
rezervne dele. Glede rezervnih delov se posvetujte s
strokovnjaki pooblaščenega servisa.
• Opozorilo! Uporaba opreme in nastavljivih delov, ki jih
proizvajalec ne priporoča v tem navodilu za uporabo je
nevarna, ker lahko poškoduje osebe in povzroči
materialne škode.
Varnostni napotki pri prvi uporabi naprave v pogon
- Pred nastavljanjem ali vzdrževanjem vedno najprej
izvlecite vtič iz vtičnice.
Polnilec priključite šele tedaj, ko dokončate vse
nastavitve in če so priključki pravilno nameščeni na pole.
- Ko vzamete napravo iz ovitka preverite, če so vsi njegovi
deli nepoškodovani in če delujejo brezhibno.
- Omrežni kabel popolnoma odvijte in ga položite tako, da
se ga polne sponke med seboj ne dotikajo.
- Po potrebi lahko električni kabel nastavite s
podaljševalnim kablom; pri tem pazite, da bo prerez
podaljševalnega kabla ustrezal omrežnemu kablu; ne
uporabljajte kablov z manjšim prerezom.
- Priključne klešče, sponke in zgornja površina
akumulatorja mora biti vedno čista; vse te dele po
potrebi očistite z žično ščetko; s tem boste zagotovili
pravilen električen spoj in boljšo učinkovitost polnjenja.
- Pazite na pravilno polarnost elektrod!
( (-) črna; (+) rdeča )
- Polnilna napetost naprave mora biti enaka nominalni
napetosti, navedeni na akumulatorju; ta vrednost ustreza
številu celic akumulatorja pomnoženo z dva
(3 celice 6 V; 6 celic = 12 V; 12 celic = 24 V).
- Pred polnjenjem napravo namestite tako, da stoji
stabilno; hkrati pa poskrbite za pravilno kroženje zraka
okoli nje. Poskrbite za ustrezno hlajenje.
- Ne polnite istočasno več baterij ali akumulatorjev.
Page 43

43
- Pokrovčke z akumulatorja lahko snamete le, če boste
priključke poprej očistili, da v rezervoar ne padajo prah in
nečistoče sicer jih med polnjenjem pustite gor.
- Poskrbite, da bo elektrolit najmanj 4 do 5 mm nad
ploščicami; po potrebi dolijte destilirano vodo, ki jo lahko
v ta namen kupite v trgovini.
1. Med polnjenjem se sproščajo eksplozivni plini, zato
preprečite iskrenje in odprt ogenj; kajenje v
neposredni bližini je prepovedano.
2.
3. Nikoli ne polnite standardnih in kompaktnih
4. Nikoli ne polnite akumulatorjev za enkratno uporabo.
5. Za napravo mora biti dovolj prostora za nemoteno
6. Upoštevajte napotke proizvajalca.
7. V akumulatorju mora biti vedno dovolj kisline.
8. Neprenehoma preverjate brezhibno stanje vseh kablov.
9. Stroja se ne sme izpostavljati atmosferskim vplivom,
10. Stroja ne uporabljajte, v kolikor ste bosi. Ne dotikajte se
11. Vtiča ne vlecite iz vtičnice za kabel.
12. Preprečite možnost, da bi stroj uporabljali otroci oziroma
Akumulator polnite le v prezračenih prostorih;
ne uporabljajte naprave za polnjenje akumulatorja v
vozilu ali z zaprtim pokrovom motorja.
akumulatorjev istočasno.
kroženje zraka.
Poškodovan električni kabel naj čimprej zamenja
strokovnjak z novim.
dežju ali snegu.
ga z vlažnima rokama oziroma mokrima ali vlažnima
nogama.
nepoklicane osebe.
Ne puščajte naprave vključene brez nadzora, ker je
nevarna za okolje.
• Pri vsakem popravilu varnostnih ali zaščitnih elementov
naprave, jih po končanem delu ponovno vrnite na svoje
mesto.
• Natančno preberite in upoštevajte vse predpise za
preprečevanje nezgod, ki veljajo na mestu, kjer napravo
uporabljate; upoštevajte tudi vsa ostala splošno veljavna
varnostna pravila in predpise.
• Pred uporabo naprave preglejte njen varnostni sistem.
Prepričajte se, da tudi lažje poškodovani ali opraskani
deli delujejo brezhibno.
• Vse pokvarjene in obrabljene dele in varnostno opremo
mora zamenjati strokovnjak pooblaščenega servisa, če
v tem navodilu ni navedeno drugače.
• Poškodovana stikala naj zamenjajo v servisni delavnici.
• Ta naprava je izdelana v skladu z vsemi ustreznimi
varnostnimi napotki. Napravo lahko popravlja le ustrezno
usposobljen električar pooblaščene servisne delavnice,
ki mora uporabiti le originalne rezervne dele. Pri
neupoštevanju tega priporočila obstaja nevarnost
poškodb.
Ravnanje v primeru nezgode
Nudite ustrezno prvo pomoč v primeru poškodb in čimprej
pokličite zdravnika na pomoč. Poškodovano osebo zaščitite
pred drugimi poškodbami in pustite jo mirovati.
Za primer poškodb mora biti na delovnem mestu vedno
nameščena omarica prve pomoči v skladu DIN 13164.
Material, ki ga porabite, nemudoma zamenjajte z novim.
Pri klicu pomoči vedno obvestite o naslednjih podatkih:
1. Kraj nezgode
2. Vrsta nezgode
3. Število ranjenih oseb
4. Vrsta poškodbe
Legenda simbolov
V tem navodilu za uporabo in/ali na stroju se nahajajo sledeči
ideogrami:
Varnost naprave:
Izdelek odgovarja ustreznim
standardom Evropske
Prepovedi:
Opozorilo:
skupnosti
Splošna prepoved (velja
skupaj z drugim
ideogramom)
Opozorilo/previdno
Ukazi:
Pred uporabo natančno
preberite navodilo za uporabo
Varovanje bivanjskega okolja:
Ne mečite odpadkov v naravo;
odstranite jih skladno s
predpisi.
Naprava je opremljena z
zaščitno izolacijo
Razred zaščite II
Ne uporabljajte na dežju
Opozorilo pred nevarnostjo
električnega udara.
Nosite zaščitne rokavice
Kartonski ovitek je
namenjen za reciklažo,
odnesite ga v surovino.
Poškodovane in/ali
odstranjene električne ali
elektronske naprave odvrzite
na ustrezno mesto ali odnesite
v surovino.
Ovitek:
Zavarujte pred vlago. Ovitek mora stati navpično.
Tehnični podatki:
Priključek Teža
Uporaba stroja v skladu z namenom
Profesionalni polnilnik za zagon s funkcijama običajno in hitro
polnjenje ter vžig motorja v vozilu. Naprava je lahko
prenosljiva zahvaljujoč velikim kolesom, s katerimi je
opremljena.
Page 44

44
Sekundarna nevarnost zaradi električnega udara
Neposreden stik z električnim tokom
Poškodovan kabel ali vtič je nevaren zaradi morebitnega
električnega udara.
Poškodovan kabel ali vtič naj vedno zamenja
strokovnjak. Napravo uporabljajte le, če je priključena oz.
ustrezno zaščitena s tokovno varovalko.
Posredni stik z električnim tokom
Poškodbe s prevodnimi deli v odprtih ali poškodovanih
električnih oz. konstrukcijskih delih.
Pri vzdrževanju napravo vedno izklopite od vira napetosti.
Uporabljajte samo s skupaj priključki, ki so opremljeni s
tokovno varovalko.
Neprimerna lokalna razsvetljava
V premalo osvetljenem prostoru obstaja večja nevarnost
poškodb.
Pri delu z napravo vedno poskrbite, da bo delovni prostor
dobro osvetljen.
Odstranjevanje
Napotke za odstranjevanje opisujejo ideogrami na orodju oz.
na njegovem ovitku. Njihov pomen je razložen v poglavju
»Oznake«.
Način odstranjevanja ovitka
Ovitek ščiti napravo, da se med transportom ne poškoduje.
Embalažni material proizvajalec izbira ob upoštevanju
bivanjskega okolja – torej računa z možno ponovno reciklažo.
Z reciklažo materiala varčujemo s surovino in zmanjšujemo
količine odpadkov. Deli ovitka (npr. folije , Styropor
lahko nevarni za otroke. Nevarnost zadušitve! Dele ovitka
shranjujte izven dosega majhnih otrok; čimprej jih odstranite.
®
), so
V okviru EU opozarjajo ti simboli na to, da se ta
produkt ne sme odstranjevati enako kot hišni
odpadki. Stare naprave vsebujejo dragocene
materiale, ki se lahko uporabijo za reciklažo;
bivanjsko okolje in zdravje ljudi zaradi nekontroliranega
odlaganja tovrstnih odpadkov. Dotrajano napravo odstranite
na ustrezen način, ali pa jo odnesite na mesto, kjer ste jo
kupili. Le tako bodo določeni materiali lahko ponovno
uporabljeni.
Zahteve, ki jih mora spolnjevati uporabnik
Pred vsako uporabo naprave natančno preberite ta navodila
za uporabo.
Izobrazba
Razen podrobnega urjenja, ki ga organizira izkušena oseba,
ni potrebno nobeno dodatno znanje za uporabo te naprave.
Minimalna starost
Napravo lahko uporabljajo le osebe, ki so napolnile 16 let
starosti. Izjema so mladoletniki, ki se pripravljajo za poklic da
bi dosegli znanje, ki mora biti pod nadzorom strokovnega
inštruktorja.
Šolanje
Za pravilno uporabo so potrebni le ustrezni napotki
inštruktorja. Posebno šolanje zato ni potrebno.
oddajajte jih v surovino, da ne onesnažujete
Tehnični podatki
Priključek: 230 V/50-60 Hz
Napetost ob polnjenju/
zagonu: 12 V / 24 V nastavljivo
Učinkoviti polnilni tok: 60 A
Aritm. polnilni tok: 40 A
Tok ob zagonu približno: 0 V: 390 A/1,5 V: 240 A
Največja zmogljivost mreže: 8 kW
Min. varovanje: 16 A
Nominalna zmogljivost: 20-1000 Ah
Zagon akumulatorja: 35-50 Ah (brez poprejšnjega
polnjenja) 65-100 Ah (s
poprejšnjim polnjenjem)
Teža: 16 kg
Dimenzije (mm): 330 x 250 x 600
Transport in skladiščenje
• Preden napravo shranite za dalj časa, jo temeljito
očistite.
• Napravo pokrijte in zaščitite pred škodljivimi podnebnimi
vplivi s plastičnim ali kartonskim pokrivalom oz.
podobnimi materiali.
Montaža in prva uvedba v pogon (slika 4+5+6)
Privijte ročaj kot kaže slika 5.
Sedaj napeljite os skozi polnilnik (slika 1/2). Nato montirajte
varnostne obročke, ki so priloženi izdelku. Nato na gred
namestite še kolesa (slika 1/1) ter jih fiksirajte z varovalnimi
obročki (slika 6).
Na kolesa namestite pokrove koles.
Za konec privijte še s pomočjo vijakov (slika 1/3) podstavek
(slika 1/4).
Rokovanje
Pred vsakršnim spreminjanjem in nastavljanjem
naprave izvlecite vtič iz vtičnice.
Funkcija polnjenja (slika 3)
• Polnilnik priključite na akumulator, ki ga polnite.
• Črn kabel vedno najprej priključite na negativen pol,
šele potem rdeč kabel s sponko na pozitiven pol.
•
tokokroga v vozilu.
• Polnilnik vedno nastavite na najnižjo stopnjo polnjenja
(min/1) (slika 3/8)
• Sedaj priključite vtič v vtičnico in polnilno zmogljivost
postopoma dvigajte, dokler se ne prikaže tok za
polnjenje, ki odgovarja približno 10 % zmogljivosti
akumulatorja.
• V kolikor polnilni tok pada, lahko stopnjo polnjenja
dvigate. (slika 3/7)
• Najkasneje 3 do 5 ur po končanem polnjenju izključite
polnilec in akumulator priključite.
•
toka ne pokaže popolne ničle.
Čas polnjenja
• Čas polnjenja je vedno odvisen od stanja akumulatorja
(skoraj poln, poln do polovica eli povsem prazen).
• Za proces regeneracije akumulatorja zadostujejo 2 – 4
ure polnjenja. Za polno zmogljivost akumulatorja je
potrebnih 8 do 10 ur.
•
polnjenja, ki znaša 10 ur.
Pred polnjenjem akumulator izključite iz
Po končanem polnjenju indikacija polnilnega
Ne prekoračujte pa maksimalnega časa
Page 45

45
Pomoč ob zagonu
• POZOR! Ob zagonu lahko pride do povečanja napetosti,
ki bi lahko povzročilo poškodbe armaturnih elementov v
vozilu. Posvetujte se z avto-mehanikom.
• Akumulator priključite po navodilih v poglavju Polnjenje
in ga pustite, da bo priključenega na vozilo.
• Motor v vozilu prižigajte še z eno osebo.
• Polnilec nastavite na največjo zmogljivost:
Stikalna stopnja 2 (slika 3/7) in „BOOST“ (slika 3/8).
• Prva oseba pritiska na stikalo Zagon na polnilniku. (slika
3/9) Druga oseba naj takoj vžiga vozilo.
• Ko motor vozila steče, takoj izklopite vžig preko naprave.
9-10 Sek.
• V kolikor se motor ne prižge takoj, počakajte približno
pet minut, da se naprava ohladi.
Namig:
V kolikor boste akumulator poprej polnili 10-15
minut, bo potrebno veliko manj toka, potrebnega za
zagon.
Opozorilo: V kolikor prekoračite maksimalen čas
zagona 10 sekund, lahko pregorijo varovalke, oziroma se
poškoduje vozilo!
Opozorilo: Električna pola se ne smeta med seboj
dotikati.
Opozorilo: Polnilnik je opremljen z varovalko proti
preobremenitvi.
Pomembno: Zamenjava topljivih varovalk
(slika 3/5) za druge, ki se razlikujejo od topljivih varovalk,
ki se uporabljajo pri napravah, lahko povzroči škode ali
poškodbe oseb.
Topljive varovalke lahko zamenjate šele, ko izvlečete vtič
iz električne vtičnice.
Varnostni napotki za uporabnika
• Preden napravo vključite, morajo biti vsi njeni varnostni
elementi pravilno montirani in vsak na svojem mestu.
• Nikoli ne prižigajte vozila, če je akumulator prazen,
oziroma poškodovan, ker s tem lahko poškodujete
polnilec.
• V kolikor prižigate akumulator v režimu polnjenja, lahko
namesto »pomoči ob zagonu« pride do poškodbe na
ampermetru in do zagona zaščite proti preobremenitvi.
• Preden pritisnete na glavno stikalo se prepričajte, da je
polnilec pravilno priključen.
• Opozorilo! Za morebitna vprašanja ali če dvomite, se
raje vedno posvetujte s strokovnjakom v pooblaščenem
servisnem centru.
• Uporabljajte napravo šele, ko natančno preberete ta
navodila za uporabo.
• Upoštevajte varnostne napotke, ki so navedeni na
ovitku.
• Do drugih oseb se vedno obnašajte odgovorno.
Navodilo »korak po koraku«
Polnjenje
1. Priključite polnilec.
2. Nastavite funkcijo za polnjenje (min/1).(slika 3/7)
3. Polnilnik vključite.
4. Priključite električni kabel.
5. Akumulator se polni. (maks. 10 ur)
Zagon
1. Priključite polnilec.
2. Nastavite funkcijo za zagon. (slika 3/9).
3. Priključite električni kabel.
4. Polnilec vključite in nato takoj zaženite vozilo.
5. Takoj, ko se motor prižge, prekinite povezavo med
polnilcem in akumulatorjem.
Okvare – vzroki – način odpravljanja
POZOR: NAJPREJ PREVERITE VAROVALKO PROTI
PREGREVANJU!
Stikalo zaščite proti preobremenitvi:
1. Rdeče klešče so za pozitivni pol (+) črne klešče pa za
negativni pol (-).
2. Prekinite stik in preverite varovalke.
3. Izberite nižjo stopnjo polnjenja.
4. V kolikor je zmogljivost akumulatorja previsoka,
priporočamo da ga napolni avtoelektričar in nato s
pogosto uporabo polnilca vzdržujte polnost akumulatorja
ali nabavite napravo večje zmogljivosti.
Akumulator naj pregleda strokovnjak. Akumulator
zamenjajte z novim.
Premočen polnilni tok na začetku polnjenja.
1. Opozorilo: če je polnilni tok čez 15 do 20 minut previsok,
to lahko pomeni, da se akumulator ponovno prazni.
Akumulator naj pregleda strokovnjak. Akumulator
zamenjajte z novim.
Prešibak polnilni tok.
1. Po potrebi polnilni tok nastavite na višjo vrednost
polnjenja.
Pokazatelj ampermetra se dotika najnižje točke skale.
1. Akumulator naj pregleda strokovnjak. Akumulator
zamenjajte z novim.
2. Omrežna napetost mora odgovarjati predvideni
napetosti.
Ampermeter ne deluje.
1. Priključke očistite in jih ponovno namestite.
2. Napravo naj pregleda strokovnjak. Akumulator
zamenjajte z novim.
3. Preverite delovanje polnilca na napolnjenem
akumulatorju v brezhibnem stanju.
Prečna preobremenitev
1. Akumulator ni pravilno priključen.
2. Klešče se očitno posredno ali neposredno med seboj
dotikajo.
3. Akumulator je izpraznjen do konca.
4. Akumulator je prazen in ima višjo zmogljivost od
zmogljivosti polnilnika.
5. Akumulator je v okvari ali poškodovan (npr. zaradi
kratkega stika notranjih celic).
Pregledi in vzdrževanje
Pred vsakim poseganjem izklopite napravo in prekinite
tokokrog.
• Plastične dele čistite le z navlaženo krpo. Plastike pa ne
čistite s čistilnimi sredstvi, raztopili ali ostrimi predmeti.
• Po vsaki uporabi očistite zračne odprtine naprave s
ščetko ali čopičem, da bodo vedno čiste in prehodne za
zrak.
Vse gibljive kovinske dele redno mažite z ustreznim
mazivom.
Varnostni napotki za preglede in vzdrževanje
Po vsaki uporabi
Prah očistite iz prezračevalnih odprtin in premičnih delov.
Redno
Premične kovinske dele naprave mažite z oljem (univerzalno
olje)
Redno
Pri vseh vijakih preverite, če so pravilno priviti.
Page 46

Servis
46
Ali imate tehnična vprašanja?: Reklamacijo? Ali
potrebujete rezervne dele ali nova navodila za uporabo?
Na naših spletnih straneh www.guede.com v poglavju
Servis Vam bomo pomagali hitro, učinkovito in brez odvečne
birokracije. Pomagajte nam in mi bomo pomagali vam. Da bi
vašo napravo v primeru reklamacije lahko identificirali,
potrebujemo njeno proizvodno številko, številko pozicije
asortimana ter letnik izdelave. Vse te podatke boste našli na
tipski etiketi izdelka. Da imate vse navedene informacije pri
roki, jih prosim vnesite tu:
Serijska številka:
Številka izdelka:
Leto izdelave:
Telefon: +49 (0) 79 04 / 700-360
Telefaks: +49 (0) 79 04 / 700-51999
E-pošta: support@ts.guede.com
ES IZJAVA O ISTOVETNOSTI
S tem izjavljamo,
Güde GmbH & Co. KG
Birkichstrasse 6
D-74549 Wolpertshausen
Nemčija
da koncepcija in zgradba spodaj navedenih naprav v
izvedbah, ki jih uvajamo na trg, ustreza vsem osnovnim
predpisom in določilom smernic ES za varnost in higieno.
V primeru spremembe naprave, o kateri se niste
posvetovali z nami, ta izjava izgubi svojo veljavnost.
Oznaka naprave: POLNILNIK AKUMULATORJEV V 421 C
Izdelek št.: 85074
Uporabne smernice ES:
2006/95/EG
2004/108/EG
Uporabljeni usklajeni standardi:
EN 60335-2-29:2004
EN 60335-1/A14:2010
EN 62233:2008
EN 55014-1:2006
EN 55014-2/A2:2008
EN 61000-3-2:2006
EN 61000-3-3:2008
EN 61000-3-11:2000
Datum/podpis proizvajalca: 10.08.2011
Podatki o podpisniku: direktor
Gospod Arnold
Tehnična dokumentacija: J. Bürkle FBL; QS
Page 47

HR
47
Prije prvog stavljanja uređaja u rad neophodno je pročitati sve informacije i upute navedene u ovim uputama
za upotrebu.
A.V. 2 Dodatno tiskani materijali, i djelomične dopune, zahtijevaju odobrenje. Pridržano pravo na tehničke izmjene.
Uređaj
Punjač za akumulator V 421 C
Oprema (serijska)
Priključni profi kabel za punjenje akumulatora, izolirana
kliješta, ampermetar, zaštita od zamjene polova, toplotni
osigurač, dodatni osigurač 50 A.
Područje upotrebe:
Punjač za profesionalnu uporabu za normalno i brzo punjenje
akumulatora i startanje vozila. Zahvaljujući kotačima postolja
punjači se mogu lako premještati.
Opseg isporuke (Slika 1+2)
1. Kotači
2. Rješenje
3. Vijci
4. Naslonska nogara
5. Štitnici kotača
6. Vijci
7. Rukohvat
8. Punjač akumulatora
Popis uređaja (vidi sliku 3)
1. Prekidač za uklj./isklj.
2. Priključak 12 V
3. Uzemljenje
4. Priključak 24 V
5. Topljivi osigurač
6. Ampermetar
7. Stupanj prekidača 1 + 2
8. Punjenje min - maks
9. Punjenje odnosno startanje akumulatora
Jamstvo
Jamstvo se odnosi samo na nedostatke, koji su nastali zbog
kvarnog materijala ili putem proizvodnje. Neophodno je, da se
prilikom reklamacije dopremi i račun obilježen datumom
prodaje. Jamstvo ne pokriva štete nastale uslijed nestručnog
korištenja kao što je na primjer preopterećenje uređaja,
primjena sile, oštećenje uslijed vanjskih utjecaja ili stranih
tijela i predmeta. Jamstvo ne pokriva niti na štete nastale
uslijed nepoštivanja naputka za upotrebu odnosno uobičajeno
habanje.
Opće upute za sigurnost na radu
Prije prve uporabe uređaja detaljno pročitajte ove upute
za uporabu. U slučaju bilo kakvih sumnja ili poteškoća u vezi
instalacije i rukovanja sa ovim uređajem obratite se
proizvođaču (Odjelu za servis.
PRIDRŽAVAJTE SE SLIJEDEĆIH UPUTA RADI
OSIGURANJA VISOKOG STUPNJA SIGURNOSTI:
Upozorenje: Uređaj se smije koristiti samo ako je
opremljen strujnom zaštitom.
UPOZORENJE!
• Održavajte radno mjesto u urednom i čistom stanju.
Nered na radnom mjestu i radnom stolu povećavaju
opasnost od nezgoda i ozljeda pri radu.
• Pazite na radne uvjete u sredini u kojoj radite.
Električne alate i strojeve za obradu materijala nemojte
koristiti u vlažnoj ili mokroj sredini. Prostorije moraju biti
dobro osvijetljene. Električna oprema ne smije biti
izložena kiši niti vlažnom zraku. Ne uključujte ovu
opremu u blizini zapaljivih tečnosti ili plinova.
• Spriječite pristup neovlaštenih osoba stroju.
Posjetioci i sve prisutne osobe, a posebno djeca te
bolesne ili slabije osobe moraju se zadržavati u dovoljnoj
udaljenosti od mjesta na kojem radite sa uređajem.
• Osigurajte da svi alati budu uredno pohranjeni.
Uređaj i alate, koje ne koristite, uvijek stavite na sigurno
mjesto, van dohvata nepozvanih osoba.
• Pazite na električni kabao. Ne vucite za kabao. Ako
želite izvaditi utikač kabla iz utičnice, nemojte povlačiti
kabel već samo utikač. Priključni kabel za napajanje
mora biti uvijek smješten u dovoljnoj udaljenosti od
izvora topline i oštrih ivica.
• Spriječite slučajno nenamjerno uključivanje uređaja.
Prije stavljanja utikača u utičnicu provjerite da je stroj
isključen pritiskom na prekidač.
• U vanjskoj sredini koristite specijalne produžne
kablove. Za vanjsku upotrebu uređaja su neophodni
produžni kablovi koji su prikladni za ovu primjenu a
su na odgovarajući način označeni.
• Budite st
alno oprezni. Uvijek pazite što radite.
Razmišljate o svome radu. Nikad ne radite sa električnim
uređajima ako ste umorni.
• Pazite na oštećene dijelove uređaja. Prije uporabe
uređaj pregledajte. Jesu neki dijelovi možda oštećeni? U
slučaju lakog oštećenja dobro razmislite da li će uređaj
ispravno i besprijekorno funkcionirati s takvim
oštećenjem.
• Spriječite ozljede uslijed strujnog udara. Izbjegavajte
svaki kontakt Vašeg tijela sa uzemljenim predmetima,
npr. sa vodovodnim cjevovodom, grijačima, štednjacima
i hladnjacima itd.
• Koristite samo odobrene dijelove. Kod održavanja i
popravaka uređaja koristite samo originalne rezervne
dijelove. U vezi rezervnih dijelova obratite se ovlaštenom
servisu.
• Upozorenje! Upotreba pribora i priključnih dijelova koji
nisu u ovom naputku izričito preporučeni za upotrebu,
može ozbiljno ugroziti osobe i objekte.
Sigurnosne upute za prvo stavljanje u rad
- Prije podešavanja, servisiranja ili održavanja stroja,
izvucite utikač iz utičnice.
Punjač priključite na mrežu tek nakon podešavanja
svih parametara i provjere ispravnosti priključka stezaljki.
- Nakon raspakiranja i uklanjanja pakiranja provjerite da li
su uređaj i svi njegovi dijelovi u besprijekornom
tehničkom stanju.
- Potpuno odmotajte priključni kabel za dovod električne
struje i položite ga tako da ne bi moglo doći do
međusobnog dodira stezaljki.
- Prema potrebi koristite produžni kabel; pritom provjerite
da presjek produžnog kabla odgovara presjeku mrežnog
kabla; nemojte koristiti kablove manjeg presjeka.
- Priključna kliješta, stezaljke i gornju površinu
akumulatora održavajte u savršeno čistom stanju; prema
potrebi očistite stezaljke akumulatora žičanom četkicom;
time ćete osigurati dobar električni kontakt i veću učinak
punjenja.
- Pazite na slučajnu zamjenu polova priključaka!
( (-) crni; (+) crveni )
- Napon punjača mora biti podudaran sa nazivnim
naponom navedenim na akumulatoru; ova vrijednost
odgovara broju članaka akumulatora x dva
(3 članka = 6 V; 6 članaka = 12 V; 12 članaka = 24 V).
- Prije punjenja uređaj instalirajte tako da bude osiguran
stabilan položaj i nesmetano strujanje zraka preko
otvora za ventilaciju. Neophodno je osigurati
odgovarajuće hlađenje uređaja.
- Ne punite istovrjemeno više baterija ili akumulatora.
koji
Page 48

48
- Čepove akumulatora skinite samo ako ste prethodno
očistili stezaljke da biste spriječili padanje prašine i
nečistoća u unutrašnjost akumulatora, i tijekom punjenja
akumulator održavajte u čistom stanju.
- Osigurajte da razina elektrolita bude najmanje 4 do 5
mm iznad ploče; prema potrebi dopunite destiliranu vodu
koju možete nabaviti u prodavaonicama.
1. Tijekom faze punjenja dolazi do nastanka
eksplozivnih gasova, zbog toga je zabranjeno
prilikom upotrebe ovog uređaja pušiti i manipulirati s
otvorenom vatrom odnosno s alatima kod kojih
dolazi do iskrenja.
2.
Akumulatore punite samo u prostorijama s
dobrim provjetravanjem; strogo je zabranjeno
koristiti punjač za punjenje akumulatora u vozilu ili
ispod zatvorenog poklopca motora.
3. Nikad ne punite zajedno standardne akumulatore i
akumulatore bez održavanja.
4. Nikada ne punite baterije za jednokratnu uporabu.
5. Iza uređaja mora ostati dovoljno mjesta za
provjetravanje.
6. Pridržavajte se uputa proizvođača.
7. Provjeravajte stanje kiseline u akumulatoru.
8. Uvijek provjeravajte besprijekorno stanje mrežnog kabla
i učvrsnog kabla. Oštećeni mrežni kabel za napajanje
mora biti odmah zamijenjen novim kablom, i to
isključivo od strane stručno osposobljene osobe.
9. Stroj ne smije biti izložen djelovanju klimatskih
uticaja, kiše niti snijega.
10. Nikad ne radite sa električnim uređajima ako ste bosi.
Nikad ne dirajte uređaj mokrim ili vlažnim rukama niti
nogama.
11. Utikač nikad ne vucite za kabel.
12. Uređaj ni u kom slučaju ne smiju koristiti djeca niti
neovlaštene osobe.
Nikada ne ostavljajte uključeni uređaj bez nadzora, u
suprotnom slučaju može stroj uzrokovati ozljede i štete.
• Prilikom popravaka sigurnosnih ili zaštitnih elemenata
neophodno je vratiti odnosno montirati ove elemente
natrag odmah nakon popravka.
• Neophodno je poznavati i poštivati propise za prevenciju
ozljeda koji su na snazi u konkretnom mjestu korištenja
uređaja, te sva opće priznata pravila sigurnosti na radu.
• Prije početka rada sa uređajem neophodno je provjeriti
sve sigurnosne elemente. Provjerite funkcionalnost
elemenata koji izgledaju da su malo oštećeni.
• Ako u ovom naputku nije drukčije određeno, oštećene
dijelove i sigurnosne/zaštitne elemente smije popravljati
odnosno mijenjati isključivo ovlašteni stručni servis.
• Oštećene sklopke uređaja odnesite na popravak u
autorizirani servis.
• Ovaj stroj udovoljava svim odgovarajućim zahtjevima na
sigurnost uređaja. Popravke uređaja smiju vršiti
isključivo stručno osposobljeni električari u autoriziranim
servisima uz upotrebu originalnih rezervnih dijelova. U
slučaju nepoštivanja ove odredbe postoji opasnost od
ozljeda.
Postupak u slučaju nezgode
U slučaju ozljeda pružite ozlijeđenoj osobi prvu pomoć i što
najbrže zatražite pomoć liječnika.
Ozlijeđenu osobu štitite od daljih ozljeda i čuvajte je u miru.
Za slučaj ozljeda na radnom mjestu uvijek treba biti na
raspolaganju priručna ljekarna prema standardu
DIN13164. Primijenjeni materijal iz priručne ljekarne treba
odmah dopuniti.
U slučaju poziva hitne pomoći navedite slijedeće
informacije:
1. Mjesto nezgode
2. Vrsta nezgode
3. Broj ranjenih osoba.
4. Vrsta oštete
Značenje simbola
U ovom naputku i/ili na stroju koriste se slijedeći simboli ideogrami:
Sigurnost proizvoda:
Proizvod ispunjava
odgovarajuće norme
Europske zajednice.
Uređaj je opremljen zaštitnom
zaštitna klasa II
izolacijom
Zabrane:
Opći znak «zabranjeno»
(zajedno sa drugim ideogramom)
Ne upotrebljavati ako pada kiša
Upozorenje:
Upozorenje/Pažnja
Upozorenje na opasnost od
ozljeda uslijed strujnog udara
Naredbe:
Prije rada sa strojem pažljivo
pročitajte ovaj naputak za
uporabu.
Upotrebljavajte zaštitne rukavice
Zaštita životne sredine:
Otpad ne bacajte u životnu
sredinu, ali ga redovito
likvidirajte.
Ambalažu od ljepenke odnesite
na recikliranje u odgovarajući
centar za skupljanje otpada.
Oštećene i/ili likvidirane
električne odnosno elektronske
uređaje treba odnijeti u centar za
skupljanje otpada ove vrste.
Ambalaža:
Čuvajte od utjecaja vlage
Tehnički podaci:
Ambalaža mora biti okrenuta
Priključak Težina
Upotreba uređaja sukladno njegovoj namjeni
Profesionalni punjač za standardno i brzo punjenje te paljenje
motora u vozilu. Mobilnost zahvaljujući velikim kotačima.
Sekundarna opasnost od električkog udara
Neposredan kontakt sa dijelovima pod naponom
Oštećen kabao ili utikač može dovesti do udara
električnom strujom.
Oštećene kablove ili utikače mora zamijeniti stručnjak.
Uređaj koristite samo ako je priključena zaštitna strujna
sklopka (RCD).
Neposredan kontakt sa el. strujom.
Ozljede uslijed kontakta s vodljivim dijelovima kod
otvorenih električnih dijelova ili konstrukcijskih dijelova u
kvaru.
prema gore
Page 49

49
Prije početka radova na održavanju uređaja uvijek odspojite
uređaj od dovoda električne struje. Uređaj smije biti priključen
samo na priključke opremljene strujnom zaštitom.
Neodgovarajuće mjesno osvjetljenje.
Nedostatno osvjetljenje predstavlja veliki sigurnosni
rizik.
Prilikom rada sa aparatom osigurajte uvijek dostatno
osvjetljenje.
Likvidacija
Naputci za likvidaciju izraženi su ideogramima, koji se nalaze
na uređaju odnosno na ambalaži. Popis pojedinih značenja
ćete naći u poglavlju «Oznake na uređaju».
Likvidacija transportne ambalaže
Ambalaža štiti uređaj od oštećenja tijekom prijevoza.
Ambalaža je obično odabrana s obzirom na zaštitu okoliša i
kasniju likvidaciju pa se može reciklirati. Vraćanjem ambalaže
u ciklus reciklaže i proizvodnje štedite sirovine i smanjujete
količinu otpada. Dijelovi ambalaže (npr. folije Styropor®)
mogu biti opasne za djecu. Postoji opasnost od ugušenja!
Dijelove ambalaže čuvajte van dosega djece i što prije
likvidirajte.
U okviru Europske unije ovi simboli upozoravaju,
da se ovaj produkt ne smije bacati među kućni
otpad. Stari uređaji sadržavaju vrijedne materijale
koji se mogu reciklirati – zbog toga ih odnesite u
ljudskog zdravlja i spriječite nekontrolirano odlaganje otpada
ove vrste u prirodi. Stari uređaj likvidirajte u centru za
skupljanje otpada ili ga pošaljite u prodavaonicu u kojoj ste ga
kupili. Time ćete omogućiti ponovnu upotrebu nekih materijala
sadržanih u ovim uređajima.
Preporuke prije upotrebe
Prije početka rada, neophodno je temeljito pročitati ove upute
za uporabu.
Kvalifikacija
Osim detaljne upute od strane stručnjaka u vezi korištenja
ovog uređaja nije potrebna druga kvalifikacija.
Minimalna starost osoblja stroja
Sa uređajem smiju raditi samo osobe koje su napunile 16
godina života. Iznimka jest samo korištenje uređaja od strane
maloljetnih osoba u sklopu stjecanja stručne prakse i
pripreme za zanimanje u svrhu stjecanja stručne spreme pod
nadzorom iskusnog instruktora.
Obuka
Korištenje uređaja zahtijeva samo odgovarajuću pouku.
Specijalna obuka nije neophodna.
Tehnički podaci
Priključak: 230 V/50-60 Hz
Napon punjenja
prilikom starta: 12 V / 24 V podesivo
Efikasna struja punjenja: 60 A
Aritm. struja punjenja: 40 A
Struja za stavljanje u pogon ca 0 V: 390 A/1,5 V: 240 A
Maksimalna snaga mreže: 8 kW
Min. osiguranje: 16 A
Nominalni kapacitet: 20-1000 Ah
Start akumulatora: 35-50 Ah (bez prethodnog
punjenja) 65-100 Ah (s
prethodnim punjenjem)
Težina: 16 kg
Dimenzije u mm: 330 x 250 x 600
centar za skupljanje otpada radi zaštite okoliša i
Transport i skladištenje
• Ako nećete uređaj dulje vrijeme koristiti, potrebno je
dobro očistiti sve njegove dijelove.
• Uređaj štitite od vremenskih prilika plastičnom plahtom,
kartonom ili sličnim materijalima.
Montaža i prvo stavljanje u pogon (slika 4+5+6)
Učvrstite rukohvat prema (slika 5.
Sada namjestite punjač kroz osovinu (slika 1/2). Zatim
montirajte sigurnosne prstene koji čine sastavni dio isporuke.
Sada na osovinu stavite kotače (slika br. 1/1) i osigurajte ih
sigurnosnim prstenima (slika br. 6).
Na kotače stavite kape.
Na kraj navijte nogu (slika br. 1/4) pomoću isporučenih
vijaka (slika br. 1/3).
Rukovanje
Prije podešavanja i namještanja odspojite punjač od
izvora napajanja.
Funkcija punjenja (slika 3)
• Priključite punjač na akumulator.
• Prvo je potrebno priključiti crni kabel na negativan pol, a
tek poslije priključiti drugi kabel na pozitivan pol.
•
Prije punjenja akumulator potpuno odspojite od
vozila.
• Punjač podesite na najniži stupanj punjenja (min/1) (slika
3/8)
• Sada stavite utikač priključnog kabla u utičnicu i lagano
povećavajte stupanj odnosno intenzitet punjenja
akumulatora sve dok ne bude prikazana struja punjenja
koja odgovara cca 10 % kapaciteta akumulatora.
• Kod pada struje punjenja moguće je povećavati stupnjeve
punjenja. (slika 3/7)
• Najkasnije 3-5 sati nakon završetka punjenja isključite
akumulator.
•
Indikator struje punjenja nakon završetka
punjenja akumulatora ne pokazuje nulu.
Vrijeme punjenja baterije
• Vrijeme trajanja punjenja akumulatora je uvijek ovisno o
stanju napunjenosti akumulatora (gotovo napunjen,
napunjen do polovine, potpuno prazan akumulator).
• Za regeneraciju akumulatora dovoljno je 2-4 sata.
Akumulator je potpuno napunjen nakon 8-10 sati
punjenja.
•
Maksimalno vrijeme punjenja akumulatora ne bi
trebalo prekoračiti 10 sati.
Pomoć prilikom startanja
• UPOZORENJE! Kod startanja može doći do nastanka
prenapona koji može oštetiti elektronske elemente u
instrumentnoj ploči Vašeg vozila. Posavjetujte se s
automehaničarom.
• Akumulator priključite prema uputama navedenim u
poglavlju Punjenje i ostavite ga priključen na vozilo
pomoću stezaljki!
• Kod startanja vozila potrebno je da budu prisutne
najmanje dvije osobe.
• Punjač podesite na maksimalnu snagu:
Stupanj priključivanja 2 (slika br. 3/7) i „BOOST“ (slika
3/8).
• Prva osoba pritisne prekidač za startanje na punjaču.
• Čim se motor vozila upali, odmah prekinite postupak
• Nakon neuspješnog startanja pričekajte oko 5 minuta
(slika 3/9) Druga osoba odmah pokreće postupak
paljenja motora.
startanja, maks. 9-10 Sek.
dok se uređaj ohladi.
Page 50

50
Savijet: Ako bateriju prije toga punite 10-15 minuta, bit će
Vam potrebna manja količina struje za startanje.
Upozorenje: Ukoliko prekoračite maksimalno vrijeme
startanja od 10 sekundi, to može uzrokovati uništenje
osigurača odnosno oštećenje vozila!
Upozorenje: Stezaljke ne smiju doći u dodir.
Upozorenje: Punjač je opremljen osiguračem protiv
preopterećenja.
Važno: Zamjena topljivih osigurača
(slika 3/5) drugim koji se razlikuju od rastalnih osigurača
koji se koriste u uređaju, može doći do materijalnih šteta
ili ozljeda osoba.
Prije zamjene rastalnih osigurača obavezno izvadite
utikač mrežnog kabla iz utičnice!
Sigurnosne upute za osoblje stroja
• Prije pokretanja uređaja moraju biti svi sigurnosni i
zaštitni elementi uređaja ispravno montirani na svom
mjestu.
• Zabranjeno je pokušati startati vozilo s praznim ili
oštećenim akumulatorom, u protivnom će doći do
oštećenja vozila.
• Ako budete pokušali startati akumulator u položaju
„punjenje“ umjesto „pomoć kod startanja“, može doći do
oštećenja ampermetra i aktiviranja zaštite od
preopterećenja.
• Prije pritiska na glavni prekidač provjerite da je punjač
pravilno priključen.
• Upozorenje! U slučaju bilo kakve sumnje prije početka
korištenja uređaja zatražite savjet stručnjaka u
ovlaštenom servisu.
• Prije prvog korištenja stroja pažljivo pročitajte naputak za
uporabu.
• Pridržavajte se svih sigurnosnih uputa navedenih u
naputku za uporabu.
• Pri radu se ponašajte odgovorno prema ostalim
osobama.
Upute «korak po korak»
Punjenje
1. Punjač priključite.
2. Podesite funkciju punjenja (min/1).(slika 3/7)
3. Punjač uključite.
4. Priključite el. kabao.
5. Akumulator se sprema za punjenje. Najviše 10 sati)
Stavljanje u rad
1. Punjač priključite.
2. Podesite funkciju stavljanja u rad. (slika 3/9)
3. Priključite el. kabao.
4. Uključite punjač akumulatora, a zatim odmah startajte
vozilo.
5. Čim se motor vozila upali, odmah prekinite startanje,
isključite punjač i odspojite od stezaljki.
Kvarovi – uzroci – otklanjanje kvarova
PAŽNJA: PRVO PROVJERITE TERMIČKE OSIGURAČE
ZA ZAŠTITU PROTIV PREGRIJAVANJA!
Gumb zaštite od preopterećenja:
1. Crvena kliješta priključite na pozitivan pol (+), a crna
kliješta na negativni pol (-).
2. Prekinite kontakt i provjerite osigurač.
3. Izaberite niži stupanj punjenja.
4. Ako je ulazna struja akumulatora previsoka, odnesite
akumulator na punjenje u ovlašteni servis i zatim čestim
korištenjem održavajte visoku razinu napunjenosti
akumulatora ili nabavite punjač većeg kapaciteta.
Odnesite akumulator u ovlašteni servis radi provjere.
Bateriju zamijenite novom.
Prejaka struja punjenja na samom početku punjenja
akumulatora.
1. Upozorenje: Ukoliko je struja punjenja previsoka i nakon
15 - 20 minuta punjenja, to može značiti da se
akumulator ispražnjava.
Odnesite akumulator u ovlašteni servis radi provjere.
Bateriju zamijenite novom.
Preniska struja punjenja.
1. Eventualno probajte podesiti regulator struje punjenja na
viši stupanj.
Pokazivač ampermetra je na nanižem stupnju na ljestvici.
1. Odnesite akumulator u ovlašteni servis radi provjere.
Bateriju zamijenite novom.
2. Mrežni napon mora biti podudaran sa naponom punjača
akumulatora.
Ampermetar ne pokazuje.
1. Očistite stezaljke i ponovo namjestite kliješta.
2. Odnesite akumulator u ovlašteni servis radi provjere.
Bateriju zamijenite novom.
3. Provjerite funkcioniranje punjača na napunjenom
akumulatoru koji je besprijekorno stanju.
Uzroci preopterećenja
1. Loš priključak između kliješta i akumulatora.
2. Dolazi do međusobnog dodira kliješta ili do njihovog
neizravnog dodira.
3. Akumulator je potpuno prazan.
4. Akumulator je potpuno prazan i njegov kapacitet je veći
od kapaciteta punjača.
5. Akumulator je u kvaru ili je oštećen (na primjer uslijed
kratkog spoja među unutarnjim elementima)
Pregledi i održavanje
Prije izvođenja bilo kakvih radova na ovom uređaju odspojite
utikač iz utičnice.
• Za čišćenje plastičnih dijelova koristite vlažnu krpu. Ne
koristite sredstva za čišćenje, otapala niti oštre šiljaste
predmete.
• Nakon završetka rada uklonite prašinu iz otvora za
provjetravanje i pokretnih dijelova stroja mekanom
četkom ili kistom.
Sve pokretne metalne dijelove stroja redovito
podmazujte uljem.
Sigurnosne upute za tehničke preglede i održavanje
Nakon svake upotrebe
Uklonite prašinu iz otvora za provjetravanje i pokretnih
dijelova.
Redovito
Podmažite pokretne metalne dijelove uljem (višenamjensko
ulje).
Redovito
Provjerite zategnutost svih vijaka, da li su pravilno fiksirani.
Servis
Da li imate tehnička pitanja ? Reklamaciju? Da li Vam
trebaju rezervni dijelovi ili upute za uporabu?
Na našim internet stranicama
www.guede.com u dijelu Servis,
pomoći ćemo Vam brzo i bez nepotrebne papirologije.
Pomognite nam da Vam možemo pomagati. Kako bismo
mogli vaš uređaj bolje identificirati, potreban nam je serijski
broj odnosno broj proizvoda i godina proizvodnje. Sve ove
podatke naći ćete na tipskoj pločici. Kako biste ove podatke
uvijek imali pri ruci, napišite je molim ovdje:
Serijski broj:
Proizvodni broj:
Godina proizvodnje:
Telefon: +49 (0) 79 04 / 700-360
Fax: +49 (0) 79 04 / 700-51999
E-mail: support@ts.guede.com
Page 51

51
ES IZJAVA O SUKLADNOSTI
Temeljem ove izjave, mi,
Güde GmbH & Co. KG
Birkichstraße 6
D-74549 Wolpertshausen
Njemačka
proglašavamo da dole navedeni uređaji, u pogledu njihove
koncepcije i konstrukcije kao i u pogledu izvedbi koje smo
uveli u promet, ispunjavaju odgovarajuće osnovne zahtjeve u
vezi sigurnosti i zdravlja prema smjernicama ES.
Ako dođe do izmjene uređaja bez naše suglasnosti,
ova Izjava postaje nevažećom.
Oznaka uređaja: PUNJAČ ZA AKUMULATOR V 421 C
Proizvodni broj: 85074
Primjenjive smjernice ES:
2006/95/EG
2004/108/EG
Primijenjeni harmonizirani standardi :
EN 60335-2-29:2004
EN 60335-1/A14:2010
EN 62233:2008
EN 55014-1:2006
EN 55014-2/A2:2008
EN 61000-3-2:2006
EN 61000-3-3:2008
EN 61000-3-11:2000
Datum/Potpis proizvođača: 10.08.2011
Podaci o potpisanoj osobi direktor
Gospodin Arnold
Tehnička dokumentacija: J. Bürkle FBL; QS
Page 52

BiH
52
A.V. 2 Dodatno štampani materijali, i djelomične dopune, podliježu odobrenju. Pridržana su prava na tehničke izmjene naših
Prije prvog stavljanja uređaja u pogon neophodno je pročitati sve informacije i uputstva navedena u ovom
Priručniku za upotrebu.
uređaja.
Uređaj
Punjač za akumulator V 421 C
Oprema (serijska)
Priključni profesionalni kabel za punjenje akumulatora,
izolirana kliješta, ampermetar, zaštita od zamjene polova,
toplotni i dodatni od osigurač 50 A.
Područje upotrebe:
Punjač za profesionalnu upotrebu za normalno i brzo punjenje
akumulatora i startanje motora vozila. Zahvaljujući kotačima
postolja punjači se mogu lako premještati.
Opseg isporuke (Slika 1+2)
1. Kotači
2. Rješenje
3. Vijci
4. Naslonska nogara
5. Štitnici kotača
6. Vijci
7. Rukohvat
8. Punjač akumulatora
Popis uređaja (vidi sliku 3)
1. Dugme za uklj./isklj.
2. Priključak 12 V
3. Uzemljenje
4. Priključak 24 V
5. Topljivi osigurač
6. Ampermetar
7. Stepen prekidača 1 + 2
8. Punjenje min - maks
9. Punjenje ili startanje pomoću akumulatora
Garancija
Garancija se odnosi samo na kvarove, koji su nastali zbog
lošeg materijala ili putem proizvodnje. Neophodno je, da se
prilikom reklamacije dopremi i račun označen datumom
prodaje. Garancija ne pokriva štete nastale zbog nestručne
upotrebe kao što je npr. preopterećenje uređaja, primjena
sile, štete nastale prilikom vanjskih utjecaja ili dodira stranih
tijela i predmeta. Garancija ne pokriva niti na štete nastale
zbog nepoštivanja uputstva za upotrebu odnosno uobičajeno
habanje.
Opšta uputstva za sigurnost na radu
Prije prve upotrebe uređaja pažljivo pročitajte ova
uputstva za korištenje. U slučaju bilo kakvih sumnji ili
poteškoća što se tiče namještanja i korištenja ovog uređaja
obratite se proizvođaču (Odjeljenju za servis).
PRIDRŽAVAJTE SE SLIJEDEĆIH UPUTSTAVA ZBOG
OBEZBJEĐENJA VISOKOG STUPNJA BEZBJEDNOSTI:
Upozorenje: Uređaj se može upotrebljavati samo
ukoliko je opremljen strujnom zaštitom.
UPOZORENJE!
• Radno mjesto mora biti uvijek u urednom i čistom
stanju. Nered na radilištu ili na stolu povećavaju
opasnost nesreća i ozljeda prilikom upotrebe.
• Pazite na radne uvjete u okolini gdje radite. Električne
aparate i uređaja za obrađivanje materijala ne koristite u
vlažnoj ili mokroj sredini. Prostorije moraju biti dobro
osvijetljene. Električna oprema ne smije biti izložena
kiši niti vlažnom zraku. Ne uključujte uređaj u blizini
zapaljivih tečnosti ili gasova.
• Spriječite pristup neovlaštenih lica stroju. Tuđa i sva
ostala prisutna lica, a posebno djeca i bolesne odnosno
slabije osobe moraju se zadržavati u dovoljnoj
udaljenosti od mjesta gdje se uređaj koristi.
• Obezbjedite da svi alati budu uredno sačuvani.
Uređaj i alate, koje ne upotrebljavate, uvijek stavite na
bezbjedno mjesto, van dohvata nepozvanih lica.
• Pazite na električni kabel. Ne vucite za kabel. Ukoliko
želite izvaditi utikač kabla iz utičnice, nemojte povlačiti
kabel nego direktno utikač. Električni kabel mora se
uvijek nalaziti na dovoljnoj udaljenosti od izvora topline i
oštrih rubova.
• Spriječite nenamjerno uključivanje uređaja. Prije
stavljanja utikača u utičnicu provjerite da je uređaj
isključen pomoću prekidača.
• U
va
njskoj sredini upotrebljavajte samo specijalne
produžne kablove. Za korištenje uređaja u vanjskoj
sredini neophodni su produžni kablovi, koji su prikladni
za ovu primjenu a koji su na označeni odgovarajući
način.
• Budite uvijek oprezni. Uvijek pazite na to što radite.
Razmišljate o svome radu. Nikad ne koristite električne
uređaje kada ste umorni.
• Pazite na oštećene dijelove. Prije upotrebe uređaj
pregledajte. Jesu neki dijelovi oštećeni? U slučaju
manjeg oštećenja dobro razmislite da li će uređaj
ispravno i besprijekorno funkcionisati s tim oštećenjem.
• Spriječite ozljede zbog strujnog udara! Izbjegavajte
svaki kontakt tijela sa uzemljenim predmetima, npr. sa
vodovodnim cjevovodom, grijačima, štednjacima i
hladnjacima.
• Upotrebljavajte samo odobrene dijelove. Prilikom
održavanja i popravaka uređaja upotrebljavajte samo
originalne dijelove. Što se tiče rezervnih dijelova
posavjetujte se sa radnicima autoriziranog servisa
• Upozorenje! Upotreba pribora i priključnih dijelova koji
nisu u ovim uputama izričito preporučeni za upotrebu,
može ozbiljno ugroziti osobe i objekte.
Bezbjednosna uputstva za prvo stavljanje u rad
- Prije svakog podešavanja, održavanja ili servisiranja
uređaja izvucite utikač iz utičnice.
Punjač priključite na mrežu tek poslije podešavanja
svih parametara i provjere ispravnosti priključka stezaljki.
- Poslije raspakiranja i uklanjanja omotača provjerite da li
su uređaj i svi njegovi dijelovi u dobrom tehničkom
stanju.
- Potpuno odmotajte električni kabel za priključak
električne struje i stavite ga tako kako ne bi moglo doći
do međusobnog kontakta između stezaljki.
- Prema potrebi upotrebljavajte produžni el. kabel;
provjerite da presjek produžnog kabla odgovara presjeku
mrežnog kabla; nemojte koristiti kablove manjeg
presjeka.
- Priključna kliješta, stezaljke i površine akumulatora
održavajte u čistom stanju; prema potrebi očistite
stezaljke akumulatora žičanom četkicom; time ćete
obezbjediti dobar električni kontakt i veći učinak
punjenja.
- Pazite na slučajnu zamjenu polova priključaka!
( (-) crni; (+) crveni )
- Napetost punjača mora biti podudarna sa nazivnom
napetošću navedenom na akumulatoru; ova vrijednost
Page 53

53
odgovara broju članaka akumulatora x dva
(3 članka = 6 V; 6 članaka = 12 V; 12 članaka = 24 V).
- Prije punjenja uređaj namjestite tako kako bi bio
obezbjeđen stabilan položaj i nesmetano strujanje
vazduha kroz otvore za ventilaciju. Neophodno je
obezbjediti odgovarajuće hlađenje uređaja.
- Ne punite istovrjemeno više akumulatora.
- Čepove akumulatora skinite samo ukoliko ste prethodno
očistili stezaljke kako biste spriječili padanje prašine i
nečistoća u unutrašnjost akumulatora, i u toku punjenja
akumulator održavajte u čistom stanju.
- Obezbjedite da razina elektrolita bude najmanje 4 do 5
mm iznad ploče; prema potrebi dopunite destiliranu vodu
koju možete nabaviti u prodavaonicama.
1. U fazi punjenja dolazi do nastanka eksplozivnih
gasova, zbog toga je zabranjeno prilikom upotrebe
ovog uređaja pušiti i rukovati s otvorenom vatrom
odnosno s alatima kod kojih dolazi do iskrenja.
2.
Akumulatore punite samo u prostorijama s
dobrim provjetravanjem; strogo je zabranjeno
upotrebljavati punjač za akumulatore u vozilu ili
ispod zatvorenog poklopca motora.
3. Nikad ne punite zajedno standardne akumulatore i
akumulatore bez održavanja.
4. Nikad ne punite akumulatore za jednokratnu
upotrebu.
5. Iza uređaja mora ostati dovoljno mjesta za
provjetravanje.
6. Pridržavajte se uputstava proizvođača.
7. Provjeravajte stanje kiseline u akumulatoru.
8. Uvijek provjeravajte besprijekorno stanje električnog
kabla i kabla za fiksiranje. Oštećeni električni kabel
mora biti odmah zamijenjen novim, i to isključivo od
strane stručno osposobljene osobe.
9. Uređaj ne smije biti izložen klimatskim uticanjima,
npr. kiši niti snijegu.
10. Nikad ne koristite električne uređaje kada ste bosi. Nikad
ne dirajte uređaj mokrim ili vlažnim rukama niti nogama.
11. Utikač nikad ne vucite za kabel.
12. Uređaj nikad ne smiju upotrebljavati djeca niti
neovlaštene osobe.
Nikada ne ostavljajte uključeni uređaj bez nadzora, u
suprotnom slučaju može uređaj uzrokovati ozljede i štete.
• Prilikom popravaka bezbjednosnih ili zaštitnih elemenata
neophodno je da vratite odnosno montirate ove
elemente nazad odmah poslije popravka.
• Važno je poznavati i poštivati propise za prevenciju
ozljeda koji su na snazi u konkretnom mjestu korištenja
uređaja, te sva opće priznata pravila bezbjednosti na
radu.
• Prije početka rada sa uređajem neophodno je da
provjerite sve sigurnosne elemente. Provjerite
funkcionalnost elemenata koji izgledaju da su manje
oštećeni.
• Ukoliko u ovom naputku nije drukčije određeno,
oštećene dijelove i bezbjednosne/zaštitne elemente
može popravljati ili mijenjati isključivo ovlašteni stručni
servis.
• Oštećene sklopke uređaja odnesite na popravku u
autorizirani servis.
• Ovaj uređaj u skladu je sa svim odgovarajućim
zahtjevima na sigurnost uređaja. Popravke uređaja
može vršiti samo stručno osposobljeni električar u
ovlaštenom servisu uz primjenu originalnih rezervnih
dijelova. U slučaju nepoštivanja ove odredbe postoji
opasnost od ozljeda.
Postupak u slučaju nesreće
U slučaju ozljeda pružite ozlijeđenoj osobi prvu pomoć i što
najbrže zatražite pomoć ljekara.
Ozlijeđeno lice štitite od daljih ozljeda i čuvajte je u miru.
Za slučaj ozljeda na radilištu mora biti uvijek prisutna
priručna kutija prve pomoći prema normi DIN13164.
Potrošeni materijal iz priručne kutije prve pomoći mora
se odmah dopuniti. U slučaju poziva hitne pomoći
navedite slijedeće informacije:
1. Mjesto nesreće
2. Vrsta nesreće
3. Broj ranjenih osoba.
4. Vrsta oštete
Značenje simbola
U ovom upustvu i/ili na uređaju nalaze se slijedeći simboli ideogrami:
Bezbjednost proizvoda:
Proizvod ispunjava
odgovarajuće norme
Europske zajednice.
Uređaj je opremljen zaštitnom
II. klasa zaštite
izolacijom
Zabrane:
Opšti znak «zabranjeno»
(zajedno sa drugim
ideogramom)
Ne upotrebljavati kad pada
kiša
Upozorenje:
Upozorenje/Pažnja
Upozorenje na opasnost od
ozljeda zbog strujnog udara
Naredbe:
Prije korištenja ovog uređaja
pažljivo pročitajte ovaj naputak
za uporabu.
Upotrebljavajte zaštitne
rukavice!
Zaštita životne okoline:
Otpad ne bacajte bilogdje,
zbog zaštite životne sredine,
ali ga redovito likvidirajte.
Ambalažu od ljepenke
odnesite u recilažu ili u
odgovarajući centar za
skupljanje otpada.
Oštećene i/ili likvidirane
električne ili elektronske
uređaje morate odnijeti u
centar za skupljanje sličnog
Ambalaža:
Čuvajte od utjecaja vlage
Tehnički podaci:
otpada.
Ambalaža mora biti
okrenuta prema gore.
Priključak Težina
Page 54

54
Korištenje uređaja u skladu sa njegovom namjenom
Profesionalni punjač za standardno i brzo punjenje i paljenje
motora u vozilu. Mobilnost zahvaljujući velikim kotačima.
Sekundarna opasnost zbog električnog udara
Neposredan kontakt sa dijelovima pod naponom
Oštećen kabao ili utikač može dovesti do udara
električnom strujom.
Oštećene kablove ili utikače može zamijeniti samo
stručnjak. Uređaj upotrebljavajte samo ukoliko je priključena
zaštita od prekostruje (RCD).
Neposredan dodir sa el. strujom.
Ozljede zbog dodira s vodljivim dijelovima kod otvorenih
električnih ili konstrukcijskih dijelova u kvaru.
Prije početka radova na održavanju uređaja uvijek odspojite
uređaj od dovoda električne struje. Uređaj može biti priključen
samo na priključke opremljene zaštitom od prekostruje.
Neodgovarajuće lokalno osvjetljenje.
Nedostatno osvjetljenje predstavlja veliki rizik
bezbednosti.
Prilikom rada sa uređajem osigurajte uvijek dostatno
osvjetljenje.
Likvidacija
Uputstva za odstranjivanje izražena su ideogramima, koji se
nalaze na uređaju odnosno na ambalaži. Objašnjenja
značenja pojedinačnih ideograma ćete naći u poglavlju
„Oznake na uređaju“.
Likvidacija originalne ambalaže
Originalna ambalaža štiti uređaj od oštećenja prilikom
prijevoza. Ambalaža je obično odabrana s obzirom na zaštitu
okoliša i kasniju likvidaciju pa se može reciklirati.
Vraćanjem ambalaže u ciklus reciklaže i proizvodnju štedite
sirovine i smanjujete količine otpada. Dijelovi ambalaže (npr.
folije Styropor®) mogu biti opasne za djecu. Postoji
opasnost od gušenja! Ambalažu čuvajte van dosega djece
ili je što prije likvidirajte.
U okviru Europske unije ovi simboli upozoravaju,
da se ovaj proizvod ne smije bacati među kućni
otpad. Stari uređaji sadrže vrijedne materijale koji
se mogu ponovo upotrijebiti – zato ih odnesite u
zdravlja te spriječite nekontrolirano odlaganje otpada ove
vrste u prirodi. Stari uređaj likvidirajte u centru za skupljanje
otpada ili ga pošaljite u prodavaonicu u kojoj ste ga nabavili.
Tako ćete omogućiti ponovnu upotrebu nekih materijala
sadržanih u ovim uređajima.
Preporuke prije korištenja
Prije početka rada, neophodno je temeljito pročitati ova
uputstva za upotrebu.
Kvalifikacija
Osim detaljnih uputstava od strane stručnjaka u vezi
korištenja ovog uređaja nije potrebna druga kvalifikacija.
Minimalna starost osoblja, koje koristi uređaj
Uređaj mogu koristiti samo osobe koje su napunile 16 godina.
Iznimka jest samo upotreba uređaja od strane maloljetnih
osoba u okviru stručne prakse i pripreme za zanimanje u
svrhu stjecanja stručne spreme pod nadzorom iskusnog
instruktora.
centar za skupljanje otpada zbog zaštite okoliša i
Obuka
Upotreba uređaja zahtijeva samo odgovarajuću pouku.
Specijalna obuka nije potrebna.
Tehnički podaci
Priključak: 230 V/50-60 Hz
Napetost punjenja prilikom
starta: 12 V / 24 V podesivo
Efikasna struja punjenja: 60 A
Aritm. struja punjenja: 40 A
Struja za stavljanje
u pogon ca.: 0 V: 390 A/1,5 V: 240 A
Maksimalna snaga mreže: 8 kW
Min. obezbjeđenje: 16 A
Nominalni kapacitet: 20-1000 Ah
Start akumulatora: 35-50 Ah (bez prethodnog
punjenja) 65-100 Ah (s
prethodnim punjenjem)
Težina: 16 kg
Dimenzije u mm: 330 x 250 x 600
Način transporta i skladištenja
• Ukoliko nećete uređaj duže vrijeme koristiti, neophodno
je dobro očistiti sve njegove dijelove.
• Uređaj zaštitite od vremenskih neprilika – pokrijte ih
plastičnom plahtom, kartonom i sl.
Montaža i prvo stavljanje u rad (slika 4+5+6)
Rukohvat učvrstite prema (slika 5.
Sada namjestite punjač kroz osovinu (slika 1/2). Zatim
montirajte bezbjednosne prstene koji su sastavni dio
isporuke. Poslije toga na osovinu stavite kotače (slika br. 1/1)
i obezbjedite ih sigurnosnim prstenima (slika br. 6).
Na kotače stavite kape. Na kraj navijte nogu (slika br. 1/4)
pomoću isporučenih vijaka (slika br. 1/3).
Rukovanje
Prije podešavanja i namještanja isključite punjač od
izvora napajanja.
Funkcija punjenja (slika 3)
• Punjač priključite na akumulator.
• Prvo je potrebno priključiti crni kabel na negativan pol, a
tek onda priključiti drugi kabel na pozitivan pol.
•
Prije punjenja akumulator potpuno odspojite od
vozila.
• Punjač podesite na najniži stupanj punjenja (min/1) (slika
3/8)
• Sada stavite utikač priključnog kabla u utičnicu i lagano
povećavajte stupanj odnosno intenzitet punjenja
akumulatora sve dok ne bude prikazana struja punjenja
koja odgovara približno 10 % kapaciteta akumulatora.
• Prilikom pada struje punjenja moguće je povećavati
stupnjeve punjenja. (slika 3/7)
• Najkasnije 3 do 5 sati poslije završetka punjenja isključite
akumulator.
•
Indikator struje punjenja poslije završetka
punjenja akumulatora ne pokazuje nulu.
Vrijeme punjenja akumulatora
• Vrijeme trajanja punjenja akumulatora uvijek zavisi od
stanja napunjenosti istog (potpuno napunjen, napunjen
do polovine, sasvim prazan akumulator).
• Za regeneraciju akumulatora dovoljno je 2-4 sata.
Akumulator je sasvim napunjen poslije 8-10 sati
punjenja.
•
Maksimalno vrijeme punjenja akumulatora ne bi
trebalo prekoračiti 10 sati.
Page 55

55
Pomoć prilikom startanja
• UPOZORENJE! Kod startanja može doći do nastanka
prenapetosti koji može štetiti elektronskim elementima u
instrumentnoj ploči Vašeg vozila. Posavjetujte se s
automehaničarom.
• Akumulator priključite prema uputstvimva navedenim u
poglavlju Punjenje i ostavite ga priključen na vozilo
pomoću stezaljki!
• Prilikom startanja vozila neophodno je da budu prisutne
najmanje dvije osobe.
• Punjač podesite na maksimalnu snagu:
Stupanj priključivanja 2 (slika 3/7) i „BOOST“ (slika
3/8).
• Prva osoba pritisne prekidač za startanje na punjaču.
(slika 3/9) Druga osoba odmah pokreće motor.
• Čim se motor vozila upali, odmah prekinite startanje,
maks. 9-10 Sek.
• Poslije neuspješnog startanja pričekajte približno 5
minuta dok se uređaj ohladi.
Savijet:
minuta, bit će Vam potrebna manja količina struje za
startanje.
startanja od 10 sekundi, to može uzrokovati uništenje
osigurača odnosno motora vozila!
kontakt.
preopterećenja.
Važno: Zamjena topljivih osigurača
(slika 3/5) drugim koji se razlikuju od topljivih osigurača
koji se upotrebljavaju u uređaju, može doći do
materijalnih šteta ili ozljeda osoba.
Prije zamjene topljivih osigurača obavezno izvadite
utikač kabla iz utičnice!
Sigurnosna uputstva za korisnika stroja
• Prije pokretanja uređaja moraju biti svi bezbjednosni i
• Zabranjeno je pokušati startati vozilo s praznim ili
• Ukoliko pokušate startati akumulator u položaju
• Prije pritiska na glavni prekidač provjerite da je punjač
• Upozorenje! U slučaju bilo kakve sumnje prije početka
• Prije prve upotrebe uređaja temeljito pročitajte uputstva
• Pridržavajte se svih sigurnosnih uputa, koje su
• Prilikom rada se ponašajte odgovorno prema ostalim
Upute «korak po korak»
Punjenje
1. Punjač priključite.
2. Podesite funkciju punjenja (min/1). (slika 3/7)
3. Punjač uključite.
4. Priključite el. kabel.
5. Akumulator se sprema za punjenje. Najviše 10 sati)
Ukoliko akumulator prije toga punite 10-15
Upozorenje: Ukoliko prekoračite maks. vrijeme
Upozorenje: Stezaljke ne smiju doći u međusobni
Upozorenje: Punjač je opremljen osiguračem protiv
zaštitni elementi uređaja ispravno montirani na svom
mjestu.
oštećenim akumulatorom inače može doći do oštećenja
vozila.
„punjenje“ umjesto „pomoć kod startanja“, može doći do
oštećenja ampermetra i aktiviranja zaštite od
preopterećenja.
pravilno priključen.
upotrebe uređaja zatražite savjet stručnjaka iz
ovlaštenog servisa.
za uporabu.
navedene u uputama za korisnika.
licima.
Stavljanje u pogon
1. Punjač priključite.
2. Podesite funkciju paljenja. (slika 3/9)
3. Priključite el. kabel.
4. Uključite punjač akumulatora, a zatim odmah startajte
motor vozila.
5. Odmah kad motor vozila upali, prekinite startanje,
isključite punjač i odspojite od stezaljki.
Kvarovi – uzroci – otklanjanje kvarova
PAŽNJA: PRVO PROVJERITE TERMIČKE OSIGURAČE
ZA ZAŠTITU PROTIV PREGRIJAVANJA
Dugme zaštite od preopterećenja:
1. Crvena kliješta priključite na pozitivan pol (+), a crna
kliješta na negativni pol (-).
2. Prekinite kontakt i provjerite osigurač.
3. Izaberite manji stupanj punjenja.
4. Ukoliko je ulazna struja akumulatora previsoka, odnesite
akumulator na punjenje u ovlašteni servis i poslije
čestom upotrebom održavajte visoku razinu
napunjenosti akumulatora ili nabavite punjač većeg
kapaciteta.
Odnesite akumulator u ovlašteni servis radi provjere.
Akumulator zamijenite novim.
Prejaka struja punjenja na samom početku punjenja
akumulatora.
1. Upozorenje: Ukoliko je struja punjenja previsoka i poslije
15 - 20 minuta punjenja, to može značiti da se
akumulator ispražnjava.
Odnesite akumulator u ovlašteni servis radi provjere.
Akumulator zamijenite novim.
Preniska struja punjenja.
1. Eventualno probajte podesiti regulator struje punjenja na
viši nivo.
Indikator ampermetra je na nanižem stupnju ljestvice.
1. Odnesite akumulator u ovlašteni servis radi provjere.
Akumulator zamijenite novim.
2. Mrežna napetost mora biti podudarna sa napetošću
punjača akumulatora.
Ampermetar ne pokazuje.
1. Očistite stezaljke i ponovo namjestite kliješta.
2. Odnesite akumulator u ovlašteni servis radi provjere.
Akumulator zamijenite novim.
3. Provjerite rad punjača na napunjenom akumulatoru koji
je besprijekornom stanju.
Uzroci preopterećenja
1. Loš priključak između kliješta i akumulatora.
2. Dolazi do međusobnog kontakta između kliješta ili do
njihovog neizravnog kontakta.
3. Akumulator je potpuno prazan.
4. Akumulator je potpuno prazan - njegov kapacitet je veći
od kapaciteta punjača.
5. Akumulator je u kvaru ili je oštećen (npr. zbog kratkog
spoja između unutarnjih elemenata).
Pregledi i održavanje
Prije vršenja bilo kakvih radova na ovom uređaju izvadite
utikač iz utičnice.
• Za čišćenje plastičnih dijelova upotrebljavajte navlaženu
krpu. Ne upotrebljavajte deterdžente, otapala niti oštre
odnosno šiljaste predmete.
• Poslje završetka rada sklonite prašinu iz otvora za
provjetravanje i pokretnih dijelova uređaja mekanom
četkom ili kistom.
Sve pokretne metalne dijelove uređaja redovito
podmazujte mazivom.
Page 56

Bezbjednosna uputstva za tehničke preglede i održavanje
56
Poslije svake upotrebe
Sklonite prašinu iz otvora za provjetravanje i pokretnih
dijelova.
Redovito
Podmažite pokretne metalne dijelove uljem (univerzalno ulje).
Redovito
Provjerite zategnutost svih vijaka, da li su pravilno učvršćeni.
Servis
Da li imate tehnička pitanja ? Reklamaciju? Da li Vam
trebaju rezervni dijelovi ili nova uputstva za upotrebu?
Na našim Internet stranicama www.guede.com u dijelu Servis,
pomoći ćemo Vam brzo i bez nepotrebne papirologije.
Pomognite Vi nama da možemo pomoći mi Vama. Da bismo
mogli vaš uređaj bolje identificirati, neophodan nam je serijski
broj odnosno broj proizvoda i godina proizvodnje. Sve gore
spomenute podatke naći ćete na tipskoj etiketi. Da biste ove
podatke uvijek imali pri ruci, zapišite ih molim tu:
Serijski broj:
Serijski broj:
Godina proizvodnje:
Telefon: +49 (0) 79 04 / 700-360
Telefaks: +49 (0) 79 04 / 700-51999
E-mail: support@ts.guede.com
ES IZJAVA O SUKLADNOSTI
Temeljem ove izjave, mi,
Güde GmbH & Co. KG
Birkichstraße 6
D-74549 Wolpertshausen
Njemačka
proglašavamo, da dolje navedeni uređaji, u smislu njihove
koncepcije i konstrukcije kao i u pogledu izvedbi koje smo
uveli u promet, ispunjavaju odgovarajuće osnovne direktive
bezbjednosti i zdravlja prema smjernicama Europske
zajednice.
Ako dođe do promjena na uređaju bez naše
suglasnosti, ova Izjava postaje nevažećom.
Oznaka uređaja: PUNJAČ ZA AKUMULATOR V 421 C
Serijski broj: 85074
Primjenjive direktive EU:
2006/95/EG
2004/108/EG
Primijenjeni harmonizirani standardi :
EN 60335- 2- 29:2004
EN 60335-1/A14:2010
EN 62233:2008
EN 55014-1:2006
EN 55014-2/A2:2008
EN 61000-3- 2:2006
EN 61000-3- 3:2008
EN 61000-3-11:2000
Datum/Potpis proizvođača: 10.08.2011
Podaci o potpisanoj osobi direktor
Gospodin Arnold
Tehnička dokumentacija: J. Bürkle FBL; QS
Page 57

RO
57
Vă rugăm ca, înainte de a pune în funcțiune utilajul, să citiți cu atenție acest mod de utilizare.
A.V. 2 Reproducerea, chiar și parțială, trebuie aprobată. Modificări tehnice rezervate.
Aparat
Încărcător baterii V 421 C
Dotare (de serie)
Cablu profesional de încărcare, clește cu mâner izolat,
ampermetru, protecție împotriva inversării polilor, protecție
termică, protecție auxiliară de 50 A.
Domenii de utilizare:
Încărcător profesional de pornire pentru încărcare normală și
rapidă și pentru pornirea vehiculelor. Datorită roților mari,
poate fi ușor deplasat.
Volumul livrării (fig. 1+2)
1. Roți
2. Ax
3. Șuruburi
4. Picior de sprijin
5. Protecție roți
6. Șuruburi
7. Mâner
8. Încărcător baterii
Descrierea aparatului (fig. 3)
1. Întrerupător conectare/deconectare
2. Cuplă 12 V
3. Legătura la masă
4. Cuplă 24 V
5. Fuzibil
6. Ampermetru
7. Nivel de cuplare 1 + 2
8. Încărcare Min – Max
9. Încărcare, respectiv pornirea bateriei
Garanție
Garanţia se referă în exclusivitate la defectele de material sau
la cele de producţie. Revendicarea reclamaţiei în perioada de
garanţie se efectuează prin prezentarea documentului original
de cumpărare cu data achiziţionării. Garanţia nu se aplică în
cazul operării neprofesionale ca de ex. suprasolicitarea
utilajului, operare forţată, deteriorare de o persoană străină
sau de un obiect străin. Nerespectarea modului de utilizare şi
a modului de montare ca şi uzura normală sunt excluse din
garanţie.
Instrucțiuni generale de securitate
Înaintea primei utilizări a aparatului trebuie să citiți
neapărat în întregime prezentul mod de operare. În cazul
în care aveți dubii privitor la conectarea sau operarea
aparatului, apelați la producător (departamentul de service).
PENTRU A ASIGURA UN ÎNALT GRAD DE SECURITATE,
TREBUIE SĂ RESPECTAȚI CU STRICTEȚE ACESTE
INSTRUCȚIUNI:
Atenție: Utilizați numai cu protecție de curent!
ATENȚIE!
• Întrețineți în curățenie și ordine locul de muncă.
Dezordinea la locul de muncă și pe masa de lucru
majorează pericolul de accidente și de rănire.
• Aveți grijă de condițiile mediului în care lucrați. Nu
folosiți sculele electrice și utilajele de prelucrare în mediu
umed. Asigurați o vizibilitate bună.
• Nu expuneți sculele electrice la ploaie sau unui
mediu cu umezeală ridicată a aerului. Nu conectați
sculele electrice în mediu cu lichide sau gaze
inflamabile.
• Nu permiteți accesul persoanelor străine. Țineți
oaspeții și spectatorii, în deosebi copiii, bolnavii și
persoanele cu sănătate șubredă la o distanță sigură de
locul dumneavoastră de muncă.
gurați o depozitare sigură a ustensilelor.
si
• A
Ustensilele pe care nu le folosiți trebuie depozitate întrun loc uscat, pe cât posibil într-un loc înalt pentru ca să
nu fie accesibile persoanelor străine.
• Acordați atenție cablului electric. Nu trageți de cablu.
Dacă vreți să-l scoateți din priză, apucați-l de ștecher.
Țineți cablul la distanță sigură de sursele de căldură,
uleiuri și de muchiile ascuțite.
• Evitați conectarea involuntară. Înainte de a introduce
ștecherul în priză, fiți atenți ca întrerupătorul să fie
întotdeauna în poziția deconectat.
• Pentru uz în mediul extern utilizați cabluri de
prelungire speciale, adecvate acestui uz și care sunt
marcate în mod
• Fiți mer
corespunzător.
eu atenți. Acordați atenție la ceea ce faceți.
Puneți mintea la contribuție. Nu folosiți scule și ustensile
electrice dacă sunteți obosiți.
• Acordați atenție pieselor deteriorate. Înainte de
utilizare, verificați ustensilele. Unele piese sunt
deteriorate? În cazul unei deteriorări simple, puneți-vă
serios întrebarea dacă și în acest caz aparatul va
funcționa sigur și perfect.
• Evitați electrocutările. Evitați orișice contact al corpului
dumneavoastră cu obiecte legate la pământ, de ex. cu
conducte de apă, corpuri de încălzit, reșouri și frigidere.
• Folosiți numai piese autorizate. În munca de
întreținere și la reparații folosiți numai piese de schimb
n atelier
identice. În acest scop apelați la u
de service
autorizat.
• Avertisment! Utilizarea accesoriilor și a ajutajelor care
nu au fost recomandate explicit în acest manual, poate
duce la periclitarea persoanelor și a obiectelor.
Instrucțiuni de securitate pentru prima punere în
funcțiune
- Înaintea reglărilor sau a lucrărilor de întreținere pe
utilaj, întotdeauna scoateți mai întâi ștecherul din
priză.
-
Conectați încărcătorul la rețea abia după ce ați
efectuat toate reglările necesare și după ce bornele
polare au fost conectate corect.
- După înlăturarea ambalajului, verificați dacă aparatul și
toate componentele sale sunt în stare perfectă.
- Desfășurați complet cablul de rețea și amplasați-l astfel
ca bornele polare să nu se poată atinge reciproc.
- La nevoie, prelungiți cablul cu un cablu prelungitor,
acordând atenție ca secțiunea cablului prelungitor să
corespundă secțiunii cablului de rețea; nu utilizați
cabluri cu secțiuni inferioare.
- Cleștele de conectare, bornele și partea superioară a
bateriei trebuie menținute în curățenie; în caz de
necesitate, curățați bornele bateriei cu o perie de metal,
astfel veți face posibil un bun contact electric și o
eficiență mai mare de încărcare.
dați atenție inversării conectărilor polare!
or
- Ac
Page 58

58
( (-) negru; (+) roșu )
- Tensiunea de încărcare a încărcătorului de baterii
trebuie să corespundă tensiunii nominale de pe baterie;
este egală cu numărul elemenților bateriei înmulțit cu
doi.
(3 elemenți = 6 V; 6 elemenți = 12 V; 12 elemenți = 24
V).
- Înainte de a încărca, instalați aparatul astfel ca să fie
stabil și asigurași ca prin orificiile respective să poată
circula aer nelimitat. Trebuie să se asigure o răcire
bună.
- Nu încărcați concomitent mai multe baterii.
- Înlăturați închizătoarele bateriilor numai atunci când ați
curățat în prealabil bornele pentru ca să nu poată cădea
în rezervor praf și alte impurități; întrețineți astfel și în
timpul încărcării.
- Aveți gr
ijă ca ele
ctrolitul să ajungă cu cel puțin 4 – 5 mm
deasupra plăcilor; în caz de nevoie completați cu apă
distilată care în acest scop se găsește în magazine.
1. În cursul fazei de încărcare iau naștere gaze
explozive, evitați deci provocarea de scântei și evitați
în apropiere ca în apropiere să se manipuleze cu foc
deschis, respectiv să se fumeze.
2.
Încărcați bateriile numai în spații aerisite, este
interzis a se utiliza aparatul în scopul încărcării
bateriilor în mașină sau sub capota motorului
închisă.
3. Niciodată nu încărcați împreună bateriile standard cu
acumulatoarele fără întreținere.
4. Nu încărcați niciodată bateriile de unică folosință.
5. Lăsați în spatele aparatului spațiu suficient pentru
aerisire.
6. Respectați manualul producătorului.
7. Verificați starea corectă a acidului din baterie.
8. Controlați mereu starea perfectă a cablului de rețea și a
cablului bornelor. În caz de deteriorare, dați imediat
cablul de rețea unui specialist pentru ca să-l
înlocuiască.
9. Este interzisă expunerea aparatului acțiunii
atmosferice, de ex. la ploaie și zăpadă.
10. Nu folosiți aparatul în cazul în care sunteți desculț. N
atingeți de el cu mâinile ude sau cu picioarele ude
vă
u
sau umede.
11. Nu scoateți ștecherul din priză trăgând de cablu.
12. Evitați ca aparatul să fie folosit de copii sau de persoane
neautorizate.
Nu lăsați fără supraveghere aparatul conectat, poate
deveni sursă de pericol.
• Dacă efectuați lucrări de întreținere sau reparații pe
instalațiile de protecție, acestea trebuie neapărat, la
sfârșitul lucrărilor, să fie montate din nou reglementar.
• Este absolut necesară cunoașterea prescripțiilor de
prevenire a accidentelor valabile în locul în care se
utilizează aparatul, ca și toate regulile de securitate
general valabile.
• Înaintea utilizării acestui aparat trebuie să verificați
neapărat instalațiile de securitate. Convingeți-vă că
piesele care sunt doar ușor deteriorate vor funcționa
totuși reglementar.
• Dacă în prezentul mod de utilizare nu se menționează
alt ceva, piesele și instalațiile de securitate pot fi
reparate sau înlocuite la un atelier autorizat.
• Întrerupătoarele defecte trebuie înlocuite la un atelier
autorizat.
Acest aparat corespunde tutur
•
or prevederilor de
securitate aferente. Reparațiile pot fi efectuate numai de
electricieni calificați în ateliere de reparații autorizate,
utilizând piese de schimb originale. Nerespectarea
acestor instrucțiuni reprezintă pericol de accidentare.
Comportament în caz de avarii
Acordaţi rănitului primul ajutor şi chemaţi într-un timp cât mai
scurt ajutorul calificat al medicului. Păziţi rănitul de alte
accidente, şi calmaţi-l. În cazul unui eventual accident, la
locul de muncă trebuie să se găsească întotdeauna la
îndemână o trusă medicală de prim-ajutor, conform
normei DIN 13164. Materialul pe care îl veţi consuma din
trusa medicală trebuie completat imediat. În cazul în care
solicitaţi ajutor, prezentaţi următoarele date:
1. Locul accidentului
2. Tipul accidentului
3. Numărul răniţilor
4. Felul rănirilor
Explicare simboluri
În prezentul manual și /sau pe aparat sunt folosite aceste
simboluri:
Securitatea produsului:
Produsul corespunde
normelor UE aferente
Clasa a II-a de protecţie
Interdicții:
Interdicție generală
(împreună cu o altă
pictogramă)
A nu se utiliza pe ploaie
Avertisment:
Avertisment/atenție
Avertisment împotriva
pericolului tensiunii
electrice
Prescripții:
Citiţi cu atenţie modul de
utilizare înainte de folosirea
utilajului
Utilizaţi mănuşi de protecţie
Ocrotirea mediului ambiant:
Lichidaţi deşeurile în mod
profesional astfel, ca să nu
poluaţi mediul ambiant.
Ambalajul din carton poate
fi predat la punctele de
colectare în scopul
reciclării.
Aparate electrice sau
electronice defecte şi /sau
lichidate trebuie să fie predate
la punctele de colectare
corespunzătoare.
Ambalaj:
sus
Protejați de umezeală
Orientarea ambalajului – în
Date tehnice:
Cuplă Greutate
Page 59

59
Utilizarea aparatului în conformitate cu destinația
acestuia
Încărcător profesional pentru încărcare și pornire, încărcare
rapidă și pornirea autovehiculelor. Se poate deplasa datorită
roților mari cu care este dotat.
Riscuri electrice remanente
Contact electric direct
Un cablu sau un ștecher defect poate duce la accidente
provocate de curentul electric.
Dați la înlocuit cablul sau ștecherele la un specialist.
Utilizați aparatul numai atunci când cupla este dotată cu
protecție de curent.
Contact electric indirect
Rănirea cu piese conductoare în cazul elementelor de
construcție deschise sau defecte.
În timpul lucrărilor de întreținere ale aparatului deconectați
întotdeauna aparatul de la sursa de curent electric. Utilizați
numai atunci când cupla este dotată cu protecție de curent.
Iluminare locală indirectă
O iluminare insuficientă reprezintă un înalt risc de
securitate.
Lucrând pe acest aparat trebuie să vă asigurați întotdeauna o
iluminare suficientă.
Lichidare
Instrucţiunile de lichidare reies din pictogramele amplasate pe
aparat, respectiv pe ambalaj. Descrierea semnificaţiilor le veţi
găsi la capitolul „Marcare“.
Lichidarea ambalajului de transport
Ambalajul protejează utilajul în timpul transportului împotriva
deteriorărilor. Materialele de ambalaj sunt utilizate de regulă
în funcţie de modul lor de încadrare faţă de mediul ambiant şi
a modului de lichidare, de aceea acestea pot fi reciclate.
Înapoierea ambalajelor în circuitul de materiale economiseşte
materiile prime şi reduce cheltuielile pentru lichidarea
deşeurilor. Părţi ale ambalajului (de ex. folie, polistiren) pot
prezenta pericol pentru copii. Există riscul de asfixiere!
Depozitați părți ale ambalajului înafara accesului copiilor la el
şi lichidaţi-le cât mai repede
În cadrul UE acest simbol atrage atenția asupra
faptului că produsul respectiv nu poate fi lichidat
precum deșeuri menajere. Aparatele vechi conțin
materiale prețioase care pot fi reciclate,a cestea
ar trebuie predat la centrele de colectare pentru a
evita poluarea mediului ambiant și a sănătății omului prin
depozitare necontrolată a acestui material. De aceea vă
rugăm să lichidați aparatele vechi prin intermediul centrelor
de colectare sau expediați-le spre a fi lichidate acolo unde
le-ați achiziționat. Astfel, unele materiale din aceste aparate
vor fi reutilizate.
Exigențe de deservire
Personalul de deservire a aparatului trebuie ca, înainte de
utilizare, să citească cu atenție prezentul mod de deservire.
Calificare
În scopul operării utilajului, în afară de o instruire amănunţită
din partea unei persoane calificate, nu este necesară nici o
altă calificare specială..
Vârsta minimă
Utilajul poate fi operat de persoane care au împlinit vârsta de
16 ani. Excepţie o fac minorii în cadrul pregătirii lor
profesionale pentru a obţine deprinderi, aceasta doar sub
supravegherea instructorului.
Instruire
Utilizarea aparatului necesită numai o instruire adecvată. Un
instructaj special nu este necesar.
Date tehnice
Cuplă: 230 V/50-60 Hz
Tensiune de încărcare/pornire: 12 V / 24 V reglabil
Curent de încărcare efectiv: 60 A
Curent de încărcare aritm.: 40 A
Curent de pornire, circa: 0 V: 390 A/1,5 V: 240 A
Putere max. rețea: 8 kW
Protecție min.: 16 A
Capacitate nominală: 20-1000 Ah
Pornire baterie: 35-50 Ah (fără încărcare
preliminară)
65-100 Ah (cu încărcare
preliminară)
Greutate: 16 kg
Dimensiuni (mm): 330 x 250 x 600
Transport și depozitare
• Înainte de a depozita aparatul pentru o perioadă mai
mare, trebuie să-l curățați temeinic.
• Protejați aparatul de intemperiile atmosferice cu o
prelată din plastic, carton sau un material asemănător.
Montajul și prima punere în funcțiune (fig. 4+5+6)
Înșurubați mânerul ca în fig. 5.
Introduceți acum axul (fig.1/2) în încărcător. Montați acum pe
ax inelele de siguranță care fac parte din livrare. Aplicați
acum pe ax și roțile (fig.1/1) și fixați-le de asemeni cu inelele
de siguranță. (fig.6).
Aplicați pe roți protecțiile acestora. La sfârșit, înșurubați cu
ajutorul șuruburilor (fig.1/3) livrate și piciorul (fig.1/4).
Operare
Înaintea fiecărui reglaj deconectați încărcătorul de la
sursa de tensiune electrică.
Funcția de încărcare (fig.3)
• Conectați încărcătorul la bateria de încărcat.
• Întotdeauna trebuie montat mai întâi cablul polului
negru la polul negativ, abia după aceea conectați cu
borna polul pozitiv.
•
Înainte de încărcare, deconectați complet
bateria de la autovehicul.
• Reglați încărcătorul la treapta ceam mai joasă de
încărcare (min/1) (fig. 3/8)
• Acum introduceți ștecherul în priză și reglați gradul de
încărcare învârtind în sus până ce încărcătorul va indica
curentul corespunzător unei valori de circa 10% din
capacitatea bateriei.
• Dacă curentul de încărcare scade, gradele de încărcare
pot fi ridicate (obr.3/7).
• Cel târziu după 3-5 ore de la terminarea încărcării,
deconectați bateria.
•
Indicarea curentului de încărcare după
terminarea procesului de încărcare nu se va reduce
complet la zero.
Perioada de încărcare a bateriei
• Perioada de încărcare depinde întotdeauna de starea
bateriei (aproape încărcată, încărcată pe jumătate,
descărcată complet).
• Pentru încărcarea de regenerare a bateriei sunt
suficiente 2-4 ore. Pentru o încărcare integrală sunt
necesare 8-10 ore.
Page 60

60
• Nu ar trebui să depășiți perioada maximă de
încărcare de 10 ore.
Ajutor la pornire
• ATENȚIE! În timpul pornirii poate ia naștere o
supratensiune care ar putea defecta electronica de pe
bordul mașinii dumneavoastră. Consultați, vă rog, acest
aspect cu un electromecanic.
• Conectați bateria conform instrucțiunilor de la capitolul
Încărcare și lăsați-o conectată la autovehicul cu ajutorul
bornelor!
• De regulă mașina trebuie pornită în două persoane.
• Reglați încărcătorul la puterea maximă:
Gradul de conectare 2 (fig. 3/7) și „BOOST“ (fig. 3/8).
• Prima persoană va apăsa conectorul de pornire de pe
încărcător (fig. 3/9) A doua persoană va începe imediat
procesul de aprindere.
• Imediat ce vehiculul pornește, întrerupeți imediat
procesul de pornire pentru max. 9-10 secunde.
• După fiecare tentativă de pornire, așteptați circa 5
minute ca să se răcească aparatul.
Sugestie:
de 10-15 minute, aceasta va avea nevoie de mult mai
puțin curent de pornire.
pornire de 10 secunde, se pot arde siguranțele, respectiv
vehiculul se poate deteriora!
de alta.
împotriva suprasolicitării.
Important: Înlocuirea fuzibililor (fig. 3/5) cu alți fuzibili
care se deosebesc de cei folosiți pe aparat poate avea ca
urmare pagube materiale sau rănirea persoanelor.
Efectuați înlocuirea fuzibililor numai atunci când cablul
este scos din priză!
Instrucțiuni de securitate pentru personalul de deservire
• Înaintea conectării aparatului trebuie ca toate instalațiile
• Este interzis a se încerca pornirea vehiculului cu bateria
• Dacă neți încercați să porniți bateria în poziția
• Înainte de a apăsa conectorul principal, convingeți-vă
• Avertisment! Dacă aveți dubii, înainte de utilizarea
• Folosiți aparatul abia după ce ați citit cu atenție întregul
• Respectați toate instrucțiunile de securitate cuprinse în
• Purtați-vă cu răspundere față de alte persoane.
Instrucțiu
Încărcare
1. Cuplați încărcătorul de baterii.
2. Reglați funcția de încărcare (min/1).(fig.3/7)
3. Porniți încărcătorul.
4. Cuplați cablul de rețea.
5. Bateria se va încărca (max.10 ore).
Dacă veți încărca bateria înainte pe o perioada
Atenție: Dacă veți depăși perioada maximă de
Atenție: Bornele polare nu au voie să se atingă una
Atenție: Încărcătorul este dotat cu o siguranță
de protecție să fie instalate la locul lor.
descărcată sau deteriorată, ca urmare s-ar putea
deteriora vehiculul.
„încărcare“ în locul „ajutor la pornire“, se poate deteriora
ampermetrul și declanșa protecția împotriva
suprasolicitării.
dacă încărcătorul este conectat corect.
aparatului cereți ajutor de la un specialist de la un centru
de service autorizat.
mod de operare.
manual.
ni „pas cu pas“
Pornire vehicul
1. Cuplați încărcătorul de baterii.
2. Reglați funcția de pornire (fig.3/9).
3. Cuplați cablul de rețea.
4. Porniți încărcătorul și imediat porniți vehiculul.
5. Imediat ce vehiculul pornește, întrerupeți pornirea și
decuplați încărcătorul și deconectați-l de la borne.
Defecțiuni - cauze – remedieri
ATENȚIE: ÎNTOTDEAUNA CONTROLAȚI MAI ÎNTÂI
SIGURANȚELE ÎMPOTRIVA SUPRASOLICITĂRII!
Comutatorul protecției împotriva suprasolicitării:
1. Conectați cleștele roșu la polul pozitiv (+) și cleștele
negru la cel negativ (-).
2. Cuplați contactul și controlați siguranțele.
3. Reglați un grad inferior de încărcare.
4. Dacă puterea bateriei este prea înaltă, recomandăm să
dați bateria la încărcat la un electrician auto după care,
printr-o utilizare frecventă a încărcătorului, să mențineți
nivelul înalt de încărcare; sau să procurați un încărcător
mai performant. Dați bateria la verificat la un specialist.
Înlocuiți bateria.
Curent de încărcare prea puternic la începutul încărcării.
1. Atenție: dacă curentul de încărcar
– 20 de minute, poate însemna că bateria se descarcă
din nou.
Dați bateria la verificat la un specialist. Înlocuiți bateria.
Curent de încărcare prea slab.
1. În caz de necesitate încercați să reglați curentul de
încărcare la o valoare superioară..
Indicatorul ampermetrului atinge valoarea minimă pe
scara cadranului.
1. Dați bateria la verificat la un specialist. Înlocuiți bateria.
2. Asigurați ca tensiunea de rețea să corespundă tensiunii
necesare.
Ampermetrul nu indică.
1. Curățați bornele și aplicați din nou cleștele.
2. Dați bateria la verificat la un specialist. Înlocuiți bateria.
3. Verificați funcționalitatea încărcătorului pe o altă baterie,
în stare perfectă.
Cauze ale suprasolicitării
1. O conectare proastă a cleștelui la baterie.
2. Cle
contactul indirect dintre aceștia.
3. Bateria este cu totul, respectiv puternic descărcată
4. Bateria este cu totul descărcată și are o capacitate mai
mare decât puterea încărcătorului.
5. Bateria este deteriorată sau defectă (de ex.
scurtcircuitarea elemenților interni)
Revizie și întreținere
Înainte fiecărei lucrări pe aparat, deconectați de la sursa de
tensiune electrică.
• Pentru a curăța piesele din plastic folosiți o cârpă
umedă. Nu folosiți detergenți, diluanți sau obiecte
ascuțite.
• După fiecare utilizare înlăturați cu o perie moale sau cu
o pensulă depunerile de praf din orificiul de aerisire și de
pe piesele mobile.
Ungeți cu regularitate toate piesele mobile de metal cu
ulei.
e va fi înalt și după
știi se ating reciproc din greșeală sau are loc
15
Page 61

Instrucțiuni de securitate pentru revizii și lucrări de
61
întreținere
După fiecare utilizare
Înlăturați praful din orificiile de aerisire și de pe piesele mobile.
Cu regularitate
Ungeți componenții mobili din metal cu ulei (un ulei universal)
Cu regularitate
Controlați toate șuruburile dacă sunt strânse temeinic.
Service
Aveţi întrebări de ordin tehnic? Reclamaţii? Aveţi nevoie
de piese de schimb sau de manualul de deservire?
Pe site-ul nostru www.guede.com la secţia Service, vă vom
ajuta repede şi nebirocratic . Vă rugăm să ne ajutaţi să vă
ajutăm. Pentru a putea, în caz de reclamaţii, identifica utilajul
dumneavoastră, avem nevoie de numărul seriei, numărul
comenzii şi anul de producţie. Toate aceste date le veţi găsi
pe plăcuţa de tip. Pentru ca să aveţi la îndemână aceste date,
vă rugăm să le notaţi mai jos.
Număr serie:
Număr comandă:
An de producţie:
Tel.: +49 (0) 79 04 / 700-360
Fax: +49 (0) 79 04 / 700-51999
E-Mail: support@ts.guede.com
DECLARAŢIE DE CONFORMITATE UE
Prin prezenta declarăm noi,
Güde GmbH & Co. KG
Birkichstrasse 6
D-74549 Wolpertshausen
Germania
că concepţia şi construcţia utilajelor de mai jos, în execuţia în
care sunt date în circulaţie, corespunde exigenţelor de bază
ale directivelor UE referitoare la siguranţă şi igienă.
În cazul unei modificări pe utilaj care nu a fost
consultată cu noi, această declaraţie îşi pierde
valabilitatea.
Marcare aparat: ÎNCĂRCĂTOR BATERII V 421 C
Nr. produs: 85074
Directive UE aferente:
2006/95/EG
2004/108/EG
Norme armonizate aplicate:
EN 60335-2-29:2004
EN 60335-1/A14:2010
EN 62233 :2008
EN 55014-1:2006
EN 55014-2/A2:2008
EN 61000-3-2:2006
EN 61000-3-3:2008
EN 61000-3-11:2000
Data/semnătura producătorului: 10.08.2011
Date despre semnatar: Director
Dl. Arnold
Documentaţie tehnică: J. Bürkle FBL; QS
Page 62

BG
62
A.V. 2 За отпечатвания, и то и на части от текста, е необходимо одобрение.Техническите изменения са запазени.
Преди пускането на уреда в действие, моля прочетете старателно това упътване за обслужване.
Уред
Зарядно устройство за батерии V 421 C
Оборудване(серийно)
Професионален кабел за зареждане, клещи с изолирани
дръжки, амперметър, защита срещу замяна на полюсите,
топлинен предпазител, допълнителен предпазител 50 A.
Област на употреба:
Професионално стартиращо зарядно устройство за
нормално зареждане и бързо зареждане и за стартиране
на автомобили. Благодарение на големите придвижващи
колела може лесно да се транс
р на доставката (карт. 1+2)
Разме
1. Колелета
2. Ос
3. Болтове
4. Опорен крак
5. Тасове на колелата
6. Болтове
7. Дръжка
8. Зарядно устройство за батерии
Описание на уреда (карт. 3)
1. Включвател /изключвател
2. Присъединение 12 V
3. Замасяване
4. Присъединение 24 V
5. Разтопим предпазител
6. Амперметър
7. Степен на включване 1 + 2
8. Зареждане Мин – Макс
9. Зареждане респ. стартиране на батерията
Гаранция
Гаранцията се отнася изключително за дефекти на
материала или фабрични дефекти.
При упражняване на дефект по смисъла на гаранцията е
необходимо да се прибави оригинален документ от
закупуването с дата на покупката.
Гаранция не се отнася да непрофесионална употреба
като напр. претоварване на уреда, употреба със сила,
увреждане от чуждо лице ил
Неспазването на упътването за употреба и обслужване и
нормалното износване също са изключени от гаранция.
Общи инструкции зо безопасност
Преди употреба на уреда е необходимо изцяло да се
прочете упътването за обслужване. Ако имате
съмнения относно включването и обслужването на уреда,
обърнете се към производителя (сервизното отделиние).
ЗА ОСИГУРЯВАНЕ НА ВИСОКА СТЕПЕН НА
БЕЗОПАСНОСТ Е НЕОБХОДИМО ВНИМАТЕЛНО ДА СЕ
СПАЗВАТ ТЕЗИ ИНСТРУКЦИИ:
портира.
и от чу
жд предмет.
Внимание: Използвайте само с токова защита!
ВНИМАНИЕ!
• Поддържайте работното място чисто и
подредено. Безпорядъка на работното място и на
работната маса повишава опасноста за злополуки и
нараняване.
• Съблюдавайте условията на средата , в която
работите. Не използвайте електрически
инструменти и обработващи машини в мокра или
влажна среда. Осигурете достатъчно осветление. Не
излагайте електрическите инструменти на дъжда
ил
на висока влажност на възкуха. Не
и
включвайте електрическите инструменти в среда със
запалими течности или газове.
• Не допускайте до уреда чужди лица. Посетители и
наблюдаващи, преди всичко деца и болни и стари
хора би трябвало да се държат на безопасно
разстояние от работното място.
• Осигурете сигурно съхр
Инструменти, които не употребявате, е необходимо
да се съхраняват на сухо, по възможност извишено
място така, че да бъдат недостъпни за
неупълномощени лица.
• Обърнете внимание на електрическия кабел. Не
дърпайте за кабела. Ако искате да извадите кабела
от щепселната кутия, хванете го за щепсела. Дръжте
кабела на без
топлина, масла и остри ръбове.
• Предотвратете неумишлено включване. Преди
мушкане на щепсела в щепселната кутия винаги
обърнете внимание инструментите да бъдат
изключени посредством включвателя на уреда.
• Навън използвайте специални удължителни
кабели. За външна употреба са Ви необходими
специални удължителни кабели, които са по
за целта
• Бъдете винаги внимателни. Обърнете внимание,
за това, което правите. Използвайте здрав човешки
разум. Не употребявайте електрически инструменти
когато сте изморени.
• Обърнете внимание на повредените части. Преди
използване прегледайте инструментите. Дали някои
части не са повредени ? В случай на лека повреда се
замислете сер
инструментите ще функционират безопасно и
безупречно.
• Предотвратете удар от електрически ток.
Избегнете какъвто и да било контакт на своето тяло
със заземени предмети, напр. водопроводи,
отоплителни тела, печки и хладилници.
• Използвайте само одобрени части. При поддръжка
и ремонти използвайте само идентични резервни
части. Относ
оторизирана сервизна работилница.
• Предупреждение! Използването на принадлежности
и разширителни части, които изрично не са
препоръчани в това упътване, може да доведе до
заплаха за хора и предмети.
Инструкции за безопасност при първоначално
пускане в действие
- Преди настройка или поддръжка на уреда найнапред винаги извадете щепсела от щепселната
кутия.
-
- След отстраняване на опаковката проверете, дали
- Размотайте изцяло мрежовия кабел и го поставете
- В слу
Включете зарядното устройство в мрежата едва
тогава, когато сте направил всички настройки и
когато полюсните клеми са свързани правилно.
уреда и всички негови части са в безупречно
състояние.
така, че полюсните клеми да не могат взаимно да се
докосват.
чай на нео
с удължителен кабел; едновременно внимавайте,
опасно разстоя
и притежават съответното обозначение.
иозно,
но резервни час
бходимост удължете мрежовия кабел
анение на инс
ние от източници на
дали въпреки това
ти се обърнете към
трументите.
дходящи
Page 63

63
сечението на удължителния кабел да отговаря на
сечението на мрежовия кабел; не употребявайте
кабели с по-малко сечение.
- Пписъединяващите клещи, клемите и горната
повърхност на батерията е необходимо да се
поддържат чисти; в случай на необходимост
почистете клемите на батерията с телена четка; с
това ще постигнете добър електрически контакт и подобра е
фект
ивност на зареждането.
- Обърнете внимание за замяна на полюсите на
свързващите кабели! ( (-) черен; (+) червен )
- Напрежението на зареждане на зарядното
устройство за бетериите трябва да съответства на
номиналното напрежение на батерията; равнява се
на броя на клетките на батерията умножено с две
(3 клетки = 6 V; 6 клетки = 12 V; 12 клетки = 24 V).
- Преди зарежда
не
инсталирайте уреда така, че да
бъде стабилен, и осигурете през съответните отвори
свободно да може да циркулира въздух. Трябва да
бъде осигурено добро охлаждане.
- Не зареждайте няколко батерии едновременно.
- Отстранете капачките на батерията само в случай,
че преди това сте почистили клемите,за да не може в
резервоара да по
па
дне прах и нечистотии, и
поддържайте така по време на зареждането.
- Осигурете, електролита да достига минимум 4 до 5
мм над плочата; в случай на необходимост
допълнете с дестилирана вода, която за тази цел е
достъпна в магазините.
1. По време на фазата на зареждане се образуват
експлозивни газове, затова предотвратете
искрене и избегнете отворен огън респ. пушене в
близост.
2.
Зареждайте батериите само в проветрявани
помещения, забранено е уреда да се използва за
зареждане на батерии в автомобили или под
затворен капак на мотора.
3. Никога не зареждайте стандартни и батерии, които
не се нуждаят от поддръжка заедно.
4. Никога не зареждайте еднократни батерии.
5. Оставете зад уреда достатъчно пространство за
проветряване.
6. Спазвайте уп
анията на производителя.
ътв
7. Контролирайте правилното състояние на киселината
в батерията.
8. Контролирайте постоянно безупречното състояние
на мрежовия кабел и кабела на клемите. В случай
на увреждане оставете мрежовия кабел да бъде
сменен веднага от специалист.
9. Не е разрешено уреда да се излага на
метеорологични влияния, напр. дъжд и сняг.
10. Не у
ребявайте уреда, когато сте боси. Не го
пот
докосвайте с влажни ръце или с мокри и влажни
крака.
11. Не изваждайте щепсела от щепселната кутия с
дърпане на кабела.
12. Предотвратете използването на уреда от деца или
неупълномощени лица.
Не оставяйте включения уред без надзор, може
да се превърне в източник на опасност.
• Ако правите ремонт или поддръжка на съоръженията
за безопасност и презпазните съоръжения след
приключване на роботите трябва отново да ги
монтирате правилно.
• Необходимо е задължително да се знаят
разпоредбите за предотвратяване на злополуки,
валидни в мястото на употреба на уреда, и всички
останали общо признати правила за безопасност.
• Преди у
реба на този инструмент трябва
пот
задължително да проверите устройството за
безопасност. Убедете се, че частите, които
изглеждат само леко повредени, действително ще
функционират правилно.
• Ако в това упътване за обслужване не е посочено
нещо друго, повредените части и съоръженията за
безопасност може да оправи или смени оторизирана
работилница.
• Повредените в
ключватели
оставете да бъдат
сменени в оторизирана работилница.
• Този уред отговаря на всички съответни разпоредби
за безопасност. Ремонти могат да извършват само
квалифицирани електротехници в оторизирани
работилници с използване на оригинални резервни
части. В случай на неспазване на тази инструкция
съществува заплаха за злополука.
Поведение при авария
Окажете при злополука съответната първа помощ и
повикайте колкото се може по бързо квалифицирана
медицинска помощ. Предпазете пострадалия от други
злополуки и го успокойте.
Заради евентуална злополука на работното място
трябва винаги да има под ръка аптечка за първа
помощ според DIN 13164. Материала, който вземете от
аптечката трябва да бъде допълнен веднага.
Ак
о ис
кате помощ, посочете тези данни:
1. Място на злополуката
2. Вид на злополуката
3. Брой на ранените
4. Вид нараняване
Пояснение на символите
В това упътване и/или на уреда са използвани тези
символи:
Безопасност на продукта:
Продукта отговаря на
съответните норми на ЕС
Уреда има защитна
клас на защита II
изолация
Забрани:
Обща забрана (свързана с
друг пиктограм)
Не използвайте по време на
дъжд
Предупреждение:
Предупреждение /
внимание
Предупреждение за опасно
електрическо напрежение
Нареждания:
Преди употреба си
прочетете упътването за
обслужване
Носете предпазни ръкавици
Защита на жизнената среда:
Одпадъците
ликвидирвайте
професионално, така че да
не вредите на жизнената
среда
Опаковъчния материал от
картон можете да
предадете за цел
рецилация във вторични
суровини
Дефектни или
ликвидирани електрически
или електронни уреди
могат да бъдат предадени
в съответните сборни
пунктове
Page 64

64
Опаковка:
Пазете пред мокро
Ориентация на
опаковката нагоре
Технически данни:
Присъединение Тегло
Употреба на уреда в съответствие с неговото
предназначение
Професионално стартиращо зарядно устройство за
зареждане, бързо зареждане и стартиране на
автомобили. Подвижно благодарение на големите
колелета.
Остатъчни електрически рискове
Пряк електрически контакт
Дефектен кабел или щепсел може да доведе до
злополука от елестрически ток.
Оставете винаги дефектния кабел или щепсел да
бъдат сменени от специалист. Използвайте уреда само,
когато присъединението е снабдено с токова защита.
Непряк електрически контакт
Нараняване от проводими части при отворени или
дефектни конструктивни елементи.
Когато извършвате поддръжка винаги изключете
машината от източника на електрически ток. Използвайте
само в присъединения снабдени с токова защита.
Недостатъчно локално осветление
Недостатъчното осветление представлява висок риск
за сигурност.
Когато работите с този уред осигурете винаги достатъчно
осветление.
Ликвидация
Инструкциите за ликвидация произлизат от пиктограмите,
които са разположени на уреда респ. на опаковката.
Описанието на отделните значения ще намерите в
раздел “Обозначения”.
Ликвидация на транспортната опаковка
Опаковката предпазва уреда пред увреждане при
транспортиране. Опаковъчните материали обикновено са
избрани според тяхната грижа за околната среда и
начина на ликвидация и затова могат да се рециклират.
Връщането на опаковката в обръщение спестява
суровини за материала и понижава разходите за
ликвидация на отпадъците.
Части от опаковката (напр. фол
стиропор®) магат да
ио,
представляват опасност за деца.
Съществува опасност от задушаване! Съхранявайте
части от опаковката на недостъпно за деца място, и ги
ликвидирайте колкото се може по-бързо.
В рамките на ЕС този символ предупреждава
за това, че не е разрешено дадения продукт
да се ликвидирва като домашен отпадък.
Старите уреди съдържат ценни материали,
ги предадете в пункт за вторични суровини , за да
избегнете увреждане на околната среда и човешкото
здраве с неко
Моля, затова ликвидирайте старите уреди посредством
пунктовете за вторични суровини или ги изпратете за
ликвидация там, където сте ги купили. Така някои
материали от тези уреди ще бъдат използвани отново.
които могат да се рециклират, и битрябвалода
нтролирано съхран
ение на този отпадък.
Изисквания за обслужване
Преди употреба на уреда обслужващия трябва
внимателно да прочете упътването за обслужване.
Квалификация
Освен подробно поучение от специалист за използването
на уреда не е необходима никаква специална
квалификация.
Минимална възраст
С уреда могат да работят само лица, които са навършили
16 години.
Изключения прави използването на непълнолетни само,
ако това става по време на професио-налното обучение с
цел постигане на умение под надзора на педагог.
Обучение
Използването на уреда изисква само съответно поучение
от специалист, респ. от упътването за обслужване .
Специално обучение не е необходимо.
Технически данни
Присъединение: 230 V/50-60 Hz
Зарядно/стартиращо
напрежение: 12 V / 24 V регулируемо
Ефективен ток на зареждане: 60 A
Аритм. ток на зареждане: 40 A
Ток на стартиране прибл.: 0 V: 390 A/1,5 V: 240 A
Макс. мощност на мрежата: 8 kW
Мин. защита: 16 A
Номинален капацитет: 20-1000 Ah
Старт на батерията: 35-50 Ah (безпредварително
зареждане) 65-100 Ah (с
предварително зареждане)
Тегло: 16 кг
Размери (мм): 330 x 250 x 600
Транспортиране и съхранение
• При съхранение за по-продължително време би
трябвало основно да почистите уреда.
• Пазете уреда с пластмасов брезент, картон или
подобен материал пред метеорологични влияния.
Монтаж и първоначално пускане в действие (карт.
4+5+6)
Завийте дръжката според карт. 5.
Сега промъкнете оста (карт.1/2) през зарядното
устройство. След това монтирайте предпазните пръстени,
които са част от доставката. Сега на оста поставете още
колелетата (карт.1/1) и също ги осигурете с осигуряващи
пръстени (карт.6).
Закрепете тасовете на колелетата
На края с помоща на доставените болтове (карт.1/3
завийте крака
(карт.1/4).
)
Обслужване
Преди всяко възстановяване и регулиране на
зарядното устройство го изключете от изпочника на
електрическо напрежение.
Функция на зареждане (карт.3)
• Присъединете зарядното устройство към
зережданата батерия.
• Черния полюсен кабел трябва винаги най-напред да
се свърже с отрицателния полюс, едва след това
свържете с клемата положителния полюс.
Page 65

65
• Преди зареждане отпойте напълно батерията
от автомобила.
• Регулирайте зарядното устройство на най-ниската
степен на зареждане (min/1) (карт. 3/8)
• Сега мушнете щепсела в щепселната кутия и
регулирайте степента на зареждане по посока
нагоре, доката зарядното устройство покаже ток на
зареждане, който отговаря прибл. на 10 % от
капацитета на батерията.
• Ако тока на зар
еждане се
понижава, стерента на
зареждане може да се повишава (карт.3/7)
• Най-късно 3-5 часа сред приключване на
зареждането отпойте батерията.
•
Индикацията на зарядния ток след
приключване на зареждането няма да се понижи
напълно на нула.
Време на зареждане на батерията
• Времето на зареждане зависи винаги от състоянието
на батерията (почти заредена, заредена на
половина, заредена напълно)
• За регенериране на батерията са достатъчни 2-4
часа. За пълно зареждане са необходими 8-
•
Би трябвало да не превишите максималното
10
часа.
време на зареждане 10 часа.
Помощ при стартиране
• ВНИМАНИЕ! При стартирането може да възникне
пренапрежение, което би могло да причини
повреждане на електрониката в таблото на Вашия
автомобил. Моля, консултирайте това с автомеханик.
• Присъединете батерията според упътването в
рездел Зареждане и я оставете присъединена с
клеми към автомобила!
• Би трябвало автомобила да се стартира
задължително от две ли
• Нагласете
зарядното устройство на максимална
ца.
мощност:
Степен на включване 2 (карт. 3/7) и „BOOST“ (карт.
3/8).
• Първото лице ще натисне включвателя на
стартиране на зарядното устройство. (карт. 3/9)
Второто лице веднага ще започне прозеса на
запалване.
• Веднага след като автомобила заработи, веднага
прекъснете процеса на стартиране, макс. 9-
• След всяки
неуспешен опит за стартиране, моля
10 сек.
изчакайте прибл. 5 минути, докато уреда изстине.
Тип:
Ако преди това зареждате батерията 10-15
минути, ще ви е необходим значително по малък ток
на стартиране.
Внимание: Ако преминете максималното време
на стартиране от 10 секунди, може да се стигне до
прегаряне на предпазителите респ. повреждане на
автомобила!
Внимание: Полюсните клеми не трябва да се
докосват.
Внимание: Зарядното устройство е снабдено с
предпазител срещу претоварване.
Важно: Смяната на разтапящите се предпазители
(карт. 3/5) за други, които са различни от разтапящите
предпазители използвани в уреда, може да доведе до
материални щети или нараняване на хора.
Извършвайте смяна на разтапящите предпазители
само тогава, когато мрежовия кабел е изваден от
щепселната кутия!
Инструкции за безопасност за обслужване
• Преди включване на машината трябва да бъдат
монтирани на своите места всички съоръжения за
безопасност и предпазни съоръжения.
• Забранено е да се опитва стартирането на
автомобила с изтощена или повредена батерия, това
би могло да доведе до повреждане на уреда.
• Когато се опитвате да стартирате батерията в
положение „з
ареждане“ вм
есто „помощ при
стартиране“, може да се стигне до повреждане на
амперметъра и задействане на защитата срещу
претоварване.
• Преди натискане на главния включвател се убедете,
че зарядното устройство е включено правилно.
• Предупреждение! Ако имате съмнения, преди
употреба на уреда се обърнете за помощ към
специалист от оторизиран серв
• Използвай
те уреда едва след старателно прочитане
изен център.
на упътването за обслужване.
• Спазвайте всички разпоредби за безопасност
посочени в упътването.
• Дръжте се отговорно спрямо други лица.
Упътване„стъпка след стъпка“
Зареждане
1. Присъединете зарядното устройство за батерии.
2. Настройте функцията за зареждане (min/1).(карт.3/7)
3. Включете зарядното устройство.
4. Включете мрежовия кабел.
5. Батерията ще се зарежда. (макс. 10 часа)
Стартиране
1. Присъединете зарядното устройство за батерии.
2. Настройте функцията за стартиране. (карт.3/9).
3. Включете мрежовия кабел.
4. Включете зарядното устройство, след това веднага
стартирайте автомобила.
5. Веднага след като автомобила заработи, веднага
прекъснете стартирането и изключете зарядното
устройство и го отпойте от клемите.
Повреди-причини-отстранение
ВНИМАНИЕ: НАЙ-НАПРЕД ВИНАГИ ПРОВЕРЕТЕ
ПРЕДПАЗИТЕЛИТЕ СРЕЩУ ПРЕТОВАРВАНЕ!
Включвател на защитата срещу претоварване :
1. Свържете червените клещи към положителния
полюс (+) и черните клещи към отрицателния (-).
2. Изключете контакта и проверете предпазителите.
3. Изберете по-ниска степен на зареждане.
4. Ако мощността на батерията е прекалено висока,
препоръчваме да оставите батерията да бъ
заредена от еле
ктротехник и след това с често
де
използвоне на зарядното устройство да поддържате
високо ниво на зареждане, или да се снабдите с помощно зарядно устройство.
Оставете батерията да бъде проверена от
специалист. Сменете батерията.
Прекалено силен ток на зареждане в началото на
зареждането.
1. Внимание: ако зарядния ток след 15 - 20 минути още
е висок, това може да означава, че батерията отново
се изтощава.
Оставете батерията да бъде проверена от
специалист. Сменете батерията.
Прекалено слаб ток на зареждане.
1. В случай на необходимост опитайте да нагласите
регулацията на зарядния ток на по-висока стойн
ост.
Page 66

66
Показателя на амперметъра докосва минимума на
скалата.
1. Оставете батерията да бъде проверена от
специалист. Сменете батерията.
2. Осигурете напрежението на мрежата да отговаря на
напрежението , което Ви е необходимо.
Амперметъра не показва.
1. Почистете клемите и сложете отново клещите.
2. Оставете за проверка при специалист. Сменете
батерията.
3. Проверете функционирането на зарядното
у
ст
ройство върху друга батерия, която е в
безупречно състояние.
Причини за претоварването
1. Лошо свързване на клещите към батерията.
2. По невнимание клещите взаимно се докосват или се
стига до техния непряк контакт.
3. Батерията е напълно респ. силно изтощена.
4. Батерията е изтощена напълно и притежава по-висок
капацитет от мощността на за
рядното ус
тройство.
5. Батерията е повредена или дефектна (например
късо съединение на вътрешните елементи)
Прегледи и поддръжка
Преди всяка работа изключете машината от източника на
електрическо напрежение.
• За чистене на пластмасовите части използвайте
влажен парцал. Не употребявайте чистещи
препарати, разтворители или остри предмети.
• След всяка употреба отстранете с мека четка от
вентилационния отвор и подвижните части
наслоения прах.
Редовно смазвайте с масло всички подвижни
метални части.
Инструкции за безопасност за прегледи и поддръжка
След всяка употреба
Отстранете праха от вентилационните отвори и
подвижните части.
Редовно
Смазвайте подвижните метални части с масло
(универсално масло)
Редовно
Контролирайте всички болтове, дали са здраво дотегнати.
Сервиз
Имате ли технически въпроси? Рекламации?
Необходими ли Ви са резервни части или упътване за
обслужване?
На нашите страници www.guede.com в отдел Сервиз ще
Ви помогнем бързо и без излишна бюрокрация.
Помогнете ни, моля, за да можем да Ви помагаме. За да
можем да идентифицираме Вашия уред в случай на
рекламация, ни е необ
ходимо да
знаем неговия сериен
номер, номера на продукта и година на производство.
Всички тези данни ще намерите на типовата табелка. За
да ги имате под ръка постоянно, запишете ги, моля, тук.
Сериен номер:
Номер на продукта:
Година на производство:
Тел.: +49 (0) 79 04 / 700-360
факс: +49 (0) 79 04 / 700-51999
E-Mail: support@ts.guede.com
ДЕКЛАРАЦИЯ ЗА СХОДСТВО С ЕС
С това декларираме ние,
Güde GmbH & Co. KG
Birkichstrasse 6
D-74549 Wolpertshausen
Германия
че концепцията и конструкцията на долупосочените уреди
в изпълнения, които пускаме в обръщение отговарят на
съответните основни изисквания на инструкциите на ЕС
за безопасност и хигиена.
В случай на изменение на уреда, което не е било
консултирано с нас, тази декларация губи своята
валидност.
Об
означе
НА БАТЕРИИ V 421 C
ние на уреда: ЗАРЯДНО УСТРОЙСТВО
Номер на продукта: 85074
Съответни наредби на ЕС:
2006/95/EG
2004/108/EG
Използвани хармонизирани норми:
EN 60335-2-29:2004
EN 60335-1/A14:2010
EN 62233 :2008
EN 55014-1:2006
EN 55014-2/A2:2008
EN 61000-3-2:2006
EN 61000-3-3:2008
EN 61000-3-11:2000
Дата / подпис на производителя : 10.08.2011г.
Данни за подписания: управител
госп. Арнолд
Техническа документация: J. Bürkle FBL; QS
Page 67

Page 68

GÜDE GmbH & Co. KG
Birkichstrasse 6
74549 Wolpertshausen
Deutschland
Tel.: +49-(0)7904/700-0
Fax.: +49-(0)7904/700-250
eMail: info@guede.com
 Loading...