

Gude Expert Power Control NET 8x User Manual
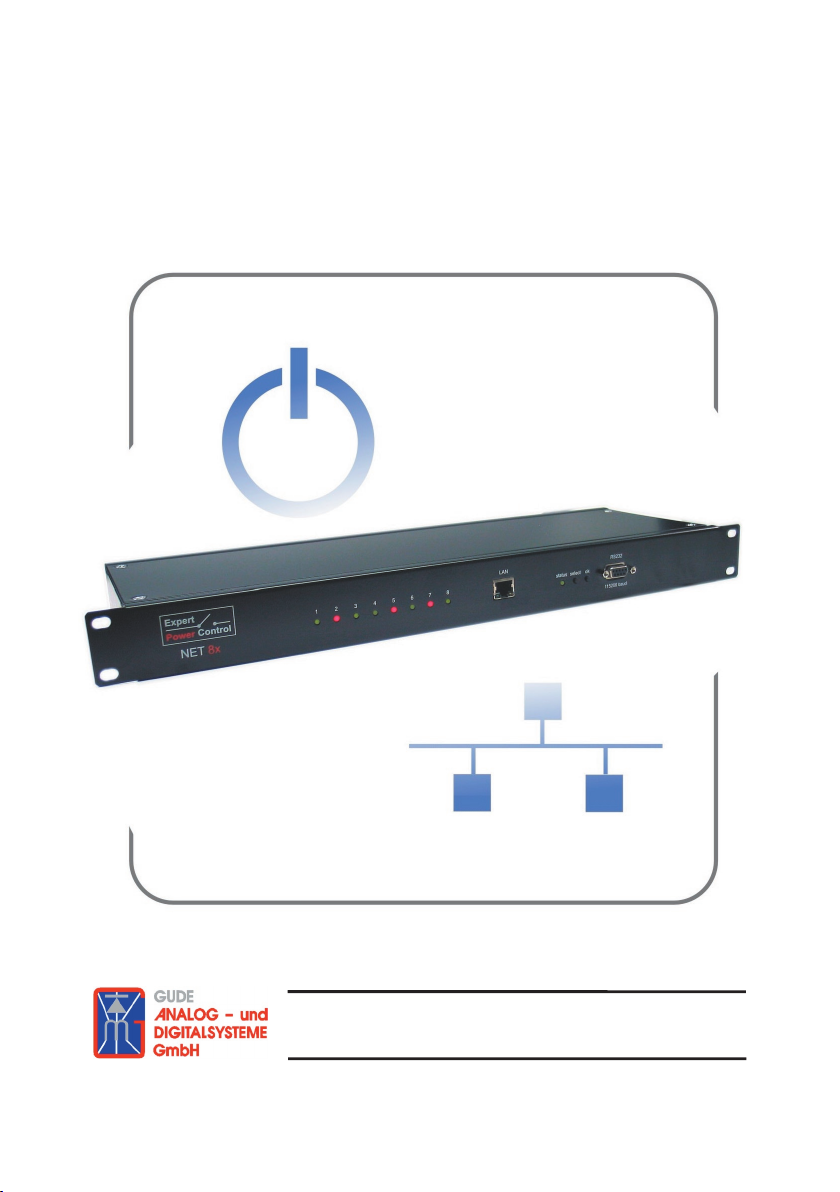
Expert Power Control NET 8x
The eight fold socket for TCP/IP networks
Manual

1Expert Power Control NET 8x
Manual Expert Power Control NET 8x
© 2008 Gude Analog- und Digitalsysteme
Rev. 2.4

Content
Security Advise 2
1. Description 3
2. Hardware 3
2.1 Extend of Delivery 3
2.2 Installation 4
2.3 Status LED 4
3. Conguration 5
3.1 Automatic conguration by DHCP 5
3.2 Network conguration by GBL_Conf.exe 5
3.3 Conguration by Webinterface 6
3.4 IP Access Control List 13
3.5 SNMP 13
3.6 Syslog 14
4. Switching 15
4.1 Switching at the device 15
4.2 Switching by Webinterface 15
4.3 Switching via Serial Interface 17
4.4 Temperature sensor 18
5. Features 19
5.1 Bootloader mode 19
5.2 Firmware update 19
5.3. Technical information 20
5.4. Default settings 20
6. Support 21
CE conformity declaration 22
Contact 23
1Expert Power Control NET 8x

3Expert Power Control NET 8x
Security Advise
The device must be installed only by qualied personnel accord-
ing to the following installation and operating instructions. The
manufacturer does not accept responsibility in case of improper
use of the device and particularly any use of equipment that may
cause personal injury or material damage.
The device contains no user-serviceable parts. All repairs must
be performed by factorytrained service personnel.
Check that the power cords, plugs and sockets are in proper
condition.
The device can be connected only to 230V AC (50 or 60 Hz)
sockets.
Always plug the device into properly earthed power sockets.
The device is intended for indoor use only. Do NOT install them
in an area where excessive moisture or heat is present.
Because of safety and approval issues it is not allowed to modify
the device without our permission.
Please note the safety advises and manuals of connected devices, too.
The device is NOT a toy. It has to be used or stored out or range
of children.
Packaging material is NOT a toy. Plastics has to be stored out of
range of children. Please recycle the packaging materials.
In case of further questions, about installation, operation or usage of the device, which are not clear after reading the manual,
please do not hesitate to ask our support team.
2
Expert Power Control NET 8x

1. Description
With Expert Power Control NET 8x (EPC NET 8x) electrical
devices can be switched via a TCP/IP network. There are only
two steps necessary for installation: The connection to an electric circuit and a TCP/IP network and the conguration of the IP
settings. Afterwards EPC NET 8x can be switched by all PCs of
the network.
2. Hardware
2.1 Extend of Delivery
Included in delivery are:
• Expert Power Control NET 8x for 19“-Installation
• Power supply cable (IEC)
• CD-ROM including Software and Manual
• Short manual
3Expert Power Control NET 8x
5Expert Power Control NET 8x
2.2 Installation
1.) Connect the power supply cable to the power socket (7) at
the rear side of EPC NET 8x and a socket. EPC NET 8x now is
booting and shortly after ready for usage.
2.) Plug the Ethernet cable into the connector (3) on the front
side of EPC NET 8x and connect it to your Ethernet.
3.) Connect the clients to the active outlets at the rear side of
EPC NET 8x (8).
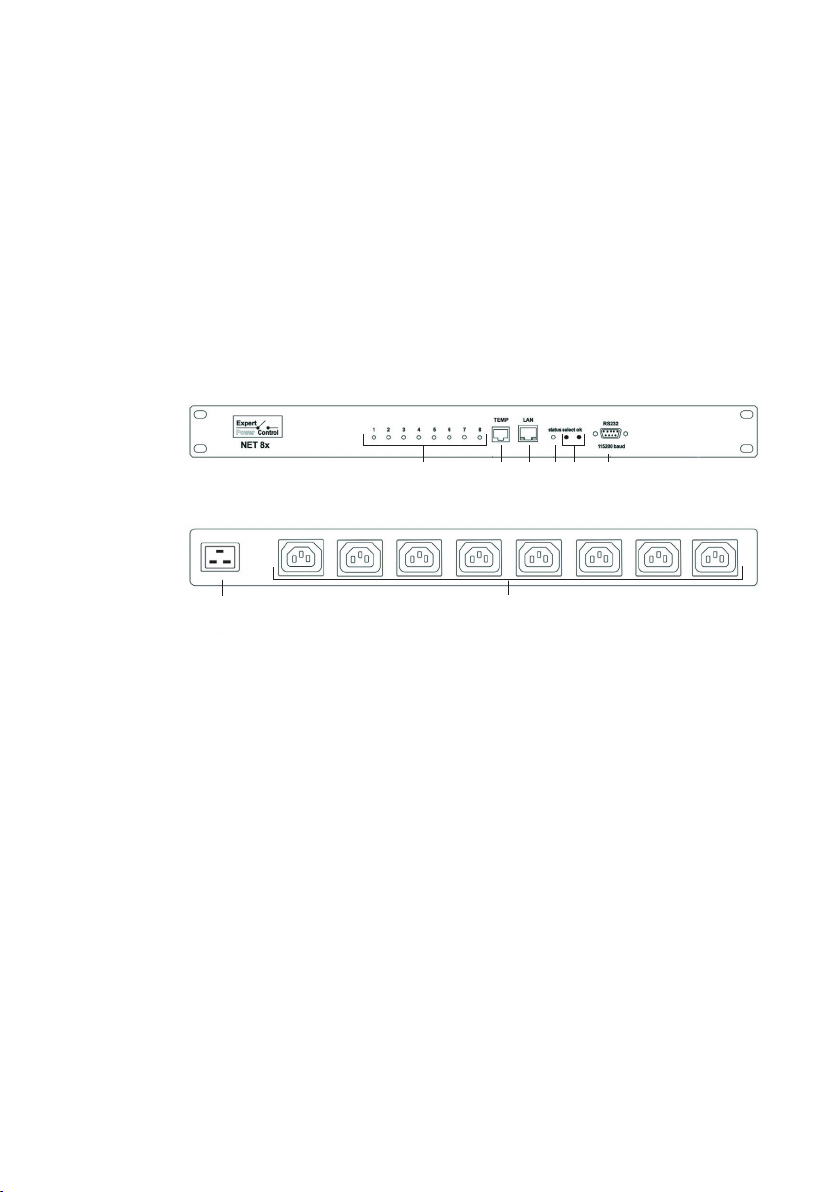
Figure 1 Front side
1 2 3 4 5
Figure 2 Rear side
7 8
1) Power Port LEDs
2) TEMP interface
3) Ethernet connector (RJ45)
4) StatusLED
5) Buttons „select“ and „ok“
6) RS232 connector
7) Power Socket (IEC C20, max. 16A)
8) 8 Power Ports (IEC C13, max. 10A)
6
2.3 Status LED
The Status LED (4) shows different states of the device:
• Status LED red: Device is not connected to the ethernet
• Status LED orange: Device is connected to the ethernet, TCP/IP settings are not allocated
• Status LED green: Device is connected to the ethernet,
TCP/IP settings allocated, device is ready to use
• Status LED blinks alternately red and green: Device is
in Bootloader mode.
4
Expert Power Control NET 8x

3. Conguration
3.1 Automatic conguration by DHCP
After switch-on EPC NET 8x looks for a DHCP server and requests an available IP address (for deactivation of that feature
see 2.2).
Please check the IP adress allocated to EPC NET 8x in the
DHCP server settings to make sure that the same address is
used at every reboot.
3.2 Network conguration by GBL_Conf.exe
For changing the network properties manually, the program
GBL_Conf.exe is required. This tool is available for free on our
website www.gude.info.
Furthermore GBL_Conf.exe enables you to install rmware updates and to reset EPC NET 8x to its factory settings (see 5.2).
Activate bootloader mode of EPC NET 8x and run GBL_
Conf.exe (see 5.1). The program will look automatically for connected devices and will display their network conguration.
If the displayed IP address accords with the factory settings
(192.168.0.2), there is either no DHCP server available in the
network or no free IP address could be allocated.
Enter a free IP address and the according netmask in the entry
mask, then save these changes by clicking on Program Device
gSaveCong.
Restart EPC NET 8x by
switching it off and on again,
so that the changes will take
effect. Now click on Search
in order to have the new
network conguration displayed.
Figure 3 Gbl_Conf.exe
5Expert Power Control NET 8x
7Expert Power Control NET 8x
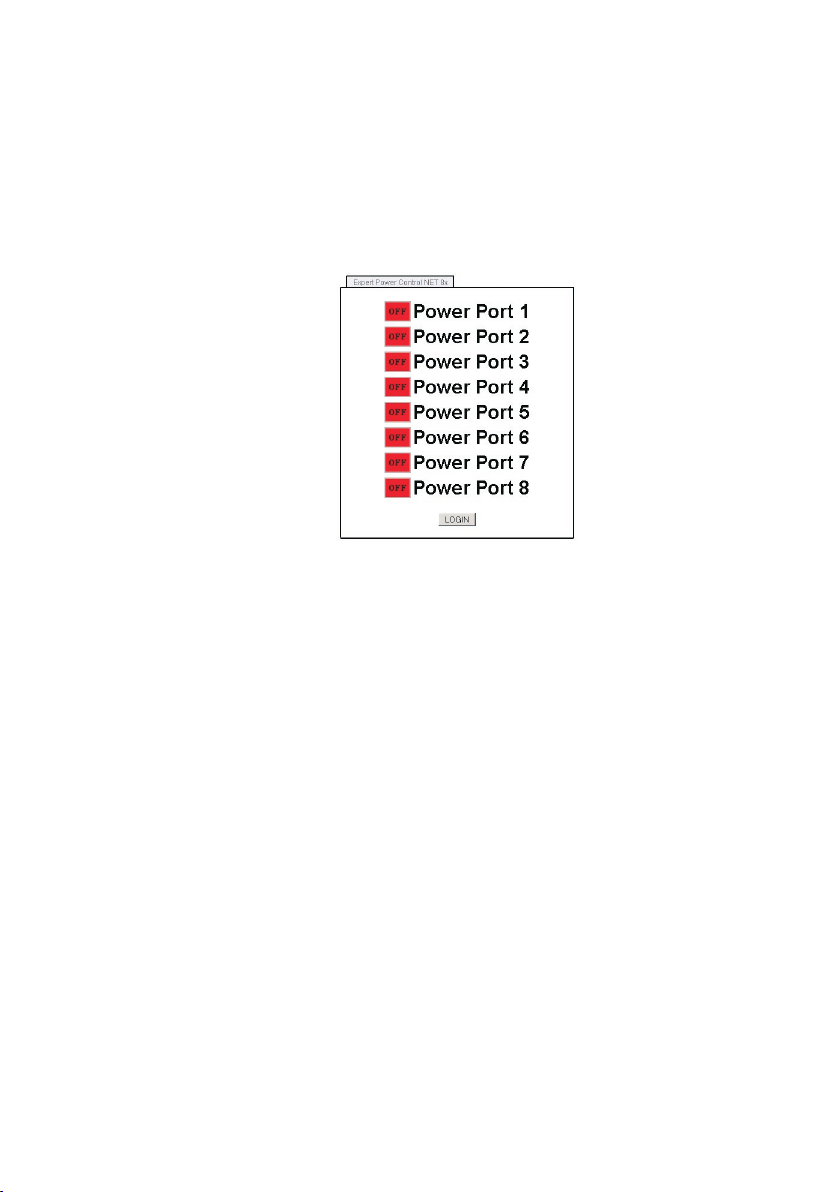
3.3 Conguration by Webinterface
Go to the website of EPC NET 8x. Enter the IP address of EPC
NET 8x into the address line of your internet browser:
http://”IP address of EPC NET 8x”/
Figure 4 LOGIN
and press LOGIN.
6
Expert Power Control NET 8x
 Loading...