

Page 1
Operation
Start / StopFunction Selection
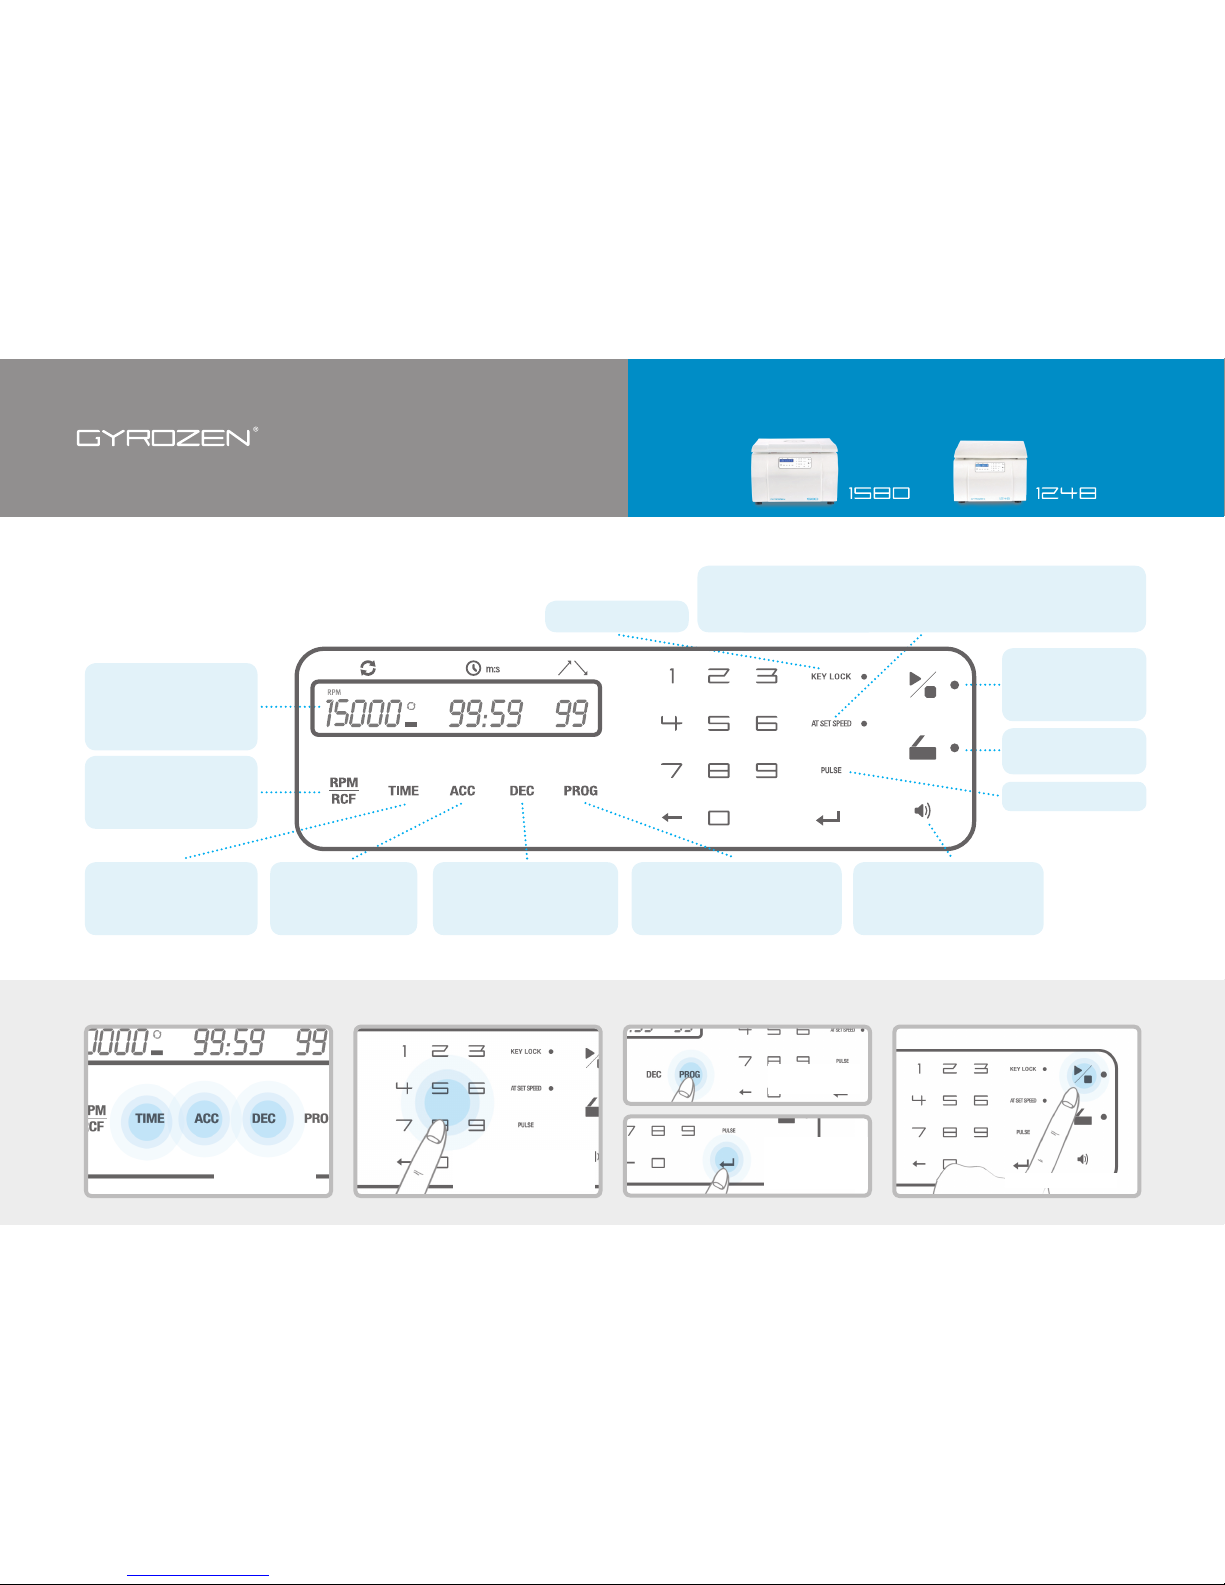
Touch the numeric buttons to
change and touch enter button
to save
Touch a parameter
to be changed
PROG Save / Call
Parameter Change
Touch start / stop button
Touch once : CALL
Touch twice : SAVE
Display & Control Panel
Cat. No. GZ-1580 Cat. No. GZ-1248
Touch the numeric
buttons to change and
touch enter button to
save or call
Display Screen
Status of Speed, Time,
ACC, DEC, Running,
Lid Open / Close
Setting DEC
DEC (0 ~ 9 / Natural DEC 0)
Setting ACC
ACC (1 ~ 9 / Max. 9)
Program SAVE / CALL
Touch once : CALL
Touch twice : SAVE (up to 100)
Setting Speed
Touch once : RPM
Touch twice : RCF
Pulse
Short Spin
Start / Stop
LED ON : Start / Run
LED OFF : Stop
Lid Open
Open : LED turns on
Key Lock / UnLock
End Alarm
Sound volume
(level : 0 ~ 10, 0 : silent)
Key Lock / UnLock
At Set Speed
ON : Counts the time at set speed / OFF : Counts the time from starting
Touch more than 2 sec. : Repeat time of end alarm (time : 0 ~ 99, 0 : silent)
Non-Refrigerated, Multi-Purpose, High- Speed Centrifuges
Quick Guide
Setting Time
To 99 min. 59 sec. or
Continuous (00:00)
Operation
Page 2
Non-Refrigerated, Multi-Purpose, High- Speed Centrifuges
Quick Guide
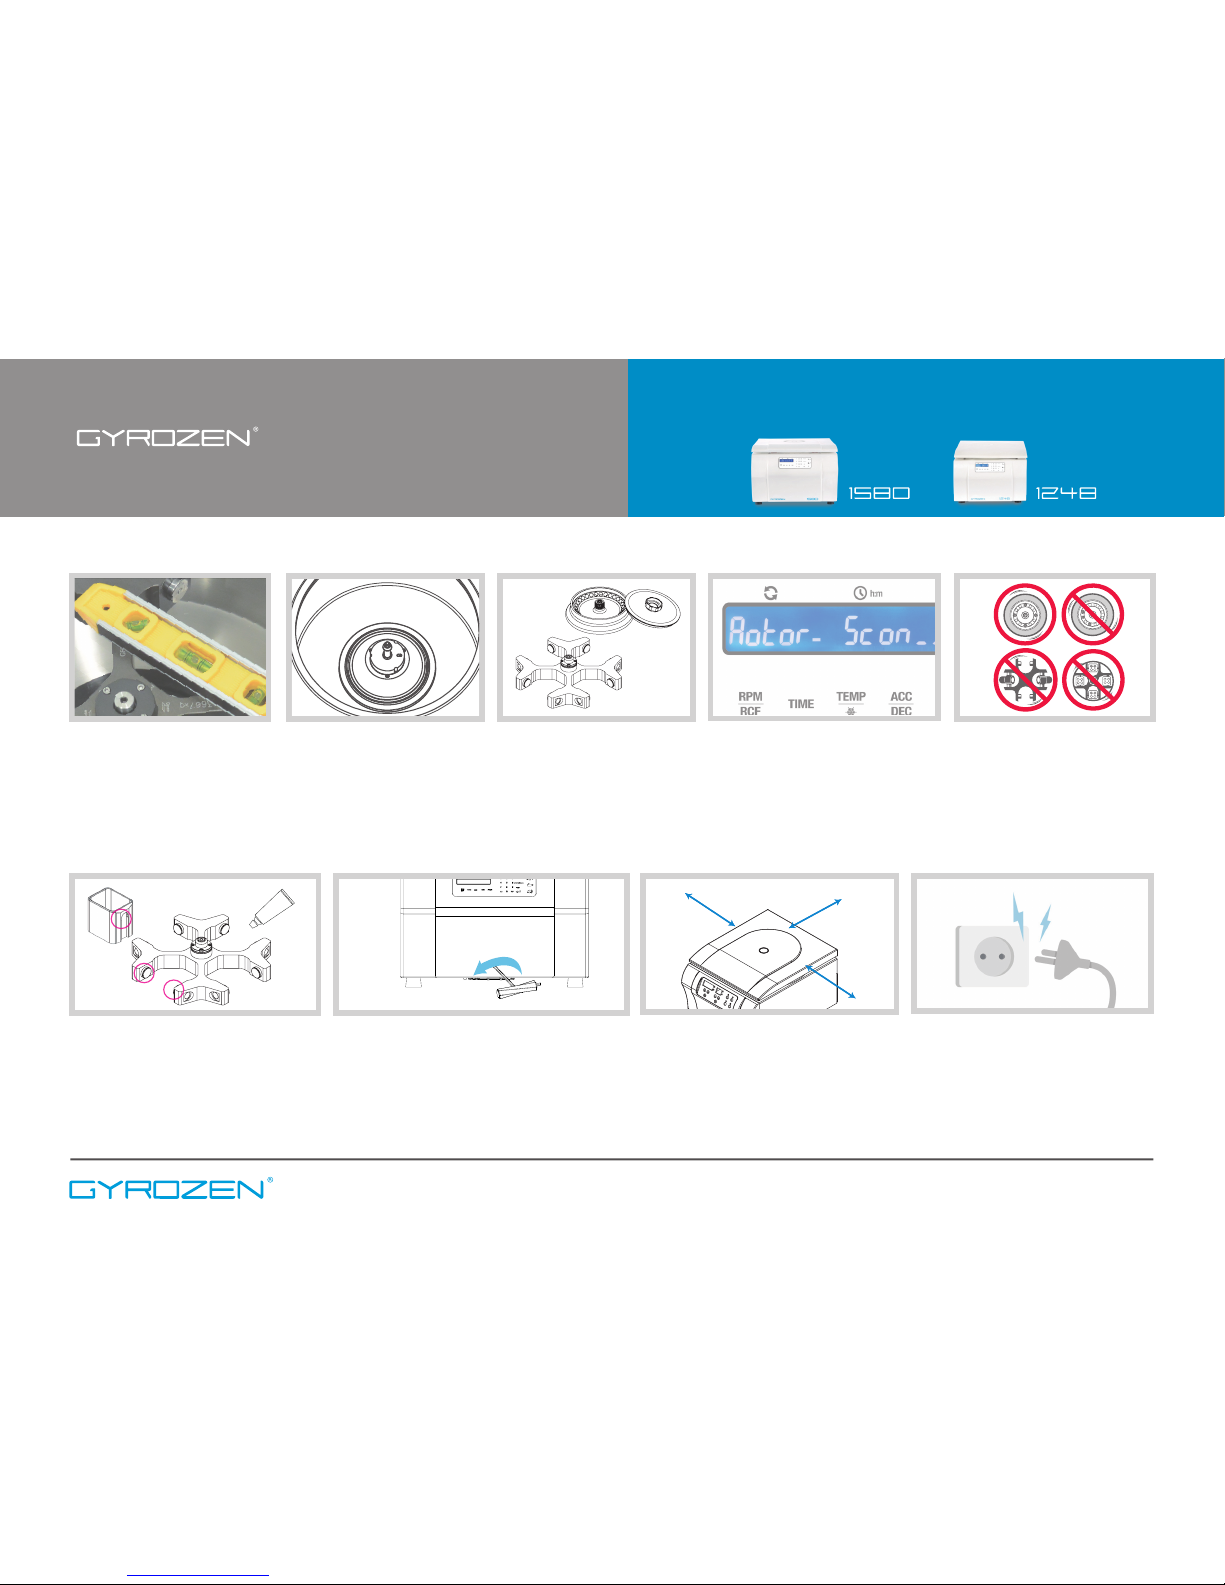
Position the centrifuge with enough space
(30 cm) on each side of centrifuge to ensure
proper air circulation and safety zone.
Secure a safety zone or 30 cm around
centrifuge
Maintenance Tips
Use the power cord supplied with the device
and connect the device to the power supplies
that match the electrical requirements. Switch
o the device and disconnect the power plug
after using the centrifuge.
Electrical safety
30 cm
30 cm
30 cm
Download corresponding user manual from www.gyrozen.com
EQG-7(Rev.1) Proudly made by Jieun Hwang, Hyewon Jeong
Clean rotor pivots and bucket grooves.
Lubricate them by coating the grease
sometimes to swing the buckets enough.
If the centrifuge lid won’t open, insert the emergency lid
open tool into the hole and turn it counter clockwise.
(Before manual opening, switch o the device and wait
until spinning is completely stopped.)
Lubricate the contact area Emergency lid open
Balancing the rotor
When centrifuge is installed, check
the horizontality by a Bubble Leveler.
Balance for centrifuge & rotor
If a rotor is absent and power is supplied,
“Rotor Scan”→“Error 9” will be appeared.
This message will be cleared after rotor coupling and lid closing.
Automatic rotor identication
Load the sample symmetrically.Clean the motor shaft. Remove the
foreign substances not to cause
any vibration.
Chamber cleaning & checking
1
2
3
4
Inspect the rotor and accessories for
damage before each use. Discontinue use and replace it if damaged.
Checking accessories for
damage
Precautions for Use
 Loading...