

GyroSet Glory User Manual

GyroSet Glory Headset User Manual (Win)
Product features------------------------------------------------------------------
The GyroSet Glory headset is a pointing device / head mouse
The GyroSet Glory headset is a versatile tool to control computers by head movements. The headset
can also be used as a wheelchair head controller together with the GyroSet Guide wheelchair
controller or interfaces to various other wheelchair controllers.
Below are the main components of GyroSet Glory:
1. USB connector. It is a Micro USB connector used mainly for charging the headset.
2. The Power switch switches power on and off for the headset (Slide left: ON; slide right: OFF)
3. Mode Selector button (big button). The mode selector button switches between headset
control and computer mouse control. When pushed it also centres the cursor on the screen.
The location of the button allows it to be pushed against a headrest of a wheelchair.
4. Click sensor. An infrared sensor that detects blinks or cheek movements based on its
placement. It is specially designed so that it’s not disturbed by sunlight, other ambient light
sources or darkness.
The GyroSet Glory headset contains a Lithium-ion battery that lasts 18-24 hours with
continuous usage, when fully charged. The headset communicates with the USB dongle
wirelessly.
What’s in the box-----------------------------------------------------------------
1. GyroSet Glory headset
2. Micro USB to USB charging/data cable
3. USB dongle
Downloading the GoryTools software-- ------------------------------------
The device can be set up / customised to individual needs. By installing the application you will be
able to change the parameters of the headset.
1. Open an internet bowser
2. Go to nowtechnologies.co.uk or nowtech.hu and find SUPPORT in the upper-right corner,
choose DOWNLOADS from the roll-down menu
3. Choose your operating system and click ‘Glory Tools Windows application’, wait for the .zip
file to download
4. Unpack the .zip file and run setup.exe
5. Once finished insert the dongle into one of the free USB ports and click on the GloryTools
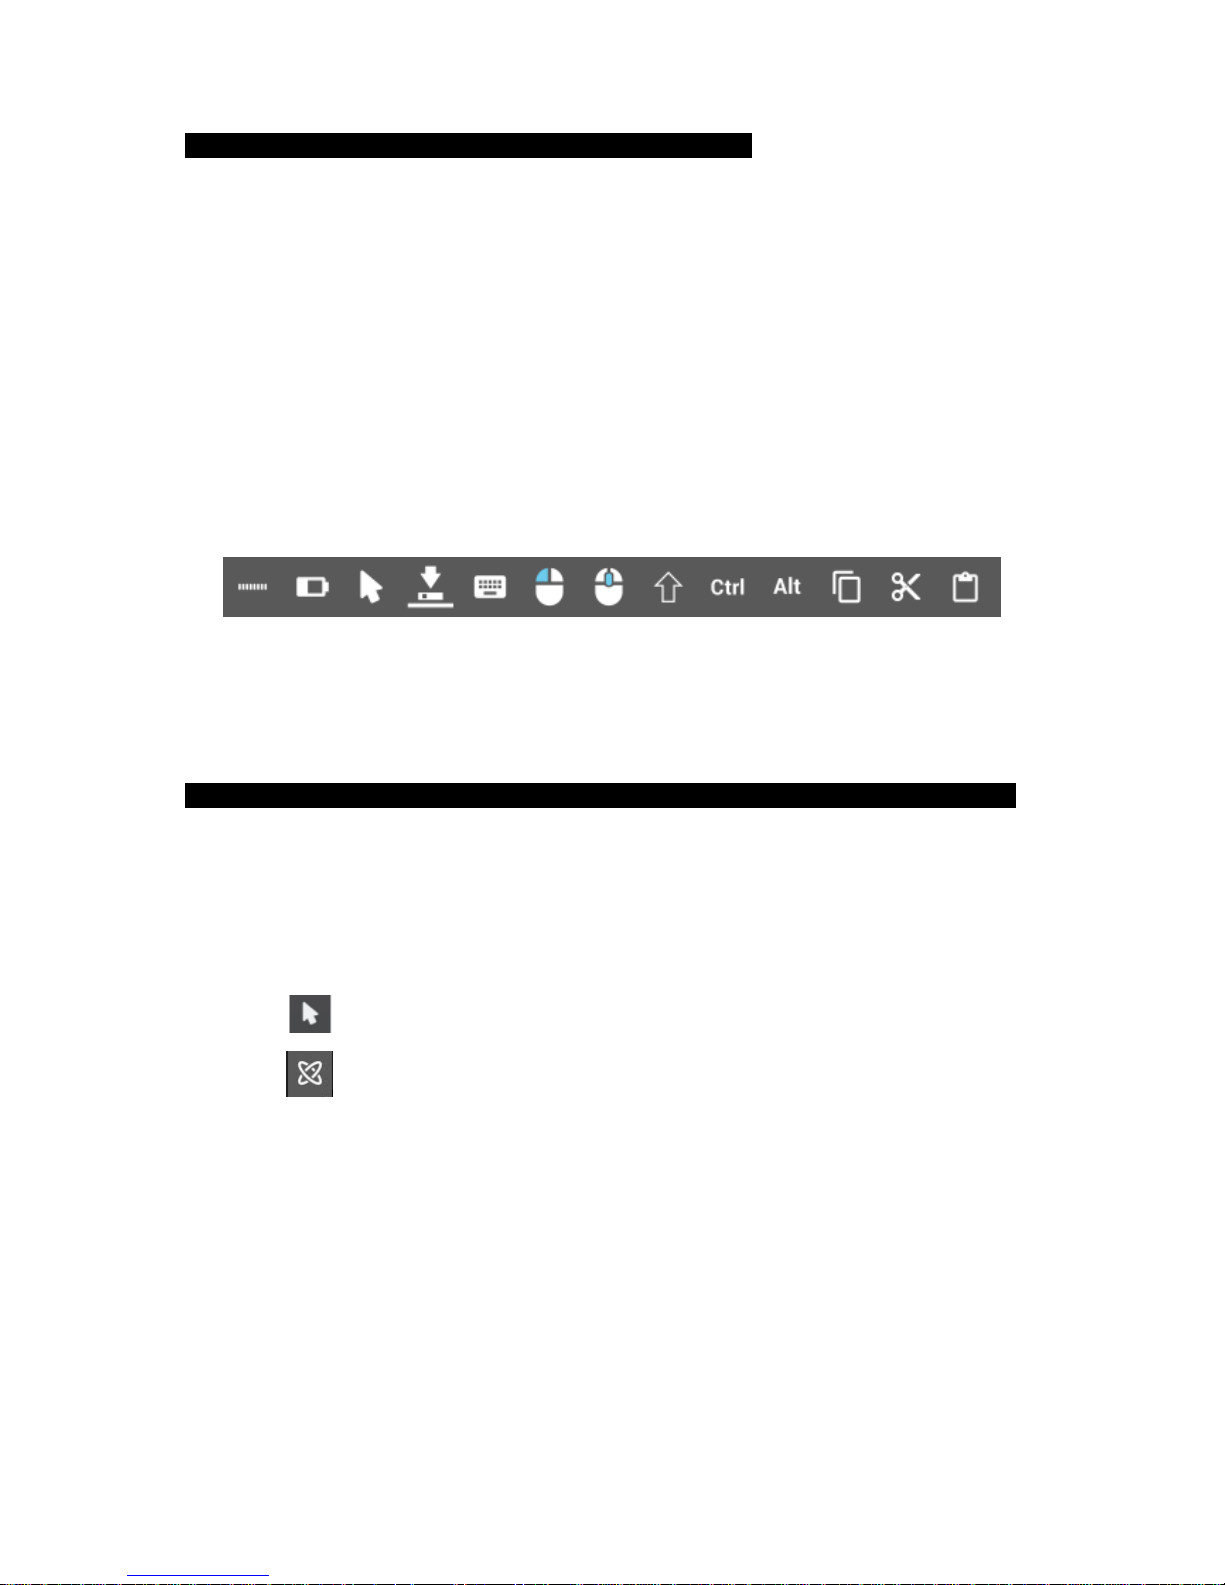
icon - a sidebar will appear:
Setting up the GoryTools software and the headset step by step --------------------------
Please follow these steps to ensure smooth operation and the best
user experience with the GyroSet Glory headset!
1. Click the status icon to see the Main Menu
Status Icon – Active Headset
Status Icon – Inactive Headset
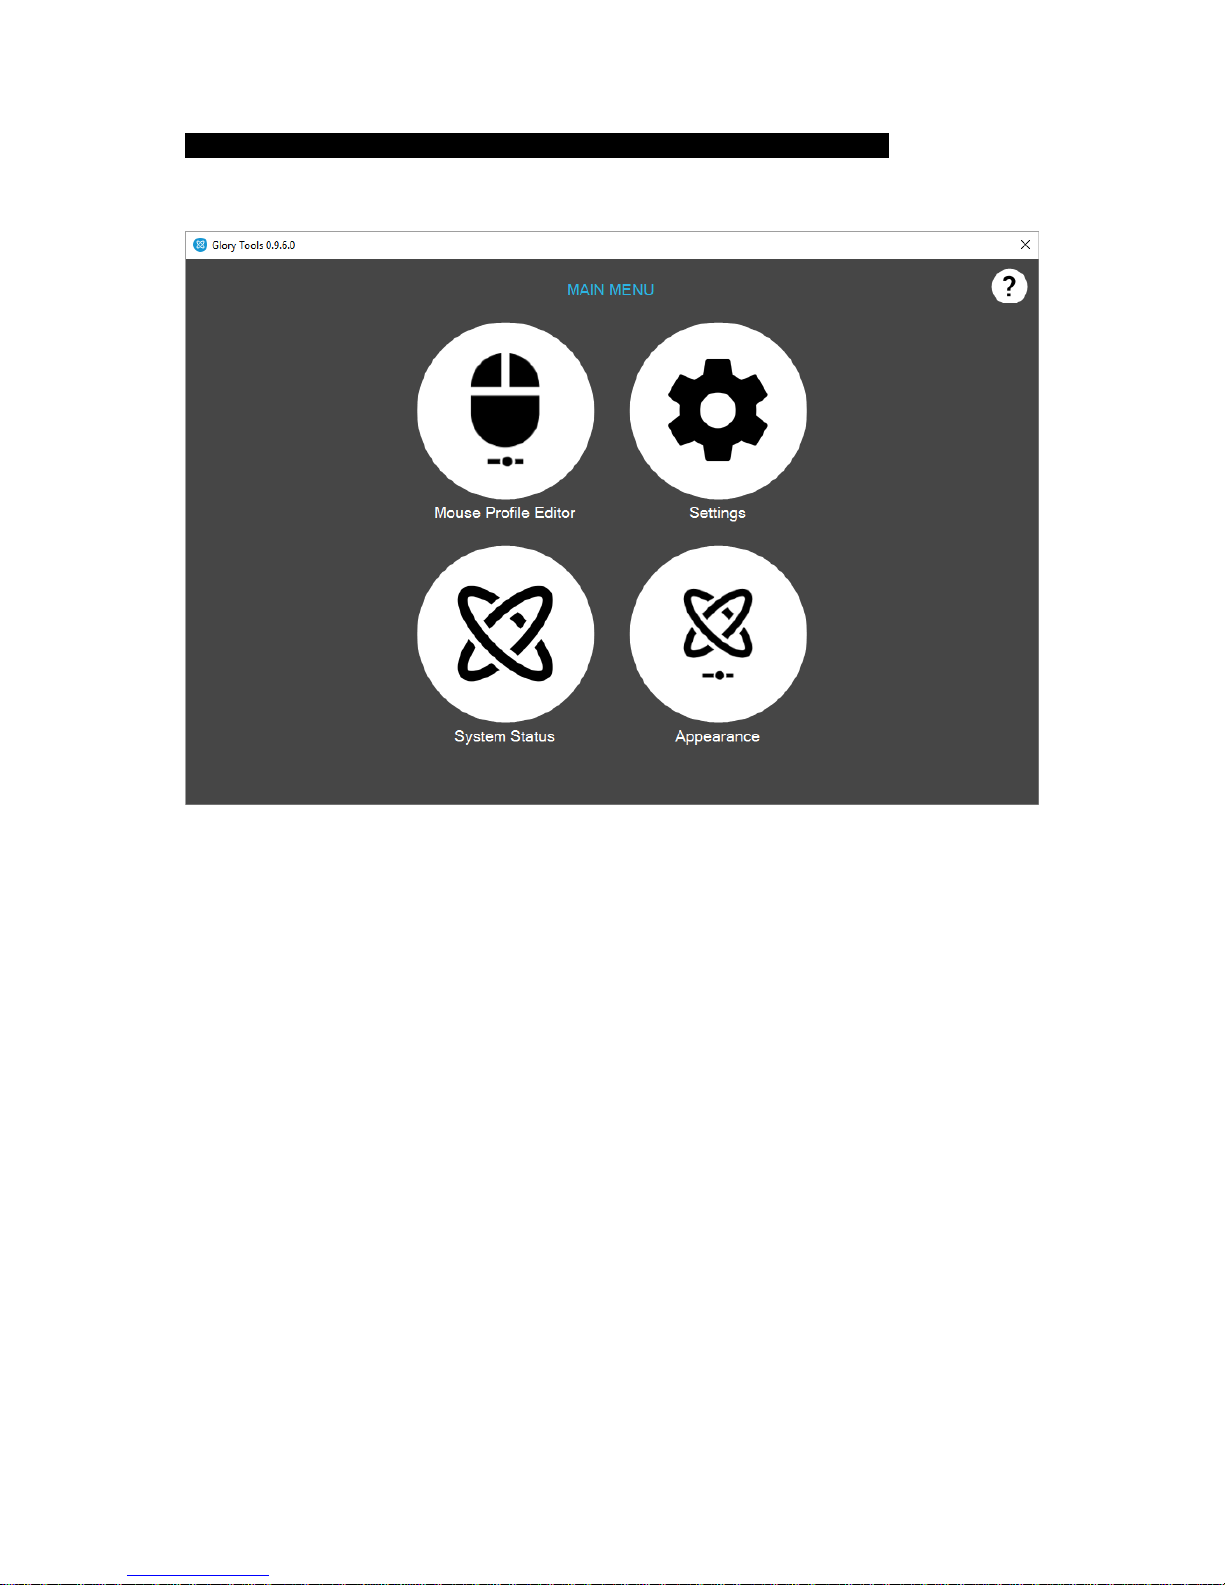
2. The Main Menu will appear.
3. Take the headset out of the box and place it next to the computer.
4. Turn on the headset while still on the table (the LED should show green, if not then the
battery is depleted and the headset should be charged by using the USB cable)
5. Go to System Status and check if all the parameters are shown
6. Go to Settings Pairing and pair the dongle with the headset (on how to do it please
check the Pairing Menu description further in this manual

7. Once paired, the headset can be used with its default settings right away, but depending
on your environment its sensors may need to be calibrated. It is recommended to
calibrate the sensors once the box has been opened.
8. Go to Settings Calibration and follow the instructions on the screen (there is a
description further in this manual on how to do calibration)
9. Put on the headset and position the blink sensor about 1 cm distance from the corner of
your eye or your cheek. On how to best position the sensor please see our FAQ section.
10. Once calibrated you may go to the Mouse Profile Editor to adjust the range and filters for
best user experience. The settings can be saved into separate profiles. For an explanation
of the various possibilities please see the Mouse Profile Editor section.
Menu descriptions ---------------------------
Main Menu
In the main menu you will find 4 menu items:
1. Mouse Profile Editor – this is the most important menu item for a user. This allows
customizing the behavior and operation of the mouse.
2. Settings – Under Settings, further technical items can be found (Channels, Calibration,
Pairing and Firmware update
3. System Status – this menu item allows the user to see the operational status of the headset
and the dongle
4. Appearance – lets the user adjust the sidebar’s properties and the language of the
GloryTools application
5. Help - In the upper-right corner you will see a question mark that takes you to HELP. Under
Help you will find instructions and the manual.
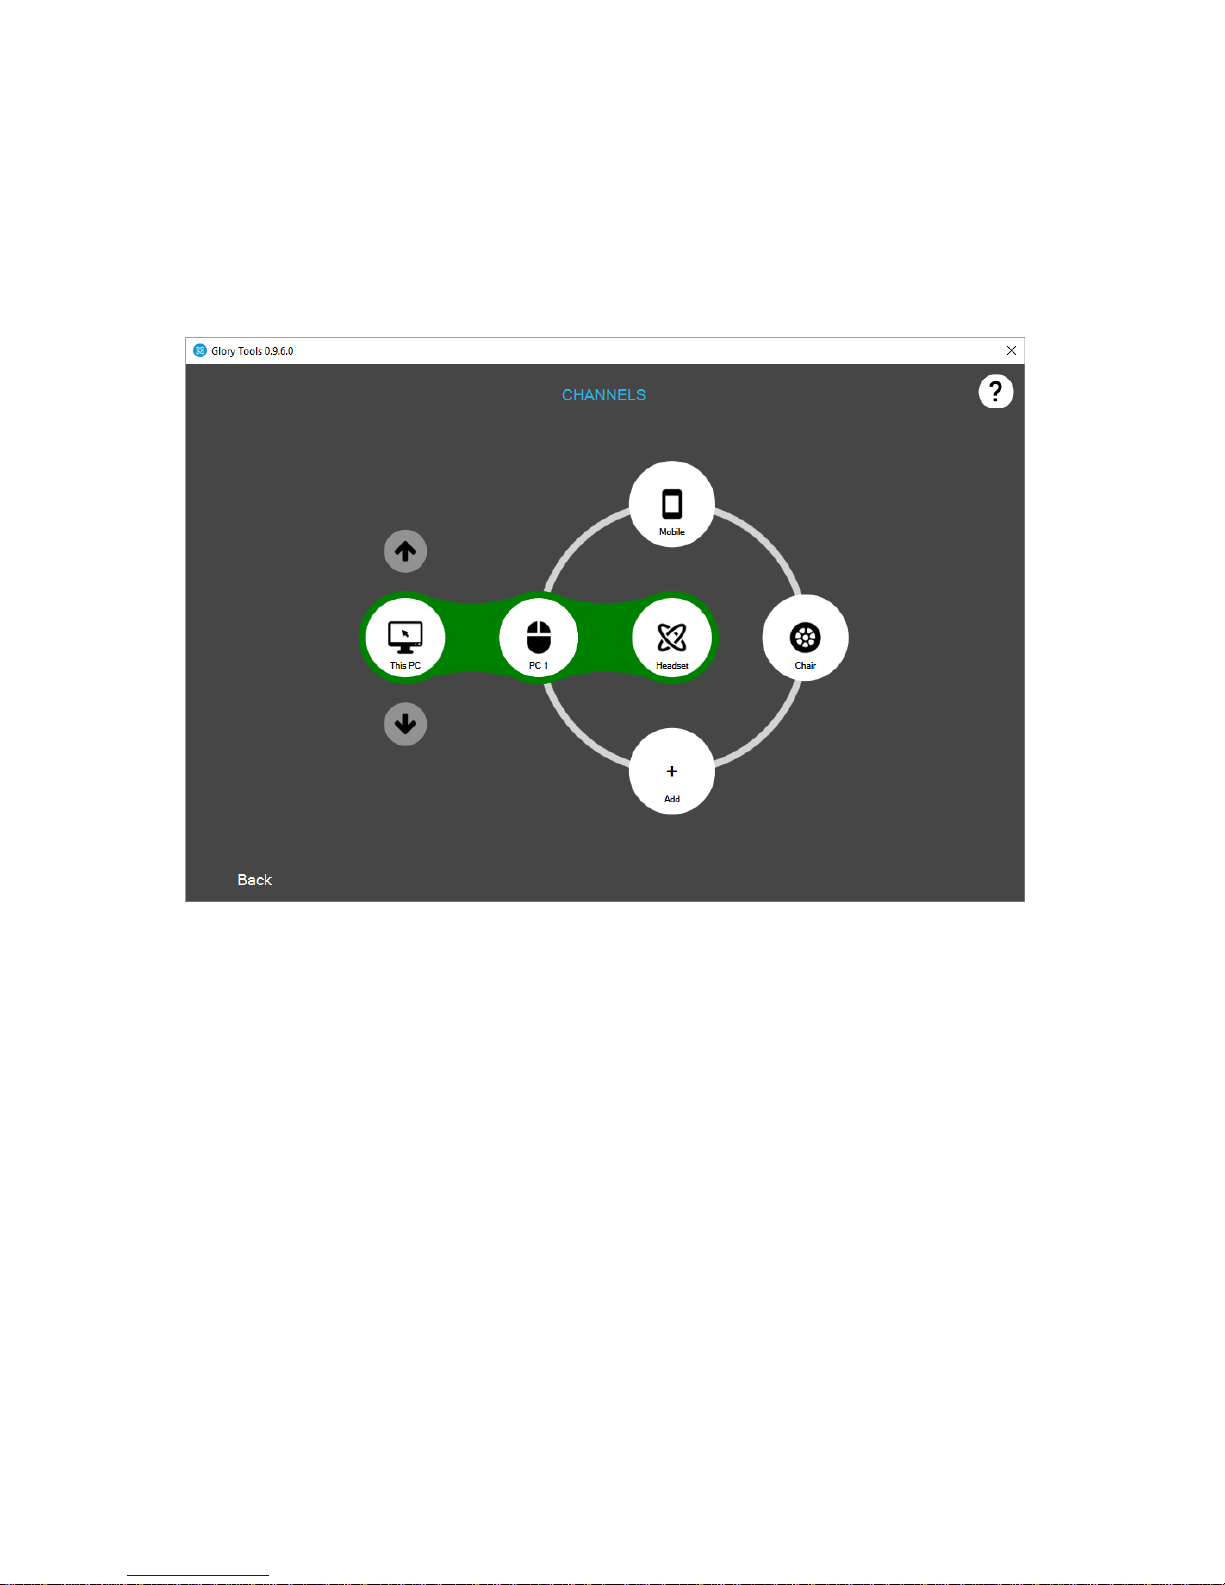
Channel Selector
Although not in the Main Menu, when pressing the Mode Selector Button (Big button) against your
headrest the channel selector appears automatically if it was configured in the Appearances menu.
You may encounter this screen early in the setup process.
Select the computer mode by pressing the Mode Selector button (Big button) on the headset very
briefly and close channel selector by clicking ‘Back’.
When pressing the Mode Selector Button (Big button) against your headrest the channel selector
appears automatically if it was configured in the Appearances menu.
The headset can be used to control computers or to drive wheelchairs. There is a possibility to switch
between computer control and wheelchair drive channels. Therefore there are two types of ‘press’
the user can do with the Mode Selector.
1. Short press (a very quick press, about half a second) switches between active and inactive
modes of the chosen function – e.g. when in computer control mode, a short press activates
or deactivates the control of the mouse cursor.
2. Long press (about 2 seconds) switches between the channels or control functions – e.g.
switches between computer control and wheelchair control.
You can add further PCs or wheelchairs to control and you can switch between them.
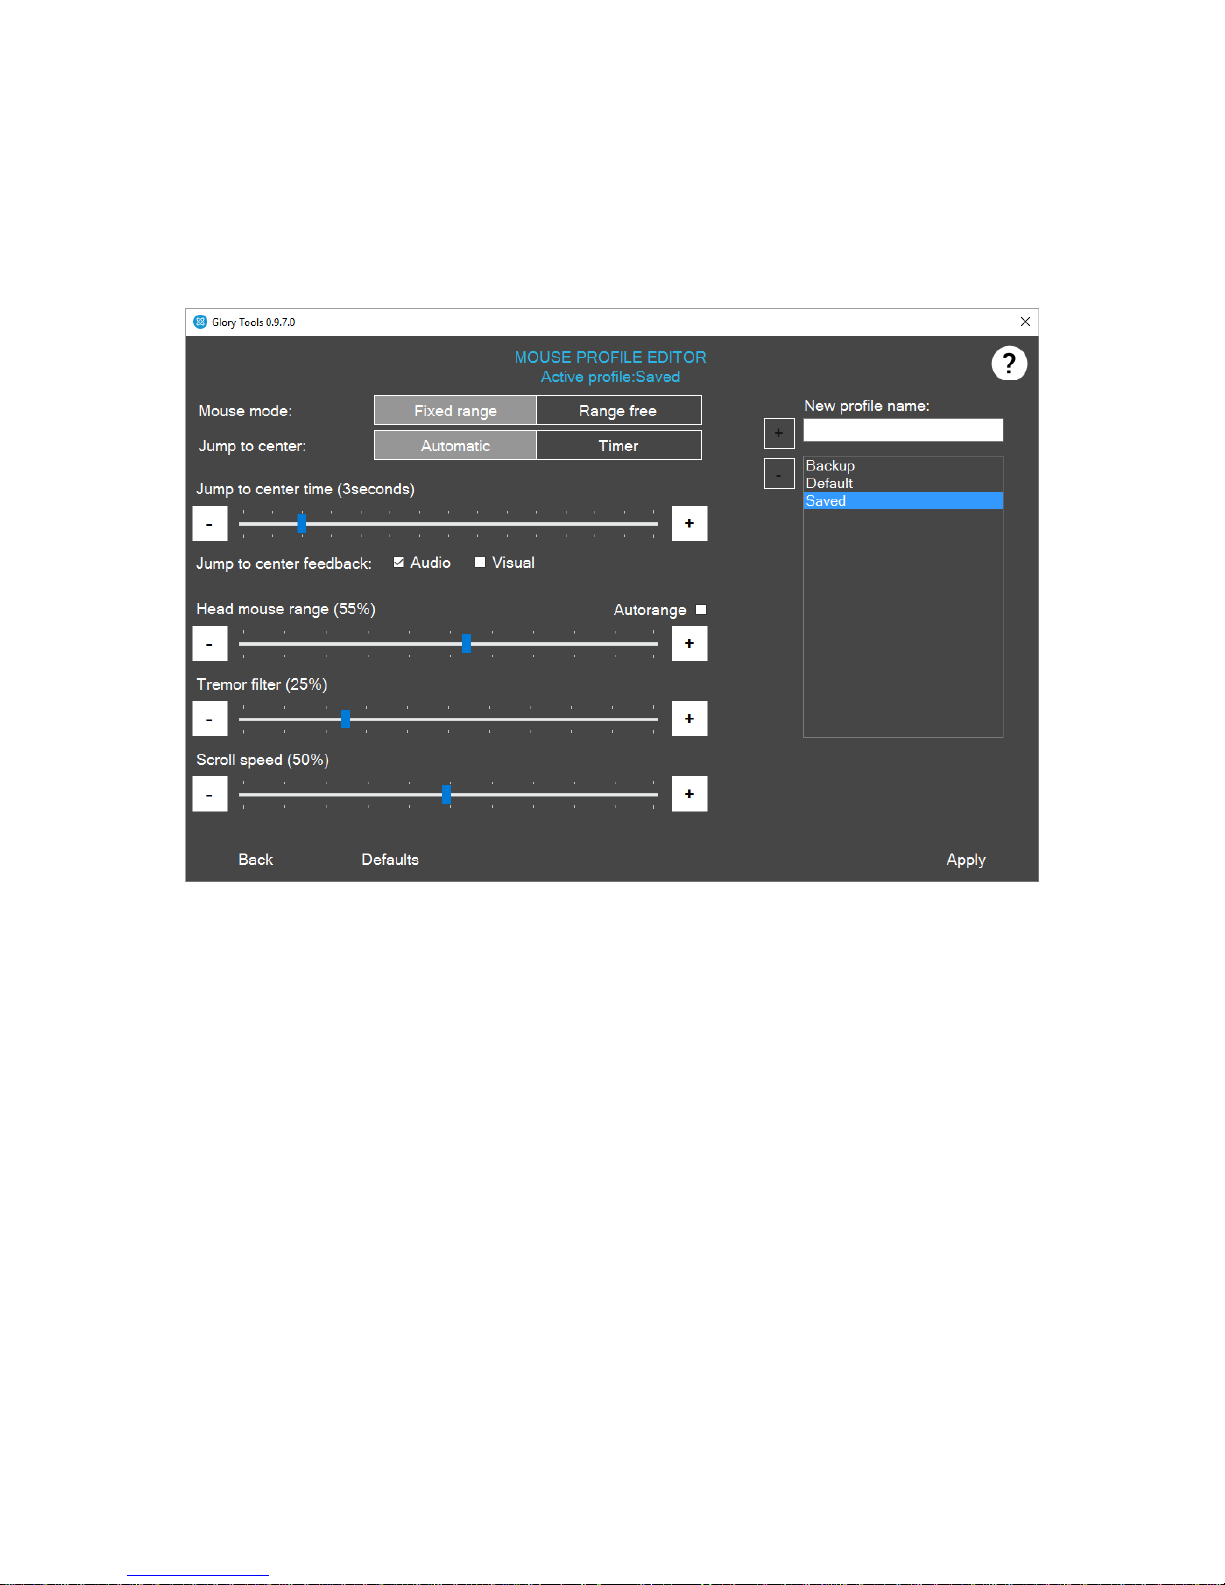
Mouse Profile Editor
Here you can set up different profiles for yourself or multiple users. You can experiment with various
modes to find out which one is the best fit for you.
MOUSE MODE
I. Fixed Range (absolute mouse): This is the recommended mode to use. In this mode, the
cursor moves in a fixed range on the screen, in other words the screen’s field is the area
where the cursor’s movement makes sense. It can be imagined as the angle of head
turning necessary to move the cursor from one side of the screen to the other. The
screen’s range is defined by the borders of the screen. This mode allows for the most
accurate and smooth operation, however the user can experience some shift over time
regarding the center position of the cursor due to the user’s movements.
II. Range free (relative mouse): In this mode the cursor’s movement is not restricted to the
borders of the screen; however the user will not see it moving outside of the screen. In
this mode cursor center position can be adjusted by trying to move the cursor beyond
the screen’s border. This mode of operation is not as accurate and smooth as the fixed
range, but more direct and some users prefer it over the other method.
 Loading...