

Page 1
Please read these instructions carefully before using the helicopter.
Page 2

Safety Instructions
Low power protection
Instructions for care and maintenance
Ready to fly
1. Keep the helicopter and the box away from small children.
2. Keep a safe distance from high speed rotating propellers to avoid injury.
3. First time users should be gentle with the throttle to avoid crashing the helicopter or any
potential injuries.
4. After flying, please turn the remote controller off first, then the helicopter.
5. Keep the charging battery away from fire and humidity.
6. Do not fly the helicopter near pets, young children, elderly and disabled people.
7. Non rechargeable batteries are not to be charged; Different types of batteries or new and
used batteries are not to be mixed; Batteries are to be inserted with correct polarity;
Exhausted batteries are to be removed from the product. The supply terminals are not to be
short circuited
8. When not in use, please turn off the power of controller and helicopter. When the helicopter
is not in use for a long period of time, remove the batteries from remote controller.
1. Use a place away from any people, pets and obstacles.
2. Turn helicopter power switch “ON”. The helicopter lights will flash. It will search the signal
from controller.
3. Turn the remote controller “ON”. The indicator light will flash. Push the left control throttle
up and down. The indicator light will be constant.
4. Push the left control throttle up slowly and start to fly.
When the helicopter’s battery is low, the system will cut-off the power to avoid excessive
discharge. This will reduce any damage to the battery.
1. Please clean the helicopter and controller with a clean soft cloth.
2. Store the helicopter in a dry, clean place. Keep the box for storage.
3. Inspect the helicopter before use. Do not use if any parts are damaged or broken.
Page 3
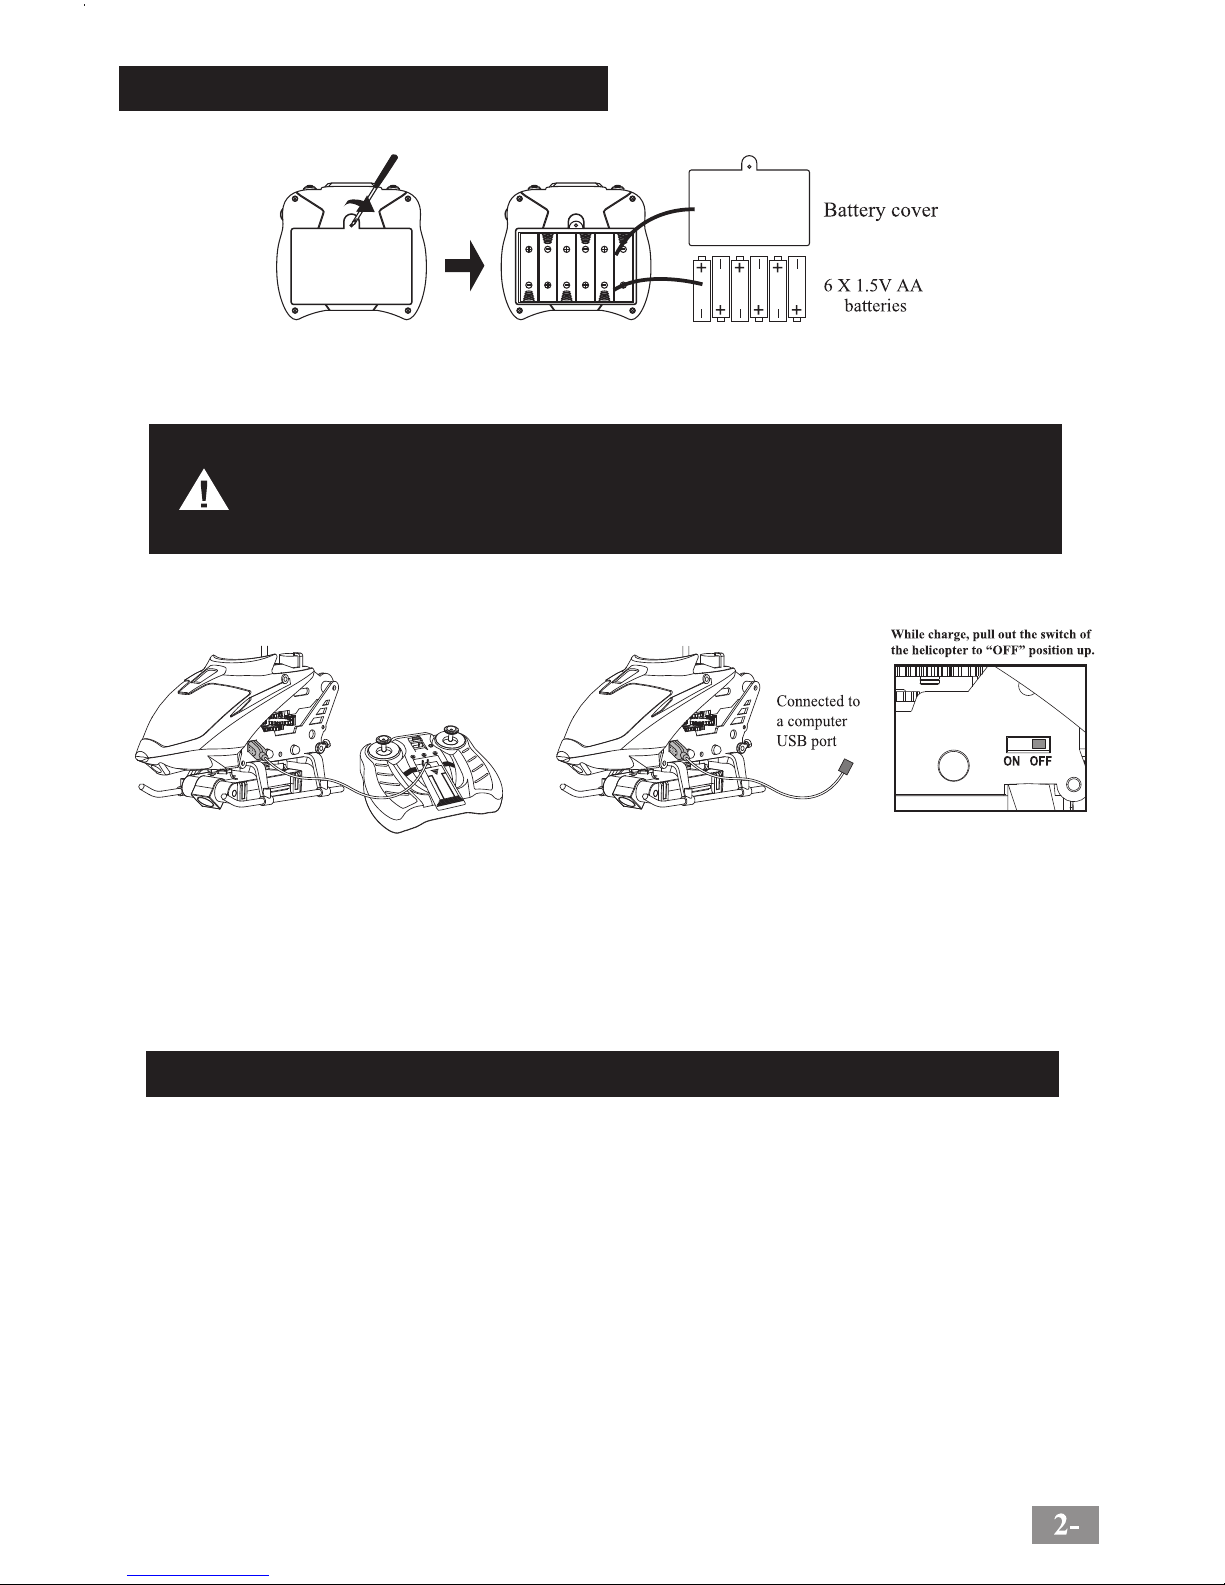
Battery Installation & Charging
Charging the helicopter battery
A. To charge the helicopter with
remote Control
1. Be sure to switch off the helicopter power.
2. Charging by A: The charging cable is accessible when sliding down the front panel of the controller.
Plug it in the helicopter port, and turn ON the controller. The indicator should turn on when the
battery starts charging. The indicator will turn off when the battery is fully charged (About 40-50
minutes).
Charge by B: Plug the provided USB charging cable into the helicopter, then insert the USB plug into
your computer. The USB indicator should turn on when the battery starts charging. The USB indicator
will turn off when the battery is fully charged (About 40-50 minutes).
The helicopter contains a built-in Li-Po battery, please pay attention to the following matters:
- Keep the battery away from fire and heating sources. It could damage the battery or cause it to
explode.
- Keep the helicopter and the battery away from water.
- Only charge the helicopter with the provided adapter.
- Do not remove or dismantle the built-in battery.
- Do not leave unattended when charging.
B. To charge the helicopter with
USB (Connected to computer)
1. Use a crosshead screwdriver to remove the controller battery cover. Insert 6 batteries
(size AA, 1.5V) observing the correct polarity indicated in the compartment. Replace the
battery cover and secure the screw.
Different types of batteries or new and used batteries are not to be mixed;
Batteries are to be inserted with correct polarity;
Exhausted batteries are to be removed from the product;
The supply terminals are not to be short circuited.
Charge time: 40-50 minutes—Fly time 5-6 minutes!
Page 4
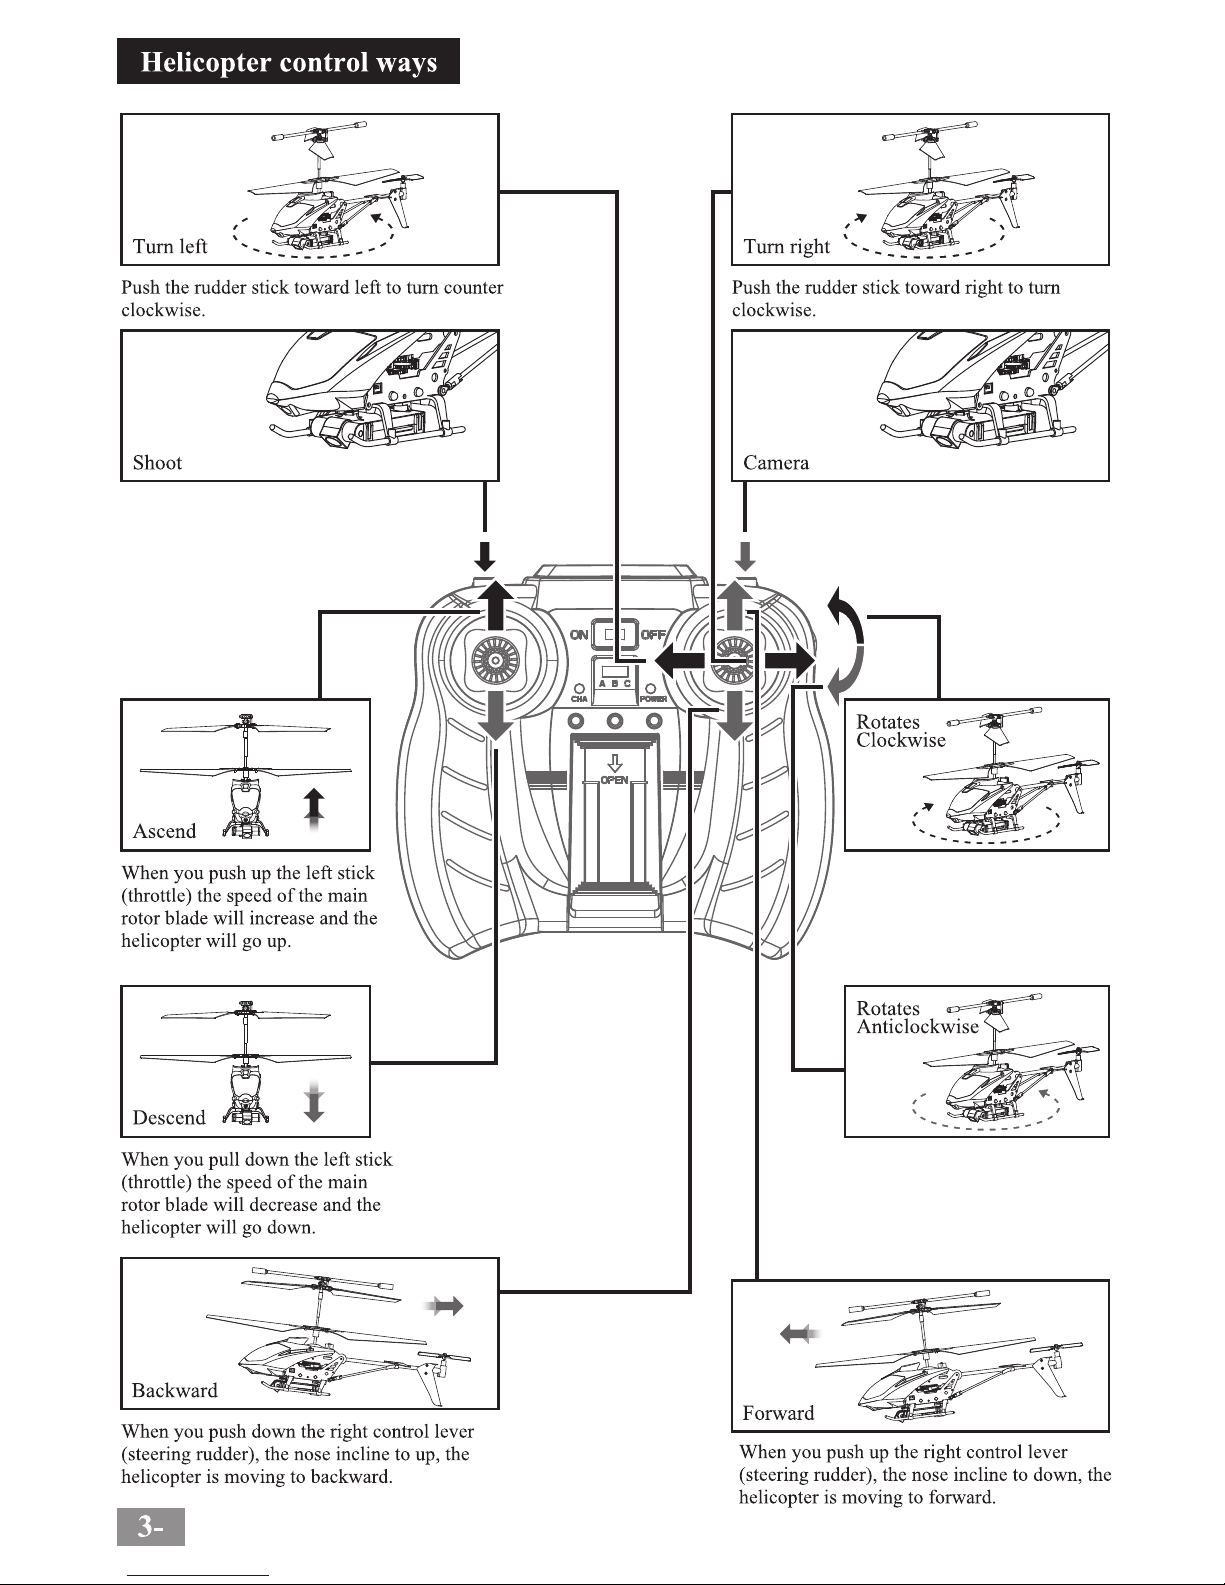
To take a picture, press the shoot button.
A red light on the camera will indicate
that the picture was taken.
To take a film, press once the camera
button. A red light will indicate that the
camera is filming. To stop taking the
movie, press the camera button a second
time.
If the helicopter is turning
excessively clockwise, rotate
this calibration button
anticlockwise until the helicopter
is balanced.
If the helicopter is turning excessively
anticlockwise, rotate this calibration
button clockwise until the helicopter
is balanced.
Page 5
3.The channel is different…”
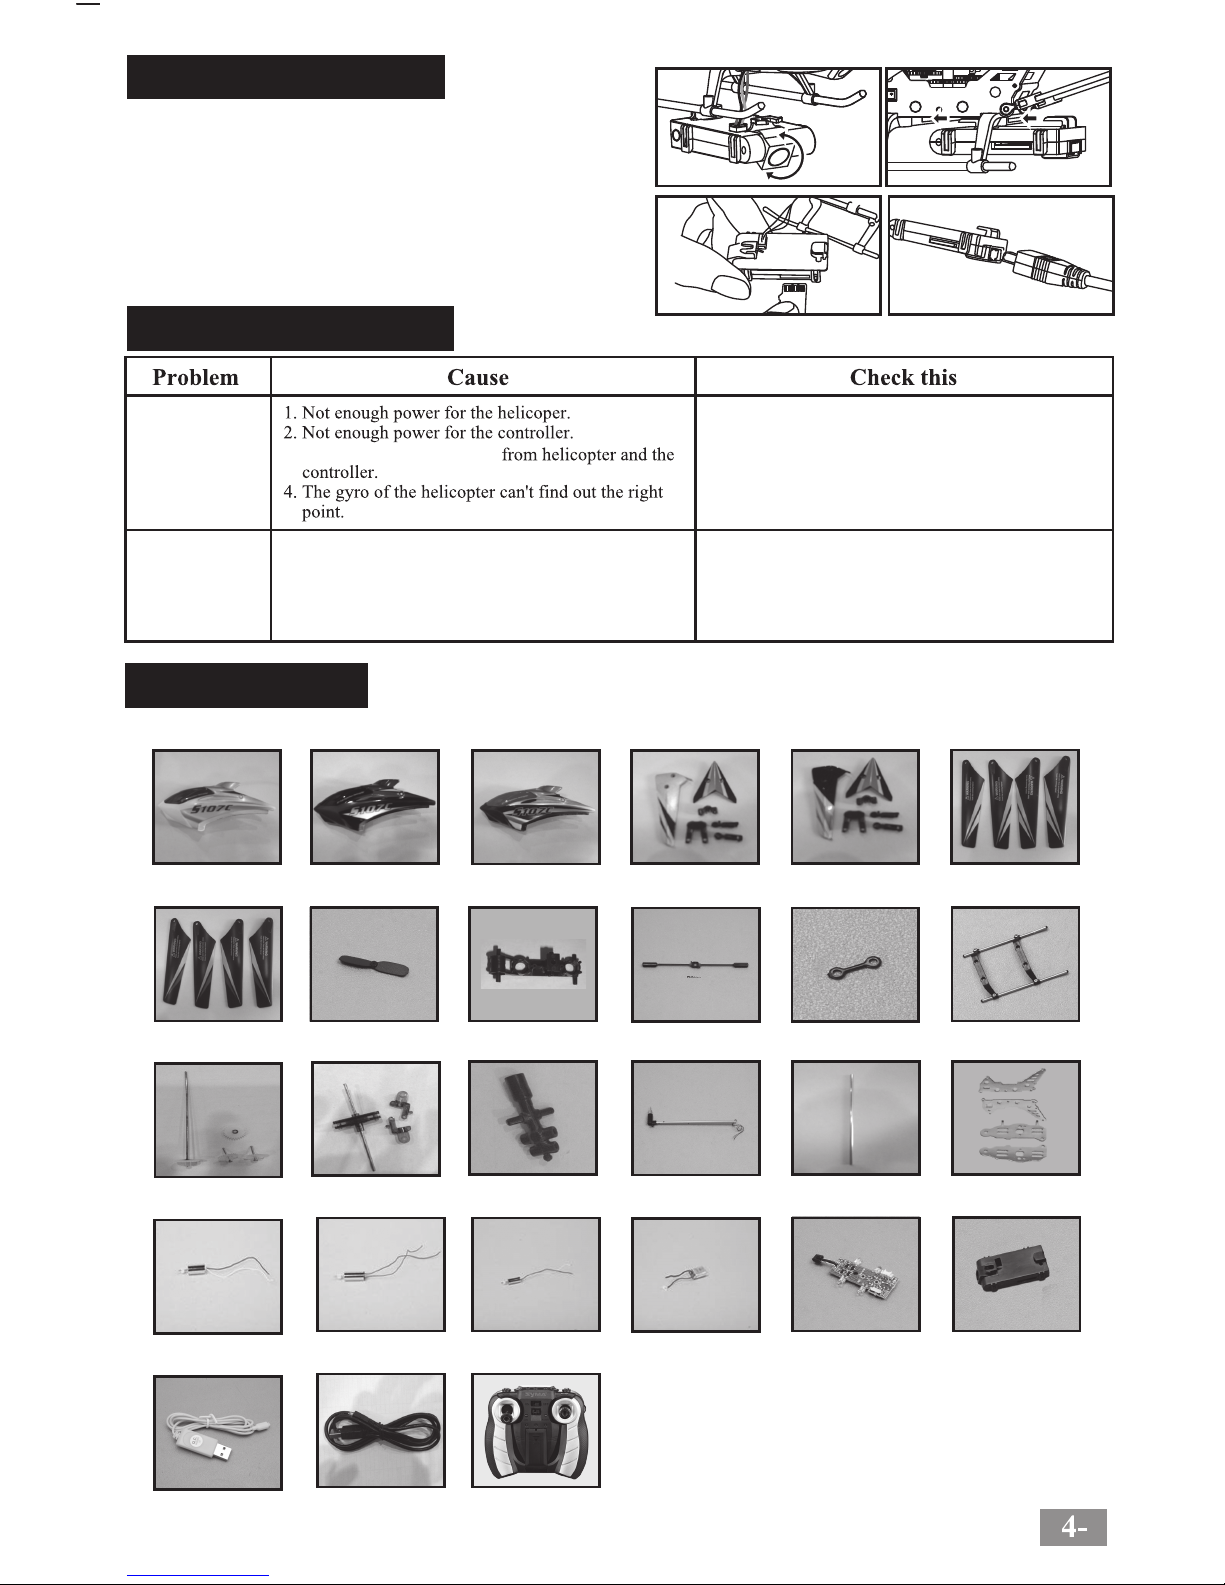
S107C-01A
Head cover
S107C-01B
Head cover
S107C-01C
Head cover
S107C-04
Main frame
S107C-06
Ascend and descend
S107C-15C
Camera box
S107C-05B
Connect buckle
S107C-03A
Main blades
S107C-03B
Main blades
S107C-03C
Tail blade
S107C-02A
Tail decoration
S107C-02B
Tail decoration
S107C-07
Gear
S107C-08
Top blad clip
S107C-05A
Balance bar
S107C-09
S107C-11
Chopper tail unit module
S107C-12B
Main frame metal part
S107C-12A
Tail support pipe
S107C-13A
Motor A
S107C-16A
USB
S107C-16B
Charging wire
S107C-17
Remote controller
S107C-13B
Motor B
S107C-13C
Motor C
S107C-15A
Circuit board
S107C-14
3.7V Li-Poly
Installation of the camera
Troubleshooting
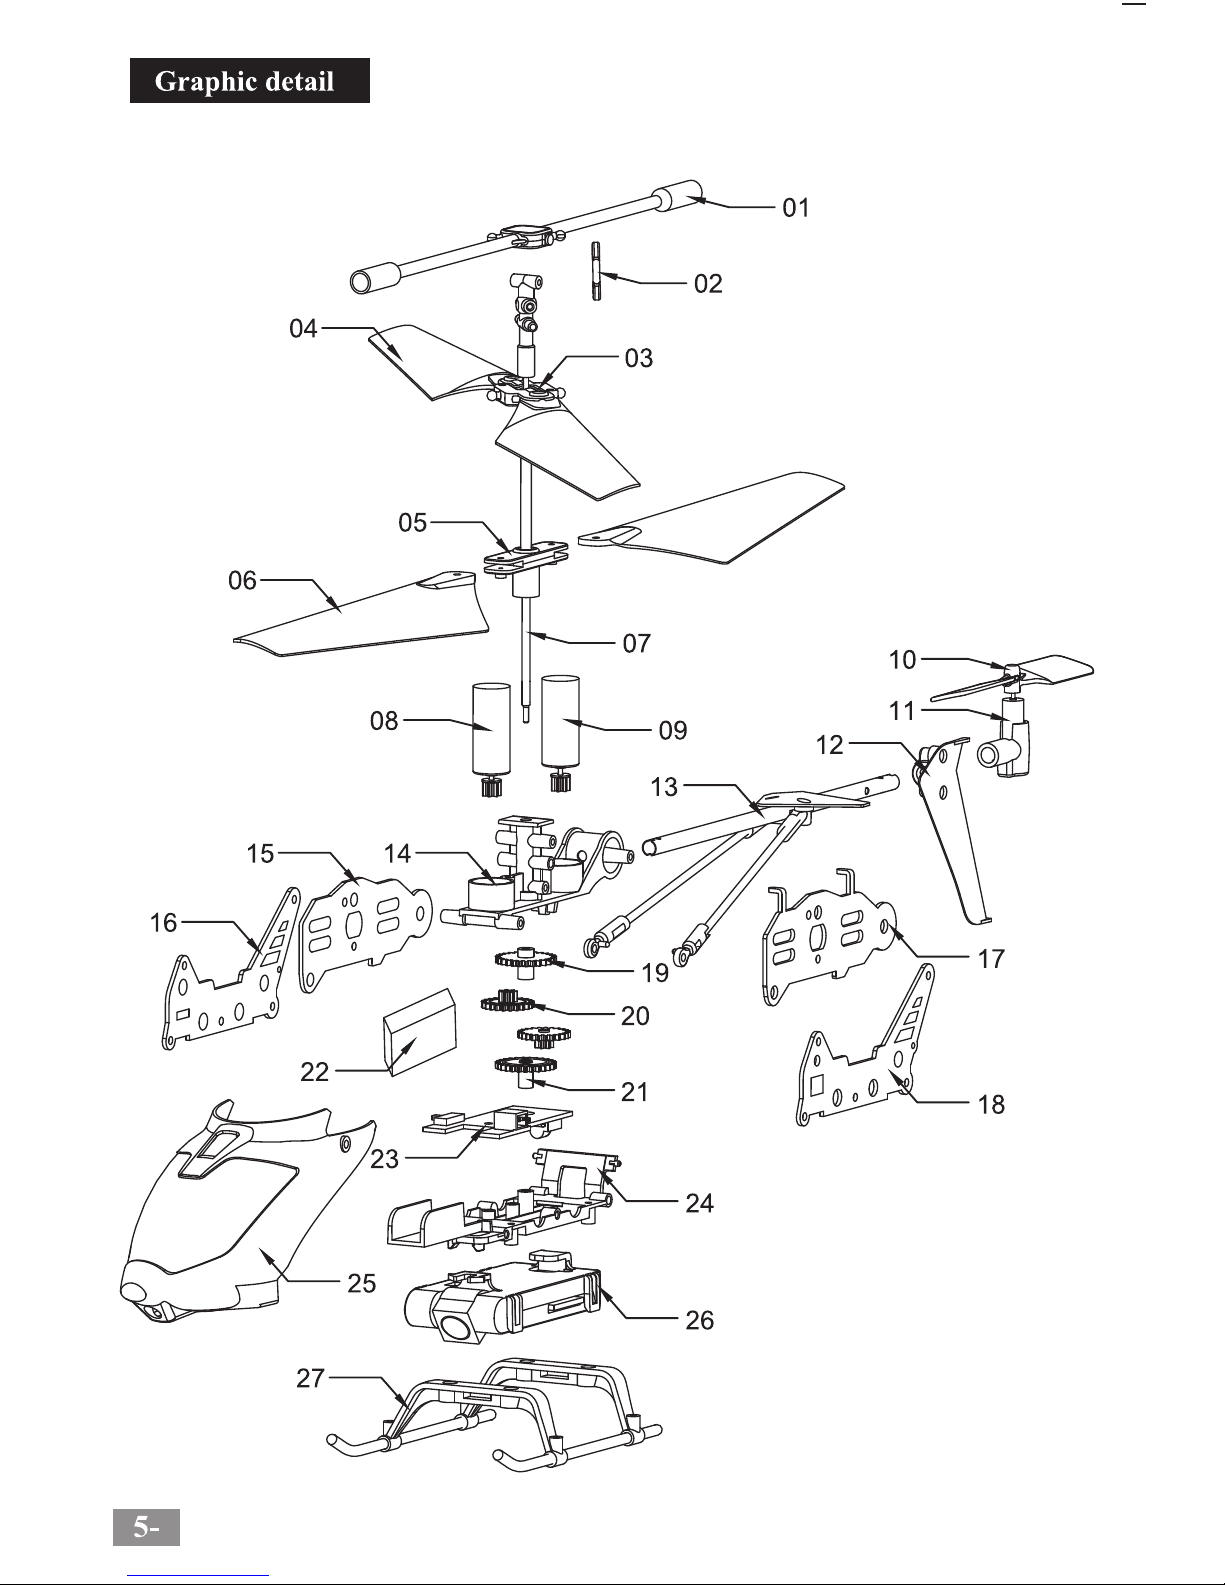
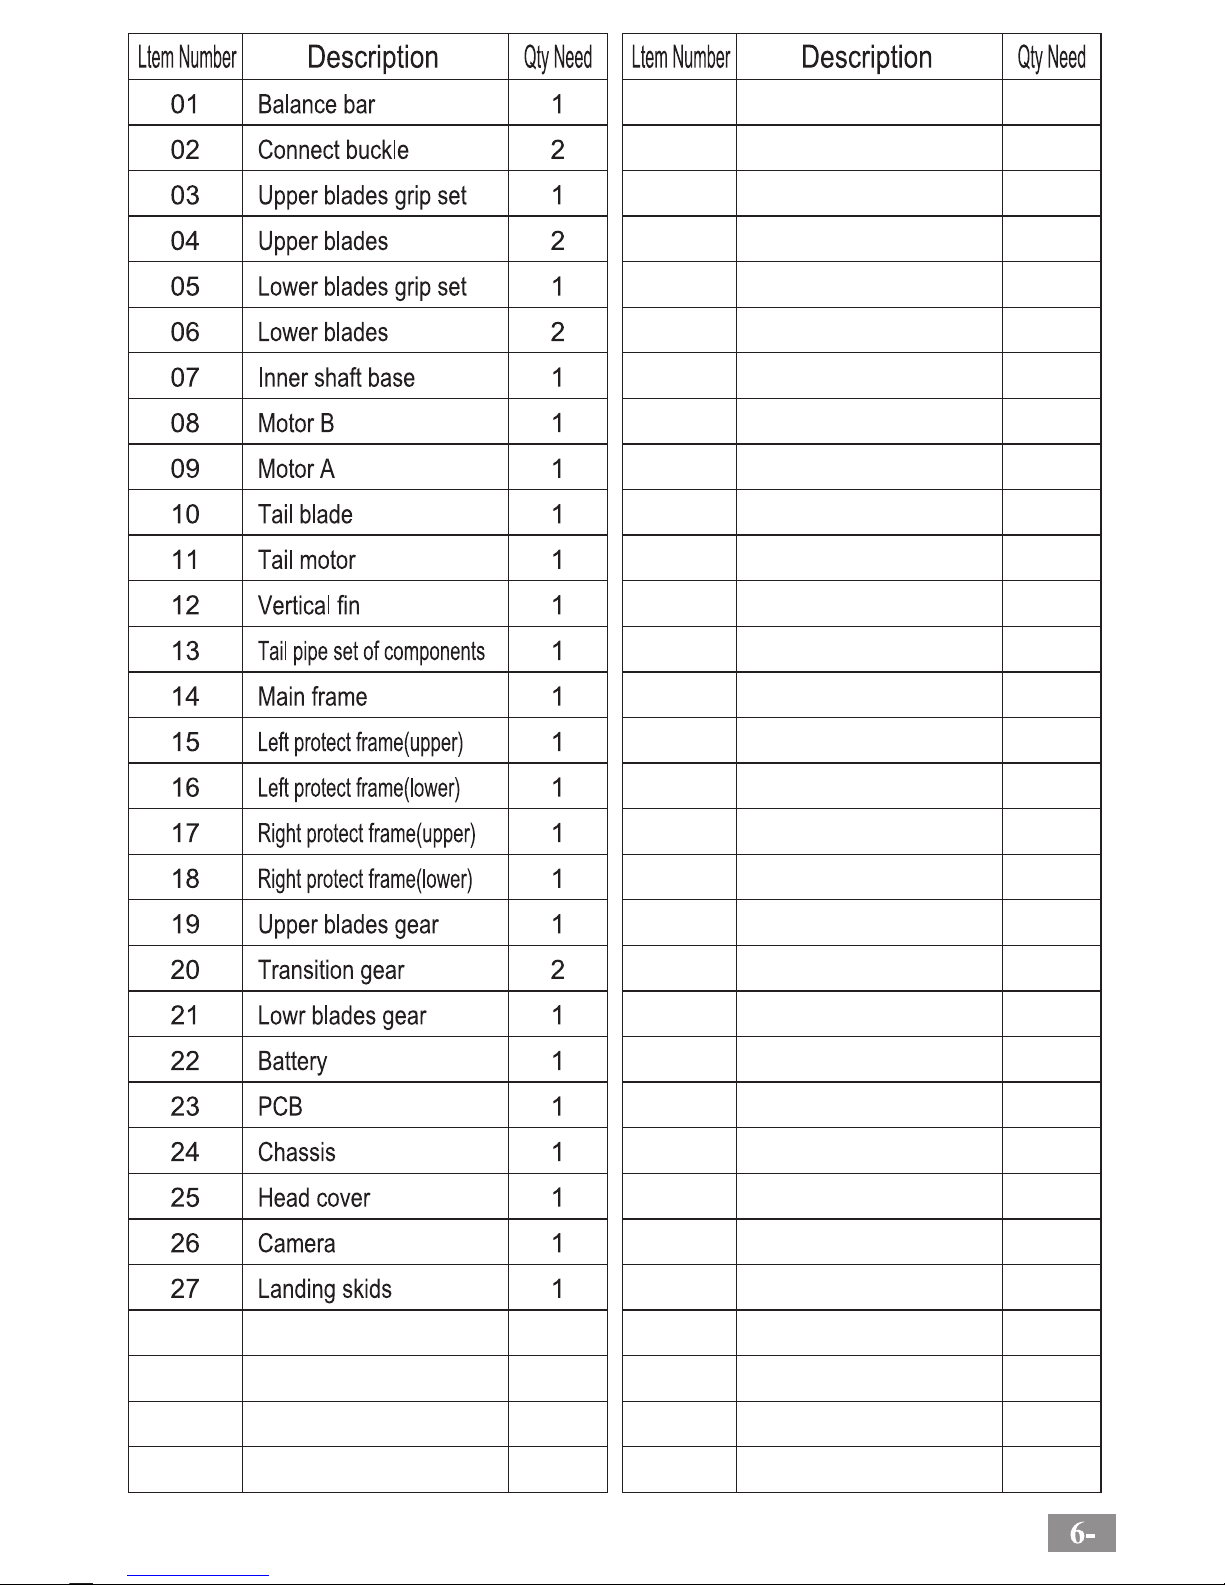
Spare parts
Connect the wire and slide the camera under the
helicopter connecting the hooks. The camera angle
can be adjusted as shown.
No reaction
from the
helicopter
No reaction
from the
helicopter
when in flight
All the spare parts below can be bought from local distributor.
1. Strong light can interfere with the IR control
2. Two remote controller are using the same frequency
1. Charge the helicopter battery.
2. Install new batteries in controller.
3.Make sure the same channel is used for the helicopter
and the controller
4. Move the helicopter onto a flat surface, and then
turn it on. Then turn on the controller
1. Use the helicopter away from strong light.
2. Use the helicopter away from products using the
same frequency.
1.Connect the USB cable in the camera and the other
side in the computer.
2.Remove the mini SD card from the camera and
insert it into a card reader. Plug the card reader into
a computer.
To get access to the pictures & films
Page 6
Page 7
Page 8

 Loading...