

Gygolite Centauri 1500 Operation Manual
• 1500 lumen LED light output
• 2 High-brightness Cree XM-L LEDs
• 8 versatile lighting modes
Boost > High > Med > Low
> SteadyPulse > Day Flash > Slow Flash > Walking
• OSP®(On-Site Programmable) Technology
• Compact Rechargeable Li-Ion battery
• Light setting and battery level indicator
• Smart Rapid Charger
• LocktiteTM tool-free handlebar mount
• Helmet mount kit
OPERATION MANUALOPERATION MANUAL
OPERATION MANUALOPERATION MANUAL
OPERATION MANUAL
Congratulations on your purchase of the Centauri, programmable highbrightness LED headlight system. Please refer to this guide to operate
your Centauri safely and properly.
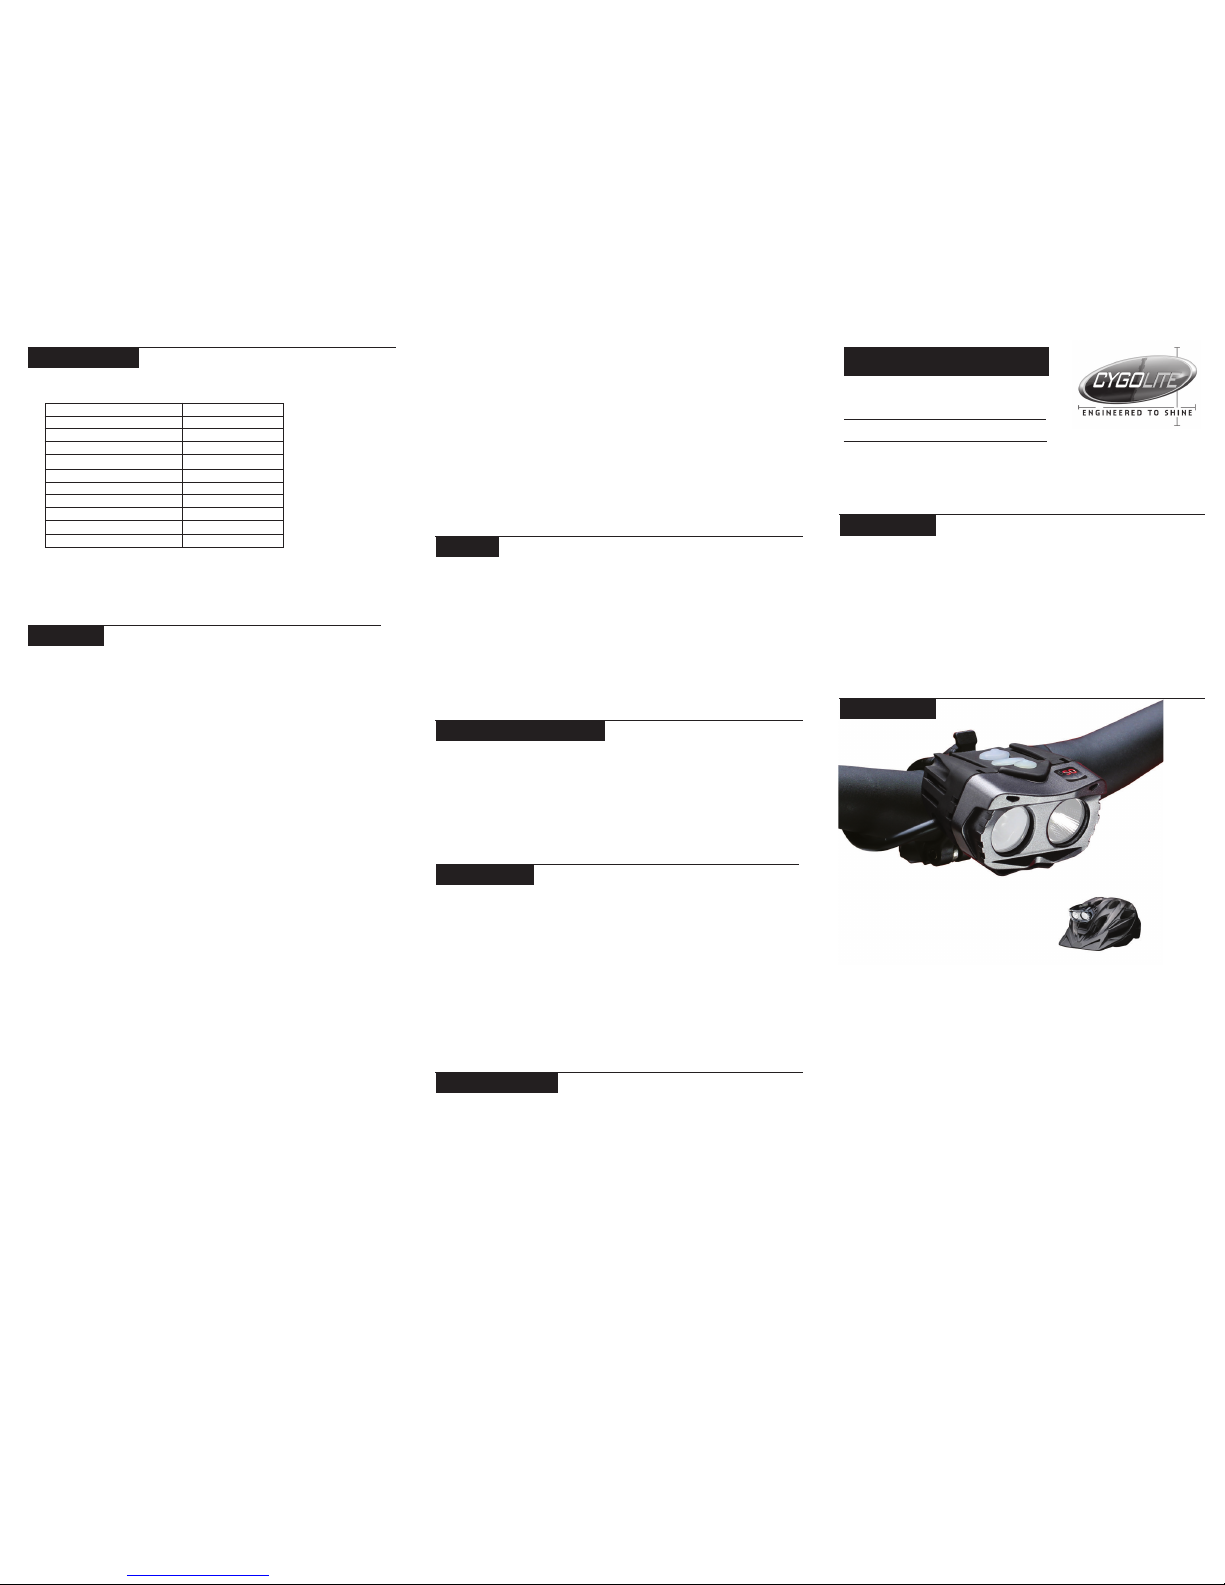
Dual LED Rechargeable Smart Bicycle Light
If you have more questions that are not listed here,
visit the support page at:
www.cygolite.com
CAUTION:
· Headlight may get hot during use. Use caution when handling.
· Unplug the headlight from charger when not in use.
· Unplug connectors by the plug, never by the cable.
· Do not modify or substitute any parts with non-Cygolite parts.
· Do not open headlight case.
· Provide adequate airflow to the headlight to cool during use.
· If the light is on & stationary longer than 5 minutes, turn it off.
· Do not look directly at light.
· Do not operate or submerge under water.
· Do not operate the light unattended.
· Keep headlight away from combustible materials.
· Do not package headunit when hot or immediately after use.
· Carrying a flash light is recommended.
· This light is for bicycle use only.
· State laws regarding flashing bicycle lights may vary among states. Use the flashing
modes in accordance to your local state laws as well as federal law.
CENTAURI 1500
FEATURESFEATURES
FEATURESFEATURES
FEATURES
CONTENTSCONTENTS
CONTENTSCONTENTS
CONTENTS
F.A.Q.sF.A.Q.s
F.A.Q.sF.A.Q.s
F.A.Q.s
The Centauri is designed to be used on bikes in some of the most extreme
outdoor conditions. Over time, dust and dirt may hinder the connections on
your battery and headlight. To prevent this from happening, ensure that
both the battery and headlight are clean after every ride.
Wipe the headlight and battery down with a damp cloth. Do not submerge
the battery or headlight in water. Remove all dirt around or on the plugs or
jacks on both the battery and headlight.
The High-Brightness LEDs have extensive life so bulb replacement is not
required.
CARECARE
CARECARE
CARE
The headlight will not turn on.
• Make sure the power button was firmly pressed.
• Make sure the battery cable is properly connected.
• Make sure the battery is fully charged.
The headlight turns off over rough terrain.
• Make sure battery cable is securely plugged into the headlight.
• Make sure battery cable is fastened to the handlebar to
minimize cable vibration.
TROUBLESHOOTINGTROUBLESHOOTING
TROUBLESHOOTINGTROUBLESHOOTING
TROUBLESHOOTING
In the USA, the Centauri comes with a lifetime limited warranty on the light
housing and one year warranty on electrical parts, against any defective
part or craftsmanship. The battery is warranted up to 6 months after the
original date of purchase. If the unit is under warranty, Cygolite will repair
or replace defective components at no charge provided the product has not
been subject to misuse, abuse, or non-Cygolite authorized alteration,
modification or repair. Warranted products requiring service must receive a
Return Merchandise Authorization number (RMA#) from customer service.
The original receipt (INCLUDING DATE) is required on all warranty repairs.
Shipping costs inccured from shipping warranty or repair items from the
customer to Cygolite are covered by the customer. For warranty issues
outside the USA, contact the retailer where the purchase was made.
WARRANTYWARRANTY
WARRANTYWARRANTY
WARRANTY
CYGOLITE
1307-A EAST SAINT GERTRUDE PL., SANTA ANA, CA 92705 USA
PHONE: (714) 437-7752 FAX: (714) 437-7962
www.cygolite.com
All Cygolite products are backed by Cygolite’s warranty, providing
quality, craftsmanship, and the assistance of our knowledgeable staff.
If any support is needed, we will assist with 48 hour turnarounds on parts
and service. For questions, problems, and/or authorized Cygolite parts
contact us.
COMMITMENTCOMMITMENT
COMMITMENTCOMMITMENT
COMMITMENT
• High-brightness LED headlight
• Rechargeable Li-Ion battery
• Smart Rapid charger
• LocktiteTM Handlebar Bracket
• Helmet mount kit
• Operation Manual
Q: When should I replace the bulbs?
· The LEDs have extensive life so bulb replacement is not
necessary.
Q: When should I charge my battery?
· The battery can be charged any time, but we recommend
fully charging the battery every time you charge it.
Q: Can I leave my battery on the charger for extended periods of
time?
· The Smart charger prevents damage from overcharging but,
like all electrical appliances, we recommend unplugging the
battery and charger once the battery is fully charged.
Q: Can I give a partial charge to my battery?
· In order for the battery level indicator to be accurate we
recommend fully charging the battery every time.
Q: How do I know the charger is charging?
· When the Smart charger system is plugged into the wall
outlet and connected to the battery, the LED charging
indicator on the charger will be RED, indicating it is in Rapid
charge mode. If the LED shows GREEN, the charger is in
trickle mode and the battery is fully charged.
Q: Are other batteries interchangeable with this light?
· No, the Centauri is only compatible with the Li-Ion battery
it came with. This light is not compatible with any other
batteries.
Q: Will chargers for my other Cygolite systems recharge the Centauri
battery?
· Yes, the Centauri battery is compatible with CygoLite’s 7.6
volt Li-Ion chargers used on the TridenX, and Turbo (7.6v)
systems
Q: Can I use non-Cygolite parts for this unit?
· No, Cygolite parts are manufactured to specific quality
specifications. Use of non-Cygolite parts will void the
warranty and may cause damage to the light.
Q: Can I use this light for activities other than cycling?
· No, this light is specifically intended for bicycle use only.
QUESTIONS ABOUT ADJUSTING BRIGHTNESS / FLASH SPEEDS
Q: Can I reset my light back to manufacture default setting?
· Yes, when the light is on, press and HOLD the power button
for 7 SECONDS. The light will turn off, then restart with the
factory default settings.
Q: Are my programmed settings going to be saved after I unplug the
battery?
· Yes, your programmed settings will be saved until you press
the OSP button.
Q: Why can’t I adjust the Boost brightness or Walking mode?
· Those 2 modes are permanent and can not be programmed.
Q: What if I don’t want to program the light, can I use it normally?
· Yes you can use the light with the factory default settings it
came with.
RUN TIMESRUN TIMES
RUN TIMESRUN TIMES
RUN TIMES
The run times below are based on the factory default settings. Run
times will vary if you customize the light settings.
NOTE: *SteadyPulse mode combines steady brightness to see and
alerting flash to be seen into one mode. It is made especially for riding
at night in high traffic areas.
RUN TIME* (hr: min)
2
3
6:30
32
3:30
48
16
45
BICYCLE MODE
Boost
High
Medium
Low
SPECIAL MODE
SteadyPulse*
Day Flash
Slow Flash
Walking
(lumen)
(1500)
(1100)
(600)
(100)
Add Foam Pad
The Centauri features a BICYCLING MODE with 4 brightness mode, and a
SPECIAL MODE with 3 flashing, and a walking mode. Among these is a
new SteadyPulseTM mode, which alerts motorists with flashes while
constantly lighting your path. These modes are controlled by the power
button and OSP button on the top of the headlight. On top center of the
headlight are 4 indicators that show which setting the headlight is in with the
far right indicator also functioning as a battery level indicator. The diagram
and instructions below indicate where these features are located on the
headlight and how to properly use them.
CAUTION: The light may get hot during use. Handle with care and turn
light off if stationary for more than 5 minutes.
TO RESTORE FACTORY DEFAULT SETTINGS
While the light is ON, press and HOLD the power button for 7 seconds. The
light will turn off, then turn back on with the factory default settings.
THERMAL PROTECTION
The Centauri features built in thermal protection to prevent the light from
overheating. The thermal protection will automatically dim the light (approx. 15%
brightness reduction) until the light cools to a normal operating temperature. At
that time, the light will return to its normal brightness.
HEADLIGHT OPERATIONHEADLIGHT OPERATION
HEADLIGHT OPERATIONHEADLIGHT OPERATION
HEADLIGHT OPERATION
1 2
MOUNTING BATTERYMOUNTING BATTERY
MOUNTING BATTERYMOUNTING BATTERY
MOUNTING BATTERY
Velcro Slot
TO REMOVE HEADLIGHT FROM THE HANDLEBARS
1. Press tab on bracket plate forward.
2. Slide headunit up.
TO ADJUST THE SIDE-TO-SIDE BEAM DIRECTION
Roll the headlight left to right to adjust the side-to-side direction.
POWER BUTTON
LIGHT MODE
INDICATORS
BATTERY LEVEL
INDICATOR
Frame mount
OSP BUTTON
Spacers
1
1
Rubber Pad
2
4
5
3
MOUNTING ON HANDLEBARSMOUNTING ON HANDLEBARS
MOUNTING ON HANDLEBARSMOUNTING ON HANDLEBARS
MOUNTING ON HANDLEBARS
1. Attach handlebar spacers to inside of handlebar bracket for standard
sized and remove them for oversized handlebars.
2. Swing thumbnut down from thumbnut slot to open bracket.
3. Attach rubber pad to handlebar spacer. First remove paper from
rubber pad to reveal adhesive side, align rubber pad holes to
handlebar spacer plugs and join together.
4. Wrap bracket around handlebar & return thumbnut to slotted space.
5. Twist thumbnut clockwise until tight.
6. Slide headlight downward into bracket until headlight clicks into place.
BATTERY LEVEL INDICATOR
The battery level indicator is the blue LED furthest to the right. It flashes 3
different speeds to indicate the battery levels.
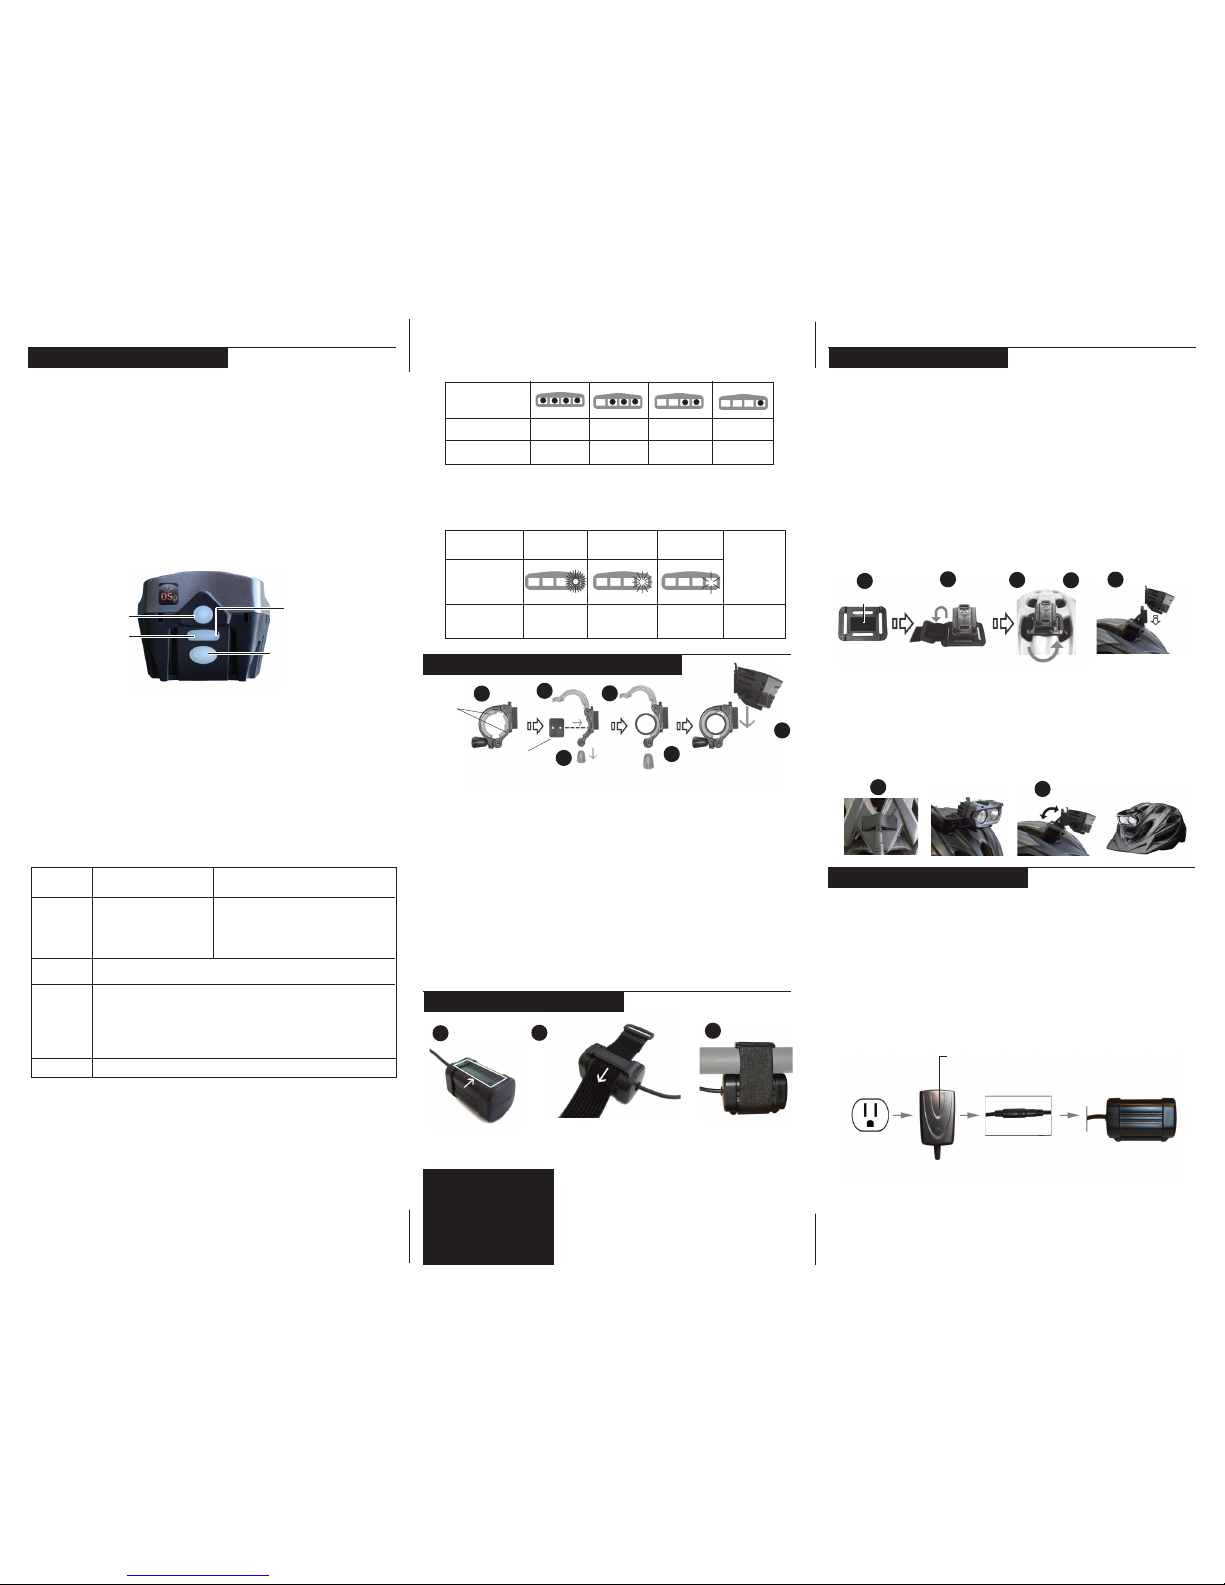
BATTERY CHARGINGBATTERY CHARGING
BATTERY CHARGINGBATTERY CHARGING
BATTERY CHARGING
NOTE: Give the battery a full charge before using for the first time. To prolong
battery life, give the battery a 1 hour charge every 2 months it is not being used.
1. Connect the charger to wall outlet first then the battery to the charger
(Follow sequence for proper charging.)
NOTE: The LED charging indicator on charger may take up to 30 seconds to
turn on after the battery and charger have been connected.
2. The LED on the Smart rapid charger shows red when charging then
green when fully charged.
3.
Allow approx. 8 continuous hours to fully charge a drained battery.
4. Disconnect charger from battery when charging is complete & not in use.
Smart rapid charger
LED charging indicator
RED=Charging
GREEN=Fully charged
WARNING: Charge the battery with the supplied charger only. Using any
other Non-Cygolite 7.6v charger to charge the battery may result in
damage. The Smart Rapid charger is for indoor use only. Unplug the
battery, and charger once the battery is fully charged.
Allow approximately 8 hours to fully charge
Battery
Outlet
HELMET MOUNTINGHELMET MOUNTING
HELMET MOUNTINGHELMET MOUNTING
HELMET MOUNTING
LIGHT MODE INDICTORS
The 4 illuminated LEDs on the top of the headlight show which setting is in use.
3
1. Add foam pad to underside of helmet bracket to cushion against the
helmet. Peel back white paper to reveal adhesive and fasten to the
helmet bracket.
2. Weave the 12" long velcro strap up through one hole of the helmet
bracket, then through the plastic loop. Pull the strap until the plastic
loop prevents the strap from moving further.
3. Position the helmet bracket above the helmet vent holes on the front
top of the helmet.
4. Insert velcro strap downward through the vent hole then up through the
opposing vent hold. Thread the velcro strap through the helmet bracket
and pull to tighten. Then faster the velcro strap to itself, making sure
the helmet bracket is secured in place.
5. Sliding downward, insert the headlight bracket plate into the helmet
bracket until the parts lock in place. To remove the headlight, press the
bracket tab forward and slide the headlight up.
6. Connect the headlight cable to the extension cable. Secure the
extension cable to the helmet by placing the 2” velcro on the top of
the helmet. Remove the white paper on the one side to reveal the
adhesive material. Attach the adhesive side to the helmet and
separate the velcro strap from itself. Sandwich the cable in between
the hook and loop of the velcro strap to secure the cable in place.
7. Place the battery in your hydration pack or jersey pocket.
8. Adjust the helmet bracket up and down to your preferred viewing
angle. If the swivel becomes loose, tighten with a phillips screwdriver.
INDICATOR
top of headlight
BICYCLE Mode
SPECIAL Mode
HIGH
DAY FLASH
MEDIUM
SLOW FLASH
LOW
WALKING
BOOST
S.PULSE
Constant
with blink
Full to
3/4 hour left
Fast Flash
Less than
3/4 hour left
Slow Flash
Less than
1/4 hour left
Headlight
flashes for
20 seconds
then turns off
Battery Empty
time remaining
Indicator
Flash sequence
Indicator
(top of headlight)
1. An adhesive foam pad is included to provide cushion and grip between
the battery and the bike. Apply the foam padding to the center of the
battery opposite the velcro slot.
2. Thread the velcro strap through the velcro slot
3. Wrap velcro strap around frame, through plastic loop, & fasten to
itself
BATTERY MOUNTING PRECAUTIONS: When mounting the battery to the
bike, make sure the battery cable and battery velcro strap do not interfere
with the brake cables or the ability to turn the handlebars.
6
6
8
1
2
3
5
4
foam pad
Turn ON
BICYCLE MODE (4)
Boost >High > Med > Low
PLUG battery cable
to headlight cable
(or from off position)
PRESS Power button
SPECIAL MODE (4)
SteadyPulse > Day Flash > Slow Flash > Walking
(From off position)
PRESS power button for 2 seconds
and then RELEASE
PRESS Power button to scroll between modes
PRESS and HOLD OSP button to gradually change brightness (in Special
mode flash speeds change) and RELEASE the button to stop the change.
HOLD the button again to change brightness in the opposite direction. If
brightness does not change while holding, the light reached the upper or
lower limit, RELEASE and HOLD the button again to go the opposite
direction. Once you release the OSP button that brightness is saved.
HOLD Power button for 2 seconds
Switch
mode
Customize
mode
Turn OFF
CUSTOMIZE LIGHT SETTINGS
OSP® is the first smart technology by Cygolite that gives you the freedom
to customize your preferred brightness settings and flashing speeds
directly to your headlight anytime, anywhere. You can use the factory
default settings or use the OSP button to customize your preferred
settings.
NOTE: Boost mode and Walking mode are non-adjustable.
WARNING: Use discretion when programming the Centauri while riding. Do
not program your light during times that require total attention. Cygolite
cannot be held responsible for injuries that may occur during riding.
 Loading...