

GxT, Inc. Ferret 95 Operator's Manual

1
Operator’s Manual
Automotive Analyzer
It’s More than a Multimeter

2
Table of Contents
Specifications ...........................................................................3
Static Discharge Notice ............................................................3
Battery Replacement / Optional Battery ..................................4
Function Buttons ......................................................................5
ON/OFF ............................................................................5
2C/4C ...............................................................................5
Hold .................................................................................. 5
Min/Max ............................................................................5
Range ...............................................................................5
REL Zero ...........................................................................5
Key Combinations & Special Functions ...................................6
Backlight Control .............................................................. 6
Power up Status ...............................................................6
Software Version ..............................................................6
Volts ..........................................................................................7
Ohms ........................................................................................8
Amps ........................................................................................ 9
Lo Amps ................................................................................. 10
Volts • Amps ...........................................................................11
Time ........................................................................................12
Fuel ........................................................................................ 13
Coil ........................................................................................14
KV Test Instructions ........................................................ 15
Fuel Injector Testing .......................................................16
Ignition Coil Testing ........................................................17
Parts & Accessories ...............................................................18
Warranty Statement ................................................................20
Safety Precautions .................................................................21
© Copyright 2006, GxT, Inc., All Rights Reserved

3
Specifications
DC Volts ........................................3 Ranges ............ 1 mV to 50V
AC Volts (True RMS) .....................3 Ranges ............ 1 mV to 50V
AC Volts Peak to Peak .................3 Ranges ............ 1 mV to 50V
Low Amps DC ..............................2 Ranges ..........10 mA to 17A
Low Amps AC (True RMS) ............2 Ranges ..........10 mA to 17A
Low Amps AC Peak to Peak ........2 Ranges ..........10 mA to 17A
High Amps DC ................................1 Range .............1 A to 600A
High Amps AC (True RMS) .............1 Range .............1 A to 600A
High Amps AC Peak to Peak .........1 Range ..............1A to 600A
Ohms ............................................5 Ranges .......... .1 Ω to 40MΩ
Continuity ........................ Beeper/Bargraph ................ .0 - 100Ω
Diode Volts .....................................1 Range .......0 to 1.999 Volts
Frequency .....................................5 Ranges ...............0 to 2KHz
Pulse Width (Up or Down) ............2 Ranges .......0 mS to 200mS
RPM Inductive ........................ 2 or 4 Stroke .....0 to 10,000 RPM
Fuel Pump RPM ...........................4 Ranges ........................RPM
Dwell Milliseconds ..........................1 Range ..............0 to 100%
Peak Amps .....................................1 Range ....... 0 to 20.0 Amps
Build Time ......................................1 Range .......... 0 - 200 mSec
Drive Time ......................................1 Range .......... 0 - 200 mSec
KiloVolts (Optional) .........................1 Range .............. 0 - 40.0 kV
Operating Temp .......................... 0° to 45°C ...........32° to 120° F
Storage Temp .......................... -20° to 60°C ......... -20° to 140° F
Case Size ................................ 21x10x5 cm ....... 10x16.5x9.5 in.
Lead Length .......................................1.8 m ......................6 Feet
Weight ................................................655 g ............. 1.6 Pounds
Power Requirements 1, Internal 9 V Battery Optional Second 9V
Displays ............................................ Backlit ..... 4 and 3 1/2 Digit
.................................................... Bar Graph ............ 31 Segment
Input Impedance .............. High Impedance ............ 10 Megohm
PC Interface ...................................... RS232 w/ Optional Software
Extreme Static Discharge
In the event that the analyzer is exposed to an extreme static
discharge, readings may appear to freeze. Although the until will
not be damaged by static, you may need to press any function
key to restart measurements.

4
Battery Replacement / Optional Battery
When the LOBAT indicator comes on the display, you will need
to replace the two 9 Volt batteries. Remove the 4 screws holding
the boot on the unit, and remove the boot. Replace both batteries
and reattach the boot.
To replace the battery, remove the 4 screws holding the protective
boot to the front panel. Remove the front panel. On the back
of the display board located at the bottom of the board is the
primary battery location. This position must be filled with a full
sized 9 volt battery. A second position towards the top of the
analog board will hold a second 9 volt battery. This is an auxiliary
battery that is not required for use. However, for extended battery
life when connected to a PC, or extended use of the backlight a
second battery is recommended.

5
Function Buttons
Press this button to turn the multimeter on and off.
Press this button to set configure the RPM to read in 2
Cycle or 4 Cycle mode. Distributorless Ignition Systems
should be set to 2 Cycle mode to correctly read RPM.
Press this button to freeze and unfreeze the display.
Pressing the Min/Max button while in certain tests
will have set up the meter to capture minimum and
maximum readings. Continue to press this button to
view the min and max readings on the top display. Press
any other test button to stop capturing minimums and
maximums.
Press the Range button to manually set the range of
most tests. Press any other test button to return to auto
ranging.
Press the REL Zero button to zero out the reading on the
bottom display. Use this button to zero the low and high
amps probe, or zero out the ohm meter. This function
can also be used to set a base measurement as zero.
Then all readings will be +/- from the base reading.
ON
OFF
2C/4C
HOLD
Min
Max
Range
REL
Zero

6
Key Combinations & Special Functions
Backlight Control
Press the HOLD button and the Min/Max
button at the same time to turn the backlight
on or off.
Power up Status
Press the Volts and V•A buttons at the same
time to disable the auto power off function.
Turn the unit off, then back on. The meter will
remain on until you turn it off, or the batteries
run down.
Software Version
Press the V•A, Time, Fuel
and Coil buttons at the same
time to display the software
version of the multimeter.
Volts
V•A
V•A
Time
Fuel
Coil
Min
Max
HOLD
7
Volts
Pressing the button will
cycle you through DC
Volts, AC volts, and AC
Peak to Peak functions.
The bargraph is an easy way to see
trends in voltage being measured.
The DC volts function is a 10 meg
high impedance voltmeter. The AC
functions use a certified true RMS
chip for accurate measurements of
irregular shaped AC waveforms. The
Peak to Peak function is the best
measurement tool to determine the
amplitude of any signal.
Note: AC auto ranging takes more
time to occur than DC auto ranging. This is to allow the AC peak
and rms circuits to settle after the abrupt change in scaling.
Supported Functions:
Volts
LOBAT
MAX
MIN
RPM
4C
AUTO
V
HOLD
REL 0
DC Voltage Display
LOBAT
MAX
MIN
RPM
4C
AUTO
V
HOLD
REL 0
AC Voltage Display
2C/4C
HOLD
Min
Max
Range
REL
Zero
8
LOBAT
MAX
MIN
Ω
HOLD
Continuity Display
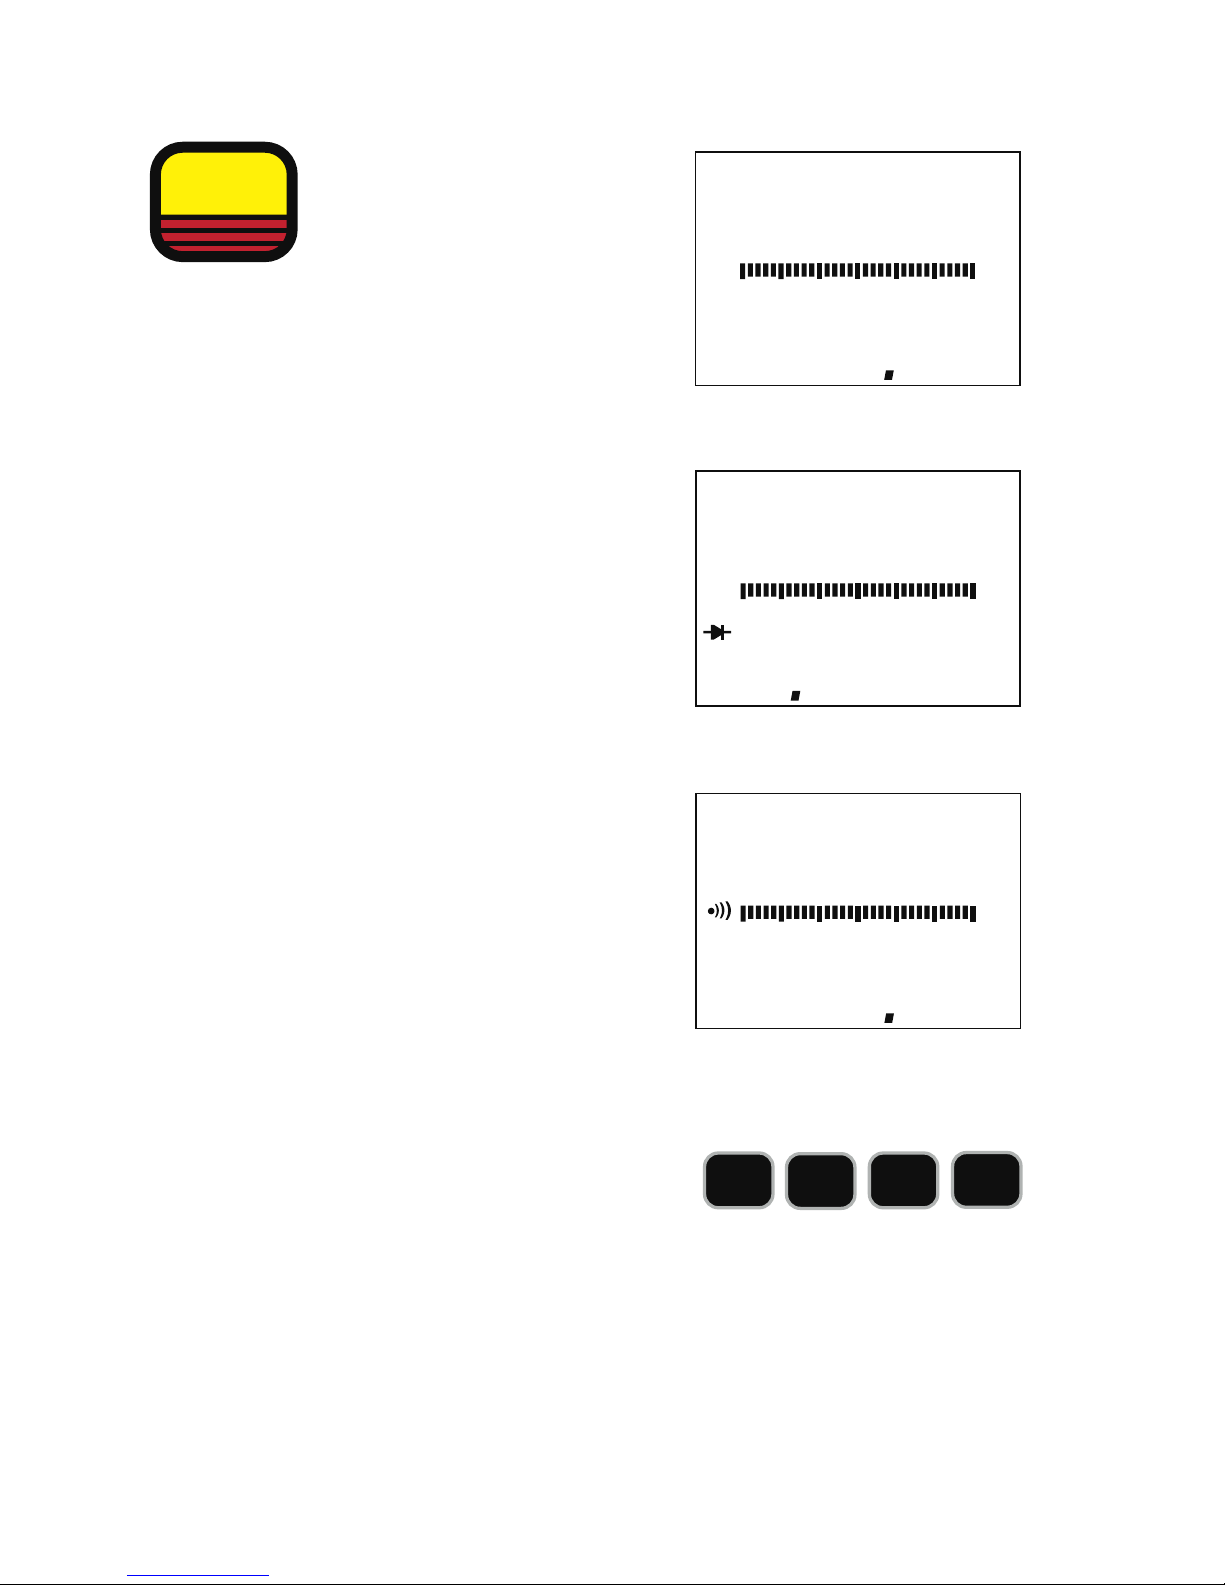
Ohms
The highest Ohms range
allows up to 40M Ohms
to be measured. All of the
ranges except the lowest
use a low current source that will not
forward bias semiconductor junctions.
The lowest Ohms range does use
source current that can cause
semiconductor junctions to conduct
and affect the readings.
The Diode Volts range will measure
semiconductor junction voltages up to
1.999 In the reverse direction an OFL
indication is expected.
The continuity test, indicated by both
the beeper symbol and the Ohms
symbol being active, uses the lowest
Ohms range. Anytime the reading goes
below 100 the beeper will sound.
Note: The meter is equipped with a self
protection device that will protect the
ohms function in case the test leads
are connected to battery voltage.
Supported Functions:
Ohms
LOBAT
MAX
MIN
AUTO
M
Ω
HOLD
REL 0
Ohms Display
LOBAT
MAX
MIN
HOLD
Diode Display
HOLD
Min
Max
Range
REL
Zero
 Loading...