

www.ferretinstruments.com
OPERATORʼS MANUAL
WARNING:
Before introducing pressure and fog to any system, the unit must be
the lowest psi setting. Only increase the pressure when test conditions and the
WARNING:
The unit should be used on a level surface. This will make sure that
the ow meter reads accurately.
Timer

2
www.ferretinstruments.com
Timer
Air Intake with a Mass Air Flow Sensor
Vacuum Lines/Intake Manifod or Plenum
Warranty
Technical Support
The CoolSmoke EVAP Leak Detector has been designed and built by automotive technicians, for

www.ferretinstruments.com
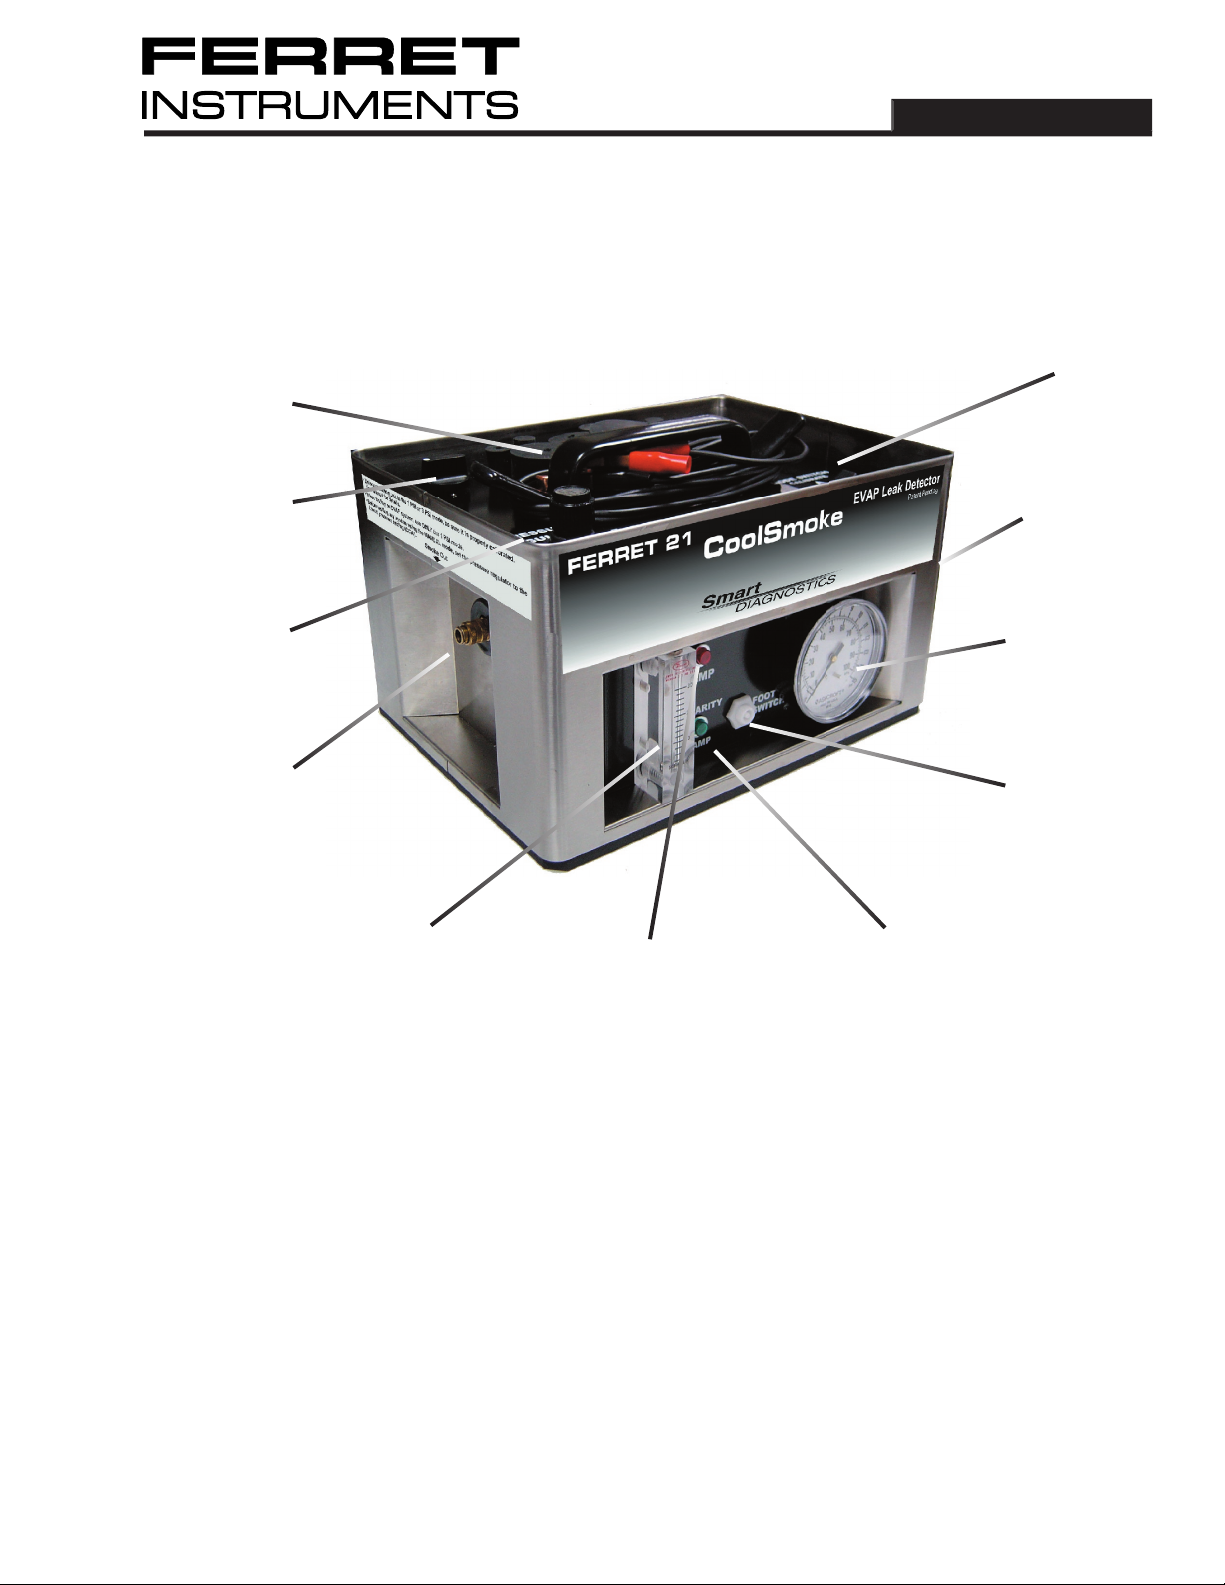
The large easy to read pressure gauge is used to determine the calibration of the CoolSmoke, and indicate
the amount of pressure that is being applied to the system under test.
The CoolSmoke incorporates a highly accurate ow gauge. When used with a properly calibrated
The polarity lamp is illuminated when the CoolSmoke is properly connected to a 12 Volt battery.
The ow lamp is illuminated when regulated shop air is owing into the system being tested. The more
frequently the ow lamp cycles on and off the bigger the leak.
The Mode Switch is located on the top deck of CoolSmoke at the front right. Press the left or right side of
the Mode Switch to select the appropriate pressure controlled mode (1 or 3 psi), or select the centre position
for the Manual Mode.
The CoolSmoke has two internal pressure cut-off switches that automatically
When the Mode Switch is placed in the center position, both internal pressure control switches are
will supply. It is essential that the air pressure regulator is turned all the way down (counter-clockwise
This mode has been speci cally provided for basic testing of Evaporative Emissions System integrity.
ow is “enabled”.
ow of smoke into the system. To do this, slowly turn the Air Pressure Regulator knob counter-clockwise,
the perfect range for the application.
www.ferretinstruments.com
The CoolSmoke operates exactly the same in the 3 psi mode as it does in the 1 psi mode. The major
SPECIAL NOTE:
This is not harmful to the system or CoolSmoke and may be ignored.
The Air Pressure Regulator has a control range from zero psi, up to 15 psi. Turning the Control Knob
When the air pressure setting is adjusted, so is the air- ow. The higher the pressure setting, the higher
the air- ow will be. This is useful when testing larger areas for leaks. Since air pressure will not build
The timer, situated on the top deck, has a maximum “ON” time of 10 minutes. In most cases, this is
to ll and saturate with fog, using the appropriate CoolSmoke settings.
The timer allows the Technician to operate the CoolSmoke hands-free, for as long as necessary.
the Technician is nished testing, simply remove the Ground Clip from the battery. The timer will return
to rest. The timer may also be wound back to zero with no ill effects.
the port on the front of your CoolSmoke. The switch may be used as a hand-held pendant switch, or left
to ll the
area quickly. Of course it’s essential that the air pressure gauge reading is continuously monitored to
ensure that the system pressure does not build beyond a suitable value.
As the air pressure increases, the regulator setting should be decreased to an appropriate level for the
system or component being tested. The higher the pressure setting, the more fog will be delivered, and
the quicker the test area will be lled.
Never hook the CoolSmoke to any system or component with the regulator setting in an unknown position.
A sudden, excessive increase in pressure will result in damage to the component.
 Loading...