

GVI Security GV-NC-102D, GV-NC-102DO User Manual
WWW.GVISS.COM
GV-NC-102D/DO
H.264 High Denition Network
Mini-Dome Camera
USER MANUAL

GVI Security • Toll Free: 888-595-2288 • Fax: 972-245-7333
This product specifications and manual are also available in pdf format at www.gviss.com
The information is subject to change without notice • v03.19.10
2
Table of Contents
1. Introduction............................................................................................................... 3
1.1 Features ........................................................................................................................................................3
1.2 Package Contents.......................................................................................................................................4
1.3 Camera Overview ......................................................................................................................................4
1.4 Dimensions ..................................................................................................................................................5
2. Preparations for IP Camera Setup ....................................................................... 6
2.1 System Requirements ................................................................................................................................6
2.2 Ethernet Connection.................................................................................................................................6
2.2.1 Indoor Camera ...........................................................................................................................................6
2.2.2 Rugged Camera ..........................................................................................................................................7
3. Deleting the Existing DC Viewer .......................................................................... 8
4. Accessing Camera .................................................................................................... 10
5. Conguration & Operation ................................................................................... 16
5.1 Browser-based Viewer Introduction ......................................................................................................16
5.2 Home Page ..................................................................................................................................................17
5.3 System Related Settings ............................................................................................................................18
5.3.1 Host Name and System Time Setting ....................................................................................................19
5.3.2 Security .........................................................................................................................................................20
5.3.3 Network .......................................................................................................................................................22
5.3.4 DDNS ...........................................................................................................................................................25
5.3.5 Mail ................................................................................................................................................................26
5.3.6 FTP ................................................................................................................................................................27
5.3.8 Snapshot ....................................................................................................................................................... 28
5.3.9 View Log File ...............................................................................................................................................28
5.3.10 View User Information .............................................................................................................................29
5.3.11 View Parameters ........................................................................................................................................31
5.3.12 Factory Default ...........................................................................................................................................31
5.3.13 Software Version .........................................................................................................................................32
5.3.14 Software Upgrade ......................................................................................................................................33
5.4 Video and Audio Streaming Settings ......................................................................................................35
5.4.1 Video Resolution and Rotate Type .........................................................................................................36
5.4.2 Video Compression ...................................................................................................................................38
5.4.3 Video OCX Protocol ................................................................................................................................39
5.4.4 Video Frame Skip .......................................................................................................................................40
5.4.5 Audio Mode and Bit Rate Settings .........................................................................................................41
5.5 Camera Settings .........................................................................................................................................42
5.5.1 Exposure Setting.........................................................................................................................................42
5.5.2 White Balance Setting ...............................................................................................................................43
5.5.3 Brightness Setting .......................................................................................................................................44
5.5.4 Sharpness Setting .......................................................................................................................................44
5.5.5 Contrast Setting .........................................................................................................................................44
5.5.6 Saturation .....................................................................................................................................................44
5.5.7 Hue ................................................................................................................................................................45
5.5.8 TV System Setup ........................................................................................................................................45
5.6 Logout ...........................................................................................................................................................45
Appendix A: Technical Specications .................................................................................... 46
Appendix B: Internet Security Settings ................................................................................ 47
Appendix C: DC Viewer Download Procedure ................................................................ 49

GVI Security • Toll Free: 888-595-2288 • Fax: 972-245-7333
This product specifications and manual are also available in pdf format at www.gviss.com
The information is subject to change without notice • v03.19.10
3
1. Introduction
autoIP™ mini dome network cameras are designed to provide cost effective, High
Denition video surveillance in a discrete, low prole enclosure. A 1/3” CMOS
progressive scan image sensor delivers High Denition video that is compressed
with H.264 to retain high video quality at a low data rate. Power over Ethernet
(PoE) reduces installation time and costs. The IP66 rugged model (GV-NC-102DO)
is ideal for environments that require dust and humidity resistance. The camera
is compatible with the user-friendly autoIP™ open platform video management
software for quick plug and play installation.
1.1 Features
• 1/3 Progressive Scan CMOS
• Resolution: 1280x720
• Flat Design Mini-Dome
• Plastic Housing (IP66 Rugged Housing - GV-NC-102DO)*
• Multiple Codec (H.264, MJPEG)
• Simultaneous Dual Codec Support
• F1.8 / f=4.3 mm Fixed Lens
• Privacy Masks
• Flip, Mirror, Rotate Functions
• Micro SD Card Support
• PoE
*Features might be different from model selection.

GVI Security • Toll Free: 888-595-2288 • Fax: 972-245-7333
This product specifications and manual are also available in pdf format at www.gviss.com
The information is subject to change without notice • v03.19.10
4
1.2 Package Contents
Please check the package contains the following items listed below.
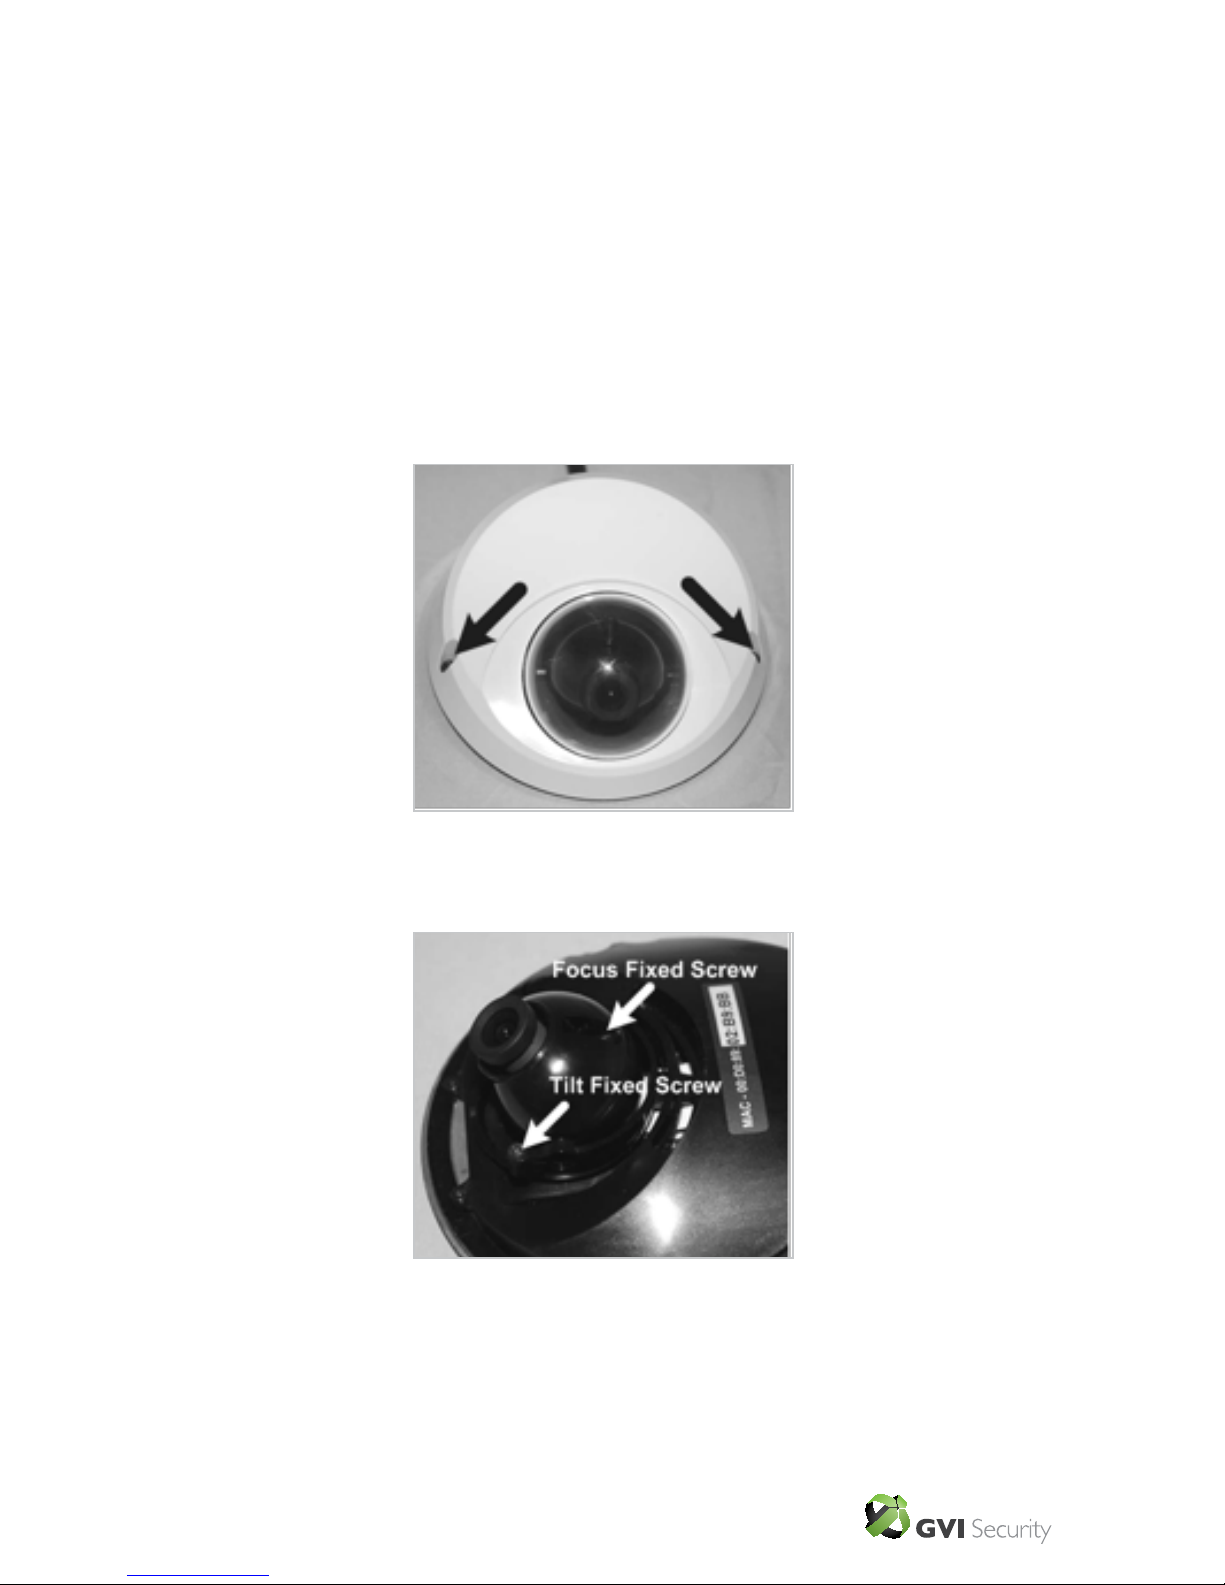
1.3 Camera Overview
Designation Description
1 Reset Button Restore to default setting; press the button with a proper tool
2 Lens Rotate the lens right/left to adjust focus
3 Focus Fixed Screw Loosen the screw to adjust the lens
4 Tilt Fixed Screw Loosen the screw to adjust tilt angle
Indoor Camera / Rugged Camera
(with Cable)
Self-tapping screws (×3)
Security Torx
Plastic Anchors (×3)
Quick Guide
Security Screw (×1)
CD

GVI Security • Toll Free: 888-595-2288 • Fax: 972-245-7333
This product specifications and manual are also available in pdf format at www.gviss.com
The information is subject to change without notice • v03.19.10
5
Dimensions
Ø4.34”
1.88”
GVI Security • Toll Free: 888-595-2288 • Fax: 972-245-7333
This product specifications and manual are also available in pdf format at www.gviss.com
The information is subject to change without notice • v03.19.10
6
Items System Requirements
Personal Computer 1. Intel® Pentium® M, 2.16 GHz or Intel® Core
TM
2 Duo, 2.0
GHz, 2. 2 GB RAM or more
Operating System Windows VISTA, Windows XP or Windows 7
Web Browser Microsoft Internet Explorer 6.0 or later
Network Card 10Base-T (10 Mbps) or 100Base-TX (100 Mbps) operation
Viewer ActiveX control plug-in for Microsoft IE
2. Preparations for IP Camera Setup
This chapter outlines information about system requirements for Mini-Dome
Camera operation, power and Ethernet connection for Indoor/Rugged IP MiniDome Camera, and access to the camera.
2.1 System Requirements
To perform the IP Dome Camera via web browser, please ensure your PC has a
good network connection, and meets system requirements as described below.
2.2 Ethernet Connection
Please follow the instructions below to connect Indoor/Rugged IP Dome Camera’s
Ethernet cable.
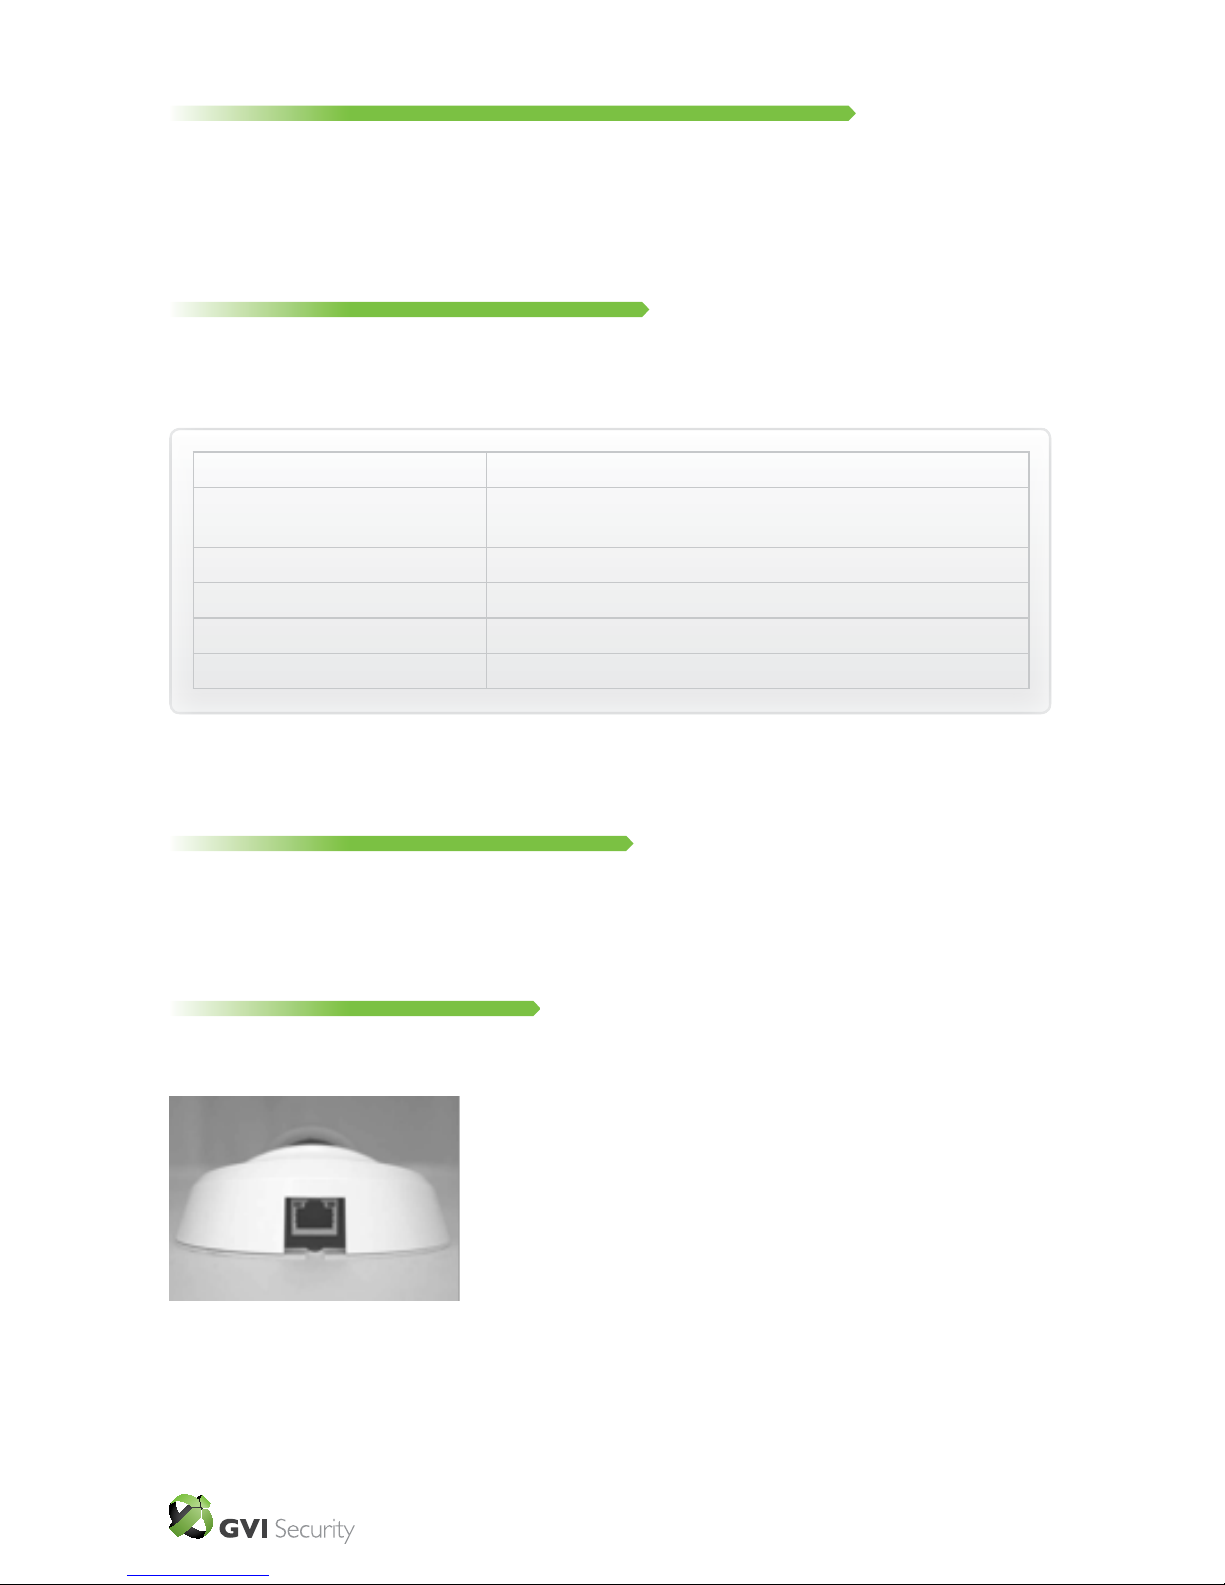
2.2.1 Indoor Camera
The Ethernet connector, which is located in the rear of the camera, is shown below:
PoE Connection: Connect one end of the Ethernet cable
to the network port on the camera, and the other end to
Power Sourcing Equipment (PSE) like hubs or routers.
GVI Security • Toll Free: 888-595-2288 • Fax: 972-245-7333
This product specifications and manual are also available in pdf format at www.gviss.com
The information is subject to change without notice • v03.19.10
7
Check the status of the link indicator and activity indicator LEDs; if the LEDs are
unlit, please check the connections.
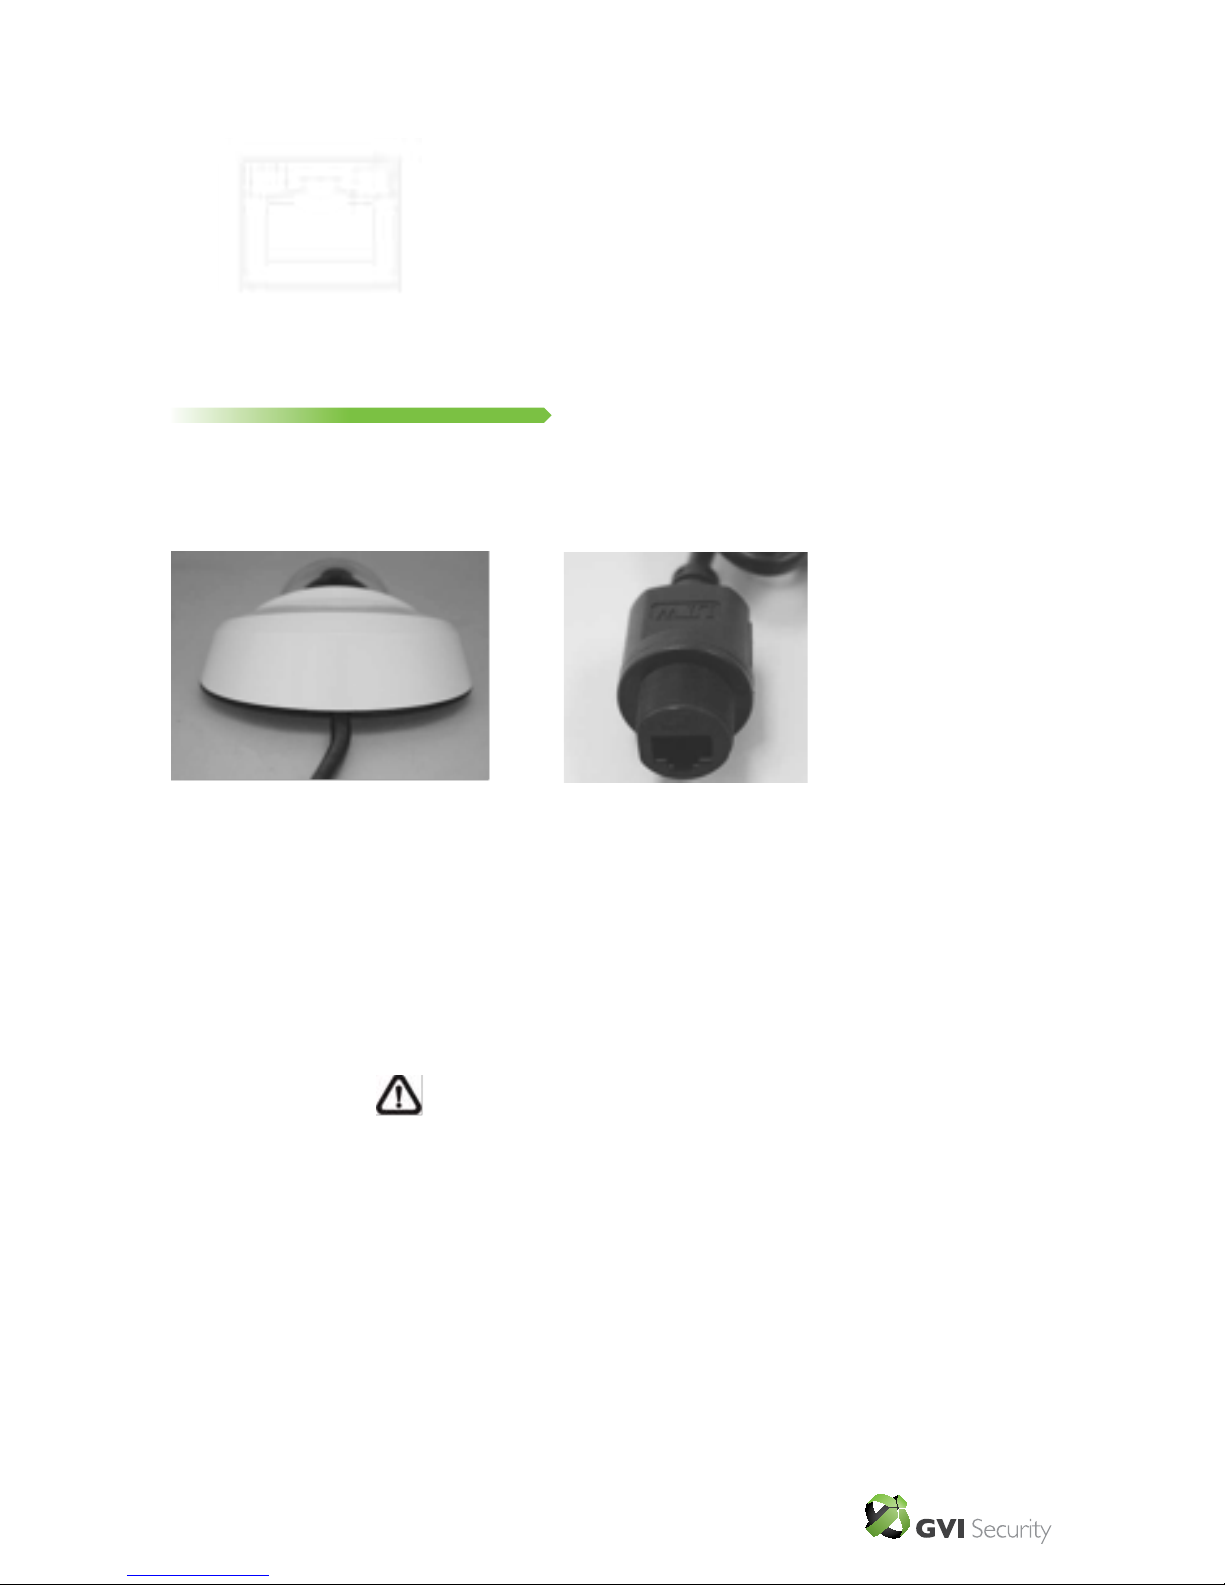
2.2.2 Rugged Camera
The Rugged IP Dome Camera supports two kinds of Ethernet cable; one is M12
D-Coded Cable, and the other is RJ45 Dongle Cable.
RJ-45 Dongle Cable Connection:
Run the Ethernet cable through the Waterproof RJ45 Screw-On Plug. Then connect
one end of the Ethernet cable to the RJ45 dongle, tightening the sealing nut of the
Waterproof RJ45 Screw-On Plug completely. Later on connect the other end of the
Ethernet cable to Power Sourcing Equipment (PSE) like hubs or routers.
Green Link Light indicates good network connection.
Orange Activity Light ashes for network activity indication.
NOTE: Please use a waterproof PoE switch/hub
so that the camera can work.
RJ45 Dongle
GVI Security • Toll Free: 888-595-2288 • Fax: 972-245-7333
This product specifications and manual are also available in pdf format at www.gviss.com
The information is subject to change without notice • v03.19.10
8
3. Deleting the Existing DC Viewer
Please rst delete the existing DC Viewer from the PC before accessing to the
autoIP™ Mini Dome Camera.
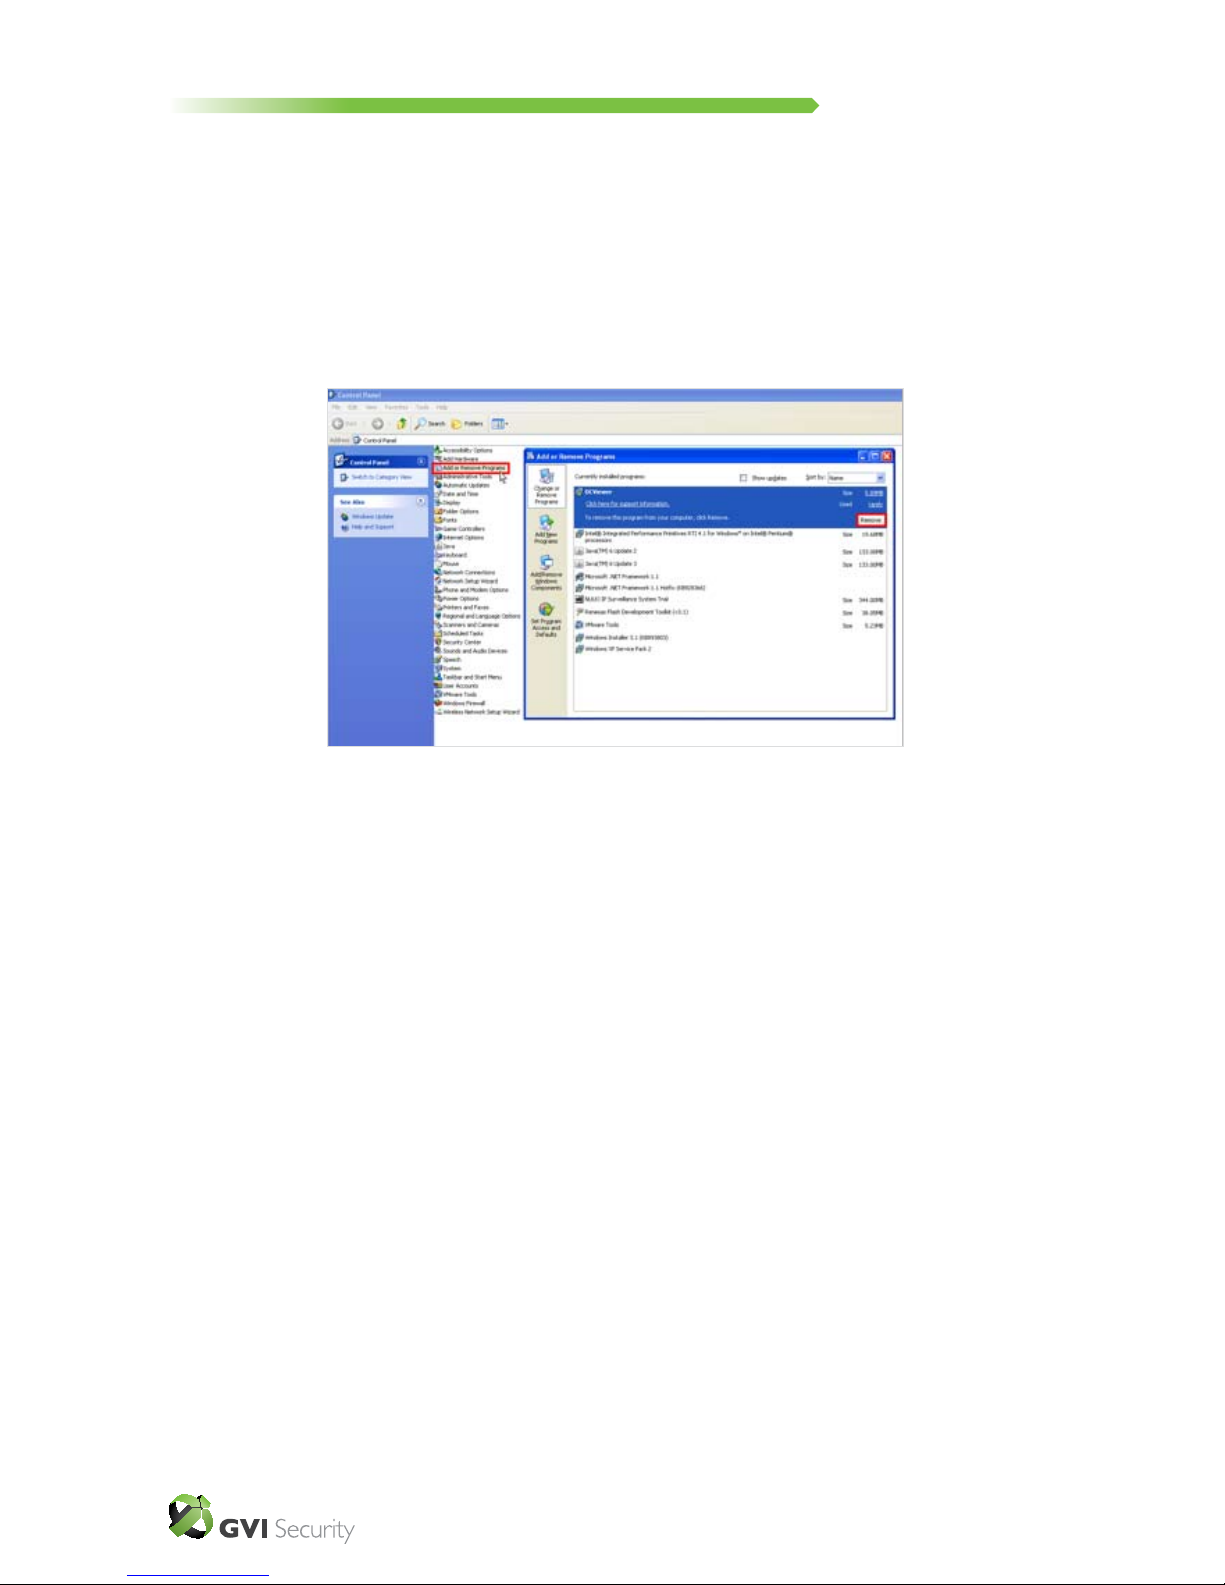
Deleting the DC Viewer
Click “Control Panel”, and then double click “Add or Remove Programs.” In
the “Currently installed programs” list, select “DCViewer” and click the button
“Remove” to uninstall the existing DC Viewer as shown in the gure below.
Deleting Temporary Internet Files
To improve browser performance, it is suggested to clean up the all the les in the
Temporary Internet Files. The procedure is as follows:

GVI Security • Toll Free: 888-595-2288 • Fax: 972-245-7333
This product specifications and manual are also available in pdf format at www.gviss.com
The information is subject to change without notice • v03.19.10
9
STEP 1: Click the “Tools” tab and select the option “Internet Options.”
STEP 2: Tap the “Delete Files” in the “Temporary Internet les” section.
The popup conrmation window will appear as shown below. Click “OK” to start
deleting the les.
GVI Security • Toll Free: 888-595-2288 • Fax: 972-245-7333
This product specifications and manual are also available in pdf format at www.gviss.com
The information is subject to change without notice • v03.19.10
10
4. Accessing Camera
autoIP™ Discovery Tool can be used to discover the cameras in the network.
autoIP™ Discovery Tool
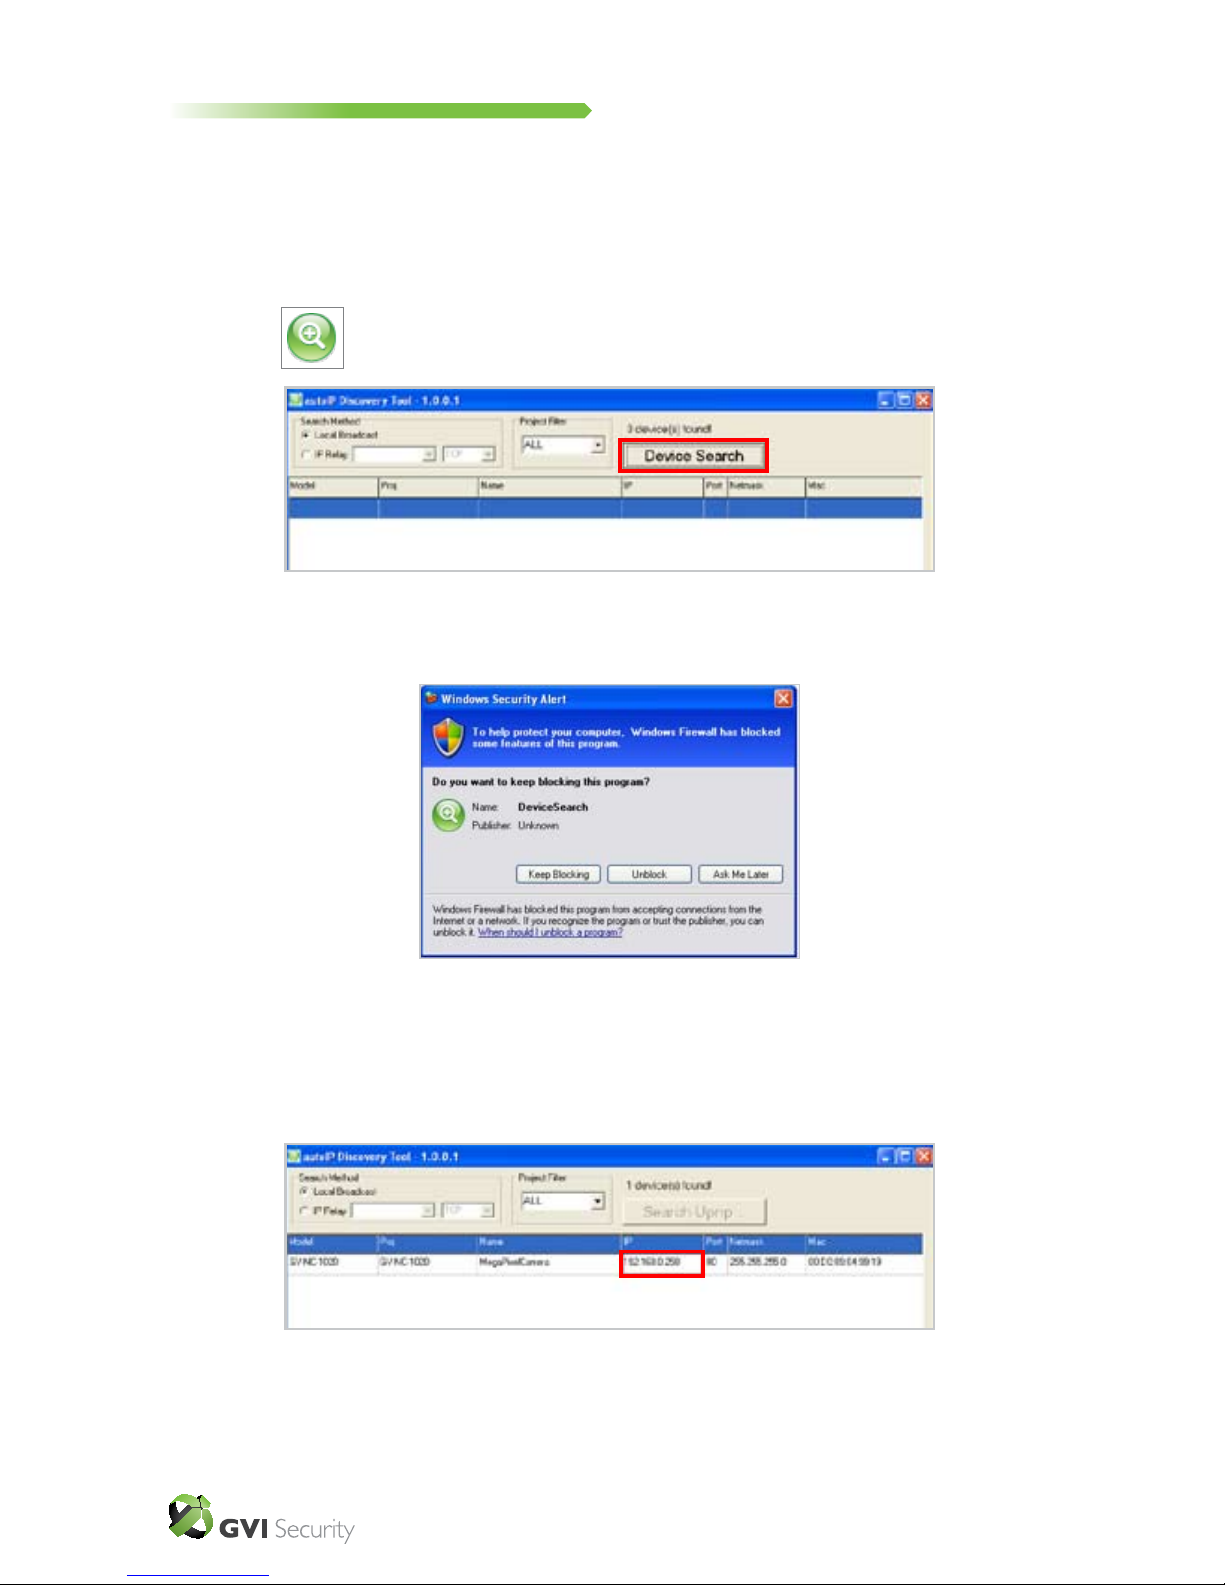
Step 1: Double click on the autoIP™ Discovery Tool.exe (see the icon below);
its window will appear as shown below. Then click the “Device Search” button.
Step 2: The security alert window will pop up. Click “Unblock” to continue.
Device Search
Step 3: Click “Device Search” again, and all found IP devices will be listed in the
page, as shown in the gure below. The IP Dome Camera’s default IP address is:
192.168.0.250. (If xed IP address is selected)
GVI Security • Toll Free: 888-595-2288 • Fax: 972-245-7333
This product specifications and manual are also available in pdf format at www.gviss.com
The information is subject to change without notice • v03.19.10
11
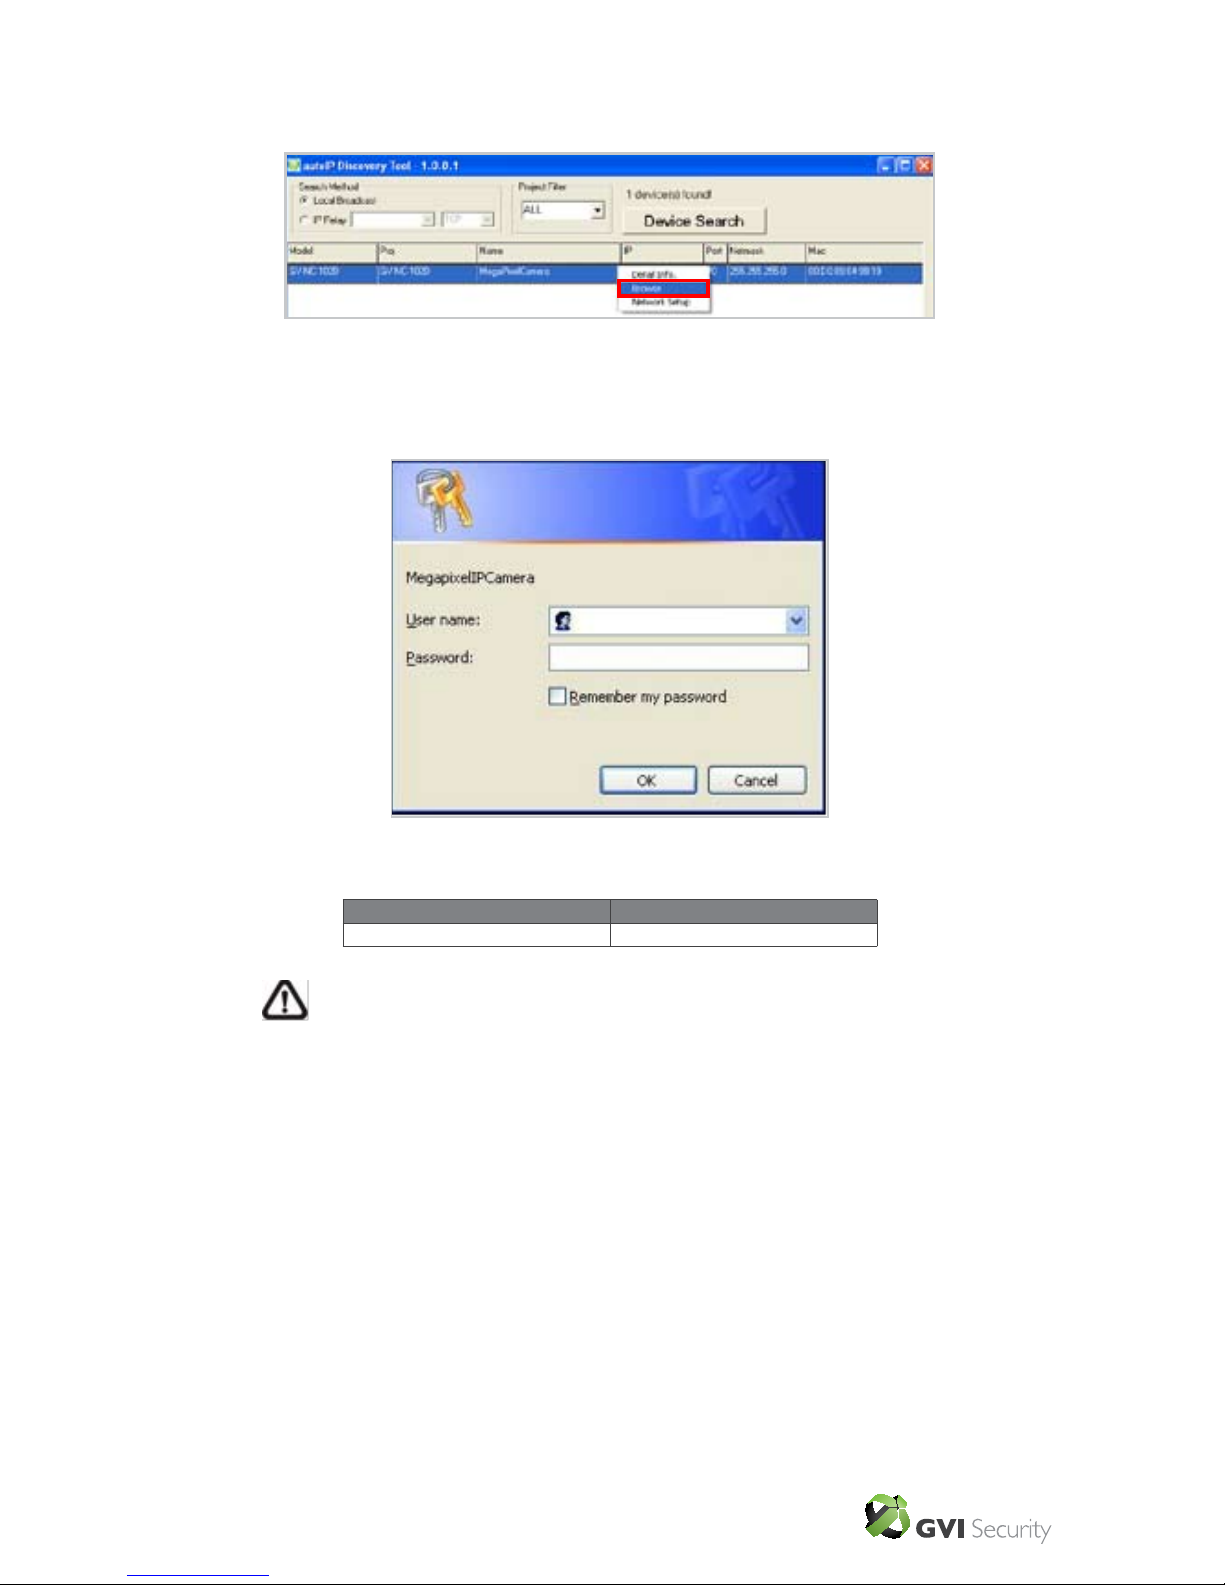
Step 4: Double click or right click and select “Browse” to access the camera
directly via web browser.
Step 5: Then the prompt window of request for entering default username and
password (as shown below) will appear for logging in to the IP Dome Camera.
The default login ID and password for the Administrator are:
Login ID Password
Admin 1234
NOTE: ID and password are case sensitive.
GVI Security • Toll Free: 888-595-2288 • Fax: 972-245-7333
This product specifications and manual are also available in pdf format at www.gviss.com
The information is subject to change without notice • v03.19.10
12
Additionally, users can change the IP Dome Camera’s network property, either
DHCP or Static IP, directly in the device nding list. Refer to the following section
for changing the IP Dome Camera’s network property.
Example of Changing IP Dome Camera’s Network Property
Users can change an IP Dome Camera’s network properties, ex. from static IP
to DHCP, in the device list. The way to change the IP Dome Camera’s network
property is specied below:
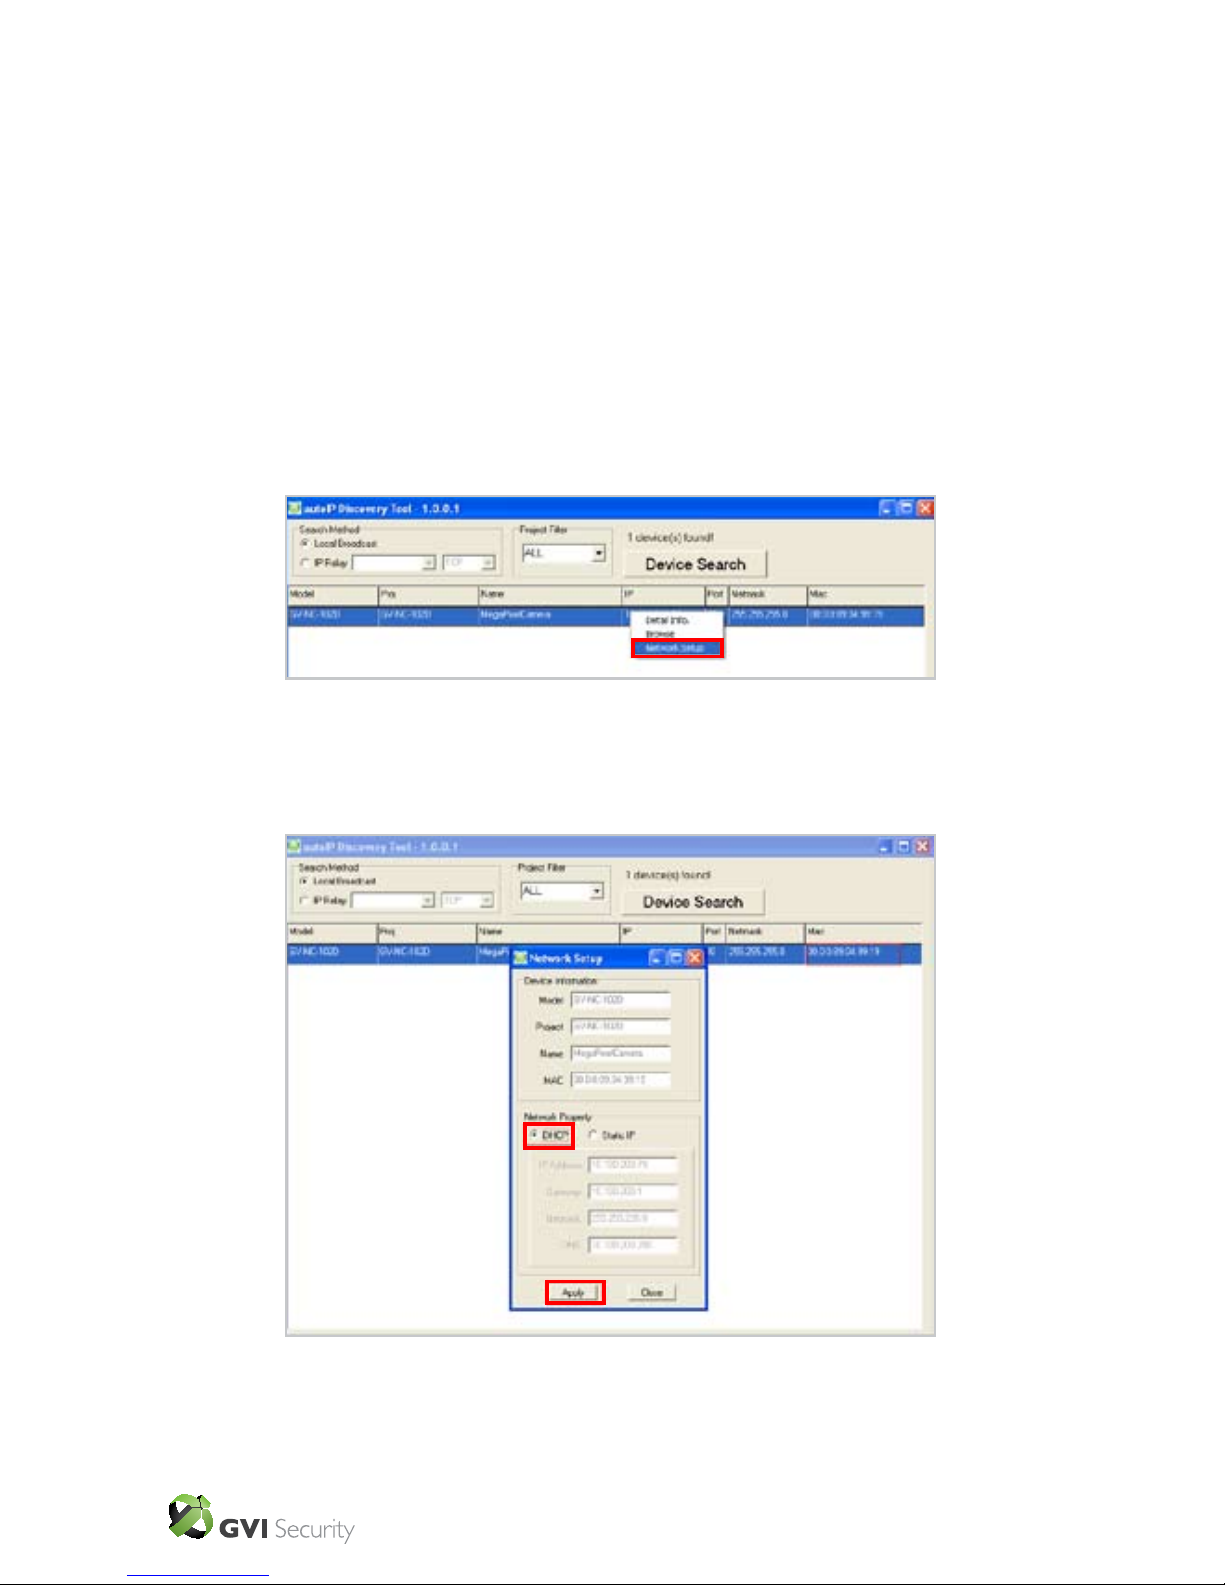
Step 1: In the nding device list, click on the Mini-Dome Camera that you would
like to modify. On the selected item, right click and select “Network Setup.”
Meanwhile, record the IP Dome Camera’s MAC address, for future identication.
Step 2: The “Network Setup” page will come out. Select “DHCP,” and press
“Apply” button down the page.
GVI Security • Toll Free: 888-595-2288 • Fax: 972-245-7333
This product specifications and manual are also available in pdf format at www.gviss.com
The information is subject to change without notice • v03.19.10
13
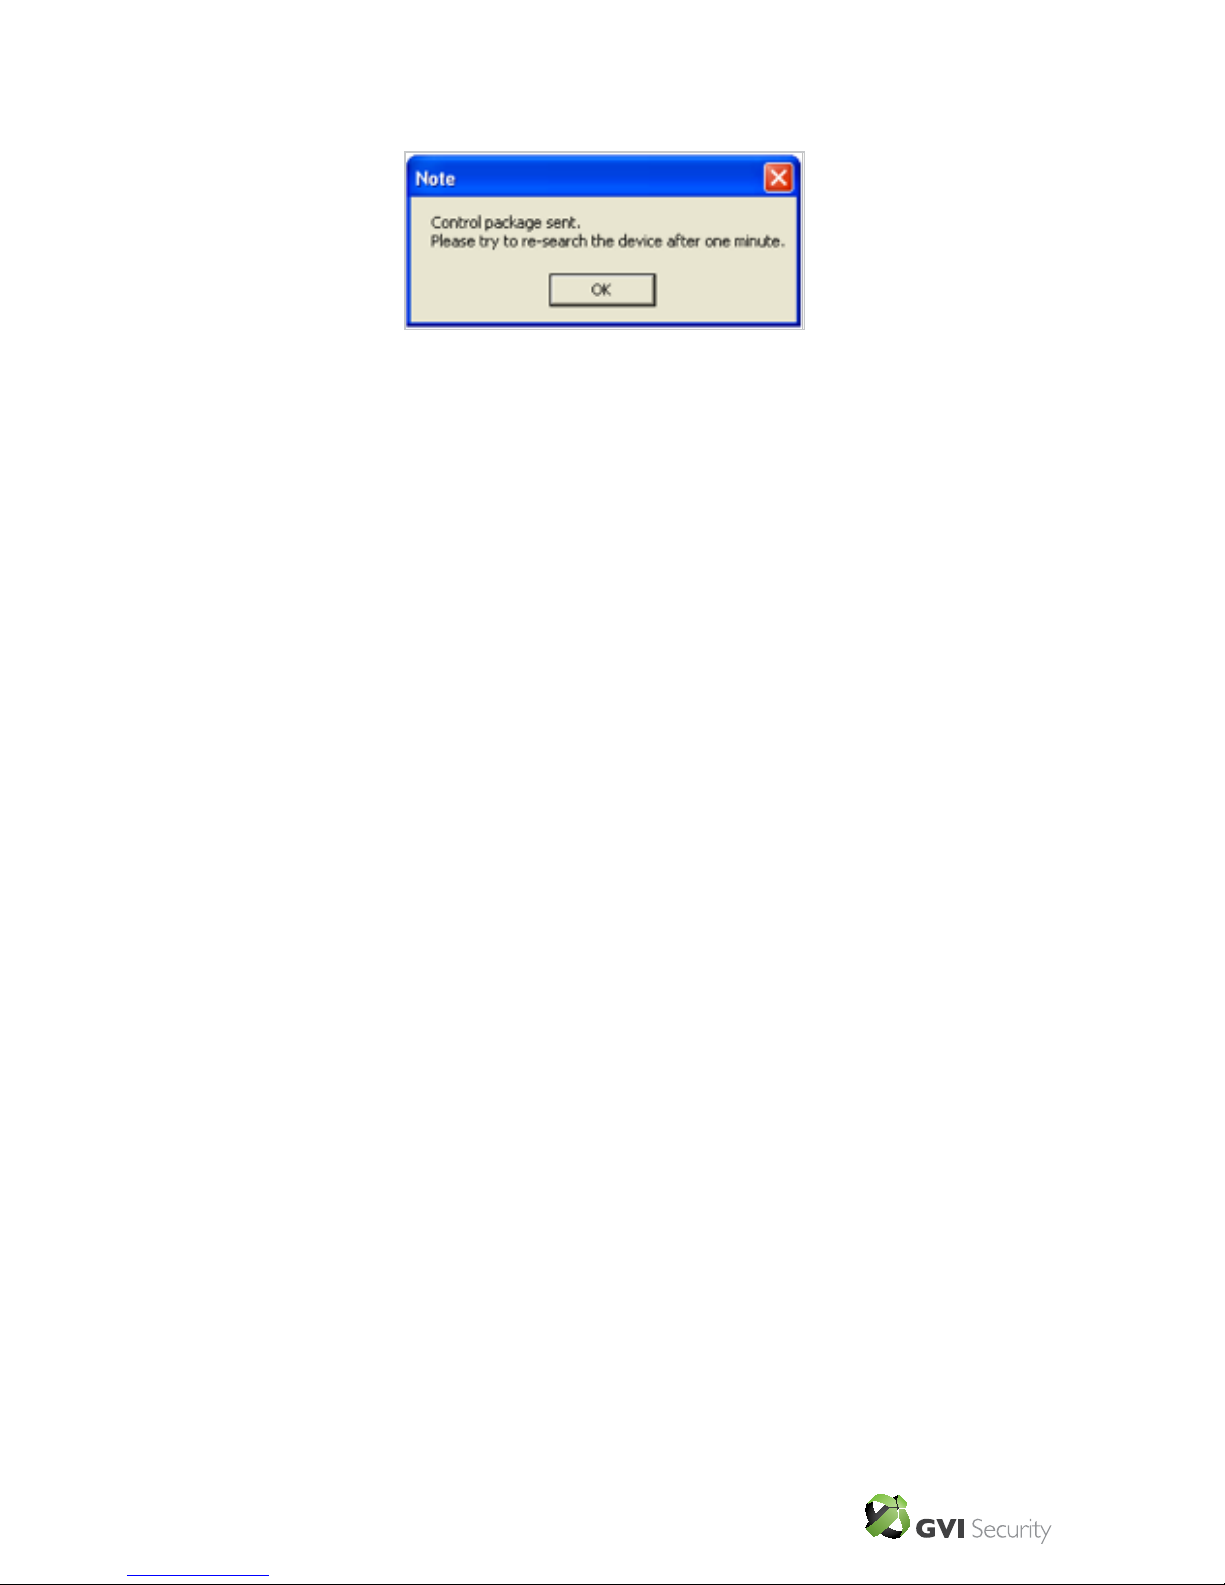
Step 3: Click “OK”. Wait for one minute to rediscover the IP Dome Camera.
Step 4: Click the “Device Search” button to discover all the devices. Then select
the IP Dome Camera with matching MAC address. Double click on the IP Dome
Camera, and the login window will come out.
Step 5: Enter User name and Password to access the IP Dome Camera.
Installing DC Viewer Software Online
For the initial access to the IP Dome Camera, a client program, DC Viewer, will be
automatically installed to your PC when connecting to the IP Dome Camera.
If the Web browser doesn’t allow DC Viewer installation, please check the Internet
security settings or ActiveX controls and plug-ins settings (see Appendix B: Internet
Security Settings) to continue the process.
GVI Security • Toll Free: 888-595-2288 • Fax: 972-245-7333
This product specifications and manual are also available in pdf format at www.gviss.com
The information is subject to change without notice • v03.19.10
14
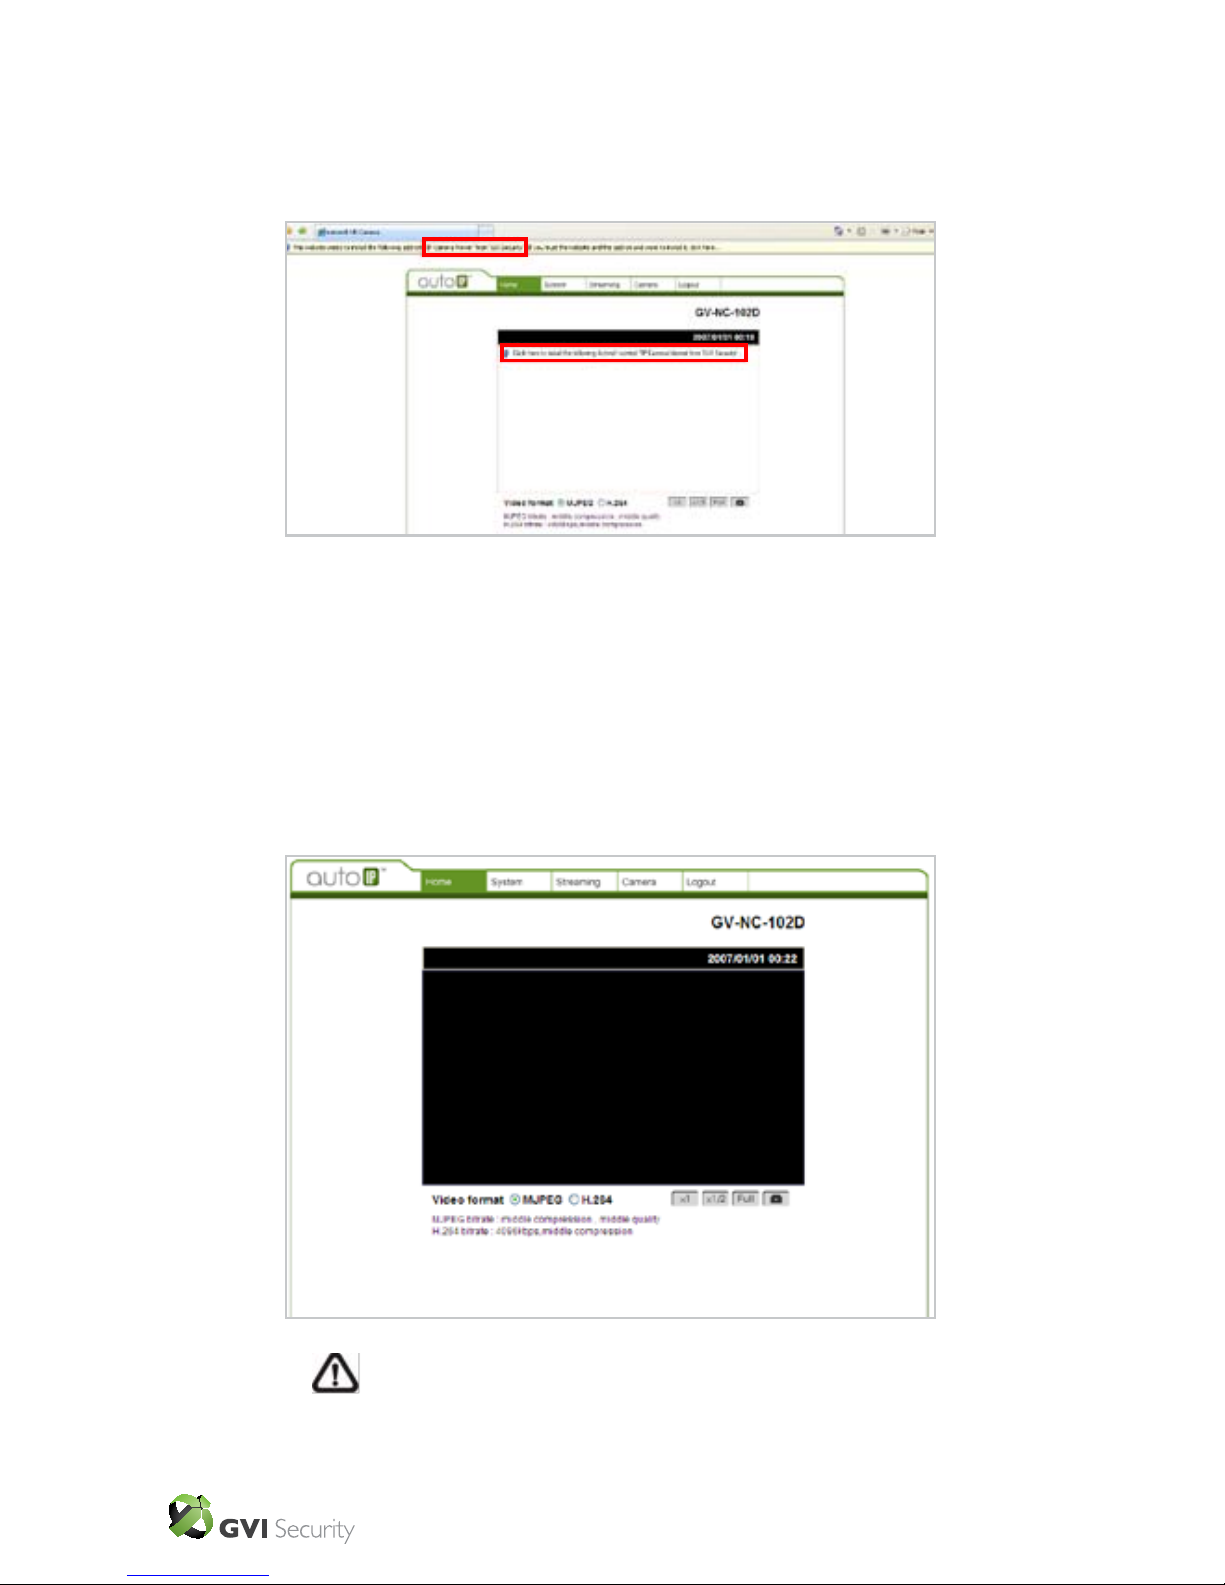
The Information Bar (just below the URL bar) may come out and ask for permission
to install the ActiveX Control for displaying video in browser. Right click on the
Information Bar and select “Install ActiveX Control…” to allow the installation.
Then the security warning window will pop up. Click “Install” to carry on software
installation.
Click “Finish” to close the DC Viewer window when download is nished. For the
detailed software download procedure, please refer to Appendix C: DC Viewer
Download Procedure.
Once login to the IP Dome Camera, users will see the Home page as shown below:
NOTE: The “talk” button below the screen only displays in Box
Camera and Vandal Proof IP Dome.
GVI Security • Toll Free: 888-595-2288 • Fax: 972-245-7333
This product specifications and manual are also available in pdf format at www.gviss.com
The information is subject to change without notice • v03.19.10
15
Administrator/User Privileges
“Administrator” represents the person who can congure the IP Dome Camera and
authorize users access to the camera; “User” refers to whoever has access to the
camera with limited authority, i.e. entering Home and Camera setting pages.
Lens Adjustment
The image displays on the Home page when successfully accessing to IP Dome
Camera. Adjust the camera’s focus to produce a clear image. Please refer to the
procedure below.
Step 1: Unscrew the IP Dome Camera’s cover.
Step 2: Loosen the focus xed screw, and rotate the lens counter-/clockwise to
adjust focus; loosen the tilt xed screw, and adjust the camera’s tilt angle.
GVI Security • Toll Free: 888-595-2288 • Fax: 972-245-7333
This product specifications and manual are also available in pdf format at www.gviss.com
The information is subject to change without notice • v03.19.10
16
5. Conguration&Operation
The autoIP™ Dome Camera is provided with a user-friendly browser-based
conguration interface. In this chapter, information about main page introduction,
system related settings and camera settings will be described in detail.
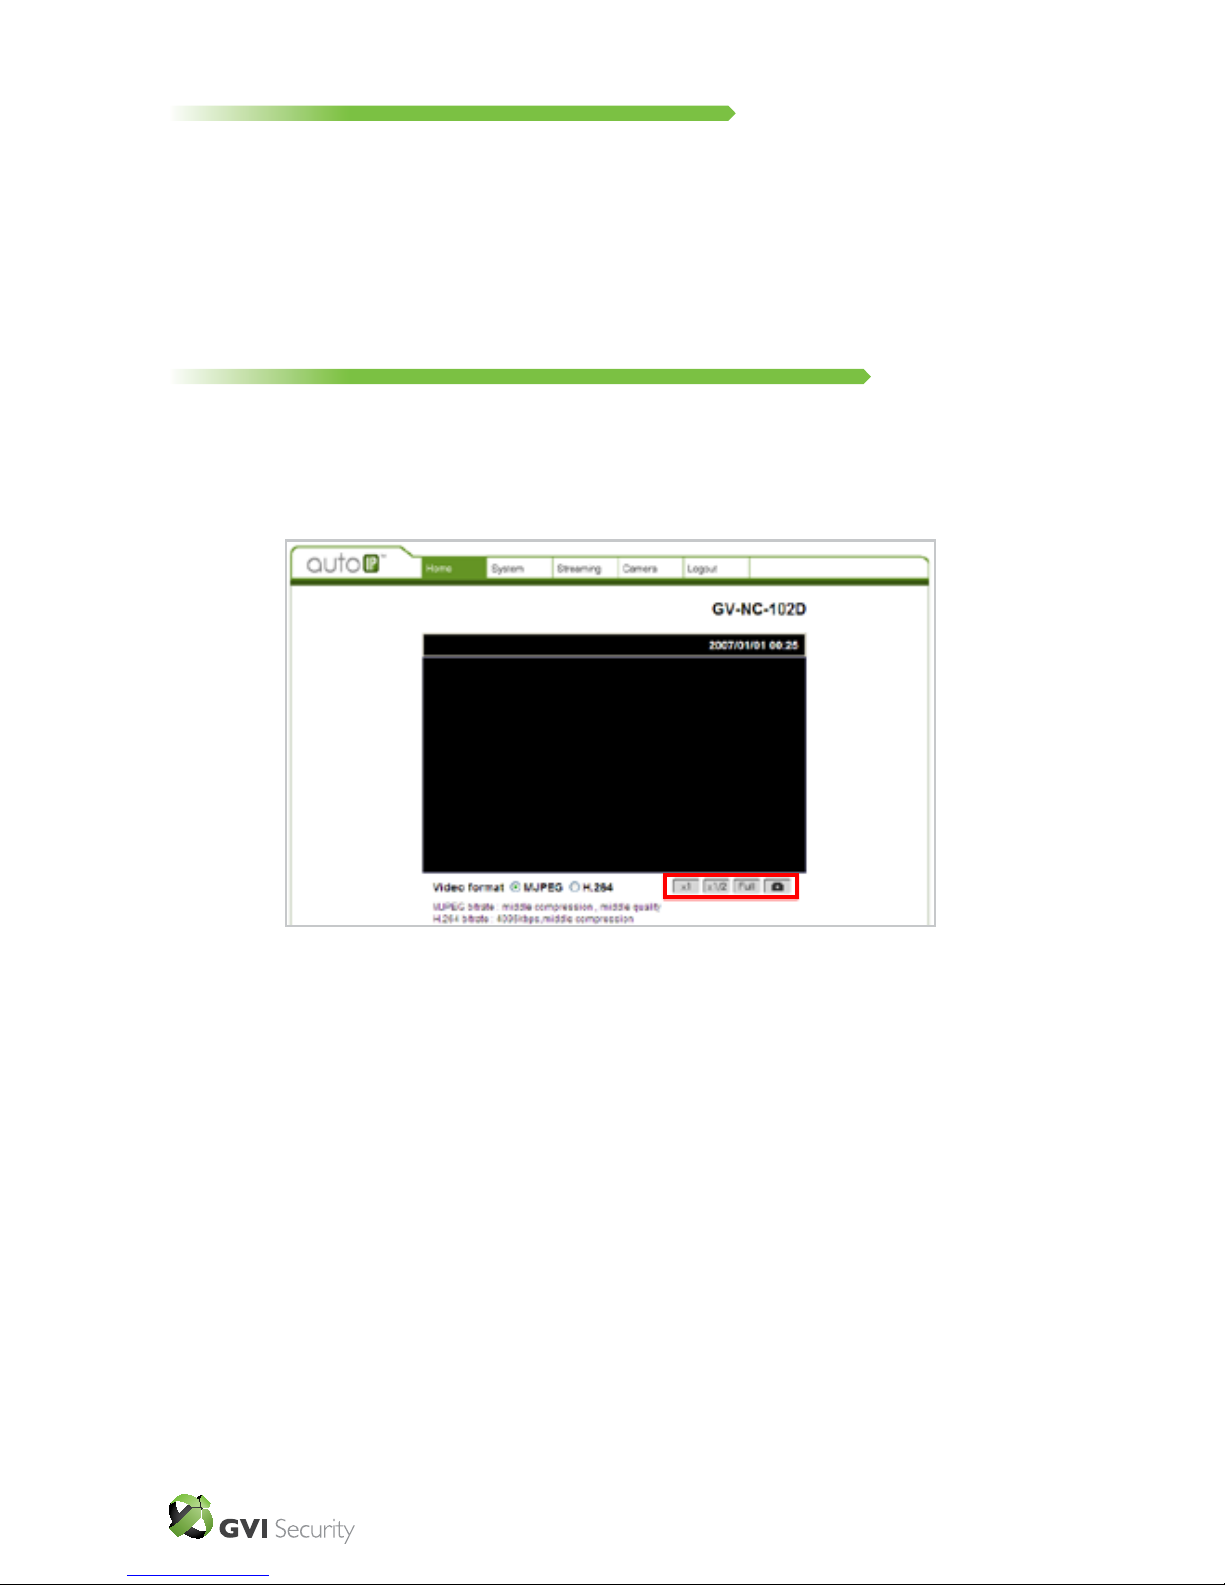
5.1 Browser-based Viewer Introduction
The gure below shows the main page of the IP Dome Camera user interface.
At the bottom of the main page, users can adjust video display size (x1, x1/2 and full
screen), select a kind of video format and save JPEG snapshots (see 5.3.8 Snapshot).
 Loading...