

Guytron GT-100 Owner's Manual

THE
GT-100
100 WATT GUITAR AMPLIFIER
Owner’s Manual
Guytron Amplification
586-254-5717
www.guytron.com
PRECAUTIONS

NOTE: IT IS VERY IMPORTANT THAT YOU READ THIS SECTION TO HELP
INSURE MANY YEARS OF TROUBLE FREE USE. THIS UNIT REQUIRES CAREFUL
HANDLING.
All warnings on this equipment and in the operating instructions should be adhered to and
all operating instructions should be followed. Do not use this equipment near water! Care
should be taken so that objects do not fall and liquids do not spill into the unit through any
openings. The power cord should be unplugged from the outlet when left unused for long
periods of time.
Operating temperature: Do not expose the GT-100 to excessive heat. This unit is
designed to operate between 32F and 104F and 0C and 40 C
DO NOT ATTEMPT TO SERVICE THIS EQUIPMENT YOURSELF!
THIS EQUIPMENT SHOULD BE SERVICED BY QUALIFIED PERSONNEL ONLY.
DO NOT MAKE ANY INTERNAL ADJUSTMENTS OR ADDITIONS TO THIS
EQUIPMENT AT ANY TIME. DO NOT TAMPER WITH INTERNAL ELECTRONIC
COMPONENTS AT ANY TIME. FAILURE TO FOLLOW THESE INSTRUCTIONS MAY
VOID THE WARRANTY OF THIS EQUIPMENT, AS WELL AS CAUSING THE RISK OF
A SEVERE SHOCK HAZARD.
Unpacking:
Before you plug in, inspect your GT-100 amp for any damage. Your amp was inspected
and sound-tested before shipment, but shipping can sometimes be tough. Check that the
footswitch and power cord have been shipped with the amp. If parts are missing, or if any
damage has occurred, contact your dealer.
Packing Materials:
We designed the original box and packing materials to protect your amp during shipment.
Save them. If you ever need to send your amp to us or to anyone else, the original box and
packing materials will ensure safe transit.
2

Before you plug in .
Take a quick look inside the back of your amp and make sure of the following:
• The tubes are securely seated in their sockets.
• A speaker cord is plugged between the Speaker jack on the amp, and the jack on the
speaker cabinet.
• The impedance selector is set to match the cabinet s impedance.
• The power cord is plugged in.
• The footswitch is plugged in (this is optional).
Now look at the front to make sure:
• The Master Volume control is set at a low level. (9 O clock is a good starting point).
• The Power switch is off.
• The Standby switch is set to standby mode.
Plug in!
Now plug the amp into the wall, plug your guitar into the input jack, and set your
controls to one of the Sample settings outlined here. Then turn on the Power switch. Wait for
about a minute for the tubes to warm up. Turn on the Standby switch.
Have Fun Jamming!
After you’ve played with your GT100 for a while, check out the rest of this manual for
some good tips on getting the most out of your new GT100 guitar amplifier. And keep an eye on
our web site as well, for sound bite and sample settings to come in the near future, as well as
links to musicians using Guytron.
3

V
FORWARD
Thank you for purchasing the Guytron GT-100. The exclusive patented design delivers
that "On 10" sound at any volume (without external power attenuators), restoring power amp
distortion and harmonics missing from conventional master volume technology. The GT-100 is a
two channel, 100 watt, pure tube amplifier with vintage tones and modern features, all hand built
in the U.S.A.
INTRODUCTION
The heart of the tone generation is in the unique foot switchable pre-amp design that
incorporates two EL84’s running in "Class A" configuration. Class A is the oldest and purest
way of amplifying a signal. Naturally, there are raging disputes among audiophiles as to what is
Class A and what is not, but this section of the amp is Class A, and that is where the feel and
basic tonal character get established. The signal does however make a transition into the Class AB
arena and that is one of the secrets of the Guytron tone.
A
INPUT
GAIN TONE LEVEL
B
OLUME
Channel "A", favoring the 50’s to 60’s stock amp tone, starts out crystal clear at low gain
settings, progressing smoothly up to a ’cranked up’ stock amp type of overdrive. The Channel
"A" tone control involves the gain structure and the amp picks up more gain in the treble range as
you turn it clockwise, yielding a progressively more "English" tone along the way. Channel A has
become very popular and is known for its unique brand of sparkle, and punch.
Channel "B" takes over where channel "A" leaves off, encompassing most of the favored
tones of the modded amp era, mid 70’s, to present. The gain control in Channel "B" is a monster,
by utilizing a dual pot it controls two stages of gain simultaneously, allowing a continuous sweep
4
from warm and clear to over the top gain and distortion. The tone control on channel "B" is a
post gain type, and serves as a treble gate to the power amp, it has no effect on the gain
structure, (unlike Channel A). It serves well in setting the relative brightness of the two channels,
ultimately adding to the versatility and allowing you to get a warm distortion with a variety of
power amp settings.
A master tone section is provided to shape the final sound before it gets delivered to your
speakers. The master tone section is integral to the 100 watt all tube output section; utilizing four
EL34’s running in class AB2. This configuration can deliver massive amounts of power on
demand. The master tone controls can be used to adjust for different rooms, as well as emulate
the tonal characteristics of different amp types, speaker configurations, etc. It is also at this
stage that effects can be blended in to further enhance the tone.
The tone controls which sometimes seem a bit subtle, are set up for emphasis and
musicality, and not designed for an exaggerated wide range of sweep, but to gently add or subtract
emphasis on important musical frequencies, without crossing into a non-musical realm, or
introducing excessive phase shift. The amp does, however, faithfully deliver the usable feel and
sound of all my favorite most popular amps, and does so at the widest possible spread of
listening levels ever available in a single package.
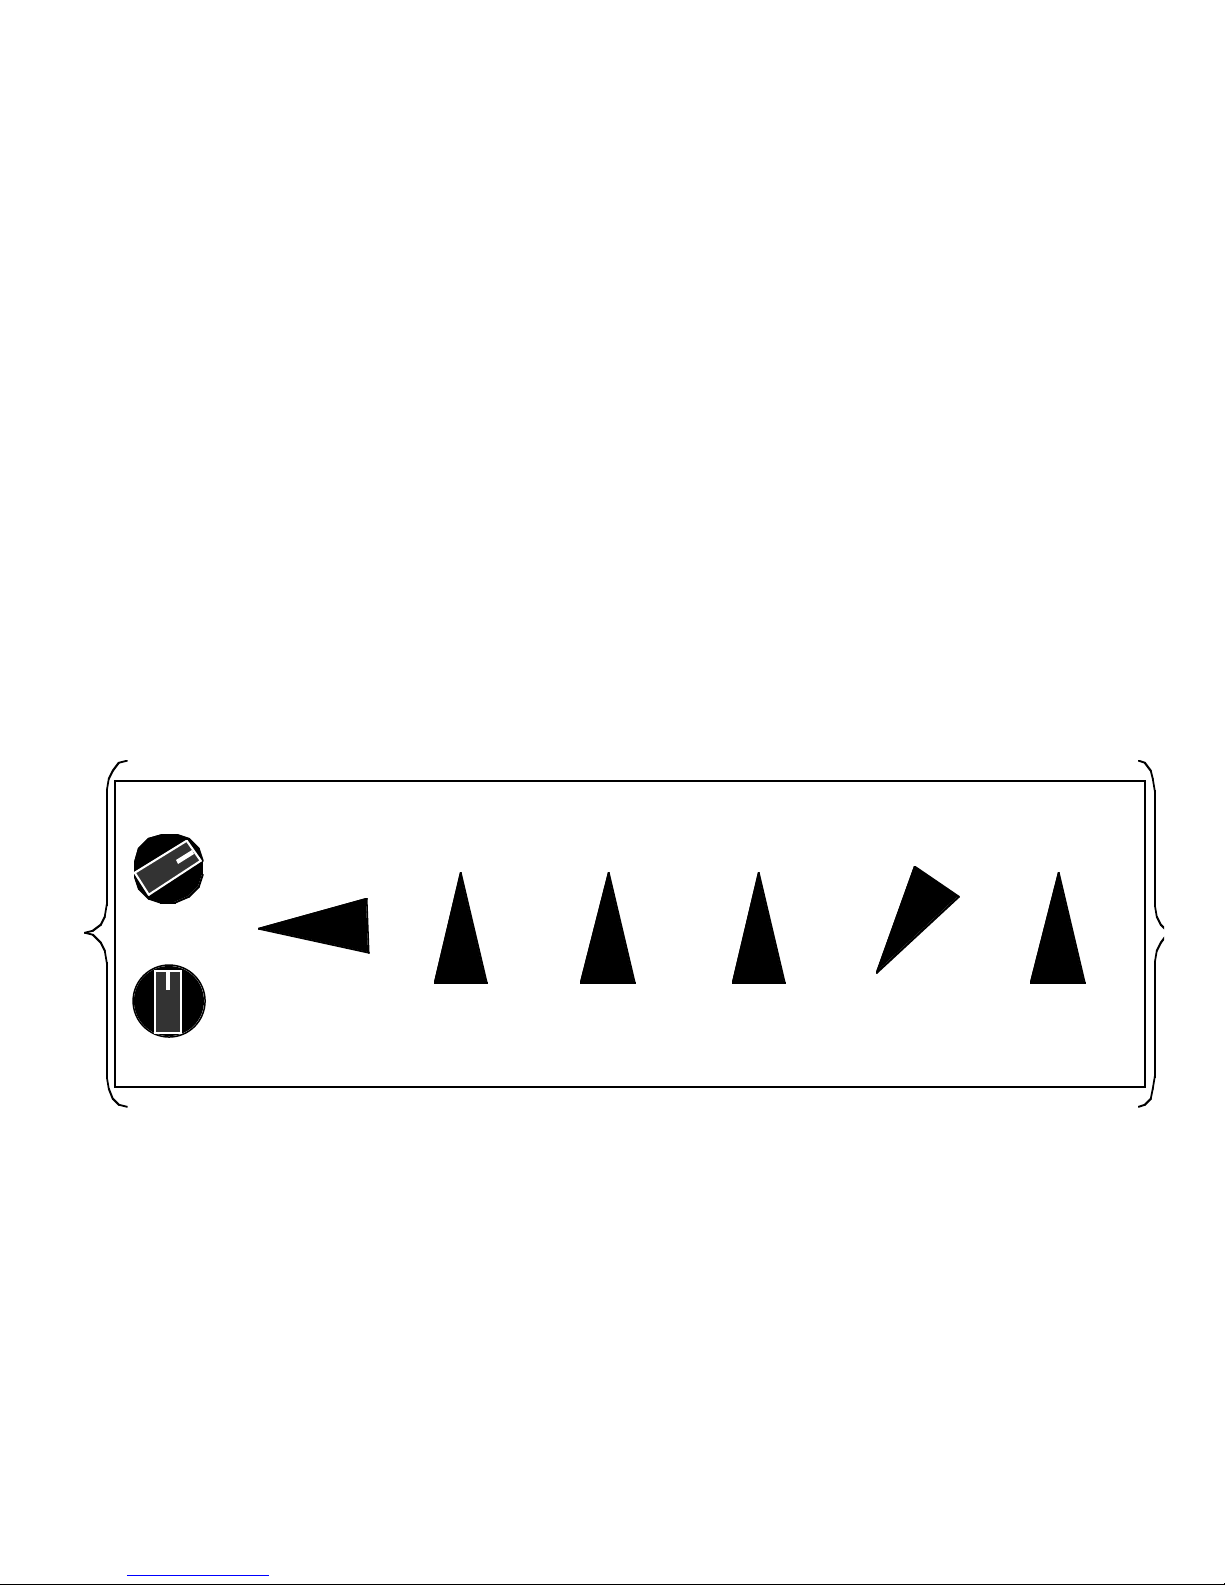
LEVEL
VOLUME TREBLE MIDRANGE BASS EFFECTS PRESENCE
Dual level effects loops are provided to allow for simultaneous running of old vintage
gear, and newer rack mount studio effects. Effects loops are transformer driven with operation
dual levels of both +3 and -10 dB, and can be used simultaneously. As a general rule, the LOW
level is for pedal type or old vintage delays, while the HIGH loop accommodates more modern
"Rack Gear". Typically effects are set to full wet, with no dry sound in the loop, as you would
with a studio mixer. A perfect blend between the loop effects and the original dry sound which
5
never left the amp, can then be quickly achieved quickly via Effects control on the front panel of
the GT100 (above). As a rule, the on board mixer using the "original" dry sound will provide a
quicker response with a more direct, natural tone and feel than you sometimes get with most
mixing. The only time this presents a potential problem, is when an effects units Input is out of
phase with its own output. This would cancel out with the original dry sound in the amp,
because the Guytron’s dry sound is (obviously) in perfect phase with itself. Another option
would be a phase reversing buffer amp in the loop to return the signal to it’s original phase
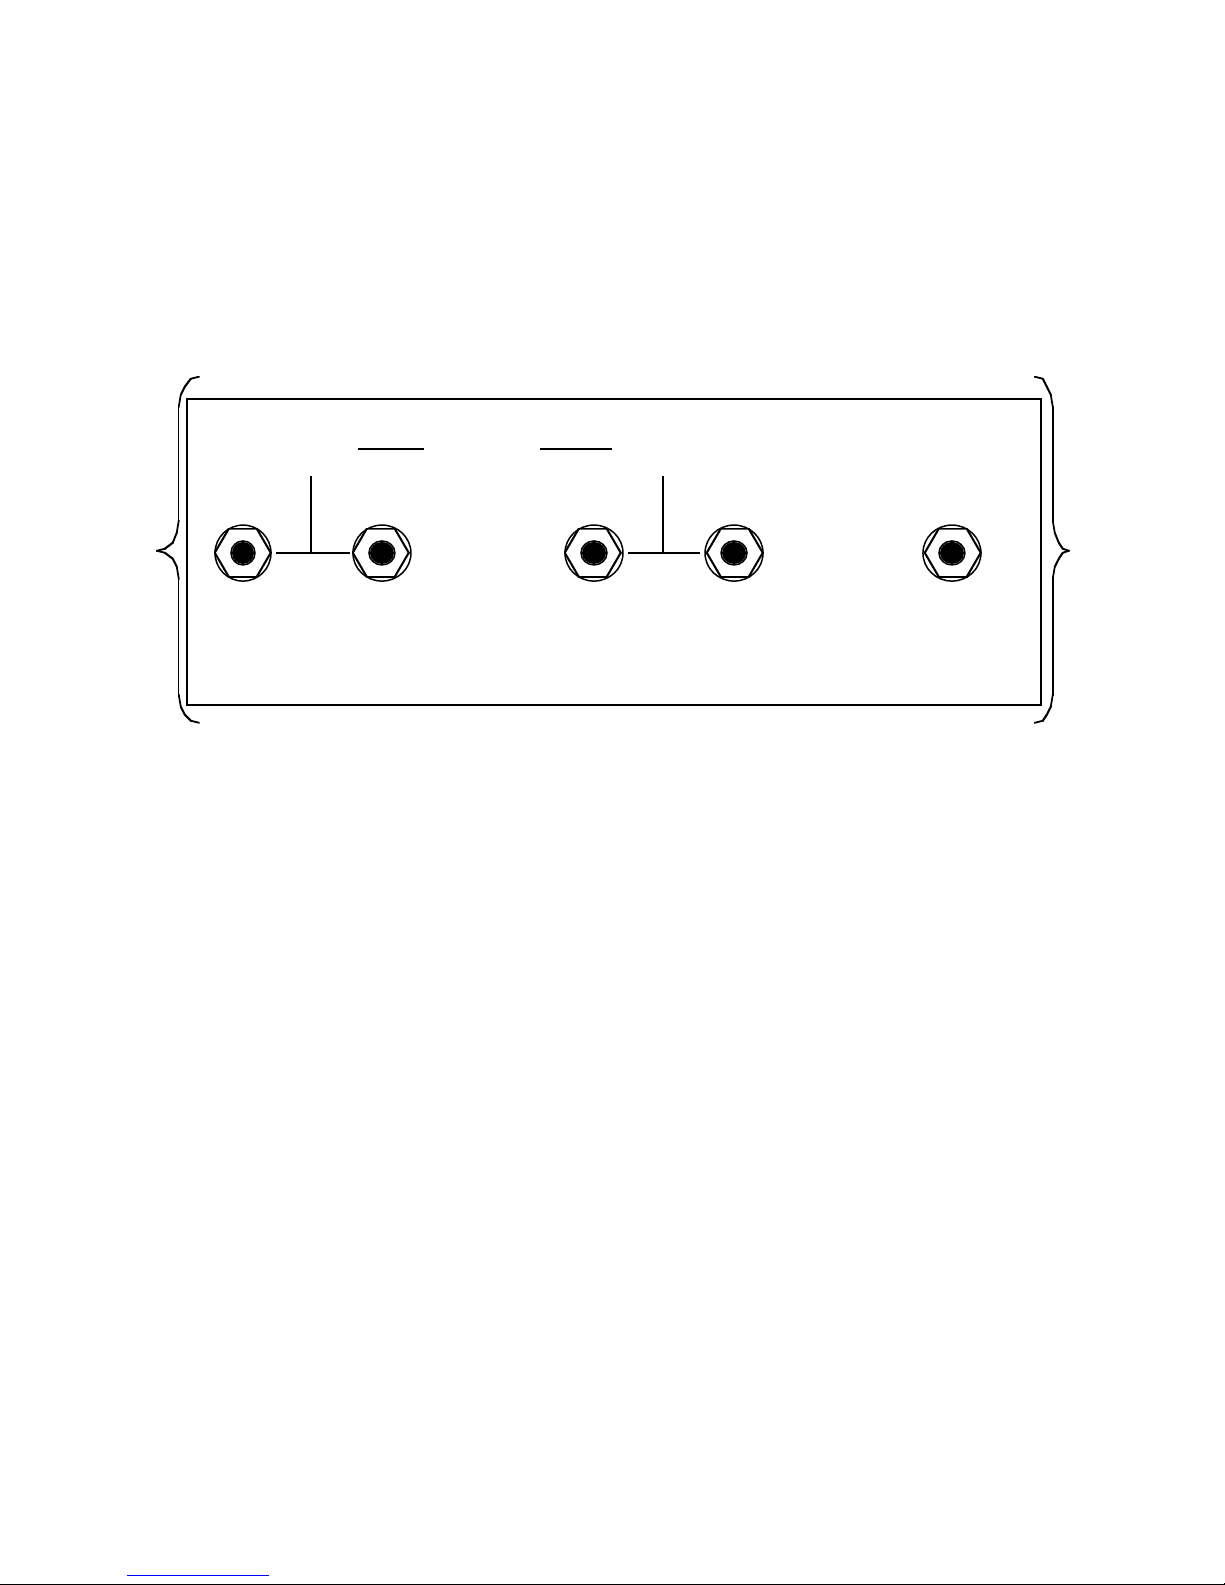
relationship, if you have a problem effects unit.
HIGH
LEVEL
SEND RETURN SEND RETURN FOOTSWITCH
EFFECTS
LOOPS
LOW
LEVEL
A complete clockwise setting of the Effects control will function exactly like an old series
effects loop for effects units where external blending is the preferred. In either case, the effects
must always be set to unity gain, while the amp is set up as you would normally be using it.
During the level setup process, the channels "Level" controls can be used as variable "Send"
controls, and the "MasterVolume" can be considered the "Return Level". This comes in handy for
some of the more picky effects you might run across.
The front panel channel selector switch is there for convenience, but is disabled while in
the center remote position, to allow for any form of "Latching" remote switching of the channels.
The switch is labeled (Center Remote) to suggest that the remote switch could be any number of
remote switching methods. Example: Using an effects device to switch the GT100 as part of an
effects pre-set.
In any case, the front panel switch is set up to override any external switching in order to
accommodate large stage situations where quick adjustments are needed. Thus eliminating the
need to run back to the footswitch or whatever while adjusting your settings.
The amp is shown in the double "ON" position. While set like this, the amp is fully
functional, and ready to play. During short to medium breaks 10-20 minutes, or between sets, it’s
best to turn the "Standby" switch to the "Standby" position. This will shut down the high
voltage inside the tubes, thus extending tube life, but it also leaves the heaters on for quick
6
startup. If the break is very much longer than that, both switches should be in the down position.
If nothing else, just to conserve energy. Tube life is also extended if the amp is allowed to warm
up at least a minute, before turning the standby switch to the "On" position. This is less of a
strain on the tubes, as well as the rest of the amp.
As for the Purple pilot light, this is an old tradition of mine that dates back to the late
70’s. I used to get a lot of these old Kustom amps in the shop. You know, the cool padded ones
you could sit on during those long boring practices. (I still think that was a stroke of genius)
They had the cool purple lights, which also happened to fit my old Fender amps perfectly. After
that, every time I did any "Custom" work on a Fender amp, I would grace it with a "Kustom"
purple jewel. Some years later on a parts run down in Detroit, I came across several hundred of
them, and that cemented the tradition. By the time the 90’s rolled around, they were once again
popular and back in production, and so there was never any decision as to which kind of pilot
light we should use on the GT-100.
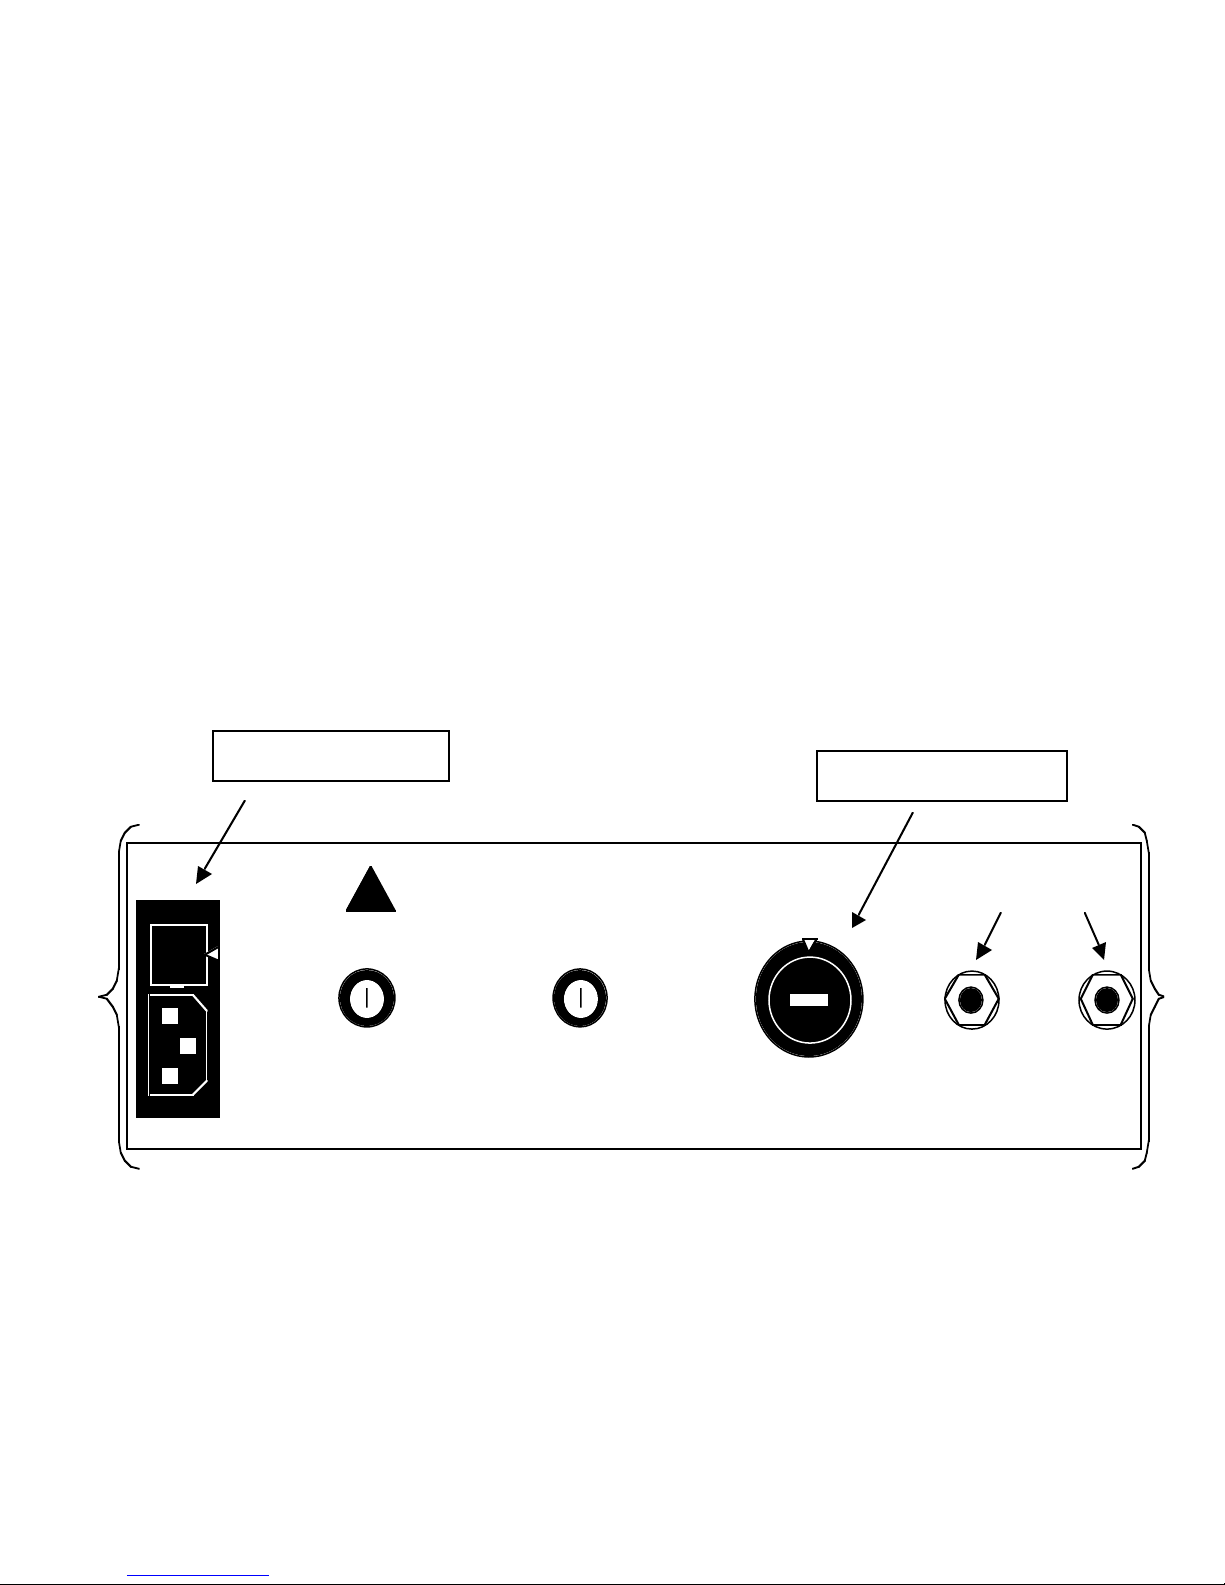
The GT-100 now comes stock with the ability to travel internationally. The back panel is
outfitted with a fused Primary voltage selector switch, which is built in to the IEC connector. To
adjust for different countries, use a small screwdriver to pry out the square voltage selector cap
(shown below) socket. Simply, install the proper fuse rating for your voltage requirements, and
rotate the cap until the correct voltage lines up to the triangle marker on the right.
Voltage selector cap
(Shown set for 120VAC)
120
5 AMP SLO-BLO 1 AMP FAST-BLO
100/120VAC ~ 5.0A SLO-BLO
220/240VAC ~ 2.5A SLO-BLO
50/60 HZ — 650 WATTS
NO USER SERVICABLE PARTS
WARNING! SHOCK HAZARD!
INSIDE.
IMPEDANCE
SELECTOR
GUYTRON L.L.C. MADE IN U.S.A MODEL: GT-100
BROOKINGS, OR PATENT PENDING SERIAL:
Impedance Selector Switch
(shown set for eight ohms)
8
There are a total of three user accessible fuses for the GT100 for extra protection and safety.
IMPORTANT!
SPEAKER
For domestic USA amps there are two (5 AMP SLO-BLO) fuses, one is under the
voltage selector cap, and the other is located in the fuse holder marked 5 AMP SLO-BLO. BOTH
7
 Loading...