

Page 1
Network installation
1
CMG-DCM
Data module
Platinum Firmware
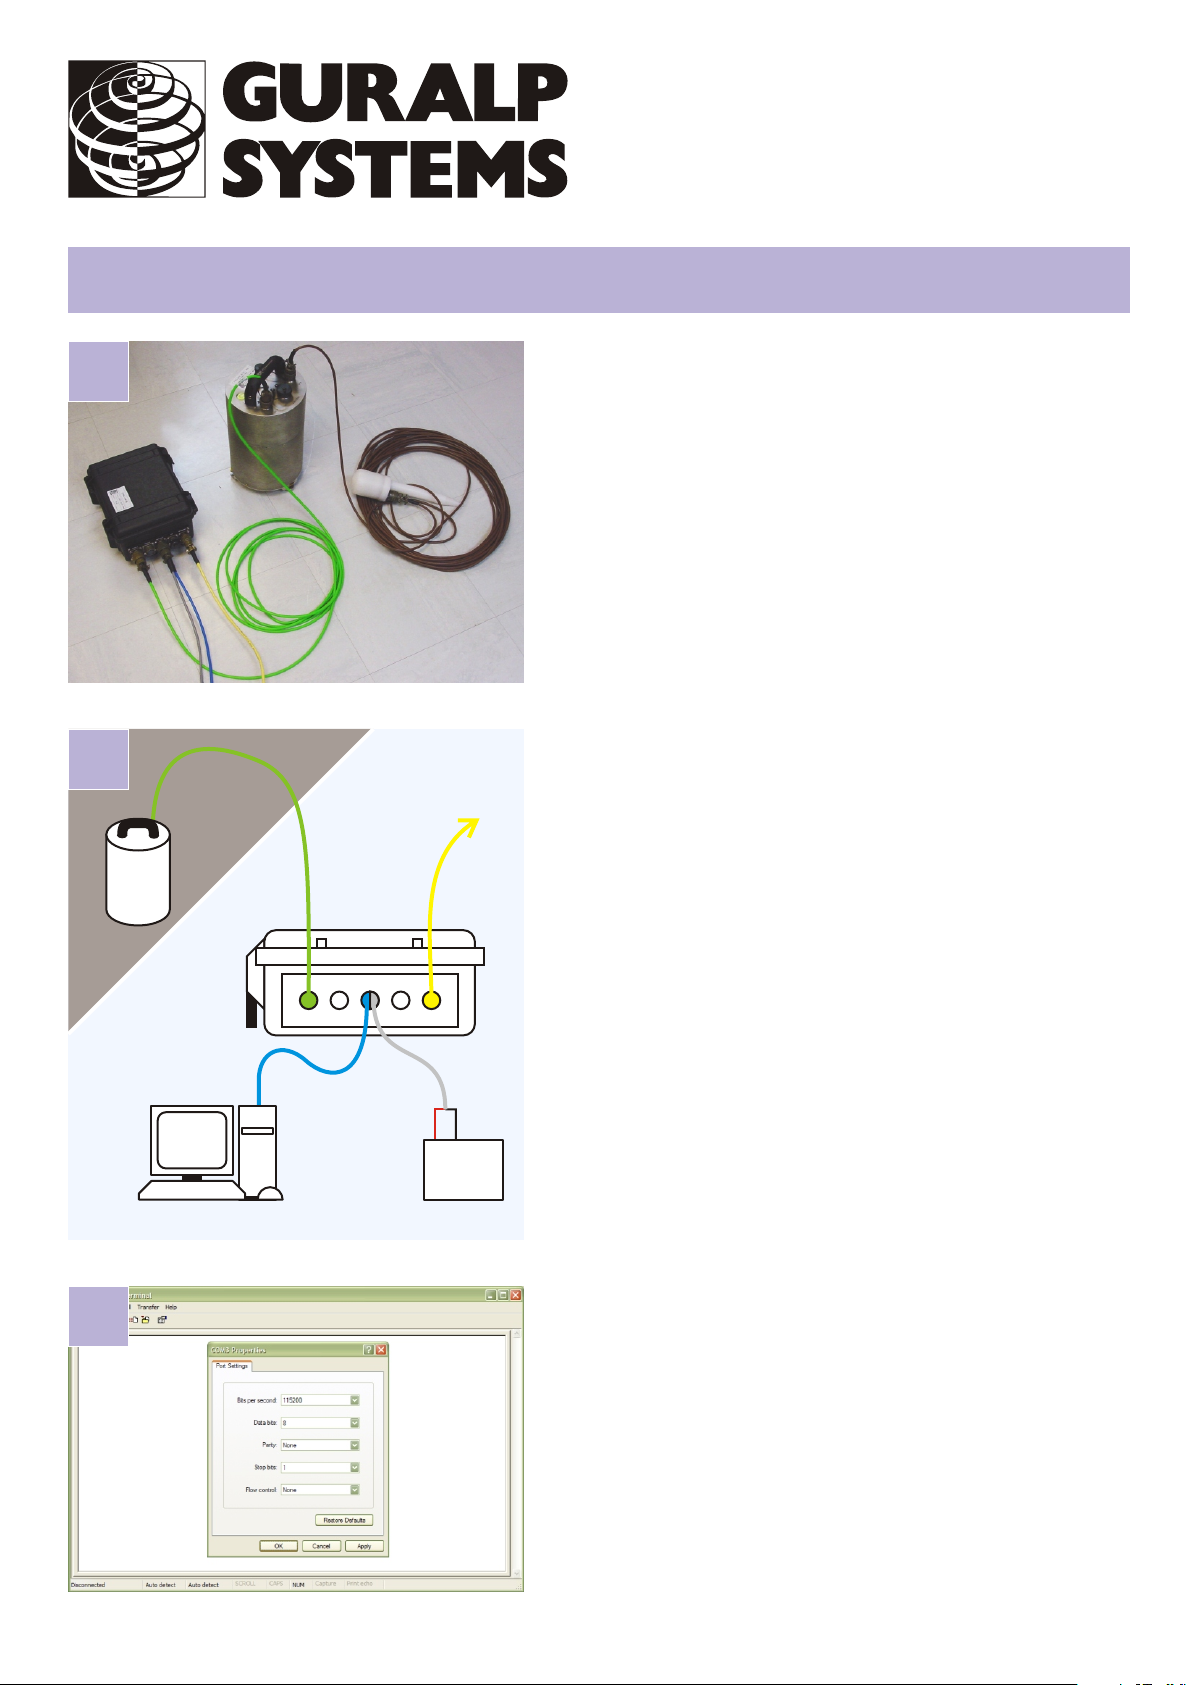
Check you have all components and cables.
* CMG-DCM module
* Green digitizer DCM cable
* Blue/grey combined DCM PC and power cables
* Yellow DCM Ethernet cable
You will need a Windows or Linux PC with an RS232
(COM) port, a Güralp Systems digitizer or digital sensor
and a DC power supply of between 12 and 24 volts.
Choose a suitable location for the DCM.
↔
↔
↔
2
3
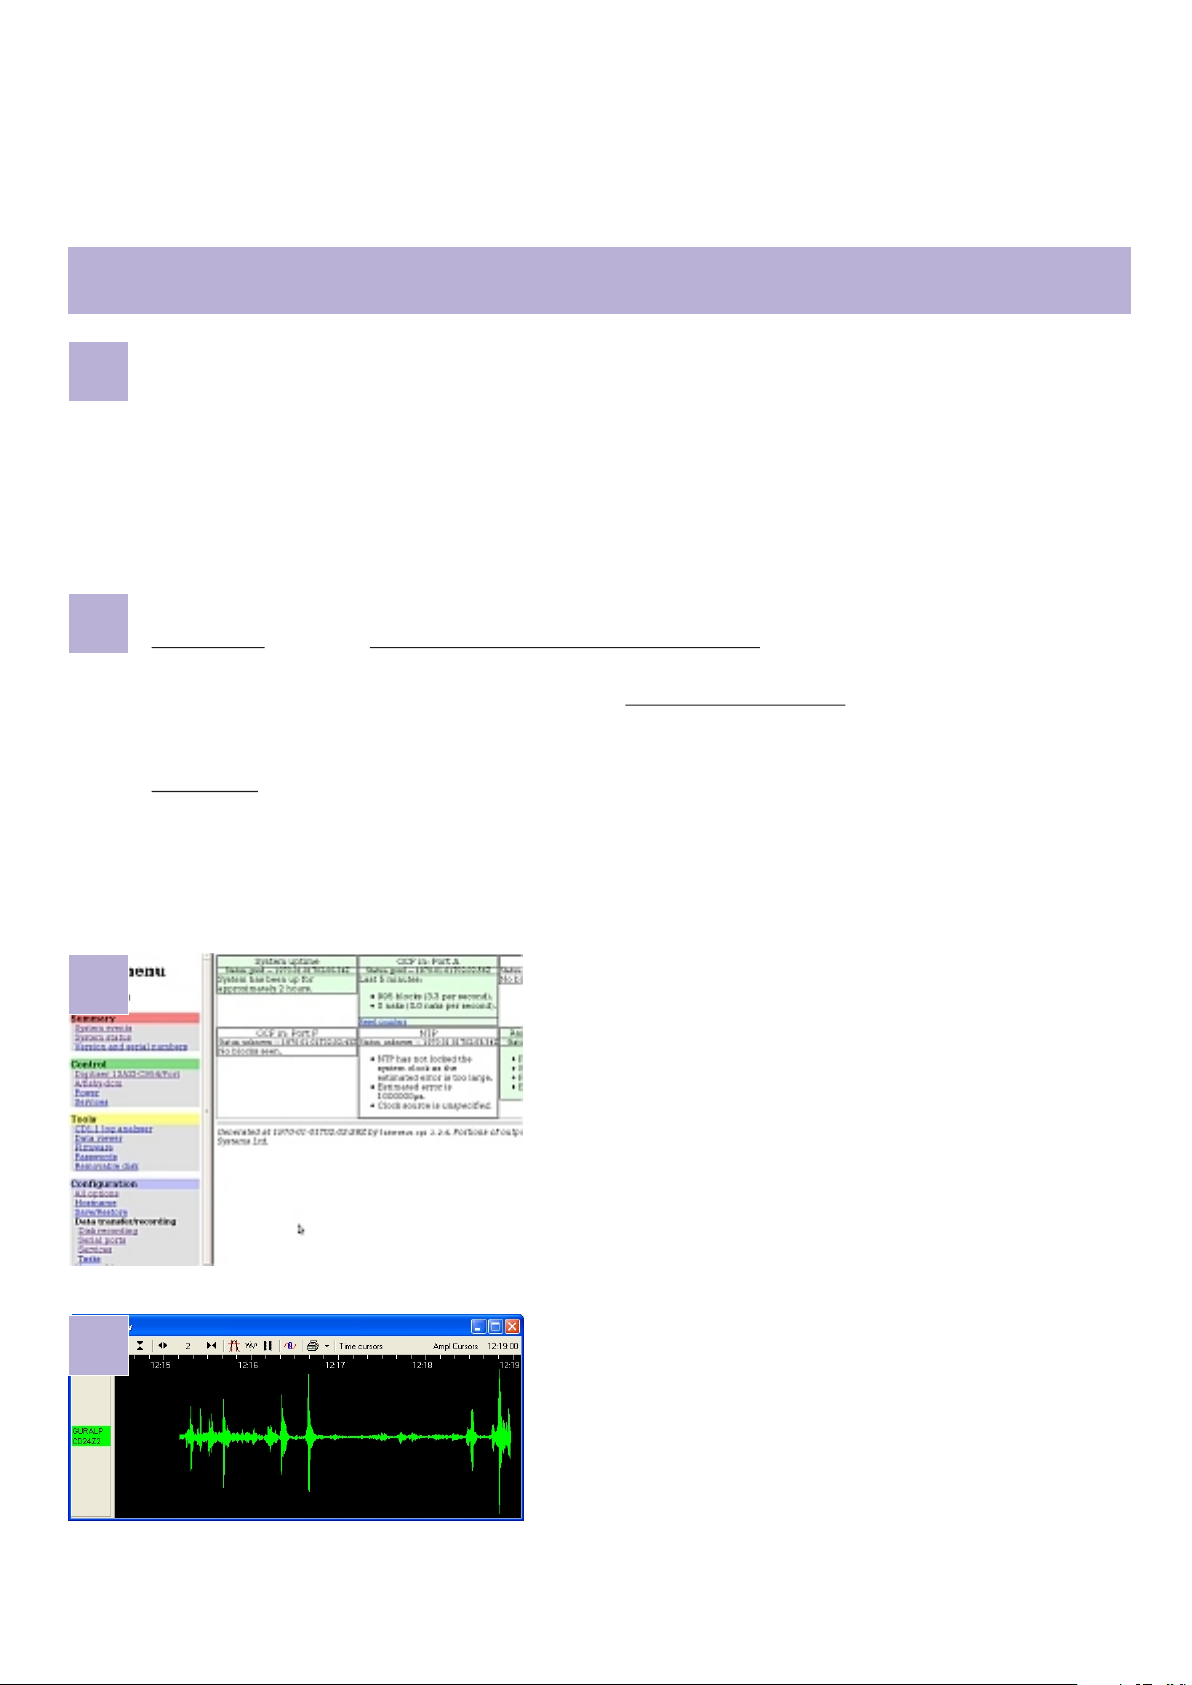
Digital
sensor
DCM
RS232
PC
PORT A NETWORK
DATA OUT
–
+
Power
supply
Connect the various parts together:
*Connect the green digitizer cable (signal + power)
between the PORT A socket on the DCM and the
DATA connector on the digitizer. Connect a second
digitizer or digital sensor to PORT B if applicable;
*Connect the yellow DCM Ethernet cable between
the NETWORK socket on the DCM and your network
switch or hub;
*Connect the 9-pin ‘D’ connector on the blue cable
to your PC’s serial (COM) connector;
*Connect the free, stripped end of the grey cable to
the power supply. Connect the black wire to the
negative (–) terminal and the red wire to the
positive (+) terminal;
*The blue and grey cables are joined together at a
10-pin mil-spec socket. Attach this to the DATA
OUT connector on the DCM, and switch on the
power supply. Do this step last..
Run a terminal program, e.g. HyperTerminal, on your PC.
Connect to the relevant serial port with these settings:
* 115,200 baud;
* 8 data bits;
* No parity bit;
* 1 stop bit;
* No flow control; and
* vt100 emulation (necessary for gconfig).
↔
Press ENTER a few times until you get a login: prompt.
Page 2
Network installation
When you get the ”login:” prompt, type root and press <ENTER>.
4
5
Enter the password rootme and press <ENTER> again.
You should get a prompt which looks like
[dcm-xxxxx ~]
You can now start entering commands. Type passwd, and press ENTER. Enter a new password
for the administrator account. If you must write it down, store it securely.
Type gconfig to enter the menu system. Use the arrow and <ENTER> keys to select, first,
Networking and then eth0 - Primary wired network interface.
Use the <TAB> or arrow keys to highlight the Configuration method field and press <ENTER>
to see the choices: use the arrow keys and <ENTER> to select either “DHCP” or “Static”
configuration. If you selected “Static”, use the <TAB> or arrow keys to move the cursor to the
IP address field and enter the required address in CIDR format (aaa.bbb.ccc.ddd/nn where nn is
the number of network bits in the address - usually 24). You can also enter the IP address of
your network’s gateway in the following field, if required.
6
7
Use the <TAB> or cursor keys to highlight the <Submit> button and then press <ENTER>.
Point your Web browser to https://aaa.bbb.ccc.ddd/
replacing aaa.bbb.ccc.ddd with the IP address of the
DCM.
Enter the username root and the password you chose in
step 4 - You should see the DCM’s Web page interface.
There is, in the main part of the display, a box for each
port. Where there is a connected digitiser, the box turns
green to indicate that GCF data is being received. The
number of packets received in the last five minutes is
also displayed. Use this to check the connection.
Run Scream! on a computer elsewhere on your network,
and instruct it to receive UDP data from port 1567 of
the DCM (use GCFSEND:B as the setting for
“Command”). Check that the streams are available.
Please refer to the full manual for detailed usage
instructions, configuration and troubleshooting.
MSH-DCM-0001-B : Page 2 of 2
 Loading...