

Page 1

SAFE - QUICK - STRONG - SMART
TacVault TV 4810
TacVault TVB 4810
OWNER’S
MANUAL
SERIAL NO. .
Page 2

Attach Receipt Here
P a g e | 1
Page 3

DO NOT LOCK THE MANUAL IN YOUR SAFE
IMPORTANT: FILL OUT THE INFORMATION BELOW AND RETAIN FOR YOUR RECORDS.
IT WILL BE REQUIRED WHEN CALLING IN FOR SERVICE AT:
Hours: Monday – Saturday 6am to 8pm PST
(800) 222-1055
SERIAL NUMBER
Model Number
Purchased at
(Dealer Name)
Date of Purchase
GunVault, Inc.
GunVault.com
1st Edition
P a g e | 2
Page 4

INDEX
Serial Number Information……………………………………………………………………………………………………… Pg. 2
Index………………………………………………………………………………………………………………………………………. Pg. 3
ID My Electronic Lock…………………………..…………………………………………………………………………………. Pg. 5
SecuRam Non Biometric Lock (TV 4810 Only)…………………………………………………………………………. Pg. 6
How to Open the Unit
Programming Instructions
Lock Out (Wrong try Penalty)
Using the Night Light
Maintenance
NL Lock (TV 4810 Only)……………………………………………………………………………………………………………. Pg. 7
How to Open the Unit
Programming Instructions
Lock Out (Wrong try Penalty)
Using the Night Light
Maintenance
SecuRam Biometric Lock (TVB 4810 Only)……………………………………………………………………………….. Pg. 8
How to Open the Unit
Programming Instructions
Deleting All Fingerprints
Maintenance
Unit Set-Up……………………………………………………………………………………………………………………………… Pg. 10
Removing Unit from the Pallet
Placement of the Unit
Anchoring of the Unit
Interior Set-Up
Warranty………………………………………………………………………………………………………………………………… Pg. 11
Registration Card……………………………………………………………………………………………………………………. Pg. 12
P a g e | 3
Page 5
Congratulations of your purchase of a GunVault!
TV 4810
TVB 4810
Your new GunVault unit is a high quality product, which will give you years of service, backed up by excellent
Technical Support and a strong Warranty. Before you get started reading this manual, please take a few moments
to fill out your Warranty Registration Card and mail it in. Or register online at www.gunvault.com.
‘Tactical Security for Home or Office’
P a g e | 4
Page 6

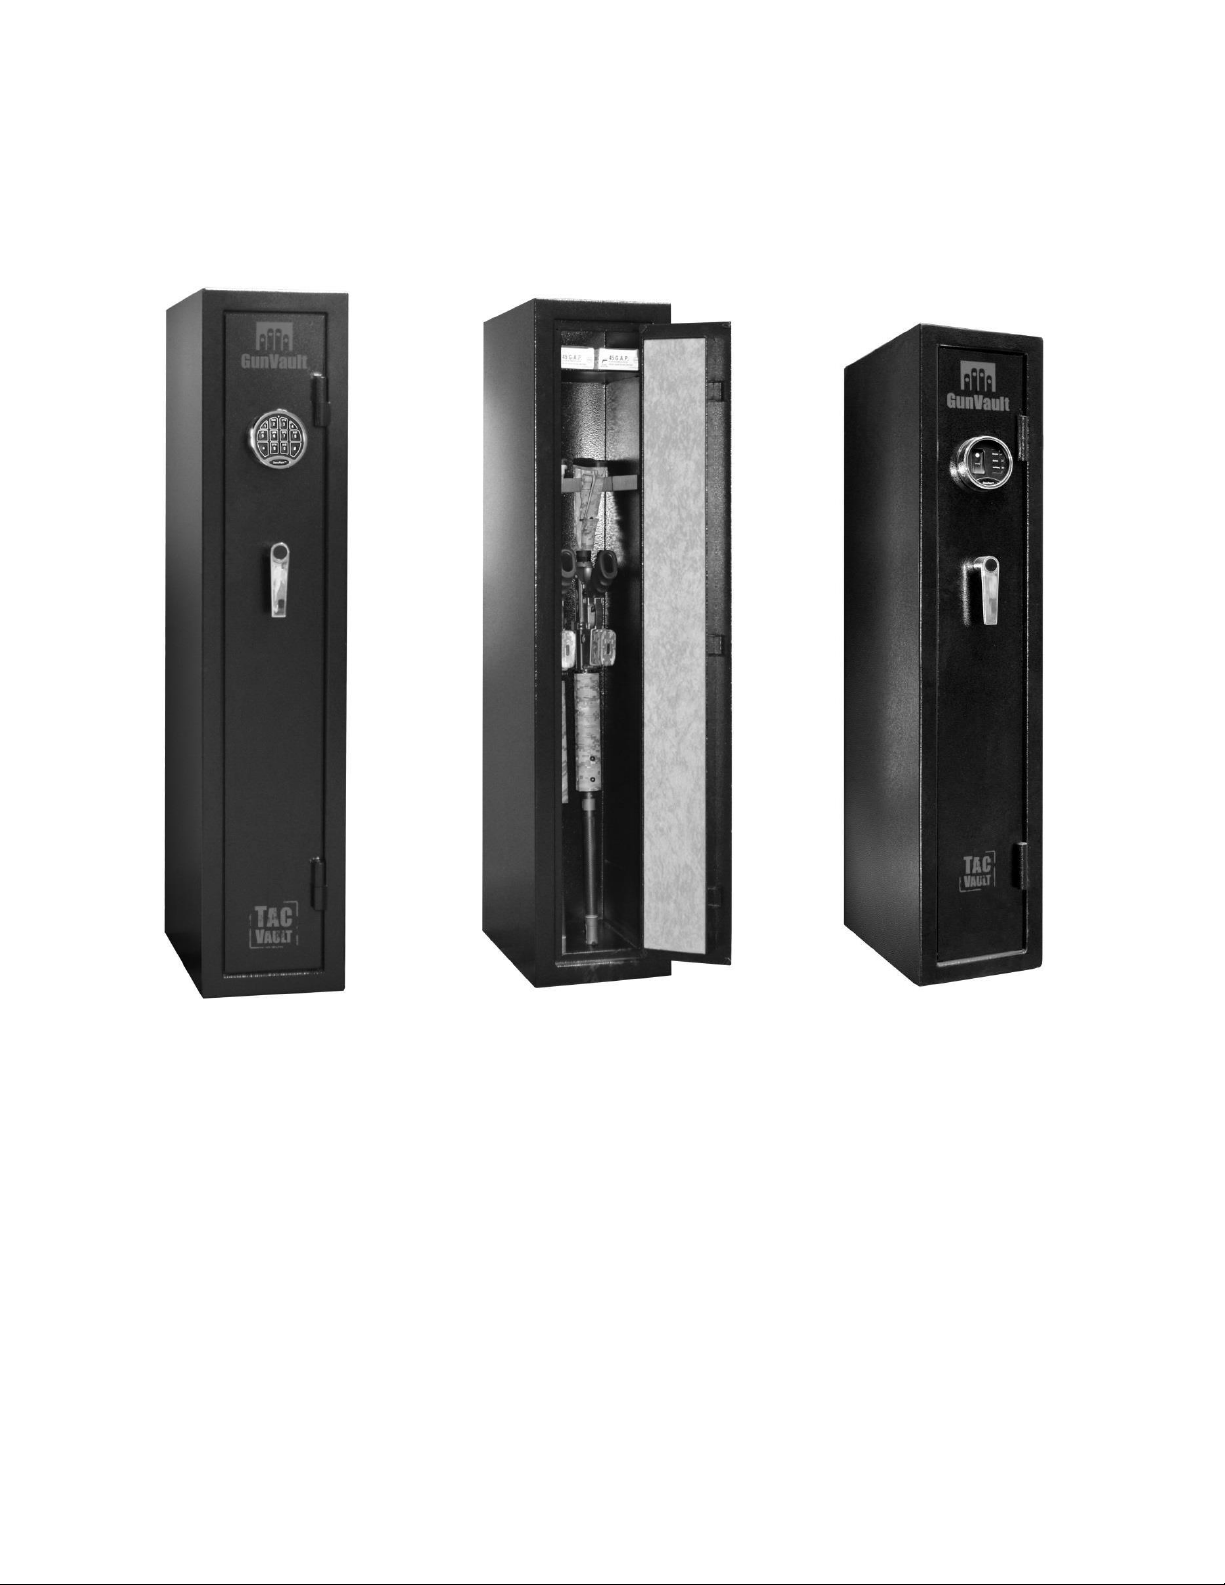
ID My Electronic Lock
Use the information below to ID the electronic lock on your Unit:
If the top row numbers on the lock is 1,2,3,4 and has a ‘SecuRam’ logo on the faceplate you have a SecuRam Non
Biometric Lock (pictured below). See Pg. 6
If the top row numbers on the lock is 1,2,3,4 with the letter ‘A’ on the number ‘1’ you have a NL Lock (pictured
below). See Pg. 7
If there’s a single push button with three (3) colored LEDs you have a SecuRam Biometric Lock (pictured below). See
Pg. 8
P a g e | 5
Page 7

SecuRam Non Biometric Lock (TV 4810 Only)
(top row of number are 1,2,3,4 and a ‘SecuRam’ logo on the faceplate)
How to Open the Unit
Important: The factory preset code is 1,2,3,4,5,6 and should be changed before using the Unit. It is the owners’ responsibility
to maintain the code; Cannon will try to maintain records for up to 6 months. Multiple electronic locks are used, each with
different operating instructions.
See the ‘ID My Lock’ section before beginning (Pg. 5).
Step 1: Turn the handle slightly clockwise until handle stops. Do not force it!
Step 2: Enter the six (6) digit code slowly.
Step 3: Turn handle counter-clockwise to unlock Unit.
If there are three (3) beeps after entering the code the lock doesn’t recognize the code. Slow down and start over.
Programming Instructions
Important: When changing the combination door must be in the open and locked position. You must know the current six (6)
digit code to program and take 20 seconds to complete steps 1-4.
Step 1: Enter '0' six (6) times
Step 2: Enter existing six (6) digit code
Step 3: Enter new six (6) digit code
Step 4: Re-enter new six (6) digit code
If lock signals three (3) times, then the former code is still valid.
Lock Out (Wrong Try Penalty)
After four (4) wrong entries the lock will go into lock out for 5 minutes. Lock can also go into lockout during re-programming
if it interprets an incorrect programming sequence.
Do not press any buttons or unplug the battery during the lockout period.
It will restart the 5 minute waiting period.
Using the Night Light
To activate the light, press the ‘ ‘ button on the keypad before entering the code.
Maintenance
Important: All maintenance work should be performed by a qualified locksmith in your area. Cannon assumes no
responsibility for the cost of maintenance or the work performed.
Low Battery Warning: The lock will repeatedly beep during unlocking indicating that the battery is low and needs to
be replaced. Only use Duracell 9 Volt Alkaline batteries with a ‘Best if Used by Date’ 5 years in the future.
Changing the Battery: Turn the brass/chrome housing ring counterclockwise and pull off. Install new battery and
reinstall brass/chrome housing ring. Hint: Align the three groves on the housing ring with the three groves on the
keypad and turn clockwise.
P a g e | 6
Page 8

NL Lock (TV 4810 Only)
(top row of numbers are 1,2,3,4 with the letter ‘A’ on the number ‘1’)
How to Open the Unit
Important: The factory preset code is 1,2,3,4,5,6 and should be changed before using the Unit. It is the owner’s responsibility
to maintain the code; Cannon will try to maintain records for up to 6 months. Multiple electronic locks are used, each with
different operating instructions.
See the ‘ID My Lock’ section before beginning (Pg. 5).
Step 1: Turn the handle slightly clockwise until handle stops. Do not force it!
Step 2: Enter the six (6) digit code slowly.
Step 3: Turn handle counter-clockwise immediately after the two (2) beeps to unlock Unit.
If there is one (1) long beep after entering the code the lock doesn’t recognize the code. Slow down and start over.
Programming Instructions
Important: When changing the combination door must be in the open and locked position. You must know the current six (6)
digit code to program and take 20 seconds to complete steps 1-4.
Step 1: Press and hold '0' until double beep. The LED remains on during the steps below.
Step 2: Enter existing six (6) digit code - You will hear a double beep
Step 3: Enter new six (6) digit code - You will hear a double beep
Step 4: Re-enter new six (6) digit code - You will hear a double beep
If lock gives a long beep , then the former code is still valid
Lock Out (Wrong Try Penalty)
After four (4) wrong entries the lock will go into lock out for 5 minutes. Lock can also go into lock out during re-programming
if it interprets an incorrect programming sequence.
Do not press any buttons or unplug the battery during the lockout period.
It will restart the 5 minute waiting period.
Using the Night Light
To activate the light, press the ‘ ‘ button on the keypad before entering the code.
Maintenance
Important: All maintenance work should be performed by a qualified locksmith in your area. Cannon assumes no
responsibility for the cost of maintenance or the work performed.
Low Battery Warning: The lock will repeatedly beep during unlocking indicating that the battery is low and needs to
be replaced. Only use Duracell 9 Volt Alkaline batteries with a ‘Best if Used by Date’ 5 years in the future.
Changing the Battery: To replace battery locate the sliding door on the bottom of the keypad. Slide door over and
battery will drop out.
P a g e | 7
Page 9

SecuRam Biometric Lock (TVB 4810 Only)
How to Open the Unit
Important: The TVB 4810 does not have a preset passcode. The biometric lock is shipped with no fingerprint and will open
after pressing the button above the gold colored finger print sensor on the keypad.
See the ‘ID My Lock’ section before beginning (Pg. 5).
Step 1: Turn the handle slightly clockwise until handle stops. Do not force it!
Step 2: Press the button above the fingerprint sensor and swipe the programmed finger from top to the bottom. If
no fingerprint is programmed, press the button above the fingerprint sensor to open.
Step 3: Turn handle counter-clockwise to unlock Unit.
If there’s a long beep with multiple red LED flashes, the fingerprint was not accepted. Slow down and start over.
Programming Instructions
Important: When enrolling fingerprints, ensure the door is in the open and locked position. The first two (2) enrolled
fingerprints are administrators and can add additional users.
Initial Enrollment (No user prints are enrolled in the lock):
Step 1: Press the button above the fingerprint sensor. A green LED will be flashing.
Step 2: Press and hold the button above the finger sensor until the green and red LED are both on.
Step 3: Slide your finger from the top to the bottom of the fingerprint sensor bar. The red LED will flash once with
a beep.
Step 4: Slide your finger from the top to the bottom of the fingerprint sensor bar. When the red and green LEDs
turn off with two (2) beeps, it means the first fingerprint is enrolled.
Enrollment of Additional Fingerprints (Only ten (10) fingrprints can be enrolled into the lock):
Step 1: Open the unit using an Administrator fingerprint
Step 2: While the green LED flashes, press and hold the button above the fingerprint sensor until there’s two (2)
beeps and the green LED turns off.
Step 3: Press the button above the fingerprint sensor, the red and green LED will turn on.
Step 4: Slide your finger from the top to the bottom of the fingerprint sensor bar. The red LED will flash once with
a beep.
Step 5: Slide your finger from the top to the bottom of the fingerprint sensor bar. When the red and green LEDs
turn off with two (2) beeps, it means the fingerprint is enrolled.
P a g e | 8
Page 10

SecuRam Biometric Lock (TVB 4810 Only) – Continued…
Deleting All Fingerprints
Important: Only the administrator finger prints can initiate the deletion process.
Step 1: Press the button above the fingerprint sensor and swipe the administrator’s finger from top to the bottom.
Step 2: While the green LED flashes, push the button above the fingerprint sensor three (3) times.
Step 3: The green and red LEDs will flash alternately indicating all fingerprints have been deleted.
Maintenance
Important: All maintenance work should be performed by a qualified locksmith in your area. Cannon assumes no
responsibility for the cost of maintenance or the work performed.
Low Battery Warning: If the yellow LED flashes three (3) times with three (3) long beeps after a valid fingerprint
read, the battery is low. Only use Duracell 9 Volt Alkaline batteries with a ‘Best if Used by Date’ 5 years in the
future.
Changing the Battery: Turn the brass/chrome housing ring counterclockwise and pull off. Install new battery and
reinstall brass/chrome housing ring. Hint: Align the three groves on the housing ring with the three groves on the
keypad and turn clockwise.
P a g e | 9
Page 11

Unit Setup
Removing Unit from Pallet
GunVault recommends contacting professional movers to install your Unit.
By choosing to install the Unit on your own you agree to hold GunVault blameless
of any damage, injury, or death caused by your negligence.
Proceed with caution.
Use Caution. Unit is top heavy. While having someone(s) securely holding the Unit:
Open door, remove the 2 lag screws from the floor area (opposite corners).
Close door. If equipped with a mechanical lock turn dial back to zero and lock with key.
With at least two (2) people, carefully slide the Unit from pallet.
Placement of the Unit
Before placing your Unit, verify the load bearing weight of the floor or stairs the Unit will be moved over (tile, wood, and
other types of floors could be damaged by the weight of the Unit). To help determine if the Unit will make it through
doorways, stairs, or corners use the empty Unit box to see if it will fit all the way to the final location.
When choosing a location consider the following:
Install the Unit near a load-bearing wall as a precaution to support the weight.
To protect the exterior finish, consider installing the Unit inside your home where there’s climate control.
Where the Unit is placed will have a big impact on how it will perform during a fire. Consider lower levels (1
or basement) where temperatures tend to be cooler and try to stay away from potential hot spots (areas where
flammable materials are stored).
Anchoring of the Unit
Anchoring the Unit to the floor is highly recommended. To help eliminate rust issues there should be a gap between the Unit
and floor to allow air flow (treated wood shims are recommended). Before leveling the Unit, make sure the Unit is
square/level. Use the appropriate hardware for the wood or cement surface the Unit is anchored too; anchoring hardware
can be purchased from a local hardware store (not included). After the Unit is anchored use the four or two black floor plugs
(depending on Unit) to cover the anchoring holes inside the Unit.
Interior Set-Up
The top shelf of the TV 4810 and TVB 4810 is fixed and cannot be adjusted.
Installing the Foam Rifle Rack:
Important: Before installing, determine the location/height by using the weapon(s) that will be stored in the unit. Double
check if the location/height is correct before installing. Because once the tap is removed and the Foam Rifle Rack is installed,
damage will occur if adjustments are needed.
Step 1: Determine the location/height of the Foam Rifle Rack.
Step 2: Clean the install area of all loose debris to insure a tight bond. If needed, rubbing alcohol can be used to
clean the area. Let the rubbing alcohol evaporate/dry before installing.
Step 3: Remove the tap on the Foam Rifle Rack.
Step 4: Carefully install the Foam Rifle Rack at the desired location and press the tap sides firmly into the units
body.
st
floor
P a g e | 10
Page 12

Warranty
1. GunVault (the “Company”) warrants to the original consumer (the “Purchaser’) of any GunVault
safe (the “GunVault safe”) purchased after January 1, 2014 against any damage caused by fire,
burglary or attempted burglary for a period of five (5) years from the date of purchase.
2. The Company warrants to the purchaser that the GunVault safe will be free from defects in
workmanship and materials for a period of one (1) year from the date of purchase.
3. These warranties are not assignable or transferable to any other person.
4. Any damage to the GunVault safe as a result of misuse, tampering, abuse, neglect, accident,
improper installation, modification, unauthorized service, destruction, or the alteration of the
serial number, or use violate of the instructions furnished by the Company will void this
warranty.
5. The sole responsibility of the Company shall be limited to the repair or replacement (in its sole
discretion) of any component of the GunVault safe which fails to conform to this warranty at no
cost to the purchaser for the period of the warranty.
6. Contact the Company directly to obtain service under this warranty. If it becomes applicable to
send a defective product to the Company, a Return Authorization Number must first be
obtained from the company. In order to obtain service under this warranty, purcasher must
provide the Company with the following items (a) proof of purchase, (b) police or fire
department report, (c) photographs of damaged sad, and (d) written testimonial.
7. Products shipped without prior Return Authorization and Return Authorization Number may not
be accepted, and the Company will not be responsible for their disposition and/or cost of return
to the owner.
8. The Company will not assume any responsibility for any loss or damage incurred in
shipping. All return authorized products should include a copy of the original invoice in
order that this warranty may be honored.
9. This warranty is not an insurance policy. The Company is not responsible for any manner of
damage to or theft of the Purchaser’s GunVault safe or its contents.
10. We recommend that the enclosed warranty cared be completed in full, and returned to the
Company within ten (10) days of the original date of purchase to validate this warranty.
11. Any implied warranties that the purchaser may have are limited to the duration of the
warranties described above. There are no further warranties that extend or apply beyond the
face hereof, and the company expressly disclaims and excludes any and all warranties of
merchant ability or fitness for a particular purpose. Some states do not allow limitations on how
long an implied warranty lasts, so the above limitation may not apply to you.
12. Repair or replacement shall be the sole remedy for the purchaser under this warranty. The
company shall not be liable for any direct, indirect, incidental or consequential damages, losses
or expense arising from the use or misuse of the GunVault safe. Some states do not allow the
exclusion or limitations of incidental or consequential damages, so the limitation may not apply
to you.
13. This warranty gives you specific legal rights, and you may also have other rights which vary
from state to state.
P a g e | 11
Page 13

Last Name First Name M.I.
Address City State Zip
Phone Number Email Address
About the GunVault:
Model Purchsed:
Have you ever bought a GunVault before this purchase? Yes No
What features prompted you to purchase a GunVaul t?
Beside firearms, what else will you store in you GunVault? Jewel ry Medicine
Documents Money Electronics Other
What prompted you to buy the GunVaul t? Magi zine Ad Newspa per Ad
TV Ad Store Sal eman In-Store Dis pl ay Magazine Articl e
Product Quality Price Personal Recommendation
Other If Magazi ne, which one
Your Sex? Mal e Female
Your Age? 18-24 25-35 35-44 45-54 55 +
Education? Attended Coll ege Graduated from Col l ege
Attended High School Graduated High School
Are you a l aw enforcement officer? Yes No
Are/Were you in the Military? Yes No Branch
Your approximate annua l hous ehold i ncome: Under 20,000 20,000-40,000 40,000-60,000
60,000-80,000 80,000-100,000 Over 100,000
Number of people in your family? Adults Children
Where do you plan to us e your GunVaul t? Home Office Other
Why di d you buy a GunVault? Price Brand Name Quality
Features Other
Check here if you don't wish to receive speci al discounts and offers from GunVault:
Where purchased? Deal er Name Date Purchased
Serial # Key #
IMPORTANT: If the keys are los t or stol en, the Serial # and Key # are required. No EXCEPTIONS! Store a copy for your records.
San Bernardino CA 92407
Very IMPORTANT
(See Key)
Warranty Registration Card
Submit online at http://www.gunvault.com/warranty/
Or
Mai l to:
19949 Kendal l Dr
P a g e | 12
Page 14

P a g e | 13
Page 15

P a g e | 14
Page 16

GunVault.com
P a g e | 15
 Loading...