

Page 1

SAFE ● QUICK ● STRONG ● SMART
Owners Manual
Models:
GV 1000S/1000D
GV 2000S/2000D
GVB 1000
GVB 2000
Covered by United States Patent Numbers 5,161,396 and 5,549,337
Page 2

DO NOT LOCK THIS IN YOUR VAULT
IMPORTANT: FILL OUT THE INFORMATION BELOW AND RETAIN FOR YOUR
RECORDS.
IT WILL BE REQUIRED WHEN CALLING TECHNICAL SERVICES AT:
(800) 222-1055
SERIAL NUMBER:
(Found inside the unit, under the bottom foam)
KEY NUMBER:
PURCHASED AT
(DEALER NAME):
DATE PURCHASED:
GunVault, Inc
www.gunvault.com
REV (02.13)
- 1 -
Page 3

Table of Contents
Congratulations on Your Purchase of a GunVault Safe
Each GunVault Safe Includes
Product Description and Features
Getting Started – All Models………………………………………………………………..Pg. 4
Securing Your Keys
Locating the Battery Holder
Installing the 9v Battery
GV 1000S/1000D and GV 2000S/2000D Models……………………………….…………..Pg. 5
Close the Door and Practice
Getting Ready to Program
Choosing Your Own Access Code
Programming Your Access Code
Turning Off Keypad Sounds
Tamper Detect Feature
Security Sleep Mode
Motion Detection and Alarm Feature (DLX Models Only)
Setting the Alarm
Setting the Sensitivity
Turning Off the Audible Alarm
Internal Courtesy Light (DLX Models Only)
DC Power Jack and External AC/DC Power Supply (DLX Models Only)
GVB 1000 and GVB 2000 Models………………………….………………………………. Pg. 9
Enrolling Your Personal Fingerprint
Close the Door and Practice
Enrolling Additional Fingerprints
Delete All of the Fingerprints
Internal Courtesy Light
DC Power Jack and External AC/DC Power Supply
Securing the Vault – All Models……..…………………………………………………….Pg. 11
Mounting Instructions
Security Cable Instructions (Optional Accessory)
Maintenance – All Models……..…………………………………………………………...Pg. 12
Low Battery Warning Indicator
Battery Replacement
Lubrication
Removable Shelf (GV 2000S/2000D & GVB 2000 Units Only)
Extra/Lost Keys
Technical Service and Warnings – All Models….………………………………………... Pg.13
Technical Service
Requirements for Return & Repair
Warnings
Limited Warranty…………………………………………………………………………..Pg. 14
- 2 -
Page 4
Congratulations on Your Purchase of a GunVault Safe!
Your new GunVault safe is a high quality product, which will give you years of service, backed
up by excellent Technical Support and a strong Warranty. Before you get started reading this
manual, please take a few moments to fill out your Warranty Registration Card and mail it in. Or
register online at www.gunvault.com.
Each GunVault Safe Includes:
GunVault safe
Owner’s Manual
Mounting Template
Three safe mounting screws
Warranty Card
Plastic shelf (GV 2000S/2000D &
GVB 2000 Units Only)
AC/DC power adapter (Deluxe &
BIO Models Only)
Product Description and Features
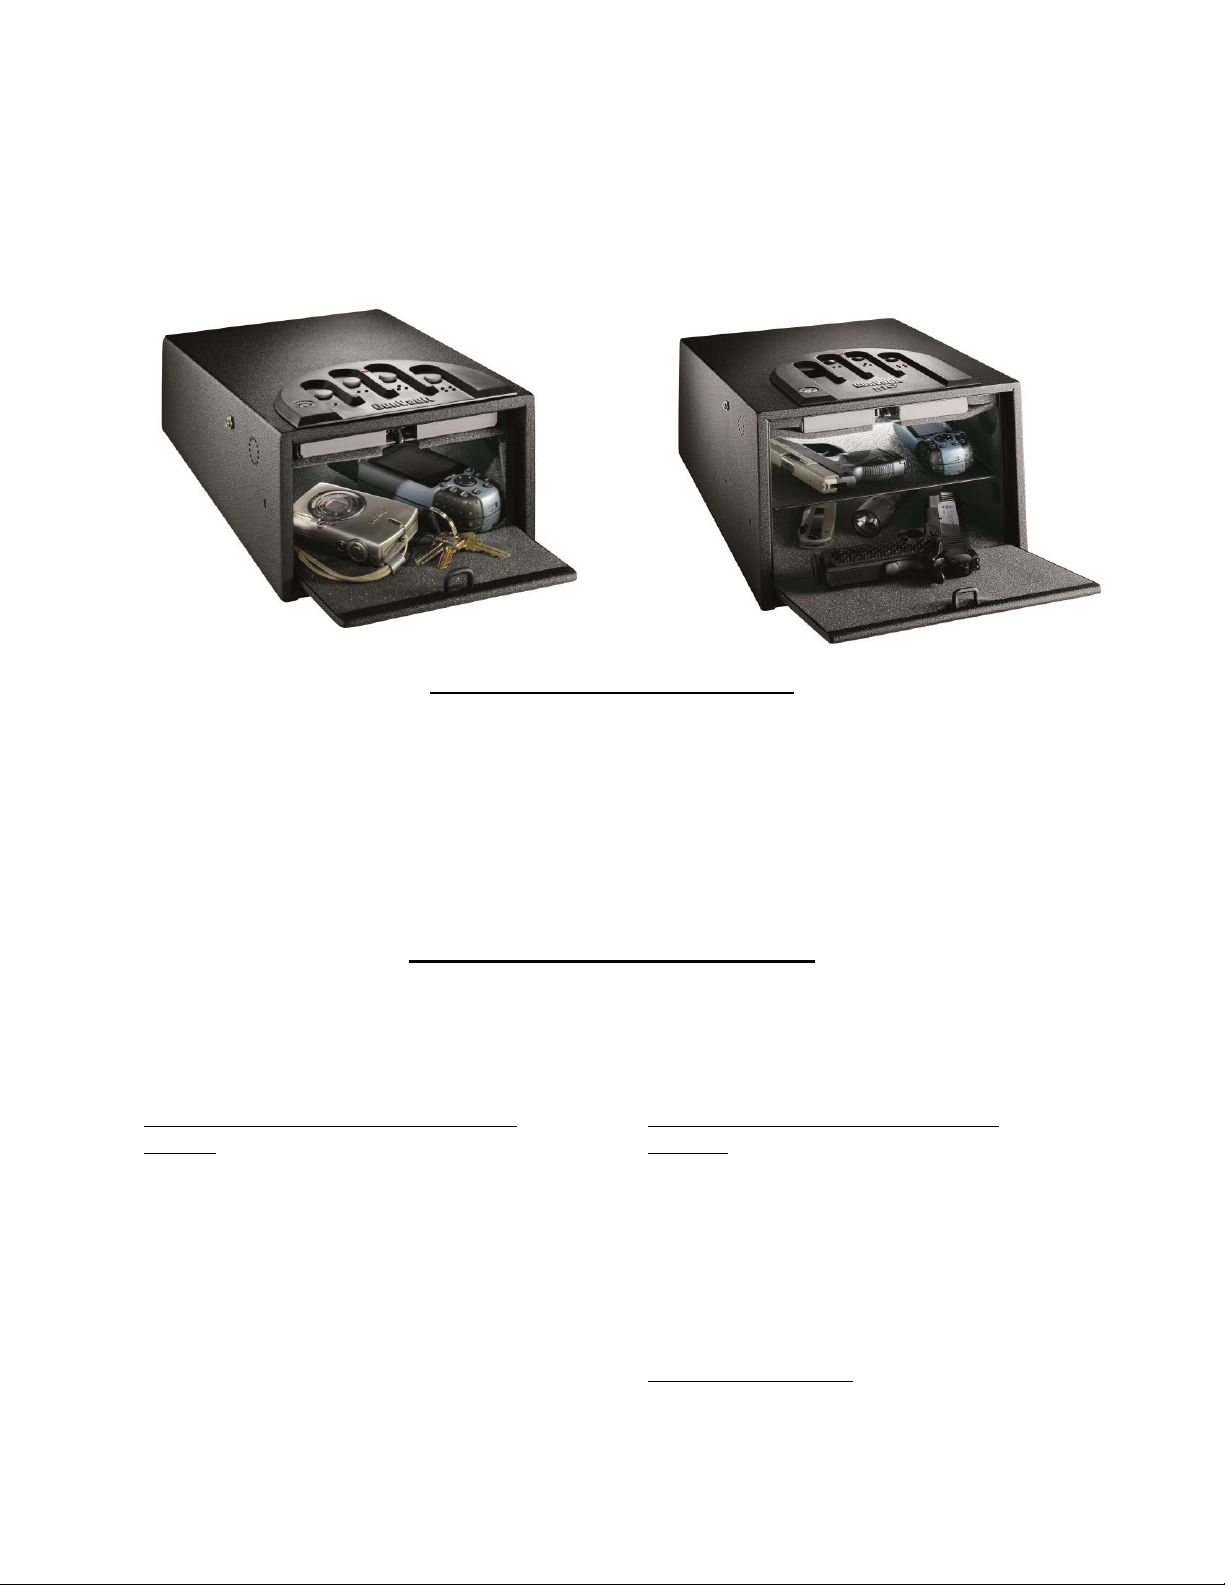
The GV 1000S/1000D, GV 2000S/2000D, GVB 1000, and GVB 2000 are manufactured from
16-gauge steel with pry-resistant doors and may be used to store a variety of items out of reach
of children and other unauthorized persons.
Standard Features for STD, DLX, BIO
Models:
Spring-loaded door for quick access to
contents
Corrosion resistant powder coat wrinkle
finish
No-Eyes Keypad
Back-up key lock access with two keys
Low battery warning
“Knock-outs” for Steel Security Cable
Additional Features for DLX & BIO
Models:
Interior Courtesy light
Motion Detection and Audible Alarm
(DLX Only)
Audio Low-Battery Warning
Power connection jack for external
power supply
Optional Accessories:
Steel Security Cable
- 3 -
Page 5

Getting Started – All Models
Securing Your Keys
REMOVE YOUR KEYS AND SECURE THEM!
DO NOT LOCK THEM IN THE SAFE!
Think carefully about storing your keys. If the key for a GunVault safe is
on your key chain, an unauthorized person might gain access to it. Never
hide or leave GunVault keys where children could gain access to them. If
you have a bank safe deposit box, one key could be kept there in case you
lose one.
IMPORTANT: We recommend that you ONLY use Duracell 9v batteries. One (1) 9v
battery is required.
Locating the Battery Holder
With your palm up, reach inside the GunVault safe and find the far
end of the ceiling foam.
Pinch the far end, and carefully pull it part of the way out of the unit
(like the tongue of a shoe). DO NOT TEAR IT LOOSE!
The 9v battery holder is located inside on the roof attached to the
back of the lock body.
Installing the 9v Battery
Position the safe with the door facing you, keypad upward.
Connect the power cable to the 9v battery. You will hear a beep audio signal, confirming
that power is connected.
When installing the 9v battery into the battery holder be careful not pinch the power
cable.
Press the 9v into battery holder position.
Press the foam ceiling back into your unit to cover the battery.
- 4 -
Page 6

GV 1000S/1000D and GV 2000S/2000D Models
Close the Door and Practice
SECURE YOUR KEYS!
DO NOT LOCK THEM INSIDE THE SAFE!
For practice, use the factory-default code, which is:
Press each button one time, from left to right – one,
two, three, four. (A common mistake is to press
button one once, button two twice, button three three
times, etc.) Notice the “feel” of the keypad; feel the
“click” as you press each key (One, Two, Three,
Four).
Getting Ready to Program
Find the LED light in the keypad.
It can glow either green or red. Depending upon the function being utilized.
There is an audible beep when keys are pressed.
Choosing Your Own Access Code
Don’t tell anyone your code.
An access code is a series of entries on the keypad. WARNING: This is not a numeric
keypad, you cannot program digits (there is no 5, 6, 7, 8, 9, or 10).
An “entry” is a single press of one or more buttons at the same time.
You can use a minimum of three entries, or a maximum of six entries, for your access code.
For each entry of the access code, you may choose one, more than one or ALL of the buttons
on the keypad in combination.
Be careful in choosing your access code. You’ll want to be sure that you can operate the unit
quickly without making an entry error.
Example of a valid access code;
Press button one, press button
two, press all four buttons
together.
Choose an access code which is
easy to use, but try to make it an
access code which is difficult to
guess.
Your current address or phone
number digits are not good
choices, because the keypad
only has four buttons.
- 5 -
Page 7

Notes:
Avoid programming in bright light; it might prevent you from seeing the red/green LED.
Look directly down upon the keypad.
Do not attempt to press the buttons with the safe resting upon a soft surface, such as a bed, a
pillow, or a deep pile carpet.
Programming Your Access Code
Note: There is a soft “beep” sound and a brief light with each keypad entry. Enter the factorydefault code, from left to right: one, two, three, four. The door will open. Leave the door open.
Find the Learn Button (see Pg 5).
Press and hold the Learn Button
for two seconds. You should see
the green light and hear the beep
– the unit is now in “Learn”
mode.
Enter your new code. The light
will remain green.
Press and hold the Learn button
again for two seconds. The light
will turn red, and you will hear a
beep. Release the Learn Button.
While the light is red, enter your
new code a second time to
confirm it.
Press and hold the Learn Button a third time for two seconds. Release the Learn button. The
light will blink green five times. And you will hear five beeps, confirming that the new code
has been accepted. If the red light blinks three times with three soft beeps at this point, and
error has occurred. Just start over by depressing the Learn Button for two seconds.
Turning Off Keypad Sound
To disable the Keypad Sound (beeps), press and hold the Learn Button for two seconds, three
times. The green light will blink three times and you will hear three beeps. Release the button.
Then press and hold buttons two and three for five seconds. The Keypad Sound is now disabled,
but this does not disable the alarm sound.
Tamper Detect Feature
Entering an invalid access code sets the tamper indicator.
Hold down buttons two and three for five seconds to read the tamper indicator.
If tampering has been detected, the red light will glow until buttons two and three are
released.
If tampering has not been detected, the green light will glow until buttons two and three are
released.
- 6 -
Page 8

Security Sleep Mode
The GunVault safe has a “Security Sleep Mode” that activates when 24 consecutive incorrect
entries are made (if the correct code is entered within 24 entries, the door will open). During
Sleep Mode the keypad does not accept any entries and last for two minutes. If a button is
depressed during Sleep Mode, the LED blinks red and the alarm beeps three times. The backup
key may be used to open the safe during sleep mode.
Motion Detection and Alarm Features (DLX Models Only)
Deluxe Model GunVault safes are equipped with Motion Detectors and Audio Alarms. Once
armed, this system will protect the safe and its contents if either one of the following occurs:
1. Twenty-four wrong entries are entered into the keypad in succession.
2. The safe is moved or disturbed.
If the Motion Detector is armed, shock, vibration or motion of any kind may trigger the
Audio Alarm.
If the alarm is triggered, a four second continuous tone will sound, followed by 25 short
audio ticks, indicating that the alarm is about to sound.
This pre-alarm delay will last for about ten seconds, after which the alarm will sound for one
minute.
If a valid code is entered during this period, the alarm will stop.
If the alarm is not turned off, it will enter Battery Saver Mode after two minutes. In Battery
Saver Mode the alarm will sound once per minute. Turn the alarm off at any time by
entering the access code.
Setting the Alarm:
To arm the Motion Detector Feature, press buttons one and four at the same time and hold for
more than five seconds. A beep will sound once per second for 10 seconds. The alarm feature is
now armed.
Setting the Sensitivity:
The Motion Detector has four levels of sensitivity. Level one is the MOST sensitive, and level
four is the LEAST sensitive. The factory setting is level two.
To change the sensitivity level, press and hold the Learn Button two times, for two seconds
each press. The green light will flash and a beep will be heard each time.
Press the desired sensitivity level.
1. Press button one to select the highest sensitivity
2. Press button four to select the lowest sensitivity.
The sensitivity level is now set.
- 7 -
Page 9

Turning Off the Audio Alarm:
To disable the Audio Alarm, enter a valid access code. If the alarm has already been triggered,
enter a valid access code. If an invalid access code has been entered, and the alarm is sounding,
wait a few seconds and enter a valid access code. Note: Once a valid access code has been
entered, the alarm and motion sensor are disabled. To re-enable the alarm function, follow the
instructions for setting the alarm.
Internal Courtesy Light (DLX Models Only)
When an access code has been used to open the safe, the interior light will shine for five seconds,
allowing a clear view of the interior.
DC Power Jack and External AC/DC Power Supply (DLX Models Only)
Warning: Never attempt to operate the safe with external power alone. Batteries MUST be
installed before and during operation with the external power supply, in order to avoid
interruption of power and loss of access codes.
Any interruption of power could cause the computer memory to reset to the factory code: one,
two, three, four. If this occurs, anyone who enters the one-two-three-four code will gain access
to the safe and its contents.
Warning: Never attempt to plug in a battery charger of any kind. Fire or explosion of
batteries could result. Never use rechargeable batteries of any kind in a GunVault safe. Their
power characteristics are not compatible with the safe.
The AC/DC power supply specified is NOT a battery charger; it is an external power supply to
be used only when batteries are installed.
- 8 -
Page 10

GVB 1000 and GVB 2000 Models
Enrolling Your Personal Finger Print
S1 Button
Fingerprint Reader
All BIO units are sent in DEMO mode. This
allows the unit to open without a fingerprint by
pressing the S1 button.
To enroll the first fingerprint, first open the
unit using the default demo mode by pressing the
S1 button. Immediately after the door opens press
and hold S1 button over 1 second until 2 beeps
sound. Then press S1 button to activate the
module and place your finger on the reader. Hold
your finger on the reader until the Green light is
on and there’s two beeps (it may need about 1-2
seconds). The fingerprint is now enrolled.
Now the first fingerprint is enrolled. (Up to 15
users can be enrolled)
Notice: The 1st and 2nd enrolled fingerprints
function as administrators which allow the
enrollment of additional users.
Close the Door and Practice
SECURE YOUR KEYS!
DO NOT LOCK THEM INSIDE THE SAFE!
Practice opening the door with the enrolled finger.
Place index finger on the Fingerprint Reader.
Press S1 button to activate the module.
The Red light is on, hold the finger on the reader until the Green light is on (it may need
about 1-2 seconds).
The door will open; the Green light blinks for 6 seconds.
- 9 -
Page 11

Enroll Additional Fingerprints
Open the GunVault by administrator’s fingerprint. Immediately after the door opens press
and hold S1 button until 2 beeps sound.
Place the new finger on the Fingerprint Reader, then press S1 button to activate the module,
hold the finger on the reader until the Green light is on (it may need about 1-2 seconds).
The new fingerprint is now enrolled.
Delete All of the Fingerprint Templates
Press and hold the red S2-Delete All Button (located inside the unit on the top back portion
of the metal lock housing) and then press and release the S1 to activate the GunVault.
Continue to hold the S2 button until Green
and Red lights stop flashing, and then release the
S2 button.
Now ALL of the
fingerprints are deleted.
Internal Courtesy Light
When an access code has been used to open the safe, the interior light will shine for five seconds,
allowing a clear view of the interior.
DC Power Jack and External AC/DC Power Supply
Warning: Never attempt to operate the safe with external power alone. Batteries MUST be
installed before and during operation with the external power supply, in order to avoid
interruption of power and loss of access codes.
Any interruption of power could cause the computer memory to reset to factory settings.
Warning: Never attempt to plug in a battery charger of any kind. Fire or explosion of
batteries could result. Never use rechargeable batteries of any kind in a GunVault safe. Their
power characteristics are not compatible with the safe.
The AC/DC power supply specified is NOT a battery charger; it is an external power supply to
be used only when batteries are installed.
- 10 -
Page 12

Securing the Vault – All Models
Mounting Instructions
The Vault can be mounted in almost any direction. Think carefully before you begin to drill
holes; make sure you could easily reach the keypad, but protect the safe from children.
IMPORTANT: Do not mount the Vault with the
door facing down! The contents could fall out when
the door is opened!
Think about your own unique mounting requirements.
You may wish to use washers, lag bolts, or other
mounting devices for reasons of your own.
Compare the Mounting Template to the safe. Notice
the mounting holes in the bottom of the safe. There are
two “key-slot” holes, and four round holes.
a) Using the template provided, drill starter holes with drill bits appropriate for your
installation. Drive screws only into the two key-slot holes. Drive the screws in until just
enough room is left between the head of the screw and the mounting surface to permit you to
slide the Vault’s key slots over the screws.
b) Slide the Vault key-slots on over the screws.
c) Now lift the foam padding in the bottom of the Vault and insert screws into remaining holes
as desired, to retain the safe in place. A minimum of three (3) screws must be used to mount
the safe.
d) Tighten all screws and smooth the foam lining. Your Vault is now securely attached to the
mounting surface!
Security Cable Instructions (Optional Accessory)
“Knock-outs” are provided on both sides to permit attachment of the Security Cable. If the
Security Cable is to be installed, use a punch or nail set and a hammer to remove the knock-out.
Before inserting cable mount, be sure to remove the little metal knock-out tab from your safe.
Do not allow this small metal piece to remain inside your safe.
Hint: A pair of needle-nosed pliers will be useful for installing the hitch pin.
a) First, loop the end of the security cable through the eye and around a
stationary object.
b) Then, insert the threaded mount through the hole in the safe.
c) Hold the mount in place while you slide the star washer over the threaded end inside the safe.
d) Spin on the nut and tighten “finger tight.”
e) Insert the Hitch Pin into the hole to ensure the nut cannot come off.
- 11 -
Page 13

Maintenance – All Models
Low Battery Warning Indicator
GV 1000/2000S – Seven red flashes and seven beeps when the valid access code is entered.
GV 1000/2000D – Audio alert which sounds once per hour in the form of two beeps.
GVB 1000/2000 – Red LED flashes with three beeps when an enrolled print opens the unit.
Battery Replacement
Warning: Replace the batteries once a year regardless of whether or not the low battery
indication is observed.
Always check carefully to be sure that all of your batteries are facing in the correct direction (i.e.
positive (+) end to positive symbol, negative (-) end to negative symbol). One battery facing the
wrong way will lower the power output of your battery tray, potentially causing unreliable
operation.
After replacing the batteries, or when power has been disconnected for more than a few seconds,
the unit will revert to the factory-default code (one, two, three, four) and you must re-program
your personal access code(s).
Lubrication
It’s a good idea to lightly coat the door hinge spring and door latch-loop with quality oil at least
once a year. Never spray anything into the latch mechanism.
Removable Shelf (GV 2000S/2000D and GVB 2000 Only)
The MultiVault (large model) has a removable shelf, which can be easily pulled out to allow for
storage of larger items. If the shelf is removed, it should be stored carefully to avoid damage or
loss. To reinstall, simply slide the shelf back into the shelf guide slots. The beveled edge faces
front.
Extra/Lost Keys
Go to Support.CannonSafe.com to download the key order form. A copy of the original receipt or the serial
number will be required to order extra/lost keys.
NO EXCEPTIONS!
Call Technical Services to order at (800) 222-1055.
- 12 -
Page 14

Technical Service and Warnings – All Models
Technical Service
If you have followed the above steps carefully and still have a problem operating your safe,
phone GunVault Technical Service. Almost all problems can be solved within minutes over the
telephone.
800-222-1055
Requirements for Return & Repair
If possible, do not return your GunVault safe to your dealer. If questions are not answered call
GunVault Technical Service which can solve most problems over the telephone, making return
unnecessary. GunVault delivered without a pre-arranged Return Authorization Number may be
returned or destroyed.
Warnings
Always follow proper weapon and local laws when storing a weapon.
The NRA has three fundamental rules for safe gun handling:
o Always keep the gun pointed in a safe direction.
o Always keep your finger off the trigger until ready to shoot.
o Always keep the gun unloaded until ready to use.
Never store a loaded handgun.
Notes:
- 13 -
Page 15

Limited Warranty
GunVault (the “Company”) warrants to the original consumer (the “Purchaser’) of any GunVault safe (the
1.
“GunVault safe”) purchased after January 1, 2014 against any damage caused by fire, burglary or
attempted burglary for a period of five (5) years from the date of purchase.
The Company warrants to the purchaser that the GunVault safe will be free from defects in workmanship
2.
and materials for a period of one (1) year from the date of purchase.
3.
These warranties are not assignable or transferable to any other person.
Any damage to the GunVault safe as a result of misuse, tampering, abuse, neglect, accident, improper
4.
installation, modification, unauthorized service, destruction, or the alteration of the serial number, or use
violate of the instructions furnished by the Company will void this warranty.
The sole responsibility of the Company shall be limited to the repair or replacement (in its sole discretion)
5.
of any component of the GunVault safe which fails to conform to this warranty at no cost to the purchaser
for the period of the warranty.
Contact the Company directly to obtain service under this warranty. If it becomes applicable to send a
6.
defective product to the Company, a Return Authorization Number must first be obtained from the
company. In order to obtain service under this warranty, purcasher must provide the Company with the
following items (a) proof of purchase, (b) police or fire department report, (c) photographs of damaged
sad, and (d) written testimonial.
Products shipped without prior Return Authorization and Return Authorization Number may not be
7.
accepted, and the Company will not be responsible for their disposition and/or cost of return to the owner.
The Company will not assume any responsibility for any loss or damage incurred in shipping. All return
8.
authorized products should include a copy of the original invoice in order that this warranty may be
honored.
This warranty is not an insurance policy. The Company is not responsible for any manner of damage to or
9.
theft of the Purchaser’s GunVault safe or its contents.
We recommend that the enclosed warranty cared be completed in full, and returned to the Company
10.
within ten (10) days of the original date of purchase to validate this warranty.
Any implied warranties that the purchaser may have are limited to the duration of the warranties
11.
described above. There are no further warranties that extend or apply beyond the face hereof, and the
company expressly disclaims and excludes any and all warranties of merchant ability or fitness for a
particular purpose. Some states do not allow limitations on how long an implied warranty lasts, so the
above limitation may not apply to you.
Repair or replacement shall be the sole remedy for the purchaser under this warranty. The company shall
12.
not be liable for any direct, indirect, incidental or consequential damages, losses or expense arising from
the use or misuse of the GunVault safe. Some states do not allow the exclusion or limitations of
incidental or consequential damages, so the limitation may not apply to you.
This warranty gives you specific legal rights, and you may also have other rights which vary from state to
13.
state.
- 14 -
Page 16

Inquiries or questions regarding GunVault safes should be directed to:
Customer Support 800-222-1055
- 15 -
 Loading...