

Gundlach PrimoX, PrimoX 11.12.00, PrimoX 11.12.10 Series Manual
Manual for PrimoX
microscopes
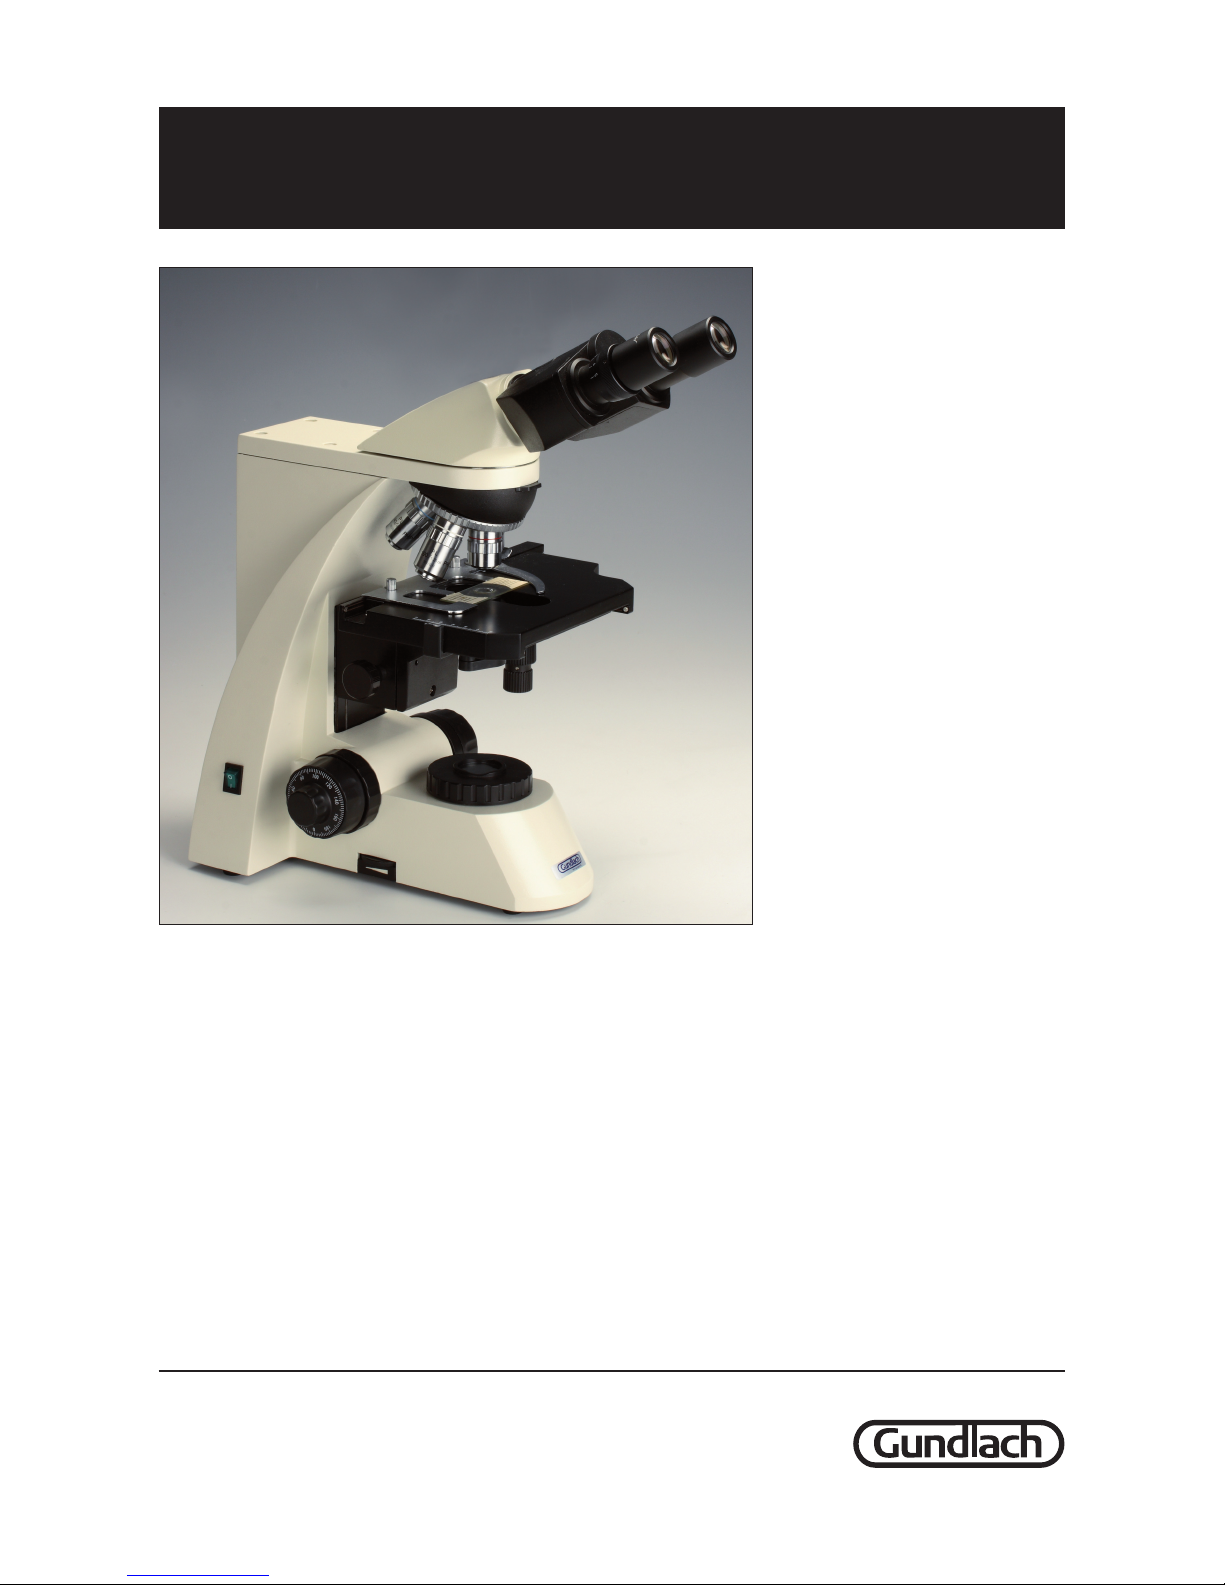
11.12.00 PrimoX, binocular
11.12.10 PrimoX, trinocular
Specifications:
Total
Magnification: 40x - 1000x.
Eyepiece: 10x wide field
Objectives: 4x N.A. 0.10
plan
10x N.A. 0.25 plan
20x N.A. 0.40 plan
40x N.A. 0.65 plan
100x N.A. 1.25 plan
Mechanical
stage: Size:
140 mm x 210 mm.
X-Y range: 75 mm x 50 mm.
Graduation: 1 mm
Focusing: Graduation for fine
focus is 0.002 mm.
Abbé-
condenser: N.A. = 1.25.With
built-in diaphragm
and filter holder.
Extra swing-out lens
that is used with the
4x objective.
Construction of the microscope:
Objectives:
All objectives are produced according to DIN-standard. 40x and 100x
objectives have a spring mount to
avoid breakage of specimens and
objectives. The five-hole objective
revolver makes it easy to change
between the different objectives.
Focusing knobs and stage stop
adjustment:
The coaxial coarse and fine adjustment knobs make it easy to attain a
sharp image. The biggest knobs are
used for the coarse adjustment and
the smallest knobs for the fine adjustment.
Between the left large focusing
knob and the column is there also a
ring. With this ring it is possible to
adjust the friction when turning it. In
this way it can be adapted to different users’ wishes.
On the right side (between the right
large focusing knobs and the column) is a stop ring with a small peg.
This is called the stage stop. With
this ring it is possible to settle the
upper limit of the stage movement
to protect the specimen from
touching and/or damaging the ob jectives. Furthermore, the stop ring
will make you able to focus more
quickly. The stage stop ring is loosened by turning the ring towards
you/down, when you are sitting in
front of the microscope.
Mechanical stage:
The specimen is placed on the
mechanical stage by pulling back
the movable handle of the specimen holder. Gently release the
handle and the specimen is placed
securely. The mechanical stage can
then be moved in the X and Y-axis
with the coaxial mounted knobs
under the right side of the mechanical stage.
PrimoX microscopes, binocular and trinocular VE111200_10
Vareno. 111200_10 Rev. 19.06.2007
Gundlach A/S Tel. +45 8694 1388 gundlach@gundlach.eu
Silkeborgvej 765 · DK-8220 Brabrand Fax +45 8694 2486 www.gundlach.eu

Condenser and iris diaphragm:
The condenser can be focused by
turning the condenser knob (left
side) up or down, until the best
picture is being obtained. At high
magnifications the position should
normally be at the top.
The condenser has a built-in iris
with an iris handle for adjustment.
Closing the iris diaphragm decreases the light but increases the contrast and depth of sharpness of the
image. Adjustment of the iris diaphragm might be necessary when
switching between objectives.
The swing-out lens is used when
the 4x objective is used. When
using the other objectives this lens
is simply swung out.
It is important that the condenser is
aligned with the light path to obtain
the best resolution and contrast.
Centring of the condenser:
– Use the 4x objective and focus
on a specimen.
– Place the condenser in the top
position.
– Reduce the diameter of the light
cone by turning the field dia phragm on top of the light housing. The light is now visible in the
eyepieces as a small round dot
in the field of view.
– Use the two clamp screws that
are mounted on the condenser
holder to centre the light cone in
the field of view. The two silver
coloured clamp screws are
mounted in a 45 degrees angle
compared with the other adjustment knobs (for example the
focussing knobs).
– Turn on the field diaphragm on
top of the lamp housing until the
light cone follows the outer edge
of the field of view. It is opened
more and more until the light is
adequate.
– The condenser is now centred.
Field diaphragm:
The field diaphragm is placed on
top of the lamp housing, and can
be adjusted by turning it. At low
magnification it is normally open
and it is closed more and more
when the magnification increases.
The field diaphragm should never
be more open than the diaphragm
in the condenser.
Filters:
A blue filter can be placed in the filter holder just beneath the iris diaphragm. This can be an advantage
for example at greater magnifications, where it will give a more detailed image.
Bulb:
The bulb is placed in the lamp housing in the bottom of the main
microscope body. It is a 2-pin halogen bulb 6 V / 20 Watt (Osram HLX
64250). The bulb must have the
correct Voltage and Wattage; otherwise it might damage the microscope’s electronic.
Fuse:
The fuse is mounted on the back
side of the main microscope body.
It can be found under the plastic
cover labelled “FUSE”.
Connecting the microscope to
mains
The microscope is developed for
the use with 220-240 V / 50-60 Hz.
General use of the microscope:
– Take out the main body and put
it on a plan and steady place.
– Hold on to the optical head, and
loosen the clamp screw on the
right side of the head. Turn the
optical head so that it faces the
correct way, and fasten it with
the clamp screw.
– Put the eyepieces into eyepiece
tubes.
– Put the mains cord in a socket
and turn on the microscope.
– Adjust the light intensity at mid
level with the brightness control
placed on the lover left side of
the microscope body. The intensity of the light can be adjusted
to the desired level with this control slider.
– Place a specimen on its place on
the mechanical stage.
– Move the mechanical stage up
and down with the focusing
knobs to obtain a clear and
sharp image. The mechanical
stage can be moved on the Yaxis and X-axis with coaxial
mounted control knobs.
– The part of the specimen that
you want to observe is placed in
the field of vision with these two
control knobs.
– It is necessary to adjust the eye-
piece tubes to fit the distance
between the eyes. This is done
by pulling or pushing the right
and left black eyepiece tubes.
The adjustment is finished, when
the image is comfortable and
shows a completely round
image. Notice the number on the
graduated scale on the front of
the optical head, and use this
number to make a quick adjustment next time the microscope
is used.
– The microscope is then adjusted
to your sight to achieve a good
and sharp image. Look through
the right eyepiece with your right
eye. Use the fine focusing knob
to get a sharp image of the specimen. Then look with your left
eye through the left eyepiece
and adjust the sharpness with
the dioptre ring on the eyepiece
tube. The dioptre ring is the
PrimoX microscopes, binocular and trinocular VE111200_10
Vareno. 111200_10 Rev. 19.06.2007
Gundlach A/S Tel. +45 8694 1388 gundlach@gundlach.eu
Silkeborgvej 765 · DK-8220 Brabrand Fax +45 8694 2486 www.gundlach.eu
SIDE 2 / 5
 Loading...