

Guilin Feiyu Technology G6 Plus User Manual

Guilin Feiyu Technology Incorporated Company
V1.1E NUser Manual
Instructions
3-Axis Stabilized Handheld Gimbal
for Camera

Catalogue
1. G6 Plus Overview 1
www.feiyu-tech.com
2. Quick Start Guide 3
3. Balance the Gimbal 4
4. Basic Operation 7
Balance Adjustment of the Pan Axis 4
Balance Adjustment of the Roll Axis 5
Balance Adjustment of the Tilt Axis 6
Modes 7
Introduction of Display 7
Joystick - operation 8
5. Advanced Operation 12
6. Specifications 15
Manual Lock 12
Auto-rotation Mode 12
Connecting to Camera
13
Firmware Upgrade
13
Function Button - operation 8
Shutter Button - operation 8
Setting Button - operation 9
Swith Camera Modes
9
Setup Parameter
9
Horizontal Adjustment Button - operation
10
Trigger Button - operation
10
Multifunction Knob - Zooming control / Follow focus / Control 3 Axis
10
App - Download and Connecting
11
Gimbal Initialization
14
26650 Li-ion Battery
X1
Micro USB Cable
X1
Mount Adapter
X1
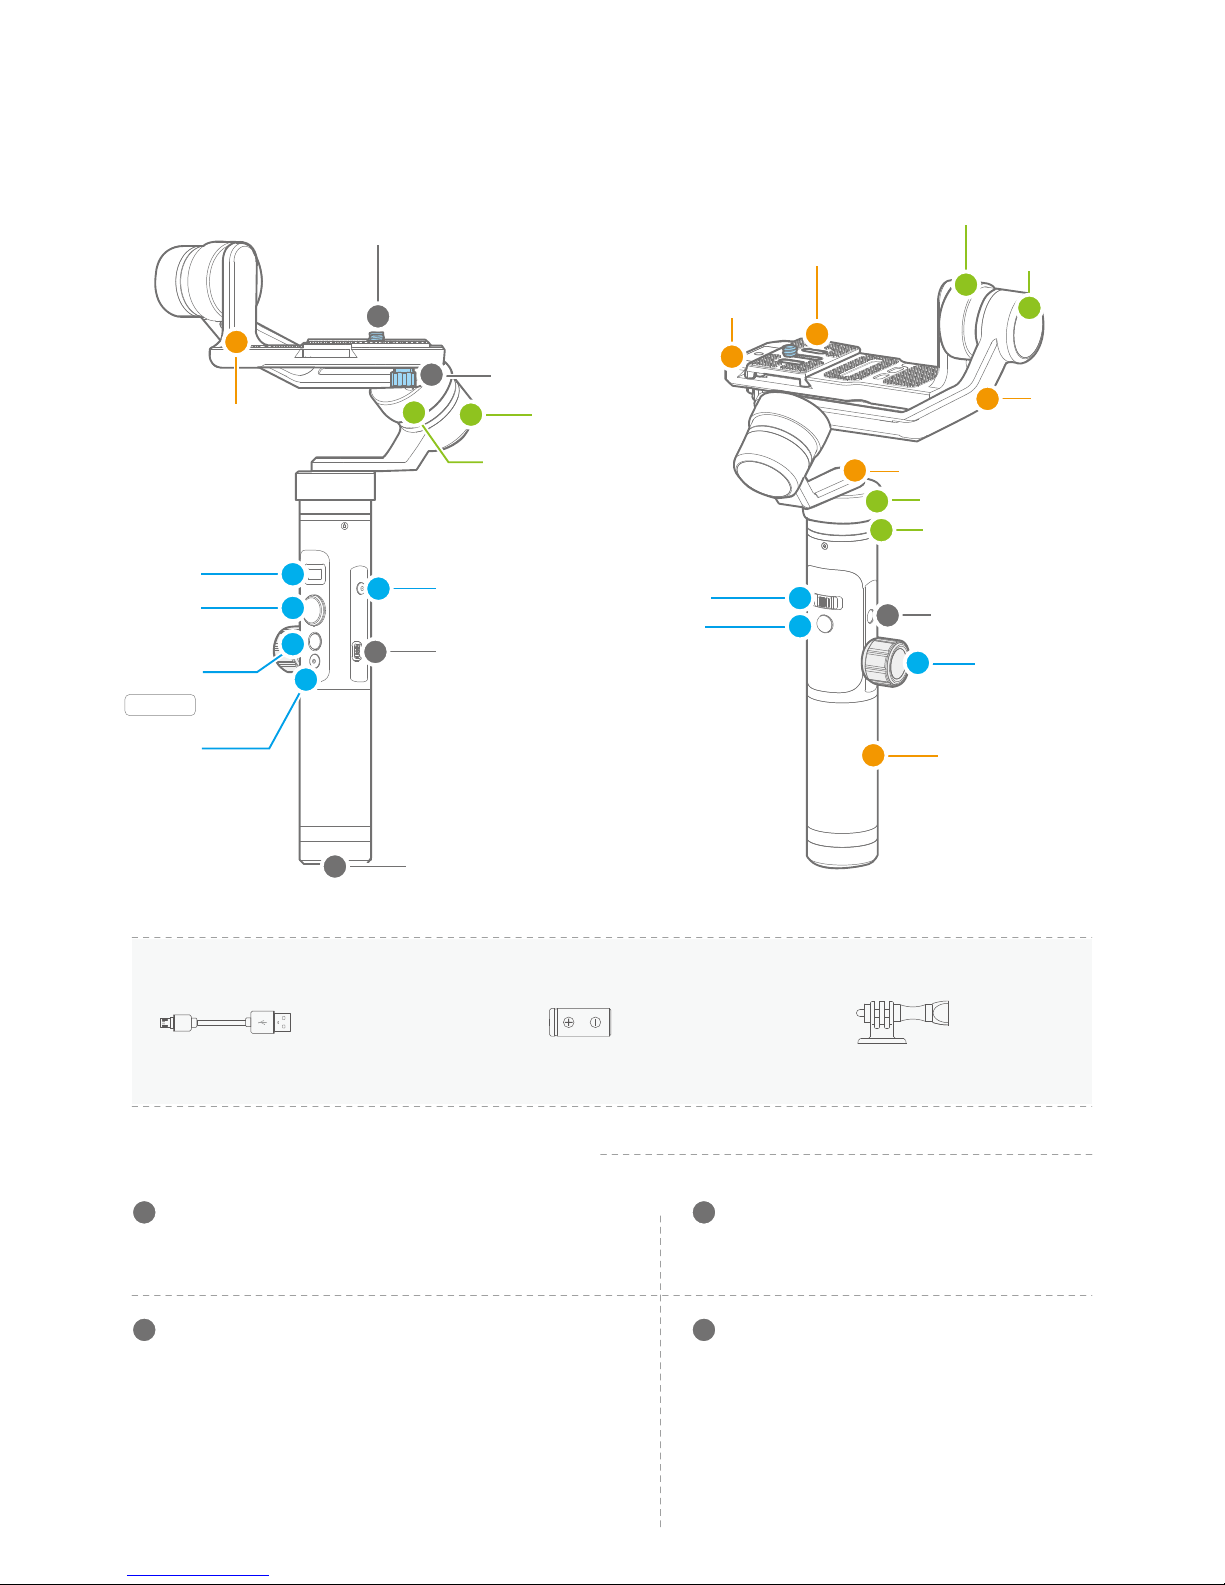
Tilt Axis Knob Ring
Cross Arm
Pan Axis
Vertical Arm
Handle
Pan Axis Knob Ring
1/4-20 Thread
Mount
Multifunction
Knob
Tilt Axis
Trigger
Button
1. G6 Plus Overview
01
www.feiyu-tech.com
Roll Axis Knob Ring
Sliding Arm
Roll Axis
Thumb Screw
Adapter Thumb Screw
1/4-20 Thread
Mount
Joystick
Shutter
Button
Display
Micro USB Port
Micro USB Port
(1) Used for charging the gimbal (input 5V / 2A ), the gimbal
can be used while being charged, but it is not available for
external power supply.
Used for fixing the camera or mobile phone to the adjustment
sliding plate
Used for fixing the adjustment sliding plate.
Used for expand other accessories, such as the
tripod which built-in 1/4 inch screw,extension
rod and so on
(2) Used for firmware upgrade (computer), please refer to
the firmware upgrade operation steps for details.
Please stuff up this port by the dustproof plug when it is not in use.
Setting Button
Accessories
Introduction of Interface and screws
3
4
2
1
4
1
2
3
4
5
6
7
8
1
6
2
3
5
6
4
1
5
2
3
4
3
1/4-20 Thread Mount
4
Thumb Screw
1
Adapter Thumb Screw
2
Function
Button
ON / OFF
Adjustment
Sliding Plate
Adapter
(Clamping plate)
Horizontal
Adjustment
Button
Display
Introduction of Display and Bottons
Introduction of Axis and Knob
1
Joystick
2
Tilt Axis
Take the camera lens as the base point, and control the
camera lens to move upward or downward by tilt axis.
Used for fixing the sliding arm.
1
Tilt Axis Knob Ring
2
Roll Axis
Take the camera lens as the base point, and control
the camera lens to tilt to the left or tilt to the right by
roll axis.
Used for fixing the cross arm.
3
Roll Axis Knob Ring
4
Pan Axis
Take the camera lens as the base point, and control
the camera lens to turn left or turn right by pan axis.
Used for fixing the vertical arm.
5
Pan Axis Knob Ring
6
Used for holding the gimbal by one hand.
Introduction of Other Components
Sliding Arm
Used for adjusting the up and down centre-of-gravity
position of tilt axis.
Used for fixing the camera.
1
Adapter (Clamping plate)
2
Adjustment Sliding Plate
Used for adjusting the front and back position of camera
so as to adjust the front and back centre-of-gravity .
position of tilt axis
Used for adjusting the centre-of-gravity position of roll axis.
3
Cross Arm
4
Used for adjusting the centre-of-gravity position of pan axis.
Vertical Arm
5
Handle
6
Function Button
3
Shutter Button
4
Setting Button
5
Horizontal Adjustment Button
6
Trigger Button
7
Multifunction Knob
8
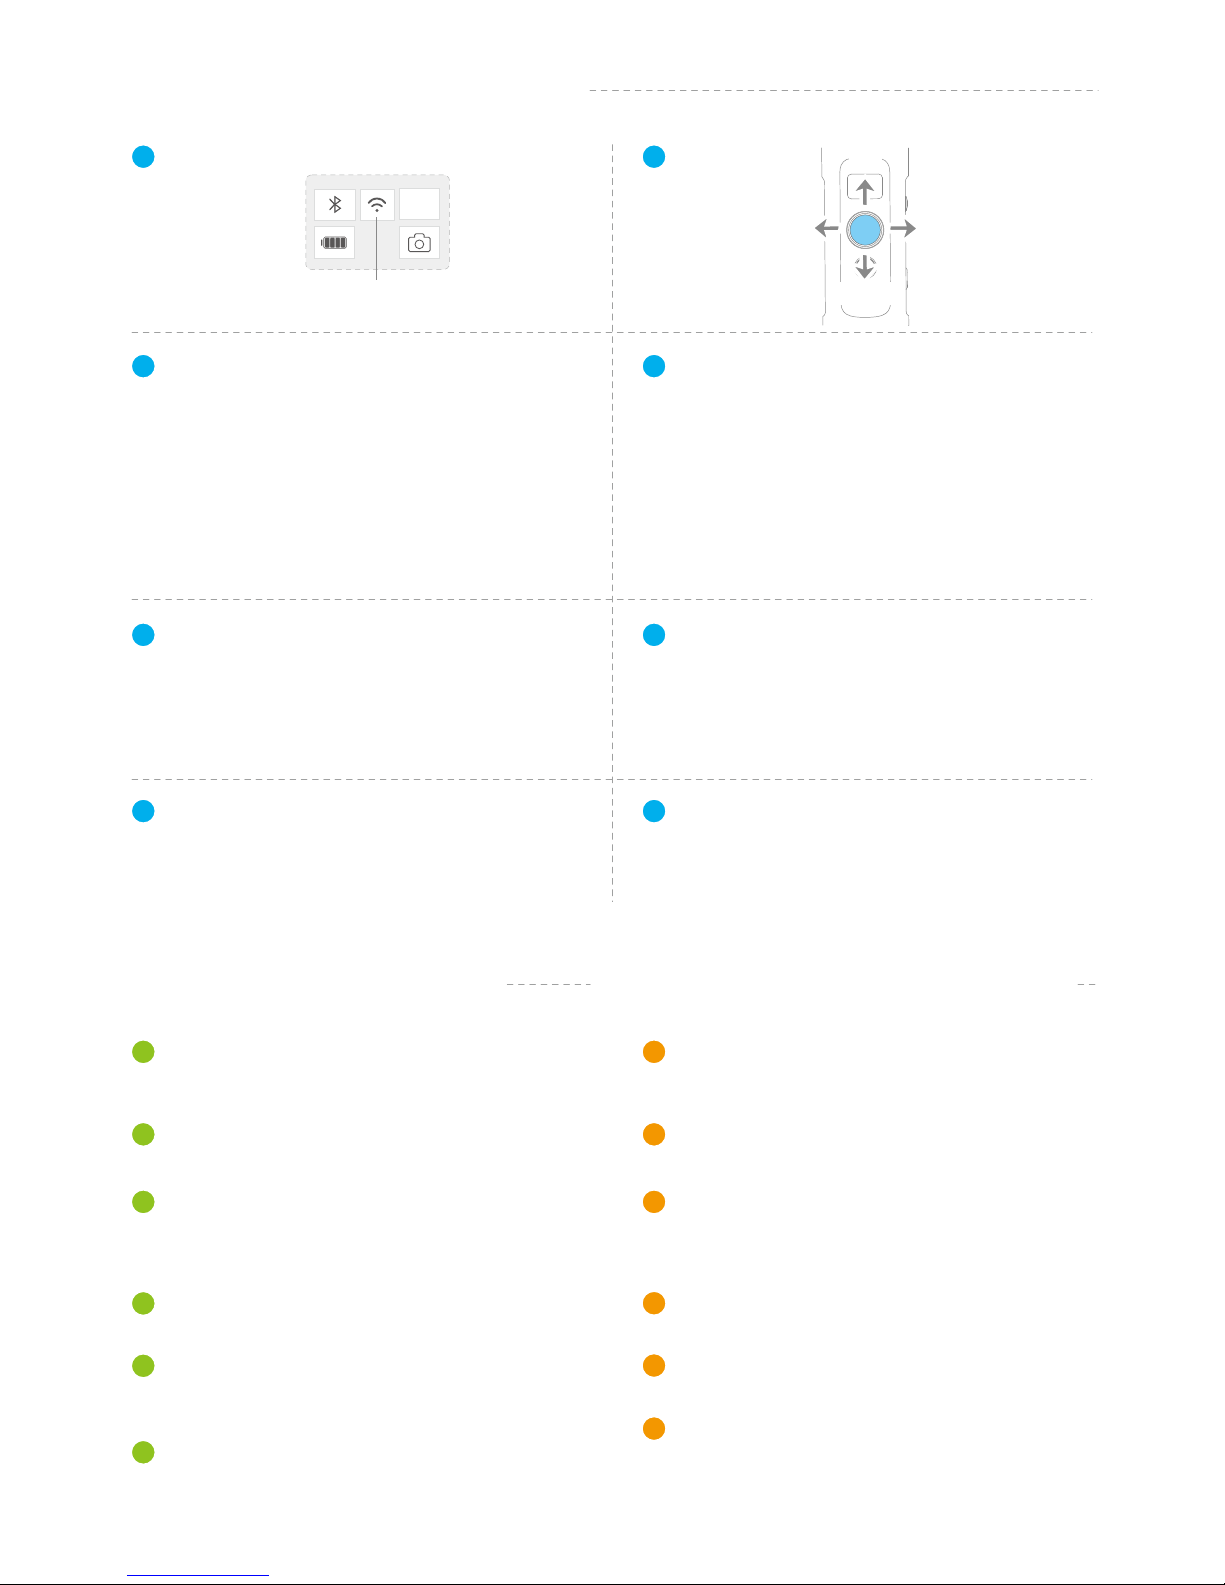
Bluetooth
Battery Level
WiFi
Modes
Camera
Mode
HF
Up
Left Right
Down
Double tap Follow mode
Quadruple tap Auto-rotation Mode
Five tap Initialization
Refer to Page 8
Refer to Page 9
(After connecting your camera)
Refer to Page 10
Refer to Page 10
Refer to Page 8
Refer to Page 10
Triple tap Rotate 180° in horizontal
Panning Mode / Lock ModeSingle tap
Power on / Power offLong press
After connecting the gimbal to camera via Feiyu
On App, shutter button can control the camera
for shooting.
Please refer to the chapter "Connecting to camera" in page 13
Please refer to the chapter "Connecting to camera" in page 13
Single tap
Swith camera modes / main interface
You can control the horizon angle via the horizontal
adjustment button.
Swith the interface for camera parametersLong press
Double tap Reset
(1) Achieve the control to the focal length of camera,
such as follow focus, zoom.
(2) Achieve the control to the angle of three axes of
the gimbal
Lock ModePress and hold
02
www.feiyu-tech.com
Smartphone
Adapter
(Optional Accessory)
Smartpnone Place in the
smartphone adapter
Correctly place the smartphone on the smartphone
adapter(Optional accessory), and tighten it with
thumb screw in the middle sliding chute.
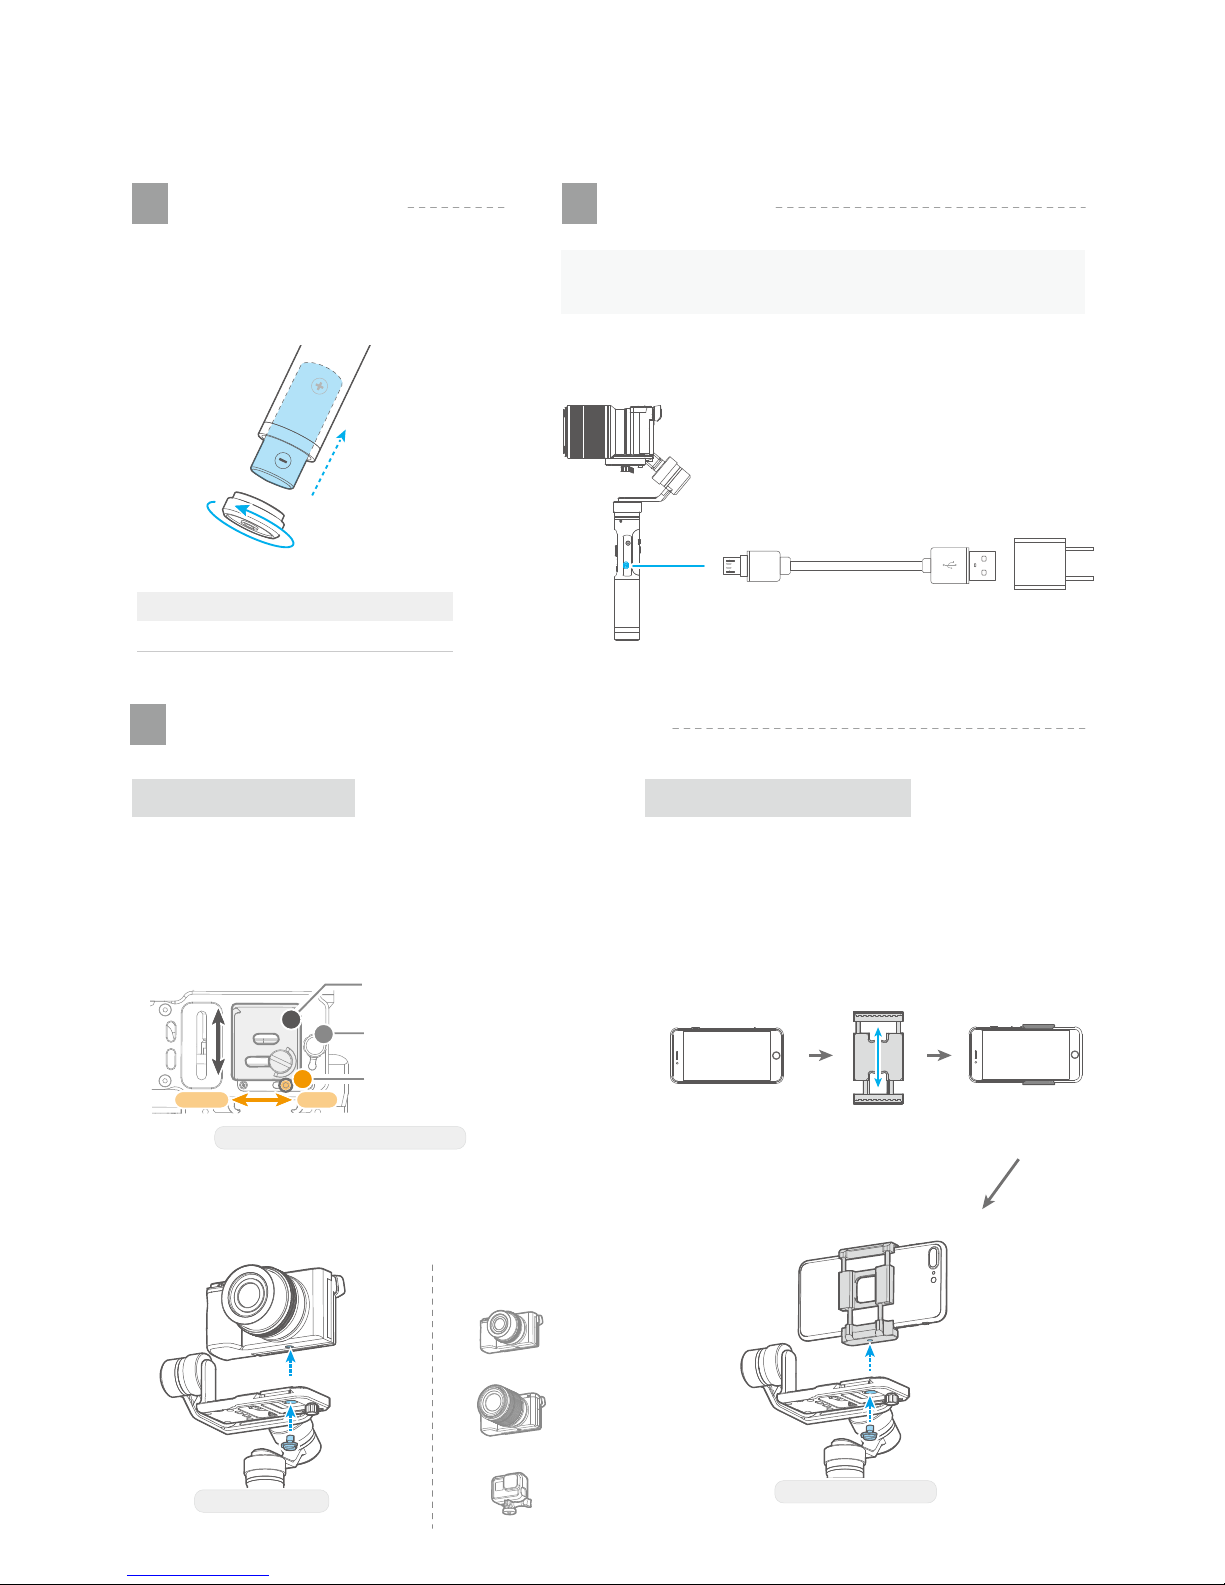
Put the Camera on Put the Smartphone on
Correctly place the camera on the adjustment sliding
plate, and tighten it with thumb screw in the middle
sliding chute.
Available mobile phone width: 57~84mm
Camera Installation
Smartphone installation
Pocket Camera
ILDC
GoPro Sports Camera
If the camera doesn't have the 1/4-20 screw hole, please
put the camera on mount adapter,which has 1/4-20 screw
hole, and then mount it following above steps.
You can also take down the adjustment sliding plate from
the adapter, install it to the bottom of the camera, and then
install to the adapter.
Compatible
for Reference
2. Quick Start Guide
Remove the bottom cap, insert a 26650
battery and then tighten the cap.
Type 26650
5000mAhBattery Capacity
Install Battery
1
Put the Camera / Smartphone on
3
Charging
2
(Equipped by user)
Output: 5V / 2A
Charging with Micro USB cable as shown below.
Micro Port USB Port
Micro USB
Cable
Please fully charge the battery before power on
the gimbal for the first time.
TIP
03
www.feiyu-tech.com
LockUnlock
Bottom of the Adapter (Clamping plate)
Safety lock
Adjustment
Sliding Plate
Thumb Screw
Unscrew
Take
Down
Unlock
1
2
3
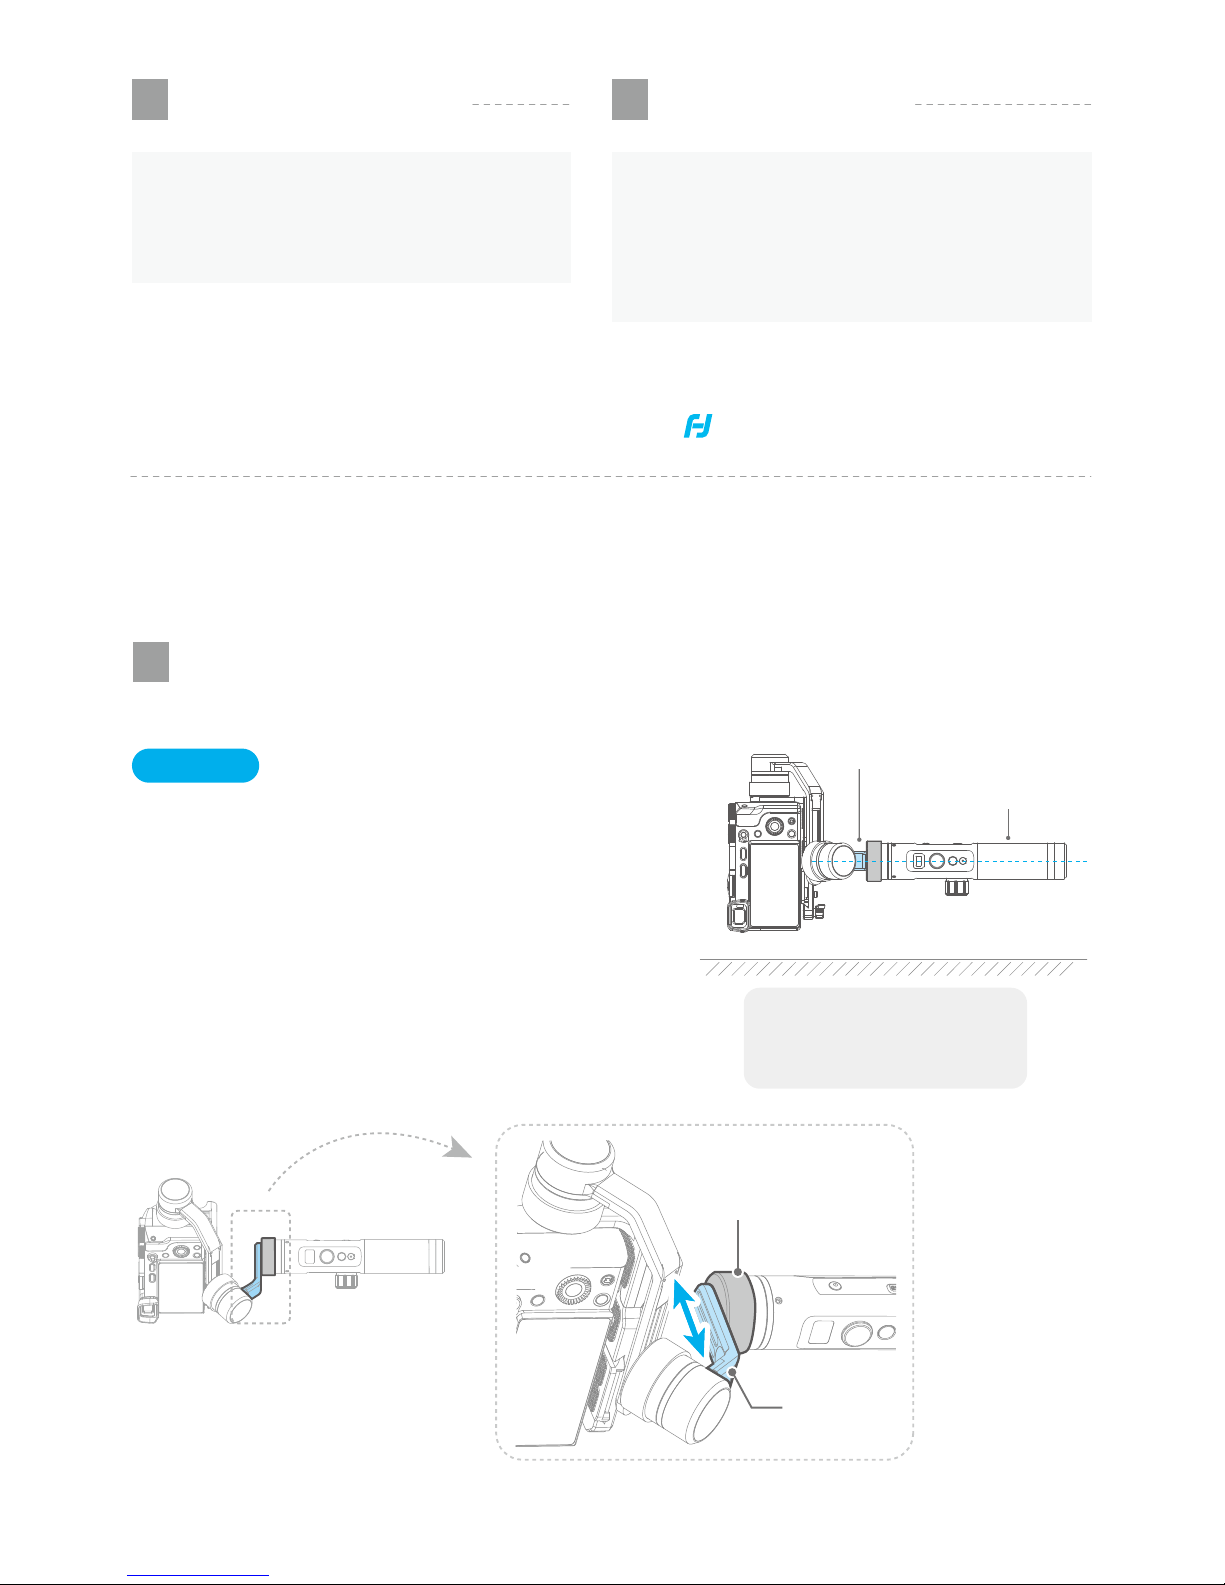
Power on / off
Long press the function button, the display will
show and release it when you hear the
beep tone.
Please refer to the follow chapter "Balance
the Gimbal" for operation
3. Balance the Gimbal
Power on the gimbal after the center of
gravity of 3 axis is balanced.
Balance the Gimbal
4
Power on / off
5
Unbalanced center of gravity can lead to a
decrease in stability, even the camera cannot be
balanced.
NOTE
(1) Please mount the camera or smartphone before
powering on the gimbal.
(2) When the battery is low, please charge the gimbal.
(3) When not in use, turn off the gimbal and then remove
the battery.
NOTE
04
www.feiyu-tech.com
Balance Adjustment of the Pan Axis
1
* After adjustment, be sure to tighten the pan axis knob ring
( Before power on )
Vertical Arm
Pan Axis Knob Ring
Loosen
Move
Level Ground
(1) Hold the handle of gimbal, keep the handle parallel
to the level ground.
(2) Loosen the pan axis knob ring
(Slightly loose until the vertical arm can be moved)
(3) Move and adjust the position of vertical arm,
until the vertical arm is parallel to the level ground
(4) Tighten the pan axis knob ring
Move and adjust the position
of vertical arm
Vertical Arm
Handle
Steps
After adjustment
Vertical arm is parallel
to the level ground
 Loading...