

Guilin Feiyu Technology G5 GS User Manual

3-Axis Gimbal for Sony Camera
Guilin Feiyu Technology Incorporated Company
V 1.1ENUser Manual
Camera thumb screw
Adapter(Clamping plate)
1
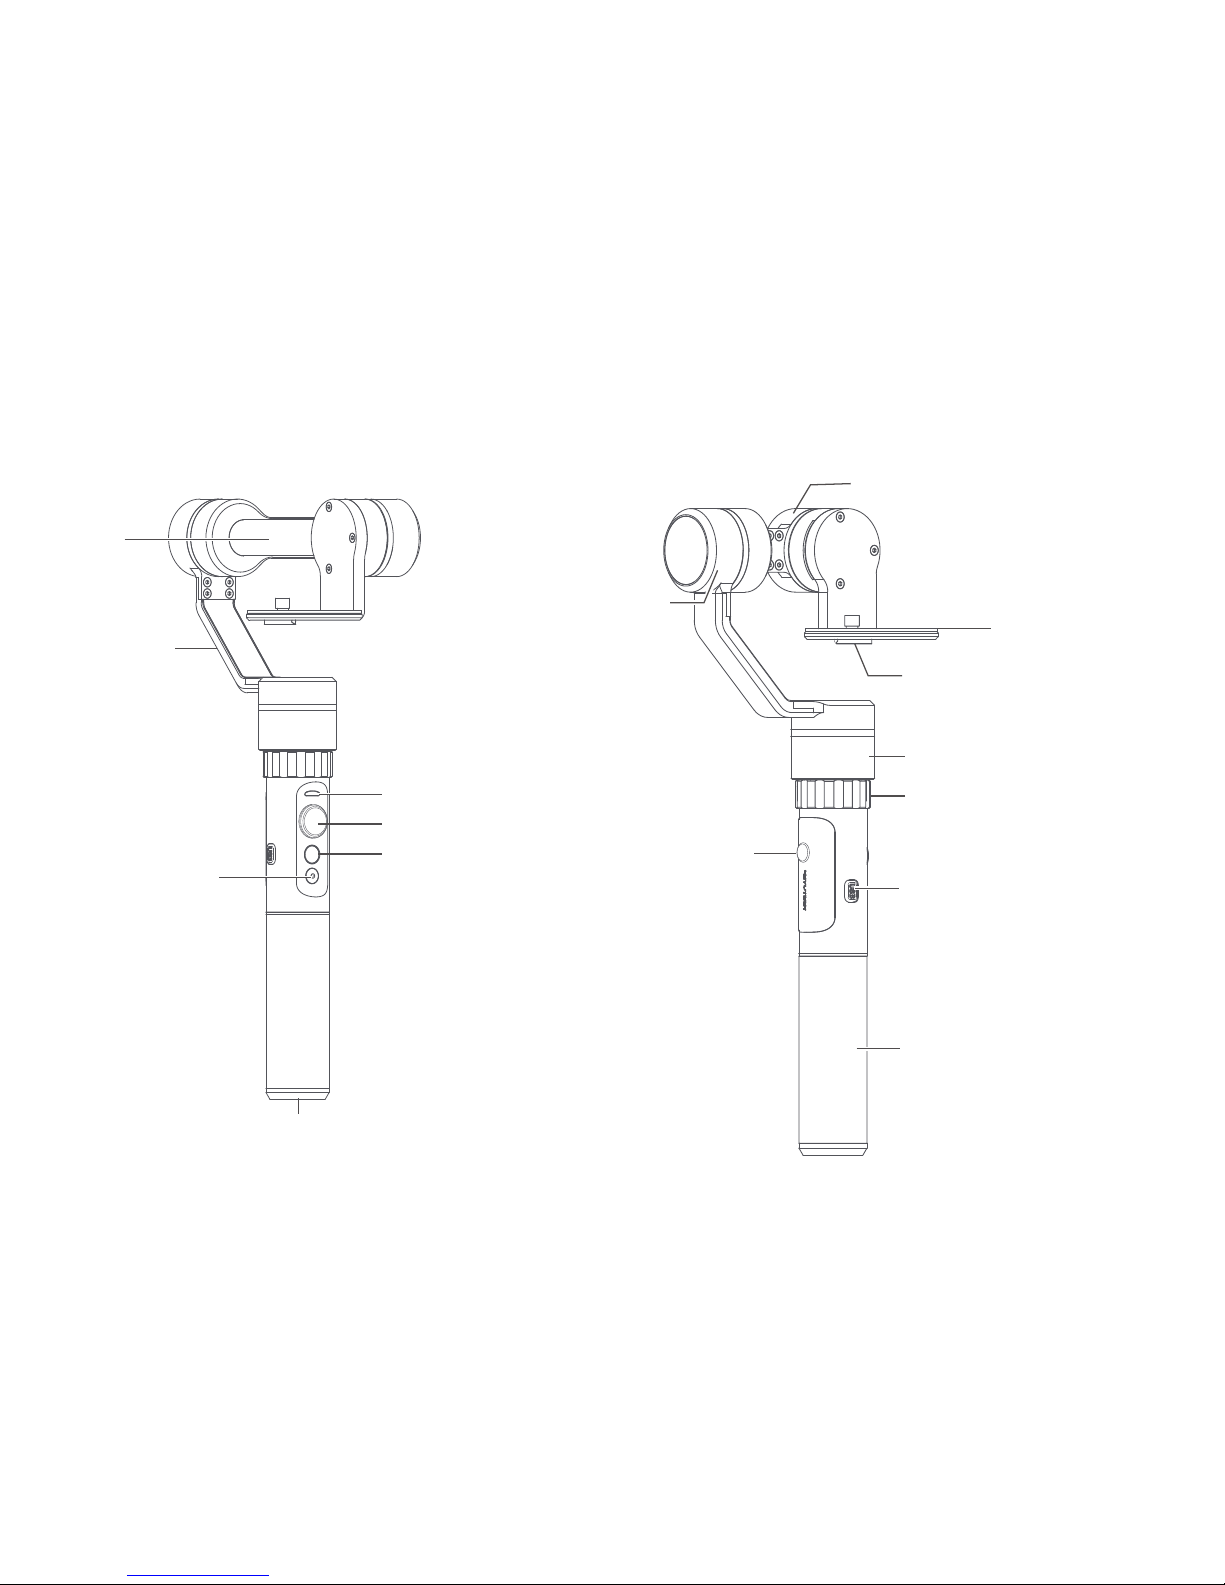
1. Product Overview
Function button
Status indicator
Joystick
Cross arm
Vertical arm
Tilt axis
Roll axis
Pan axis
Trigger button
Retaining ring
Self-timer
shortcuts
1/4-20 Thread Mount
Single hand grip
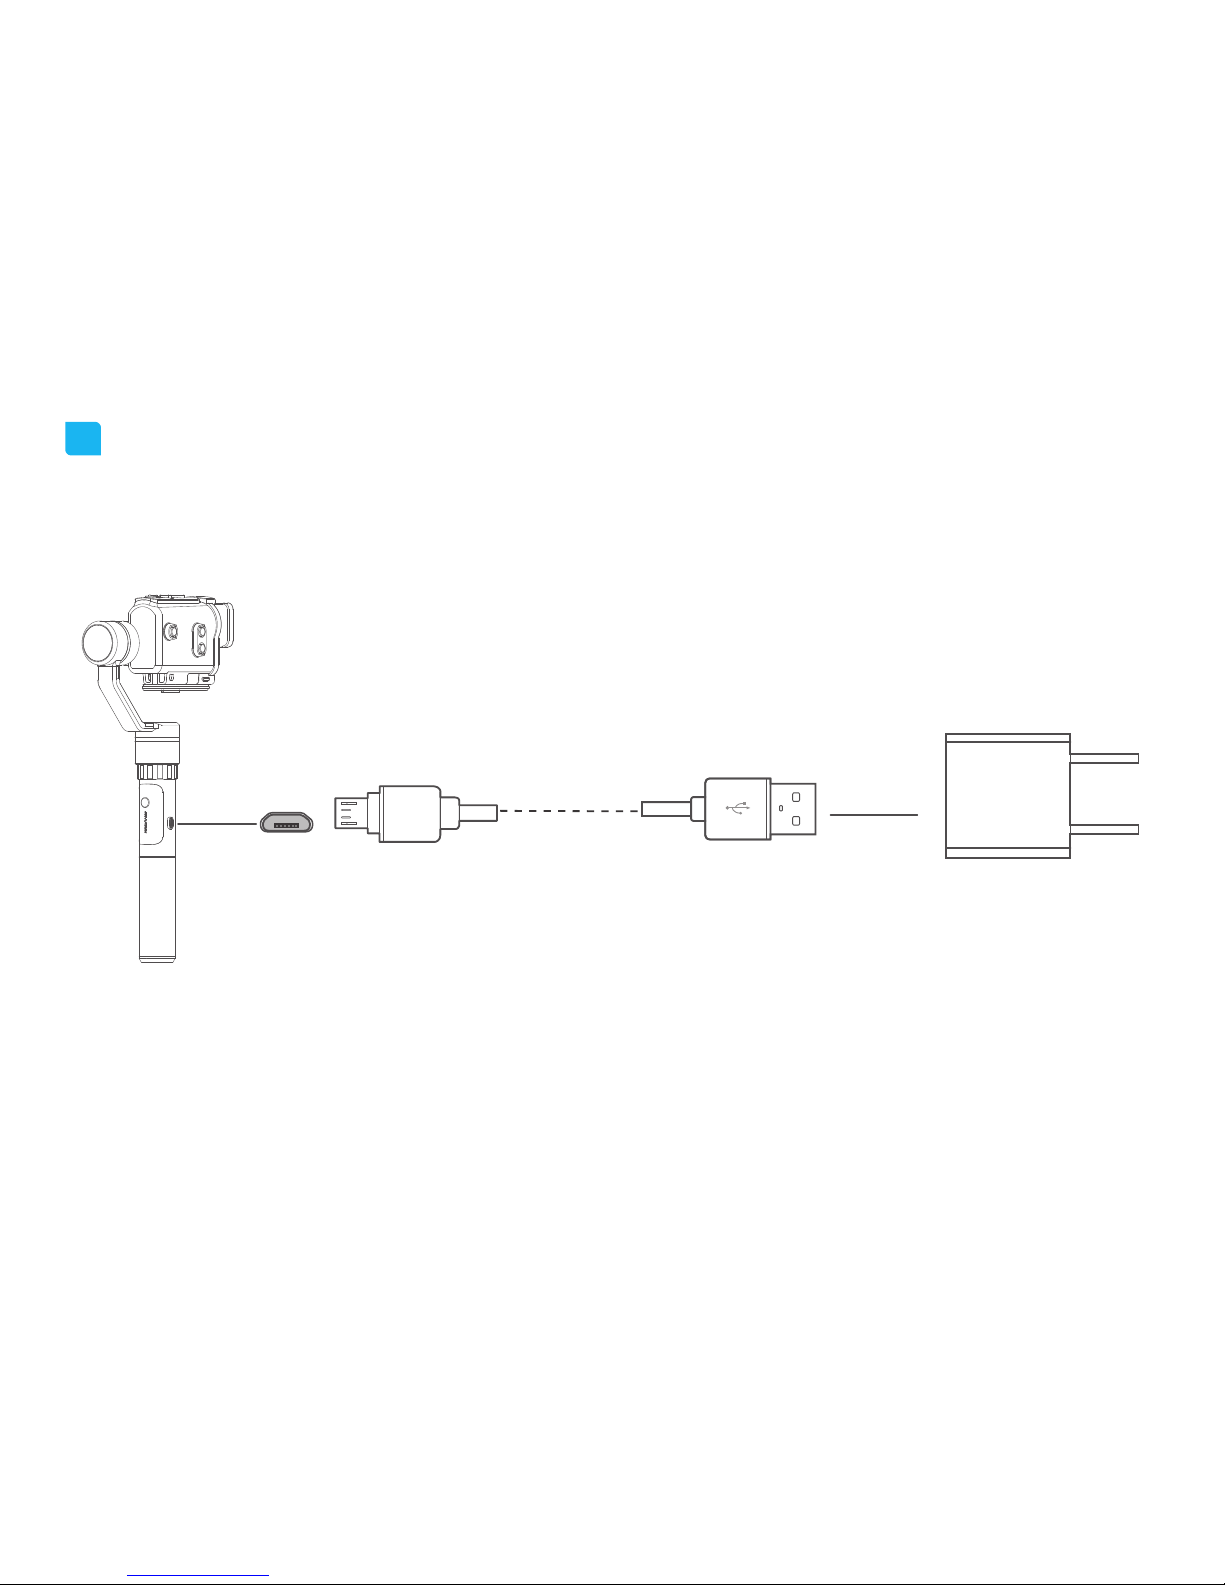
Micro USB port
1/4 thumb screw
2
Cold shoe mount
1/4-20
Inch screw
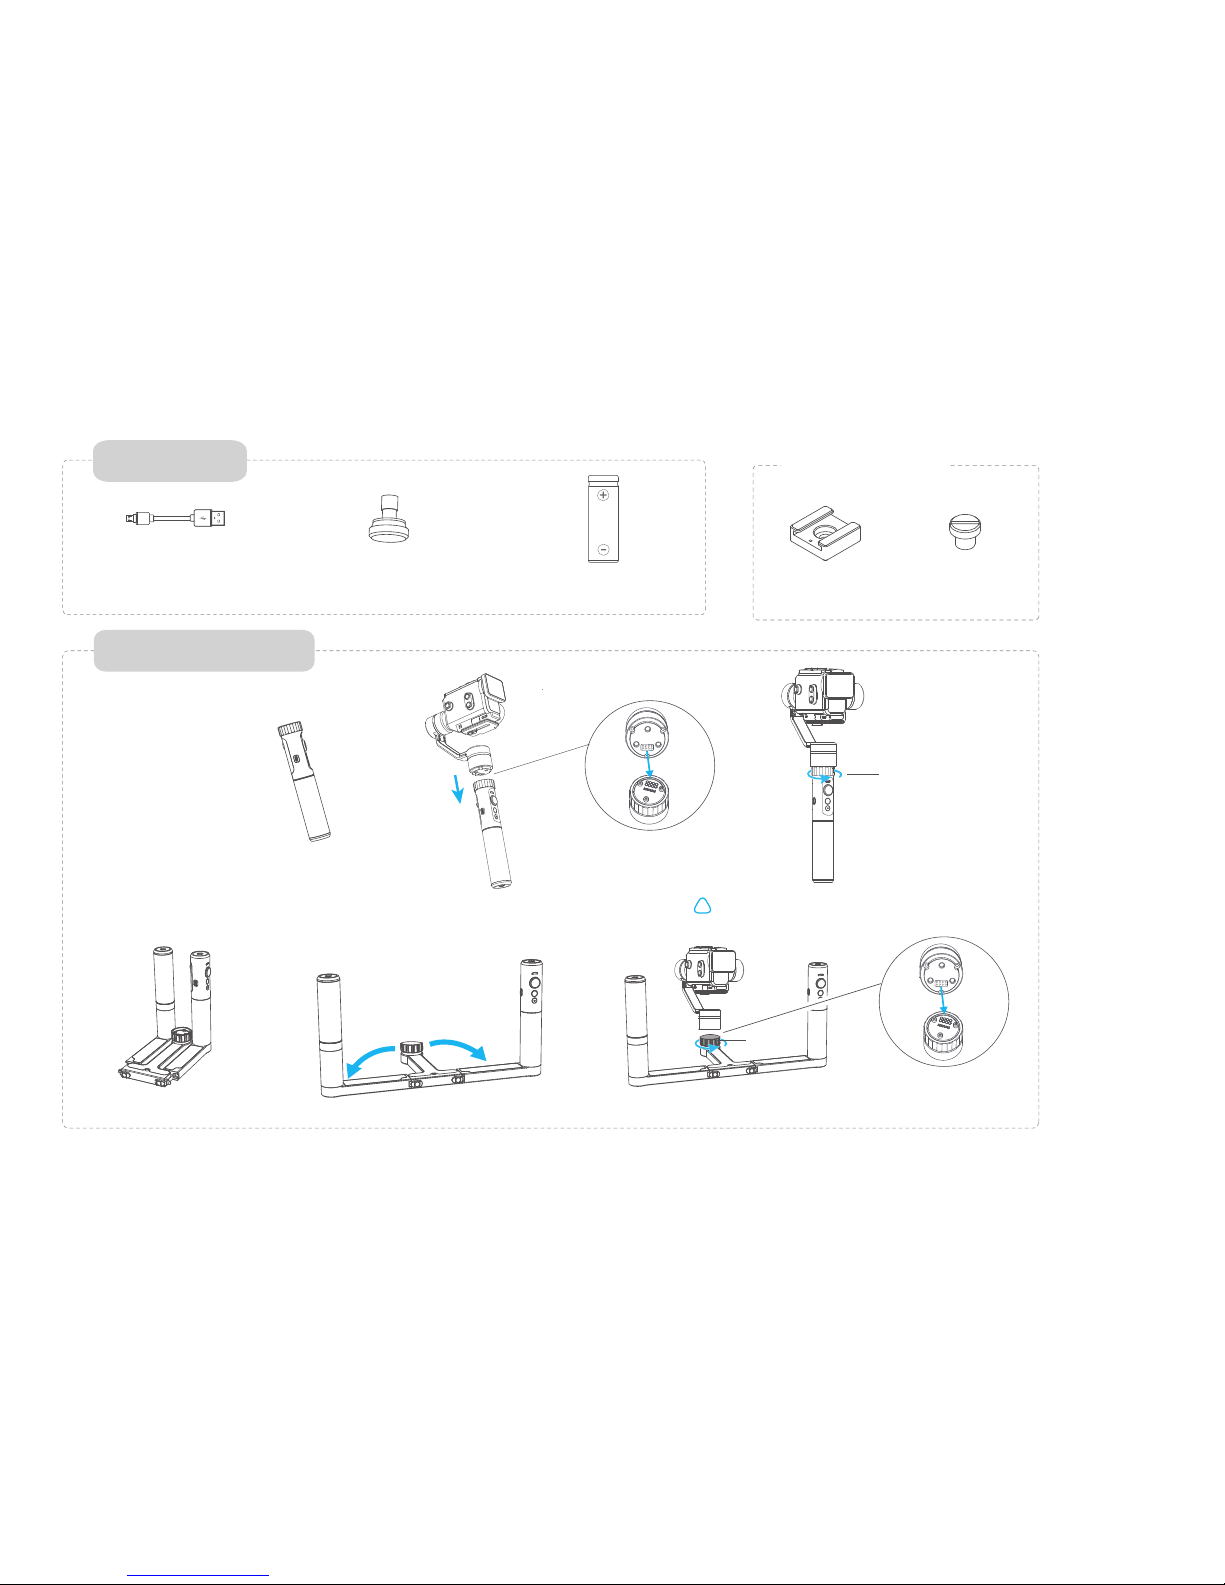
Dual-hand grip accessories
Retaining ring
Single hand grip
Hand grip installation
Dual-hand grip foldable set (Optional)
Included items
22650 Li-ion
battery
Micro USB cable
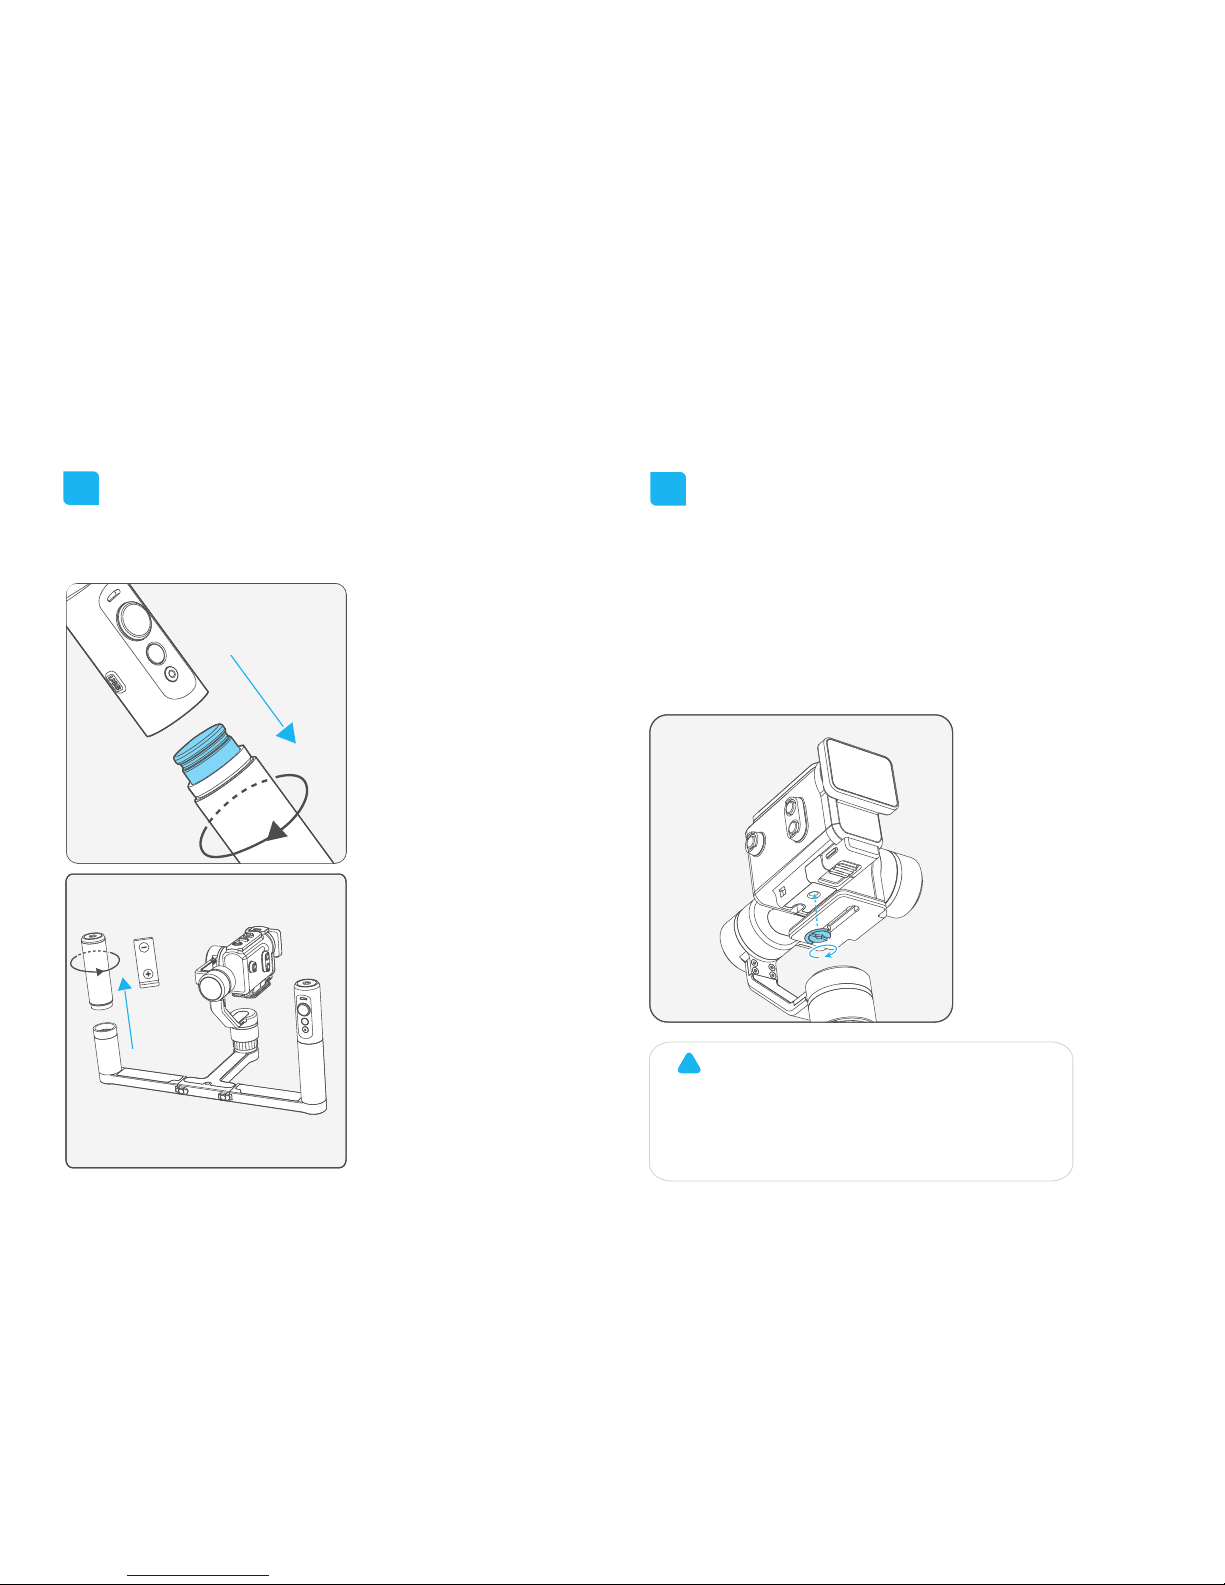
Retaining ring
Make sure to tighten the retaining
ring until fully locked!
!
1
2
Tips:you need to install the waterproof shell
before you can perform the following steps
3
Place the camera correctly on the clamping plate
and attach the tilt axis ,use the camera thumb
screw to secure the camera through the middle
chute atthe bottom of clamping plate.
2. User Guide
Install the Sony camera
(1) Please install the camera before powering
on the gimbal.
(2) When not in use, turn off the gimbal and then
remove the camera.
Attention !
!
Single hand grip
Dual hand grip
Insert battery
Remove the hand grip and insert the
provided 22650 battery.
4
3
Option 1: charging with micro USB cable.
Micro USB cable
Gimbal charging
* Please fully charge the battery before powering on the gimbal for the first time.
5V/1A USB charger
(not included)
Option 2: remove the battery and charge in external charger (not included).
 Loading...