

Page 1
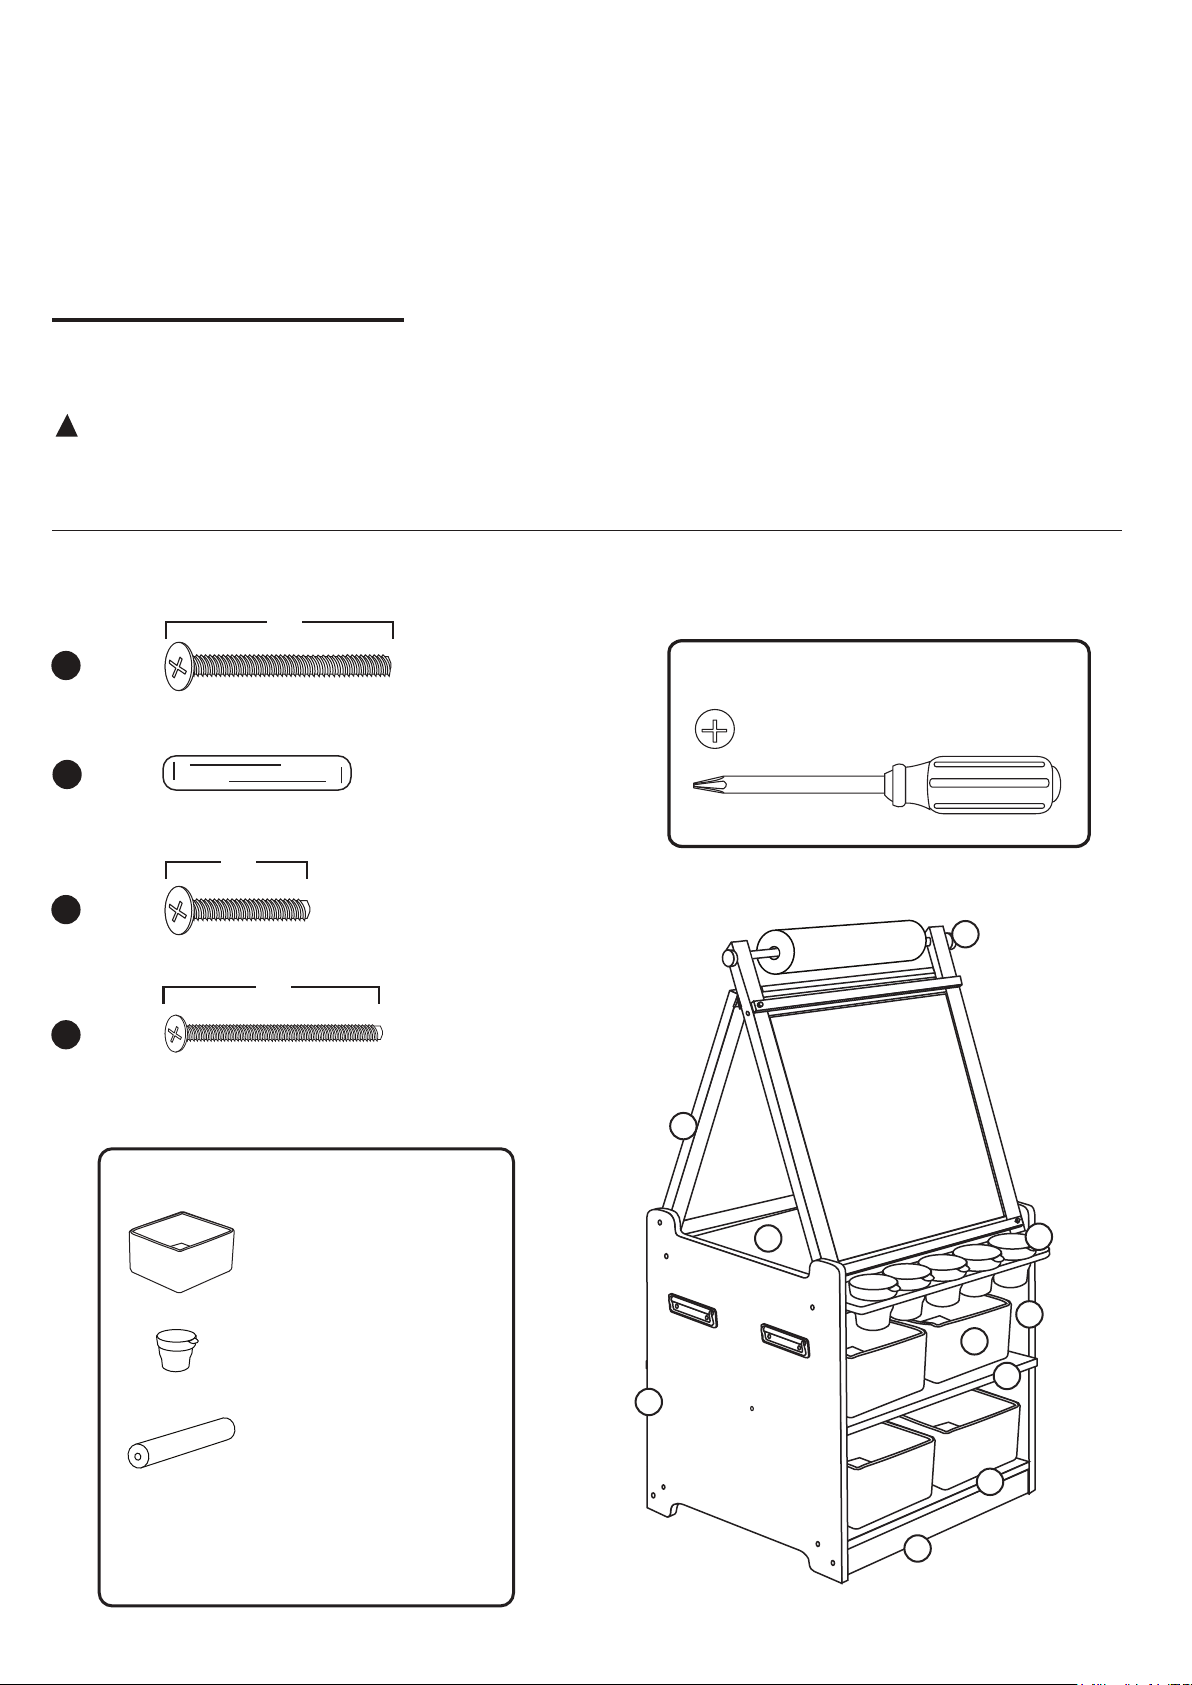
Desk To Easel Art Cart
Assembly Instructions
For ages 3 and up.
Adult assembly required.
!
WARNING
Small parts and sharp points may be present
prior to assembly.
1.6"
(40mm)
(14)
1
2
(12)
Care Instructions
To clean your product, use mild soap and
water on a damp cloth. Do not use window
cleaners or cleaning abrasives as they will
scratch the surface and could damage the
protective coating.
Customer Service
For questions regarding this product, or to
receive replacement or missing parts,
contact Customer Service. Please have the
model number and part number(s) located in
this Assembly Instruction sheet available for
reference.
Hardware and Parts
You will also
need a Phillipshead screwdriver
(not included).
Limited Warranty
All products are warranted to the original
purchaser at the time of purchase and
for a period of one (1) year thereafter.
In order to provide you with timely
assistance, please thoroughly inspect
your product for missing or defective
parts immediately after opening the
carton. To receive replacement or
missing parts under this warranty,
contact Customer Service. You will also
need your sales receipt or other proof of
purchase.
page 1 of 4
1"
(25mm)
(2)
3
J
1.5"
(38mm)
(2)
4
H
Art Cart Includes:
4 Fabric Storage Bins
5 Paint Cups with Lids
F
L
I
K
C
D
1 Starter Roll of Paper (18" )
A
B
Page 2
page 2 of 4
C
1
1
B
2
A
2
B
4
4
1
1
D
E
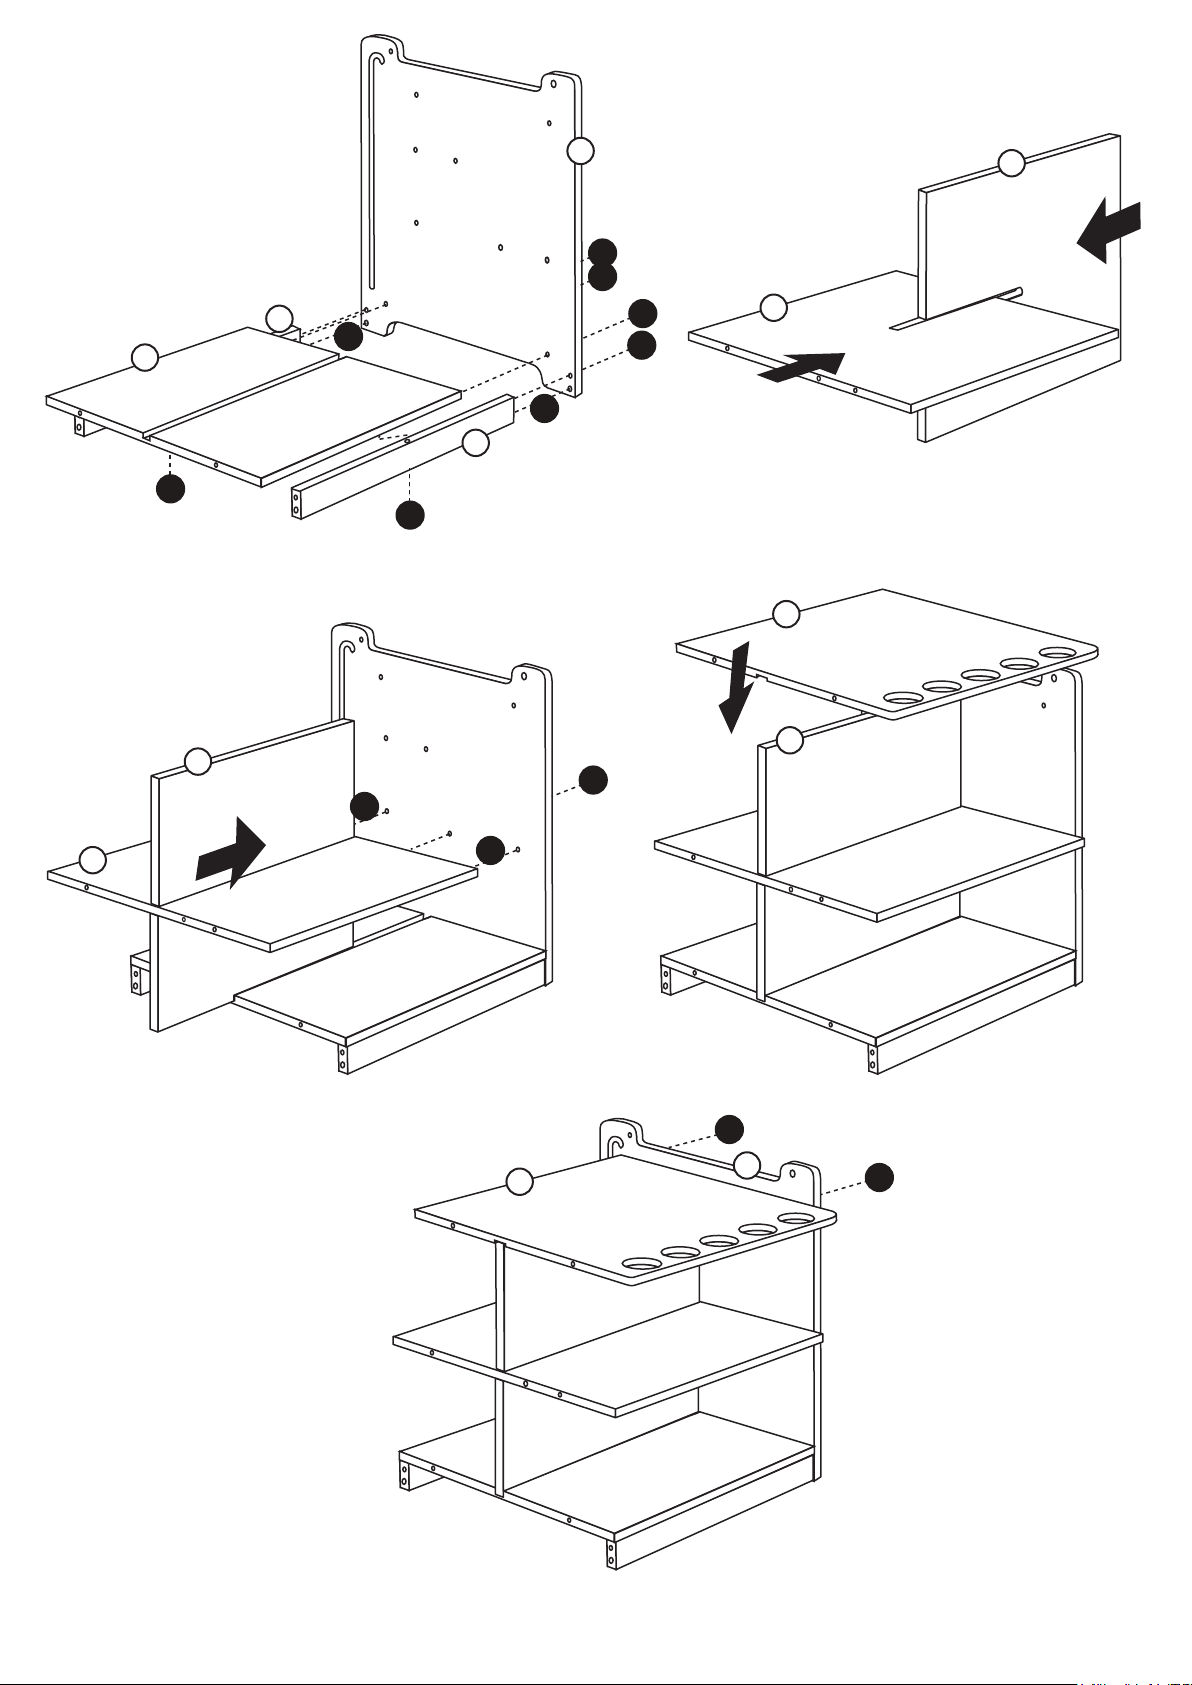
STEP 1 STEP 2
F
E
E
2
D
2
1
STEP 3 STEP 4
1
F
C
1
STEP 5
Page 3
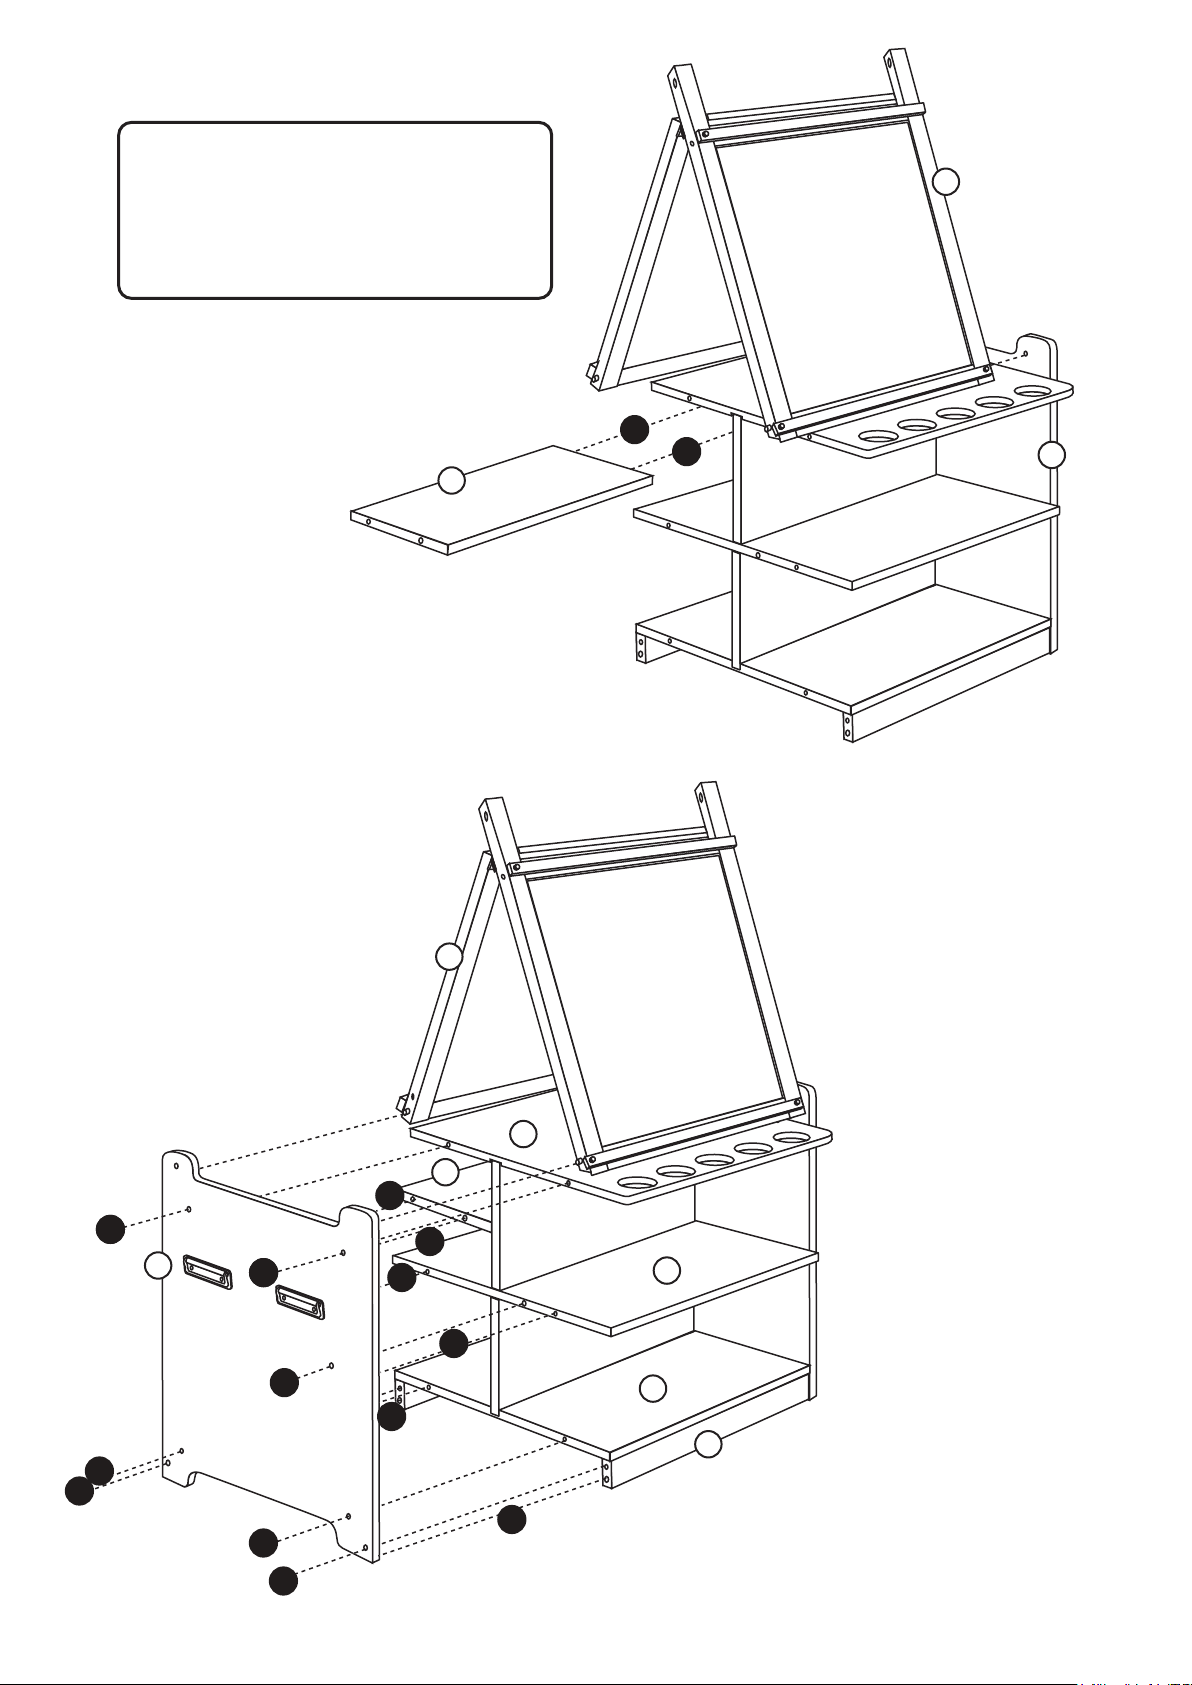
HELPFUL TIP:
Gently turn the unit on its side, with
Part C at on the oor, to assemble Step
6 and Step 7. It will be easier to align the
parts and hardware.
G
page 3 of 4
H
2
2
C
STEP 6
H
F
G
2
1
I
1
2
2
2
D
1
2
1
1
2
1
1
A
B
STEP 7
Page 4
page 4 of 4
J
H
3
I
3
K
L
L
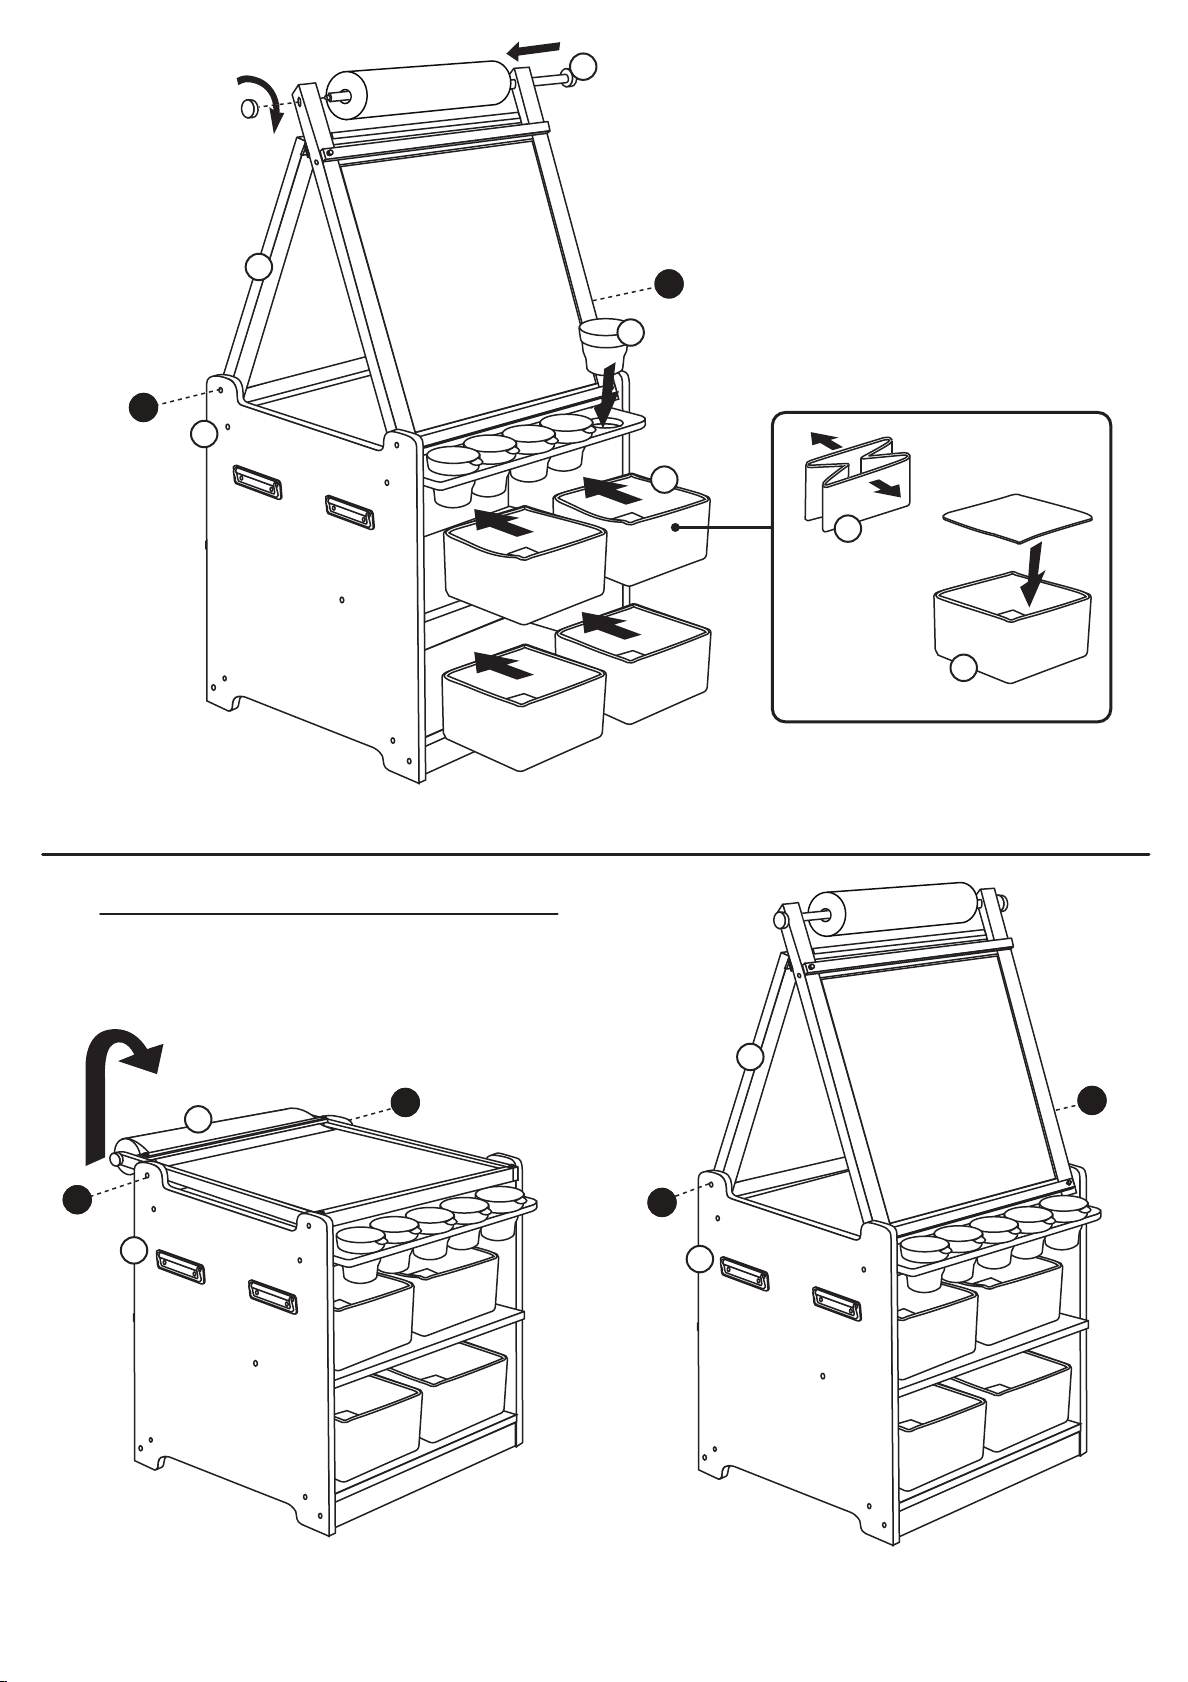
STEP 1
L
STEP 2
STEP 8
Switching Your Art Cart From Desk to Easel
ADULT ASSEMBLY IS NEEDED WHEN SWITCHING THE
ART CART TO BOTH DESK AND EASEL OPTIONS.
3
H
3
I
H
3
3
I
STEP 1 STEP 2
Remove Hardware 3 from both sides of Art Cart. Lift Part H
up and allow dowels to rest into the easel postion.
Secure Part H with Hardware 3 on both sides, as
shown in above diagram.
 Loading...