

Gude Expert Power Control NET 8x 8211, Expert Power Control NET 8x 8210 User Manual
Expert Power Control NET 8x 8210 / 8211
© 2010 Gude Analog- und Digitalsysteme GmbH

Expert Power Control NET 8x 8210 / 8211
© 2010 Gude Analog- und Digitalsysteme
GmbH
23.08.2010

Table of content
3Table of contentExpert Power Control NET 8x 8210 / 8211
Chapter 1
Chapter 2
Chapter 3
3.1 Content of delivery
3.2 Connections
3.3 Installation
3.4 Status LED
Chapter 4
4.1 DHCP
4.2 Network settings with GBL_Conf
4.3 Configuration via webinterface
4.3.1
4.3.2
Security Advise
Description
Hardware
Configuration
Configuration - Power Ports
Configuration - IP address
5
5
6
6
7
7
8
8
8
8
10
10
12
4.3.3
4.3.4
4.3.5
4.3.6
4.3.7
4.3.8
Chapter 5
5.1 Switching at the device
5.2 Switching by Webinterface
5.2.1
5.2.2
5.3 Switching via serial interface
5.4 Sensor
Chapter 6
Configuration - IP ACL
Configuration - HTTP
Configuration - Messages
Configuration - SNMP
Configuration - SNMP Trap Receiver List
Configuration - Syslog
Operation
Switching
Batchmode
Features
13
13
14
15
16
17
18
18
18
18
19
19
20
21
6.1 Bootloader mode
6.2 Firmware update
6.3 Technical information
21
21
21
Expert Power Control NET 8x 8210 / 8211

4Table of contentExpert Power Control NET 8x 8210 / 8211
6.4 Fabrique settings
Chapter 7
Chapter 8
Support
Declarations of conformity
21
22
23
© 2010 Gude Analog- und Digitalsysteme GmbH

Expert Power Control NET 8x 8210 / 8211 Security Advise
1 Security Advise
The device must be installed only by qualified personnel according to the following installation and operating instructions.
The manufacturer does not accept responsibility in case of improper use of the device and particularly any use of equipment
that may cause personal injury or material damage.
The device contains no user-maintenable parts. All maintenance has to be performed by factorytrained service personnel.
Check if the power cord, the plug and the socket are in proper condition.
The device can be connected only to 230V AC (50 or 60 Hz) sockets.
Always connect the device to properly grounded power sockets.
The device is intended for indoor use only. Do NOT install them in an area where excessive moisture or heat is present.
Because of safety and approval issues it is not allowed to modify the device without our permission.
Please note the safety advises and manuals of connected devices, too.
The device is NOT a toy. It has to be used or stored out or range of children.
Packaging material is NOT a toy. Plastics has to be stored out of range of children. Please recycle the packaging materials.
In case of further questions, about installation, operation or usage of the device, which are not clear after reading the manual,
please do not hesitate to ask our support team.
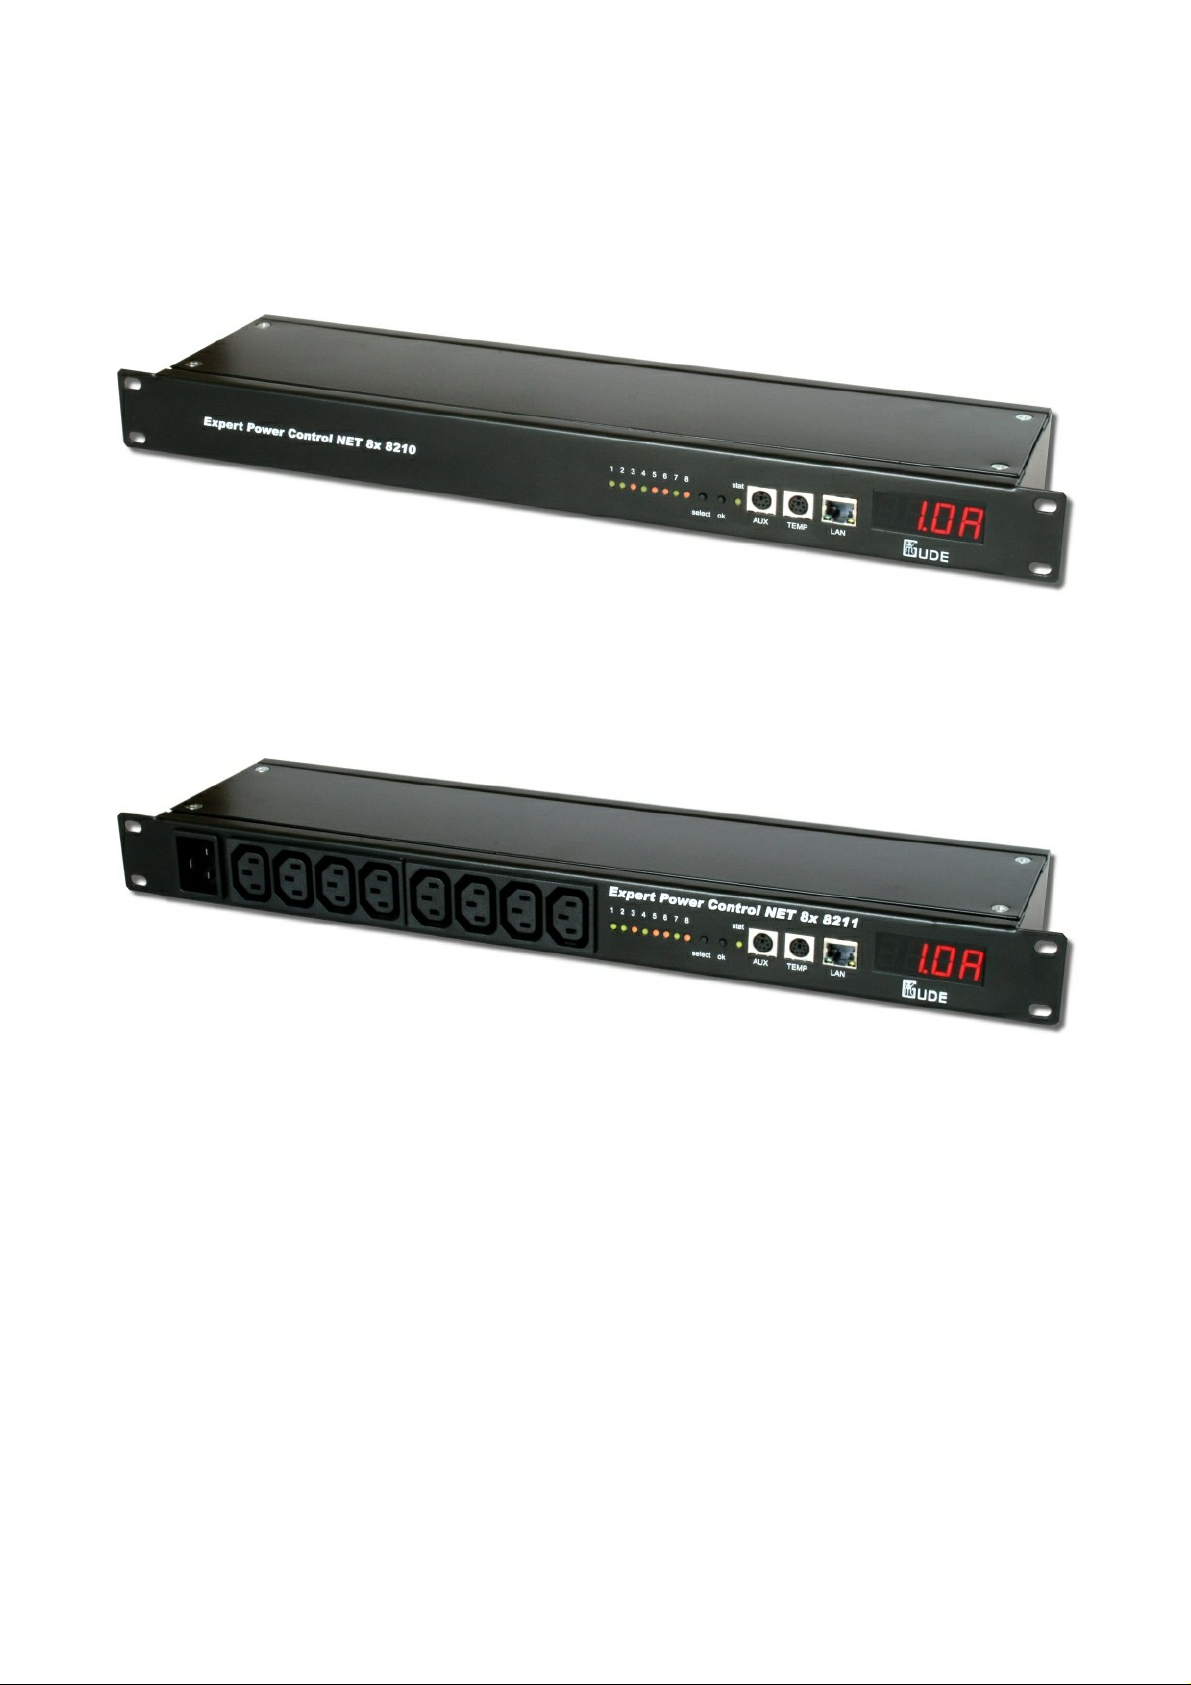
2 Description
The Remote Power Switch Expert Power Control NET 8x 8210 / 8211 allows the switching of electrical devices via a TCP/IP
network and a serial interface.
For installation just connect the power and network cables to Expert Power Control NET 8x 8210 / 8211.
5
After the device has received an IP address every client in the same network is able to switch the eight Power Ports (max. 10
A) via webinterface. Expert Power Control NET 8x 8210 / 8211 offers also features like SNMP and Syslog. Additional
Expert Power Control NET 8x 8210 / 8211 can be controlled via a serial connection.
A temperature sensor and a hybrid sensor (temperature and humidity) can be connected to Expert Power Control NET 8x
8210 / 8211.
A watchdog function for each power port is implemented.
The display on the front is able to show the IP address, the recent total load, the peak current (timeframe adjustable) and the
measurements of the sensors.
Furthermore the access to the device can be restricted by IP access control lists and a HTTP password.
Expert Power Control NET 8x 8210 / 8211 Description
3 Hardware
6
3.1
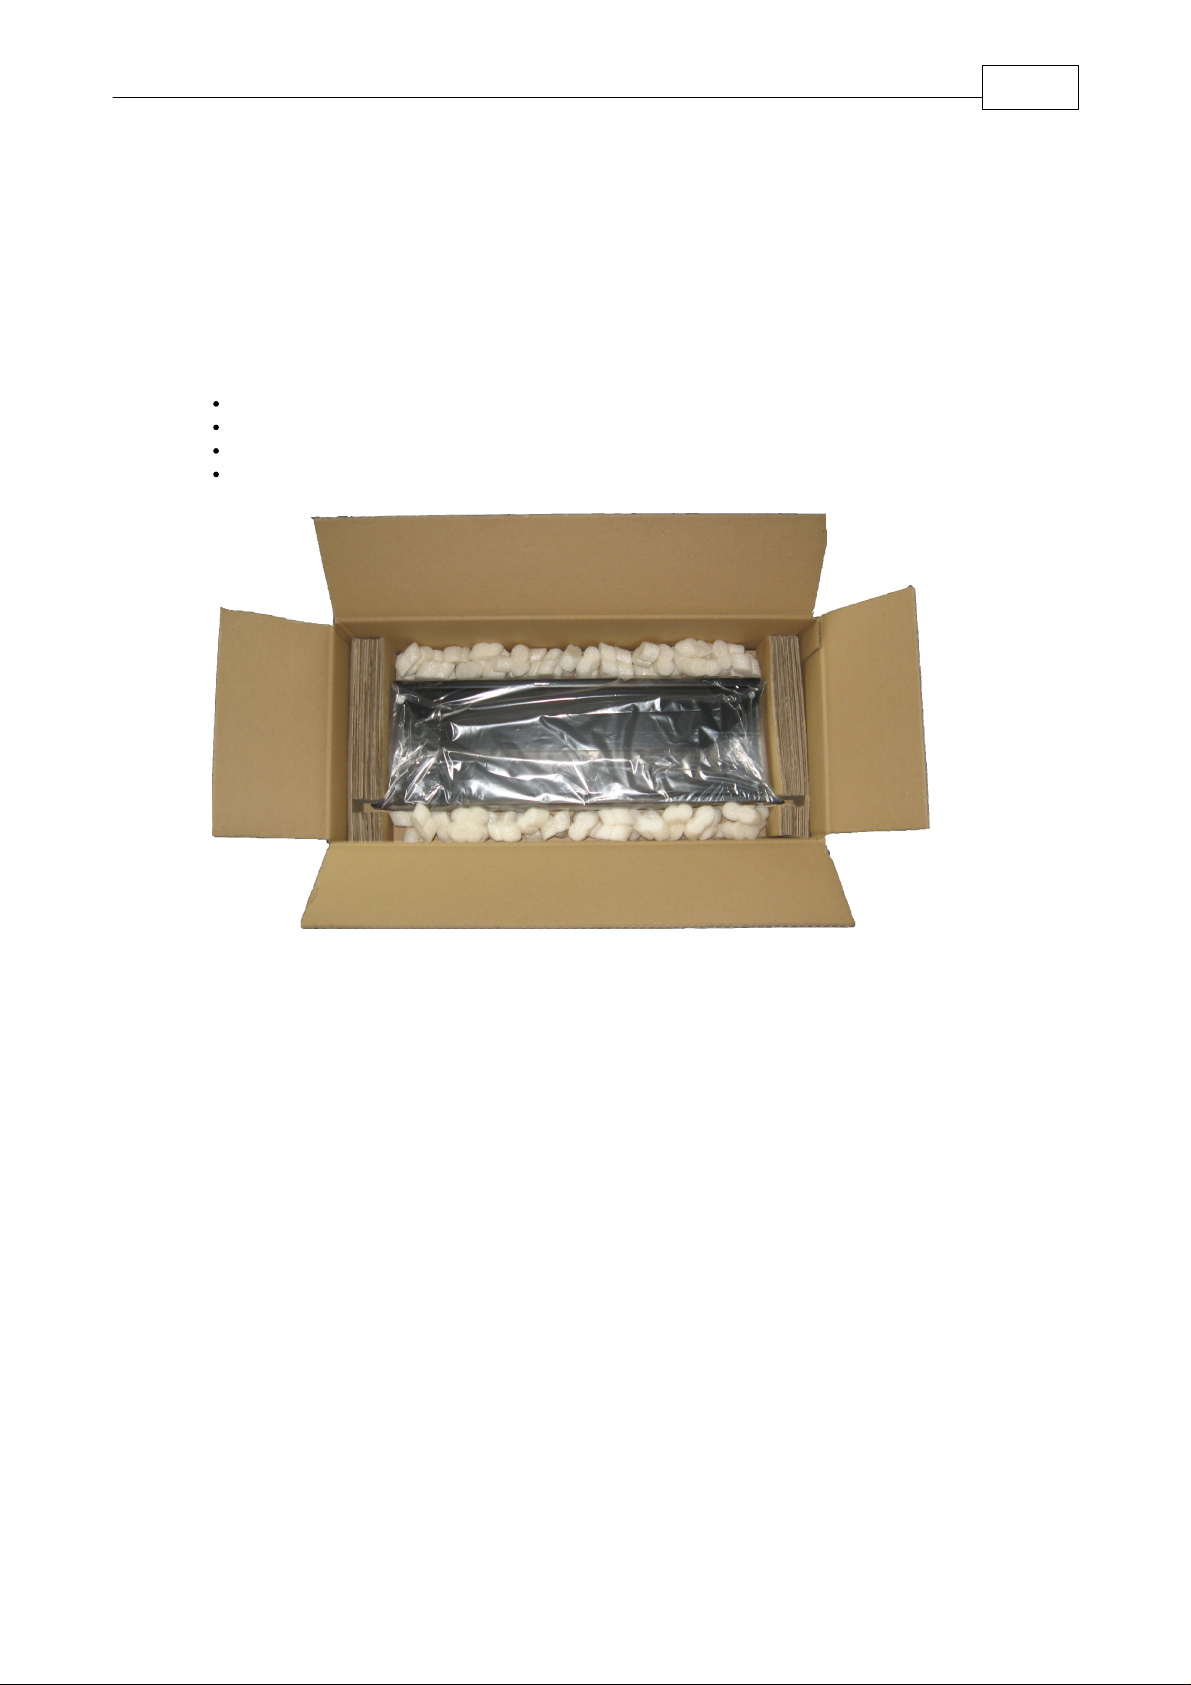
Included in delivery are:
Content of delivery
Expert Power Control NET 8x 8210 / 8211
Power supply cable (IEC)
CD-ROM including Software and Manual
Short manual
Expert Power Control NET 8x 8210 / 8211 Hardware
7
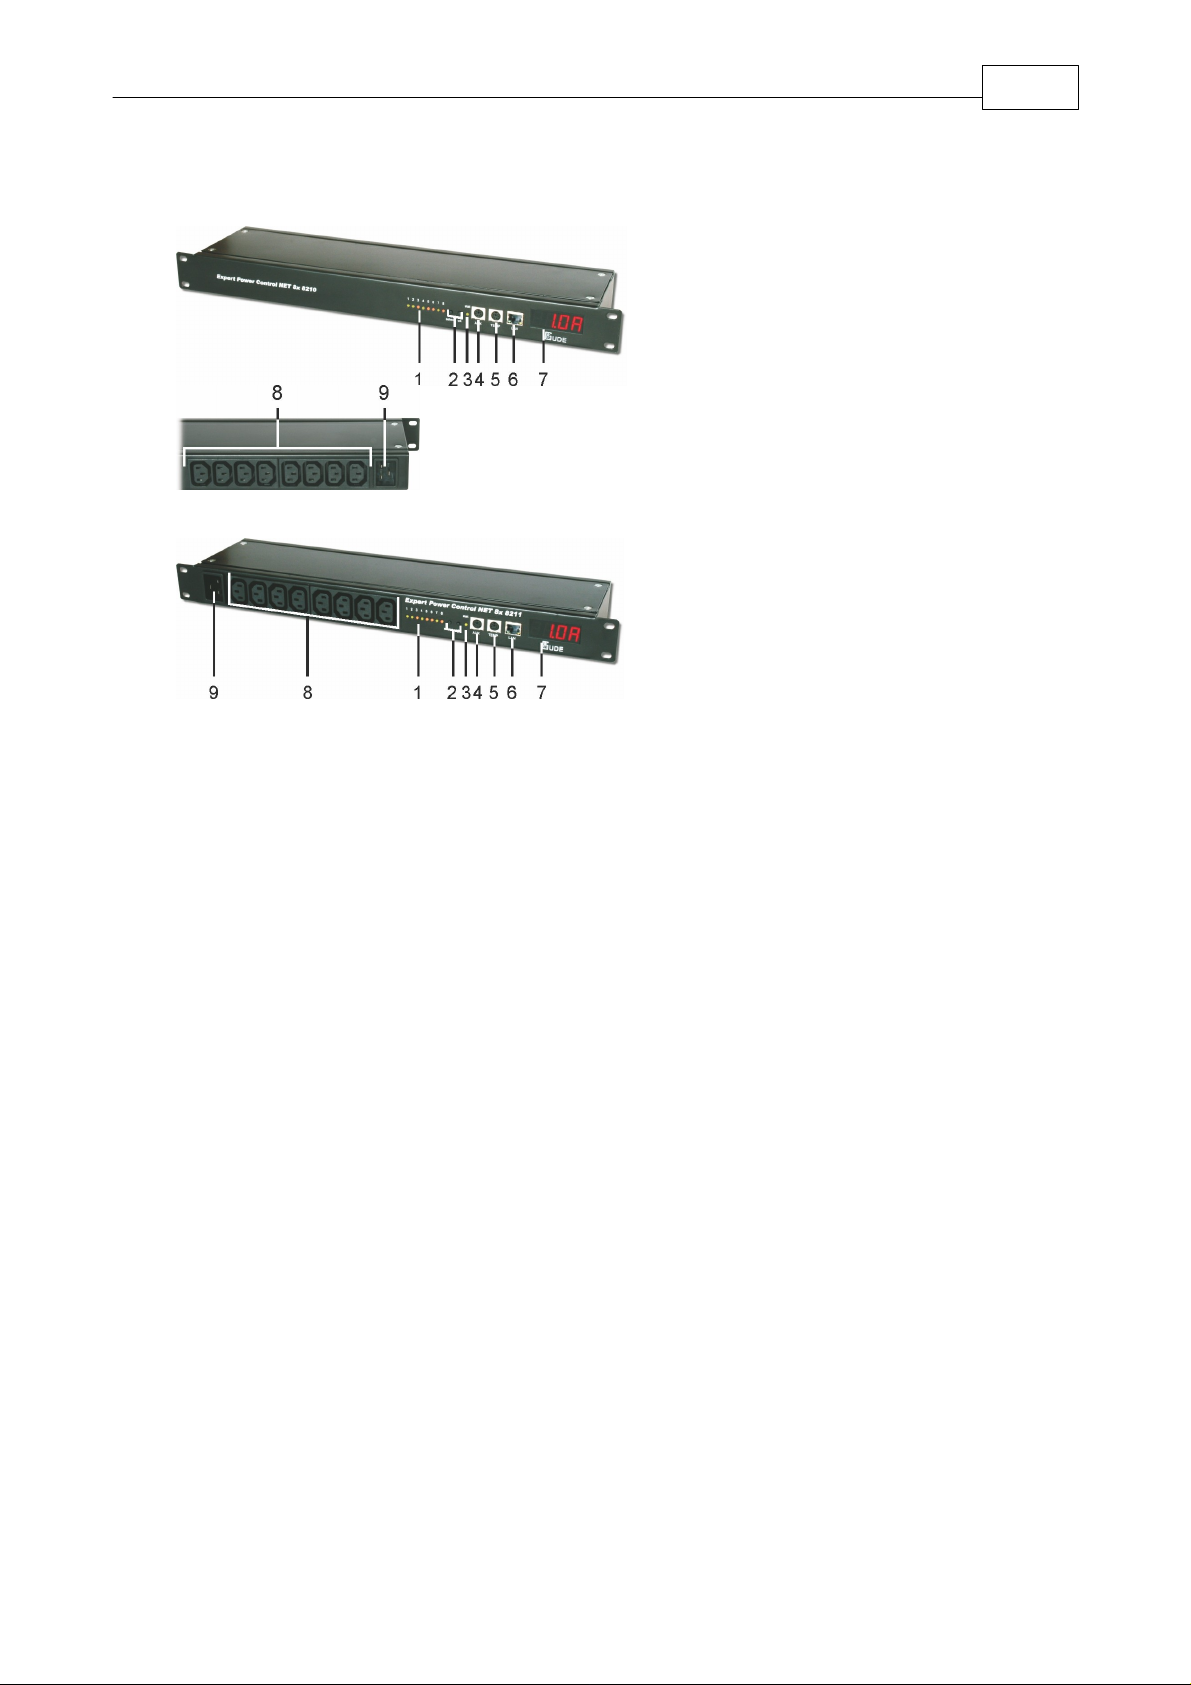
3.2
Connections Expert Power Control NET 8x 8210
Connections Expert Power Control NET 8x 8211
1) Power Port LEDs
2) Buttons "select" and "ok"
3) Status LED
4) Aux connector for serial interface (RS232-PS2 cable) or Sensor
5) TEMP connector for Sensor
6) Ethernet connector (RJ45)
7) Display
8) 8 Power Ports (IEC C13, max. 10A)
9) Power supply (IEC C20, max. 16A)
Connections
3.3
1.) Connect the power supply cable to the power socket at the rear side (Expert Power Control NET 8x 8210) or front side (
Expert Power Control NET 8x 8211 ) of Expert Power Control NET 8x 8210 / 8211 and a socket. Expert Power Control
NET 8x 8210 / 8211 now is booting and shortly after ready for usage.
2.) Plug the Ethernet cable into the connector on the front side of Expert Power Control NET 8x 8210 / 8211 and connect it
to your Ethernet.
3.) Connect the clients to the Power Ports at the rear side (Expert Power Control NET 8x 8210) or front side (Expert Power
Control NET 8x 8211 ) of the device.
Installation
Expert Power Control NET 8x 8210 / 8211 Hardware
8
3.4
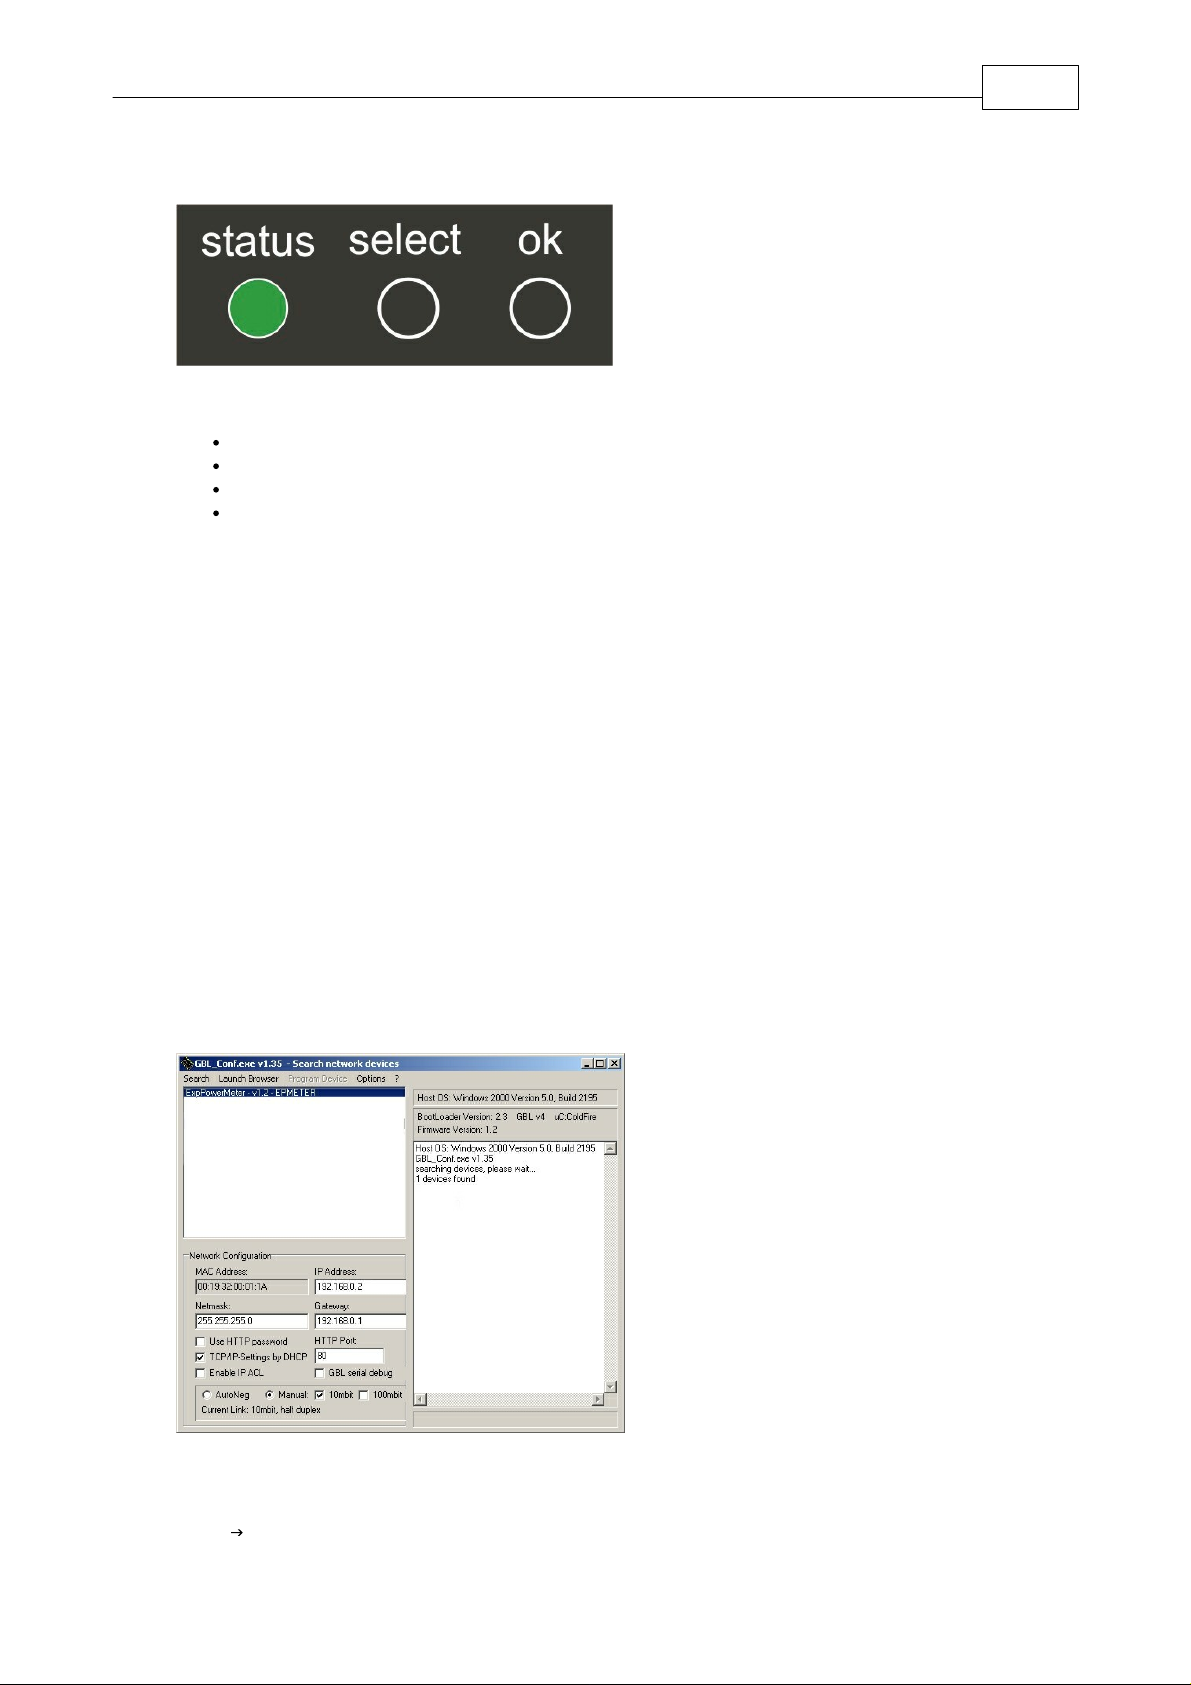
The Status LED shows different states of the device:
Status LED
Status LED red: Device is not connected to the ethernet
Status LED orange: Device is connected to the ethernet, TCP/IP settings are not allocated
Status LED green: Device is connected to the ethernet, TCP/IP settings allocated, device is ready to use
Status LED blinks alternately red and green: Device is in Bootloader mode.
4 Configuration
4.1
After switch-on Expert Power Control NET 8x 8210 / 8211 looks for a DHCP server and requests an available IP address .
DHCP
Please check the IP address allocated to Expert Power Control NET 8x 8210 / 8211 in the DHCP server settings to make
sure that the same address is used at every reboot.
4.2
For changing the network properties manually, the program GBL_Conf.exe is required. This tool is available for free on our
website www.gude.info.
Furthermore GBL_Conf.exe enables you to install firmware updates and to reset Expert Power Control NET 8x 8210 / 8211
to its factory settings.
Activate bootloader mode of Expert Power Control NET 8x 8210 / 8211 and run GBL_Conf.exe. The program will look
automatically for connected devices and will display their network configuration.
Network settings with GBL_Conf
If the displayed IP address accords with the factory settings (192.168.0.2), there is either no DHCP server available in the
network or no free IP address could be allocated.
Enter a free IP address and the according netmask in the entry mask, then save these changes by clicking on Program
Device SaveConfig.
 Loading...