

GuardTrax GT2 Quick Start Manual
Quick Start Guide

Thank you for ordering the GT2 Security
Force Locator. Contained in this box you
will find the following items:
IMPORTANT NOTE: Prior to powering up the device, it is very
important that the GT2 be charged for six (6) hours upon its first
charge. Insert the mini USB connector of the included USB cable
into the USB connector on the side of the GT2. Connect the other
end of the USB cable to the included wall/car charging adapter.
Plug the wall/car charging adapter into a wall power outlet and
your GT2 is now charging.
Once you have charged your GT2 contact the Activation Hotline
at 443-766-1337 between 10am and 3pm EST Monday – Friday
to activate your device and receive your account username and
password.
GT2 Security Force Locator Device
USB charging cord with plug-in adapter
GT2 carrying holster
RFID Tags (As per your order)
2

Now that your GT2 is charged and activated, you may power the
device ON by pressing and holding the ENTER button for five (5)
seconds, or until the LCD displays “PWR ON”.
You can expect to see the word “READY” appear on the LCD
display upon powering up the device.
GSM: Within the first minute, you can expect to see the GSM
service level bars appear in the upper right corner of the LCD
display. These bars indicate the GSM signal strength and connec-
tion to the GSM mobile network. Presence of the bars means your
GT2 has the ability to transmit data.
GPS: If you are within satellite coverage when you power your GT2
on, you will notice within 5-7 minutes, the appearance of a satellite
icon in the upper left corner of the LCD display. The appearance
of this icon indicates that the GT2 has an acceptable connection
with the GPS satellites. (The 5-7 minute duration is due to initial-
ization, power up and map almanac downloads.)
NOTE: If you are indoors, when your GT2 is powered on, in most
cases, the satellite icon will NOT appear in the left corner of the
LCD display. Expect to acquire GPS connection within minutes of
when your device has an unobstructed view of the sky.
After powering on my GT2,
what should I expect to see?
1
2
3
3

You will also see the battery level icon appear which is located
in the lower left corner of the LCD display. The battery display
has four (4) measurement bars indicating the strength of the
battery level. The battery will typically power the device for 18
to 24 hours. It typically takes four (4) hours to recharge the
GT2 completely.
Finally , the date and time will appear in the lower right corner
of the LCD display. The default setting is GMT but you may set
your time zone with the menu option button.
After powering on my GT2,
what should I expect to see?
(continued)
4
5
4
Your GT2 is now ready for action. Wherever you walk or drive, the GT2
will be reporting your activity to the GuardTrax web site located at
www.myguardtrax.com.
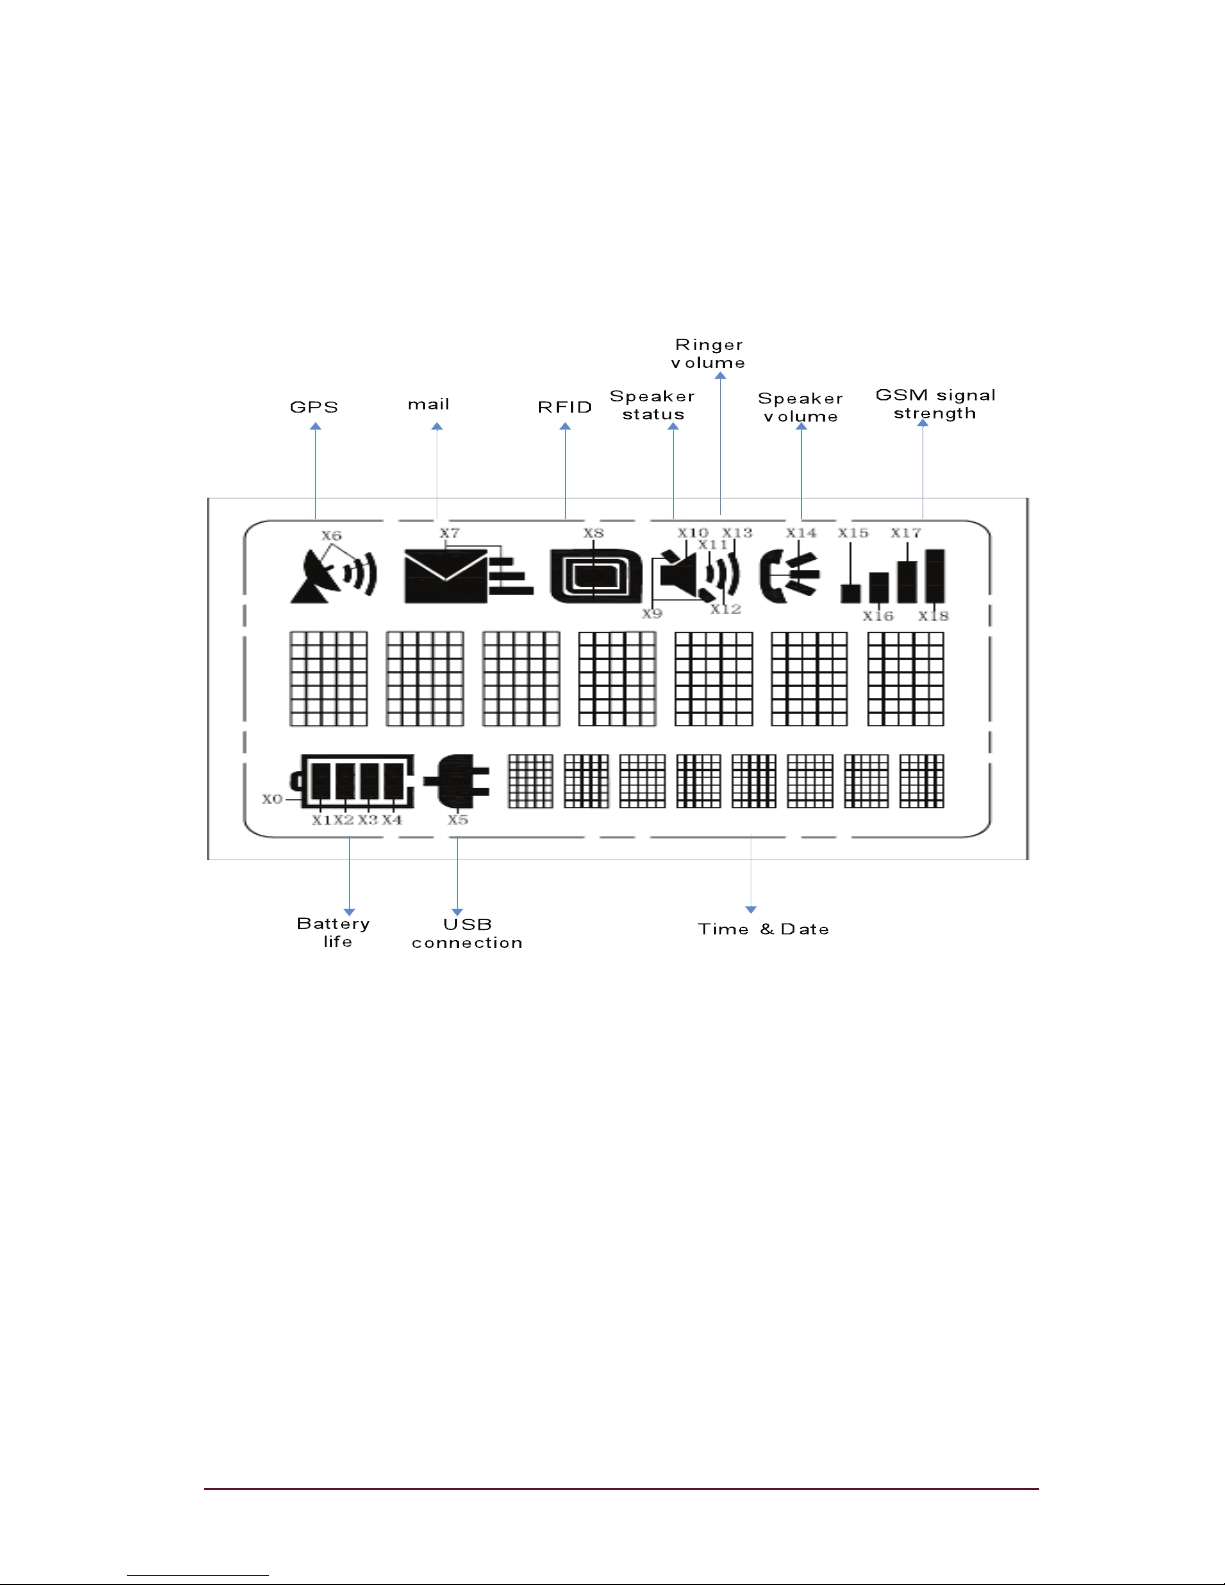
The LCD display has eight (8) icons plus an
area to show messaging or feedback. See
examples below.
5
How do I read an RFID tag with the GT2?
With the GT2 powered on, and the word “READY” listed
on the LCD display, you are now prepared to begin reading RFID tags.
Press and hold the “ENTER/RFID” button on the front of the GT2 until
the display reads “RFID ON” and the ‘RFID’ icon appears in the display
(p. 5). By holding the enter button down, you are turning on the RFID
reader. Once you see the RFID icon, you may release the enter button,
as the RFID will remain active for five (5) minutes. Holding the device
up-right to any tag thereafter will result in a positive scan.
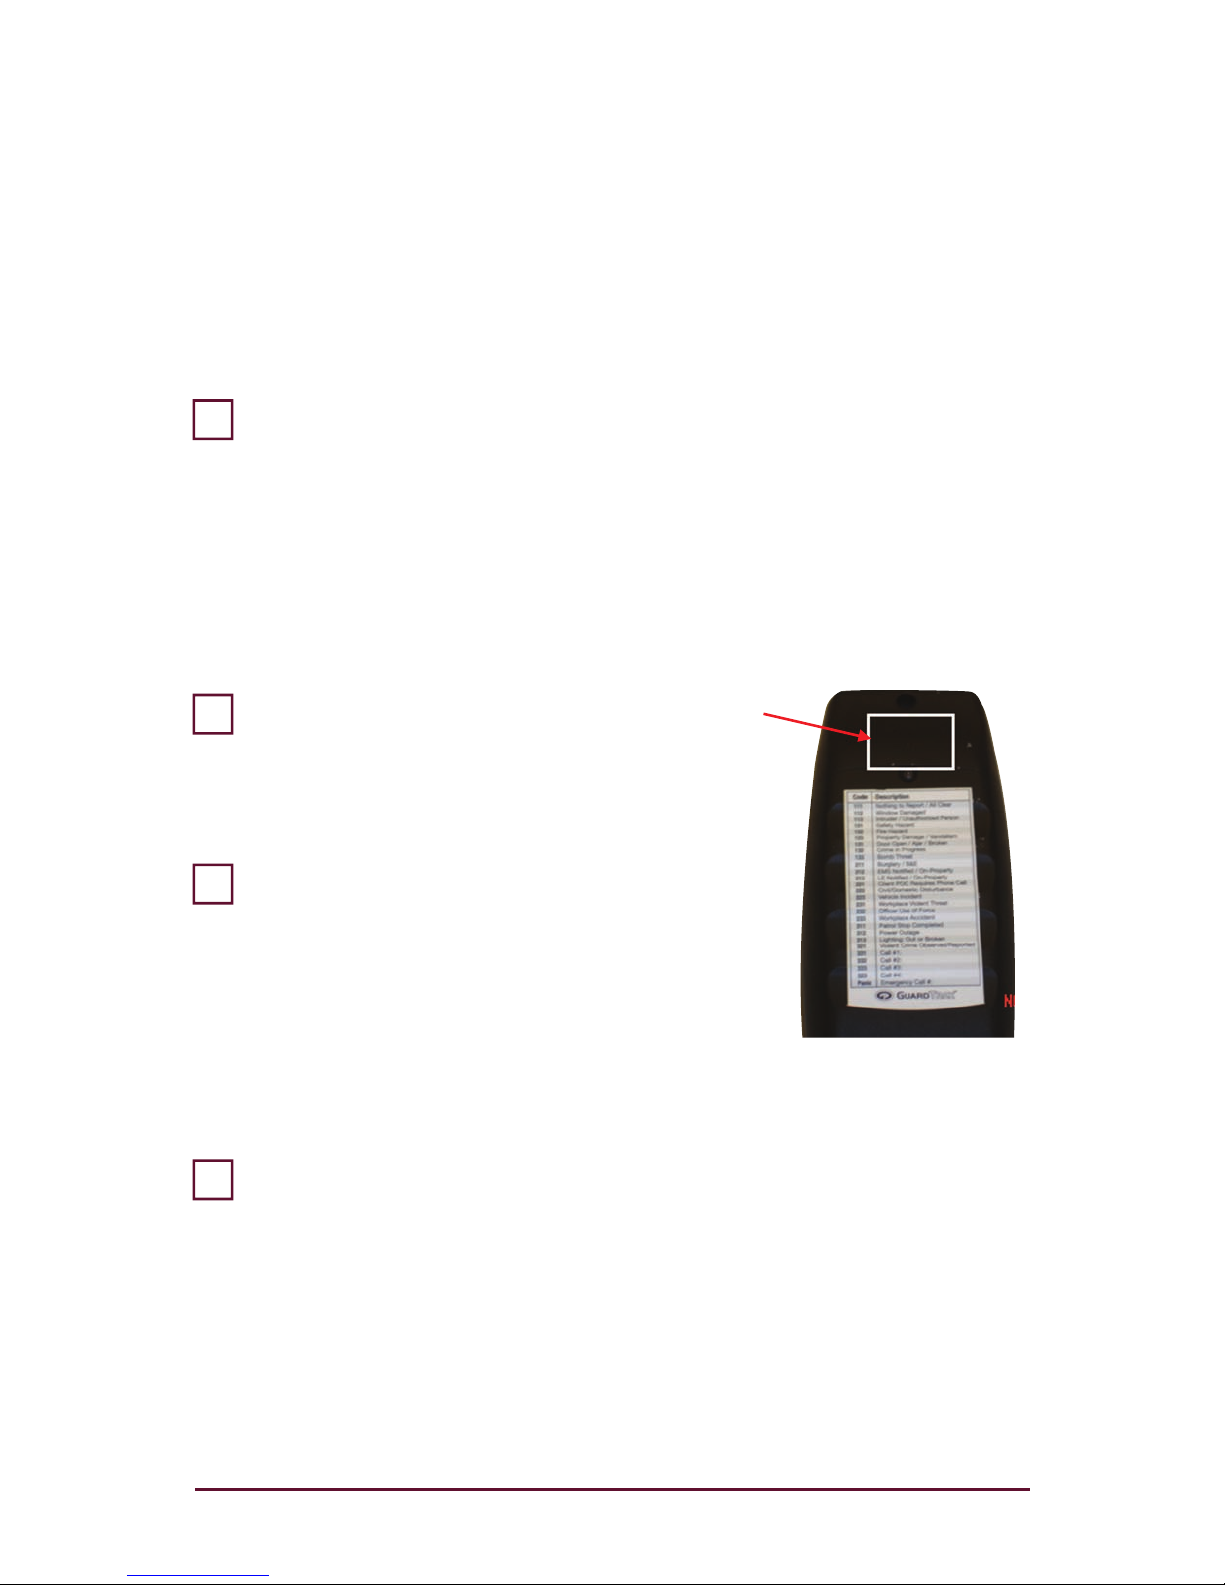
The RFID tag is read by holding the RFID
marking on the back of the device up against
the tag. {Vibrate and/or Beep}
The GT2 has now read the RFID tag. After
reading the RFID tag, the LCD will show
“RFID OK”, indicating a positive read, and the
GT2 immediately uploads the tag information
to the GuardTrax web site (assuming you
have GSM connection).
To conserve battery, you may hold down the “Enter/RFID” button to turn
off the RFID function. The RFID icon will disappear from the display.
NOTE: The GT2 RFID reader will remain on for five (5) minutes or until
another RFID tag is read, which will then reset the five (5) minute timer. If
another tag is not read within the five (5) minute window, the RFID reader
must be turned on again by following the steps listed above.
1
2
3
4
6

How do I enter an incident code using the GT2?
With the GT2 powered on and the word “READY” listed
on the LCD display, you are now prepared to begin entering incident codes.
Enter the desired code by pressing the numbers on the keypad.
(Example: 123)
After entering the desired code, press the “ENTER” button on
the keypad.
The LCD display will then read “SENT”
The GT2 has now sent the code together with your current GPS
location point to the GuardTrax web site, where it will be
displayed on the map as a keyed event.
NOTE: In order for incident codes to be viewed on the map, you
must have a valid GPS connection shown by the satellite in the
top left corner of the LCD display. If there is no valid GPS, the
web site, maps and alerts will mark the location as the last
known valid GPS location.
1
2
3
4
7

111 Nothing to Report/All Clear
112 Window Damaged or Broken
113 Intruder/Unauthorized Person
121 Safety Hazard
122 Fire Hazard
123 Property Damage/Vandalism
131 Door Found Open/Ajar/Broken
132 Crime in Progress
133 Bomb Threat
211 Burglary/B&E
212 EMS Notified/On-Property
213 LE Notified/On-Property
221 Client POC Requires Phone Call
222 Civil/Domestic Disturbance
223 Vehicle Incident
231 Workplace Violence Threat
232 Officer Use of Force
233 Workplace Accident
311 Patrol Stop Completed
312 Power Outage
313 Lighting: Burned Out/Broken
321 Violent Crime Observed/Reported
Key Code / Key Code Definition
8
 Loading...