

Page 1
USE & CARE INSTRUCTIONS
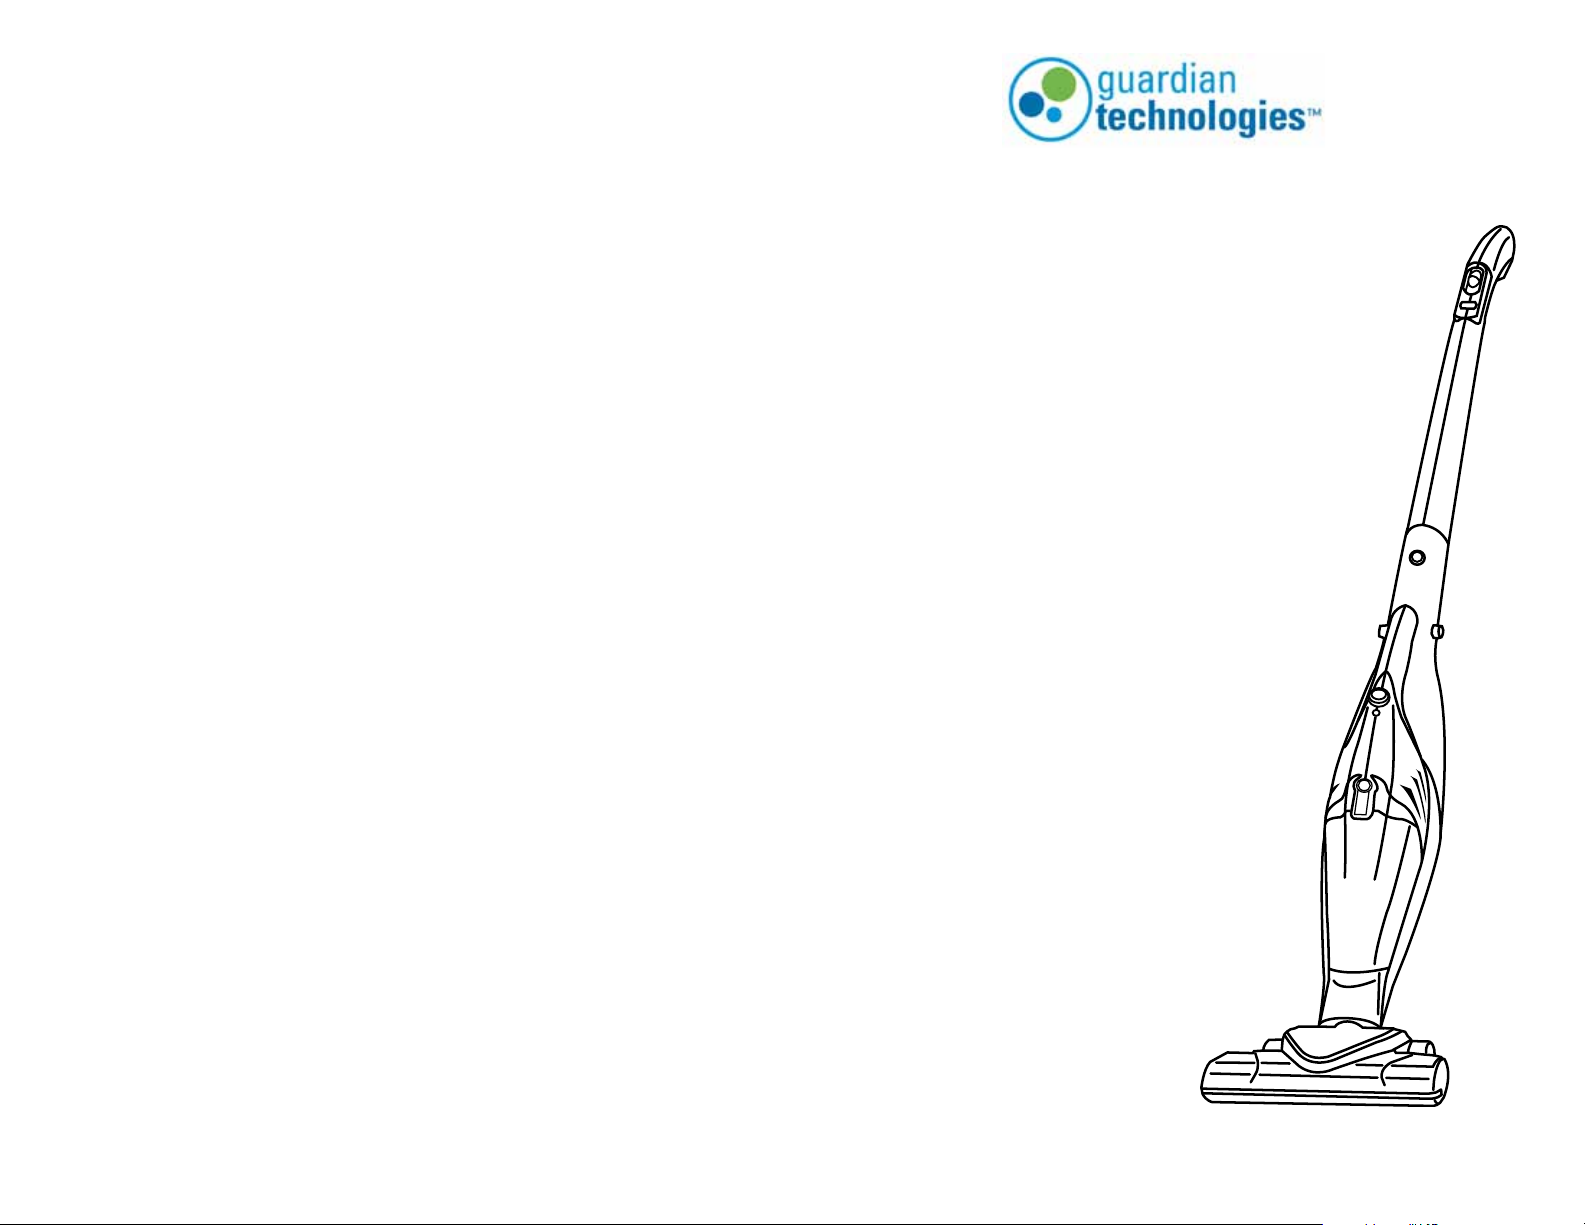
Guardian Technologies
Rechargeable
2-in-1 Stick Vac
with Silver Clean Technology
English E - 1
French F - 1
Spanish S - 1
Model No. GGS50
1-Year Limited Warranty
www.guardiantechnologies.com
1.866.603.5900
REV0409
Date Purchased
month ________
year _________
E-1
Page 2
THIS VACUUM IS INTENDED FOR HOUSEHOLD USE ONLY
IMPORTANT SAFETY INSTRUCTIONS
PLEASE READ ALL INSTRUCTIONS BEFORE USING THIS APPLIANCE
SAVE THESE INSTRUCTIONS.
When using an electrical appliance, basic precautions should always be followed,
including the following:
WARNING: THE CORDS, WIRES AND/OR CABLES SUPPLIED WITH THIS PRODUCT CONTAIN CHEMICALS,
INCLUDING LEAD OR LEAD COMPOUNDS, KNOWN TO THESTATE OF CALIFORNIA TO CAUSE CANCER
AND BIRTH DEFECTS OR OTHER REPRODUCTIVE HARM. WASH HANDS AFTER USING.
READ ALL INSTRUCTIONS BEFORE USING THIS APPLIANCE.
1. SAVE THESE INSTRUCTIONS - This manual contains important safety and operating
instructions for the GGS50 Rechargeable 2-in-1 Stick Vac.
2. Before using battery charger, read all instructions and cautionary markings on the battery
charger, battery and vacuum.
3. To reduce the risk of battery explosion, follow these instructions and those marked on the battery.
4. Caution - To reduce the risk of injury, use battery charger only with vacuum/battery provided.
Other types of products/batteries may burst causing personal injury and damage.
5. WARNING - To reduce the risk of electric shock, do not use outdoors or on wet surfaces.
Do not expose to rain. Store indoors. Do not use nozzle on wet surfaces.
6. Do not allow to be used as a toy. Close attention is necessary when used by or near children.
7. Use only as described in this manual. Use only manufacturer’s recommended attachments.
8. Do not use with damaged cord or plug. If appliance is not working as it should, has been dropped,
damaged, left outdoors or dropped into water, return it to a service center.
9. Do not put any objects into openings. Do not use with any opening blocked; keep free of dust, lint,
hair and anything that may reduce air ow.
10. Keep hair, loose clothing, ngers and all parts of body away from openings and moving parts.
11. Turn off all controls before unplugging.
12. Use extra care when cleaning on stairs.
13. Do not use to pick up ammable or combustible liquids, such as gasoline or use in areas
where they may be present.
14. Do not pull or carry by cord, use cord as a handle, close a door on cord or pull cord around
sharp edges or corners. Keep cord away from heater surfaces.
15. Do not unplug by pulling on cord. To unplug, grasp the plug, not the cord.
16. Do not handle plug or appliance with wet hands.
17. Use only the charger supplied by the manufacturer to recharge.
18. Do not pick up anything that is burning or smoking, such as cigarettes, matches or hot ashes.
19. Do not use without dust lter in place.
20. Do not incinerate this appliance even if it is severely damaged. The batteries can explode
in a re.
SPECIFICATIONS
Model Number ......................... GGS50
DC Power ..................................... 9.6V
Motor Amp ............................ 8.1 amps
Motor Wattage ...................... 75 watts
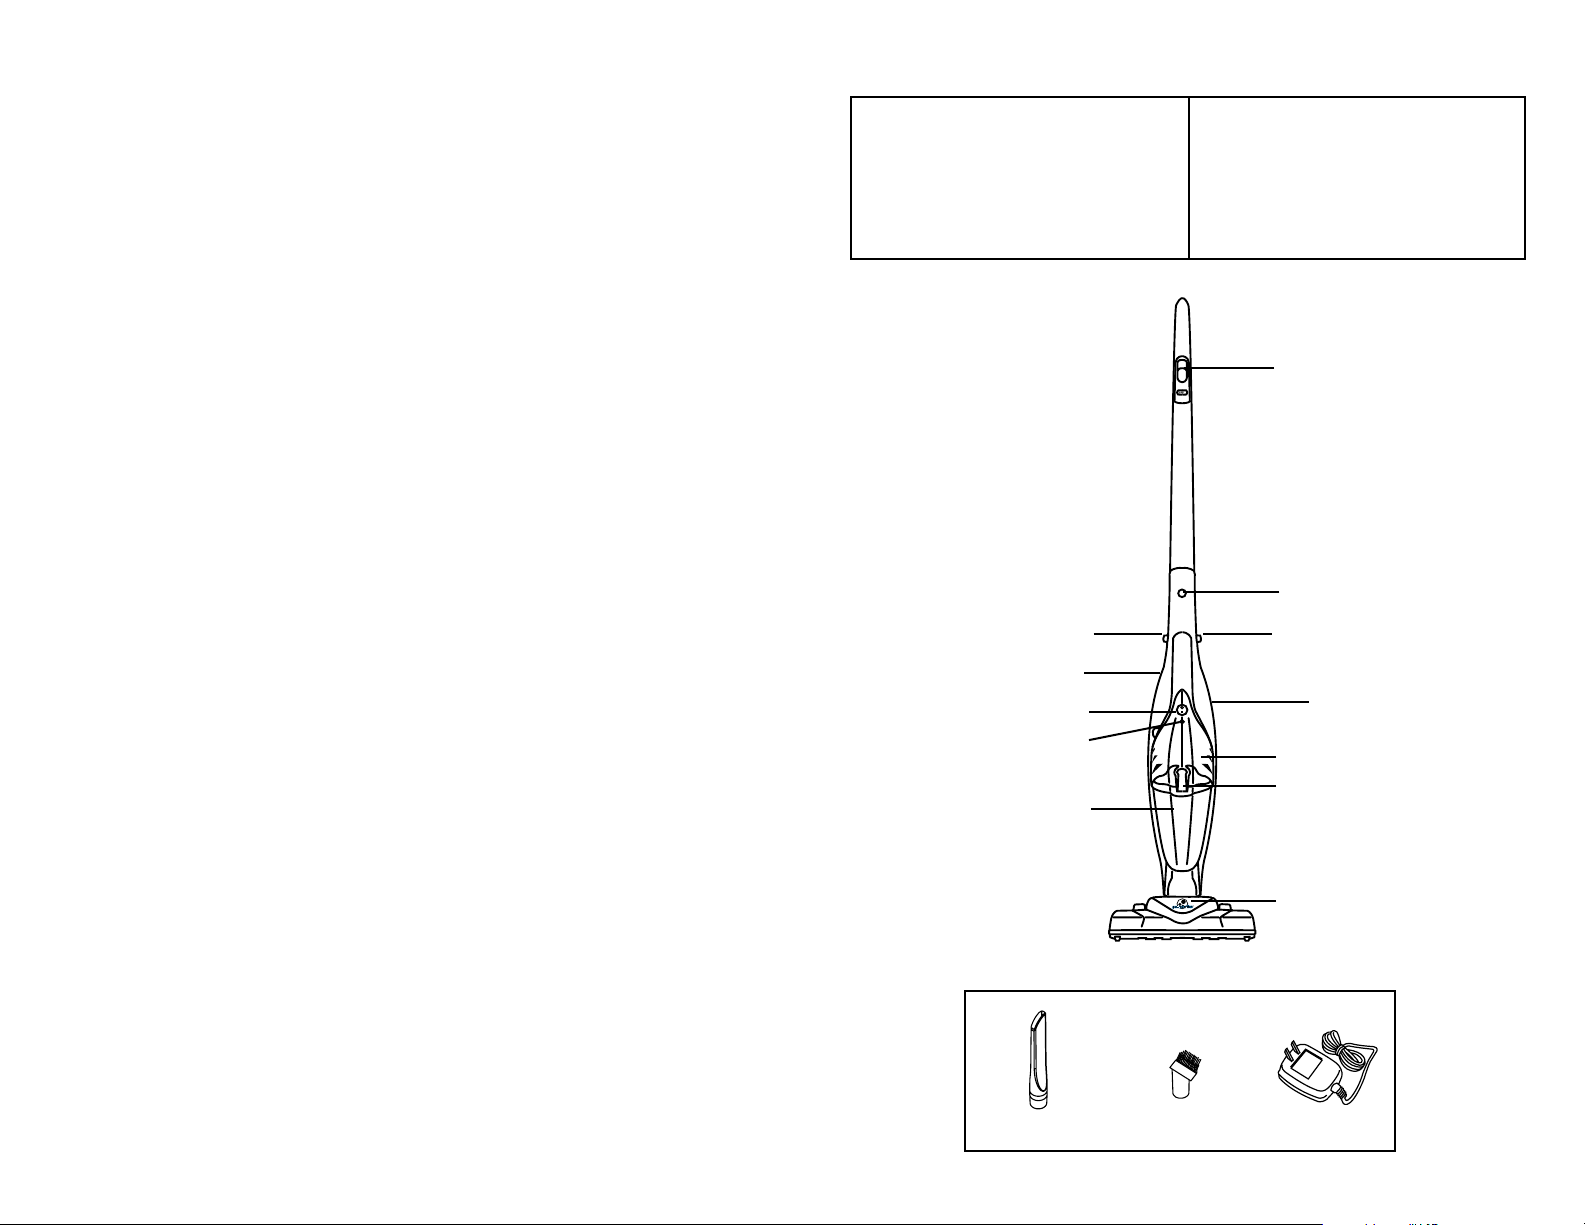
Hand Vac Release Button
Dust Brush/Crevice Tool
Storage (Back of Handle)
Hand Vac Power Switch
Charging Light
Dirt Cup with Filter
Dirt Cup Capacity ............... 0.42 quarts
Dimensions ... 9.75”W x 45”H x 5.75”D
Weight ................................ 4.8 pounds
Power/Carpet/Floor
Selector
Handle Assembly Button
Hand Vac Release Button
Charging Port
Handheld Vacuum
Dirt Cup Release Button
Power Nozzle
NOTE: This product is shipped with the handle of the stick vacuum unassembled from the body of the
stick vacuum for packing purposes. Upon unpacking and assembly - DO NOT disassemble product.
E-2
Crevice Tool Dust Brush Charger
E-3
Page 3

ASSEMBLY
DIRECTIONS FOR USE
1. Press handle assembly button while inserting the handle into the handle opening on
the main body making sure not to pinch internal cord. Handle assembly button will
snap into place when handle is fully connected. (Fig. 1)
2. Attach the power nozzle into the air intake of the main body making sure contacts
between the nozzle and body are aligned and inserted completely. (Fig. 2)
Fig. 1 Fig. 2
Fig. 3
CHARGING
STICK VAC
NOTE: Be sure hand vac is properly stored
on-board before using stick vac.
1. Slide the Selector switch to either FLOOR
(suction only/brushroll off) or CARPET
(suction with brushroll on). (Fig. 4)
2. Use complete stick vac to remove dust and debris from bareoors and carpets.
3. Tools can be inserted at bottom of stick vac by removing nozzle base and inserting
tool into opening. Ideal for hard-to-reach, above oor cleaning.
Fig. 4
NOTE: Use only the charger supplied by the manufacturer to recharge.
IMPORTANT: Before rst use, charge your vacuum for at least 24 hours.
Both power switches must be in the OFF position when unit is charging on base. If
charging light is not illuminated, press ON/OFF button to assure unit is turned off.
Remember, unit will not charge if charging light is not illuminated.
CAUTION: Do not allow the battery to run down completely before charging. Running
down battery will cause battery life to shorten severely.
1. Connect charger into the charging port located on the side of the vacuum
(in the hand vac). (Fig. 3) Charge unit with hand vac stored on-board.
2. Connect wall charger to the outlet.
3. A red charging light will illuminate when unit is charging. Unit will be charged in
16-24 hours. Recharge unit as soon as the motor power decreases noticeably. The
unit can be on a constant charge so it is always ready for use.
4. The light stays on and remains the same color even when the unit is fully charged.
E-4
Fig. 5
Fig. 6 Fig. 7
HAND VAC
1. Press two side HAND VAC RELEASE buttons and pull the hand
vac from the main unit. (Fig. 5)
2. Turn power switch ON.
3. Use for above oor cleaning such as counters, upholstery etc.
4. Insert crevice tool/dust brush into the opening of nozzle to extend
5. To replace the handheld unit, insert the dirt cup into the main body rst then
press the upper portion of the hand vac into the main body until it’s secure. (Fig. 7)
6. Empty and clean dirt cup and lter after each use or when cup is full.
reach. (Fig. 6)
E-5
Page 4

DIRT CUP & FILTER: CLEANING AND REPLACEMENT
POWER BRUSH
IMPORTANT: For best results empty dirt cup and clean the lter after each use.
CLEANING
1. Press dirt cup release and separate dirt cup to remove. (Fig. 8)
2. Grasp lter and pull to remove from cup. (Fig. 9)
3. Tap to remove dirt or debris from lter.
4. Empty dirt cup contents into trash bin.
5. Return lter by aligning with dirt cup.
6. Align and re-attach dirt cup/nozzle.
7. Return hand vac to main stick vac body for storage and charging.
IMPORTANT: Disconnect cleaner from electrical outlet.
1. To maintain cleaning effectiveness, regularly remove hair, lint, strings,
threads etc. from the brushroll.
2. To remove brushroll for further cleaning turn tab on base of unit and remove
small cover. (Fig. 11) Remove brushroll and endcaps. (Fig. 12) Reverse process
to return to unit.
Fig. 11
Fig. 12
Fig. 8 Fig. 9 Fig. 10
FILTER REPLACEMENT
NOTE: For best performance, replace lter every 6 months.
1. Remove lter as described in CLEANING INSTRUCTIONS.
2. Twist the lter to separate it from the lter adapter. (Fig. 10)
3. Keep the lter adapter and discard of old lter.
4. Reattach lter adapter and new lter. Twist to secure.
5. Return lter assembly to dirt cup.
NOTE
Replacement parts can be purchased by calling 1.866.603.5900
or by visitng www.guardiantechnologies.com
Replacement Filter Model No. FLT
E-6
BATTERY DISPOSAL
To preserve natural resources, please recycle or dispose of expired battery pack
properly. This product contains nickel-cadmium battery and must be disposed of
properly. Local, state or federal laws may prohibit disposal of nickel-cadmium
batteries in ordinary trash. Consult your local waste authority for information
regarding available recycling and/or disposal options. For disposal information,
call the rechargeable battery recycling corporation at 1-800-8BATTERY.
WARNING
Upon removal, cover the battery packs terminals with heavy duty adhesive tape.
Do not attempt to destroy or disassemble battery pack or remove any of its
components. Nickel-cadmium batteries must be recycled or disposed of properly.
Also, never touch both terminals with metal objects and/or body parts as short
circuit may result. Keep away from children. Failure to comply with these warnings
could result in re and/or serious injury.
E-7
Page 5

TROUBLESHOOTING GUIDE
LIMITED WARRANTY
PROBLEM SOLUTION
Battery not charged.
Contacts between unit and base are dirty.
Battery dead - won’t hold a charge.
Needs service.
Red indicator not lit.
Low or no suction
1. Battery charge is getting weak.
2. Dirt cup is full.
3. Filter is dirty.
Dust escaping from vacuum
1. Dirt cup is full.
2. Filter is dirty.
3. Hand vac is not in place.
Battery won’t charge
Power button is in the ON position.
Power nozzle brush not rotating.
Handheld unit works but stick does not.
Machine does not stop when turned off.
Charge battery. Charge for atleast 24 hours
before rst use.
Make sure power switch is OFF before charging.
Clean contacts with cloth.
Contact customer service.
Call 1.866.603.5900.
Contact customer service.
Call 1.866.603.5900.
Make sure adapter plug and socket are plugged
in properly.
Make sure both the handheld unit and the stick are
turned to OFF while charging.
1. Charge battery.
2. Empty dirt cup.
3. Clean or replace lter.
1. Empty dirt cup.
2. Clean or replace lter.
3. Store hand vac on-board main body.
Turn power button OFF
Make sure switch on the handle is in the
CARPET position.
Remove dirt, debris, hair from brushroll.
Remove and return handheld to proper position making
sure the 3 prongs/contacts are clean and free of debris.
Contact customer service.
Call 1.866.603.5900.
Turn power button on both stick and hand vac to OFF.
To the consumer, Guardian Technologies LLC warrants this product to be free of
defects in materials and workmanship commencing upon the date of the original
purchase. Save your original sales receipt to validate start of warranty period.
If this product should become defective within the warranty period, we will repair
or replace any defective parts free of charge. The complete machine must be
delivered pre-paid to any authorized Guardian Technologies LLC warranty service
center. Please include complete information on the problem, date of purchase, copy
of original sales receipt and your name, address and telephone number. If you are
not near a warranty station, call the factory for assistance in the US and Canada at
1.866.603.5900. Use only genuine Guardian Technologies replacement parts.
The warranty does not include unusual wear, damage resulting from accident
or unreasonable use of the product. This warranty does NOT cover bulbs. This
warranty does NOT cover unauthorized repairs. This warranty gives you specic
legal rights and you may have other rights (other rights may vary from state to
state in the U.S.A).
We consider the registration process important to ensuring superior service to our
customers, however submitting this card to Guardian Technologies LLC is optional
and does not affect your right to utilize this warranty according to the conditions
above. If you have any questions or comments about our product call Toll Free at
1.866.603.5900 or send comments to: ATTN Customer Service
Guardian Technologies LLC
7700 St. Clair Avenue
Mentor, Ohio 44060
ANY OTHER SERVICING SHOULD BE DONE BY AN AUTHORIZED
SERVICE REPRESENTATIVE/CUSTOMER SERVICE 1.866.603.5900.
In the event that further assistance is required, visit our website at
www.guardiantechnologies.com. Costs of any transportation to and
from any place of repair are to be paid by the owner. Always identify
your product by the model number and manufacturing code when
requesting information or ordering replacement parts.
E-8
Guardian Technologies LLC
7700 St Clair Avenue | Mentor Ohio 44060
1.866.603.5900 | www.guardiantechnologies.com
E-9
 Loading...